

Garelick 31600 User Manual
Assembly Instructions for:
31600 Motor Carrier
TOOLS Required: Page 1
Hammer
CAUTION:
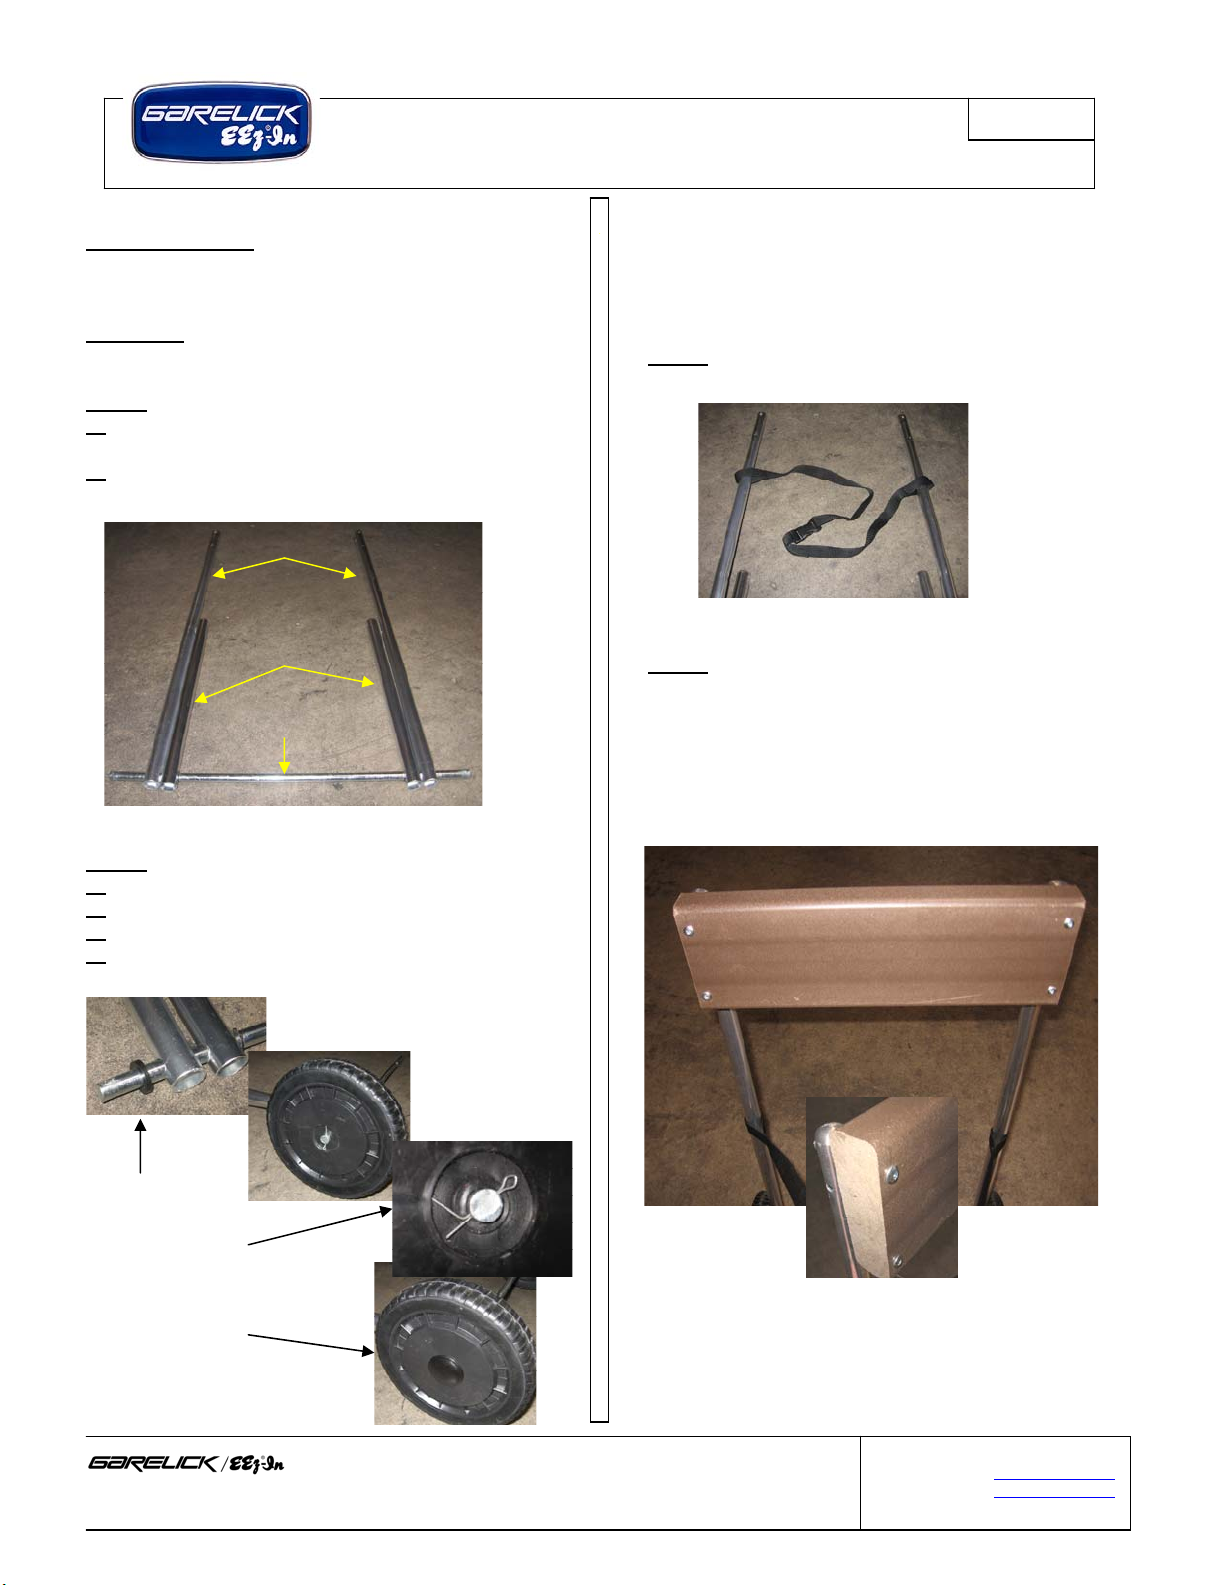
Step 1
A.
Slide bottom braces on axle using large holes as
shown.
Slide Upright support tube on axle using large holes
B.
as shown.
Step 2
A.
Place plastic washer on axle.
B. Place wheel on axle as shown.
C. Secure with pin. **Bend pin to secure in place**
D.
Place caps on wheels. Gently tap into place with
hammer.
Plastic Washer
Cap
PO Box 8, 644 2
St. Paul Park, MN 55071
Tubing will crush if over-tightened.
: Motor Carrier Assembly
Upright Support Tube
Bottom Brace
Axle
:
Bend pin
nd
Street
Form 12.121
Step 3
Place tank tie straps on upright supports as shown.
:
Step 4:
Attach plastic block to each end of upright support by
aligning holes. Insert 4 bolts (2 7/8” long) and tighten
fasteners.
NOTE: Top of block should be even with ends of
upright tubes as shown.
Phone: (651) 459-9795
E-mail: mail@gareick.com
On the Web: www.garelick.com
Revision Date: 08/07
Assembly Instructions for:
31600 Motor Carrier
Page 2
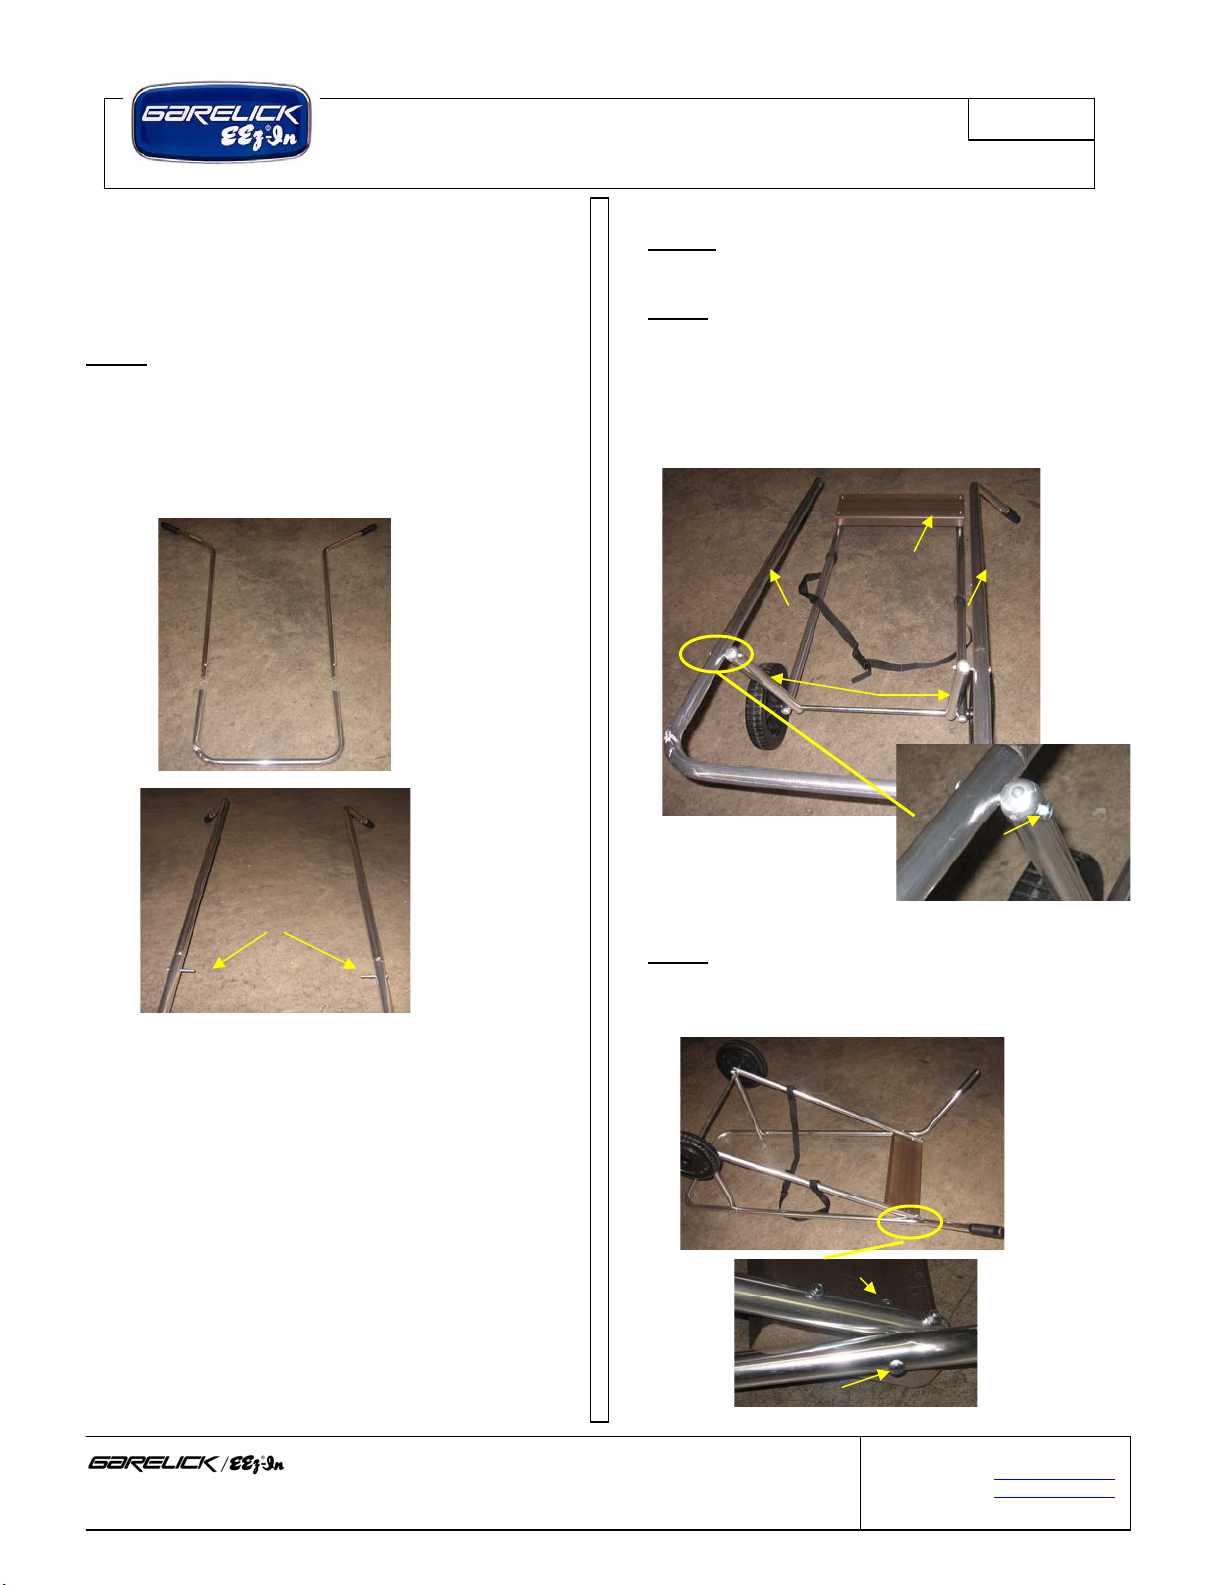
Step 5
Insert handles into short bottom U tube.
Align holes in assembly so that the handles will
point AWAY from each other and insert bolts.
NOTE: DO NOT add fasteners yet.
PO Box 8, 644 2
St. Paul Park, MN 55071
: Handle Assembly
Handles
Short U Tube
Bolts
nd
Street
Form 12.121
NOTE:
assemblies; some force will be needed to align certain
holes.
Step 6
Slide handles assembly into upright support assembly.
Insert bolts in bottom brace and finger tighten
fasteners.
NOTE: Handles will rest on outsides of upright support
tubes. Make sure plastic block is facing up as shown.
Step 7
Align holes to fasten handles to upright support. (May
need to turn assembly “up-side-down”)
Insert bolt and finger tighten fasteners.
Rigidity of cart is obtained through the following
:
Block
Handle Assembly
Bottom Brace
Locknut
:
Locknut
Phone: (651) 459-9795
E-mail: mail@gareick.com
On the Web: www.garelick.com
Revision Date: 08/07
 Loading...