

Page 1
Assembly Instructions
Wooden Cold Frame
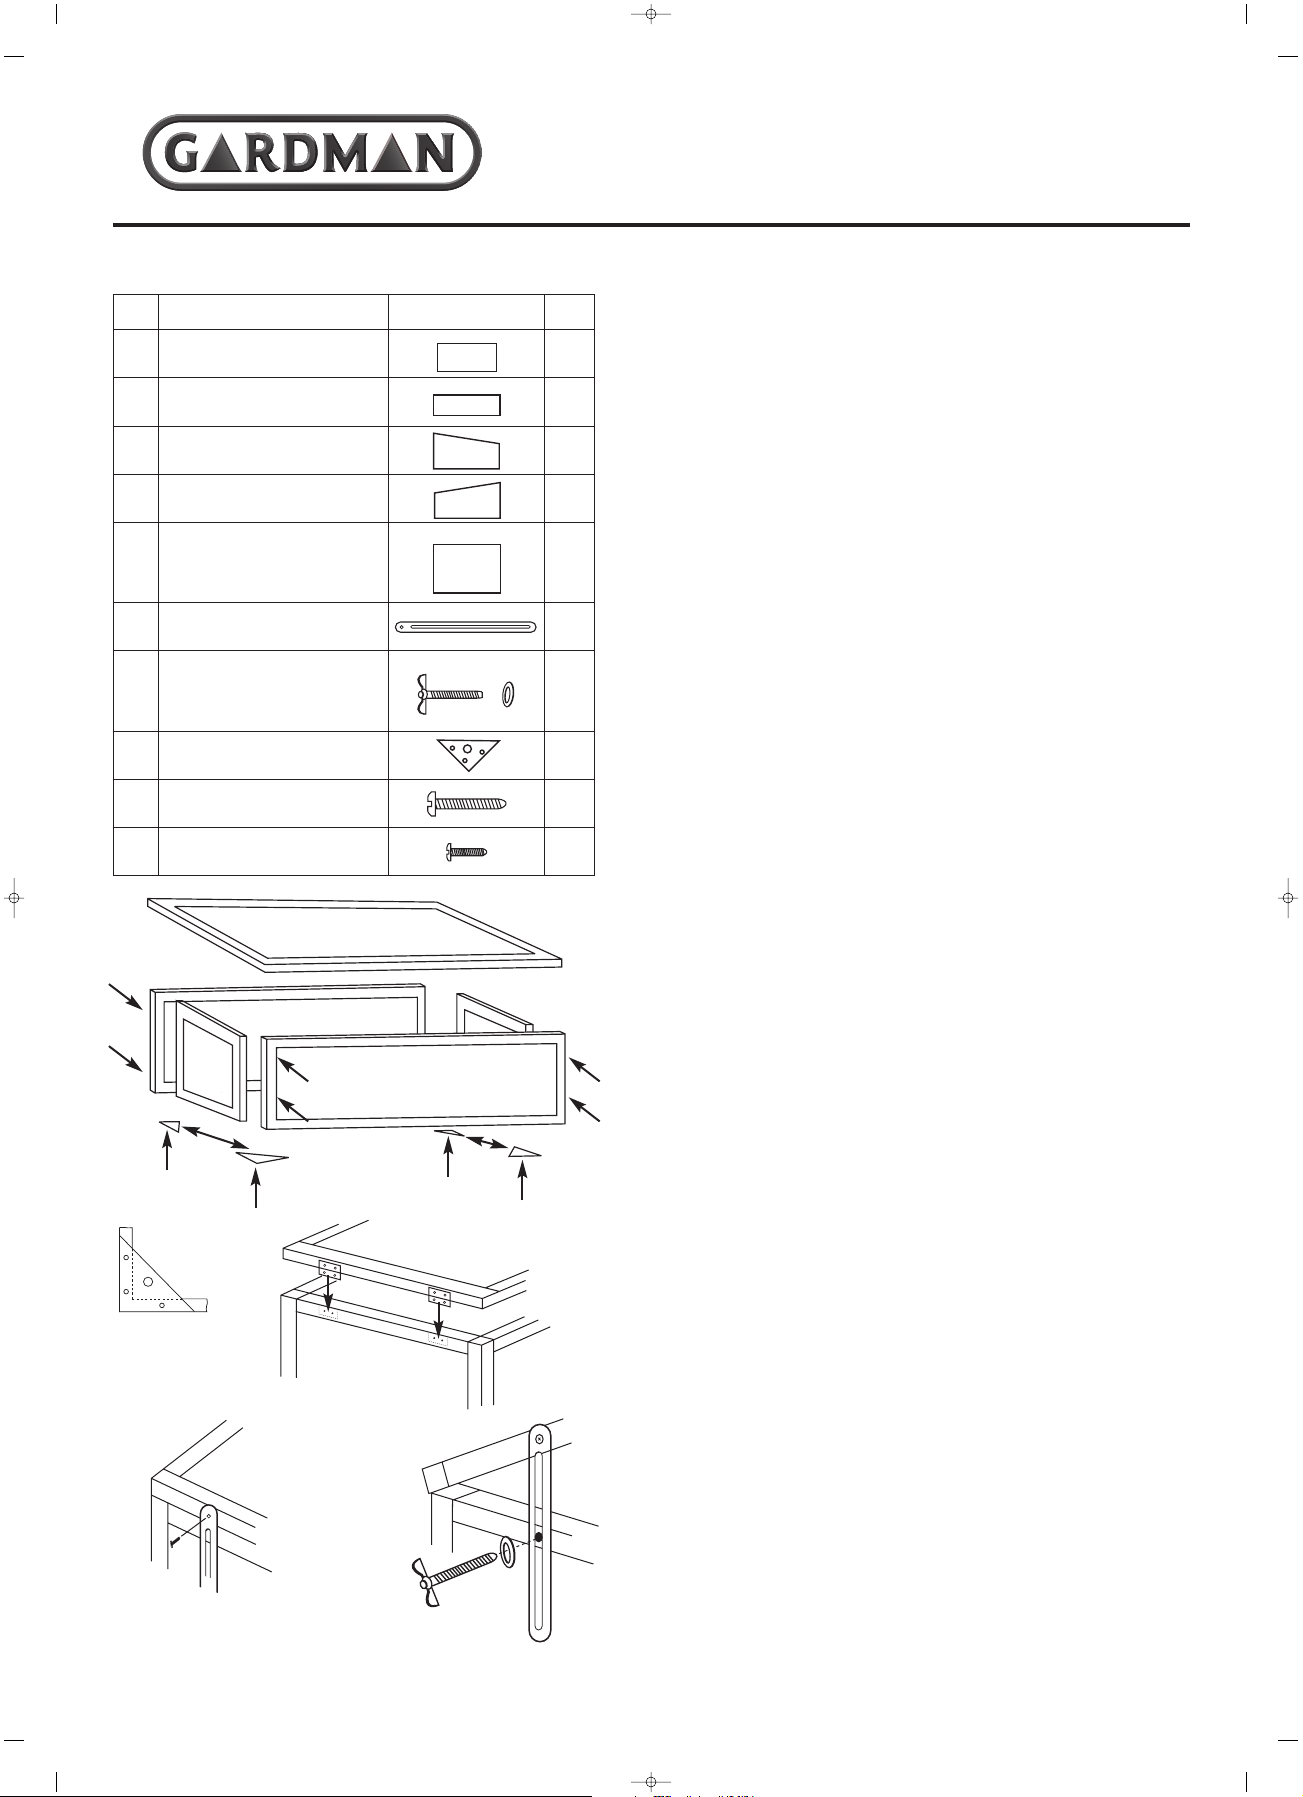
Parts & Fittings Supplied
Ref Description Illustration Qty
A Glazed Back Panel 1
B Glazed Front Panel 1
C1 Glazed Side Panel Left 1
C2 Glazed Side Panel Right 1
D Glazed Lid Panel 1
and Hinges
E Lid Support Arms 2
F 35mm Wing Bolt 2
and Washer
G Base Plates 4
H Large Frame Screws 8
I Small Screws 22
Assembly
1. Check all screws are tight in the ready-made
frame sections but avoid over-tightening.
2. Do not yet remove the protective covers on
the polycarbonate glazing: note the cover is
on the outside of the panels.
3. Assemble the frame body (parts A, B, & C1
& C2) using the large screws (H) and the
pre-drilled holes in the frame. (See Fig 1).
4. Fix the base plates (G) to the underside
corners of the frame using 3 small screws
(I) per plate. (See Fig 2).
5. Place the lid (D) in position so that the hinges
are at the back and are facing downwards.
Line up the lid with the frame sides and hold
firmly whilst attaching the hinges to the back
panel (A) using screws (I). (See Fig 3).
6. To assemble the lid support arms:
a. Screw the support arms (E) into the lid
sides using small screws (I). Position the
screw directly above the bolt hole in
sides (C). (See Figs 4 and 5).
b. Pass the washers over bolts (F) and insert
the bolts, from the outside, through the
slots in the support arms and into the
pre-drilled holes in the sides (C1 & C2).
Screw in part way to secure it. (See Fig 5).
c. Tighten the wing bolt when the lid is in
the required position.
7. To complete the assembly, peel off the
protective sheet from the polycarbonate
panels and site the cold frame in good light
but out of prolonged fierce sunlight. Use the
corner base plates to peg or bolt down the
cold frame if extra security is required.
Care & maintenance
Extra coatings of wood preservative will
prolong the life of the product but be sure
to use one that is harmless to plants.
Avoid constant contact with wet soil by
mounting the frame on bricks, slabs or
wooden battens.
Before You Start
Please check that all components are present
and read through these instructions carefully.
Fig. 2
Gardman Ltd, High Street, Moulton, Spalding, Lincs. PE12 6QD UK
Fax +44 (0)1406 372 233
•
•
Fig. 5
Fig. 4
C
D
C
D
A
Fig. 3
Fig. 1
A
B
C2
C1
D
G
G
4702.2_Graphix_08895_Inst 11/10/07 11:38 pm Page 1
 Loading...