

Page 1
Traditional Garden Obelisk
Assembly Instructions
07700
Components Supplied
Tools Required (not supplied)
Phillips cross-head screwdriver
Mallet
Tape Measure
Before You Start
•Layout all of the component parts and
make sure you have all of the parts listed.
• When you are ready to start, make sure
that you have the right tools to hand,
plenty of space and a clean dry area for
assembly. Always try to assemble the
product as close as possible to the
intended location.
•Remove all plastic bags and dispose of
safely.
•Retain the instructions for future use.
Caution
This pack contains small items which should
be kept away from children.
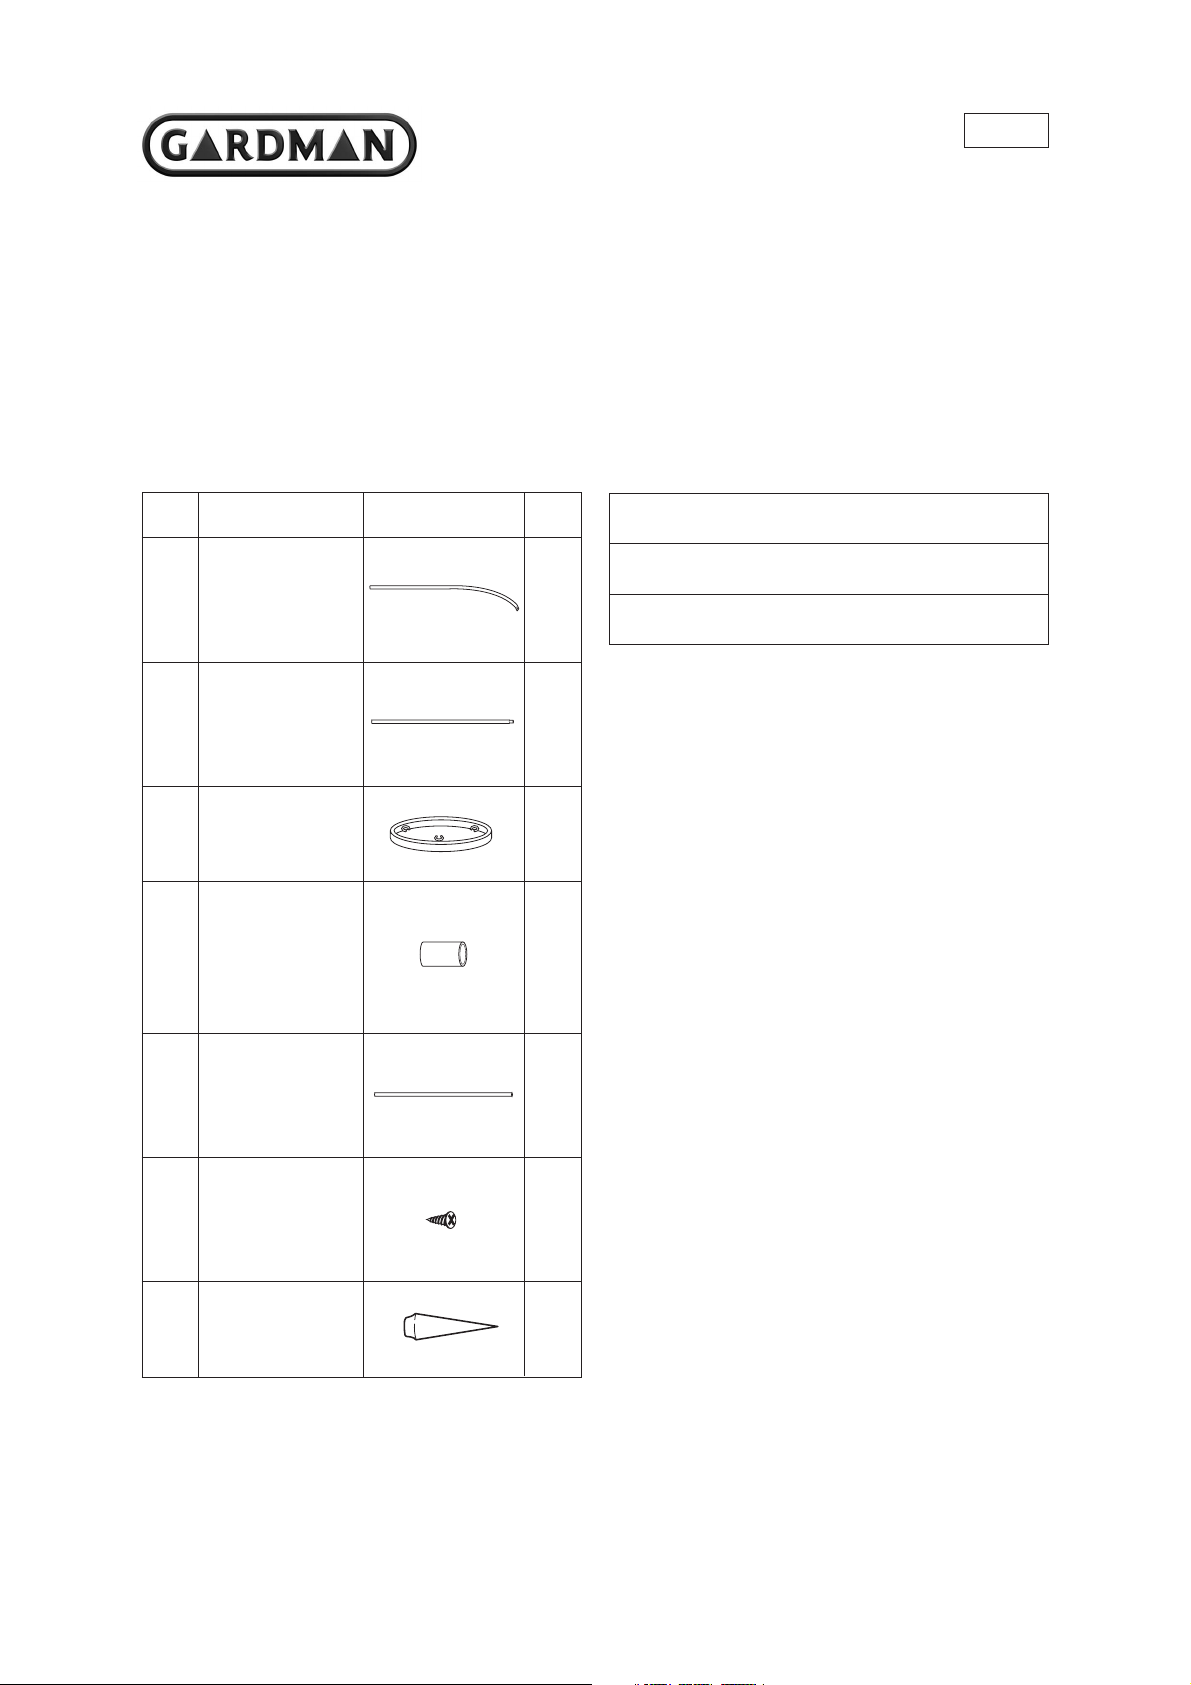
Ref Description Illustration Qty
AUpper leg 3
tubes
BLower leg 3
tubes
C Rings 3
D Moisture 3
protection
sleeves
EGround hole 1
maker
FFinial retaining 1
screw
GFinial 1
Consumer Helpline
If you have any problems or queries with
this product then please contact our
helpline number: 01406 372227,
or write to: Gardman Ltd. High Street,
Moulton, Spalding, Lincs, PE12 6QD.
Fax: +44 (0) 1406 372233.
Page 2
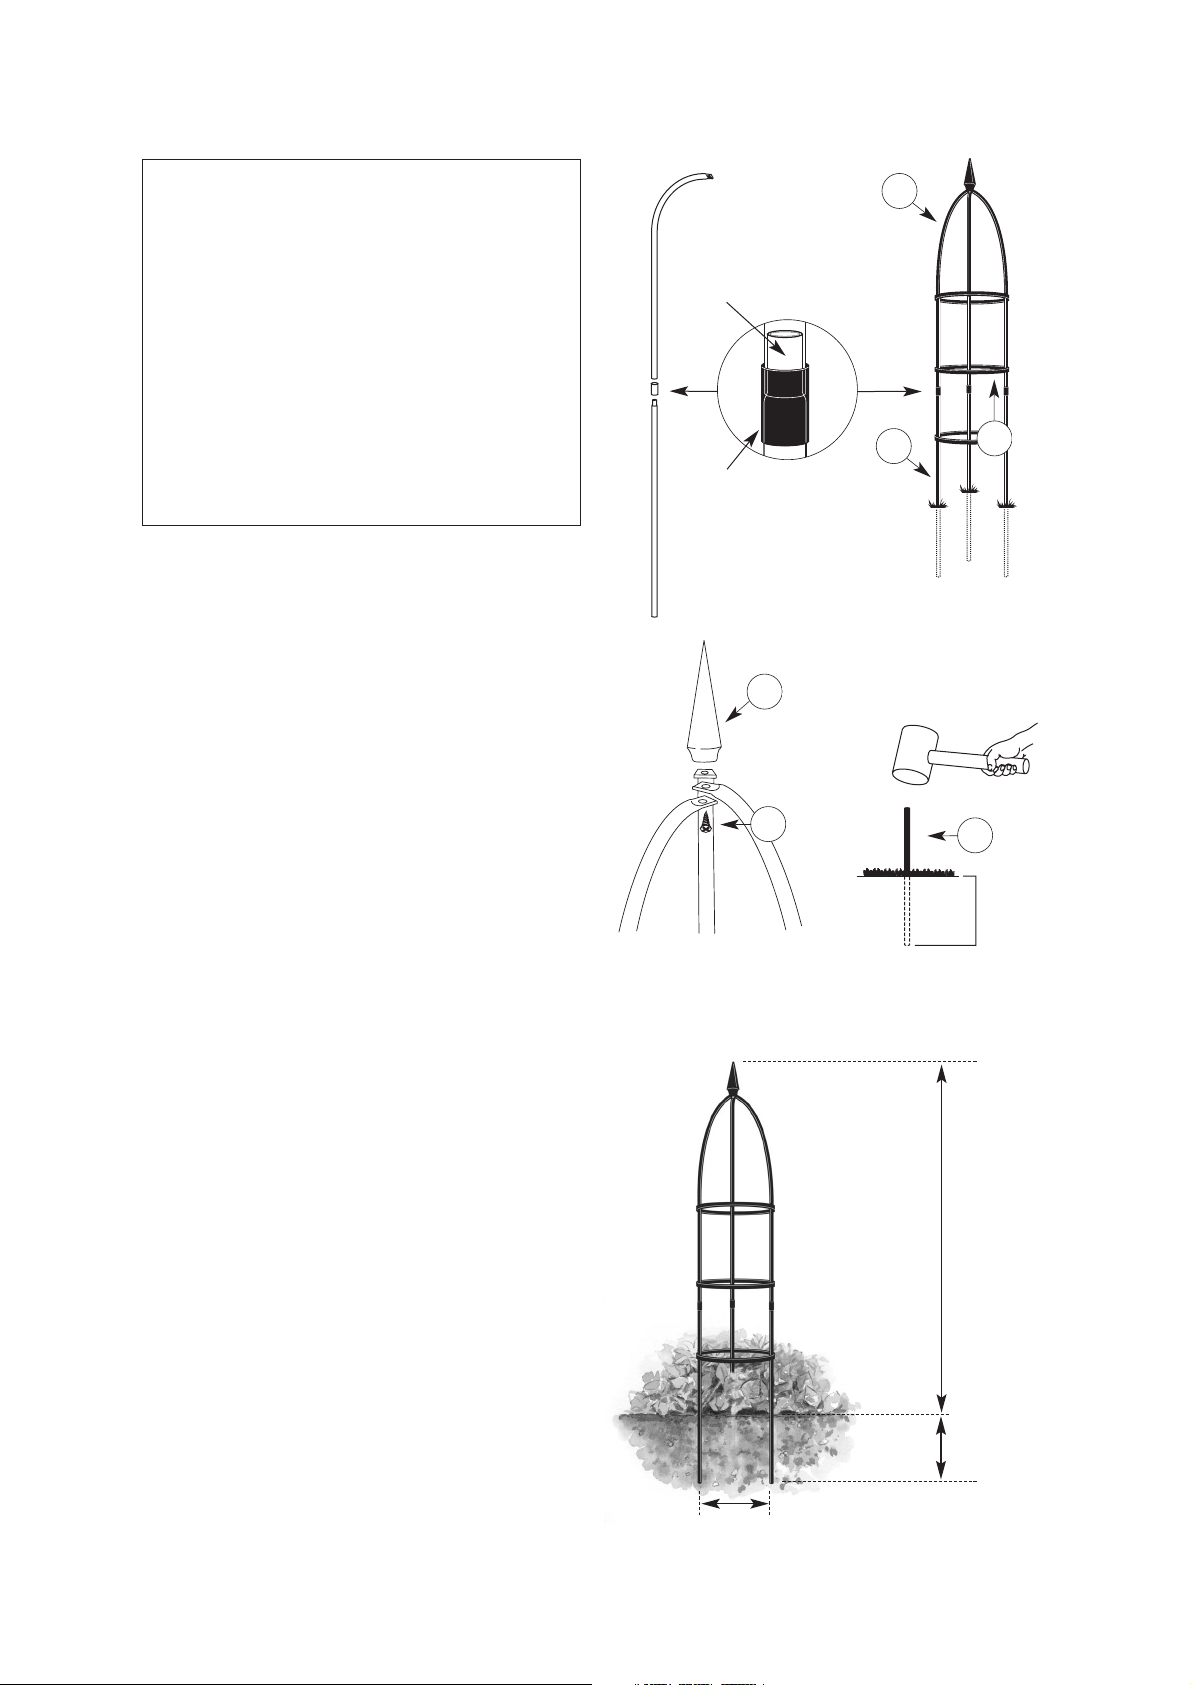
1. Fit the upper leg tubes (A) to lower leg
tubes (B) with the moisture protection
sleeves (D). Slide the moisture protection
sleeves half way onto the joint of the
upper leg tubes before pushing the lower
leg tubes into the sleeves and joint.
2. Place finial (G) on top of the leg
assemblies, insert screw (F) through the
top of the three flattened leg assemblies
and into the base of the finial.
Tighten screw.
3. Connect all three leg assemblies by
clipping them inside the 3 plastic rings
(C). For best results the rings should be
spaced approximately 0.30m (1') apart.
4. Place assembled obelisk in desired
location and mark the leg positions on
the ground. Remove obelisk and drive
hole maker (E) to a recommended depth
of approximately 0.30m (1').
Insert legs into holes and firm earth
around to secure.
Helpful hints:
You may find it easier to assemble your
obelisk horizontally on its side and then
carefully stand it upright to install.
Before assembling the obelisk, use one of
the plastic rings as a template to mark
out the 3 leg positions in the desired
location. This will aid fitting.
Soaking the moisture protection sleeves
in warm water for a few minutes prior to
fitting will make them more malleable
and will aid fitting.
Assembly
D
0.30m
0.32m
(1'
1
/
2")
1.55m
(5'1")
0.30m
(1')
All sizes approx.
BELOW GROUND
HEIGHT ABOVE
GROUND
WIDTH
TOTAL HEIGHT BEFORE FITTING:
1.85m
(
6
'
1
")
A
B
G
F
E
C
Joint
Moisture
Protection
Sleeve
 Loading...