

Page 1
Hunde-Katzen-Schreck
Art.-Nr. 60049
Gebrauchsanweisung 2
Instruction manual 5
Notice d’utilisation 8
Manual de instrucciones 11
Istruzioni per l’uso 14
Page 2

2
Page 3
Gebrauchsanweisung
Art.-Nr. 60049
Stand: 05/17
Sehr geehrter Kunde,
vielen Dank, dass Sie sich für eines unserer Qualitätsprodukte entschieden haben. Im Folgenden werden wir Ihnen die
Funktionen und die Handhabung unseres Gerätes erklären.
Bitte nehmen Sie sich die Zeit, lesen die Anleitung in Ruhe
durch und benutzen Sie das Gerät in der beschriebenen Form.
Beachten Sie alle enthalten Sicherheits- und Bedienungshinweise. Bewahren Sie diese Anleitung auf und geben Sie diese
bei Weitergabe des Gerätes mit. Sollten Sie Fragen oder Anregungen zu diesem Gerät haben, wenden Sie sich bitte an
Ihren Fachhändler oder an unser Service-Team
Wir freuen uns, wenn Sie uns weiter empfehlen und wünschen Ihnen viel Erfolg mit diesem Gerät.
1. Allgemeines
Hunde und Katzen sind die beliebtesten Haustiere, ob im
Garten oder im Wohnraum gern gesehen und geliebt. Dennoch gibt es Orte die haustierfrei bleiben sollen wie z.B.
Speisekammern oder Sandkästen, Teichanlagen oder der
Hauseingang, wo Nachbarskatze ihr Unwesen treibt. Der
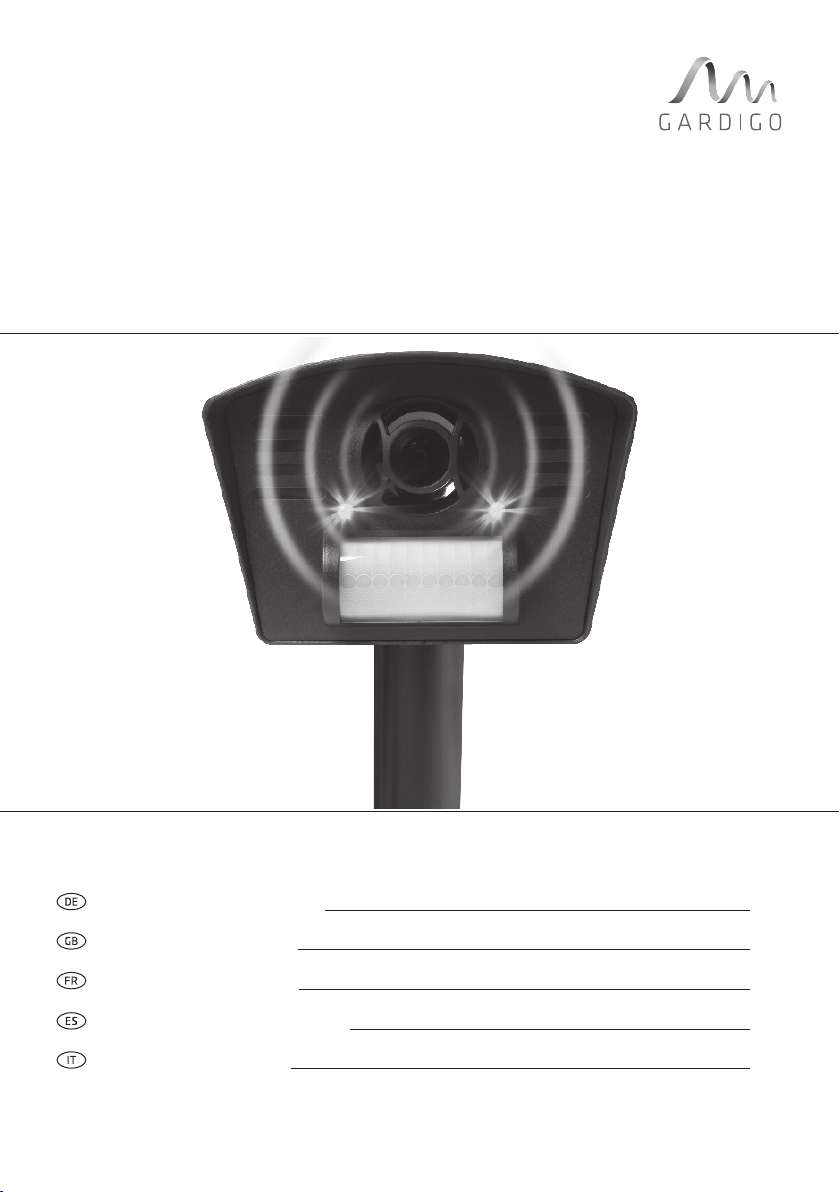
Hunde-Katzen-Schreck LED von Gardigo vertreibt die Tiere
umweltfreundlich mittels Ultraschall und Licht von diesen
Orten. Über einen Infrarot-Bewegungsmelder wird registriert,
wenn sich ein Tier in der Nähe befindet und der Ultraschallton
bzw. Ultraschall+Licht (je nach Einstellung) setzt ein. Die hohen Töne werden zunächst unbewusst wahrgenommen, sind
auf Dauer aber sehr unangenehm und die Tiere suchen sich
einen ruhigeren, angenehmern Aufenthaltsort. Die Tiere fühlen sich nicht verscheucht und die Töne sind unbedenklich.
Der Wirkungserfolg kann je nach Tier mehrere Tage auf sich
warten lassen.
Für einen flexiblen Einsatz besitzt das Gerät eine Kugelgelenk-Halterung und Erdspieß.
Der eingebaute Infrarot-Bewegungsmelder registriert Tiere in
einem Winkel von 110° und einer Reichweite von 7 m. In diesem Moment setzt ein hochfrequenter Ton zwischen 18.000
– 60.000 Hz ein, welcher ständig wechselt.
2. Technische Daten
• Frequenzbereich: 18.000 – 60.000 Hz
• Erfassungsbereich Bewegungsmelder: 110°, 7 m Reichweite
• Wirkungsbereich: bis zu 7 m
• Stroboskop: 2 super helle LED’s
• Spannungsversorgung: 5 x AA 1,5 V Mignon Batterie
3. Lieferumfang
1. Hunde-Katzen-Schreck
2. Erdspieß (– 3-teilig)
3. Anleitung
4. Befestigungskit
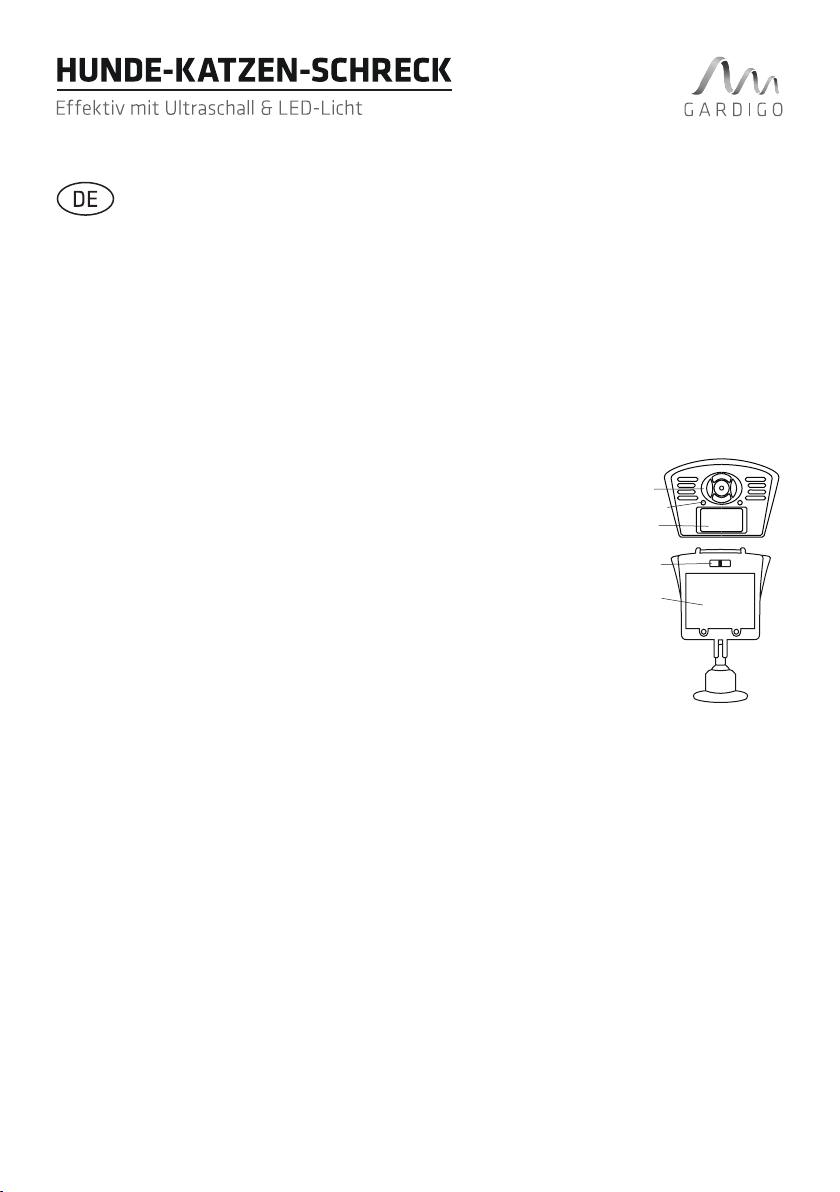
a
b
c
(2 x Schrauben, 2 x Dübel)
d
ON1 OFF ON2
a. Lautsprecher
e
b. LED-Blitzlicht
c. Infrarot- Bewegungsmelder
d. Ein-/Aus-Schalter
e. Batteriefach
4. Anwendungsbereiche
• Hauseingänge
• Sandkisten vor unangenehmen Hinterlassenschaften
• Teichanlagen, um die Fische vor hungrigen Katzen zu
schützen
• Blumenbeete vor Kaninchen
• Wohnraum vor Nachbarskatze
• Speisekammer
• Vogelhäuser und Vogeltränken
5. Hinweise zur Wirkungsweise
Die Gardigo Hunde-Katzen-Schreck LED verhindert nicht den
Aufenthalt von Tieren, andere Orte jedoch werden den Tieren angenehmer erscheinen. Sie beginnen sich vermehrt dort
auf zu halten. Das Gerät arbeitet mit Licht und wechselnden
Ultraschallwellen, welche in diesem Frequenzbereich für
3
Page 4
Hunde und Katzen störend wirken. Wie gut sich die Schallwellen ausbreiten, hängt mit den räumlichen Gegebenheiten
zusammen. Der Wechsel der Frequenzen verhindert einen
Gewöhnungseffekt. Merken die Tiere, dass der unangenehme Ton anhält, werden sie an einen anderen Ort umziehen.
Bis dieser Effekt eintritt, können einige Tage bis Wochen
vergehen. Das Gerät sollte dauerhaft in Betrieb sein, um die
Wirkung nicht zu unterbrechen.
tigungsmaterial nicht für alle Wandarten eignet. Erkundigen
Sie sich im Handel nach den für die jeweilige Wandbeschaffenheit geeigneten Schrauben und Dübel.
Für eine unsachgemäße Wand-Dübel Verbindung und dadurch entstandene Schäden übernimmt der Hersteller keine
Haftung.
8. Inbetriebnahme
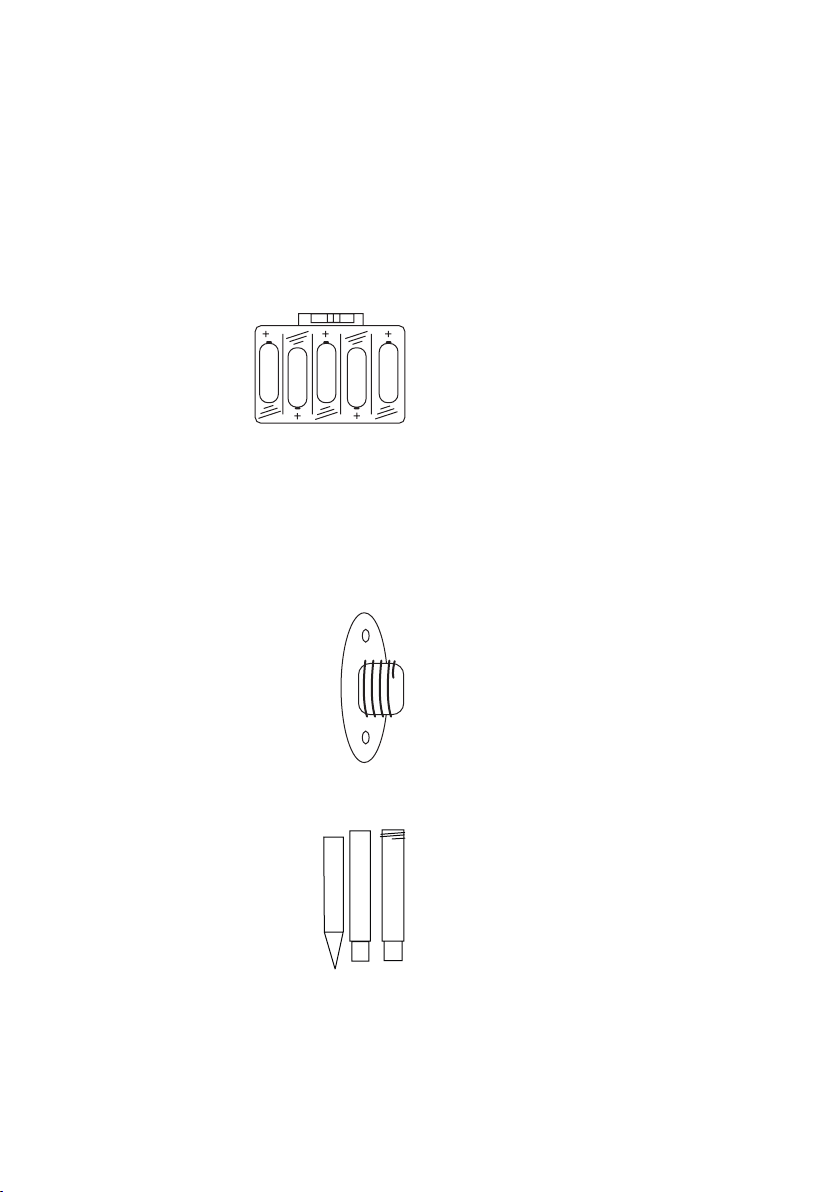
6. Batterien einlegen
Öffnen Sie mit einem KreuzSchraubenausdreher das Batteriegehäuse auf der Unterseite
1.5V"AA"Size
1.5V"AA"Size
1.5V"AA"Size
und bestücken dies mit 5 Stück
1,5 V AA-Batterien. Verschließen Sie das Gehäuse wieder
1.5V"AA"Size
1.5V"AA"Size
bevor Sie das Gerät einschalten.
Schieben Sie den Ein-/Aus-Schalter (ON/OFF) auf die Position „ON1“ – um das Gerät auf Funktion zu testen. Die LED’s
sollten nach kurzer Zeit aufleuchten. Zeigt das Gerät keine
Funktion, überprüfen Sie bitte ob die Batterien geladen und
richtig eingelegt sind.
7. Montage
Sie können das Gerät an der Wand oder in der
Erde installieren.
Wandmontage: Schrauben Sie die Wandhalterung von dem Kugelgelenk. Wählen Sie einen
geeigneten Platz für das Gerät und befestigen
Sie die Halterung mit den im Lieferumfang befindlichen Dübel und Schrauben sicher an der
Wand. Eine optimale Höhe ist 1,5 m. Das Gerät können Sie je
nach Tier oder zu beschallenden Bereich ausrichten.
Erdspieß: Stecken Sie die drei Teile des Erdspießes zusammen. Drehen Sie die Wandhalterung von dem Kugelgelenk und den
Erdspieß in das Kugelgelenk. Positionieren
Sie das Gerät im Rasen, Beet oder Sandkasten.
Das Gerät hat drei Schalterstellungen:
1. ON1 – Wenn der Bewegungsmelder angesprochen wird,
sendet das Gerät auf dieser Position Ultraschallwellen zusammen mit LED-Blitzlicht für 20 Sekunden aus.
2. OFF – Das Gerät ist auf dieser Position ausgeschaltet und
sendet weder Ultraschall noch Licht aus.
3. ON2 – Wenn der Bewegungsmelder angesprochen wird,
sendet das Gerät auf dieser Position Ultraschallwellen für
20 Sekunden aus.
Wir empfehlen tagsüber den Betrieb in ON2 und zum Einbruch der Dunkelheit den Betrieb in ON1.
Der Gardigo Hunde-Katzen-Schreck ist nun einsatzbereit.
Hinweis: Der Ultraschallton in diesem Frequenzbereich ist
für das menschliche Gehör nicht wahrnehmbar. Vor dem
Batteriewechsel bitte den Ein-/Aus-Schalter in die Position
„OFF“ schieben.
9. Weitere Hinweise zum Umgang
• Befinden sich Haustiere im Wirkungsbereich, die nicht ge-
stört werden sollen, schalten Sie das Gerät aus.
• Der Bewegungsmelder registriert nur Bewegung mit Kör-
perwärme, dazu gehören auch Menschen – um Strom zu
sparen sollten Sie daher bei großem Personenaufkommen
das Gerät ggf. ausschalten.
• Tauchen Sie das Gerät nicht in Wasser oder andere Flüssig-
keiten.
• Öffnen Sie das Gerät nicht gewaltsam.
• Säubern Sie das Gerät bei Verschmutzung mit einem
feuchten Tuch.
Service-Hotline: Telefon (0 53 02) 9 34 87 88
Wichtiger Warnhinweis beim Bohren in Wänden:
Vergewissern Sie sich vor dem Bohren, dass sich keine Gas-,
Wasser- oder Stromleitungen an der Bohrstelle befinden.
Montage nur durch fachkundige Personen. Unbedingt auf die
Wandbeschaffenheit achten, da sich das beigefügte Befes-
Ihr Gardigo Team
4
Page 5
Elektro- und Elektronikgeräte
dürfen nicht in den Hausmüll!
Dieses Produkt darf am Ende seiner Lebensdauer nicht über
den normalen Haushaltsabfall entsorgt werden, sondern muss
an einem Sammelpunkt für das Recycling von elektrischen und
elektronischen Geräten abgegeben werden. Das Symbol auf
dem Produkt, der Gebrauchsanweisung oder der Verpackung
weist darauf hin.
Die Werkstoffe sind gemäß ihrer Kennzeichnung wieder verwertbar. Mit der Wiederverwendung, der stofflichen Verwertung oder anderen Formen der Verwertung von Altgeräten leisten Sie einen wichtigen Beitrag zum Schutze unserer Umwelt.
Bitte erfragen Sie bei der Gemeindeverwaltung die zuständige
Entsorgungsstelle.
Batterien und Akkus dürfen
nicht in den Hausmüll!
Jeder Verbraucher ist gesetzlich verpflichtet, alle Batterien und
Akkus, egal ob sie Schadstoffe* enthalten oder nicht, bei einer
Sammelstelle seines Stadtteils / seiner Gemeinde oder im Handel abzugeben, damit sie einer umweltschonenden Entsorgung
zugeführt werden können. Batterien und Akkus bitte nur in
entladenem Zustand abgeben!
*gekennzeichnet mit: Cd = Cadmium
Pb = Blei
Hg = Quecksilber
5
Page 6

Instruction manual
Art.-No. 60049
Status: 05/17
Dear client,
thank you for choosing one of our quality products. In the
following, we will explain the functions and operation of our
product. Please take the time to read through the instructions carefully. Please take some time to read through the
instructions carefully. Please note all the included safety and
operating instructions. Keep this manual safe and ensure
that you include it when passing on the product on to a third
party. If you have any questions or suggestions about this
product, please contact your supplier or our service team.
We would appreciate it if you would recommend us to others,
and we hope you enjoy using this unit.
1. General
The Animal Chaser Pro provides a convenient, effective and
humane way to deter cats, dogs, and even raccoons from your
garden, yard and lawn without harm. This product utilizes a
sophisticated PIR (passive infrared) detection system to monitor a large area up by up to an approximate distance of 23
ft. When an animal enters the area covered by the infrared
sensor, the Animal Chaser Pro produces an ultrasonic sound
at a frequency range from 18 kHz up to 60 kHz that is very
unpleasant to animals but virtually inaudible to the human
ear. In addition to the noise the unit emits, the Animal Chaser
Pro also emits an intense LED strobe light to further ward off
unwanted animals.
a. Speaker
b. LED strobe light
c. Passive Infre-red motion detector
(PIR)
d. Switch
e. Battery Compartment
a
b
c
d
ON1 OFF ON2
e
Warning:
• Turn off the Animal Chaser Pro if your
pet is playing in the protected area!
• Do not immerse the unit in water or
any other liquid!
• Do not modify or tamper the unit or its internal compo-
nents. Covering or painting over the front speaker grill can
damage the unit and cause it to malfunction.
• For best function, keep the PIR lens clear. Use a damp cloth
to wipe them. Do not use benzene, alcohol or paint thinner!
• Do not mount where it can fall and injure others!
Note: For outdoor use only. Your pets may not be deterred by
this product as they see your home as their home and territory.
2. Battery Installation
1. Remove two screws on the
bottom of unit to access bat-
1.5V"AA"Size
1.5V"AA"Size
1.5V"AA"Size
tery compartment
1.5V"AA"Size
2. Insert 5 x “AA” alkaline or li-
1.5V"AA"Size
thium batteries. Be sure to
follow the polarity diagram and insert the batteries cor-
rectly. Do not mix old and new batteries.
3. How to install
With Mounting Plate
1. Determine the location you want to place your Animal
Chaser Pro. Mounting locations are preferably at 5 to 8 ft in
height, in view of the protected area, out of reach of child-
ren and placed where it can not fall and injure
others.
2. Using a pencil, mark the center of where you
would like the screw to be placed and have a
drill bit a little smaller than the closed end of
the plastic anchor ready.
3. Using the drill bit, drill a hole through the
center of your mark and about as deep as the
an chor is long.
4. Using a hammer or rubber mallet, gently tap the anchor
until it is flush with the wall.
5. Insert the screw and slowly rotate it into the anchor leaving
about 1/8 or 1/4 of the screw out to hang the Solar Animal
Chaser.
6
Page 7

Note: Anchors are most notably used on drywall and plaster,
for most other walls it is not needed.
With Stand
1. Connect all pieces of stand together.
2. Unscrew the mounting plate from device.
3. Replace the mounting plate to the stand.
4. Determine the location you want to place
your Animal Chaser Pro with stand.
4. How to use
Environmental
protection notice
At the end of its life span this product may not be disposed as
normal household waste but must be disposed of at a collecting place for recycling of electrical and electronic equipment.
The icon on the product, in the manual, or on the packing points
to this fact. The materials are recyclable according to their labelling. Through reusing, material recycling, or other forms of
utilisation of old devices you make an important contribution
to the protection of the environment. Please ask the local administration for the responsible waste disposal centre.
The Animal Chaser Pro has a three position switch which is
located on the bottom of the unit housing.
1. ON1 – When the motion sensor is triggered, the unit will
produce a high pitched ultrasonic frequency in conjunction
with a bright strobe light to ward away unwanted animals
for 20 seconds.
2. OFF – Unit is off and the sensors will not be triggered.
3. ON2 – When the motion sensor is triggered, the unit will
produce a high pitched ultrasonic frequency to ward away
unwanted animals for 20 seconds
5. Specifications
• Area Covered: up to 500 ft² at an angle of 110° within a 23
ft distance
• Strobe Light: 2 Super bright LEDs
• Audio Frequency: 18 kHz to 60 kHz
• Battery: 5 x AA 1.5V
• Dimensions: 6 1/4 x 5 x 4 1/4 (H x W x D) without stand
6. Additional notes
If there are pets within the scope of the device whom you
do not wish to disturb, turn the device off. The movement
sensor registers movement by detecting body heat, including
that of humans, so to save battery life, you should switch the
device off if you are expecting large numbers of people in the
vicinity. Do not submerge the device in water or other fluid.
When opening the device, do so gently. To clean the device,
wipe with a damp cloth.
Do not throw batteries and
rechargeable batteries into
household waste!
Consumers are legally obligated to return used and rechargeable batteries, whether they contain harmful substances* or not,
to designated recycling areas, disposal sites, or stores where
batteries/rechargeable batteries can be bought. By doing so,
you are fulfilling all legal battery recycling and disposal obligations and are contributing to a better enviroment. Make sur e
batteries are completly discharged before disposing!
*marked with Cd = cadmium
Hg = mercuric
Pb = lead
Service Hotline: Phone +49 (0) 53 02 9 34 87 88
Your Gardigo Team
7
Page 8

Notice d’utilisation
Réf. 60049
Mise à jour: 05/17
Cher client,
merci d’avoir choisi l’un de nos produits de qualité. Nous vous
expliquons ci-dessous comment utiliser et manipuler notre
appareil. Veuillez prendre le temps de lire cette notice avec
attention. Veuillez respecter toutes les consignes de sécurité
et de commande. Veuillez conserver ce manuel et le donner
avec l’appareil. Si vous avez des questions ou des remarques
sur cet appareil, veuillez vous adresser à votre revendeur ou à
notre équipe de service.
Nous serions ravis que vous nous recommandiez autour de
vous et nous vous souhaitons une utilisation agréable de
l’appareil.
1. Général
Le répulsif animaux combine une alarme PIR, des ultrasons,
un stroboscope sonique et clignotant pour chasser les animaux indésirables de votre jardin!
Le répulsif animaux est un appareil perfectionné, avec son
stroboscope clignotant qui détecte les indésirables et les
empêche d’entrer dans votre propriété, jour et nuit. Le répulsif animaux utilise les ultrasons et les flashs stroboscopiques
pour éloigner les animaux indésirables de votre jardin, pelouse et de votre cour, de manière efficace et humaine.
Ce tout dernier modèle de répulsif animaux est un moyen
pratique, sans restriction d’emplacement, pour éloigner les
chats, les chiens, les lapins, les écureuils et tous les autres
nuisibles potentiels de votre jardin sans leur faire de mal. Le
répulsif animaux est efficace contre les chats, chiens, écureuils, lapins, rongeurs, oiseaux nuisibles, qui ont peur des
flashes.
3. Avec l’éventaire
1. Raccordez tous les morceauxd’éventaire ensemble
2. Dévissez la plaque montante del’appareil.
3. Remplacez la plaque montante àl’éventaire.
4. Déterminez l’endroit vous voulez placervotre Planeur d’Animal
Avantageux avecl’éventaire
a
b
c
a. Orateur
b. Lumière de stroboscope LED
c. IInfre-rouge passif détecteur de
mouvement (PIR)
d
ON1 OFF ON2
e
d. Changement
e. Logement de piles
5. Avertissement
Dégoûtez le Planeur d’Animal Avantageuxsi votre animal
de compagnie joue dans larégion protégée !Ne plongez pas
l’unité dans l’eau ou autreliquide !Ne modifiez pas ou tripotez l’unité ou sescomposantes intérieures. La couverture
oula peinture sur le gril d’orateur de devantpeuvent endom
mager à l’unité et le fairemal fonctionner.Pour la meilleure
fonction, gardez lalentille PIR claire. Utilisez du tissu humidepour les essuyer. N’utilisez pas le benzène,l’alcool ou
la peinture plus mince ! Ne montez pas où il peut tomber
et blesserd’autres! Note : Pour l’utilisation en plein airseulement. Vos animaux de compagnie nepeuvent pas être dissuadés par ce produitpuisqu’ils voient votre maison comme
leurmaison et territoire.
6. Installation de batterie
2. Spécifications
• Région couverte: jusqu’à 500 ft ² à un angle de 110 °
dansune 23 distance ft
• Lumière de stroboscope: 2 LEDsbrillants Formidables
• Fréquence audio: 18 kHz à 60 kHz
• Batterie: 5 Associationd’automobilistes x 1. 5V
• Dimensions: 6 1/4 x 5 x 4 1/4 (H x L x P) sanséventaire
1. Enlevez deux vis sur le fond
d’unité pouraccéder au loge-
1.5V"AA"Size
1.5V"AA"Size
ment de piles
1.5V"AA"Size
2. Insérez“Associationd’automo
1.5V"AA"Size
bilistes“ x alcaline ou batteries de lithium. Suivez absolumentle diagramme de polarité et insérez lesbatteries correctement. Ne mélangezpas
de vieilles et nouvelles batteries.
1.5V"AA"Size
8
Page 9

7. Comment installer
Service: service@gardigo.de
Avec la plaque montante
1. Déterminez l’endroit vous voulez placervotre Planeur
d’Animal Avantageux. Lesendroits montants sont de préférence à5 à 8 ft dans la hauteur, vu la régionprotégée, hors
de portée des enfants etplacés où il ne peut pas tomber
etblesser d’autres.
2. En utilisant un crayon, marquez lecentre d’où vousvoudriez
que la vis soitplacée et auriez un morceau de foreuseun
peu plus petit que la fin fermée del’ancre de plastique
prête.
3. L’utilisation de la foreuse a mordu, aforé un trou par le
centre de votremarque et presque aussi profondémentque
l’ancre dure
4. En utilisant un marteau ou un maillet decaoutchouc, tapez doucement l’ancrejusqu’à ce
que ce soit la rougeur avec lemur.
1. Insérez la vis et faites-la tournerlentement
dans l’ancre partant d’ou dela vis pour accrocher le Planeur d’AnimalSolaire.
8. Comment utiliser
Le Planeur d’Animal Avantageux a un troischangement de
position qui est localisé surle fond du logement d’unit:
1. ON1 – Quand le détecteur de mouvementest déclenché,
l’unité produira une hautefréquence ultrasonique jetée
dans laconjonction avec une lumière destroboscope brillante à la salle d’hôpital lesanimaux loin superflus depuis
20secondes.
2. OFF – l’Unité est débranchée et lesdétecteurs ne seront pas déclenchés.
3. ON2 – Quand le détecteur de mouvementest déclenché, l’unité produira une
hautefréquence ultrasonique jetée à la
salled’hôpital les animaux loin superflus
depuis20 secondes.
Votre Équipe Gardigo
Elektro- und Elektronikgeräte
dürfen nicht in den Hausmüll!
Dieses Produkt darf am Ende seiner Lebensdauer nicht über
den normalen Haushaltsabfall entsorgt werden, sondern muss
an einem Sammelpunkt für das Recycling von elektrischen und
elektronischen Geräten abgegeben werden. Das Symbol auf dem
Produkt, der Gebrauchsanweisung oder der Verpackung weist
darauf hin.
Die Werkstoffe sind gemäß ihrer Kennzeichnung wieder verwertbar. Mit der Wiederverwendung, der stofflichen Verwertung oder
anderen Formen der Verwertung von Altgeräten leisten Sie einen
wichtigen Beitrag zum Schutze unserer Umwelt. Bitte erfragen
Sie bei der Gemeindeverwaltung die zuständige Entsorgungsstelle.
Batterien und Akkus dürfen
nicht in den Hausmüll!
Jeder Verbraucher ist gesetzlich verpflichtet, alle Batterien und
Akkus, egal ob sie Schadstoffe* enthalten oder nicht, bei einer
Sammelstelle seines Stadtteils/seiner Gemeinde oder im Handel abzugeben, damit sie einer umweltschonenden Entsorgung
zugeführt werden können. Batterien und Akkus bitte nur in entladenem Zustand abgeben!
*gekennzeichnet mit: Cd = Cadmium
Pb = Blei
Hg = Quecksilber
9. Autres remarques concernant l’utilisation de l’appareil
Éteignez l’appareil si des animaux qui ne doivent pas être
gênés se trouvent dans la zone d’efficacité. Le détecteur de
mouvement détecte uniquement les mouvements au moyen
de la chaleur corporelle (dont celle des hommes). En cas de
visites fréquentes, il est conseillé d’éteindre l’appareil pour
économiser du courant. Ne plongez pas l’appareil dans de
l’eau ni dans d’autres liquides. Ne forcez pas pour ouvrir
l’appareil. En cas d’encrassement, nettoyez l’appareil avec un
chiffon humide.
9
Page 10

Manual de instrucciones
Art.-No. 60049
Estado: 05/17
Estimado cliente,
le agradecemos que haya elegido uno de nuestros productos
de calidad. A continuación explicamos en detalle las funciones y el manejo de nuestro aparato. Tómese algo de tiempo para leer las instrucciones con atención. Tómese algo
de tiempo para leer las instrucciones con atención hasta el
final. Siga todas las indicaciones de seguridad y de manejo.
Guarde este manual para poder entregarlo junto al aparato
si se lo cede a otra persona. Si tiene alguna pregunta o algún
comentario acerca de este aparato, póngase en contacto con
su distribuidor o con nuestro equipo de atención al cliente.
Esperamos que pueda recomendarnos y le deseamos que disfrute el uso de este aparato.
1. General
Los perros y los gatos son de nuestros animales domésticos
favoritos, que adoramos tener tanto en el jardín como en el
salón. Sin embargo, existen lugares en los que no deberían
entrar los animales, como despensas, cajas de arena, estanques o la entrada de la casa, por donde se pasea el gato
del vecino. El LED para asustar perros y gatos de Gardigo
mantiene alejados a los animales de forma ecológica, mediante luz y ultrasonidos. Un sensor de infrarrojos registra
el movimiento de un animal que se acerca, lo que activa el
ultrasonido, o el ultrasonido y la luz (dependiendo de la configuración). Los tonos altos se perciben de forma inconsciente,
pero cuando se mantienen resultan muy desagradables, lo
que hace que los animales busquen un lugar más tranquilo y
agradable en el que pasar el rato. Los animales no se sienten
excluidos y los sonidos son inofensivos. Puede tardar varios
días en hacer efecto, dependiendo del animal del que se trate.
Para poder situarlo donde sea más conveniente, el aparato
cuenta con un gancho para colgar y con un pie para clavarlo en
el suelo. El sensor de movimiento integrado registra a los animales en un ángulo de 110º y una amplitud de 7 m. Si registra
alguno, comienza a emitir un tono agudo de entre 18 000 y
60 000 Hz, que cambia constantemente.
2. Datos técnicos
• Rango de frecuencias: 18 000 – 60 000 Hz
• Cobertura del sensor de movimiento: 110°, 7 m de alcance
• Alcance: hasta 7 m
• Estroboscopio: 2 LED muy claros
• Suministro eléctrico: baterías 5 x AA 1,5 V Mignon
3. La entrega incluye
1. Dispositivo para asustar perros
y gatos
2. Pie de 3 piezas
3. Instrucciones
4. Kit de montaje (2 tornillos,
2 tacos)
a. Altavoz
b. Flash LED
c. Sensor de movimiento infrarrojo
d. Interruptor apagado/encendido
e. Compartimento para batería
4. Ámbito de aplicación
• Entradas
• Cajas de arena, para evitar sorpresas desagradables
• Stanques, para proteger a los peces de gatos hambrientos
• Flores, para protegerlas de los conejos
• Zonas habitables, para protegerlas de gatos vecinos
• Despensas
• Casitas y bebederos de pájaros
5. Indicaciones para el funcionamiento
El LED para asustar perros y gatos de Gardigo no evita la aparición de los animales, pero las zonas en las que no se emplee
resultarán más atractivas a los animales. Empezarán a establecerse más a menudo en esas zonas. El aparato funciona
con luz y ultrasonidos cambiantes, cuyo rango de frecuencias
resulta desagradable a perros y gatos. El nivel de propagación
a
b
c
d
e
10
Page 11

de las ondas ultrasónicas dependerá de las características del
lugar de empleo. La variación en las frecuencias evita que los
animales se acostumbren. Si los animales se dan cuenta de
que el sonido no desaparece, buscarán otro lugar. Hasta que
se produzca este efecto, pueden pasar algunos días e incluso
algunas semanas. El aparato debe mantenerse en funcionamiento durante períodos largos para no alterar su eficacia.
6. Colocar las baterías
Con un destornillador de cruz, abra la carcasa del compartimento de las baterías de la parte inferior e introduzca las 5
baterías 1,5 V AA. Cierre la carcasa antes de volver a encender el aparato. Coloque el interruptor de encendido y pagado
(ON/OFF) en la posición «ON1», para comprobar que funciona. Pasados unos momentos, deberían activarse los LED.
Si el aparato no funciona, compruebe que las baterías están
cargadas y colocadas correctamente.
8. Funcionamiento
El aparato tiene tres posiciones de funcionamiento distintas:
1. ON1 – En esta posición, cuando se activa el sensor, el aparato empieza a emitir ultrasonidos y flashes LED a intervalos de 20 segundos.
2. OFF – En esta posición, el aparato está apagado y no emite
ni luz ni ultrasonido.
3. ON2 – En esta posición, cuando se activa el sensor, el aparato empieza a emitir ultrasonidos a intervalos de 20 segundos.
Recomendamos el modo de funcionamiento ON2 y el modo
ON1 cuando empiece a oscurecer. El ahuyentador de perros y
gatos de Gardigo está listo para usar.
Nota: El ultrasonido de este rango de frecuencia no es perceptible para el oído humano.
Antes de cambiar las baterías, recuerde situar el interruptor
en la posición «OFF» (apagado).
7. Montaje
Puede instalar el aparato en la pared o en el suelo.
Montaje en pared: tornille el
gancho de la conexión giratoria.
Elija un lugar adecuado para in-
1.5V"AA"Size
1.5V"AA"Size
1.5V"AA"Size
stalar el aparato y fije el soporte
a la pared mediante los tacos
y tornillos suministrados en el
1.5V"AA"Size
1.5V"AA"Size
embalaje. Una altura óptima es
1,5 m. Puede orientar el aparato dependiendo del animal o de
la zona que quiera sonorizar.
Pie: Monte las tres piezas del pie. Aparte el gancho de la pared de la conexión giratoria girándolo y póngale el pie. Clave el aparato en el césped,
entre las flores o en la caja de arena. Indicación
importante en caso de taladrar la pared: Asegúrese antes de taladrar de que no hay ninguna
tubería, tubería de gas o línea eléctrica en el
lugar en el que desea taladrar. El montaje deben
realizarlo únicamente personas especializadas. Tenga en cuenta también los materiales
de la pared, ya que el material de fijación suministrado no se adapta a todos los tipos de
muros. Pregunte a su distribuidor qué tacos
y tornillos son necesarios para los materiales
de los que dispone. El fabricante no asume
responsabilidad alguna por daños causados
por la utilización de tacos incorrectos.
9. Otras indicaciones sobre el funcionamiento
• Si en el área de alcance hay animales domésticos que no
deban ser molestados, apague el aparato.
• El sensor de movimiento registra el únicamente movimiento del calor corporal, de forma que también percibe a
los seres humanos. Para ahorrar electricidad, si va a celebrar una gran reunión, recomendamos que apague el aparato.
• No sumerja el aparato en agua ni en otros líquidos.
• No fuerce el aparato para abrirlo.
• Si se ensucia, limpie el aparato con un paño húmedo.
Servicio: service@gardigo.de
Su Equipo Gardigo
11
Page 12

Indicaciones para la
protección del medio ambiente
Este producto no se puede tirar al cubo de basura convencional
al final de su vida útil, sino que debe ser entregado en un punto
de recogida para el reciclaje de aparatos eléctricos y electrónicos.
El símbolo que aparece en el producto, en las instrucciones de
uso o en el paquete hace referencia a esto. Los materiales son
reutilizables de acuerdo con su identificación. Al reutilizar, utilizar
como material o utilizar de alguna otra forma aparatos antiguos
está prestando un importante servicio a la protección de nuestro
medio ambiente. Por favor, pregunte por el puesto de gestión de
residuos en su administración local.
Indicaciones sobre la
eliminación de las pilas
Las pilas/baterías están sometidas a disposiciones legales. Por
ello, deberá entregarlas después de su uso en el punto de venta o
en un centro de recogida de residuos perteneciente a los organismos públicos responsables de la gestión de los residuos. No de seche nunca baterías o pilas en la basura doméstica, bolsas amarillas o similares. Las pilas o baterías sólo deben desecharse en el
depósito de recogida de pilas usadas cuando estén descargadas
y después de haber tomado precauciones contra cortocircuitos
(p. ej. cubrir los polos).
12
Page 13

Istruzioni per l’uso
Art.-No. 60049
Stato: 05/17
Gentile cliente,
grazie per aver scelto uno dei nostri prodotti di alta qualità.
Qui di seguito spieghiamo le funzioni e le modalità d’uso del
nostro dispositivo, che vi invitiamo a leggere attentamente e
a seguire scrupolosamente. Conservate il presente manuale
in un luogo sicuro e in caso di trasferimento dell’apparecchio
consegnatelo corredato di questa documentazione. Per domande o suggerimenti concernenti il presente apparecchio,
rivolgetevi ai rivenditori specializzati o al nostro team di assistenza.
Saremo lieti se l’uso di questo dispositivo soddisferà le vostre
esigenze e se consiglierete i nostri prodotti ad altri.
1. Descrizone del prodotto
I cani e i gatti sono gli animali domestici più amati, sempre
benvenuti in giardino o nell’ambiente domestico. Tuttavia vi
sono luoghi a cui gli animali non devono avere accesso, come
per esempio le dispense o i recinti con sabbia, in prossimità
di stagni o presso l’ingresso dell’abitazione o dove si muove
il gatto dei vicini di casa. Il repulsivo LED per cani e gatti di
Gardigo li tiene a distanza in modo rispettoso per gli animali
stessi grazie all’uso di ultrasuoni e luce. Attraverso un segnalatore di movimento a infrarossi viene registrata la presenza
di un animale nelle vicinanze e vengono attivati gli ultrasuoni
nonché la luce (a seconda dell’impostazione). I toni elevati
vengono dapprima percepiti inconsapevolmente, ma sono
molto sgradevoli, pertanto gli animali sono indotti a ricercare
un luogo più tranquillo e gradevole. Gli animali non si sentono scacciati e i toni non provocano alcun danno. L’effetto può
richiedere diversi giorni di tempo a seconda dell’animale in
questione. Al fine di rendere possibile un utilizzo flessibile,
l’apparecchio dispone di un supporto con giunto sferico e di
un’asta da fissaggio a terra. Il sensore di movimento a infrarossi integrato registra la presenza di animali in un angolo
di 110° e con una portata di 7 m. Nello stesso momento viene
generato un tono ad alta frequenza, fra 18.000 e 60.000 Hz, il
quale varia costantemente.
2. Dati tecnici
• Ambito di frequenza: 18.000 – 60.000 Hz
• Ambito di rilevazione del sensore di movimento: 110°,
portata pari a 7 m
• Campo d’azione: fino a 7 m
• Stroboscopio: 2 LED estremamente luminosi
• Alimentazione: 65 batterie mignon di tipo AA 1,5 V
3. Fornitura
1. Repulsivo per cani e gatti
2. Asta per fissaggio a terra – a 3
componenti
a
b
c
3. Istruzioni
4. Set di fissaggio (2 viti, 2 tasselli)
a. Altoparlante
d
ON1 OFF ON2
e
b. Flash LED
c. Sensore di movimento a infrarossi
d. Interruttore ON/OFF
e. Scomparto portabatterie
4. Ambiti di applicazione
• Ingressi delle abitazioni
• Recinti con sabbia da proteggere contro resti sgradevoli
• Stagni per la protezione dei pesci dai gatti affamati
• Aiuole di fiori da proteggere contro i conigli
• Luoghi abitativi da proteggere contro i gatti dei vicini di casa
• Dispensa
• Uccelliere e abbeveratoi per uccelli
5. Avvertenze per l’efficacia dell’apparecchio
Il repulsivo per cani e gatti a LED Gardigo non evita la presenza di animali. Tuttavia altri luoghi appariranno più piacevoli per gli animali, i quali inizieranno pertanto a soffermarsi
più spesso altrove. L’apparecchio lavora con l’ausilio di luce
e onde a ultrasuoni alternanti, le quali vengono avvertite in
questo campo di frequenza come fastidiose da cani e gatti.
13
Page 14

La qualità della diffusione delle onde acustiche dipende dalle
condizioni ambientali in oggetto. La variazione delle frequenze impedisce che si generi un effetto di assuefazione. Se gli
animali notano che il tono spiacevole persiste si trasferiscono in un altro luogo. Fino al momento in cui subentra questo
effetto possono trascorrere giorni o settimane. L’apparecchio
deve essere in funzione in modo duraturo, al fine di non interrompere l’effetto.
6. Inserimento della batterie
Servendosi di un cacciavite con
punta a croce, aprire lo scomparto porta batterie sul lato
1.5V"AA"Size
1.5V"AA"Size
1.5V"AA"Size
inferiore e inserirvi 5 batterie di
tipo AA da 1,5 V. Chiudere nuovamente lo scomparto prima di
1.5V"AA"Size
1.5V"AA"Size
attivare l’apparecchio. Portare
l’interruttore ON/OFF in posizione “ON1“ – per controllare il
corretto funzionamento dell’apparecchio. Dopo un breve intervallo di tempo, i LED devono illuminarsi. Se l’apparecchio
non funziona, controllare che le batterie siano cariche e che
siano state montate correttamente.
si assume alcuna responsabilità per il collegamento non conforme del tassello alla
parete e per i danni derivanti.
8. Messa in funzione
L’apparecchio ha tre posizioni per l’interruttore:
1. ON1 – quando scatta il sensore di movimento l’apparecchio
invia, in questa posizione, ultrasuoni nonché un flash LED
per 20 secondi.
2. OFF – n questa posizione l’apparecchio è disattivato e non
genera né ultrasuoni né luce.
3. ON2 – quando scatta il sensore di movimento l’apparecchio
invia, in questa posizione, ultrasuoni per 20 secondi.
Si consiglia di impostare la posizione ON2 durante il giorno e
la posizione ON1 al calare della notte. Il repulsivo per cani e
gatti Gardigo è quindi pronto a entrare in funzione.
Nota:in questo ambito di frequenza l’ultrasuono non è percepibile dall’udito umano.
Prima di sostituire le batterie portare l’interruttore ON/OFF
in posizione “OFF”.
7. Montaggio
L’apparecchio può essere montato a terra oppure a parete.
Montaggio a parete: avvitare il supporto a
parete con giunto sferico. Scegliere un posto
appropriato per l’apparecchio e fissare il supporto alla parete con le viti e il tassello forniti
in dotazione. L’altezza ottimale corrisponde
a 1,5 m. L’apparecchio può essere orientato a
seconda dell’animale o dell’area interessata
dall’ultrasuono.
Asta per fissaggio a terra: inserire insieme le tre parti
dell’asta per fissaggio a terra. Avvitare il supporto a parete
con giunto a sfera e inserire l’asta nel giunto. Posizionare
l’apparecchio nel prato, nell’aiuola o nel recinto di sabbia. Avvertenza importante per la perforazione delle pareti: prima
di procedere alla perforazione è necessario accertarsi che non
vi siano tubi del gas o dell’acqua né cavi di corrente in corrispondenza del punto di perforazione. Il montaggio deve essere
effettuato esclusivamente da parte di personale qualificato.
Prestare assolutamente attenzione alle caratteristiche della
parete, in quanto il materiale di fissaggio fornito in dotazione
non è adatto a tutti i tipi di parete. Si consiglia di informarsi
presso il venditore in merito alle viti e ai tasselli adatti alle
specifiche proprietà delle pareti in oggetto. Il costruttore non
9. Ulteriori avvertenze in merito all’utilizzo
dell’apparecchio
• Nel caso in cui nell’ambito d’azione dell’apparecchio si
trovino degli animali che non devono essere disturbati, è
necessario disattivare l’apparecchio.
• Il sensore di movimento registra solo i movimenti esclusivamente sulla base del calore corporeo, anche nel caso
in cui si tratti di persone. Al fine di risparmiare corrente si
consiglia pertanto di disattivare l’apparecchio qualora vi
sia un’elevata circolazione di persone.
• Non immergere l’apparecchio nell’acqua o in altri liquidi.
• Non usare forza per aprire l’apparecchio.
• Pulire l’apparecchio con un panno umido.
Servizio: service@gardigo.de
Il vostro Team Gardigo
14
Page 15

Avvertenze per la protezione
dell’ambiente
Questo apparecchio, alla fine della sua vita, non potrà essere
smaltito attraverso il normale ciclo dei rifiuti domestici, bensì
dovrà essere conferito presso un punto di raccolta per il recupero
di apparecchiature elettriche ed elettroniche, come indicato dal
simbolo riportato sul prodotto stesso, nel manuale di istruzioni oppure sulla confezione. I diversi materiali potranno essere
riciclati secondo le modalità riportate sulla loro marcatura.
Attraverso il riutilizzo, il riciclaggio dei diversi materiali oppure
altre forme di recycling delle apparecchiature usate, apporterete
un valido contributo alla protezione del nostro ambiente. Siete
pregati di informarvi presso le vostre amministrazioni comunali
circa l’ubicazione di detti punti di raccolta.
Suggerimenti importanti
per le batterie
Le batterie contengono sostanze inquinanti e il loro trattamento
è soggetto a disposizioni di legge. Per questo motivo è necessario restituire le batterie esauste al punto di vendita oppure ai
centri di raccolta per le sostanze inquinanti presenti nel vs comune di residenza. Non smaltire mai la batteria nei rifiuti domestici
o nei contenitori per la raccolta die altri materiali (plastica, vetro,
organico o simili). Gettare le batterie esauste esclusivamente nel
contenitore previsto per le batterie, avendo cura di evitare corto
circuiti (ad esempio, coprendo i poli con nastro adesivo).
15
Page 16

16tevigo GmbH · Raiffeisenstr. 2 D · 38159 Vechelde (Germany) · www.gardigo.com
 Loading...