

Page 1
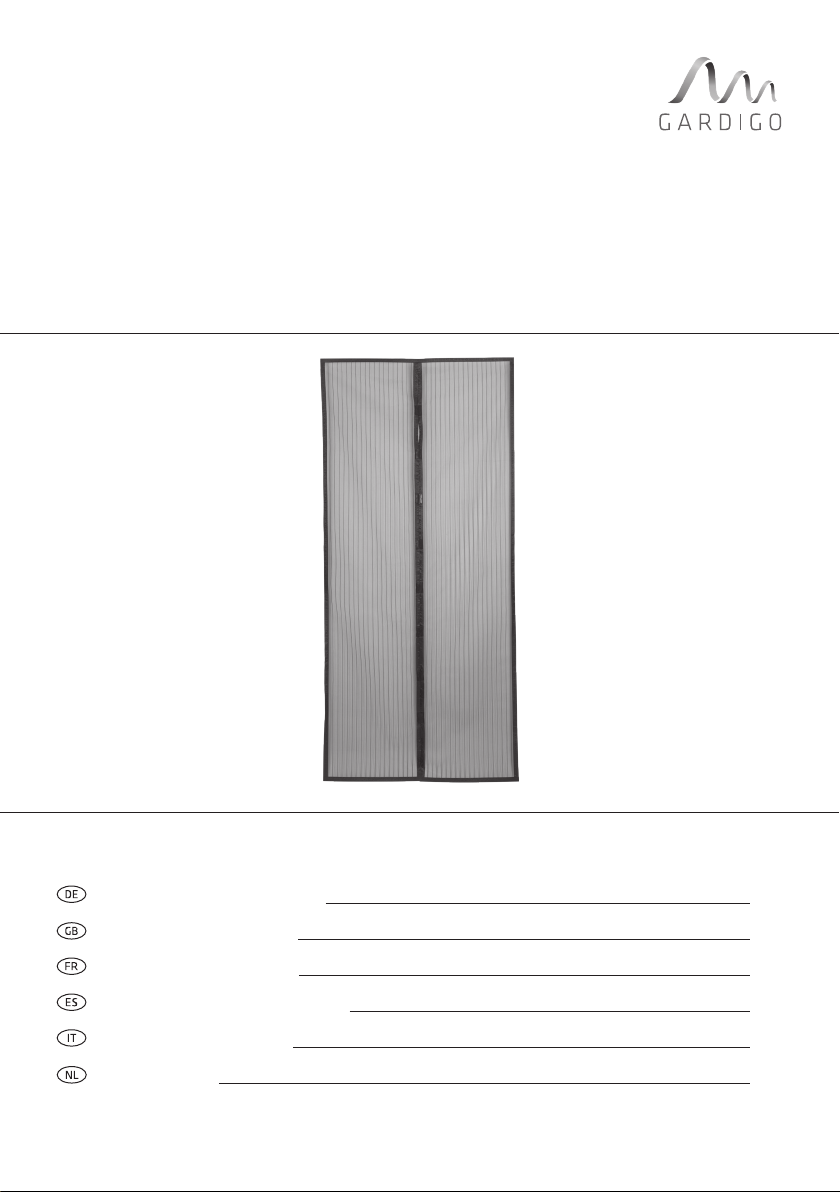
Insekten-Schutz-Vorhang
Art.-Nr. 25307
Gebrauchsanweisung 3
Instruction manual 4
Notice d’utilisation 5
Manual de instrucciones 6
Istruzioni per l’uso 7
Instructies 8
Page 2

H
H
B
H
B
B
2
Page 3
Gebrauchsanweisung
Art.-Nr. 25307
Sehr geehrter Kunde,
vielen Dank, dass Sie sich für eines unserer Qualitätsprodukte entschieden haben. Im Folgenden werden wir Ihnen die
Funktionen und die Handhabung unseres Produkts erklären.
Bitte nehmen Sie sich die Zeit und lesen die Anleitung in
Ruhe durch. Beachten Sie alle Sicherheits- und Bedienungshinweise.
Sollten Sie Fragen oder Anregungen zu diesem Produkt haben, wenden Sie sich bitte an Ihren Fachhändler oder an unser Service-Team. Wir freuen uns, wenn Sie uns weiterempfehlen und wünschen Ihnen viel Erfolg mit diesem Produkt.
1. Sicherheitshinweise
• Verpackungsmaterial usw. gehö-
ren nicht in den Aktionsbereich
von Kindern.
• In jedem Fall ist zu prüfen, ob das
Produkt für den jeweiligen Einsatzort geeignet ist.
• Absturzgefahr: Bringen Sie das
Produkt nur an Fenstern an, die
von außen gefahrlos zugänglich
sind. Lehnen Sie sich bei der
Montage nicht aus dem Fenster.
Drücken Sie nicht von innen gegen das Gitter.
2. Montage
1. Reinigen Sie den Rahmen, an dem Sie das Fliegengitter installieren möchten gründlich und lassen Sie diesen danach
komplett abtrocknen.
2. Ziehen Sie die Schutzfolie von jeweils einer Seite der Klettstreifenpaare ab und bringen Sie diese am Türrahmen an.
Lassen Sie den Kleber für 2 Stunden aushärten.
3. Ziehen Sie die Schutzfolien der aufgeklebten Klettstreifen
ab und drücken Sie den Insektenschutzvorhang daran fest.
Stand: 12/20
4. Kürzen Sie den Vorhang mit einer Schere auf die benötigte
Breite und Länge, falls nötig.
5. Alternativ können Sie den Vorhang mit den mitgelieferten
Reißzwecken am Türrahmen befestigen.
3. Technische Daten
• hochwertiges Fiberglasgewebe
• Farbe: anthrazit
• Magnetverschluss
• Maße: 100 x 220 cm
• Handwaschbar bei 30 °C (nur das Gewebe)
4. Lieferumfang
• selbstklebende Klettstreifen, 14 Stück
• Reißzwecken, 20 Stück
• Insekten-Schutz-Vorhang
• Anleitung
6. Allgemeine Hinweise
• Es ist zu beachten, dass Bedien- oder Montagefehler oder
Schäden, die durch Nichtbeachtung der Bedienungsanleitung entstehen, außerhalb des Einflussbereichs der Gardigo liegen und für daraus resultierende Schäden keinerlei
Haftung übernommen werden kann. Dies gilt auch dann,
wenn Veränderungen oder Reparaturversuche an dem Produkt vorgenommen wurden sowie bei Schäden und Folgeschäden, die durch Fehlbedienungen, fahrlässige Behandlung oder Missbrauch entstanden sind. In all diesen Fällen
erlischt auch die Garantie.
• Säubern Sie das Gerät bei Verschmutzung mit einem feuchten Tuch. Verwenden Sie keine scharfen Reiniger oder Lösungsmittel.
Service-Hotline: Telefon (0 53 02) 9 34 87 88
Ihr Gardigo-Team
3
Page 4

Fly screen curtain
Instruction manual
Art.-No. 25307
Dear customer,
thank you for deciding on one of our quality products. In this
manual we will explain the functions and the handling of our
device. Please take your time to read through the manual
and follow all safety and operational instructions in order to
achieve best results. If you have suggestions or questions
about this product please contact your dealer or our service
team. We would be delighted if you would recommend us and
wish you success with the use of this product.
1. Safety Instructions
• Packaging materials, etc. do not
belong in the hands of children.
• It must be determined if the de-
vice is suitable for the respective
use.
• Risk of falling: Only attach the
product to windows that can be
safely accessed from the outside.
Do not lean out of the window
during assembly. Do not press
lean the screen from the inside.
Status: 12/20
3. Specification
• high quality fiberglass fabric
• Color: anthracite
• Magnetic closure
• Dimensions: 100 x 220 cm
• Zipper to operate the window
• Hand washable at 30 °C (only the fabric)
4. Scope of delivery
• self-adhesive Velcro strips, 14 pieces
• Thumbtacks, 20 pieces
• Insect screen curtain
• Instruction manual
5. General Information
• It should be noted that installation errors or damage
caused by non-observance of the operating instructions
are beyond the control of Gardigo and no liability can be
assumed for resulting damages and the warranty can only
be applied to a fully equipped device in prime condition.
This applies especially if alterations or repair attempts
have been made and/or if the operation of the device has
been incorrect, careless or abusive. In all these cases, the
warranty expires.
• The device may be cleaned with a damp cloth. Do not use
any solvents or detergents.
Service Hotline: Phone +49 (0) 53 02 9 34 87 88
2. Assembly
1. Thoroughly clean the frame on which you want to install
the fly screen and then allow it to dry completely.
2. Remove the protective film from one side of the Velcro
strips and attach them to the door frame. Let the glue harden for 2 hours.
3. Remove the protective film from the matching Velcro
strips and press the insect protection curtain onto it.
4. Use scissors to shorten the curtain to the required width
and length, if necessary.
5. Alternatively, you can attach the curtain to the door frame
with the supplied thumbtacks.
4
Your Gardigo-Team
Page 5

Moustiquaire
Notice d’utilisation
Réf. 25307
Cher client,
merci d’avoir choisi l’un de nos produits de qualité. Nous vous
expliquons ci-dessous comment utiliser et manipuler notre
produit. Veuillez prendre le temps de lire cette notice avec attention. Veuillez respecter toutes les consignes de sécurité et
de commande. Si vous avez des questions ou des remarques
sur ce produit, veuillez-vous adresser à votre revendeur ou
à notre équipe de service. Nous serions ravis que vous nous
recommandiez autour de vous et nous vous souhaitons une
utilisation agréable de le produit.
1. Consignes de sécurité
et avertissements
• Gardez le matériau d’emballage,
etc. en dehors de la portée des
enfants.
• Dans tous les cas, déterminez si
le produit est adapté à l’endroit
où vous désirez l’installer.
• Risque de chute: N’installez le
produit que sur des fenêtres qui
sont accessibles en toute sécurité de l’extérieur. Ne vous penchez pas par la fenêtre pendant
l’installation. Ne vous appuyez
pas contre la moustiquaire de
l’intérieur.
Mise à jour: 12/20
3. Retirez le film protecteur des bandes velcro collées et
placez la toile en l’agrippant au velcro.
4. Si nécessaire, raccourcissez la toile à l’aide de ciseaux à la
largeur et à la longueur souhaitées.
5. Vous pouvez également fixer la moustiquaire au cadre de
la porte à l’aide des punaises fournies.
3. Spécification
• la toile en fibre de verre de haute qualité
• Couleur: anthracite
• Fermeture magnétique
• Dimensions: 100 x 220 cm
• Lavable à la main à 30 ° C (uniquement moustiquaire)
4. Contenu de l’emballage
• bandes Velcro auto-adhésives, 14 pièces
• Punaises, 20 pièces
• Rideau moustiquaire
• Notice d’utilisation
5. Remarques générales
• Nous déclinons toute responsabilité pour les erreurs
d’utilisation ou de branchement ou les dommages causé
par le non-respect des instructions en dehors du contrôle de Gardigo. Cela vaut aussi si des modifications ou des
tentatives de réparation ont été apportées à l’appareil ou
si toute autre erreur d’utilisation ou une utilisation négligente ou abusive ont conduit à des dommages. Dans ces
cas, la garantie expire.
• Nettoyez le dispositif avec un chiffon humide. Ne pas utiliser de produits nettoyants abrasifs ou de solvants.
Service: service@gardigo.de
Votre Équipe Gardigo
2. Montage
1. Nettoyez entièrement l’encadrement de fenêtre sur lequel
vous voulez installer la moustiquaire et laissez-le sécher
complètement.
2. Retirez le film protecteur d’un côté de chaque paire de
bandes velcro et fixez-les sur le cadre de la porte. Laissez
l’adhésif durcir pendant 2 heures.
5
Page 6

Mosquitero
Manual de instrucciones
Art.-No. 25307
Estimado cliente,
le agradecemos que haya elegido uno de nuestros productos
de calidad. A continuación, explicamos en detalle las funciones y el manejo de nuestro producto. Tómese algo de tiempo
para leer las instrucciones con atención hasta el final. Tenga
en cuenta todas las indicaciones de seguridad y manejo. Si
tiene alguna pregunta o algún comentario acerca de este producto póngase en contacto con su distribuidor o con nuestro
equipo de atención al cliente. Le agradeceríamos que nos recomendara y le deseamos muchos éxitos con el uso de este.
1. Indicaciones de seguridad
• El embalaje etc. deben ser man-
tenidos lejos del alcance de niños.
• En cualquier caso, hay que comprobar si el aparato es adecuado
para el lugar de aplicación en
cuestión.
• Peligro de caídas: Sólo instale el
producto en ventanas que sean
accesibles de forma segura desde
el exterior. Durante la instalación,
no se asome a la ventana. No presione la malla desde el interior.
Estado: 12/20
3. Especificación
• tejido de fibra de vidrio de alta calidad
• Color: antracita
• Cierre magnético
• Dimensiones: 100 x 220 cm
• Lavable a mano a 30 °C (solo la tela)
4. La entrega incluye
• tiras de velcro autoadhesivas, 14 piezas
• Chinchetas, 20 piezas
• Cortina de mosquitera
• Manual de instrucciones
5. Información general
• Se ha de tener en cuenta que los fallos de empleo, de
conexión o daños que se produzcan por inobservancia del
manual de instrucciones quedan fuera de la esfera de influencia de Gardigo, por lo que Gardigo no podrá asumir
la responsabilidad por los daños resultantes. Esto se aplica incluso si se han realizado cambios en el producto, así
como daños y daños colaterales que sean resultado del
manejo incorrecto, del manejo imprudente o del abuso del
producto. En todos estos casos expiraría la garantía.
• Si el dispositivo llega a ensuciarse, límpielo con un trapo
húmedo. No use limpiadores abrasivos ni disolventes.
Servicio: service@gardigo.de
Su Equipo Gardigo
2. Montaje
1. Limpie bien el marco en el que quiere instalar el mosquitero y después deje que se seque completamente.
2. Retire la película protectora de un lado de cada par de tiras
de velcro y fije éstas en el marco de la puerta. Deje que el
pegamento se cure durante 2 horas.
3. Retire las películas protectoras de las tiras de velcro pegadas y presione la cortina mosquitera contra ellas.
4. Acorte la cortina con tijeras a la anchura y longitud requeridas, si es necesario.
5. Alternativamente, puede fijar la cortina al marco de la puerta con las chinchetas suministradas.
6
Page 7

Zanzariera
Istruzioni per l’uso
Art.-Nr. 25307
Gentile cliente,
grazie per aver scelto uno dei nostri prodotti di alta qualità.
Qui di seguito spieghiamo le funzioni e le modalità d’uso del
nostro dispositivo, che vi invitiamo a leggere attentamente
e a seguire scrupolosamente. Porre estrema attenzione a
tutte le norme di sicurezza e di funzionamento indicate. Per
domande o suggerimenti concernenti il presente prodotto, rivolgetevi ai rivenditori specializzati o al nostro team di assistenza. Saremo lieti se l’uso di questo dispositivo soddisferà
le vostre esigenze e se consiglieresti nostri prodotti ad altri.
1. Avvertenza di sicurezza
• Tenere materiali da imballaggio,
ecc dalla portata dei bambini.
• Bisogna in ogni caso determinare
se il dispositivo è adatto al particolare sito di applicazione.
• Pericolo di caduta: installare il
prodotto solo su finestre accessibili dall’esterno in sicurezza. Non
sporgersi dalla finestra durante
l’installazione. Non premere
contro la rete della zanzariera
dall’interno.
Stato: 12/20
3. Specifica
• tessuto in fibra di vetro di alta qualità
• Colore: antracite
• Chiusura magnetica
• Dimensioni: 100 x 220 cm
• Lavabile a mano a 30 °C (solo il tessuto)
4. Fornitura
• Strisce autoadesive in velcro, 14 pezzi
• Puntine da disegno, 20 pezzi
• Tenda zanzariera
• Istruzioni per l’uso
5. Remarques générales
• É da notare che montaggio guasti o danni causati dalla
mancata osservanza delle istruzioni sono fuori dalle responsabilità di Gardigo e per tanto non può essere accettata alcuna responsabilità per eventuali danni. Ciò avviene
anche per modifiche o tentativi di riparazione apportati al
prodotto, o danni conseguenti che derivano da un funzionamento errato, uso sconsiderato o abuso. In tutti questi
casi, la garanzia non ha validità.
• In caso di sporcizia pulire l’unità con un panno umido. Non
utilizzare detergenti abrasivi o solventi.
Servizio: service@gardigo.de
Il vostro Team Gardigo
2. Installazione
1. Pulire accuratamente il telaio della finestra su cui si vuole
installare la zanzariera e lasciare asciugare completamente.
2. Rimuovere per ciascuna coppia di nastro adesivo in velcrouna pellicola protettiva e fissare i nastri al telaio della
porta. Lasciare indurire l’adesivo per circa 2 ore.
3. Rimuovere dai nastri in velcro le restanti pellicole protettive e quindi applicarci la rete della zanzariera premendo con
forza.
4. Accorciare eventualmente con delle forbici la rete nella larghezza e lunghezza necessarie.
5. In alternativa è possibile fissare la rete al telaio della porta
con i chiodini in dotazione.
7
Page 8

Vliegenhorren
Instructies
Art.-Nr. 25307
Geachte klant,
hartelijk dank dat u voor een van onze kwaliteitsproducten
gekozen heeft. Hieronder informeren wij u over de functies
en het gebruik van ons product. Neemt u alstublieft de tijd
om de handleiding op uw gemak door te lezen. Neem alle vermelde veiligheids- en bedieningsaanwijzingen in acht. Indien
u vragen of suggesties heeft over dit product, gelieve contact
op te nemen met uw handelaar of met ons serviceteam. Wij
verheugen ons, wanneer u ons verder aanbeveelt en wensen
u veel succes met dit product.
1. Veiligheidsinstructies
• Verpakkingsmateriaal horen niet
in het actiebereik van kinderen.
• In ieder geval dient te worden
gecontroleerd, of het apparaat
geschikt is voor de toepassingslocatie.
• Valgevaar: Monteer het product
alleen op ramen die van buitenaf veilig toegankelijk zijn. Leun
tijdens het monteren niet uit het
raam. Druk van binnenuit niet
tegen de hor.
Status: 12/20
3. Spezifikation
• hoogwaardig glasvezeldoek
• Kleur: antraciet
• Magnetische sluiting
• Afmetingen: 100 x 220 cm
• Handwasbaar op 30 °C (alleen de stof)
4. Omvang levering
• zelfklevende klittenbandstrips, 14 stuks
• Punaises, 20 stuks
• Insectenhorgordijn
• Instructies
5. Algemene informatie
• Er zij op gewezen dat montagefouten of schade die door
niet-naleving van de gebruiksaanwijzing ontstaat, buiten
de invloedssfeer van de Gardigo liggen en voor daaruit
voortvloeiende schade geen enkele aansprakelijkheid kan
worden aanvaard. Dit geldt ook als wijzigingen of reparatiepogingen aan het product werden gedaan en bij schade
en gevolgschade die door onjuiste bedieningen, nalatige
behandeling of misbruik zijn ontstaan. In al deze gevallen
vervalt ook de garantie.
• Maak het product bij vervuiling schoon met een vochtige
doek. Gebruik geen agressieve schoonmaakmiddelen of
oplosmiddelen.
Service: service@gardigo.de
Uw Gardigo-Team
2. Installatie
1. Maak het raamkozijn waarop u de vliegenhor wilt bevestigen grondig schoon en laat het daarna volledig drogen.
2. Verwijder de beschermfolie aan één kant van elk paar klittenbandstroken en bevestig deze aan het deurkozijn. Laat
de lijm 2 uur uitharden.
3. Verwijder de beschermfolie van de klittenbandstroken en
druk het vliegenhorgordijn op zijn plaats.
4. Indien nodig het gordijn met een schaar inkorten tot de
gewenste breedte en lengte.
5. Als alternatief kunt u het gordijn met de bijgeleverde punaises aan het deurkozijn bevestigen.
8
 Loading...