

Page 1
GB Operating Instructions
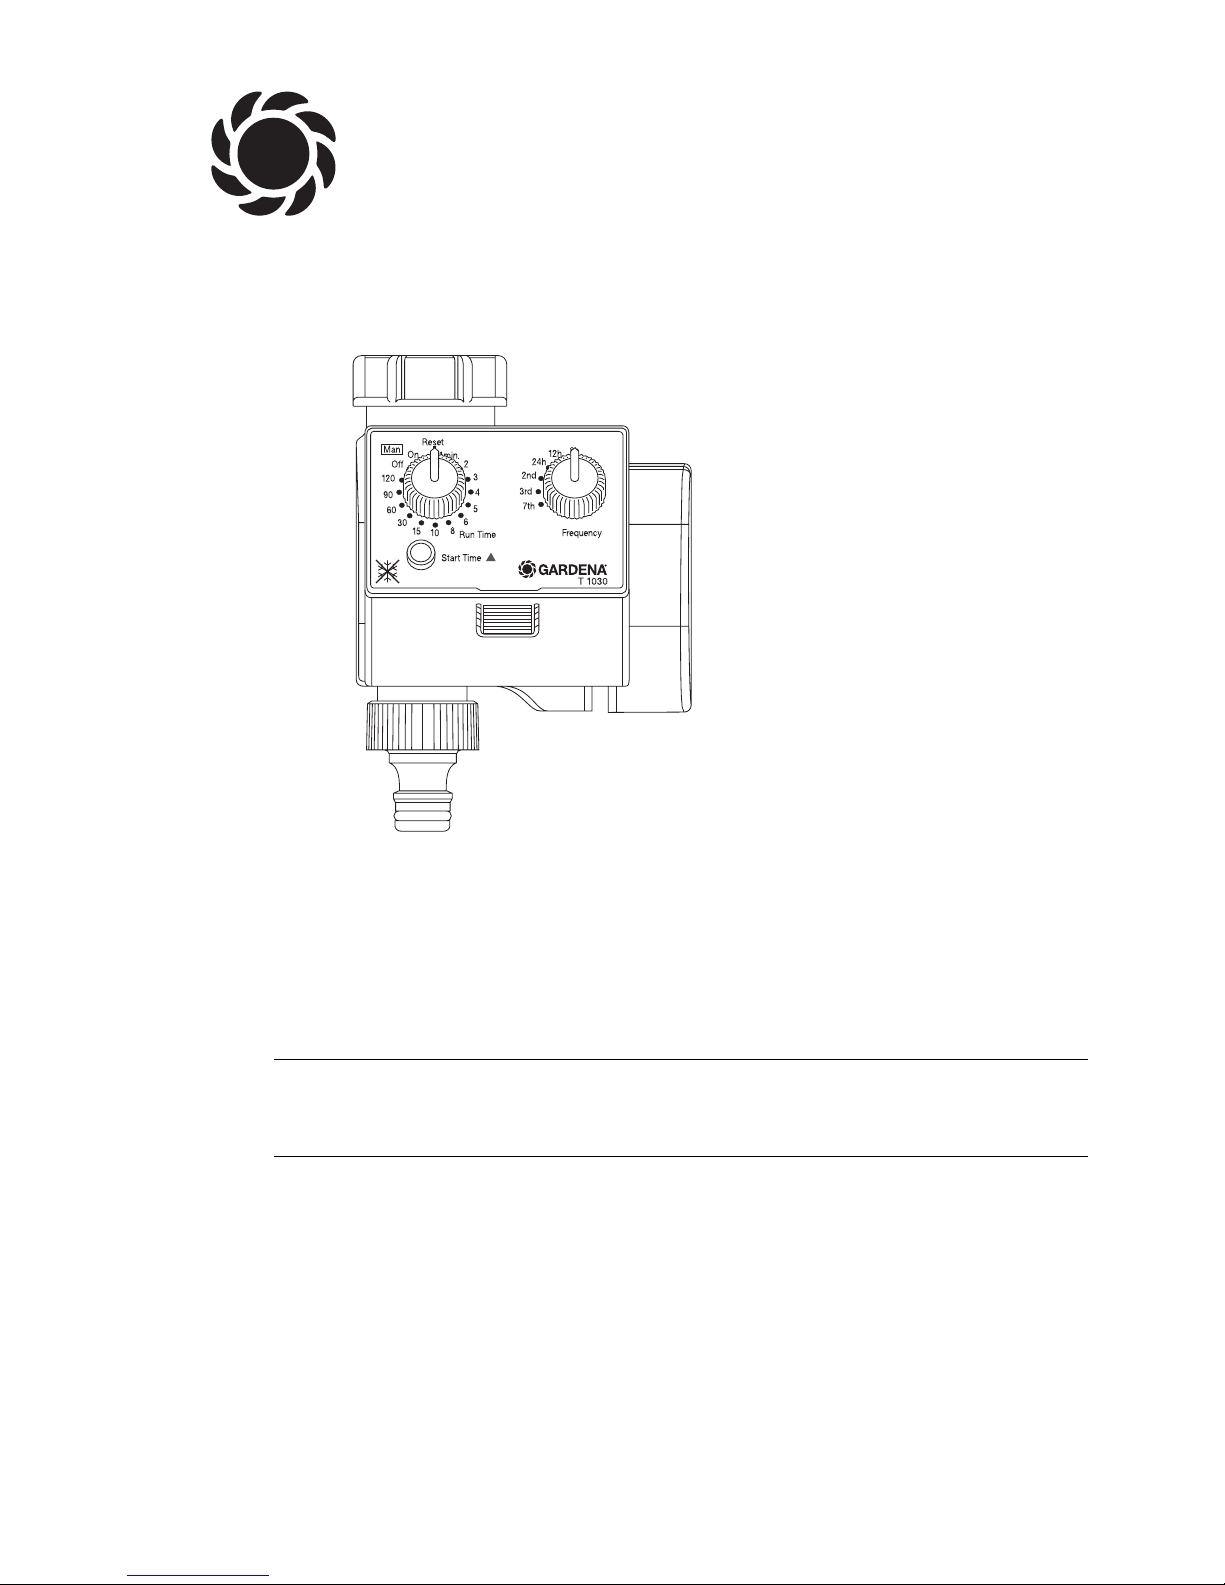
Water Timer Electronic T 1030
F Mode d’emploi
Programmateur electronic T 1030
E Manual de instrucciones
Temporizador de riego T 1030
Art. 1806
GARDENA
®
Page 2

G
Please read these operating instructions carefully before using the unit.
Unfold inside cover page to read the operating
instructions.
Contents Page
Summary of Operating Instructions 6
Operating Instructions 4 -15
Guarantee 43
Warranty Card 45
F
Nous vous remercions de bien vouloir lire
attentivement ce mode d’emploi avant d’utiliser
votre programmateur.
En dépliant le volet de la couverture, vous
aurez sous les yeux une série d’illustrations
vous permettant une meilleure compréhension
de ce mode d’emploi.
Contenu Page
Résumé du mode d’utilisation 18
Mode d’emploi 16 - 29
Garantie 43
Carte de garantie 45
E
Antes del montaje y de la puesta en marcha
del equipo, aconsejamos una atenta lectura
del presente manual de instrucciones.
Para facilitar la lectura, desdoble la cubierta.
Contenido Página
Resumen de las instrucciones para el uso 32
Manual de instrucciones 30 - 42
Garantía 44
Tarjeta de garantía 45
Page 3
Page 4

4
GARDENA
Water Timer Electronic T 1030
1. Notes on these Operating Instructions
Please read these operating instructions carefully and observe the notes
given. Use these operating instructions to familiarise yourself with the
water timer, the unit’s features and proper use as well as with the notes
on safety.
A
For safety reasons, children and young people under 16 as well
as anyone who is not familiar with these operating instructions
may not use the water timer.
Keep these operating instructions in a safe place.
2. Proper Use
The GARDENA Water Timer Electronic T 1030 is suitable and determinated
for private use in domestic and hobby gardens, exclusively for outdoor use,
to control sprinklers and watering systems.
A
The water timer must not be used for industrial purposes or
in conjunction with chemicals, foodstuffs, easily flammable
and explosive materials.
Compliance with the operating instructions provided by the manufacturer
is a prerequisite to ensure proper use of the GARDENA Water Timer
Electronic.
The operating instructions also contain operating, servicing and maintenance conditions.
G
Page 5

5
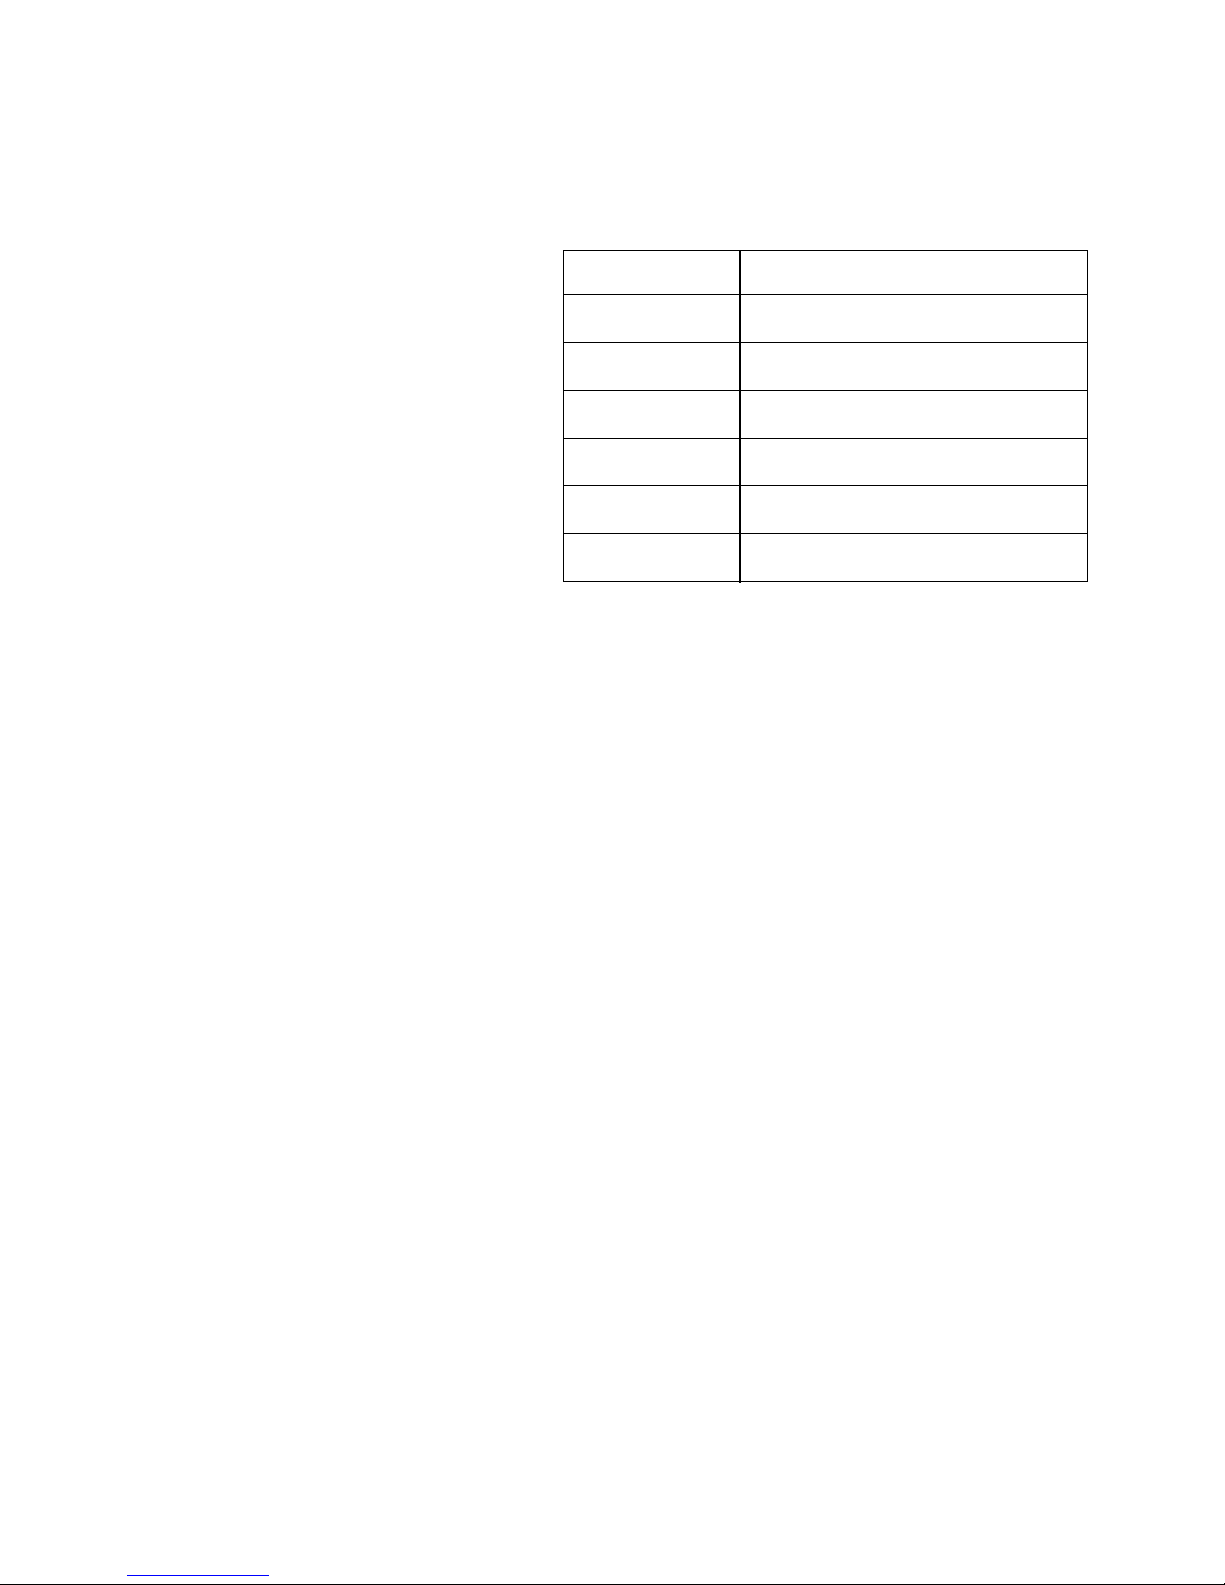
3. Technical Data
Operating pressure: 1-12 bar
Flow medium: clean fresh water
Max. water temperature: 40 °C
Watering cycles per day
(programmable): up to 3
Watering cycles per week: every day, every 2nd, 3rd or 7th day
Watering cycles per program: 1, 2, 3, 4, 5, 6, 8, 10, 15, 30, 60,
90 or 120 min.
Battery : 1 × 9 V alkali-manganese (alkaline)
type IEC 6LR61
Service life of the battery : approx. 1 year
4. How the Water Timer Electronic Works
This GARDENA Water Timer Electronic T 1030 allows you to set different
watering times and cycles for different watering times independent of
whether you are using a sprinkler, a sprinkler system installation or a driphead watering system to water your garden.
Your Water Timer Electronic will water your garden completely automatically according to the program you choose. You can set the timer to water
your garden early in the morning or late at night when water evaporates
the least, or while you are on holiday.
Page 6
6
5. Summary of Operating Instructions
1. Insert the battery.
Only use a 9 V alkali-manganese (alkaline) battery type IEC 6LR61.
Check the polarity (+/– markings).
2. Setting the watering
frequency
The following watering cycles
can be selected using the
Frequency control knob:
3. Setting the watering time / starting time (Run Time)
You can select the watering time using the Run Time control knob
3
.
You can select 13 positions between 1 and 120 minutes.
The times you enter are accepted 5 seconds after you have finished
entering the data. The time this happens is the future watering
starting time.
4. Delaying the starting time (Start Time)
The Start Time can be delayed up to 5 seconds after you have selected
the Run Time. Each time you press the Start Time key
4
, the Start
Time is delayed by 1 hour from the original time set.
5. Manual On/ Off operation (Man)
Turning the Run Time knob 3to On opens the valve, turning it back to
Off or to the required watering time, closes the valve. The starting time
you originally programmed remains unchanged.
6. Reset
Turning the Run Time knob 3to Reset deletes the starting time and
watering time. The watering valve is not opened.
7. Bad weather operation (Man/Off)
If Run Time
3
is set to Off, your garden will not be watered automati-
cally. e.g. during a rainy period. If, at the end of the rainy period, you
turn the knob back to the required watering time, the starting time you
selected remains unchanged.
Setting Watering Cycle
7
th
every 7 days
3
rd
every 3 days
2
nd
every 2 days
24 h daily
12 h twice a day
8 h three times a day
Page 7

7
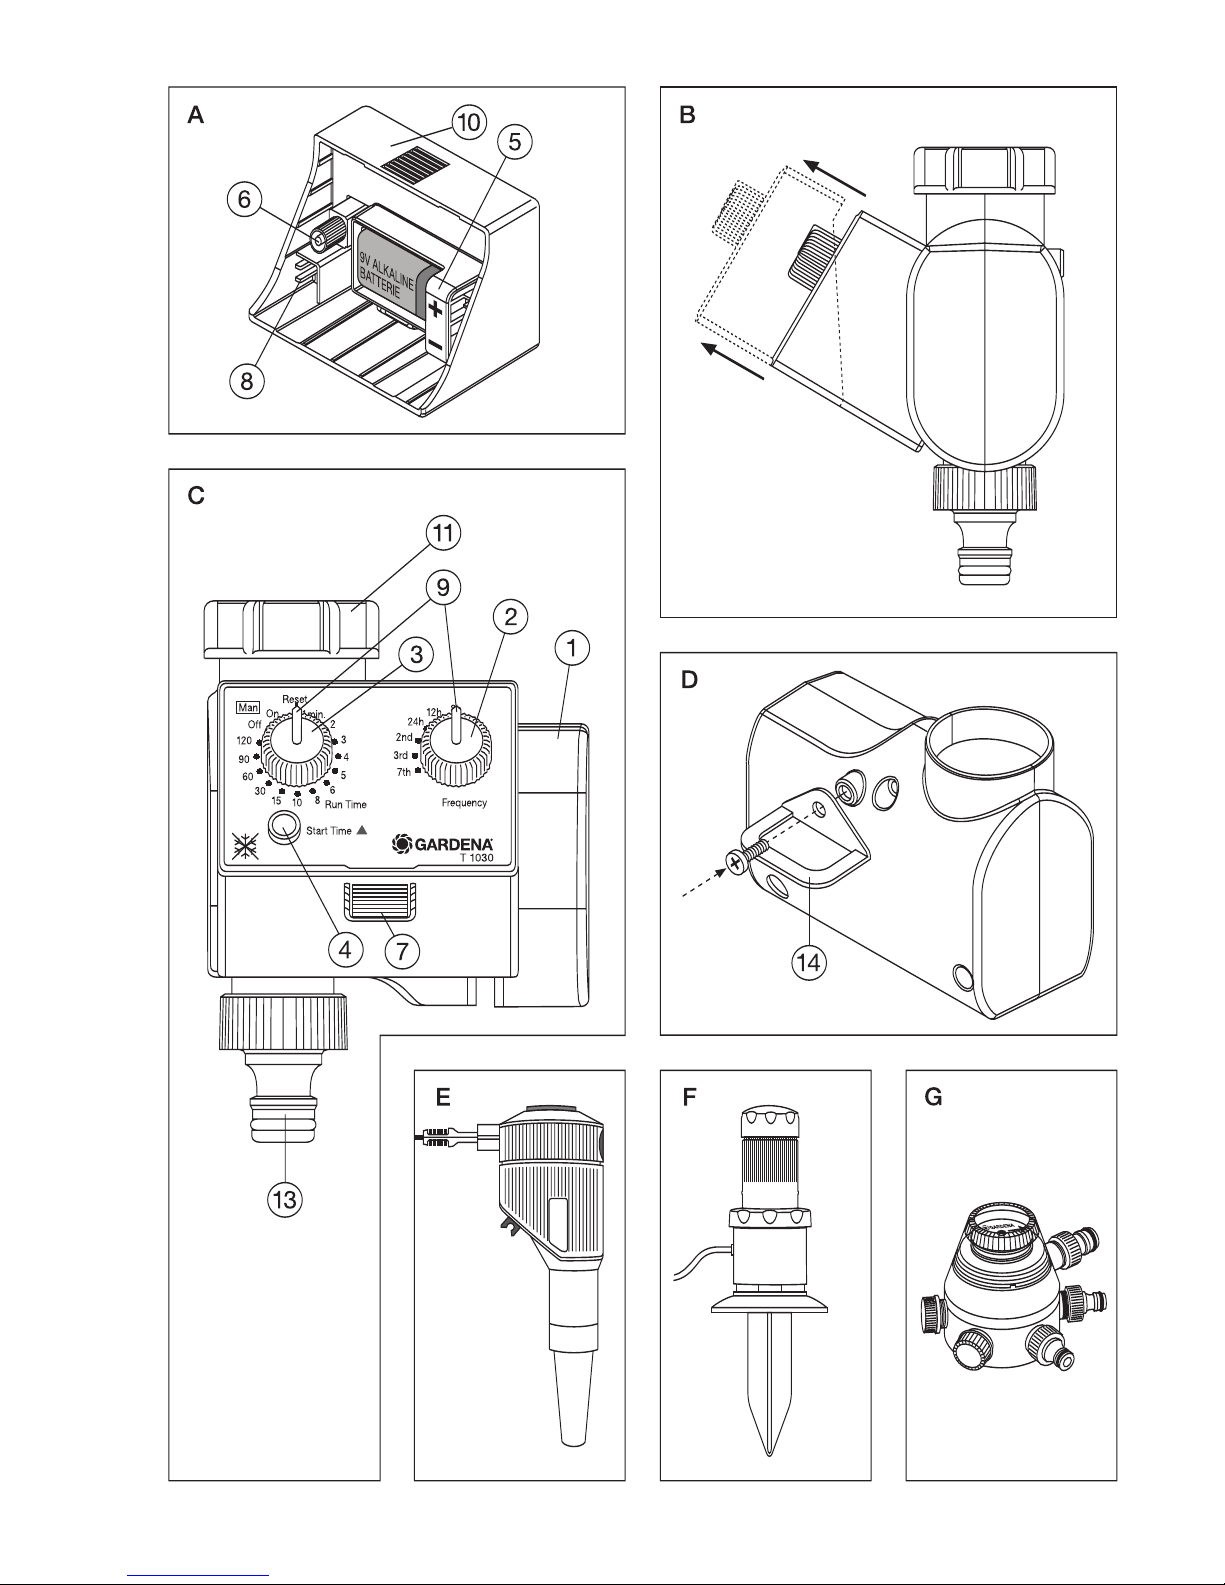
6. Operating Parts
1
Complete housing Accompanying accessories
2
Watering cycle control knob
C
GARDENA threaded tap
(Frequency) connector
3
Watering time control knob
(Run Time)
4
Key for starting time (Start Time) Option
5
Battery compartment
D
Anti-theft protection
6
Control unit connection plug
7
Release button for control unit
8
Connection socket for Soil
Moisture Sensor / Rain Sensor
9
Control knob markings
0
Control unit
A
Sleeve nut
7. Features of the Water Timer
7.1 Operating elements (Fig. C)
Frequency To set the watering cycle.
Run Time To set the watering time (Run Time), watering
starting time and to open and close the water flow
by hand.
Start Time
▲▲
The starting time is delayed by an hour from the time
you set the timer, each time you press the key.
7.2 More Functions
Sleeve nut To connect the Water Timer to the tap.
GARDENA threaded tap connector
Fits GARDENA System hoses.
Connection For GARDENA Soil Moisture Sensor (Art. No. 1187)
and GARDENA Rain Sensor (Art. No. 1189).
Battery compartment
To insert a 9 V battery.
Page 8

8
7.3 Other products which can be connected
Fig. D Anti-theft protection
With special one-way screw and bracket.
Available from GARDENA Services.
Fig. E GARDENA Soil Moisture Sensor (Art. No. 1187)
Fig. F GARDENA Rain Sensor (Art. No. 1189)
Fig. G GARDENA Automatic Water Distributor (Art. No. 1198)
8. Preparation for Use
Before you use your water timer you must:
1. Insert the battery
2. Connect the water timer to the tap
3. Ensure the new battery works properly.
8.1 Inserting the battery (Fig. A)
1. Remove the control unit
0
from the housing of the water timer by
pressing the release button 7(see Fig. B / C).
2. Insert the battery in the battery compartment 5(only use a 9 V alkaline
battery type IEC 6LR61) (Fig. A).
Note: When inserting the battery pay attention to the +/– markings.
3. Reattach the control unit to the housing. The water timer beeps to signal
it is ready to be programmed.
After another 5 seconds a double beep confirms that the current settings
have been accepted (except when Run Time is set to Reset).
Note: the current time is taken to be the starting time.
4. To delete the current settings, turn the knob to Reset. Set the timer as
described under “Setting the Watering Data”.
8.2 Connecting to the Tap (Fig. C)
The Water Timer is fitted with a sleeve nut for taps with a
USAS .75-11.5 NH thread.
8.3 Checking the new battery
To check the new battery, turn on the tap and turn the knob on the water
timer to On (valve opens) and then shortly afterwards to Off (valve closes).
If the battery capacity is too low a warning tone which beeps at intervals
will sound.
Not
e: To ensure that the water does not cause any damage make sure
that the water flow is directed away from the water timer (connect hose,
stand a bucket underneath, etc.).
Page 9

9
9. Setting the Watering Data
Note: The control unit 0of the water timer can be removed (Fig. B).
This allows you to select the watering program somewhere other than
where the water timer is to be used.
9.1 Setting the watering cycle
You can determine how often your garden should be watered by turning
the Frequency knob 2:
– every 8, 12 or 24 hours (8 h, 12 h, 24 h) or
– every 2nd, 3rd or 7th day (2nd,3rd,7th)
Note: Intermediate positions are not possible.
9.2 Starting time and watering time
1. Turn the Run Time control knob 3to Reset.
2. Then set the Run Time control knob 3to the required watering time:
1, 2, 3, 4, 5, 6, 8, 10, 15, 30, 60, 90 or 120 minutes.
Important ! After 5 seconds the time you have set is accepted.
This is signalled acoustically by a double beep.
3. The double beep also indicates that the current time has been accepted
as the starting time for future watering programs. The future watering
starting time can be delayed by an hour each time you press Start
Time ▲. The Start Time ▲ must be activated before the double beep.
Note: The water timer beeps every time you press the key correctly
to confirm you have delayed the time by one hour.
Important ! Start Time ▲ is only active for a max. of 5 seconds after
the last time you press the key. It is then no longer possible to change
the starting time. This is signalled by a double beep.
The watering starting time can only be deleted by turning the knob
to Reset.
9.3 Examples
Current time: 9:00 am.
The watering program should run as follows:
Example a) Every day at 9:00 for 10 minutes.
Example b) 3 x a day (= every 8 hours) for 2 minutes. at 10:00,
at 18:00 and at 2:00.
Example c) Every 3 days at 16:00 for 60 minutes.
Page 10

10
The timer should be programmed as follows:
Step 1 Step 2 Step 3
Setting Setting Start Time
▲▲
Frequency Run Time key
Example a) 24 h 10 min. do not press
Example b) 8 h 2 min. press once
Example c) 3
rd
60 min. press 7 times
The watering time has now been changed. The water timer will now
automatically run the required watering programs.
9.4 Turning off the watering programs
The watering programs can be switched off for any period of time
e.g. in periods of bad weather as follows:
1. Turn the Run Time knob
3
clockwise to Off.
2. To restart the watering e.g. at the end of the bad weather period,
turn the Run Time knob
3
back to the required watering time.
Note: The starting time you previously selected remains unchanged
so that your garden is watered at the usual times (the times you programmed).
9.5 Manual On/Off operation
In addition to watering your garden fully automatically, the Water Timer
can be operated manually by turning the Run Time knob 3to On or Off.
Automatic watering programs during this time are not executed or interrupted. After manually opening / closing the valve (On/Off) you can once
again select a watering time. A watering starting time which you determined earlier remains unchanged.
“On” position
In the On position the valve is opened after a delay of 2 seconds and then
automatically closed again after 30 minutes. If the water timer is switched
to On during an automatic watering program the valve stays open and is
closed after 30 minutes.
“Off” position
In the Off position, an open valve is closed after a delay of 2 seconds.
Page 11

11
10. Changing the Setting
The time and the watering time can be changed using the control knob
(Run Time).
The changes are accepted after approx. 5 seconds and this is signalled
acoustically by a double beep. If the water timer is not reset the original
starting time remains unchanged.
Making changes during watering
You can change the watering time (Run Time) during an automatic watering program as follows:
.If the elapsed watering time is shorter than the new watering time you
have selected, then the new watering time is valid.
Example:
Old Run Time = 10 minutes, changed after 5 minutes to 30 minutes.
The total watering time is then 30 minutes.
.If the watering time which has already expired is longer than the new
watering time, the water flow is interrupted in the next minute.
If you have already chosen the starting time (Start Time / Run Time
already set) any changes you make to the watering frequency (Frequency)
are active as soon as the next watering program starts.
If you have forgotten the current start time, you should reset the Water
Timer and then re-enter the watering data.
11. Battery
11.1 Status indicator
If the battery capacity falls below a certain level, a warning signal sounds
every 15 seconds. The programs you have set are not run. The water flow
cannot be opened manually. If a valve is open, however, it will be closed.
11.2 Changing the battery
If the battery capacity is too low (the warning signal beeps every
15 seconds), you must change the battery. To do this, the water timer
must be removed from the tap.
Important : Changing the battery deletes the data you have set.
Page 12

12
To change the battery :
1. Insert the battery in the battery compartment
5
.
2. Set the Run Time control knob 3to Reset.
3. Reset the watering data as described in “Setting the watering data”.
If the Run Time knob 3is not turned to Reset, 5 seconds after the battery
was inserted the current Run Time
3
and Frequency
2
settings shall
be accepted. This is confirmed by a double beep.
Note: The time the battery was changed is taken to be the starting time.
To ensure that the water timer works properly we recommend that you
insert a new battery at the beginning of every gardening season, or at
the latest after a year.
Important ! Please dispose of used batteries properly at the appropriate
communal waste disposal site. Only dispose of batteries when flat.
12. Notes on Safety and Operation
.
The minimum water output to ensure that the Water Timer
functions correctly is 20- 30 l / h.
For example, at least 10 x 2-litre Drip Heads are required to
control the Micro-Drip-System.
.
The Water Timer must be stored in a dry place away from frost
before the frosty season begins.
.
The max. temperature for the water flow is 40 °C.
.
The minimum operating pressure is 1 bar, the maximum operating
pressure is 12 bar.
.
For functional safety reasons, only use a 9 V alkali-manganese
battery.
.
The water timer beeps at intervals to indicate that the battery
capacity is too low until the battery is flat. When the water timer
is beeping the valve is no longer opened. To ensure that the
water timer works properly a battery with low capacity must be
exchanged.
.
We recommend fitting the water timer with a new battery at the
beginning of every gardening season or at the latest after a year.
.
The functional safety of the water timer depends on the capability
of the battery. The water timer will only run for approx. 1 year if
the new alkali-manganese battery has a nominal voltage of at least
9 V. Check the battery before you buy it.
Page 13

13
.
To prevent water penetrating the battery compartment, the Water
Timer may only be installed in a perpendicular position with the
sleeve nut pointing upwards.
.
The control unit must be attached to the Water Timer during
operation.
.
Warning! Only use the water timer outdoors.
The water timer is not approved for indoor use.
.
Check the filter in the sleeve nut Aregularly and clean if necessary.
.
Avoid tensile strain. Do not pull the hose connected to the Water
Timer.
.
Only use clear fresh water.
13. Options
13.1 Anti-Theft Protection (Fig. D)
To protect your Water Timer against theft, the GARDENA anti-theft
protection (1815-00.791.00) is available at GARDENA Service.
The bracket on the anti-theft protection is fitted onto the back of the
unit. Note that the screw included cannot
be loosened once it has been
screwed in. The bracket can be used, for example, to attach a chain.
13.2 GARDENA Soil Moisture Sensor (Fig. E)
Together with the GARDENA Soil Moisture Sensor Art. No. 1187 watering
is controlled considering the soil moisture.
Assembly
The Soil Moisture Sensor is connected to the socket 8on the back of
the control unit (Fig. A).
How it works
If the connected Soil Moisture Sensor indicates there is sufficient moisture
then the watering program is either interrupted or not initiated.
Note: Manual watering (On, Off) is still possible.
Page 14

14
13.3 GARDENA Rain Sensor (Fig. F)
Together with the GARDENA Rain Sensor Art. No. 1189 watering is
controlled considering natural precipitation.
Assembly
The Rain Sensor, as an alternative to the Soil Moisture Sensor, can be
connected to the connection socket
8
on the back of the control unit
(Fig. A).
How it works
If the connected Rain Sensor indicates an appropriate amount of rain,
the watering program is interrupted or not initiated.
Note: Manual watering (On, Off) is still possible.
13.4 GARDENA Automatic Water Distributor (Fig. G)
Connecting the GARDENA Automatic Water Distributor (Art. No. 1198)
allows you to control up to 6 watering lines with your water timer electronic
(max. 3 lines per day).
Ideal in areas with not enough water flow to operate all areas at the same
time. Allows the operation of each channel one after the other.
14. Faults
Faults Possible cause Remedy
Manual opening Battery capacity Insert a new alkaline
using On not / too low. battery.
not completely
Tap turned off. Turn on tap.
Watering program Battery capacity Insert a new alkaline
do not run. too low; water timer battery.
is beeping.
Watering program Set the Run Time
turned off. Run Time to the required
set to Off or Reset. watering time.
Valve was opened Run Time set to On.
manually and closed Set the Run Time
automatically after back to the required
30 minutes. watering time.
Tap turned off. Turn on tap.
Page 15

15
Watering program Connected Soil Check the moisture
do not run. Moisture Sensor / level setting on the
Rain Sensor indicates Soil Moisture Sensor.
adequate amount of
moisture.
Watering program Water timer has Determine the new
run at the wrong been reset. starting time. Set the
time. starting time (see
“Setting the watering
data”).
Battery flat after Not an alkaline Use an alkaline
working for a battery. battery.
short time.
Device not working. Battery inserted Observe the
incorrectly. +/– markings.
Battery is flat. Insert a new alkaline
battery.
If you have any problems with your Water Timer, please contact our
Customer Service or return the defective unit together with a short description of the problem directly to one of the GARDENA Service Centres
listed on the back of this leaflet.
If covered under warranty, please include the completed and signed
warranty card.
Disposal
(in accordance with RL2002 /96 /EC)
The product must not be added to normal household waste.
It must be disposed of in line with local environmental
regulations.
We expressly point out that, in accordance with the product liability
law, we are not liable for any damage caused by our units if it is due
to improper repair or if parts exchanged are not original GARDENA
parts or parts approved by us, and, if the repairs were not carried
out by a GARDENA Service Centre or an authorised specialist.
The same applies to spare parts and accessories.
Page 16

43
G
Guarantee
GARDENA guarantees this
product for 2 years (from date
of purchase). This guarantee
covers all serious defects of the
unit that can be proved to be
material or manufacturing faults.
Under warranty we will either
replace the unit or repair it free
of charge if the following conditions apply:
.The unit must have been
handled properly and in keeping with the requirements of
the operating instructions.
.Neither the purchaser nor a
non-authorised third party have
attempted to repair the unit.
Defects in the Water Timer attributable to batteries which have been
incorrectly installed or are leaking
are excluded from the warranty
provisions.
This manufacturer’s guarantee
does not affect the user’s existing
warranty claims against the dealer/
seller.
In case of claim cut out the
warranty card and send it
together with the unit to the
GARDENA Service Centre.
F
Garantie
GARDENA accorde pour cet
appareil une garantie contractuelle
de 2 ans à compter du jour de
l’achat. Elle est assurée par le
remplacement gratuit des pièces
défectueuses ou de l’appareil.
Le choix en étant laissé à la libre
initiative de GARDENA.
En tout état de cause s’applique
la garantie légale couvrant toutes
les conséquences des défauts
ou vices cachés (article 1641 et
suivants du Code Civil).
Pour que ces garanties soient
valables, les conditions suivantes
doivent être remplies :
.L’appareil a été manipulé de
manière adéquate, suivant les
instructions du mode d’emploi.
.Il n’y a eu aucun essai de
réparation, ni par le client, ni
par un tiers.
Les défectuosités dues à une
mauvaise mise en place de la pile
ou à l’utilisation d’une pile défectueuse sont exclues de la garantie.
Une intervention sous garantie
ne prolonge pas la durée initiale
de la garantie contractuelle.
Toutes les revendications dépassant le contenu de ce texte ne
sont pas couvertes par la garantie,
quel que soit le motif de droit.
Pendant la période de garantie,
le Service Après-Vente et les
Centres SAV agréés effectueront,
à titre payant, les réparations
Page 17

44
nécessaires par suite de manipulations erronées.
En cas de réclamation, découpez
la carte de garantie et retournez-la
avec l’appareil au Service AprèsVente de GARDENA.
E
Garantía
Para este producto GARDENA
concede una garantía de 2 años
(a partir de la fecha de compra).
Esta garantía se refiere a todos
los defectos esenciales del producto que tengan de origen defectos de materiales o de fabricación.
La garantía se efectúa mediante
intercambio por un artículo en
perfectas condiciones o mediante
la reparación gratuita de la pieza
enviada, según nuestro criterio,
sólo en el caso de que se hayan
cumplido los siguientes requisitos:
.El aparato fue manipulado
correctamente y según la
indicaciones del manual de
instrucciones.
.Ni el cliente ni terceros inten-
taron repararlo.
Los defectos del temporizador de
riego debidos a la colocación incorrecta o a derrames de las pilas
están excluidos de la garantía.
Esta garantía del fabricante no
afectará los derechos de garantía
que eventualmente existen con
respecto al distribuidor/vendedor.
En el caso de reclamación, rogamos recortar y enviar la presente
Tarjeta de Garantía con el aparato.
Page 18

45
Warranty Card
Carte de garantie
Tarjeta de garantía
Water Timer Electronic T 1030 Art. No. 1806
Programmateur electronic T 1030 réf. 1806
Temporizador de riego T 1030 Art. nº 1806
Purchase date:
Acheté le (date et lieu d’achat) :
Fecha de compra:
Ê
Dealer’s stamp/Receipt:
Cachet du revendeur :
Sello del comerciante:
Reasons for complaint:
Défaut constaté :
Reclamo:
Page 19

USA
Melnor Inc.
Parts & Service Department
3085 Shawnee Drive
Winchester, VA 22604
Phone: (+1) 540 722-9080
Fax: (+1) 888 411-2500
service_us
@
melnor.com
Canada
GARDENA Canada Ltd.
100 Summerlea Road
Brampton
Ontario L6T 4X3
Phone: (+1) 905 792 93 30
Fax: (+1) 905 792 89 96
info
@
gardenacanada.com
1806-21.960.03 /1205
GARDENA
Manufacturing GmbH
89079 Ulm Germany
http://www.gardena.com
 Loading...