

USER MANUAL
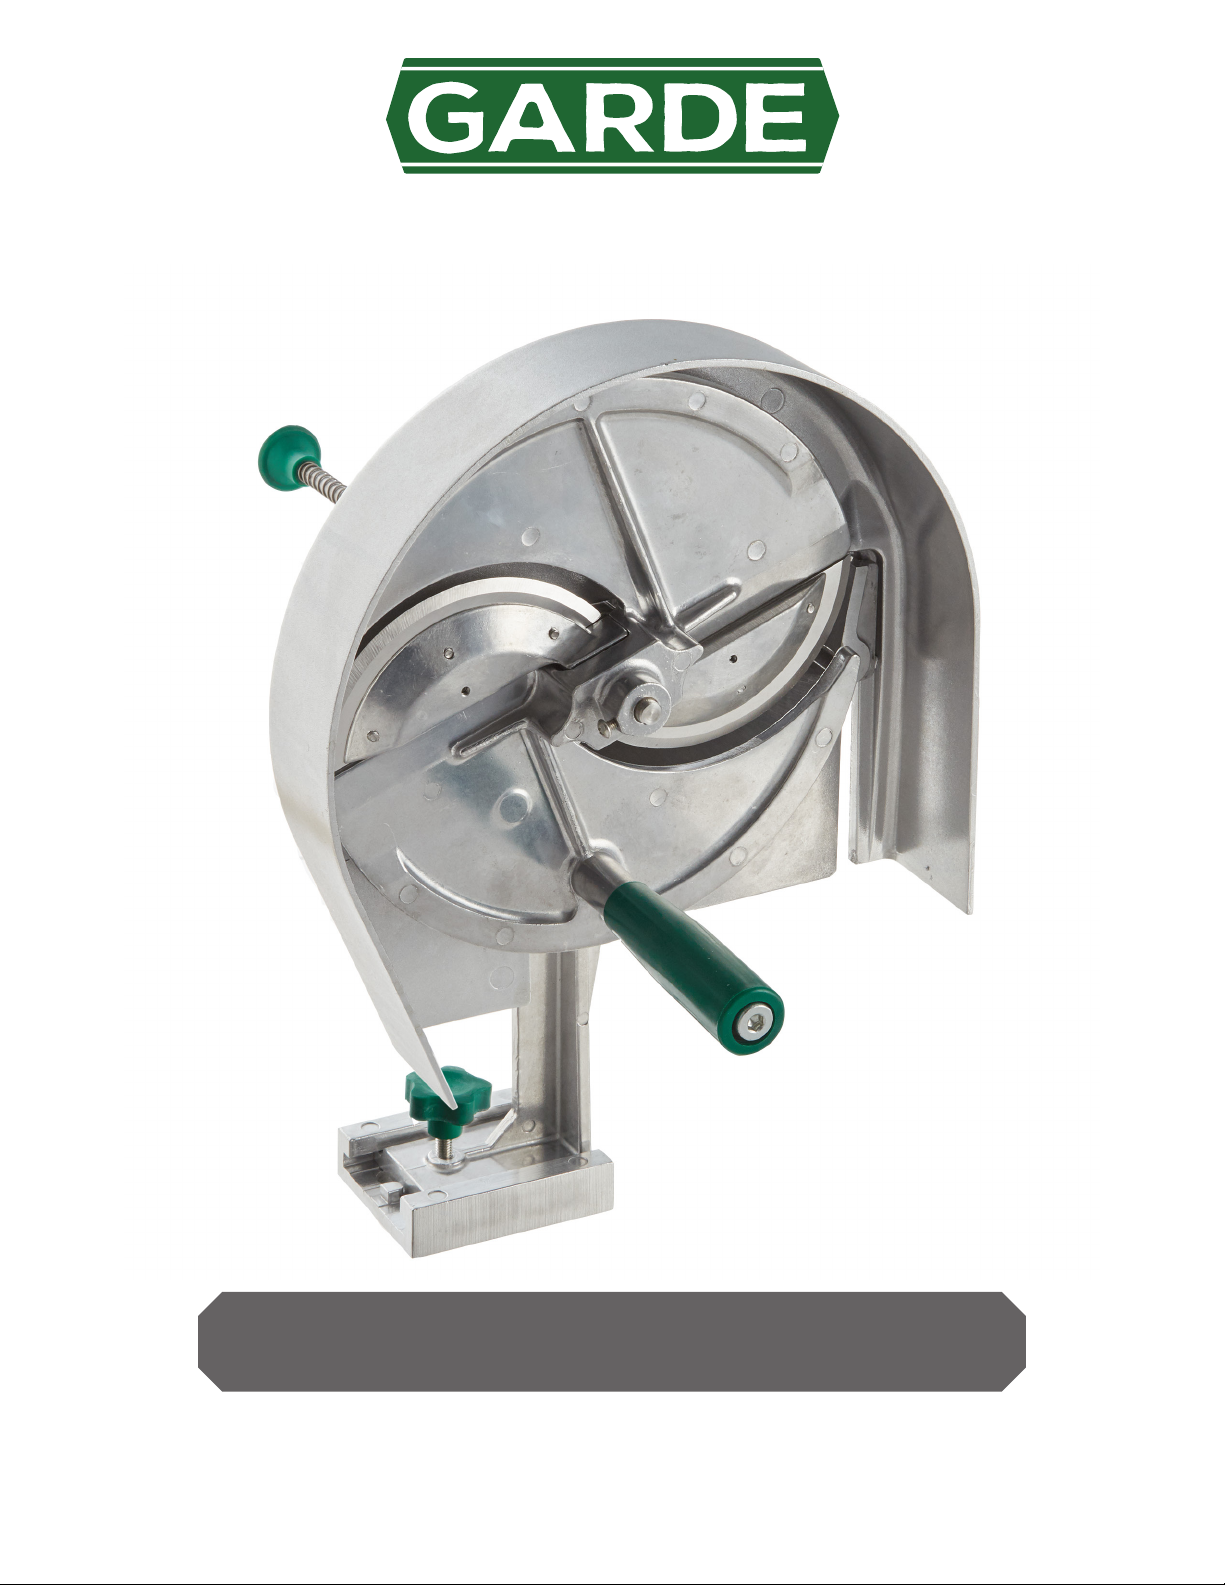
Rotary Produce Slicer
Item #181ROTSLICE
Adjustable from 1/8" to ½" Slices
07/2020

USER MANUAL
Please read and comply with the instrucons listed on this document. To get the best service life and
performance from your machine, clean it thoroughly before and aer each use by following the instrucons
listed below. Minimize the use of alkaline cleaners as they may dull the nish and cause ping.
Safety Instructions
Be careful when handling and operang the machine, as the blades are very sharp. Always keep your hands
away from the blades.
Mounting
1) Place the mounng base on the desired work surface and draw an outline of the mounng base.
2) Draw circles where the four holes of the mounng base are located then remove the mounng base from
the surface.
3) Drill ¼” (or slightly larger) holes in the work surface where the circles from the holes in the mounng base
were drawn.
4) Secure the mounng base to the work surface using the screws provided.
5) Aach the rotary slicer to the mounng base by sliding the base of the slider into the mounng base.
Twist the lock screw unl the rotary slicer is rmly aached.
Adjust Slice Thickness
1) To remove the slicing assembly, turn the sha lock to the le, and then pull the slicing assembly out of
the frame using the handle.
2) Hold the slicing assembly staonary and twist the adjusng screw located at the opposite end of the
slicing assembly (opposite the handle). Connue to twist unl desired thickness is reached.
Operation
1) Check that slice thickness is set to the desired level.
2) Core, slice or cut any produce to prepare it for slicing. Make sure that the produce will t in the trough.
3) Li the cover plate and place produce in the trough in front of the push plate. Close the cover plate.
4) Gently push the produce towards the slicing assembly using the push plate handle, while simultaneously
rotang the slicing assembly handle.
5) For slice uniformity, rotate the slicing handle slower as slice thickness increases. This will ensure that
produce is fully advanced to the slicing plate before slicing with the next blade begins.
6) For ease of use, begin rotang the slicing assembly before advancing the produce through the trough.
This will provide a running start which will make producing the rst slice easier.

USER MANUAL
Please read and comply with the instrucons listed on this document. To get the best service life and
performance from your machine, clean it thoroughly before and aer each use by following the instrucons
listed below. Minimize the use of alkaline cleaners as they may dull the nish and cause ping.
Cleaning and Maintenance
1) Turn the sha lock assembly to the le and pull the slicing assembly away from the frame to remove it.
2) Remove the lock pin and the sha lock assembly. Set in a secure locaon where they will not get lost.
3) Li the guard o of the frame.
4) Twist the push plate handle counter-clockwise to remove it from the push plate. Remove the push plate
from the trough.
5) Remove the unit from the mount.
6) Thoroughly clean all components with water and soap, or a mild detergent.
7) Immediately aer cleaning, dry all components and re-assemble by reversing the disassembly process
described above.
8) If necessary, lubricate the grooves in the trough and push plate arms with mineral oil or its equivalent (do
not use cooking oil).
Changing Blades
1) Remove the slicing assembly from the rest of the unit by turning the sha lock assembly to the le and
pulling the slicing assembly away from the frame.
2) Remove screws to release blades. Replace with new blades and secure using the screws)
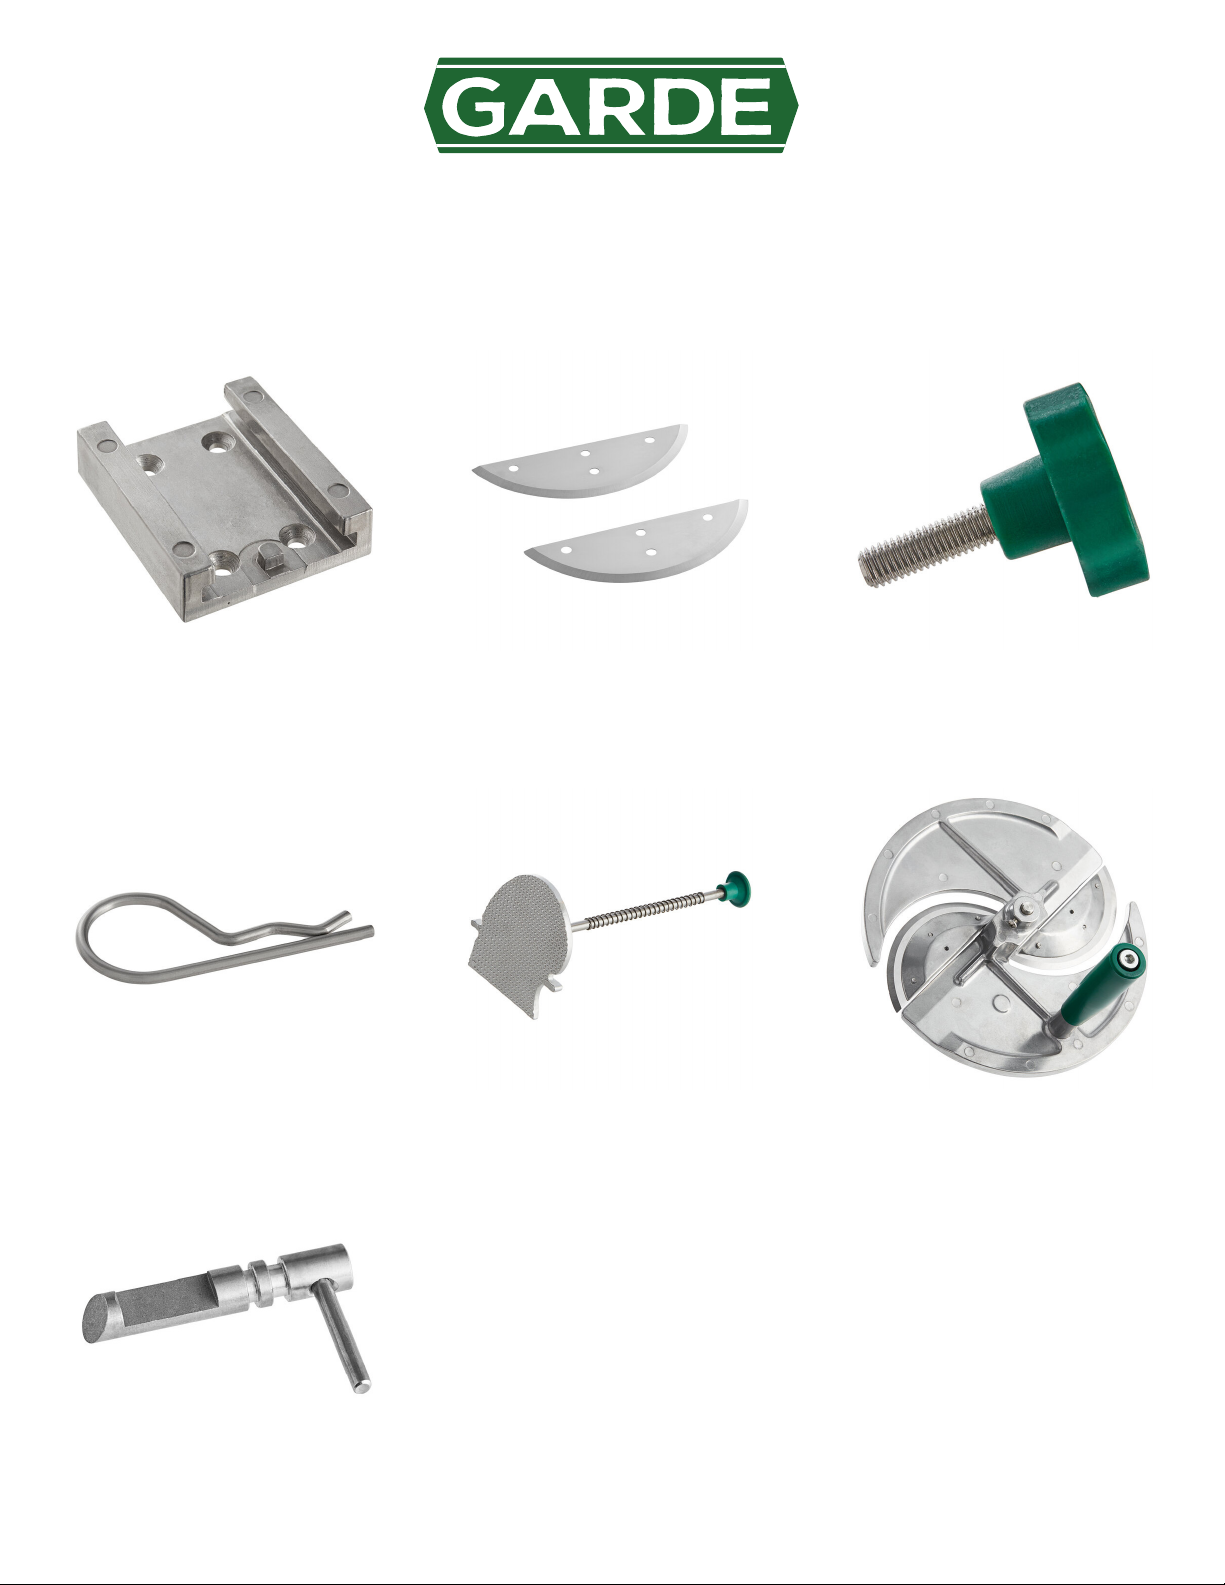
Replacement Parts
USER MANUAL
Mounting Base
#181ROTBASE
Lock Pin
#181ROTPIN
Replacement Blades
#181ROTBLD
Push Plate Assembly
#181ROTPUSH
Lock Screw/Knob
#181ROTKNOB
Slicing Blade Assembly
#181ROTASBLY
Shaft Lock
#181ROTSFTLK

EQUIPMENT LIMITED WARRANTY
Garde warrants its equipment to be free from defects in material and workmanship for a period of 1 year. This is the
sole and exclusive warranty made by Garde covering your Garde brand equipment. A claim under this warranty must
be made within 1 year from the date of purchase of the equipment. Only the equipment’s original purchaser may
make a claim under this warranty. Garde reserves the right to approve or deny the repair or replacement of any part
or repair request. The warranty is not transferable. Garde Equipment installed in/on a food truck or trailer will be
limited to a period of 30 days from the original date of purchase.
To Make a Warranty Claim:
For Warranty Inquiries contact the location where you purchased the product:
• WebstaurantStore.com: Contact help@webstaurantstore.com. Please have your order number ready.
• The Restaurant Store: If you purchased this unit from your local store, please contact your store directly.
• TheRestaurantStore.com: Online purchases, call 717-392-7261. Please have your order number ready.
Failure to contact the designated location prior to obtaining equipment service may void your warranty.
Garde makes no other warranties, express or implied, statutory or otherwise, and HEREBY DISCLAIMS ALL IMPLIED
WARRANTIES, INCLUDING THE IMPLIED WARRANTIES OF MERCHANTABILITY AND OF FITNESS FOR A
PARTICULAR PURPOSE.
This Limited Warranty does not cover:
• Equipment sold or used outside the Continental United States
• Use of unltered water (if applicable)
• Blades. They are expected to wear down and be replaced by user on a consistent basis dependent
upon frequency of usage.
• Garde has the sole discretion on wearable parts not covered under warranty
• Equipment used for residential or other non-commercial purposes
• Equipment not purchased directly from an authorized dealer
• Equipment that has been altered, modied, or repaired by anyone other than an authorized service agency
• Equipment where the serial number plate has been removed or altered.
• Damage or failure due to improper installation, improper utility connection or supply, and issues resulting from
improper ventilation or airow.
• Defects and damage due to improper maintenance, wear and tear, misuse, abuse, vandalism, or Act of God.
Any action for breach of this warranty must be commenced within 1 year of the date on which the breach occurred.
No modication of this warranty, or waiver of its terms, shall be effective unless approved in a writing signed by the
parties. The laws of the Commonwealth of Pennsylvania shall govern this warranty and the parties’ rights and duties
under it. Garde shall not under any circumstances be liable for incidental or consequential damages of any kind,
including but not limited to loss of prots.
 Loading...