

Ganz ZN-DT2MTP-IR, ZN-DT2MTP, ZN-DT1MTP-IR, ZN-DT1MTP User Manual
1

SAF
w
o
n
o
c
o
a
y
e
d
b
o
e
s
y
N
u
s
i
p
.
c
c
n
a
n
a
o
f
C
a
a
o
c
e
g
d
c
e
a
q
e
f
o
g
e
c
o
r
p
e
p
y
n
e
e
o
u
e
n
e
r
r
r
v
u
a
o
w
n
o
o
c
h
r
T
o
a
h
s
t
h
s
ETY I
STRU
TION
S
1) Read
2) Keep
3) Heed
4) Follo
5) Do n
6) Clea
7) Do n
instru
8) Do n
that p
9) Only
10) Use
app
injur
these instr
these instru
all warning
all instruct
t use this a
only with a
t block any
tions.
t install nea
roduce heat
use the atta
only with a
ratus. Whe
from tip-ov
ctions.
ctions.
.
ons.
paratus ne
dry cloth.
of the ventil
r any heat s
hments/ac
art, stand, t
a cart is us
er.
r water.
tion openin
urces such
essories sp
ripod or bra
d, use caut
s. Install in
as radiators
cified by th
cket specifi
ion when m
accordance
, heat regist
manufactu
d by the ma
ving the ca
ith the ma
rs, stoves,
er.
ufacturer,
t/apparatus
ufacturer's
r other app
r sold with t
combination
ratus
e
to avoid
12) Unp
13) Ref
en
r o
s n
Caution
Danger
Replac
These
electric
unless
lug this app
r all servici
amaged in
jects have f
t operate n
of explosion
only with th
ervicing ins
shock does
ou are quali
ratus durin
g to qualifie
any way, su
llen into th
rmally, or h
if battery is
e same or e
tructions ar
not perform
ied to do s
lightning st
service pe
h as power
apparatus,
s been dro
incorrectly r
uivalent ty
for use b
any servici
.
rms or whe
rsonnel. Ser
supply cord
the apparat
ped.
placed.
e.
qualified s
g other tha
n unused fo
icing is req
or plug is d
s has been
rvice pers
that conta
long period
ired when t
maged, liqu
exposed to
nnel only.
ned in the
s of time.
he apparatu
id has been
ain or mois
o reduce t
perating in
has be
spilled o
ure, doe
e risk of
tructions
2
n USA and Canada, Use Class 2 Power Supply Only
3
1. Product Features
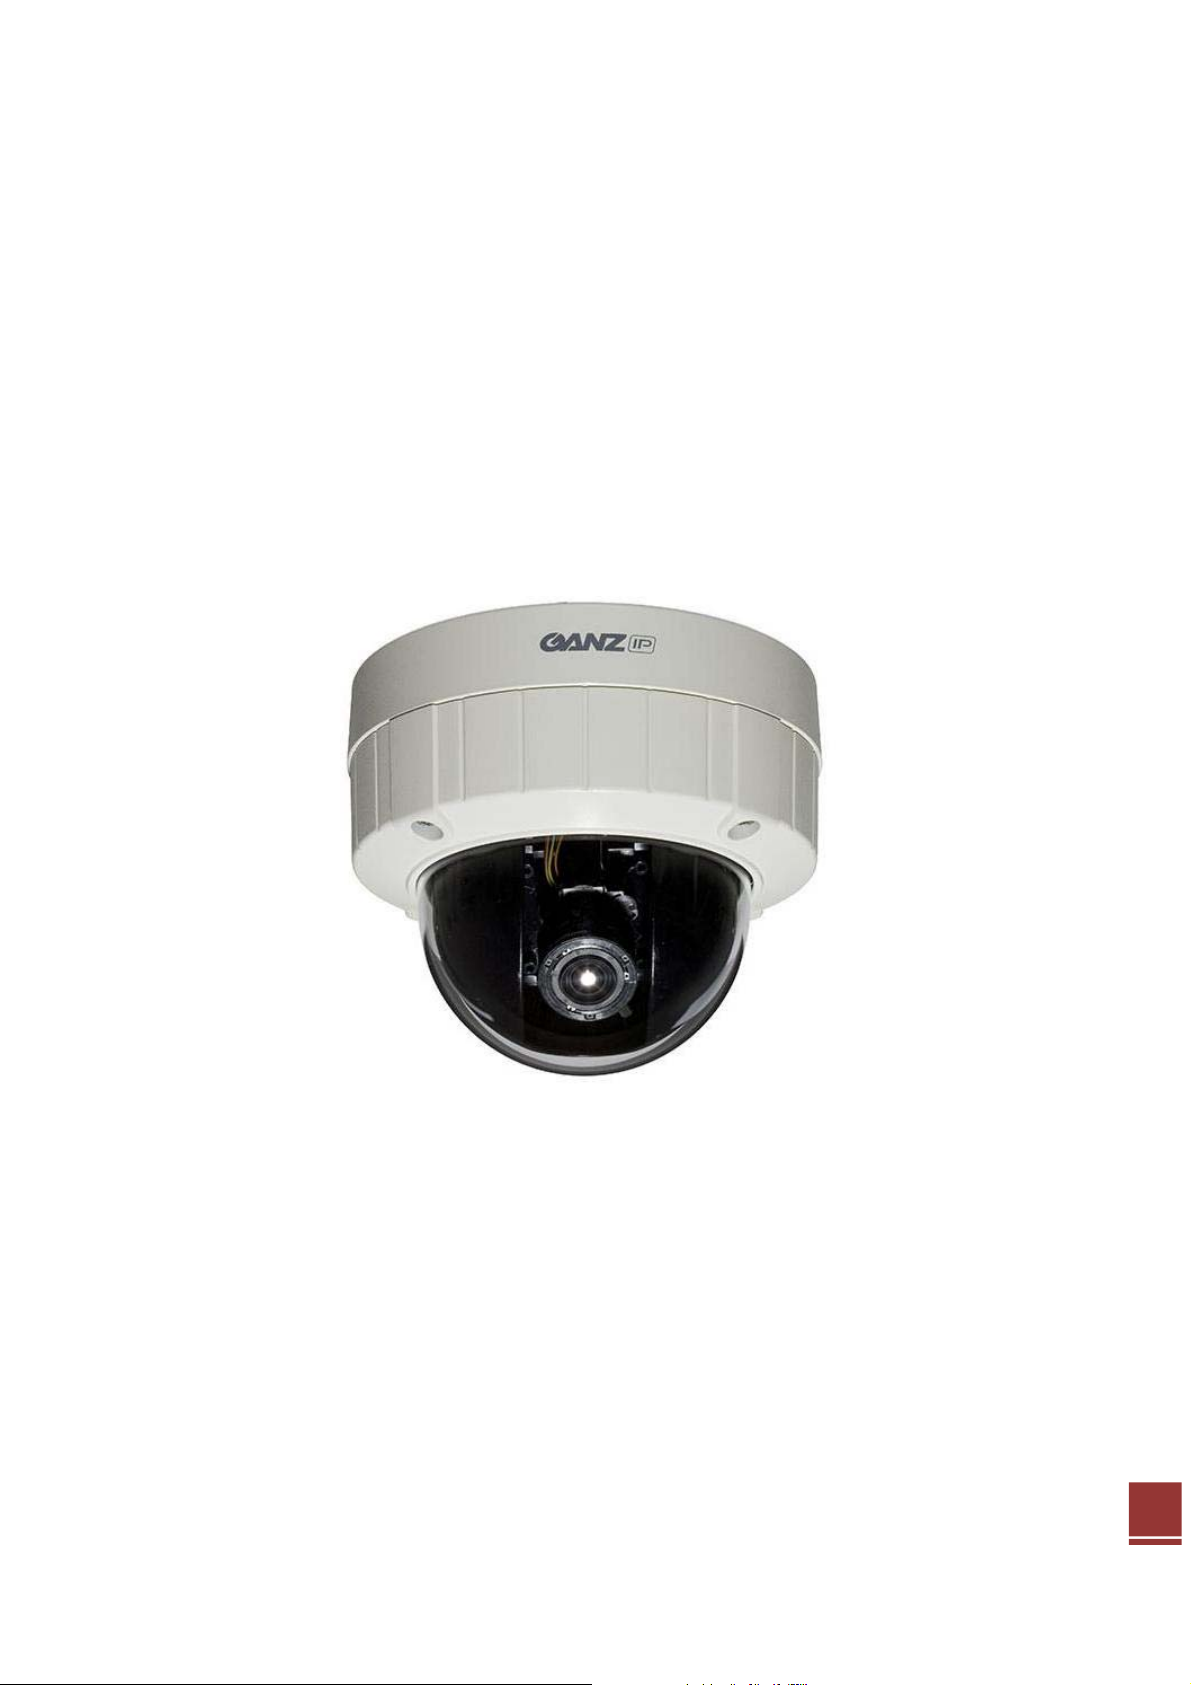
The GANZ PixelPro is a high performance H.264 network camera, designed for
demanding security installations. It delivers crisp, clear images, disclosing every
detail, thanks to its top quality Megapixel progressive CMOS sensor and advanced
image processing.
Supported by the industry’s largest base of video management software, the GANZ
PixelPro provides the perfect solution for securing bank offices, airports and other
facilities, and for traffic surveillance, over IP based networks.
The optimal Power over Ethernet (IEEE 802.3af) support power to the camera to be
delivered via the network, eliminating the need for a power outlet and reducing
installation costs. Steady power could be guaranteed with a central Uninterruptible
Power Supply (UPS).
The GANZ PixelPro offers a comprehensive set of network security and
management features.
This includes support for port based network control (IEEE802.1X), which allows the
camera to be connected to a network secured with this control, and HTTPS
encryption, which provides a secure channel between camera and application. It also
enables authentication of the video source. Video products are efficiently managed
with the powerful Management tool, which is provided on the Installation CD which
comes with camera.
4
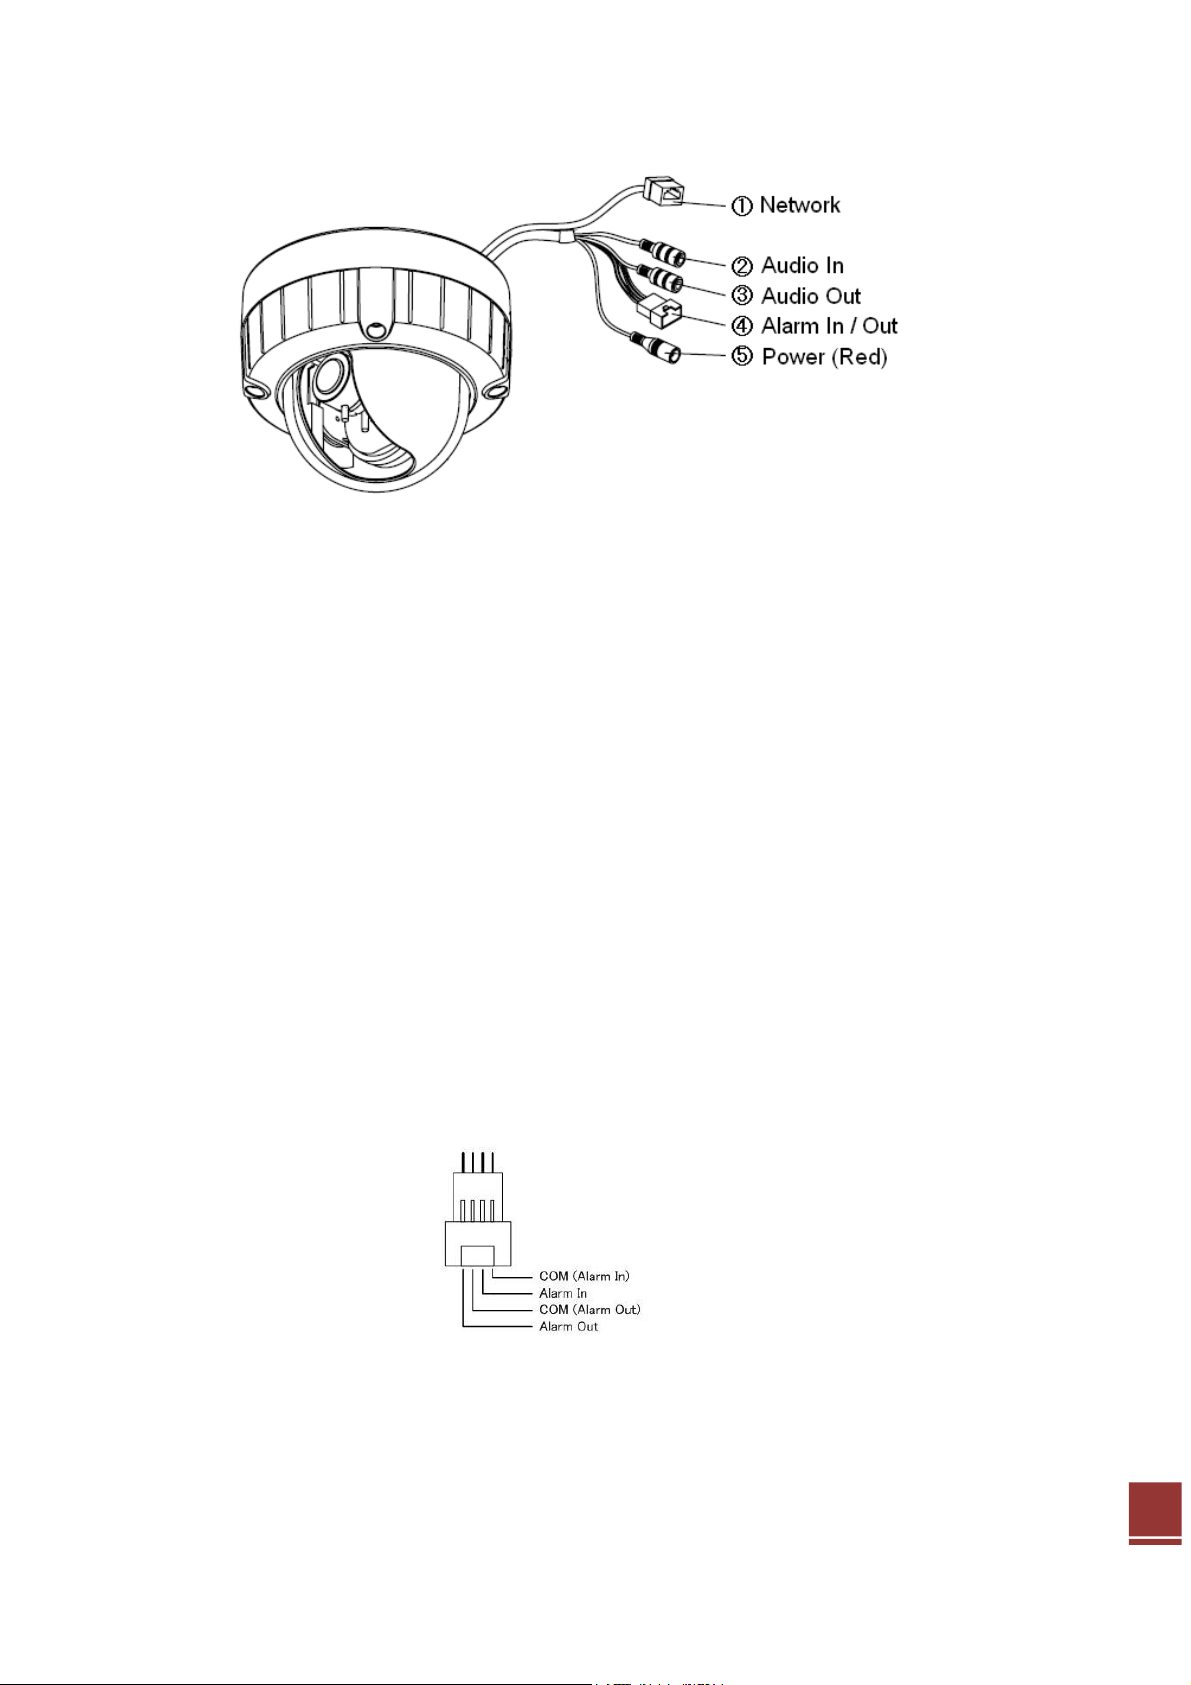
1. Network connector
The GANZ PixelPro connects to the network via a standard network cable, and
automatically detects the speed of the local network segment (10BaseT/100BaseTX
Ethernet). This socket could also be used to power the GANZ PixelPro via Power
over Ethernet (PoE). The camera auto-senses the correct power level when using a
PoE switch, router or injector.
2. Audio in
Audio in (line level), for line-in mono signal (only left channel is used from a stereo
signal)
3. Audio out
The Audio output (line level), which could be connected to a line output of a
microphone system or an active speaker with a built-in amplifier.
4. Alarm in / Alarm out
One analog (dry contact) alarm input
One relay output (0.5A 125VAC / 1A 30VDC)
Pin Assignment
5. Power Connector
12VDC or 24VAC power connector
5
1. Micro SD card (SDHC supported)
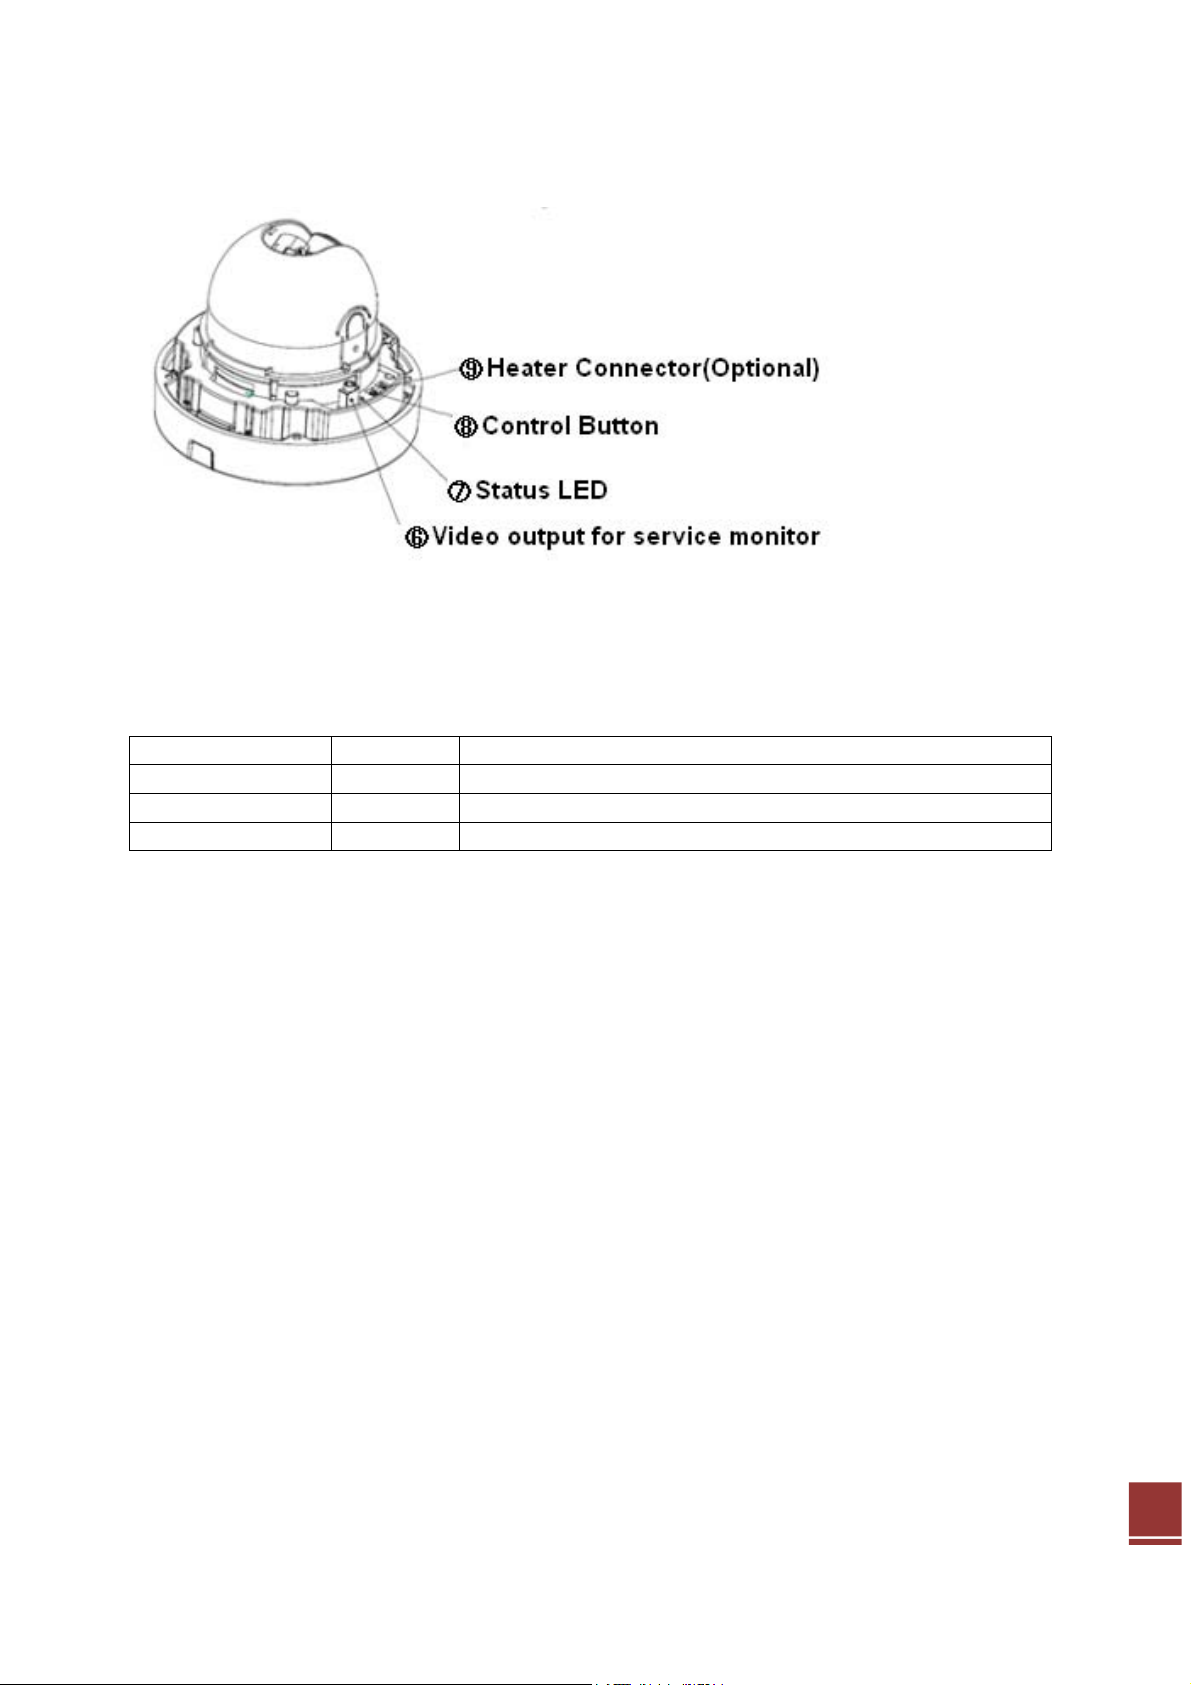
6. Video output for service monitor
This analog video output is available. Use accessory cable to video output.
7. Status LED
LED Color Description
Power/Status Green Steady for correct power and activity.
Amber Flashes for factory default activity.
Unlit It is when no or incorrect power is supplied.
8. Control Button
Press this button to reset or restore the camera configuration to its factory default
settings.
Reset : keep pushing the button about 6 seconds.
Factory Defeult : keep puishing the button about 12 seconds.
9. Heater Connector (Optional)
6
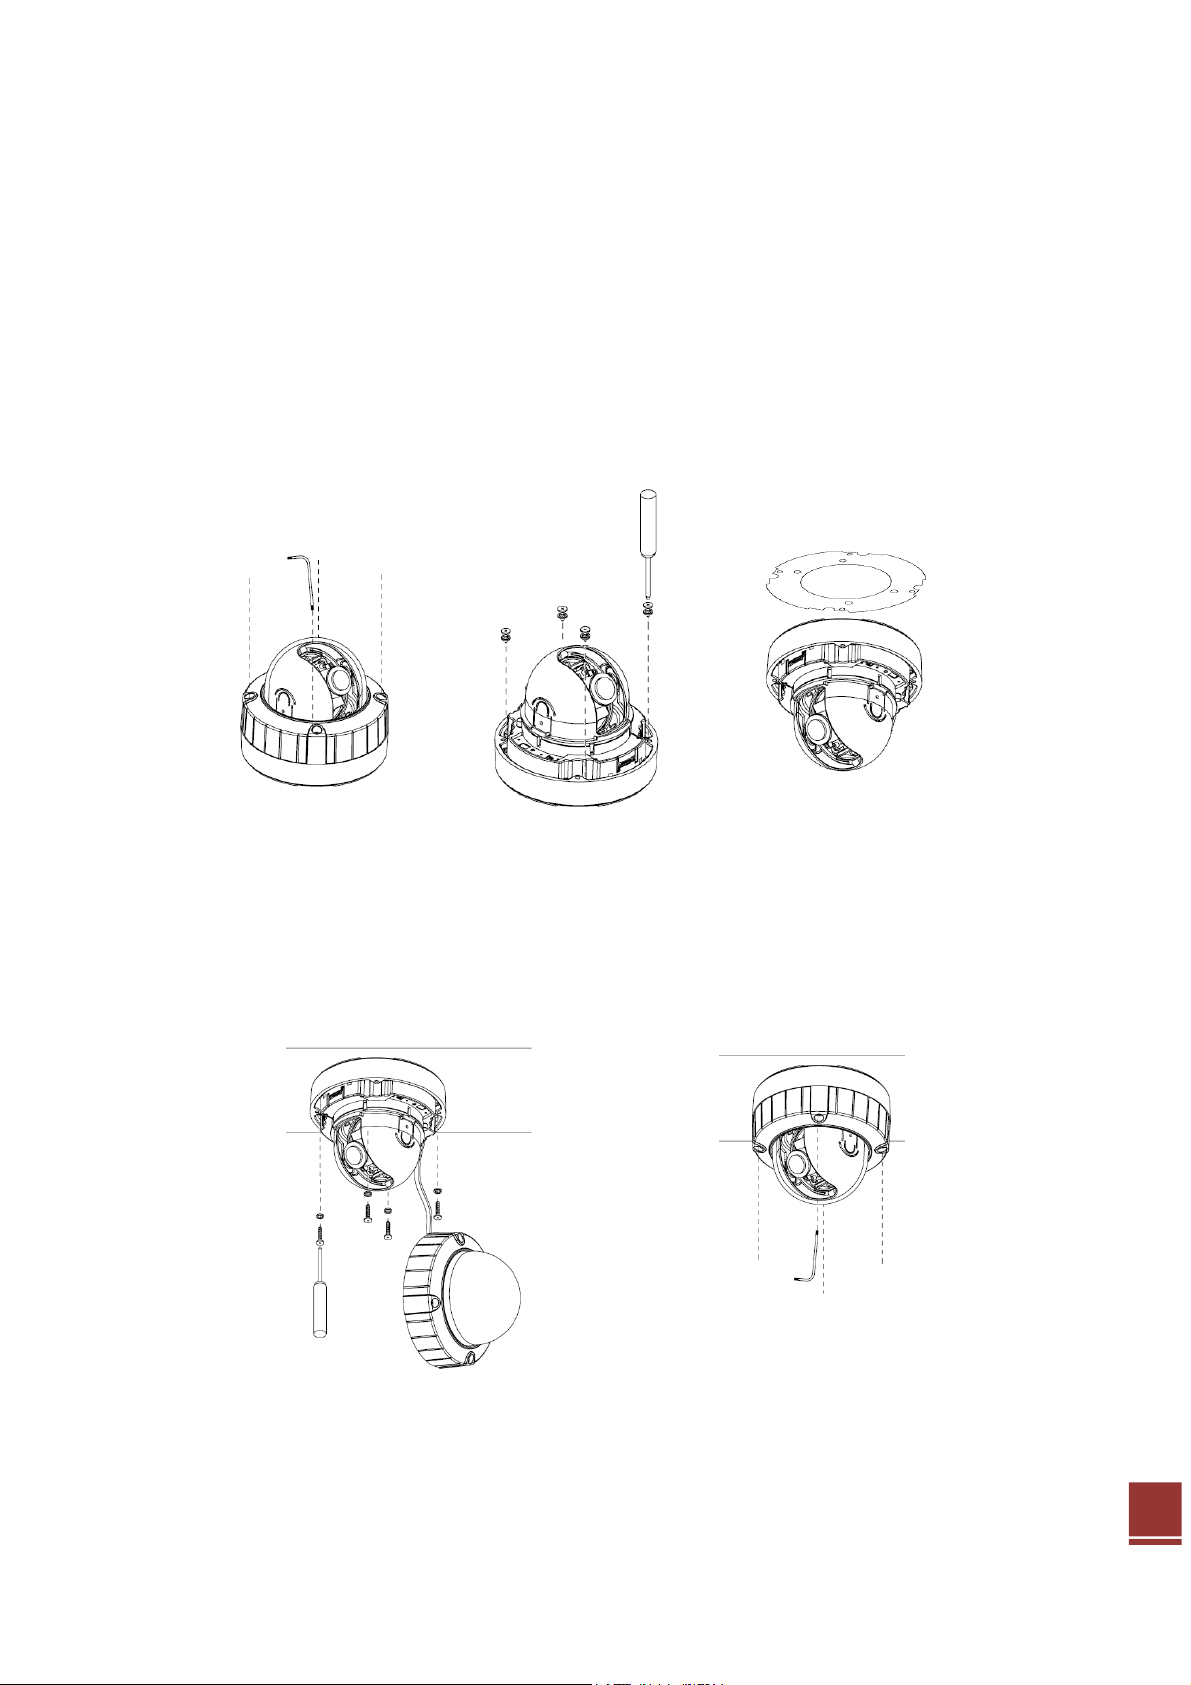
Installation Preparation
1) Remove Dome Cover
Loosen four hexalobular screws by supplied L-key wrench and remove Dome cover.
2) Remove four screws
Remove four screws and o-lings from camera base.
3) Attach the cushion plate.
Attach the supplied bottom cushion plate to the camera base by 3M tape.
1 2 3
Mounting to a ceiling / wall
1) Secure the camera to ceiling or wall with four supplied tapping screws and o-ring.
2) Secure the Dome cover to camera base by supplied hexalobular L-key wrench.
1 2
7
2. Accessing the Camera
Follow the instructions in the GANZ PixelPro Installation Guide to install the camera.
The GANZ PixelPro could be accessed with most standard operating systems and
browsers. The recommended browser is Internet Explorer for Windows with other
operating systems.
2.1 Access from a browser
1. Start a browser (Internet Explorer)
2. Enter the IP address or host name of the camera in the Location/Address field of
your browser. Press Enter.
3. Login dialog will appear when the camera is accessed for the first time.
4. The default user name is ADMIN, and password is 1234.
5. The camera’s Live View page is now displayed in your browser.
Note: The layout of the live view page in the camera may have been customized to
meet specific requirements. Consequently, some of the examples and
functions featured here may differ from those displayed on your own Live View
page.
8

2.2 Accessing the camera from the Internet
Once installed, the camera is accessible on the local network (LAN). Configure the
router/firewall to allow incoming data traffic to access the camera from the Internet.
For security reasons this is usually done on a specific port. Please refer to the
documentation for router/firewall for further instructions.
2.3 Adjusting the Image and Focus
To adjust the position of the lens:
1. Open the Live View page in your web browser.
- Select the Setup tab, and open the Installation page.
- Select the ‘Video Format'.
2. Connect analog monitor to the VIDEO OUT (BNC) on the cable.
- Control the FOCUS with monitor’s image.
3. Check the image from the Live View page on your web browser.
- Set ‘Installation Mode’ to ‘OFF’ to resume normal camera operation.
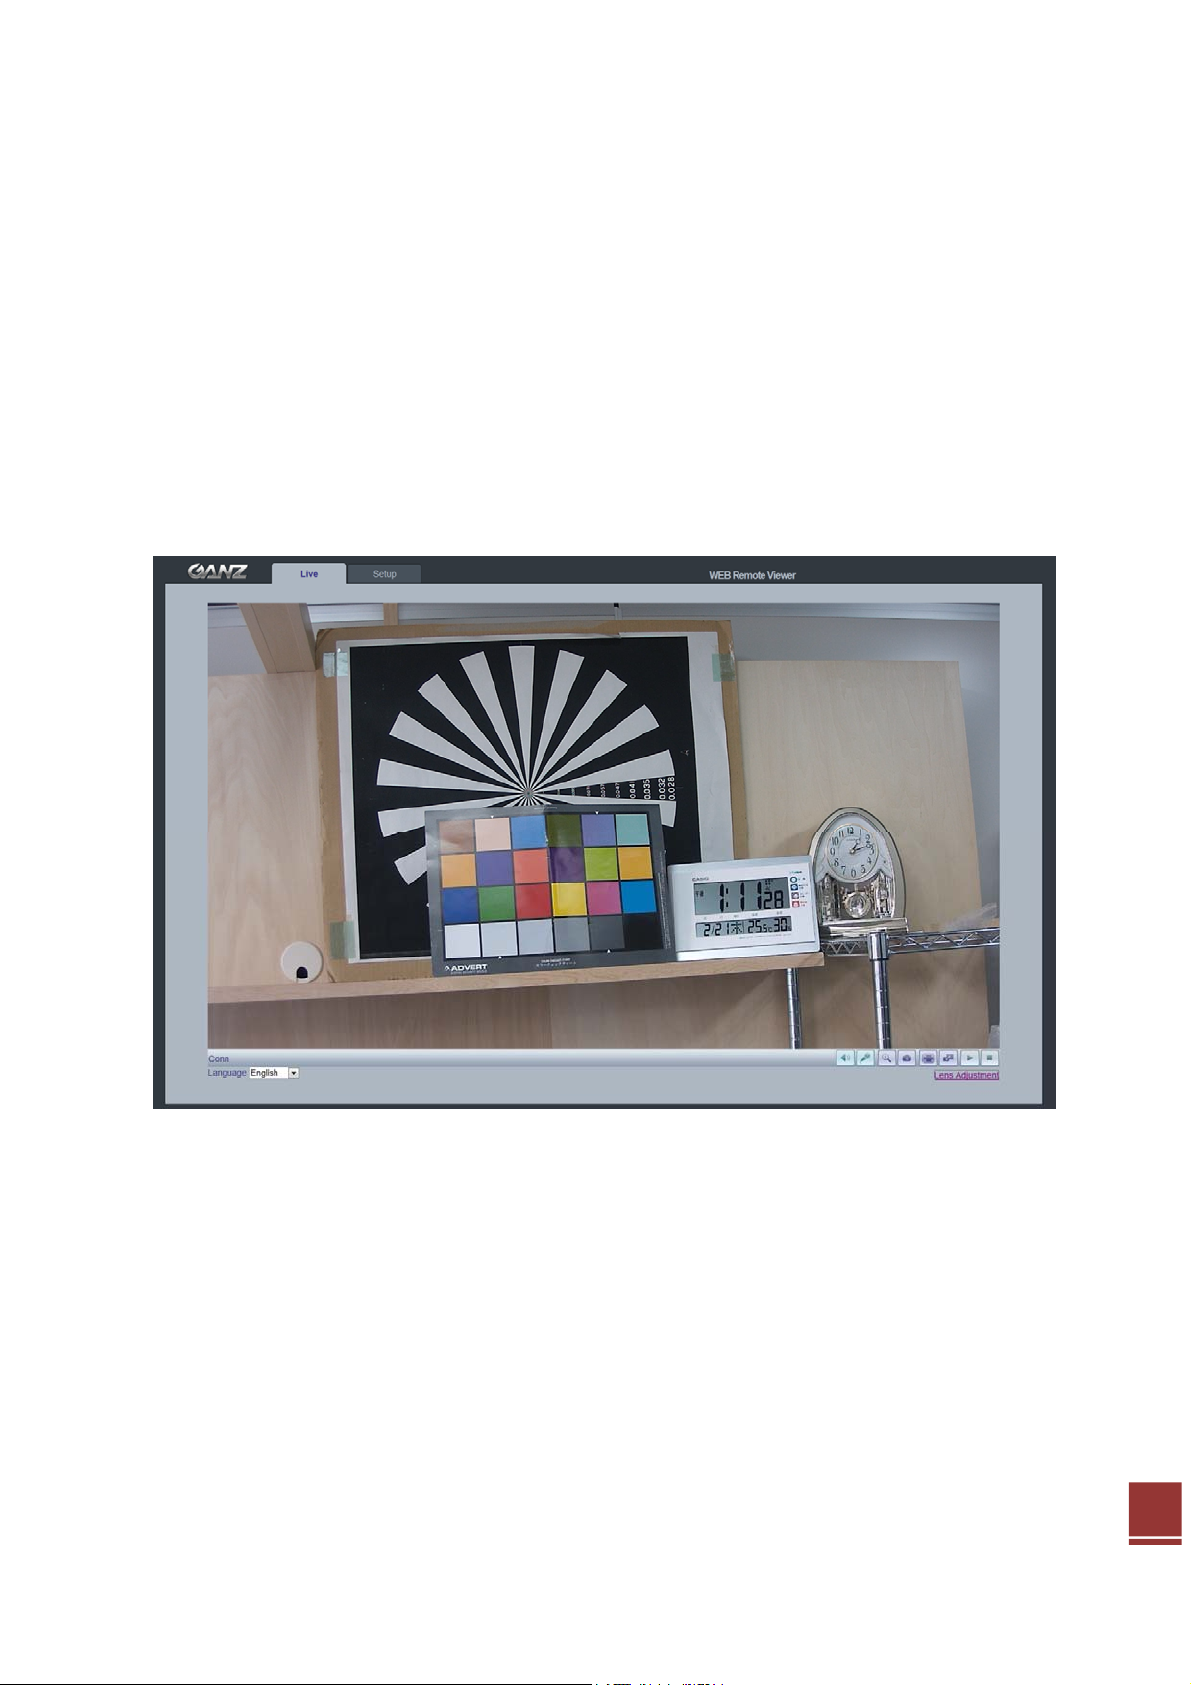
2.4 The Live View page
Enable/Disable PC Speaker output
Enable/Disable PC Microphone input
Digital Zoom
Snap Shot
Full Screen
Video Stream change: First stream Ù Second stream
Play: Click this button by manually to start the stream
Stop: Click this button by manually to stop streaming
NOTE: It is possible that not all the buttons described below will be visible unless the
Live View page has been customized to display them.
9

2.5 Video stream types
H.264 protocols and communication methods
• RTP (Real-time Transport Protocol) is a protocol that allows programs to manage
the real-time transmission of multimedia data, via unicast or multicast.
• RTSP (Real Time Streaming Protocol) serves as a control protocol, to negotiate the
type of transport protocol to use for the stream. RTSP is used by a viewing client to
start a unicast session.
• UDP (User Datagram Protocol) is a communications protocol that offers limited
service for exchanging data in a network which uses the Internet Protocol (IP).
UDP is an alternative to the Transmission Control Protocol (TCP). The advantage of
UDP is that, it is not required to deliver all data and may drop network packets when
there is network congestion. This is suitable for live video, as there is no point in retransmitting old information that will not be displayed anyway.
• Unicasting is communication between a single sender and a single receiver over a
network. This means that the video stream goes independently to each user, and
each user gets own stream. A benefit of unicasting is, in case one stream fails, it
only affects one user.
• Multicasting(Will be supported)is bandwidth-conserving technology that reduces
bandwidth usage by simultaneously delivering a single stream of information to
multiple network recipients. This technology is used primarily on delimited networks
(intranets), as each user needs an uninterrupted data flow and should not rely on
network routers.
2.6 How to stream H.264
Deciding on the combination of protocols and methods to use depends on your
viewing requirements, and on the properties of your network. Setting the preferred
method(s) is done in webpage.
RTP+RTSP
This method (actually RTP over UDP and RTSP over TCP) should be your first
consideration for live video, especially when it is important to always have an up-todate video stream, even if some images are lost due to network problems. This could
be configured as multicast or unicast.
RTP/RTSP/Multicasting (Will be supported) provides the most efficient usage of
bandwidth, especially when there are large numbers of clients viewing
simultaneously. Note however, that a multicast broadcast could not pass a network
router unless the router is configured to allow this. For example, It is impossible to
multicast over the Internet.
10
RTP/RTSP/Unicasting should be used for video-on-demand broadcasting, so that
there is no video traffic on the network until a client connects and requests the
stream. However, as more and more unicast clients get connected, the traffic on the
network will increase and may cause congestion. Although there is a maximum of 10
unicast viewers, note that all multicast users combined count as 1 unicast viewer.
RTP/RTSP
This unicast method is RTP tunneled over RTSP. This could be used to exploit the
fact that it is relatively simple to configure firewalls to allow RTSP traffic.
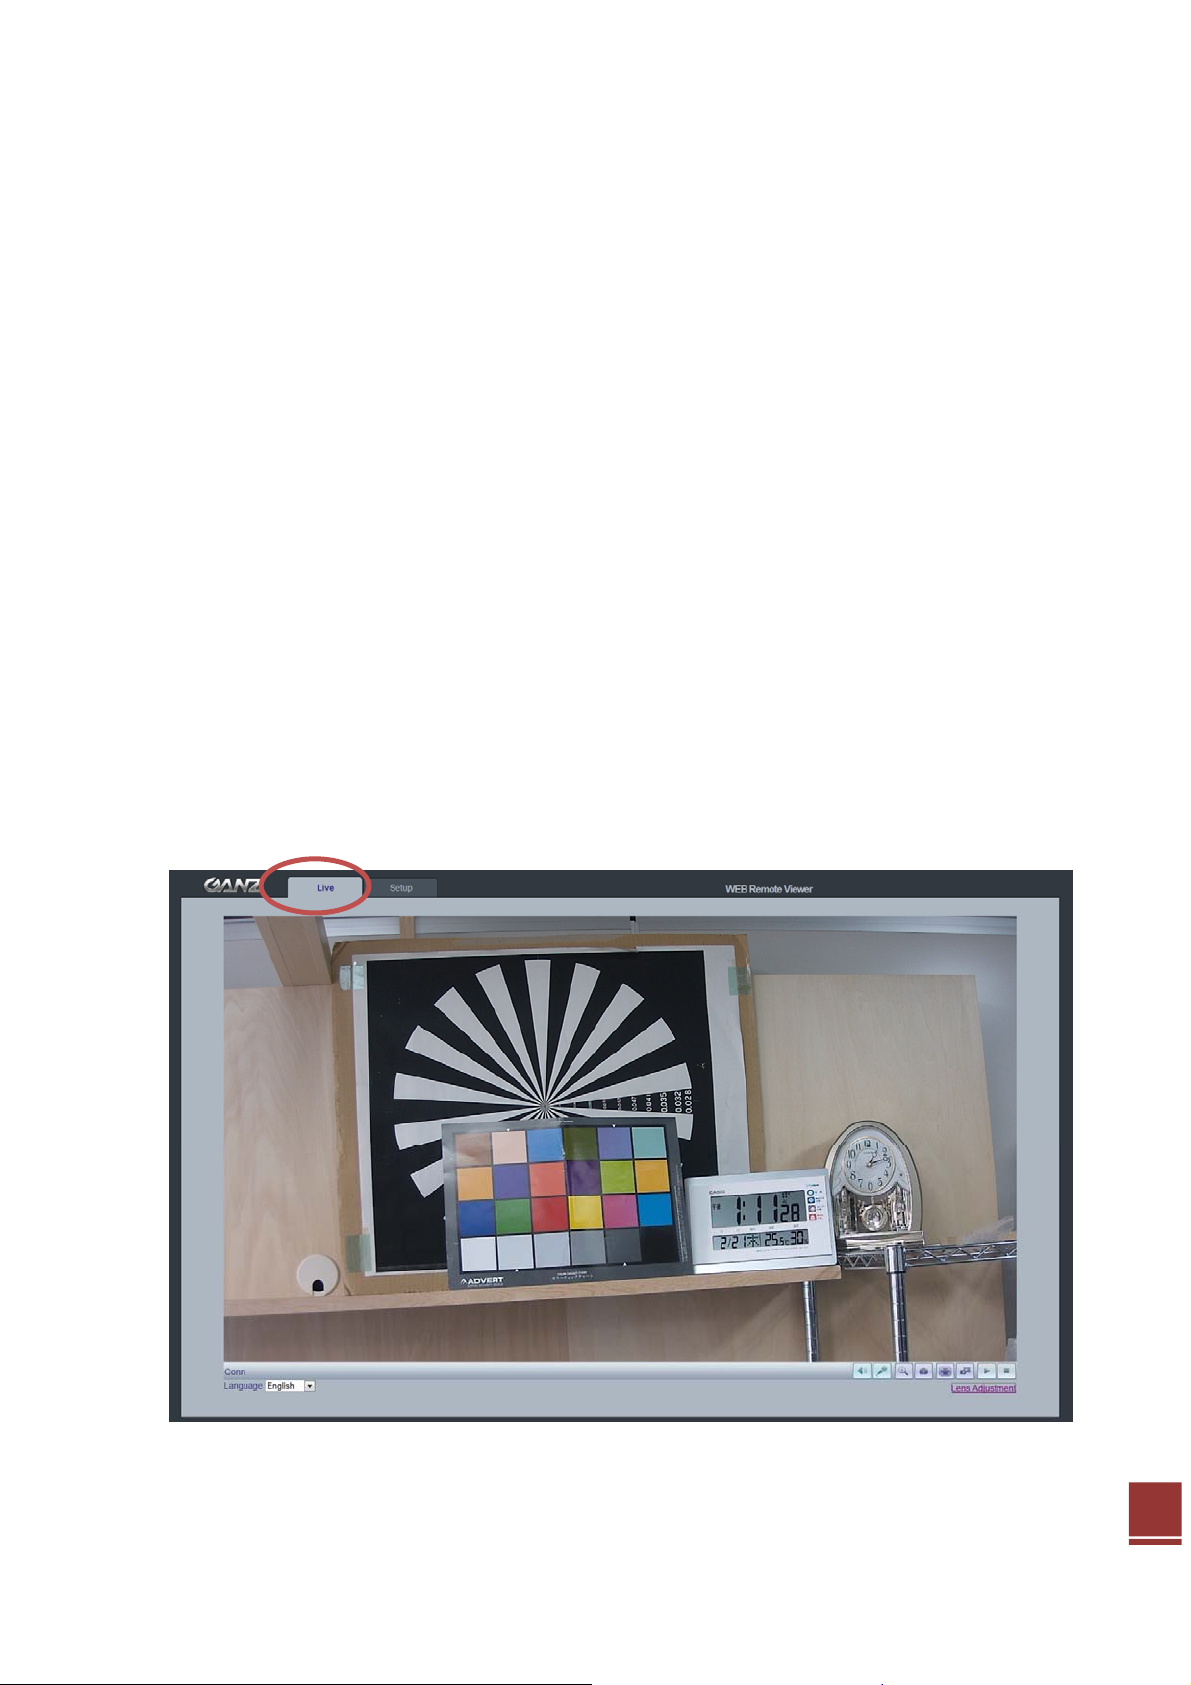
3. The Setup
The GANZ PixelPro is configured from the Setup link, which is available on the top
left hand side in the web interface. This configuration could be done by:
• Administrators, who have unrestricted access to all settings under the Setup tab.
Accessing the Setup link from a browser
1. Start your web browser and enter the IP address or host name of the camera into
the address bar.
2. The Live View page is now displayed. Click on the Setup tap.
11
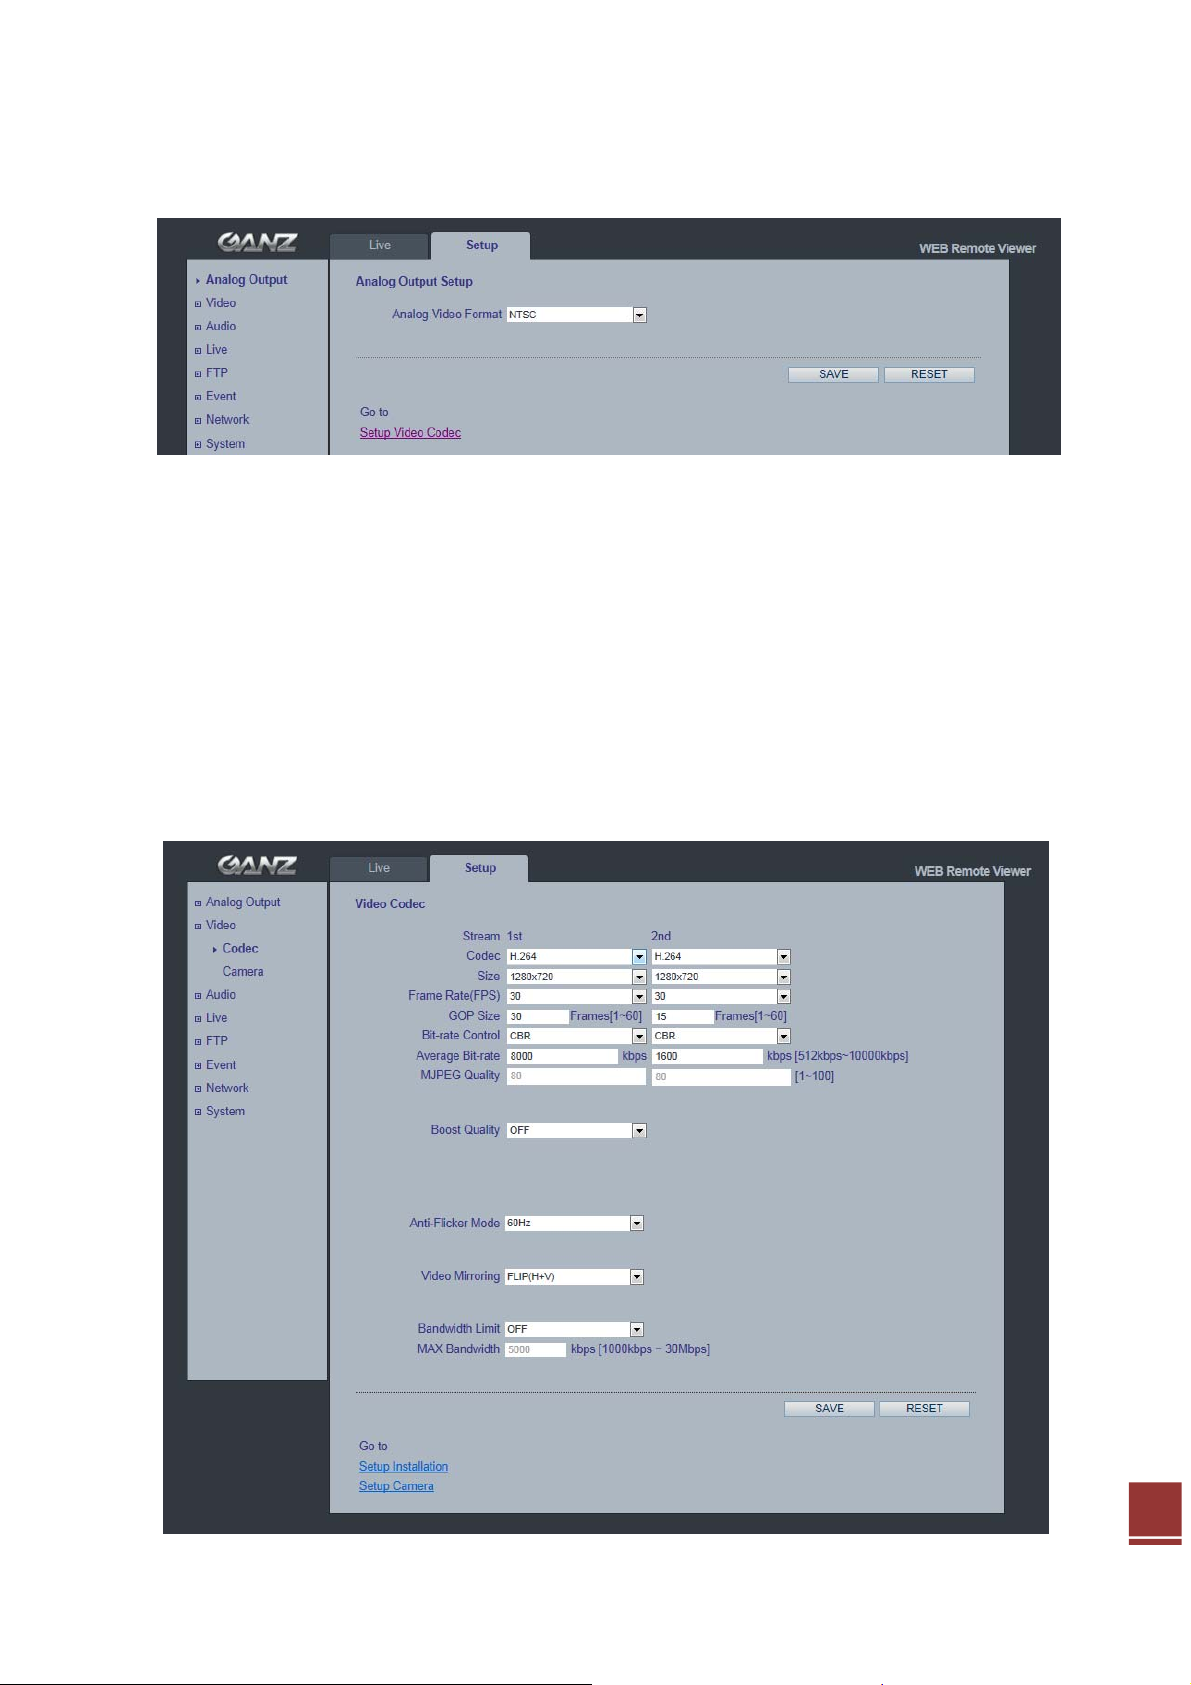
4. Analog output
4.1 Analog Output Setup
Analog output allows selection of output format of the analog BNC output from
the camera. NTSC, PAL: Analog Output is selectable.
5. Video
The following descriptions show examples of some of the features available in the
GANZ PixelPro.
5.1 Codec
These are the tools for adjusting the H.264 settings and controlling the video bit rate.
12
 Loading...