

Page 1
CILLOS STEM & HANDLEBAR INSTRUCTIONS
Page 2
2013 CILLOS STEM & HANDLEBAR
INSTALLATION INSTRUCTIONS
Gamut USA
3540 Charter Park Dr
San Jose, CA 95136
support@gamutusa.com
www.gamutusa.com
TOOLS REQUIRED:
• 4mm & 5mm allen (hex) keys
• Torque wrench
TORQUE
REQUIREMENT
N-m in-lbs
44-715-8
Tighten all bolts using a torque
wrench set to 5-8 Nm (44-71 in-lbs).
Grease the threads of all bolts before
installing stem.
Slide stem onto steer tube, and add/remove
spacers to ensure you achieve the 2-3mm
gap between the top surface of the stem (or
spacer) and top surface of the steer tube.
Install headset top cap and top cap bolt.
Tighten headset top cap bolt to manufacturer’s recommended specifications.
Turn stem side-to-side to center with front
wheel. Once stem is centered, tighten the
side steer tube clamp bolts to the proper
torque settings.
21
1
3
4
2
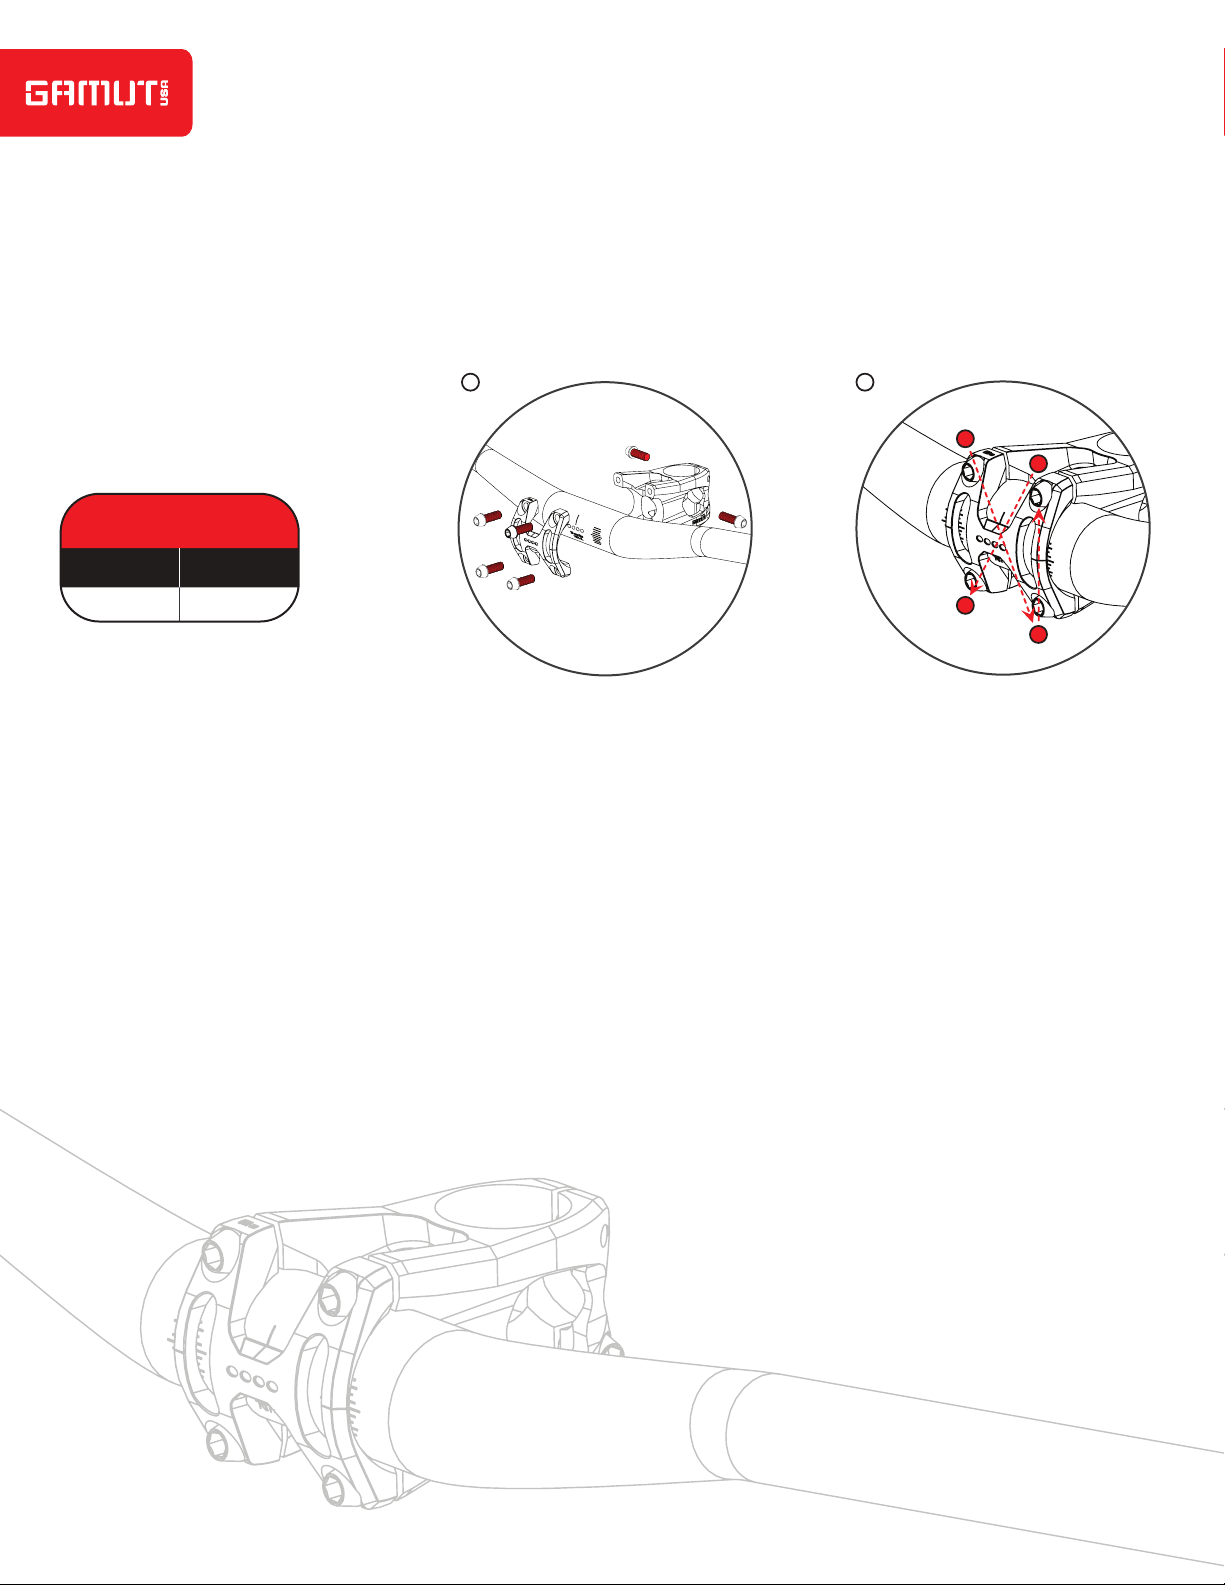
Install your handlebar in the stem. Replace
stem faceplate, and then re-install all 4 stem
faceplate bolts. Before tightening stem
faceplate bolts, ensure the handlebar is
centered in the middle of the stem and the
rotation of the handlebar is positioned to
your preference.
Once the handlebar is properly positioned in
the stem, alternate tightening the 4 bolts in a
cross-pattern until the proper torque setting
is achieved (refer to illustration above).
Ensure the gap between the stem faceplate
and the stem body is equal on top and bottom
of stem.
 Loading...