

Page 1
™
THE ULTIMATE CITY SIMULATOR
USER’S
MANUAL
Page 2
USER MANUAL
ª
THE ULTIMATE CITY SIMULATOR
by Michael Bremer
On the whole I’d rather be in Philadelphia.
– W.C. Fields (1879-1946)
Page 3

Credits
The Program
Designed By: Fred Haslam and Will Wright
IBM Programming: Jon Ross, Daniel Browning, James Turner
Windows Programming: James Turner, Jon Ross
Producer: Don Walters
Art Director: Jenny Martin
Computer Art: Suzie Greene (Lead Artist), Bonnie Borucki, Kelli Pearson, Eben Sorkin
Music: Sue Kasper, Brian Conrad, Justin McCormick
Sound Driver: Halestorm, Inc.
Sound Effects: Maxis Sample Heds, Halestorm, Inc.
Technical Director: Brian Conrad
Newspaper Articles: Debra Larson, Chris Weiss
Special Technical Assistance: Bruce Joffe (GIS Consultant), Craig Christenson (National
Renewable Energy Laboratory), Ray Gatchalian (Oakland Fire Department), Diane L. Zahm
(Florida Department of Law Enforcement)
The Manual
Written By: Michael Bremer
Copy Editors: Debra Larson, Tom Bentley
Documentation Design: Vera Jaye, Kristine Brogno
Documentation Layout: David Caggiano
Contributions To Documentation: Fred Haslam, Will Wright, Don Walters, Kathleen Robinson
Special Artistic Contributions: John “Bean” Hastings, Richard E. Bartlett, AIA, Margo Lockwood,
Larry Wilson, David Caggiano, Tom Bentley, Barbara Pollak, Emily Friedman, Keith Ferrell,
James Hewes, Joey Holliday, William Holliday
The Package
Package Design: Jamie Davison Design, Inc.
Package Illustration: David Schleinkofer
The Maxis Support Team
Lead Testers: Chris Weiss, Alan Barton
QA: Alan Barton (Supervisor), Manny Granillo, Chris Weiss, Roger Johnsen, Don Horat
Tech Support: Carter Lipscomb (Manager), Kevin O’Hare, Peter Alau, Chris Blackwell, Kirk Lesser
Beta Testing: Robert McNamara, Steve Perrin, and all of Maxis
Product Manager: Larry Lee
Public Relations: Lois Tilles and Sally Vandershaf
Manufacturing: Val Garcia, Kim Vincent, Gina Martinez
Thanks To
Jeff Braun, Joe Scirica, Jim Siefert, Bob Derber, Sam Poole, Robin Harper, Michael Perry, Cassidy,
Joell Jones, all the rest of the Maxoids who made this possible, and ‘The Veddy Bad Girlfriend’
Page iii
Page 4
THE ULTIMATE CITY SIMULATOR
™
Contents
INTRODUCTION ............................................................................ 1
ABOUT THIS MANUAL ..................................... 3
FROM SIMCITY TO SIMCITY 2000 .................. 4
GETTING STARTED ......................................... 4
TUTORIALS .................................................................................. 5
BEFORE YOU BEGIN ........................................ 7
TUTORIAL 1—THE BASICS ........................... 10
TUTORIAL 2—LANDSCAPE ENGINEERING . 25
TUTORIAL 3—ADVANCED FEATURES ........ 33
REFERENCE............................................................................... 45
THE BASICS .................................................... 46
MENUS .............................................................. 50
File Menu ........................................................ 50
Options Menu ................................................ 51
Disasters Menu .............................................. 52
Windows Menu .............................................. 53
Newspaper Menu ........................................... 54
WINDOWS ...................................................... 55
City Window ................................................... 55
Map Window .................................................. 78
Budget Window ............................................. 81
Ordinance Window ...................................... 89
Population Window ...................................... 92
Industries Window ....................................... 93
Graphs Window ............................................. 94
Neighbors Window ....................................... 96
INSIDE THE SIMULATION.............................. 97
STRATEGIES ................................................. 119
GALLERY ................................................................................. 125
APPENDIX: FROM SIMCITY TO SIMCITY 2000....................... 136
BIBLIOGRAPHY........................................................................ 139
INDEX ...................................................................................... 140
SimCity 2000Page iv
Page 5
INTRODUCTION
To search for the ideal city today is useless. For all cities
are different. Each one has its own spirit, its own problems, and its own pattern of life. As long as the city lives,
these aspects continue to change. Thus to look for the
ideal city is not only a waste of time but may be seriously
detrimental. In fact, the concept is obsolete; there is no
such thing.
– Steen Eiler Rasmussen (1898- )
Page 6
THE ULTIMATE CITY SIMULATOR
™
Introduction
Welcome to SimCity 2000.
When you play SimCity 2000, you become the planner, designer and mayor of an unlimited number of cities. You can
take over and run any of the included scenario cities, or build
your own from the ground up.
You’re in charge. You can choose to build small, rural towns,
or huge bustling megalopolises. As you design and build your
cities, simulated citizens, known as Sims, move in and build
their homes, stores and workplaces, raise their families and
invite their friends. If your city is a nice place to live, your
population will increase. If it’s not, your Sims will leave town.
And be assured that they’ll let you know what they think about
you and your policies.
One of the toughest challenges of SimCity 2000 is to maintain
a huge city without sacrificing your Sims’ quality of life, without going broke maintaining the infrastructure, and without
raising taxes so high that businesses relocate. SimCity 2000
lets you face the same dilemmas that mayors all over the world
are facing. We’ve all said at one time or another that we could
do a better job than our elected officials—here’s your chance
to prove it.
SimCity 2000 is primarily a “building” game, where you create
and try to increase the size of your cities—but you also have
plenty of opportunities to destroy. From bulldozers to earthquakes to air crashes, the implements of destruction are only
a mouse-click away. But remember, it’s a lot more challenging
to build than to destroy, and the lives, hopes and dreams of
millions of Sims are in your hands.
SimCity 2000 — IntroductionPage 2
Page 7
About this
This manual is divided into four main sections:
The Introduction welcomes you to SimCity 2000, explains a
little about the manual in general, helps you get the game up
and running on your computer and sends you on your way to
play.
The Tutorials are small guided tours through different aspects
of city-building with SimCity 2000.
The Reference section describes in detail all the windows,
buttons, features and functions of SimCity 2000, and explains
much of the behind-the-scenes simulation action.
The Gallery section consists of contributions from a number
of people to give you varying views, feelings, interpretations
and predictions about real cities in words and pictures. Some
of these individual pieces are located at the back of the manual
in the “official” Gallery section. Others are spread throughout
the rest of the manual.
And for those who are familiar with an earlier version of
SimCity, there is an Appendix that lists SimCity 2000’s new
features and differences from the earlier versions.
Manual
In addition, the SimCity 2000 package includes a machinespecific Addendum to cover installation, startup, and any
special features and functions on your computer.
Page 3
Page 8
THE ULTIMATE CITY SIMULATOR
™
From SimCity to
SimCity 2000
If you’re already familiar with an earlier version of SimCity,
then you should have no trouble moving into SimCity 2000. If
you haven’t played SimCity before, then skip the rest of this
section. You will not be quizzed on this material.
A few major features have changed and some tools have moved
since the earlier versions of the game, so you may have just a little
trouble finding things. A summary of all the changes and differences between the programs can be found in the Appendix. But
to help you get started, here are the three most-asked questions
by SimCity users when we sat them down in front of SimCity 2000:
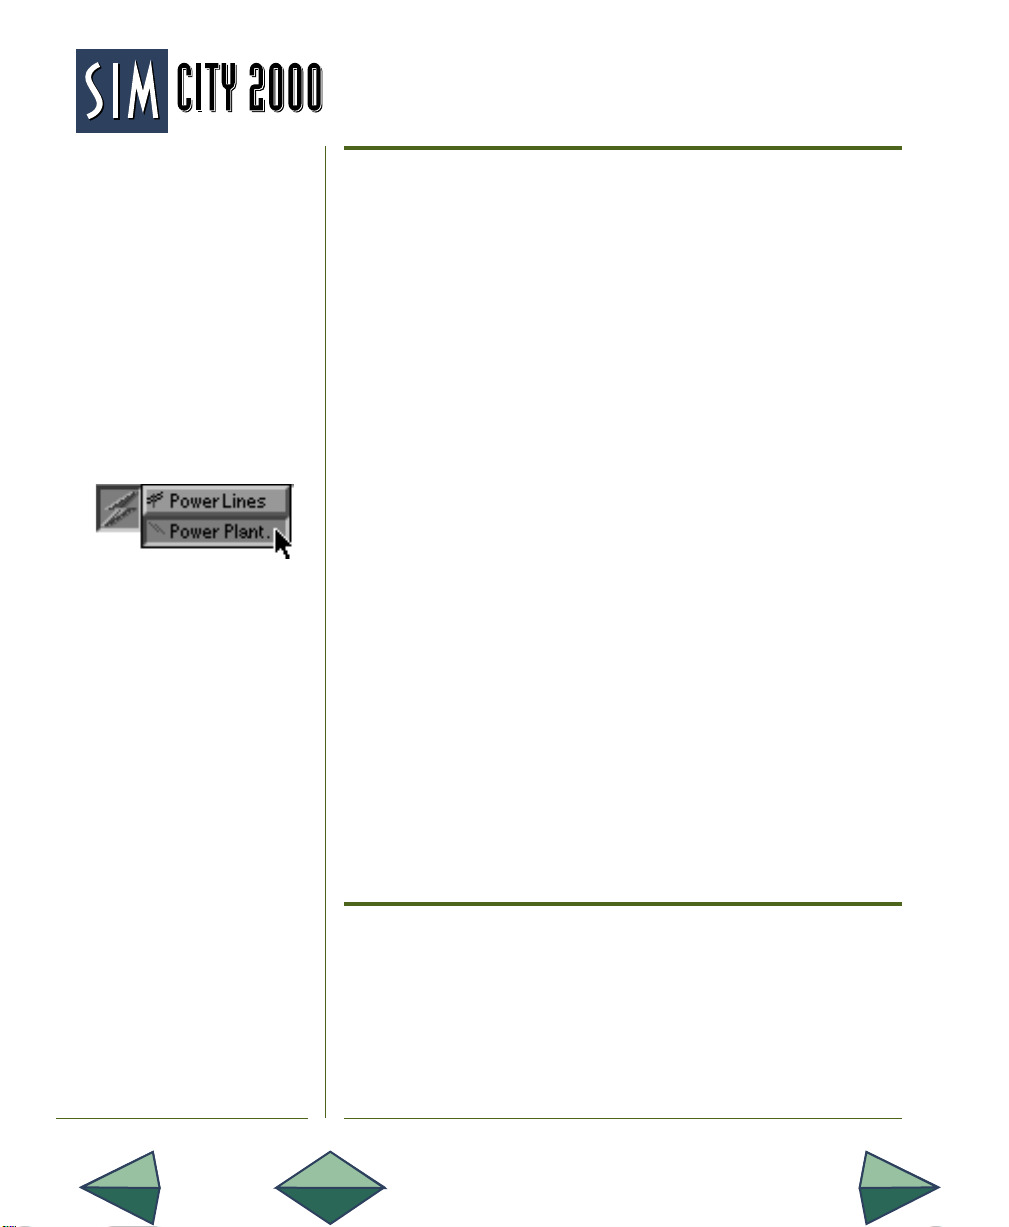
• Where the heck are the power plants?
They’re in a submenu under the power icon. Select Power
Plant... from the submenu and you’ll have a choice of from three
to nine different power sources, depending on the city’s date.
• I click and click—why won’t the durn thing set down zones?
Instead of the fixed-size zones that you plop down, SimCity 2000
lets you make any size square or rectangular zone by clicking
and dragging the mouse where you want to zone. You can zone
over roads and rails, and place roads and rails in zones. By the
way, airports and seaports are placed the same way as zones.
Getting Started
• What’s the deal with the water system?
We’ve added a water system to the game, including pumps,
pipes, treatment plants, water towers and desalinization plants.
You don’t need to worry about water to start a city. But you will
need a water system before the population can grow very dense.
SimCity 2000 must be installed to a hard disk before you can
run the program.
Once you’re up and running, feel free to jump right in and play,
or if you want some guidance and a quick introduction to the
main features and functions of the game, check out the tutorials.
SimCity 2000 — IntroductionPage 4
Page 9
TUTORIAL
The experts are all saying that our big cities have become
ungovernable. What the hell do the experts know?
Newsweek, April 5, 1971
– Richard J. Daley (Mayor, Chicago) (1902-1976)
Page 10
THE ULTIMATE CITY SIMULATOR
™
Tutorials
Congratulations! By the virtue of owning SimCity 2000 you are
hereby proclaimed Mayor of a million cities and ruler of a
billion simulated lives (your Sims). It’s a tough game, but
somebody’s gotta play it.
These tutorials are designed to help you adjust to your new
office with as little transition time as possible.
There are three tutorials, each designed to be finished in one
short sitting so you can get them out of the way and get on with
the important business of building and running your cities.
The first one is a general overview of the basic features of
SimCity 2000—enough so you can start a new city, and get
going on your own. The second one focuses on creating,
editing and modifying your city’s terrain, both before and after
you’ve begun building your city. The third one goes into detail
on a few of the advanced features.
This series of vignettes about cities
and city planning was provided by
Richard Bartlett, AIA, Architect.
Spread throughout the manual, they
give a historical and humanistic
perspective to planning that you may
wish to incorporate into your city
designs.
We suggest that you whip through the first tutorial, then go
play on your own for a while. You may figure everything else
out on your own, and never need the other tutorials, but
they’re here if and when you want them.
Cities are for people: a place for their hopes and dreams, their work
and play, their homes and homes for their children. Cities are alive and
have personalities, each different from all others and
each in constant change. A living organism made up of
its collective inhabitants, a city is many things, but it is
above all a storehouse of human characteristics.
I
SimCity 2000 — TutorialPage 6
Page 11

Before jumping into the tutorials, take a moment to look over
the following skills and conventions that will make your stay in
SimCity 2000 a pleasant one.
Before You Begin
SimCity 2000 requires a mouse. To play, you must know how to
use a mouse for the following actions:
• Click—point the cursor to an object and briefly press
the left (or only) mouse button.
• Double-click—point the cursor to an object and briefly
press the left (or only) mouse button twice quickly.
• Click and drag—point the cursor to an object, then
press and hold the left (or only) mouse button, then
move the mouse to drag the object. Release the mouse
button to release the object.
Unless otherwise specified, whenever this manual refers to
clicking, double-clicking or clicking and dragging, use the left
(or only) mouse button.
When you see the term “Shift-click,” it means to hold down
either Shift key on the keyboard and click the mouse button.
When you see the term “control-click,” it means you should
hold down the Control key on the keyboard while you click.
Mouse and Keyboard
Stuff
In these tutorials, when you see text that looks like the text in
this paragraph, it’s an explanation of something.
Page 7
Page 12
THE ULTIMATE CITY SIMULATOR
™
Instructions and
Explanations
What Makes a
(Sim)City?
In these tutorials, when you see text that looks like the text in
this paragraph, it’s an explanation of something.
When you see text that looks like this, it’s an actual instruction for
you to follow.
When you see text that looks like this, it’s a note
or a warning or other important message.
To prepare you for building your city in the rest of this tutorial,
here is a basic explanation of exactly what is city in SimCity
2000 is made of.
While SimCity has many layers of complexity and lots and lots
of features and all sorts of stuff to put in your city, it’s fairly
easy to get a small city started. All you need is:
• A place for the Sims to live: a residential zone
• A place for the Sims to work: an industrial zone
• A place for the Sims to shop and conduct business:
a commercial zone
• A source of power: a power plant
• A way to get the power from the power plant to the
zones: power lines
• A way for Sims to travel between work, home or shops:
roads
That’s all you need to build, and Sims with that pioneering spirit
will move into your city and build their own houses, factories
and offices. They’ll drive their cars and carry on business and
complain about taxes. If you build it, they will simulate.
A small ring of stones holds together the glowing embers of last night’s
fire. Leaning on his staff, the herdsman quietly scans his flock, also
contained within a larger circle of boulders and posts. Maximum land
within minimum fence—today we call this radiocentric planning.
SimCity 2000 — TutorialPage 8
II
Page 13
Once your city has begun to grow, you can add:
• More zones with different density levels
• Multiple above- and below-ground means of
transportation
• A complete water system
• Custom landscaping
• Airports and seaports
• Police and fire stations
• Educational and recreational facilities
• A whole lot more
Enough talk ... time for a simulating experience.
In the distance an ox pulls against the farmer’s timber plow, adding another
straight line to an ever-widening rectangular plot of soil. As a time-saving
invention, the plow gave the farmer freedom for other pursuits, but because it was
a shaper of plots, it was the precursor of planning—zoning by brute force
Page 9
.
III
Page 14

THE ULTIMATE CITY SIMULATOR
™
Tutorial 1– The
Basics
The Start of
Something Big
If you haven’t already, take a look at your machine-specific
Addendum, and install SimCity 2000 to your hard drive.
Start SimCity 2000.
See your Addendum for instructions.
Either the first time you play the game or during installation,
you will be asked to enter your name to personalize your copy
of SimCity 2000. Be sure to type your full name—and be polite
because the name that you type in will appear a number of
times and places in the game.
Soon a list of four choices will appear; it’s time for your first
real decision. Here you can load a city that you’ve already
saved, start a brand-new city, edit a new map (we’ll be doing
this in Tutorial 2), or play one of the pre-built scenarios. For
this tutorial, we’ll want to start a new city.
Click on Start New City.
In mere moments you’ll see a dialog box that asks you to make
three decisions: how hard or easy you want your game to be,
what year the game should start, and what your new city
should be named. The defaults are Easy and 1900, which will be
just fine, so all we need to do is type in the name.
Make sure the City Name is highlighted and type in: Tutorial 1 City.
Click on Done.
Note: On computers that allow long file names,
the city name you type here will also be your file
name. On computers that require shorter file
names (systems with DOS or Windows 3.1) ,
you’ll get to type in a file name when you save
the city to disk.
SimCity 2000 — TutorialPage 10
Page 15

Soon the founding of your city will be announced in the
newspaper. The newspaper is your tool for staying in
touch with your adoring SimConstituents.
Click on the headline. Read the story that zooms out. Click again.
Open and read the other stories if you like, by clicking on them.
Click in the Close box in the upper-left corner of the Newspaper to send it to the recycling bin.
You are now looking at the City window, where you will spend
most of your time as you build, run and rule your city.
At the top of the window is the Title bar. It contains the current
city date, the city name, and the amount of money you have in
your city treasury.
Over on the left side of the screen is the City toolbar. It has lots
of buttons—your tools for creating and running your city.
Note: Every January, the Budget window will
pop up. For now, just click on its Done button to
make it go away. We’ll worry about the budget
later. If the Newspaper pops up, click on its
close box.
Title BarCity Name
Zoom Box
City
Toolbar
City Date
City Funds
A Window onYour City
Scroll Bars
Resize Box
Page 11
Page 16
THE ULTIMATE CITY SIMULATOR
™
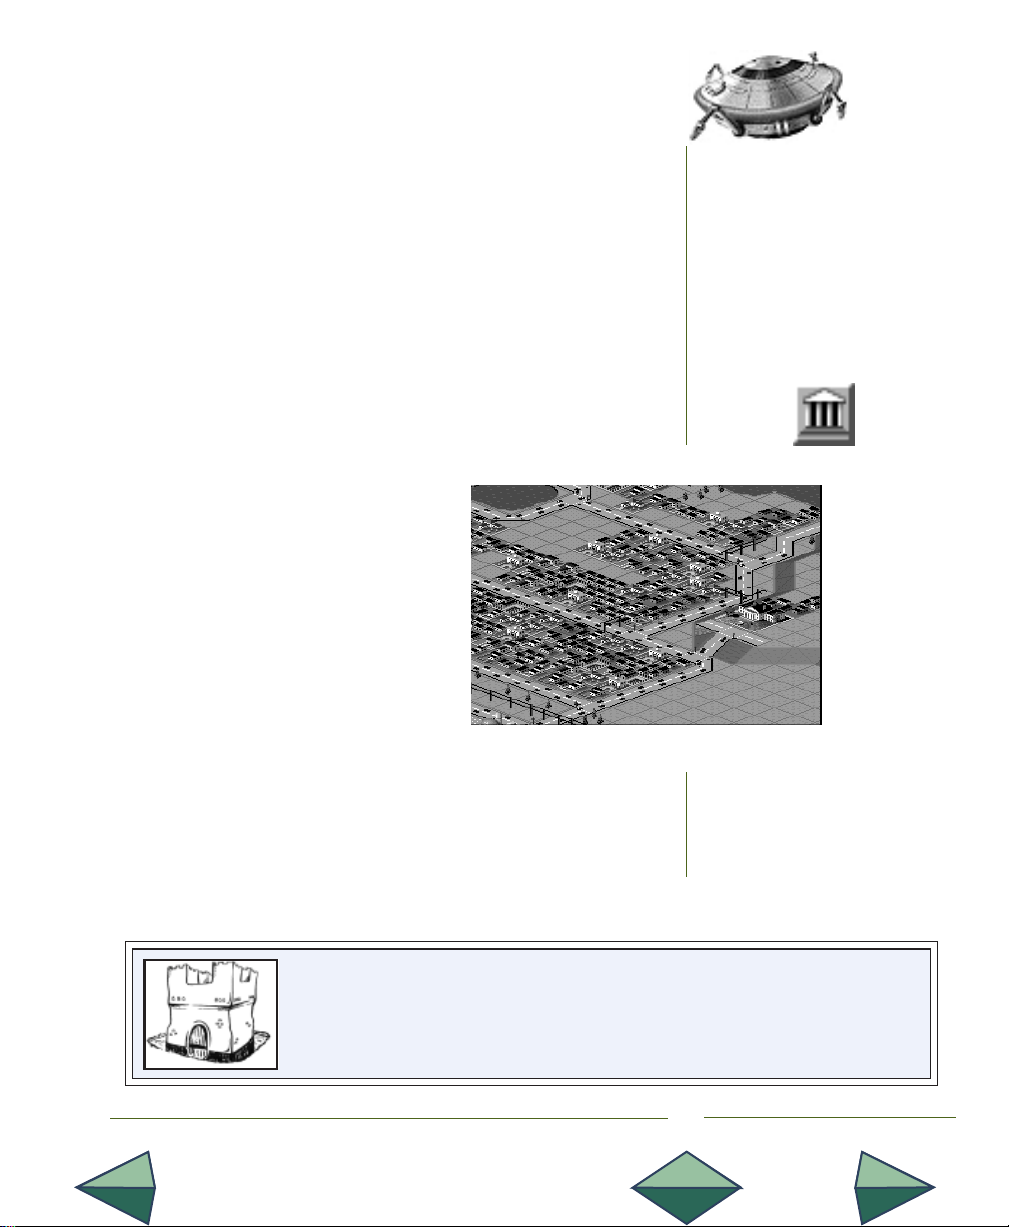
In the window itself you see the site of your city-to-be. A
pristine wilderness: bare land, some forest areas and some
flowing water. And the land isn’t flat—there are hills and
valleys, peaks and canyons. The terrain is divided into tiny
squares. Each of these squares is called a “tile.” Each tile is
approximately one acre, or a 200 x 200 foot square.
We’ll explore your new domain in a moment, but first, we need
to take a detour and go straight to the top ... of your screen.
And on the Menu
Tonight...
At the top of your screen is, of course, the Menu bar. These
menus are well-behaved and work just like the menus in your
other programs. Click and hold on the menu name to open the
menu, slide the cursor to the menu item you want to activate,
then release the mouse button.
Take a moment and open each of the menus, revealing their hidden
glory.
Once you’ve looked them over:
Open the Options menu.
Select Auto-Budget.
This option makes the simulation repeat the same budget until
you tell it otherwise—and stops that pesky Budget window
from popping up and spoiling your view.
Open the Disasters menu.
Select No Disasters.
This setting keeps random disasters from occurring. (Those
disasters really mess up a tutorial.)
For safety against roving thieves and predators, the farmer and herdsman laid their camps
together, and through this simple act of survival and cooperation, attracted like-minded
countrymen into their midst. The camp became a village, with a better standard of living,
and more visitors became residents... and the village continued to grow.
SimCity 2000 — TutorialPage 12
IV
Page 17
And speaking of views, behold the vistas and valleys of your
city-to-be. How’d you like another angle on the place?
Click on the Rotate Counter-Clockwise button in the City toolbar.
Do it again.
Click on the Rotate Clockwise button until you find the angle that
pleases you.
As you can see, you can rotate the city and view it from all
sides. This’ll come in very handy later, when you’re building
your city. What’s that? You want a closer view? No problem.
Click once on the Zoom In button in the City toolbar.
How’s that? Closer?
Click again on the Zoom In button.
That’s as close as you get. (Notice that the Zoom In button is
ghosted and unavailable.) Now that you’re here, how do you get
around? Let’s zoom out for a wider view, then do some travelin’.
Click once on the Zoom Out button.
Click on the Center button.
Click anywhere on the landscape.
Put a New Spin on
Things
The landscape will redraw in the City window, centered on the
spot where you clicked. You can also use the Scroll bars to
move around the landscape, but the Center button gives you
more precise control.
A millennium would pass before any substantial innovations would drastically change the size or character
of cities. But then...
“...within a very recent period, three new factors have been suddenly developed which promise to exert a
powerful influence on the problems of city and country life. These are the trolley, the bicycle, and the telephone.
It is impossible to foresee at present just what their influence is to be on the question of the distribution of
population; but this much is certain, that it adds from five to fifteen miles to the radius of every large town. It is by
such apparently unimportant, trifling, and inconspicuous forces that civilization is swayed and moulded in its
evolutions and no man can foresee them or say whither they lead...” — F.J. Kinsbury, 1895
Page 13
V
Page 18
THE ULTIMATE CITY SIMULATOR
™
Make Yourself
at Home
A nice, flat spot.
Let There Be Zones
Time to pick a spot to found your city. Since each landscape
generated by SimCity 2000 is different, the landscape on your
screen, and therefore the city that you build, won’t look
exactly like the one in this manual—but it should be close.
Kinda. Sorta. Maybe.
Click on the Zoom Out button until you are as far out as you
can get.
Look for a nice, flat spot.
If there is water nearby, or even running through your spot, all
the better, but not necessary. If there is no spot in your city that
you are willing to call home, then open the File menu, and
select New City. You’ll be asked if you want to save the old
one—click No. Then a new landscape will be generated, and
you’ll get to name your city and all that other stuff you did a few
pages ago. You can repeat this until you find a home.
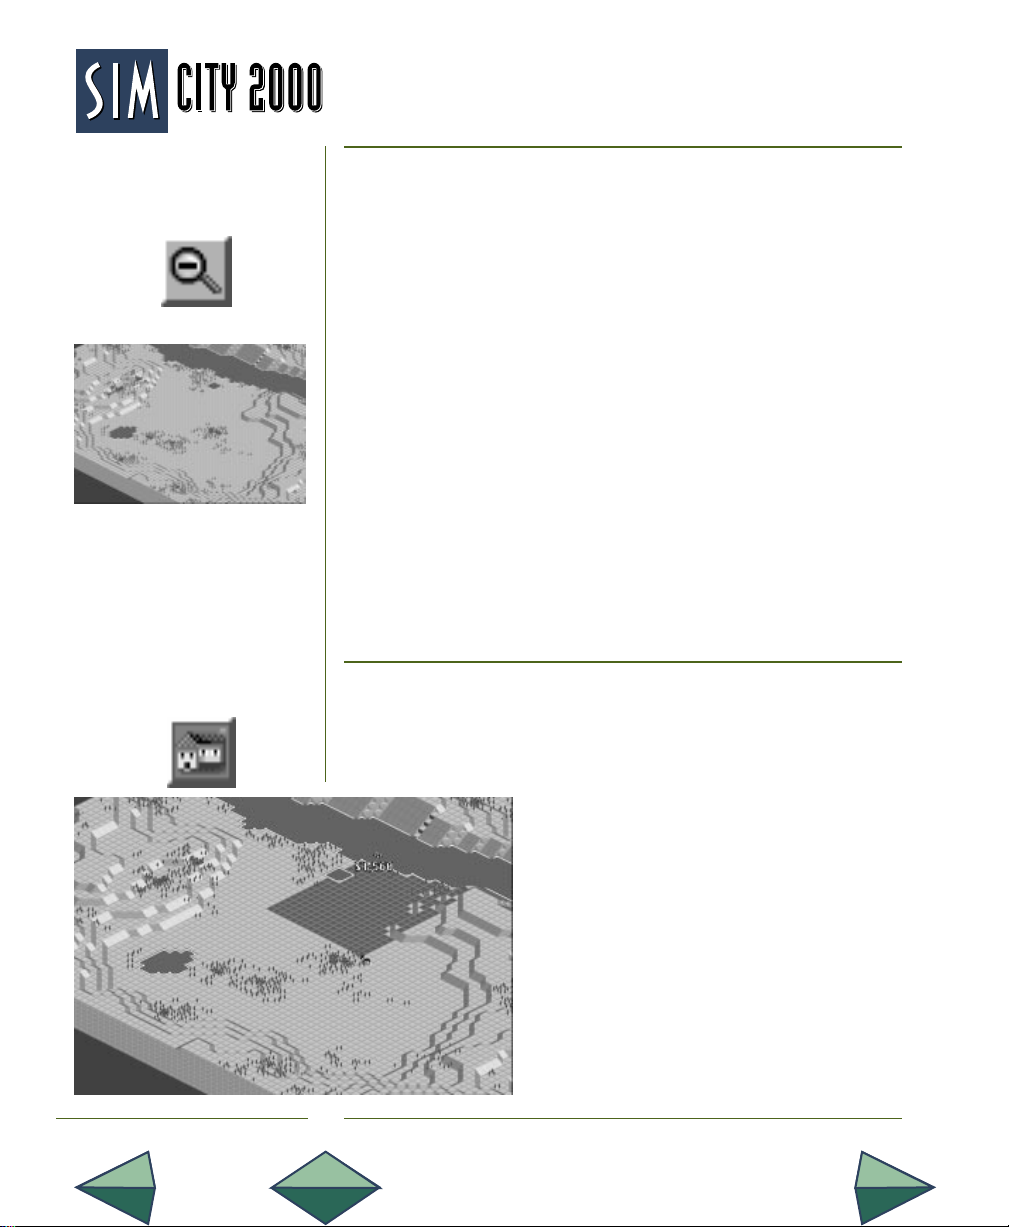
Once you’re satisfied, then it’s time to zone out.
As mentioned in What Makes a (Sim)City above, we’ll need
three kinds of zones in our city: residential, where the Sims
live, commercial, for offices and stores, and industrial, for
factories.
A residental zone.
Survey your chosen territory and pick a
spot to zone residential. If there is water
nearby, include some waterfront in your
zone.
Click on the Residential Zone button.
Click and drag on the landscape to form a
rectangle where you want to make a residential
zone.
You can zone right over hills and trees.
SimCity 2000 — TutorialPage 14
Page 19
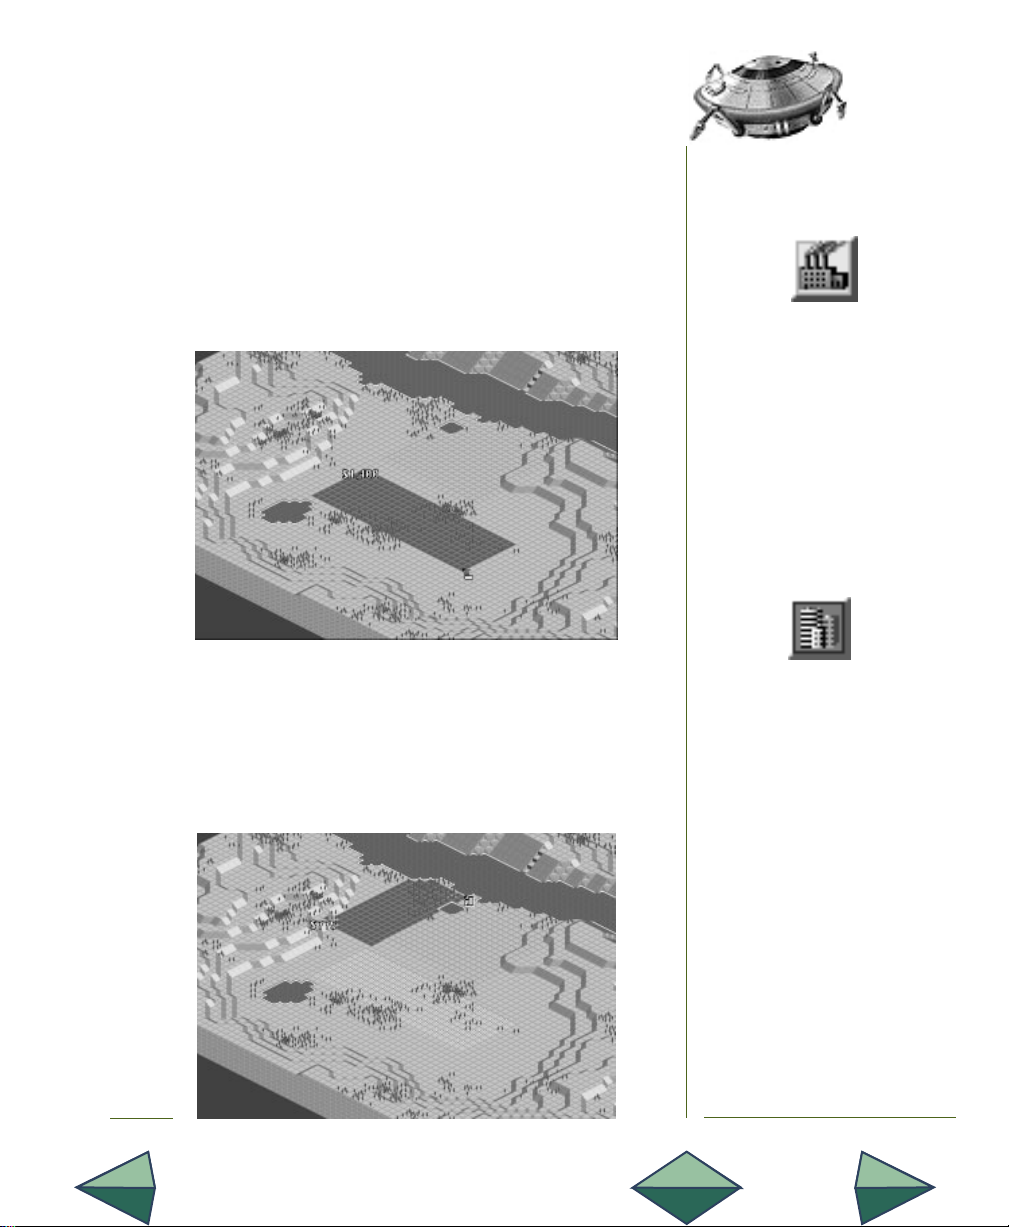
Now find a spot for the industrial zone. It is in your Sims’ best
interest to leave a bit of a buffer zone between residential and
industrial zones.
Click on the Industrial Zone button.
Click and drag on the landscape to form a rectangle where you want
to make an industrial zone.
Now find a spot for a commercial zone. Close to residential is
handy. Some waterfront is nice, but not necessary.
Click on the Commercial Zone button.
Click and drag on the landscape to form a rectangle where you want
to make a commercial zone.
Page 15
Page 20

THE ULTIMATE CITY SIMULATOR
™
Power to the People
The Sims that live in SimCities may have that pioneering spirit,
but they won’t move in until you supply electric power. After
all, they are electronic life-forms.
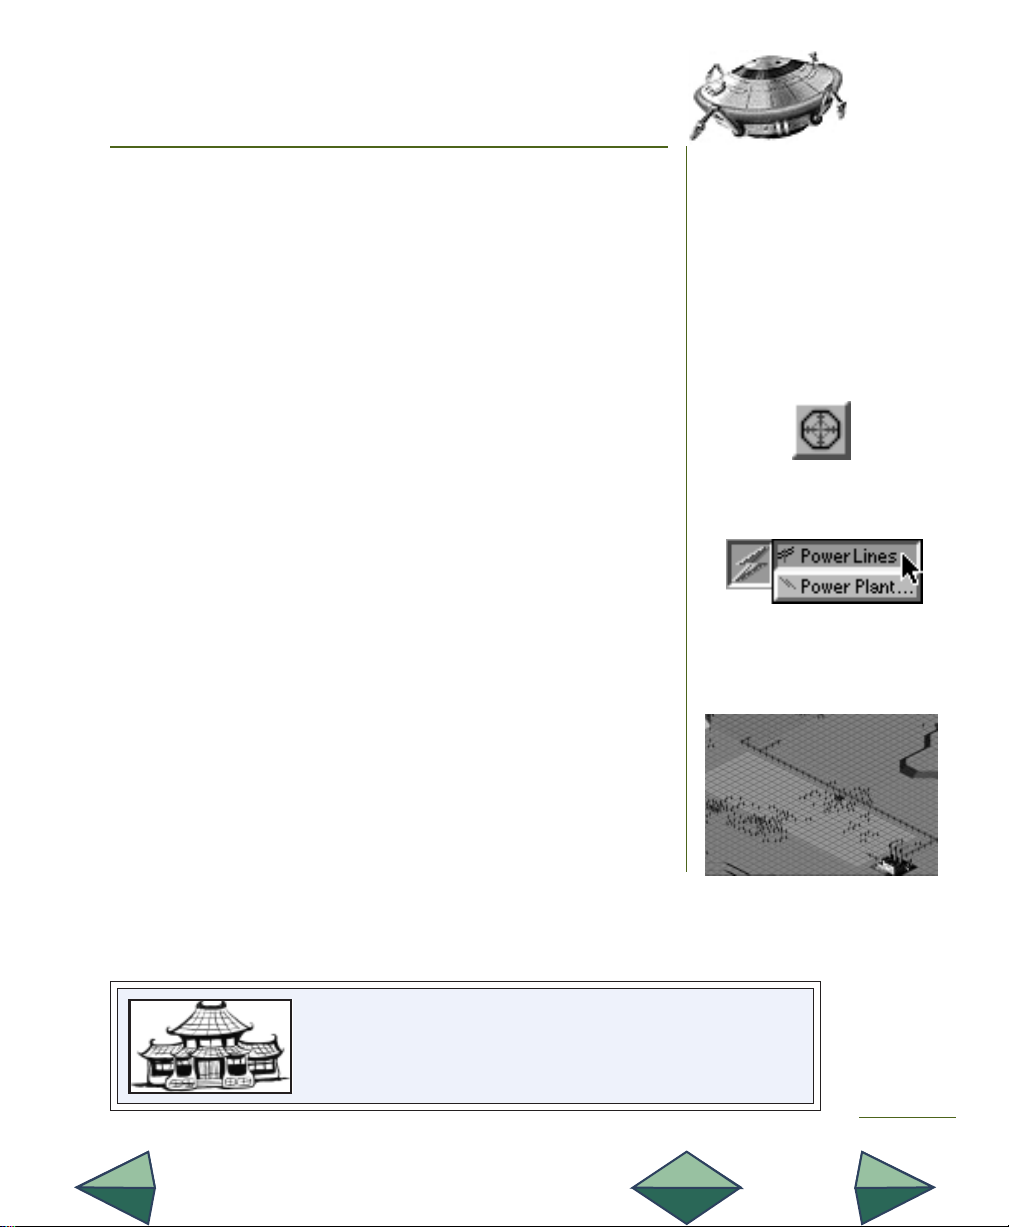
To supply power, you need a power plant of some sort and
power lines to get the power to where you want it. Both of these
things are available from the Power button in the City toolbar.
Click and hold on the Power button in the City toolbar.
Move the cursor to highlight Power Plant... and release the mouse
button.
An assortment of power plants will appear, with pictures of,
prices for and outputs from each plant. There is also an INFO
button for each power plant that brings up even more fascinating facts. Power plants are not available to you until the city
year reaches the time when that technology is available. In
other words, you can’t have nuclear fusion in 1901.
Click on the Coal Power Plant.
The power plant assortment will disappear, and a grey 4 x 4-tile
shadow will follow the cursor. This is the size of the base of the
power plant. Find a place—preferably near your industrial
zone and far from your residential zone—to place the power
plant. It must be placed on flat ground.
Click on the terrain to place your power plant.
SimCity 2000 — TutorialPage 16
Page 21
Now we need to power up the zones. We’ll need power lines to
get the power from the power plant to each zone. Power won’t
travel from zone to zone without power lines, even if they’re
touching. Within zones, the building-to-building power lines are
built by the Sims when they build their buildings. (But that’s a
private sector problem—you only have to power up each zone.)
Placing power lines can be a bit tricky, so it’s best to zoom in
as close as you can get.
Click on the Center button.
Click on your power plant.
Click on the Zoom In button until you are as close as you can get.
Click and hold on the Power button in the City toolbar.
Move the cursor to highlight Power Lines and release the mouse
button.
You’re ready to lay some power lines.
Click or click and drag to place power lines that connect the power
plant to each of your zones.
If you place power lines that aren’t connected to power, they’ll
blink to indicate that they aren’t hooked up yet. If your power lines
flash, then you’ve missed a connection. You may have to rotate
the terrain to get a good look at your power plant from all sides.
I’ve Got a Line on You
Note: Laying power lines in hilly areas can be
tricky. You may have to rotate the landscape
and zoom in for a good close look. Try to stay on
flat land for this tutorial.
Villages, cities, landscapes, regions and places in general derive their
uniqueness from intangible forces. A sensitive planner or architect will
recognize these qualities and incorporate them into the master plan.
VI
Page 17
Page 22

THE ULTIMATE CITY SIMULATOR
™
The Drive to Thrive
Now all we need is a transportation system, and your town
should be ready for some Sims to move in.
Click on the Road button in the City toolbar.
Click and drag through and around your zones to set up a network
of roads.
By the time you get your roads down, some Sims should be
moving into your town.
Power cannot travel through roads without wires, so place
power lines across the roads to make sure each section of
every zone has power.
Click and hold on the Power button and select Power Lines again.
Place power lines across the roads to connect all parts of each zone.
Now sit patiently for a few minutes as your city slowly begins
to grow.
Note: If nobody moves into your city, then it’s
either because the zones aren’t powered up, or
the residential and industrial zones are too far
apart. Sims like to drive their cars, but they
hate to commute very far.
Your Just Desserts
Your city should be growing now. Go ahead and add some
more zones, or play with roads to get in some practice. Fairly
soon a newspaper will announce to the world that your little
town has reached the lofty population of 2000, and as a reward,
you may build yourself a house.
Note: If you don’t get this message after 5 or 7
minutes, then you may not have made your
zones large enough.
SimCity 2000 — TutorialPage 18
Page 23
This is but the first of many rewards that you will reap as mayor
of SimCity. Rewards are based on population, and include your
own house, a city hall, a statue in your honor and ... well, you’ll
find out.
Rewards show up under the Reward button in the City toolbar,
which is ghosted and unavailable most of the time. Once you
reach the population of 2000, then the Reward button will no
longer be ghosted.
Click and hold on the Reward button, slide the cursor to Mayor’s
House and release the mouse button.
Place your house in a prestigious spot,
preferably with a good view.
Connect your house to the rest of the
town with roads and power lines.
Congratulations. You’ve successfully
taken a hunk of barren dirt and built
a small city. But this is no time to rest
on your laurels. For now, save your
city to disk, then we’ll move on.
Open the File menu.
Select Save City.
Depending on your computer, it will either go ahead and save
without asking you any questions, or prompt you for a location
and file name. See your machine-specific Addendum for details
on saving files and file names.
An aware planner is a steward of the earth, whose designs enhance the natural evolution of
a place instead of inhibiting it. If you move to a mountain, then live on the mountain—
don’t try to turn it into a valley. If you move to the desert, live in and with the desert—
don’t pretend it’s something else and plant yards with water-hungry grass.
VI
Page 19
Page 24
THE ULTIMATE CITY SIMULATOR
™
Belly on Up to the
(Tool)Bar
Bulldozer
Landscape
Power
Roads
Rails
Residential Zones
Education
City Services
Signs
Rotate
Counter-
Clockwise
Zoom Out
Maps Window
Population Window
Neighbors Window
Show Buildings
Show
Infrastructure
Underground
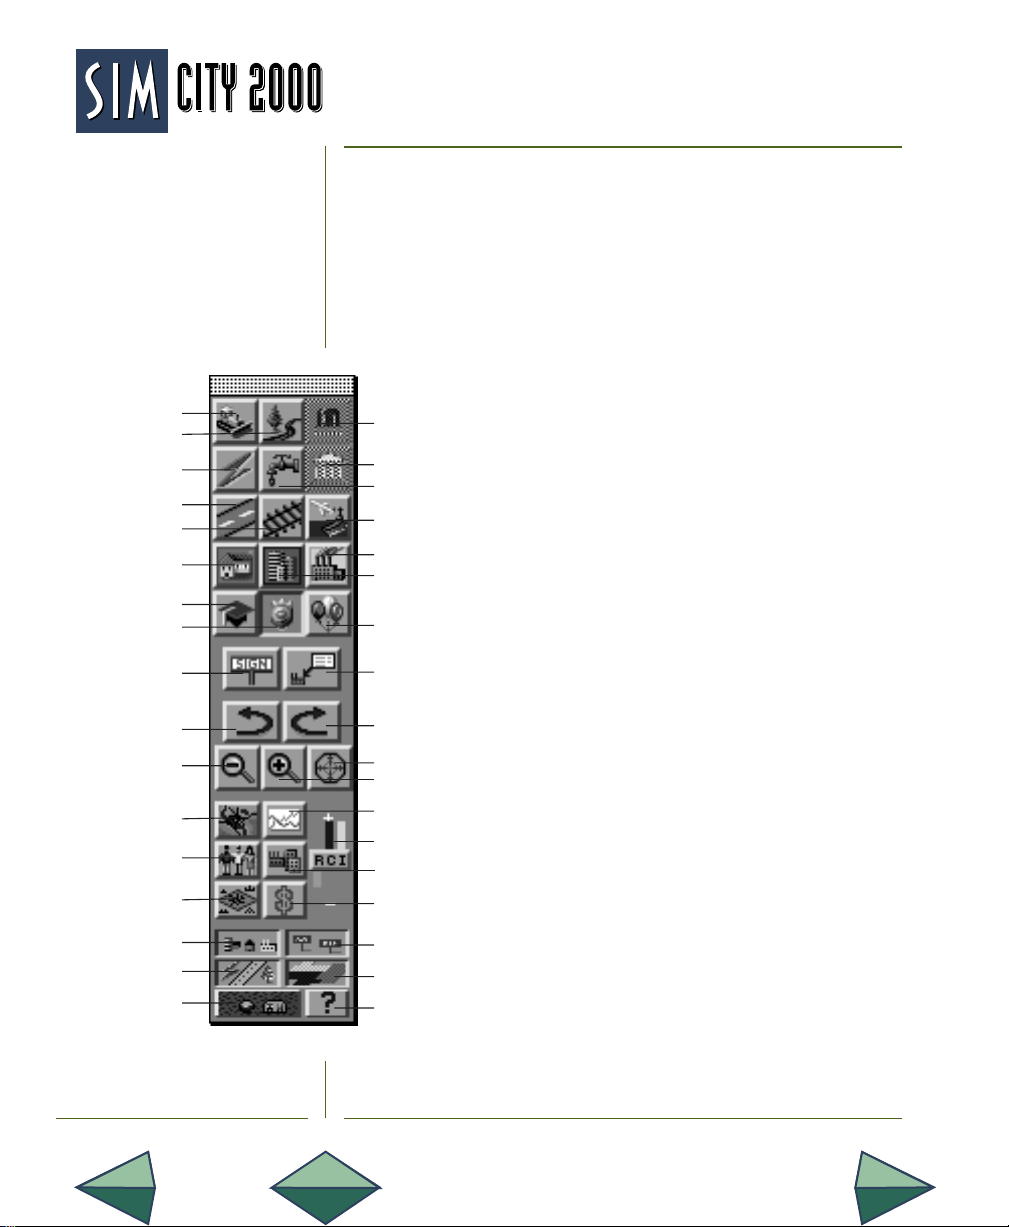
Let’s take a quick look at the City toolbar. If it ever gets in your
way you can move it around the screen by clicking and dragging the bar at the top.
An important—and useful—thing to remember is the built-in
help. Just hold down either Shift key, and click on any button
in the toolbar for a complete explanation of what the button
does.
All of the buttons in the top five rows activate
submenus that give the button more power
Emergency
Rewards
Water
Ports
Industrial Zones
Commercial
Zones
Recreation
Query
Rotate Clockwise
Center
Zoom In
Graphs Window
Demand
Indicator
Industry Window
Budget Window
Show Signs
Show Zones
Help
and flexibility. You’ve already seen that with
the Power button.
Click and hold on all the buttons in the top five
rows, one by one, to see all their submenus.
Two of the buttons will not do anything: the
Reward button and the Emergency button.
The Emergency button, which lets you dispatch police and fire departments to the
scene of an emergency, only works during an
emergency. And as you already know, the
Reward button only lights up as you reach
certain population levels.
Seeing all those submenus should assure you
that there’s a lot more to mastering SimCity
2000 than building a town of 2000 people.
Many of these features will be covered in
Tutorial 3, but there are a few items that will
prove useful to you right away: the bulldozer,
landscaping and building bridges.
SimCity 2000 — TutorialPage 20
Page 25
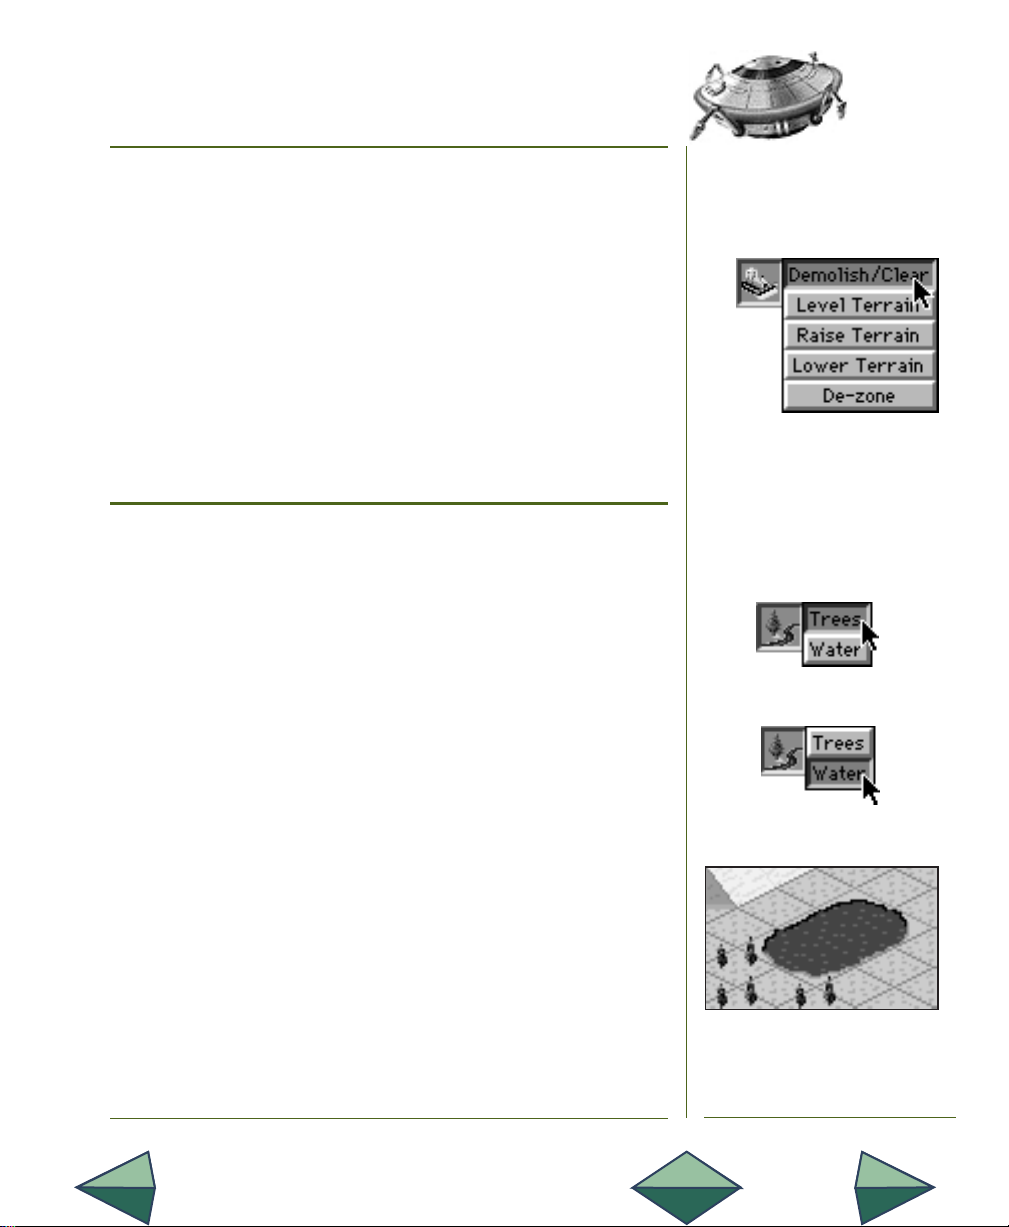
The bulldozer has a number of uses, but for now we’ll concentrate on its Demolish/Clear function.
Click and hold on the Bulldozer button.
Highlight Demolish/Clear.
Now go on a rampage through your city. Bulldoze any extra
sections of road, abandoned factories or anything else you’d
care to eliminate. (Don’t worry, the city has been saved to disk,
you can undo any damage you do by loading it back in.)
The first time you ’doze something, it turns it to rubble (with
quite a jolly explosion). ’Doze it again to clear the rubble.
Doin’ Some Dozin’
The Landscape button lets you add trees or water to the
landscape. Click and hold on the Landscape button.
Highlight Trees and release the mouse button.
Click or click and drag across the land to add trees.
Trees add value to land as well as an aesthetic touch to your
creation. Now for water.
Click and hold on the Landscape button.
Highlight Water and release the mouse button.
Click or click and drag across the land to make a small lake—but
keep it small, adding water is expensive.
Water also adds value to land, and has recreational value, too.
Over the River and Through the Woods
Page 21
Page 26
THE ULTIMATE CITY SIMULATOR
™
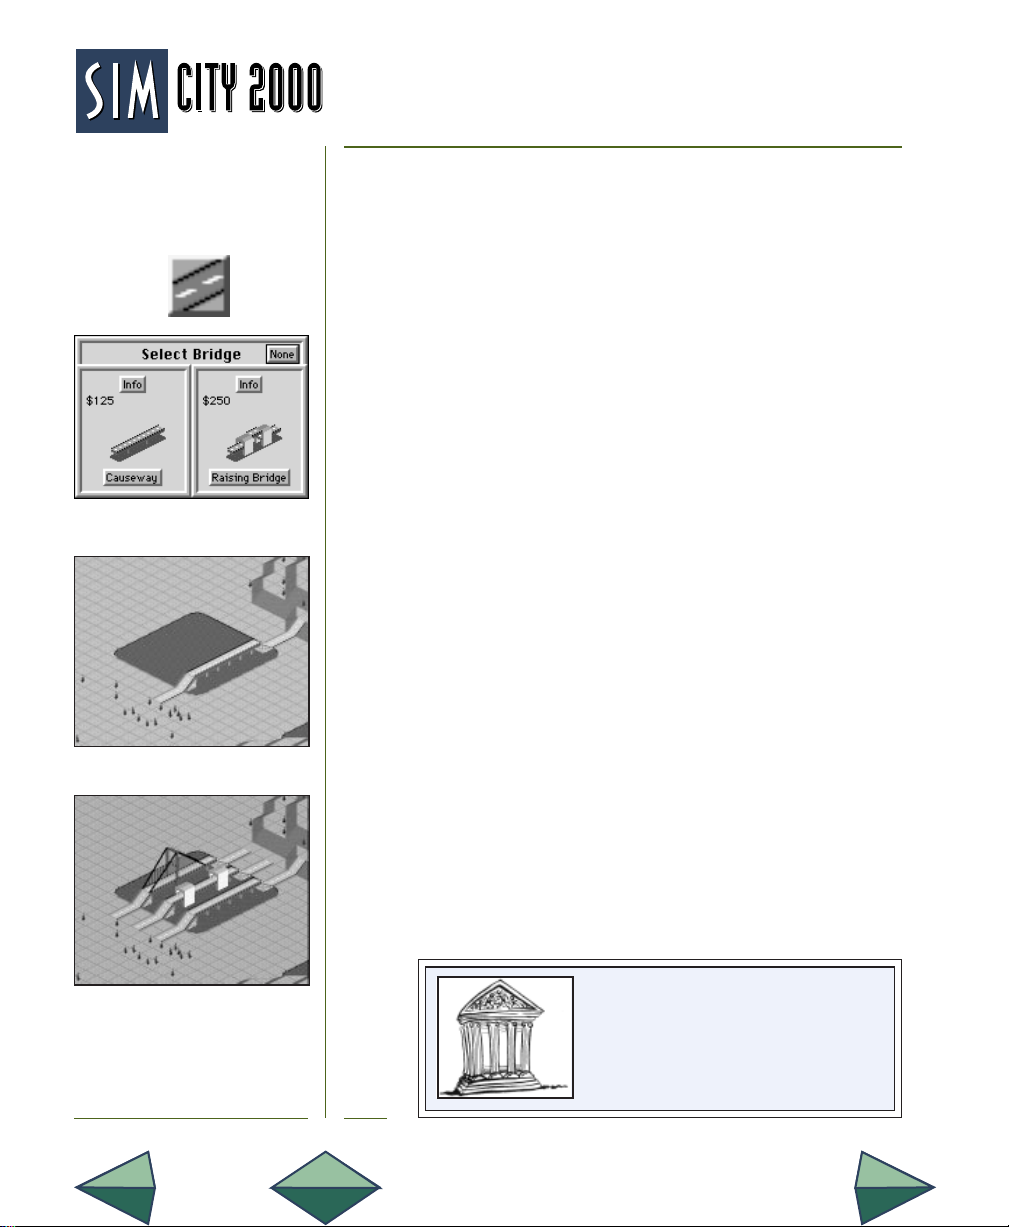
A Little Bridgework
And speaking of water, how do you make your roads cross it?
Locate and center the screen on a lake or river that has flat land
surrounding it.
Click on the Road button.
Click and drag the cursor so it crosses the lake or river.
Just by laying a road over water, the SimConstruction crew
knows that you need a bridge. So they pop up this dialog box
to let you decide what kind of bridge you want and tell you how
much it’ll cost. There is also an Info button you can press for
more information on each type of bridge. Depending on the
year in your city, and the width of the water, you will be shown
a choice of one, two or three different bridges you can build.
For now, go ahead and build a causeway bridge.
Click on the Causeway button to build the bridge.
The causeway is only one of the three types of bridges that you
can have in SimCity 2000. Let’s build another one, or two if they
are all available.
Click and drag across the water next to the causeway.
When given the choice of bridges, build a raising bridge, if it is
available.
Page 22
Now build a suspension bridge if it is available.
Ancient civilizations often identified their
places with a particular deity that
personified its distinctive qualities.
VIII
SimCity 2000 — Tutorial
Page 27
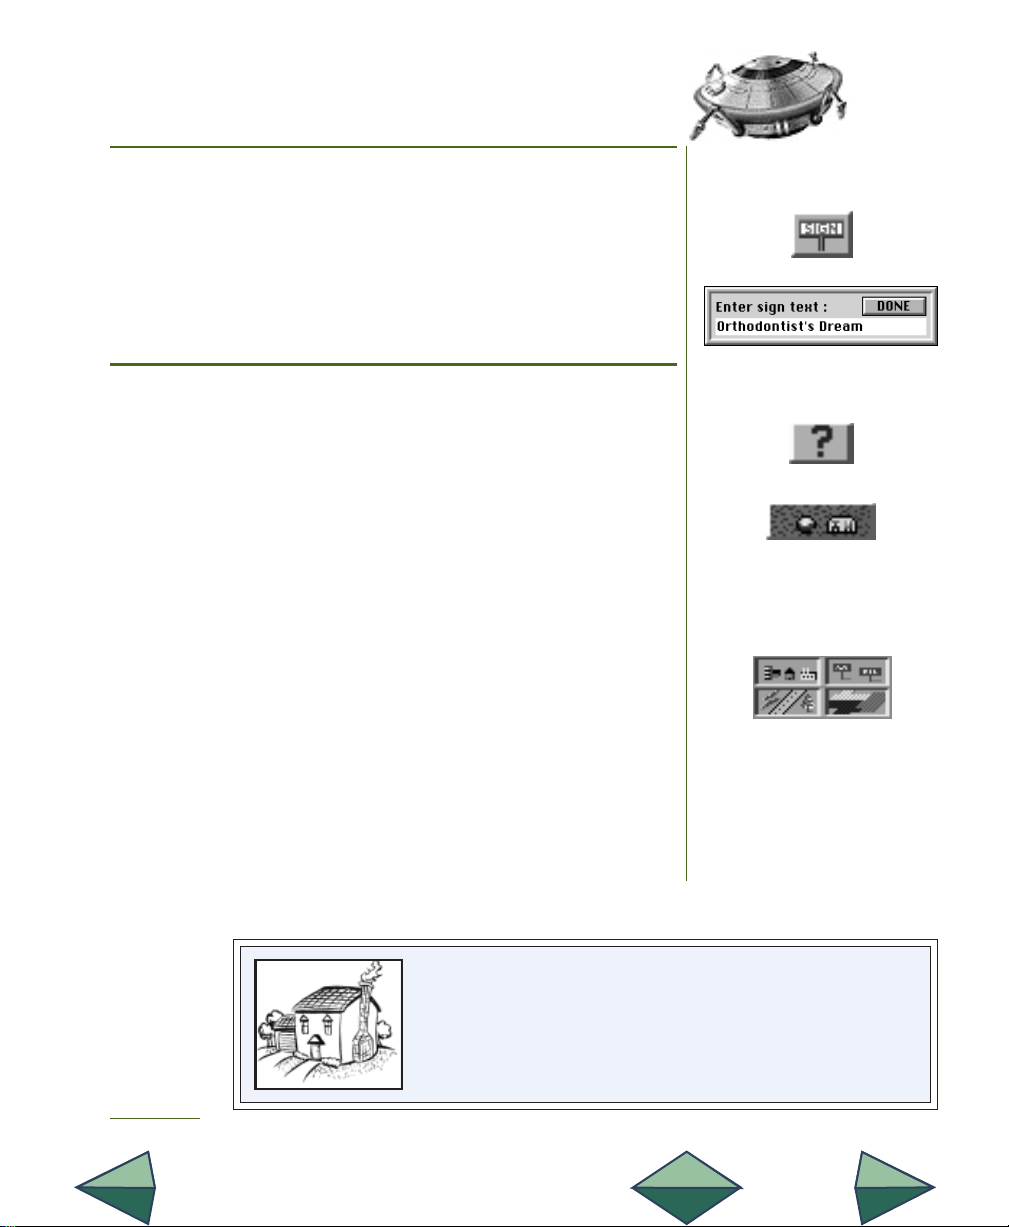
A handy-dandy feature of SimCity 2000 is the ability to add signs
to buildings or spots of interest in your city.
Click on the Sign button.
Click on one of the bridges you just built.
Type “Orthodontist’s Dream” into the dialog box.
Click the Done button.
Give Me a Sign
At the bottom of the City toolbar are six buttons. The one with
the question mark brings up a reminder that you can get help on
each button of the toolbar by holding down the Shift key and
clicking on the button.
To the left of the help button is the Underground button.
Clicking on it reveals SimCity’s soft white underbelly, where you
can build an underground transportation system and run water
to all your city’s buildings. Clicking on it again takes you back up
to the surface.
The four buttons above Help and Underground are Show Buildings, Show Signs, Show Infrastructure and Show Zones. Each of
these buttons toggles on and off different parts of the city. The
parts aren’t destroyed, they just turn invisible until you want to
see them again.
Zoom out, center on the built-up part of your city and play with the
four Show buttons, the Underground button and the Help button for
a while.
Hang in there. We’re almost done with Tutorial 1!
Show and Tell
The sizes of most early cities around the world were originally
determined by the capacity of surrounding farmlands to feed the
population. Many modern urban planners are aware of the
importance of determining how large a population can be sustained
within the boundaries of a municipality. But then again, many aren’t.
IX
Page 23
Page 28
THE ULTIMATE CITY SIMULATOR
™
You’re in Demand
What a Pane
Maps Window
Graphs Window
Industry Window
Budget Window
Neighbors Window
Population Window
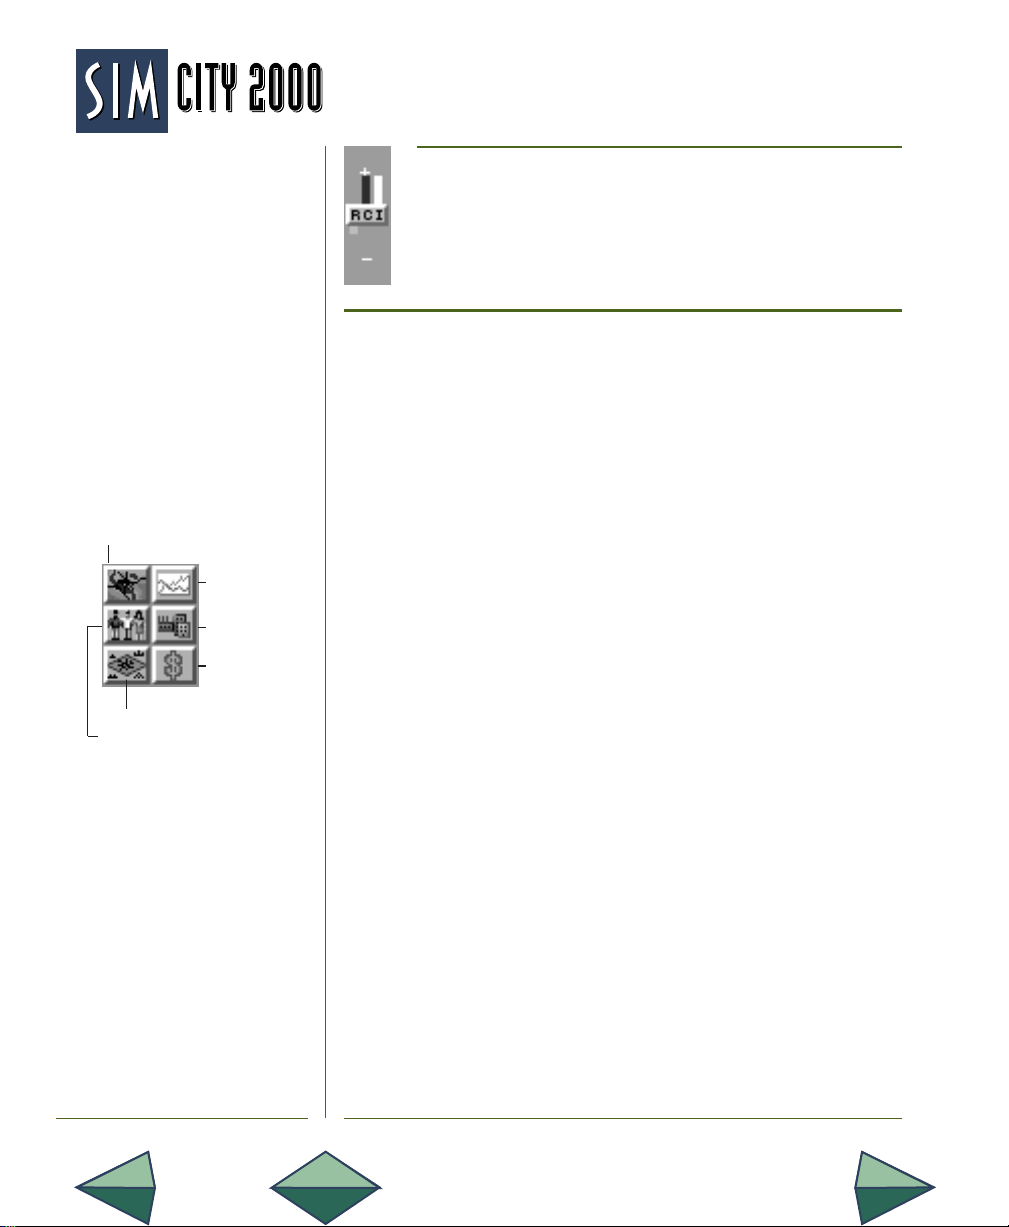
Now take a look at the City toolbar and pick out the
Demand Indicator. This lets you know what type of
zones are in demand in your city. The bars stick up to
show demand and down to show oversupply for Residential, Commercial and Industrial zones.
To the left of the Demand Indicator are six buttons. Each of these
buttons opens small information windows that sit on top of the
City window. The information in these windows helps you understand what’s going on in your city, and helps you keep things
running smoothly. Some of them will be covered in Tutorial 3. All
of them are explained in detail in the Reference section.
Most of these buttons (all but the one with the money sign)
work in two ways:
1.Click and hold on them to see a small pop-up information display that disappears when you let go of the
mouse button.
2.Click and drag them away from the toolbar to open a
window that stays until you tell it to go away.
One at a time, click and hold on each of the six buttons, take a quick
look at what comes up, then release the mouse button. (Note that
the Budget window stays there unless you click the Done button.)
Page 24
One at a time, click and drag each of the six buttons to open all the
windows.
Close all the windows.
Well, that’s it for Tutorial 1. When you’re ready for more, check
out the next two tutorials. And the Reference section is always
there when you need it for details on every window, toolbar
and button. Now go play.
Play.
Have fun.
Have more fun.
SimCity 2000 — Tutorial
Page 29
Welcome back. In this tutorial, we’ll be modifying and
customizing the landforms that you build your cities on.
Tutorial 2–
In the last tutorial we touched on adding trees and water with
the Landscape button, and looked at the submenu under the
Bulldozer button. These are powerful tools for molding, shaping and beautifying the land. But if you make drastic changes,
it can drain your city’s treasury.
All the time you spent in Tutorial 1 was in “City-Building mode.”
As an alternative, SimCity 2000 has a “Terrain-Editing mode”
that allows you to make all the modifications to the land you
want—at no charge—before you actually start your city. When
you’ve created the perfect locale for a new town, you can
switch to City mode and start building. But you can’t switch
back. Sorry, them’s the rules.
Enough gabbing. Put on your work boots and grab your hard
hat—we’ve got mountains to move.
Landscape
Engineering
The attitude of the ancient Greeks toward town design reflects their sense
of the finite, the idea that all things should be a definite size to be
comprehensible and workable. Aristotle described the ideal size of a city,
or “polis,” noting that less than 10,000 people are too few to constitute a
viable political entity and more than 20,000 are too unwieldy.
Page 25
X
Page 30
THE ULTIMATE CITY SIMULATOR
™
Make River
Generate New
Landscape
Raise Terrain
In the Mode
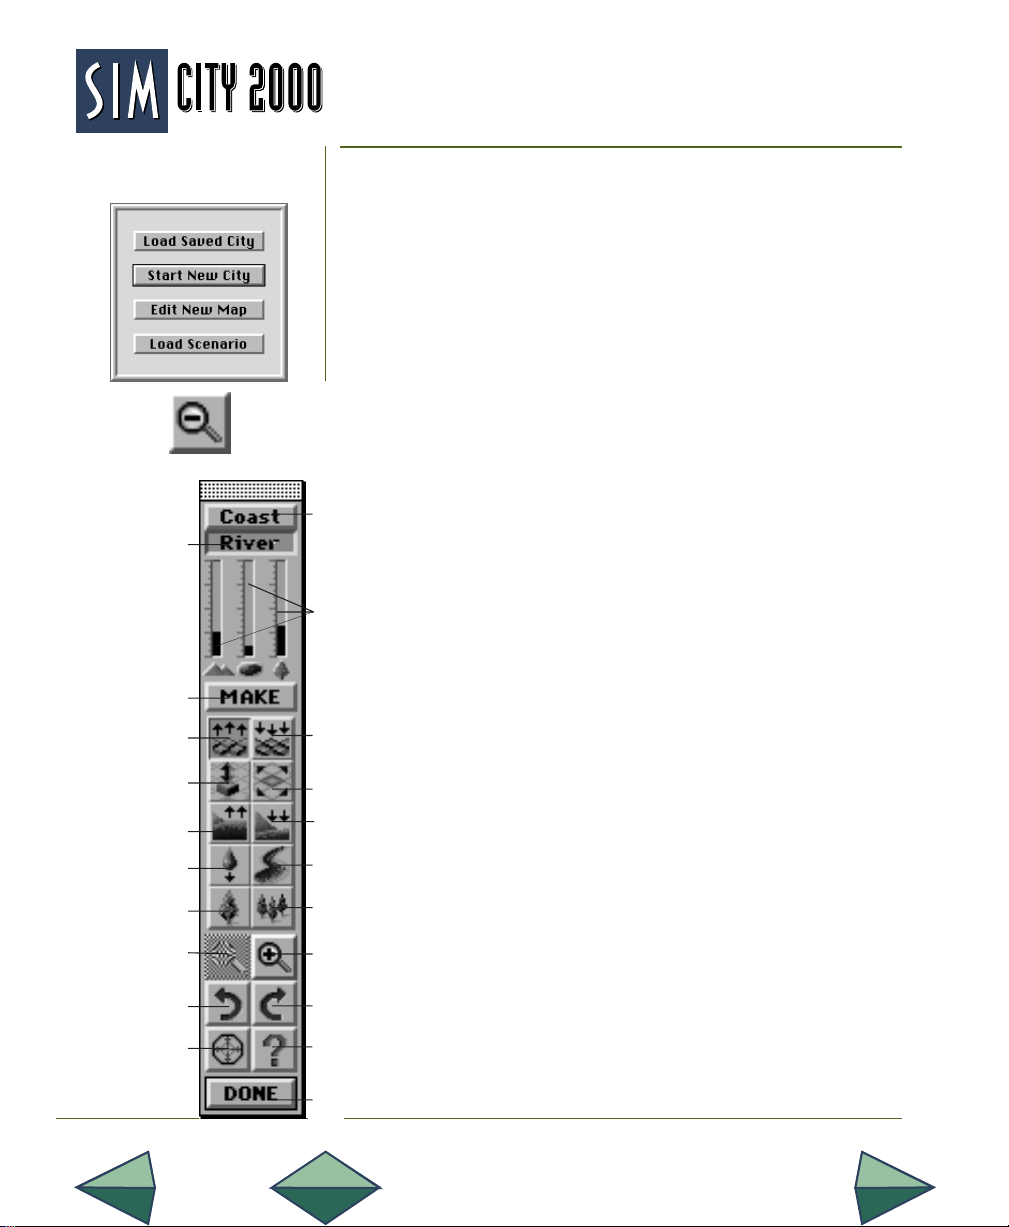
First, we’ll get into Terrain-Editing mode.
If SimCity 2000 isn’t running now, start it up. You’ll soon see this
dialog box:
Click Edit New Map.
If SimCity 2000 is already running, and you’ve been playing for
a while, save whatever you’re working on (if you wish) and:
Click on the Zoom Out button until you are all the way
out.
Open the File menu.
Select Edit New Map.
Make
Coast
This is the same old City window as in Tutorial 1, but
with a big difference—this time we’re in Terrain
mode, and the City toolbar has been replaced by the
Sliders
Terrain toolbar.
Near the bottom of the toolbar are six buttons that
you are already familiar with. The Zoom In, Zoom Out,
Rotate, Center and Help buttons work here exactly as
Lower Terrain
they do in the City toolbar.
Stretch
Terrain
Raise Sea
Level
Place Water
Place Tree
Zoom Out
Rotate
Counter-
Clockwise
Center
Page 26
Level
Terrain
Lower Sea
Level
Place
Stream
Place
Forest
Zoom In
Rotate
Clockwise
Help
Leave Terrain Mode and Go
to City Mode
And, of course, if you ever need a reminder of what a
button does, hold down either Shift key and click on
the button.
SimCity 2000 — Tutorial
Page 31

The top section of the Terrain toolbar gives you a good head
start on reaching that perfect landform by letting you select
some general characteristics that you want, then generating
the land to your specifications. Once generated, you can
customize it to your heart’s content.
The Coast button lets you choose to (or not to) have an ocean
coastline along one side of your city.
The River button lets you choose whether or not a river runs
through it.
The three slider bars let you set how much of the land you want
to be covered by mountains, water and trees. To set the slider
bars, you can either click and drag them or just click at your
desired setting. The higher the bar, the more mountain, water
and tree coverage.
When you’ve finished with the Coast and River buttons and the
sliders, clicking on the Make button generates the new landform.
To test it out, try generating landforms with each of these
settings:
My Generation
Set the buttons and sliders to match example one, to the right.
Click on the Make button.
Look over the landscape.
Repeat for the other two examples.
With the two buttons and three sliders you can create an
almost unlimited number of landforms. Play around with generating landforms for a while if you wish, then generate the
landform from example 3.
1
Page 27
2
3
Page 32

THE ULTIMATE CITY SIMULATOR
™
Did the Earth Move
for You, too?
You should be looking at something approximately like this:
Note: As you go through the rest of this tutorial,
feel free to zoom in for a closer look and rotate
to get a different angle on your creation. You
already know how to do it, so I won’t bore you
with the details.
Look over the terrain and pick a nice, big, flat, boring spot.
We’ll use the Raise Terrain tool to give it a lift.
Click on the Raise Terrain button.
Click and drag on a flat spot of land to build a huge mountain.
Making Molehills
out of Mountains
Page 28
Well, maybe that mountain is a bit too high for this flat, prairielike wilderness. Let’s bring it down with the Lower Terrain tool.
Click on the Lower Terrain button.
Trim the mountain down to size
—but not too small.
SimCity 2000 — Tutorial
Page 33

Sometimes you need to flatten out the top of a mountain and
form terraces to make some usable, level space. That’s where
the Level Terrain tool comes in.
Note: If you don’t have enough of your mountain left after lowering it, use the Raise Terrain
tool to build it back up again.
Click on the Level Terrain button.
Click and hold somewhere on your mountain near—but not at—the
top.
Drag the cursor across the top of the mountain to chop it off.
You probably noticed that the Level Terrain tool raises land to
your chosen level as well as lowers it. Now make some terraces
on your mountain.
On the Level
When you do a lot of terrain modifications, you will sometimes
see grey triangular areas. These are actually cement supports to
keep the land from shifting or caving in. SimConstruction engineers are trained professionals who know how to do their jobs.
Even in today’s world, we seek relationships to neighborhoods of
less than 20,000 people, beyond which we lose our ability to relate
to the rest of the population. We need to be able to identify with
those who live near us, or else we feel “lost.”
XI
Page 29
Page 34

THE ULTIMATE CITY SIMULATOR
™
A Bit of a Stretch
The Stretch Terrain tool lets you grab a section of land and
stretch it up into a mountain or pull it down to a mesa or canyon.
Locate a flat, empty section of land.
Click on the Stretch Terrain tool.
Click and hold on the land, drag it upwards to create a pyramid-like
mountain, and release the mouse button.
Click on the top of the mountain and drag it down to flatten it into
a mesa.
Click and hold on the side of the mountain and drag the cursor
down to carve out a canyon.
Large metropolises tend to separate and concentrate elements of
business necessities and cultural amenities, eliminating diversity
within neighborhoods. Smaller cities retain a greater potential
for mixed experiences, which invigorates nature’s most
adaptable creature: man.
SimCity 2000 — TutorialPage 30
XII
Page 35

Enough of this dealing with dirt—let’s get wet. There are a few
water tools in the Terrain toolbar. One works just like the
Water setting on the Landscape button in the City toolbar. The
other is a little more powerful—and little more unpredictable.
It lets you place flowing streams.
Find or build a small hill somewhere in the terrain.
Click on the Water button.
Click and drag on the flat terrain at the foot of the hill.
Click on the Place Stream button.
Click at the top of the hill to send a stream running down into the lake.
Click a few more times in the same area to produce a cascading
waterfall.
There are also buttons that let you raise and lower sea level.
Water You Thinkin’ About?
Click on the Zoom Out button until you are all the way out.
Click once on the Raise Sea Level button.
Click twice on the Lower Sea Level button.
Click again on the Raise Sea Level button.
These buttons let you turn mountains into a chain of islands,
turn wet grassland into a desert, or create swampland if you
know any rich suckers.
Page 31
Page 36

THE ULTIMATE CITY SIMULATOR
™
Out In the Woods
City a la Mode
SimCity 2000 lets you add trees and forests to your landscape,
with (of all things) the Tree and Forest buttons.
Find a spot in the terrain that is sadly lacking trees.
Click on the Tree button.
Click and drag across the barren plain to plant some trees.
Click on the Forest button.
Click and drag across the plain to plant a lot of trees.
You are now the master of land, sea and forest, able to shape
them to suit your whims. If you wish, take some time and play
around with the landscape. When you’re ready to get a city
going, then head for the Done button at the bottom of the
Terrain toolbar. It sends you into City mode, changes the
toolbar, and starts time in the city.
Click Done and start building a city.
You’ll find the Raise Terrain, Lower Terrain and Level Terrain
functions in the submenu under the Bulldozer button. But
remember: in City mode, you’ll be charged for each tile you
raise, lower or level.
If and when you feel like it, Tutorial 3 is just around the corner,
filled with useful advanced city-building techniques.
SimCity 2000 — TutorialPage 32
Page 37

If you’re here then you must already be an experienced mayor
with complete mastery of all the tools and techniques in
Tutorials 1 and 2. Either that or you’re so excited about the
advanced features of SimCity 2000 that you just couldn’t wait.
Tutorial 3–
Advanced
In any event, in this tutorial, you will:
• Load in your old city from Tutorial 1.
• Take a look around with the Query tool.
• Add police and fire protection.
• Take a quick look at all the smaller windows and get an
idea of what they do.
• Play with the Budget window and city finance.
• Make a couple political deals in the Council window.
• Deal with an emergency.
If SimCity 2000 isn’t running now, start it up. You’ll soon see
this dialog box:
Click Load Saved City.
Load your city from the end of Tutorial 1.
If SimCity 2000 is already running, and you’ve been playing for
a while, save whatever you’re working on (if you wish) and:
Open the File menu.
Select Load City.
Features
A New Beginning
Load your city from the end of Tutorial 1.
Note: Loading cities is a little different for each
type of computer. See your machine-specific
Addendum for details.
Page 33
Page 38

THE ULTIMATE CITY SIMULATOR
™
Within seconds, you will be looking over the familiar landscape
of Tutorial 1 City. Before moving on, let’s do a couple things:
turn on Auto-Budget to keep that pesky Budget window away
until we’re ready for it, and add some police and fire protection
to your town.
Open the Options menu.
Select Auto-Budget (unless it’s already on).
Click and hold on the City Services button in the City toolbar.
Select Police from the submenu.
Place the police station somewhere in your city.
Click and hold on the City Services button again.
Select Fire Station from the submenu.
Place a fire station somewhere in your city, possibly
near the police station.
Make sure the stations have power and access to roads.
The Query Theory
Inquiring mayors want and need to know what’s going on in
their towns. And whether you need to research important city
issues or are just curious, the Query tool gives you the lowdown on your city.
Click on the Query button in the City toolbar.
Click on a house in your residential zone.
An information box has popped up with all the
vital stats the simulator has about the spot
where you clicked.
SimCity 2000 — TutorialPage 34
Page 39
Click on the information box to close it.
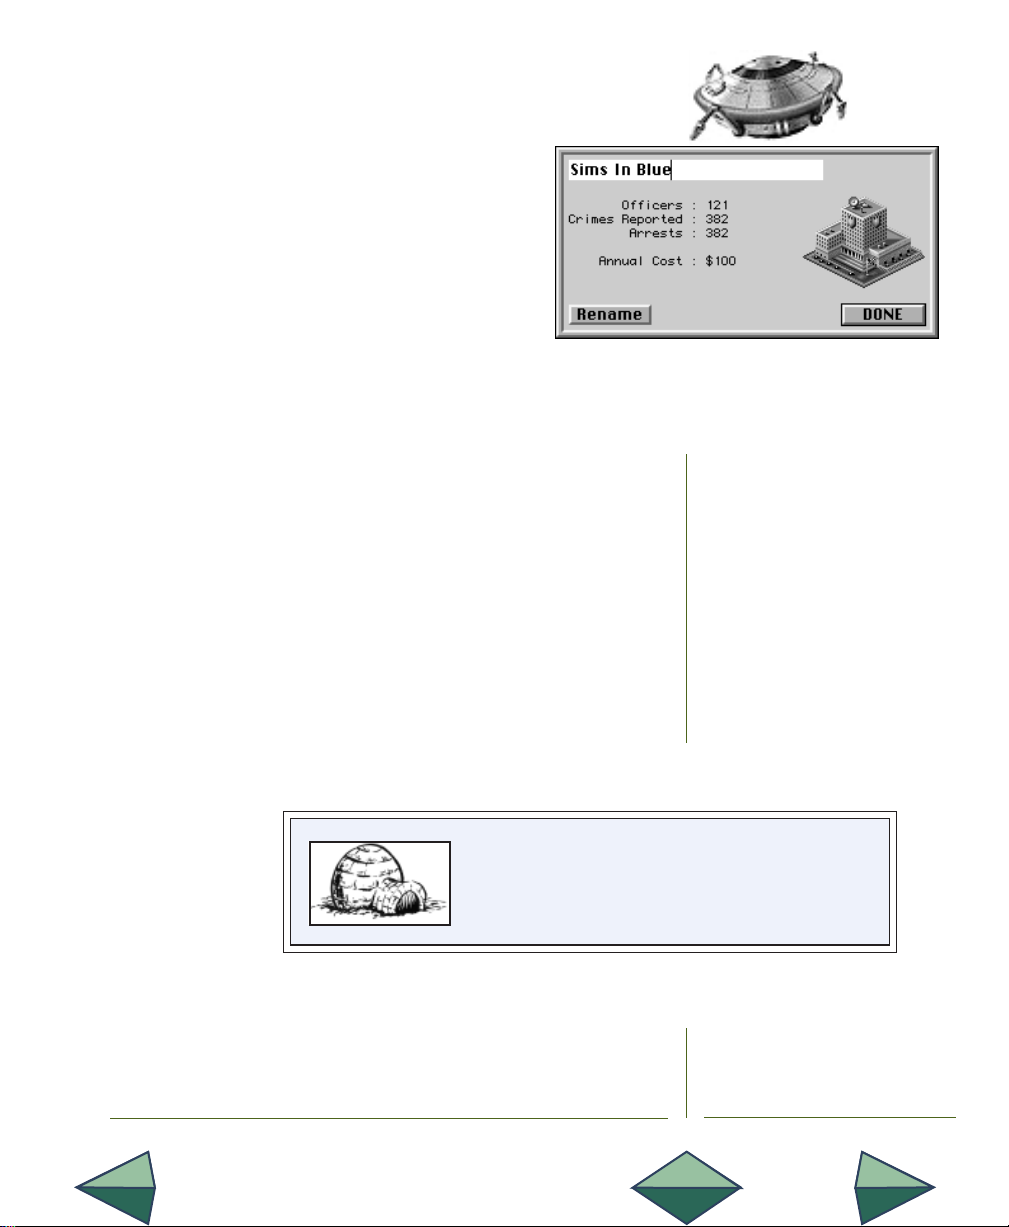
Click on your police station.
Once again an information box has opened, but
this time with different information—information that is important in judging the effectiveness of a police station. Whenever you query a
place in your city, you will see the most useful
information for that place. Pay attention to the numbers of
officers, crimes and arrests in this box, and scribble them
down on a piece of paper if you have one handy. Later on we’ll
see what cutting the police budget does to these numbers.
Notice the Rename button. SimCity 2000 allows you to personalize your city by renaming many of the buildings and locations.
Click on the Rename button.
Type in your own name for your police department, something like,
“Tutorial Enforcement Unit,” or “Sims In Blue.”
Click the Done button.
When business, culture and leisure overlap, creative
energies flow though our streets, our shops, our homes.
Under diversified conditions, society becomes richer in
experiences and civilizations continue to unfold.
Page 35
XIII
Page 40

THE ULTIMATE CITY SIMULATOR
™
A WhirlWind(ow)
Tour
Other than a brief glimpse at the other windows in Tutorial 1,
we’ve spent almost the whole time in the City window. The City
window is the mainstay of SimCity 2000. It stays active even
when other windows are open on top of it. Clicking on the City
window won’t bring it to the front, covering any of the other,
smaller windows on the screen. When you place the other
windows, try not to cover the City window’s Scroll bars.
After the City window, the Map window is the most-used and
most versatile.
Click and drag the Map window button in the City toolbar away
from the toolbar to open the Map window.
Click in the Grow box in the upper right corner to enlarge the Map
window.
Welcome to the Map window. It shows a
number of different map displays that give
you location-based information about your
city. You can open it either through the
Windows menu or with the Map window
button in the City toolbar.
Somewhere on the map is a white rectangle.
The rectangle shows the area of the map that
is currently visible in the City window. When
you click on the map, you move the rectangle, and the City window redraws to show
the new area in the rectangle.
Click on the map a few times to move the rectangle, and see how the City window changes.
Click on the map, over the middle of your city.
The buttons along the left side of the Map window let you
choose different map displays. Some of the buttons have
submenus for even more displays. Let’s take a quick look at all
the map displays.
SimCity 2000 — TutorialPage 36
Page 41

Note: In map displays that show density or
coverage, the darker the greyscale, the higher the
density.
Click and hold on the top Map window button.
Select the first item in the submenu and release the mouse
button.Take a look at the map.
Repeat for every item of every submenu of every Map window
button—except the very last button. (Don’t worry, it won’t take
very long; some of the buttons don’t have submenus.)
The last Map window button doesn’t change the view in the
Map window—it turns the City window into a super-duperextra-large map. (This is the City window’s Map mode.) Clicking the button again returns the City window to its normal
state. Sometimes you need a huge, detailed map to see all the
finer details of your city.
Click on the last Map window button.
Take a look, then click on it again.
Click in the Close box to close the Map window.
The Graphs window shows time-based information about the
people, places and problems in your city. Use it for identifying
and tracking trends and changes in things like pollution, land
value, and levels of health and education. You can open it from
the Windows menu or by clicking and dragging the
Graphs window button in the City toolbar.
Click and drag the Graphs window button on the City
toolbar to open the Graphs window.
Spend 2 minutes and 37 seconds turning on and off each
of the graphs, and changing the scale from 1 to 10 to 100
years.
Close the Graphs window.
Page 37
Page 42

THE ULTIMATE CITY SIMULATOR
™
The Population window gives you information about the people
in your city, and their levels of health and education. You can
open the Population window in the usual ways.
Click and drag the Population window button on the City toolbar.
Click on each of the three buttons at the bottom of the window and
look at each of the three displays.
Close the Population window.
The Industries window shows the
ratio of the different types of industries in your city. It also shows
which industries’ products are in
demand nationally, and allows
you to set different tax rates for
each industry to encourage, discourage or drain dry those industries you like, don’t like or just
want to exploit. You can open the
Industries window by... you know
the routine by now.
Click and drag the Industries window button in the City toolbar.
Look over the current (Population) display.
Click on the Tax Rates button.
SimCity 2000 — TutorialPage 38
Page 43

Pick an industry you want to encourage, and lower its tax rate by
clicking and dragging its bar toward the left.
Pick an industry you want to discourage, and raise its tax rate by
clicking and dragging its bar toward the right.
Click on the Demand button and look over the Demand display.
Close the Industries window.
The Neighbors window shows your city surrounded by its
neighboring cities, and gives the populations for each city, and
for SimNation as a whole. I bet you can figure out how the
Neighbors window is opened.
Open the Windows menu and select Neighbors (unless you really
really want to use the Neighbors window button).
Take a look and close the window.
The Budget window is where you control all the finances of
your city. The Budget window is so important that it deserves
its own clever headline in this tutorial, so here goes:
Click on the Budget window button in the City toolbar.
Along the left side of the Budget window is a list of all the
revenues and expenses that you face as a mayor in SimCity
2000. For each revenue or expense, there is:
• Year-to-Date Column—a number (in blue)
that shows the actual cash amount you
have made or spent so far this year.
• Estimated Column—a number (in red) that
shows what the end-of-year expense or revenue will be at the current Budget window
settings.
• Books—a button to push to see a detailed
monthly report on the revenue or expense.
• Advisors—a button to push when you want
a little advice.
The Buck Starts Here
Page 39
Page 44

THE ULTIMATE CITY SIMULATOR
™
• Percentages—most (but not all) of the revenues and
expenses have a percentage setting so you can set the
amounts of funding or taxation.
Help is available by holding down either Shift key and clicking
on any word, number, column or button in the Budget window.
The very first revenue is your main source of income: property
taxes. To the right of the words “Property Taxes” is the current
tax rate given as a percentage (currently 7%). You can set the
property tax rate to anything between 0 and 20% by clicking on
the up and down arrows to the right of the percentage number.
Give your Sims a break and lower their taxes.
Click twice on the down-arrow to the right of Property Taxes and
lower the rate to 5%.
If your computer is equipped to play sound effects, you’ll hear
the cheers of the populace.
Click once on the up-arrow to the right of Property Taxes and raise
the rate to 6%.
Once again, if your computer can play sound effects, you’ll
hear the reaction of the masses. How soon they forget.
Skip down to Bond Payment. This is the amount of interest you
pay on bond issues. Part of financing your city is issuing bonds,
which is basically borrowing money from your citizens. The
interest rate the city pays varies according to the simulated
market and the difficulty level of the game. Everything you
need to deal with bonds is in the Bond Payment books.
As technology and waves of immigration advanced, laws became
necessary to minimize fire damage in congested areas and to assure a
supply of drinking water as well as to carry away sewage. With our ability
to build higher, faster and “better,” we also realized that neighbors
could affect each other’s property values and aesthetics.
XIV
SimCity 2000 — TutorialPage 40
Page 45

Click on the Book button for Bond Payment.
The Bond Payment books give you a monthby-month breakdown of the number of outstanding bonds, their interest rate, the monetary amount of interest you pay and a total
of interest paid. Blue numbers show actual
year-to-date amounts, red numbers are projections for the rest of the year.
At the bottom of the window are buttons for
dealing with bond issues.
Click on the Show Bonds button.
You are shown a pop-up box with your city’s
credit rating, and general status on bonds
and interest rates.
Click on the pop-up box to close it.
Click on the Issue Bond button.
You are given the current bond interest rate and asked if you
want to issue the bond. Go ahead.
Click Yes to issue the bond.
Click on the Show Bonds button to see that it has been issued.
Click to close the Show Bonds box.
Later, when you have the money, you can come back here and
repay the bond, but for now, let’s move on.
Click the Done button to close the Bond Payment books and return
to the Budget window.
Look at the line just below Bond Payment. This is the financial
information for your Police Departments. To the right of the
words “Police Department” is a percentage number set to 100,
and to the right of that are up- and down-arrows that let you
change the level of funding.
Page 41
Page 46

THE ULTIMATE CITY SIMULATOR
™
Click on the down-arrow to change the Police Department funding
to 50%.
Click on the Police Department Book button.
Look it over, then click to close the Police books.
We’ll check out the effect of lowering the police
budget a little later. There are no other buttons or
adjustments in the Police books.
Let’s look at another set of books.
Click on the Transit Authority Book button.
Not only do the Transit Authority books
give you a monthly breakdown of transit
expenses, but they let you individually set
the funding levels for different transportation systems. Since the bridges we built in
Tutorial 1 aren’t hooked up to anything,
there’s no point in funding them. And just
to see what happens, we’ll remove funding from a couple other systems.
Click on the down-arrow for Bridge funding
until it goes to 0%.
Set funding levels for Subway and Tunnel to 0%.
Click Done to close the Transit Authority books and return to the
Budget window.
Notice that the percentage setting next to Transit
Authority changed. When you change settings in the
books, they are reflected here.
One more set of books to inspect: City Ordinance (just under
Property Taxes).
SimCity 2000 — TutorialPage 42
Page 47

Click on the City Ordinance Book button.
These are various programs, bills and ordinances that you can enact as mayor. Each
program contributes in some way to the quality of life in your city, but each also has a
drawback, usually its cost. Politics is a rough
business, filled with hard decisions.
That’s it for the Budget window—except for
one detail. Let’s clear out all this budget stuff
then see how our funding change affected the
police department.
Click Done to close the Community Program dialog.
Click Done to close the Budget window.
Click on the Query button in the City toolbar.
Click on the Police Department.
When you compare it with your last
query, you should have about half as
many officers. Depending on the size of
your city, crime may be running rampant, or it may be under control. In a very
small town, you don’t necessarily need
full police or fire department funding.
And speaking of fire departments...
From time to time, or when you feel like it, you will have the
solemn duty (or distinct pleasure, depending on your personality) of dealing with disasters. Of course, the best way to deal
with a disaster is to prevent it. The better fire coverage you
have, the less often fires will occur. But sometimes, no matter
how prepared you are, disaster strikes. Especially when you
choose them from a menu.
A Hot Time in the Old Town
Page 43
Page 48
THE ULTIMATE CITY SIMULATOR
™
Open the Disasters menu.
Select Fire.
Once you select Fire, two things will happen: a fire will break
out somewhere in the city limits and the Emergency button will
become available. The Emergency tool lets you dispatch your
police and fire departments to the scene of the emergency.
Click and hold on the Emergency button in the City toolbar.
Select Dispatch Fire.
Click near the fire.
Click and hold on the Emergency button.
Select Dispatch Police.
Click near the fire.
Note: If the fire went out before you had a chance
to dispatch your troops, start another one.
Graduation
You can’t place your fire fighters directly on fires, but you can
use them to block the path of the fire, and even chase it down.
You can place one police or fire icon for every station you have.
If you have three of four stations, it makes it easier to surround
a fire and block its path.
You have completed an extensive tutorial in city design and
management. You are now an expert in everything from planning to landscaping to politics.
When you’re ready for even more advanced features, check
out the Reference section for tips on adding a water system to
your city, and improving and expanding your transportation
system with highways, onramps, tunnels, rails, subways, and
bus lines.
Go forth and play SimCity 2000.
SimCity 2000 — TutorialPage 44
Page 49

REFERENCE
Slums may well be breeding-grounds of crime, but middleclass suburbs are incubators of apathy and delirium.
The Unquiet Grave
– Cyril Connolly (1903-1974)
Page 50

THE ULTIMATE CITY SIMULATOR
™
Reference
This Reference section is an in-depth explanation of (just about)
every window, button, feature and function of SimCity 2000 on a
number of different computers. This section will make a lot more
sense to you if you play through Tutorial 1 first.
The Basics
Who Are You and
What Are You
Doing?
Here are a few basic points that should clarify your place in the
SimCity 2000 universe and prepare you for the rest of the
Reference section.
In SimCity 2000 you are the planner and mayor of an unlimited
number of cities. These cities can be as small as you want or as
large as you can make them.
Your cities don’t live in a vacuum. Their growth and decline are
affected by surrounding cities. These surrounding cities are
both a market for selling your manufactured goods and competitors, vying for population and businesses.
In your role as mayor, you are directly responsible for:
• Planning—zoning, long- and short-range strategies
• City infrastructure—water, power, transportation
• Government services—fire, police, hospitals, prisons
• Education—schools, colleges, libraries, museums
• Recreation and open spaces—parks, zoos, stadiums, marinas
• City budget and taxes
• Major and minor land manipulation
• The health, wealth and happiness of the Sims that live in your city
You are not directly responsible for building houses, stores,
factories or other buildings (the Sims take care of them).
SimCity 2000 — ReferencePage 46
Page 51

There are a number of scenarios built into SimCity 2000. Each
scenario provides you with different challenges at different
levels of difficulty.
Each scenario has a “win” condition. If you meet this condition
within a specific time, you’ll receive the key to the city and be
allowed to continue your job as mayor. If you don’t meet the
condition, you’ll be run out of town—until you’re ready to try
again.
When you start your own city, there are no time limits to beat
and no conditions to meet. There is no winning or losing. You
are the sole judge, passing judgment upon yourself. The only
two criteria in this judgment are your own enjoyment and the
quality of life of your Sims.
Scenarios and Cities
In 1916, New York City adopted a zoning ordinance which would become the
model for cities across the nation. Overcrowding, overdevelopment, adverse
effects on neighboring property values, lack of light and air became matters of
public health... and a new public agency was created to safeguard the public by
regulating and controlling development. “Public health, welfare and safety”
became the accepted basis for regulation by municipalities.
Page 47
XV
Page 52

THE ULTIMATE CITY SIMULATOR
™
Mouse and
Keyboard
Conventions
Getting Help
Terrain
In general, all instructions that refer to clicking, double-clicking or clicking and dragging refer to the left mouse button (if
you have more than one).
Help is available in most places in SimCity 2000. If you see a
button with a question mark on it, click on it for help.
If you have a mouse with more than one button, clicking with
the right button on any button or icon will invoke a help
message explaining that button or icon. If you have a mouse
with one button, hold down either Shift key on your keyboard
and click on any button or icon for help.
Terrain in SimCity 2000 has 32 levels of altitude, with mountains, valleys, lakes, rivers, streams, and waterfalls. You can
customize and modify the landform, both at the beginning of a
game and during actual city-building.
When you start a brand-new city with the Edit New Map
command from the File menu, you can mold and shape the
terrain for your city as much as you want, without any charge.
Once you start playing a game and begin building a city, it will
cost you to modify the terrain.
City Limits
The land is divided up into “tiles.” A tile is the smallest piece
of land that can be raised, lowered or covered with water. It is
approximately 200 by 200 feet square, or about one acre.
The total city limits are equivalent to approximately 5 miles by
5 miles square. Buildings, objects, roads, etc., are also divided
up into tiles. One section of road is one tile. Some of the larger
buildings are made of many tiles.
SimCity 2000 — ReferencePage 48
Page 53

The entire city limits is yours for city expansion, for parks and
open spaces, or to leave wild. A city in SimCity 2000 can be tiny,
or can fill the entire rectangular city limits.
You can build multiple separate communities or small cities
within the city limits, but the simulation will treat them as one
city. All the statistics and information in the Graphs, Population, Industry and other windows collectively covers everything within the entire city limits.
The City window is your main view of your city. It is always
open as long as SimCity 2000 is running. The game is easiest to
control with the City window as large as possible, but you can
resize it on some computers.
Most of the other, smaller windows, such as the Map and
Population windows, open either by selecting them in the
Windows menu, or by clicking on their button on the toolbar.
If you just want to take a quick look at one of the smaller
windows (momentary view), click and hold on their buttons in
the toolbar. The window will be visible until you release the
mouse button. If, while holding down the button, you drag the
window away from the toolbar then release the mouse button,
then the window will remain on the screen until you close it
(tear-off view).
There are two other important points to remember about the
small windows:
1.Some of them have extra buttons or controls that appear in
tear-off, but not momentary view.
2. As long as these small windows are open, they will remain on
top of the City window. When you click on the City window
to modify the city, it will not cover the small windows—
place them carefully so they don’t block your access to the
City window scroll bars.
The City Window and the Rest of ‘Em
Page 49
Page 54

THE ULTIMATE CITY SIMULATOR
™
Menus
File Menu
These are all the menus and menu items in SimCity 2000. There
may be a few slight differences.
This menu has the commands for file management, starting
new games and scenarios and quitting SimCity 2000.
ABOUT SIMCITY 2000
Brings up exciting and thrilling information about the game and
its makers.
LOAD CITY
Opens a file-loading dialog box allowing you to load in and play
a previously saved SimCity 2000 city. This command can also
be used to import a city from SimCity or SimCity Classic.
NEW CITY
First asks if you want to save your existing city, then generates
a new, empty terrain, prompts you for the city’s name and
game level, then begins the game.
EDIT NEW MAP
First asks you if you want to save your existing city, then
removes all buildings and infrastructure and delivers the bare
terrain into Terrain-Editing mode. In Terrain-Editing mode,
you have access to tools to customize and/or regenerate the
terrain to your heart’s content—without being charged.
LOAD SCENARIO
Opens a dialog box that allows you to view all the different
scenarios, then select one.
SAVE CITY
Saves the current city to disk under the same name and in the
same place where it was last saved. If it hasn’t been saved
before, the Save City As... dialog box will open, allowing you to
name/rename the city and choose the destination disk and
directory or folder.
SimCity 2000 — ReferencePage 50
Page 55

SAVE CITY AS...
Opens a dialog box that allows you to name/rename a city and
choose the disk and directory or folder where you want to save it.
QUIT
Rips SimCity from your computer’s memory and makes it go
away until you’re ready to resume your mayoral responsibilities. It will first ask if you want to save your existing city.
SPEED MENU
This menu has the commands for setting the simulation to
different speeds, including pause. The currently set speed will
be marked by a check mark. Actual speeds will vary, depending
on your computer, its microprocessor and its clock speed.
PAUSE
Stops time in the simulation.
TURTLE
Sets the simulation to run slower than molasses on a cold day.
LLAMA
Sets the simulation to run at a medium speed.
CHEETAH
Sets the simulation to run as fast as your computer will go.
This menu controls a number of simulation and sound options
so you can tailor the game to your style of play. Options that
are active have a check mark next to them.
AUTO-BUDGET
When selected, Auto-Budget stops the Budget window from
opening at the end of each year, and automatically repeats the
previous budget.
Options Menu
Page 51
Page 56

THE ULTIMATE CITY SIMULATOR
™
AUTO-GOTO
When active, Auto-Goto automatically centers the City window over an important occurrence, such as a disaster. When
inactive, you will still receive messages to notify you of important goings-on in your city.
SOUND EFFECTS
Toggles sound effects on and off. The audio quality of the
sound effects will vary greatly depending on the sound capabilities of your computer.
MUSIC
Toggles the musical soundtrack on and off. The audio quality
of the music will vary greatly depending on the sound capabilities of your computer.
Disasters Menu
This menu lets you activate various disasters, or disable them
entirely. For more information on disasters, see Dealing with
Disasters in the Strategies section below.
FIRE
Causes a fire to break out somewhere within the city limits.
FLOOD
Causes a wave of raised water to come in off the coast or down
a river, washing away anything that isn’t tied down.
AIR CRASH
Causes an airplane to crash somewhere within the city limits.
TORNADO
Sets a tornado loose to wreak havoc across the city limits.
EARTHQUAKE
Sets the earth to quakin’ and the ground to shakin’.
MONSTER
Releases the terror of the year 2000.
SimCity 2000 — ReferencePage 52
Page 57

NO DISASTERS
Prevents disasters from occurring. No Disasters will not prevent the “official” scenario disasters, or stop disasters already
in progress. No Disasters also prevents the City Council from
voting in ordinances without your approval.
Note: All power plants have a 50-year life span, and then
they blow up. They don’t cause fires or spread radiation—they just stop working and collapse. Watch your
newspapers for warnings that power plants are getting
old. If you have No Disasters active, when power plants
reach the end of their lives, they are automatically
rebuilt and you are automatically charged. If you don’t
have enough cash in your city funds to pay for the power
plant replacement, it goes boom.
This menu lets you access the various windows in SimCity 2000.
MAP
Opens the Map window for various displays of your entire city.
BUDGET
Opens the Budget window for fiddling with your city’s finances.
ORDINANCES
Opens the Ordinance window for setting and inspecting various city bonds, bills and ordinances.
POPULATION
Opens the Population window to see a demographic breakdown of the Sims in your city.
INDUSTRY
Opens the Industry window to see the different types of
industries currently operating in your city, and to set individual tax rates for different industries.
Windows Menu
Page 53
Page 58
THE ULTIMATE CITY SIMULATOR
™
GRAPHS
Opens the Graphs window to see graphical displays of city
data and statistics over time.
NEIGHBORS
Opens the Neighbors window to see how you compare with
your surrounding neighbor cities.
Newspaper Menu
The creation of zoning and public health, welfare and safety laws was thought to be a solution
to many problems: a benevolent public body enlightened to determine what is best for all and
empowered through enabling legislation to enforce its findings. It would not take long,
however, to realize that this new set of rules did not eliminate difficulties in development of
land; it only gave the battlefield boundaries and suggested new implements of war.
This menu lets you set your newspaper delivery rate and read
various local papers. Even with both delivery options below
turned off, newspapers announcing disasters will be delivered.
SUBSCRIPTION
When active, a newspaper will be delivered (popped up on the
screen) twice a year.
EXTRA!!!
When active, only newspapers that report important occurrences—inventions and major steps in city growth—will be
delivered.
THE NEWSPAPERS
Opens and/or activates the various local newspapers. There
will be from none (at the start of a city) to six (in a very large
city) different local newspapers. The newspaper that is marked
with a circle to the left of its name is the paper that will be
delivered. Opening a newspaper manually changes it to the
one that will be delivered.
XVI
SimCity 2000 — ReferencePage 54
Page 59

This section describes in detail each of the windows in SimCity
2000.
Windows
IN GENERAL
The City window is your main work area for molding, shaping
and growing your city and the land under it. It is always open
while SimCity 2000 is running (on most computers).
At the top of the window is the Title bar, containing the
simulation date, the name of the city and your current funds.
On the right end of the Titlebar is some sort of box or button
(depending on your computer) for quickly resizing the window.
• On DOS-based computers, it is the
Zoom box, which toggles the window between full-screen size and
the last previously set window size.
• On a Windows-based computer,
there will be two buttons. The Maximize button toggles the window
between full-screen size and the
last previously set window size.
The Minimize button shrinks the
window to an icon.
You can resize the City window by
clicking and dragging the Resize box.
The Scroll Bars and Scroll Arrows let you move the city around
in the City window.
City
Toolbar
City Date
City Window
City Name
City Funds
Scroll Bars
Zoom
Box
Title Bar
Resize Box
The Toolbar provides all the tools you’ll need to zone, build
and run your city. It appears differently, depending on the
mode you are in. And speaking of modes...
Page 55
Page 60

THE ULTIMATE CITY SIMULATOR
™
MODES
The City window has three modes: City-Building, TerrainEditing and Map.
City-Building is the main, most-used mode. It lets you build and
grow your city. You can also edit the terrain, but there are
physical and financial limitations.
In Terrain-Editing mode, you can make all the changes and
modifications you could ever desire to the new, empty landscape without being charged. Once you leave Terrain-Editing
mode and enter City-Building mode to start your city, you can
never return that same landscape to Terrain-Editing mode.
Map mode turns the entire City window into a giant, scalable
display that mirrors the information in the Map window. The City
window’s Map mode is toggled on and off from the Map window.
THE VIEW
The view in the City window is an isometric, simulated 3-D
landscape. It can be viewed in three different sizes, allowing
you to see more or less of your city at once, at various levels
of detail.
SimCity 2000 — ReferencePage 56
Page 61

THE LANDSCAPE
Each time you start a new city in SimCity 2000, a new landscape is generated. You can regenerate the landscape as
many times as you like. You can modify the landscape as
much as you like.
When the City window is in terrain-editing mode, you can
make drastic changes to the land at no cost to the city. You
can raise or level mountains, dig streams, raise or lower the
sea level, and place individual trees or forests.
Once the City window is in city-building mode, you can still
make drastic changes to the landscape, but you’ll have to pay
for the work out of the city’s funds.
There are three basic elements to the landscape: land, water
and trees.
The land in SimCity 2000 is divided into small squares, called
tiles. Tiles can be raised or lowered to provide 32 levels of
altitude. Land that is below sea level will be under water.
Water in SimCity 2000 flows downhill, as all good water
should. When you generate a new landscape in terrain-editing
mode, you can choose whether or not you want a river
running through the landscape, and you can, if you want, have
one edge of your city be a coastline. Your landscape can also
have streams, ponds and lakes. And you can raise or lower sea
level, to make your city either a desert or a chain of islands.
Trees in SimCity 2000, as in the real world, are big plants that
provide shade and homes for wildlife. They add an aesthetic
touch to cities, and improve land value.
Page 57
Page 62
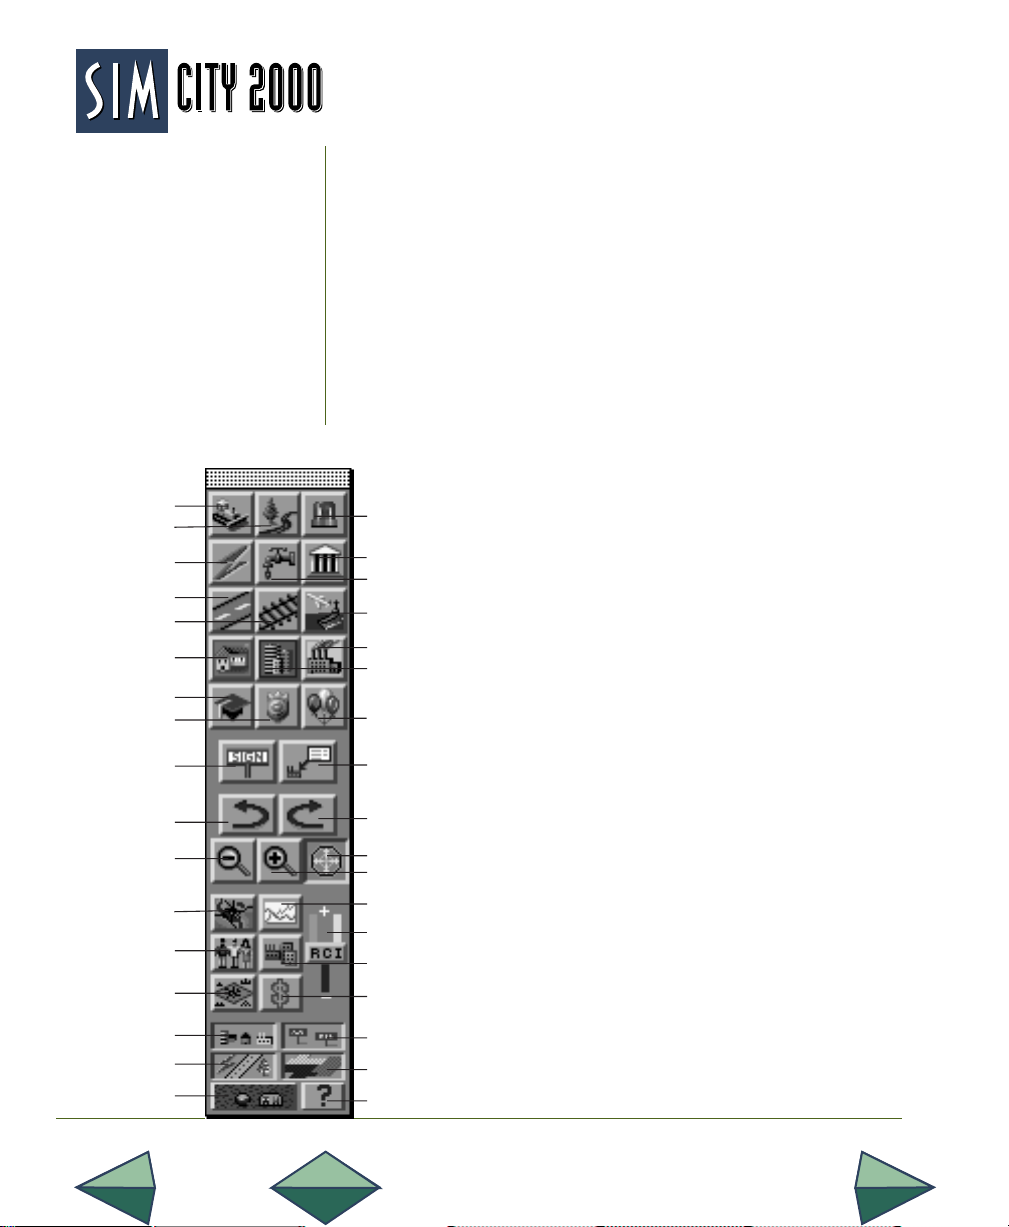
Bulldozer
Landscape
Power
Roads
Rails
Residential Zones
Education
City Services
Signs
Rotate
Counter-
Clockwise
Zoom Out
Map Window
Population Window
Neighbors Window
Show Buildings
Show
Infrastructure
Underground
THE ULTIMATE CITY SIMULATOR
™
THE CITY TOOLBAR
When the City window is in city-building mode, it has the City
toolbar—your main control center for building, modifying
and running your city. It can be moved around your screen by
clicking and dragging the bar at the top.
For ease of use, especially for newcomers to SimCity 2000, you
can simply click on any button, then use the default setting of
the tool. When you’re ready for more power, more features
and more flexibility, you can make use of the submenus that
are hidden below many of the buttons. If you click and hold on
a button with a submenu, the submenu will pop
up, allowing you to access many more choices
Emergency
Rewards
Water
Ports
Industrial Zones
Commercial
Zones
Recreation
Query
Rotate Clockwise
Center
Zoom In
Graphs Window
Demand
Indicator
Industry Window
Budget Window
Show Signs
Show Zones
Help
and options. The submenus, and their available
options, change over the years, reflecting the
available technology.
The City toolbar contains tools that let you:
• Modify the landscape
•
Zoom in and out for close-up and far-out views
• Center on different areas of the city in the City
window
• Rotate the city in the City window
• Zone residential, commercial and industrial areas
• Build the city infrastructure
• Add special-purpose buildings (museums,
zoos, etc.)
• Closely inspect city areas
• Add signs or markers
• Turn on and off the display of various objects and layers in the City window
• Open various information windows
It also has a Demand Indicator for various zones.
SimCity 2000 — ReferencePage 58
Page 63

Any time you need a reminder of what each of the buttons
does, hold down either Shift key and click on a button. A
friendly help message will pop up and set you straight.
These are the tools in the City toolbar:
BULLDOZER
The bulldozer is a multi-function multi-level tool, with a default
setting and a submenu to choose between four additional actions.
Click and hold on the Bulldozer button to open the submenu.
When the bulldozer is active, the cursor will appear as a bulldozer.
To operate the bulldozer, choose the function you want, then
click or click and drag where you want to do your ’dozin’.
Demolish/Clear (the default) destroys and removes trees,
rubble, and man-made (Sim-made?) objects without affecting
the terrain or zoning status. Just click on anything to destroy it.
Cost: $1 per tile.
Level Terrain lets you choose an altitude level and slice off hills
and mountains at your chosen height. Level also clears, removing all trees, roads, power lines and buildings.
Cost: $25 per tile per altitude change.
Raise Terrain lets you make mountains out of molehills.
Cost: $25 per tile per altitude change.
Lower Terrain lets you lower mountains and dig canyons. (If
you lower the terrain below sea level, it will fill with water.)
Cost: $25 per tile per altitude change.
De-zone lets you change undeveloped residential, commercial
or industrial zones to unzoned land.
Cost: $1 per tile.
Raising, lowering and leveling terrain can be very expensive, so
do it sparingly. If you want to make a lot of changes to the
landscape, do it in terrain-editing mode before you start your city,
or save up a lot of cash.
Page 59
Page 64
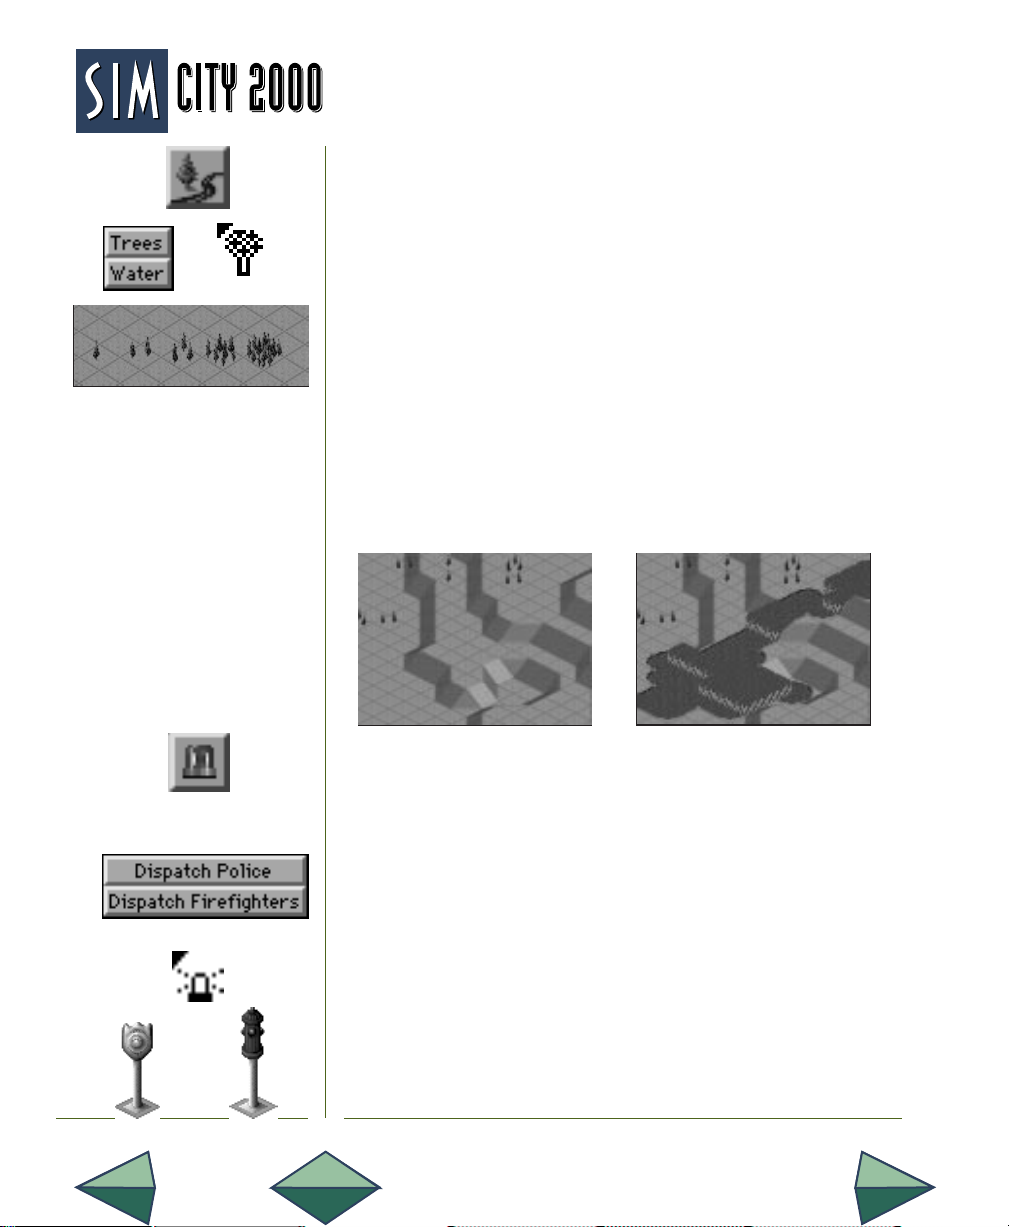
THE ULTIMATE CITY SIMULATOR
™
LANDSCAPE TOOL
The Landscape tool lets you add trees and water to your city.
When active, the cursor will appear as a tree. Clicking and
holding on the button opens a submenu that allows you to
choose between trees and water.
The Tree tool lets you place trees onto the landscape. Each click
will place either one or two trees. You can click repeatedly on a
single tile to create dense thickets, and click and drag across
many tiles to create forests.
Cost: $3 per click.
The Water tool lets you create lakes and streams by clicking
where you want your water to appear.
Cost: $100 per tile.
Before After
EMERGENCY
The Emergency tool lets you dispatch police and/or fire departments to the scene of a disaster. This tool will be ghosted
and unavailable unless a disaster is occurring. When active,
the cursor will appear as an emergency beacon. Clicking and
holding on the tool opens a submenu that allows you to choose
between dispatching police and fire.
Once you activate the tool and choose the department you
want to dispatch, click on the area of the city where you want
your city’s finest to go. An icon representing either your
dispatched fire or police troops will be placed where you click.
You can place one icon for each station you have. After you
SimCity 2000 — ReferencePage 60
Page 65

have placed them all, clicking again will move the first one you
placed to the last place you clicked, enabling you to block,
surround and contain a fire or riot. There is no cost for
dispatching police or firesims.
POWER
Power is a multi-use tool. Clicking and holding on it opens a
submenu that allows you to choose between two functions:
laying power lines and placing power plants. When this tool is
active, the cursor appears as a lightning bolt.
Power Lines (the default setting) lets you “paint” your power lines
onto the land by clicking in the place where you want the line to
start, dragging the cursor to the place where you want the line to
stop, and releasing the mouse button. If you start laying a power
line and change your mind, you can cancel the operation by
holding down the Shift key before you release the mouse button.
Power lines blink warning lights to let you know
if they’re not hooked to a power source. Power
lines can only be run in straight lines and 90degree angles. They can cross roads or rails, but
not on curved sections or straight sections that
run at 45 degrees. Laying power lines across
water is a little more expensive. If you lay power
lines across water, a dialog box will open and let you
know how much it will cost.
Cost: $2 per tile across land, $10 per tile across water.
Click and drag...
and...release.
Power Plant... lets you choose power sources for your
city. Depending on the year and the technology level of
your city, there may be from three to nine types of power
plants available. Click on the power source you want, then
click on the terrain where you want it to go. There is an info
button for each power plant that tells you the advantages,
disadvantages and costs for each type of power plant.
Page 61
Page 66

Click and drag...
THE ULTIMATE CITY SIMULATOR
™
WATER SYSTEM
The Water System tool is a multi-use tool. Clicking and holding
on it opens a submenu that allows you to choose between five
different water-related functions: laying water pipes, installing
water pumps, buying storage tanks, and building treatment
and desalinization plants. When this tool is active, the cursor
appears as a water faucet.
Depending on the year and technology level in your city, you
may only have access to pumps and water towers. As time
passes and inventions are invented, the other options become
available. A city can exist without a water system, but population density will be limited. When the Sims build, they install
the underground water pipes for their buildings. Your only
responsibility is to hook the buildings up to the water system.
Pipes (the default setting) lets you “paint” your water pipes
onto the landscape by clicking in the place where you want the
pipe to start, dragging the cursor to the place you want the
pipe to stop, and releasing the mouse button. If you start laying
a water pipe and change your mind, you can cancel the
operation by holding down the Shift key before you release the
mouse button. Water pipes are always laid underground.
Activating Pipes automatically turns on the underground view
so you can see your pipes.
Cost: $3 per tile.
and...release.
Water Pumps when placed on land act as wells, a good source of
water. Water pumps need to be hooked to the power grid to
function. When pumps are placed right next to a lake or river,
they supply twice as much water as a well. A pump placed next
to a coastline (salt water) only produces as much water as a well.
Cost: $100 per pump.
Water Towers lets you store precious water so you won’t have
summer shortages in arid climates.
Cost: $250 per tower.
SimCity 2000 — ReferencePage 62
Page 67

Treatment plants clean and recycle your city’s water, lessening seasonal shortages.
Cost: $500 per treatment plant.
Desalinization plants remove the salt from sea water. They are
expensive, but sometimes necessary in beach communities
with little or no other source of water. Desalinization plants,
which need power to function, have internal pumps, and don’t
require extra water pumps. They produce approximately twice
as much water as a water pump next to a river.
Cost: $1,000 per desalinization plant.
REWARDS
This button is like a surprise package. It will be ghosted and
unavailable until you deserve a reward. Rewards are based on
your city’s population, and consist of special buildings and
monuments to your mayoral prowess. When this tool is active,
the cursor appears as a mayor tipping his hat.
The rewards you can strive to gain are... no, I won’t tell you.
You’ll just have to wait and see for yourself.
ROADS
Roads is a multi-use tool. Clicking and holding on it opens a
submenu that allows you to choose between five different
road-related functions: placing roads and highways, and building tunnels, onramps and bus depots. When this tool is active,
the cursor appears as a piece of paved road.
Depending on the year and technology level of your city, you
may only have access to roads and tunnels. As time passes, the
other options become available.
Page 63
Page 68

Click and drag...
and...release.
THE ULTIMATE CITY SIMULATOR
™
Road (the default setting) lets you “paint” your roads onto the
land by clicking in the place where you want the road to start,
dragging the cursor to the place you want the road to stop, and
releasing the mouse button. If you start laying a road and
change your mind, you can cancel the operation by holding
down the Shift key before you release the mouse button.
Roads can run in straight lines, 90-degree angles and 45-degree
angles. When roads cross, they form an intersection. If you lay a
road across water and it is possible to build a bridge, you will be told
how much it will cost. If a bridge can’t be built, you will be notified.
Cost: $10 per road tile.
Highways are high-capacity roads that are raised above the
ground on pylons. They can handle four times as many cars as
regular roads. They are placed the same way as roads. You will
need to place onramps to allow cars to get on and off highways.
When highways cross, they form cloverleafs. If you lay a highway
across water and it is possible to build a bridge, you will be told
how much it will cost. If a bridge can’t be built, you will be notified.
Cost: $100 per highway section (4 tiles).
Click...
...and the Sims build the tunnel.
Tunnel lets you make pathways for roads through hills and
mountains. Tunnels cannot curve, and you cannot cross tunnels, even at different altitudes. To place a tunnel, click on the
tile that you want as your entrance point. The entrance point
must be a sloped tile. Your highway engineers won’t try to
build a tunnel where it’s impossible to build, or where it is unsafe,
due to unstable terrain. If you pick a good spot, an engineer’s
report will tell you how much the tunnel will cost and ask if you
want to go ahead or not.
Cost: $150 per tile of tunnel.
SimCity 2000 — ReferencePage 64
Page 69

Onramps allow cars and buses to travel
back and forth between roads and highways. Place them as junctions between
roads and highways. For best results,
put onramps on both sides of a highway.
Cost: $25 per tile.
Ready for onramps
Bus Depots allow commuters to take the bus to work and help
alleviate traffic. They must be placed on level ground. You will
need at least two bus depots since buses travel between them.
Passengers can get on and off between depots.
Cost: $250 per depot.
RAILS
Rails is a multi-use tool. Clicking and holding on it opens a
submenu that allows you to choose between four different railrelated functions: placing rails, placing subways (underground
rails), building rail depots and building subway stations. When
this tool is active, the cursor appears as a length of track.
Depending on the year and technology level of your city, you
may only have access to rails and rail depots. As time passes,
the other options become available.
Onramps placed
Rail (the default setting) lets you “paint” your tracks onto the
land by clicking in the place where you want the rail to start,
dragging the cursor to the place where you want it to stop, and
releasing the mouse button. If you start laying a rail and change
your mind, you can cancel the operation by holding down the
Shift key before you release the mouse button. Rails are
useless without rail depots.
Cost: $25 per tile.
Page 65
Page 70

THE ULTIMATE CITY SIMULATOR
™
Subways are an underground rail system. The are placed in the
same way as rails, but while looking at the underground view.
Subways are useless without subway stations.
Cost: $100 per tile.
Rail Depots allow commuters to get on and off trains. Without
depots, rails are useless. They must be placed on level ground,
and adjacent to tracks.
Cost: $500 per depot.
Subway Stations allow passengers access to subway trains.
Subway trains only stop at stations. They must be placed on
level ground, adjacent to a subway line. It’s usually easiest to
place subway stations while looking at the underground level.
Cost: $250 per depot.
Subway Stations above ground
Subway Stations below ground
Subway to Rail Junctions allow you to hook up your subways
and above-ground rails for a continuous transit system. They
must be placed adjacent to a rail tile.
Cost $250 per tile.
Subway/Rail Junction above
ground
Subway/Rail Junction below ground
SimCity 2000 — ReferencePage 66
Page 71
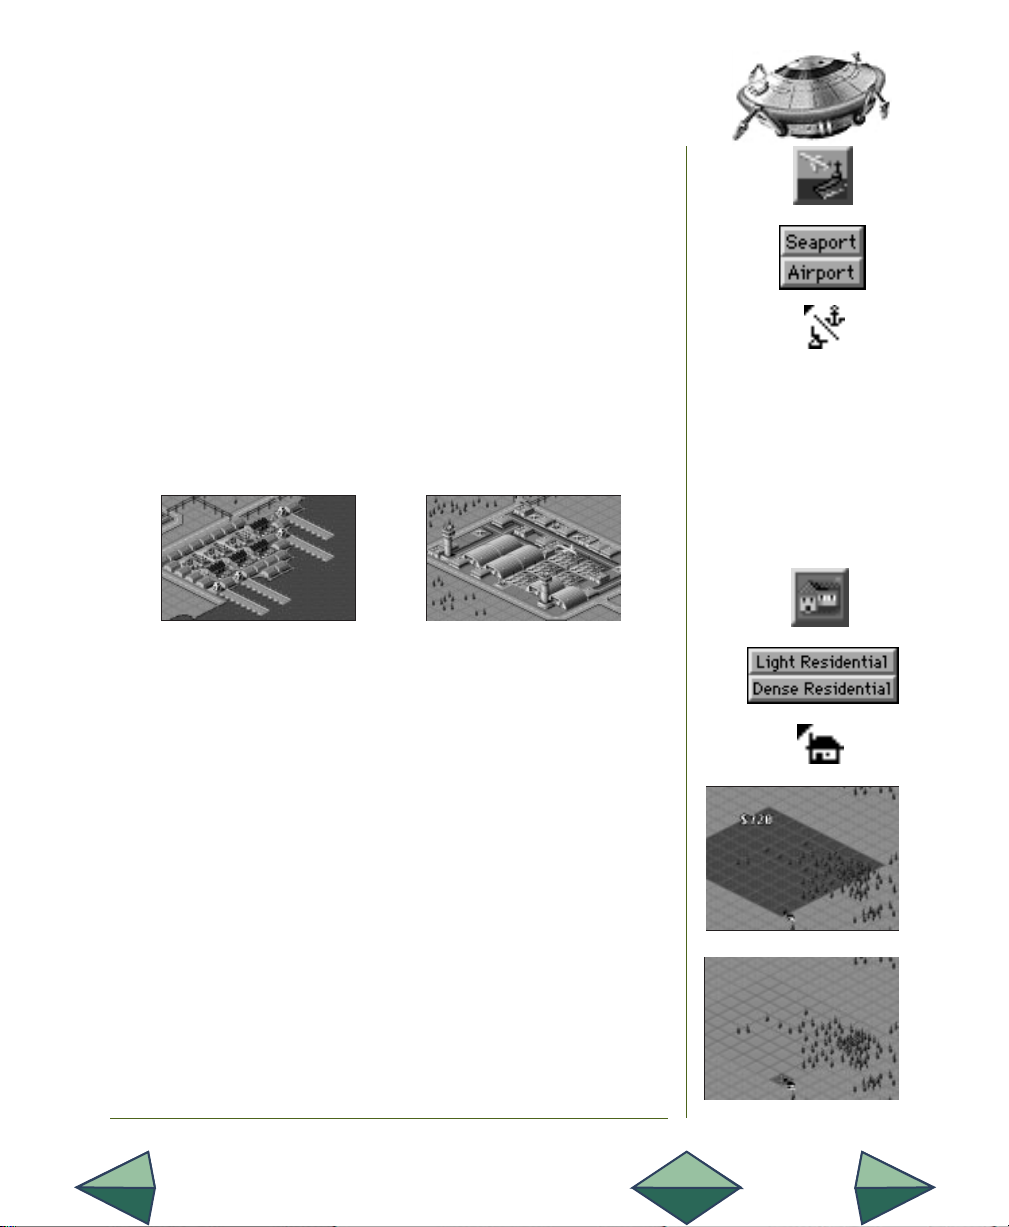
PORTS
Ports is a dual-purpose tool that allows you to place both
airports and seaports. Click and hold on the Ports button to open
a menu and choose the type of port you want to place. When this
tool is active, the cursor will appear as an anchor and radar dish.
Ports are placed by clicking and dragging to form a square or
rectangle, then releasing the mouse button. If you start placing
a port and change your mind, you can cancel the operation by
holding down the Shift key before you release the mouse
button. Ports must be powered before they will develop.
Seaports must be on a shoreline to be of any use.
Cost: $150 per seaport tile, $250 per airport tile.
Seaport
Airport
RESIDENTIAL ZONES
The Residential Zone tool lets you, as mayor, designate areas of
your city as places where people live. Clicking and holding on
Residential Zones opens a submenu that lets you choose whether
the zones will be low-density (light) or high-density (dense).
When this tool is active, the cursor will appear as a little house.
To zone an area as residential, click and hold on the terrain, drag
the mouse, creating a rectangle, then release the mouse button.
If you start laying down a zone line and change your mind, you can
cancel the operation by holding down the Shift key before you
release the mouse button. If you zone residential over an area that
includes some tiles that are already the same density residential,
you will not be charged for zoning those tiles. If you zone over an
undeveloped area that is already commercial, industrial or a
different density residential, it will be rezoned and you will be
charged. You cannot rezone an area that is already developed.
Cost: Light Residential $5 per tile, Dense Residential $10 per tile.
Click and drag...
...and release.
Page 67
Page 72

THE ULTIMATE CITY SIMULATOR
™
COMMERCIAL ZONES
The Commercial Zone tool lets you, as mayor, designate areas
of your city as places where people build stores, offices and
other places of commerce. Clicking and holding on Commercial
Zones opens a submenu that lets you choose whether the zones
will be low-density (light) or high-density (dense). When this
tool is active, the cursor will appear as a little office building.
To zone an area as commercial, click and hold on the terrain,
then drag the mouse, creating a rectangle, then release the
mouse button. If you start laying down a zone line and change
your mind, you can cancel the operation by holding down the
Shift key before you release the mouse button. If you zone
commercial over an area that includes some tiles that are
already the same density commercial, you will not be charged
for rezoning those tiles. If you zone commercial over an undeveloped area that is already residential, industrial or a different density commercial, it will be rezoned and you will be
charged. You cannot rezone an area that is already developed.
Cost: Light Commercial $5 per tile, Dense Commercial $10 per tile.
INDUSTRIAL ZONES
The Industrial Zone tool lets you, as mayor, designate areas of
your city as places where people build factories. Clicking and
holding on Industrial Zones opens a submenu that lets you
choose whether the zones will be low-density (light) or highdensity (dense). When this tool is active, the cursor will appear
as a little factory.
To zone an area as industrial, click and hold on the terrain,
then drag the mouse, creating a rectangle, then release the
mouse button. If you start placing a zone and change your
mind, you can cancel the operation by holding down the Shift
key before you release the mouse button. If you zone industrial
over an area that includes some tiles that are already the same
density industrial, you will not be charged for rezoning those
tiles. If you zone industrial over an undeveloped area that is
SimCity 2000 — ReferencePage 68
Page 73
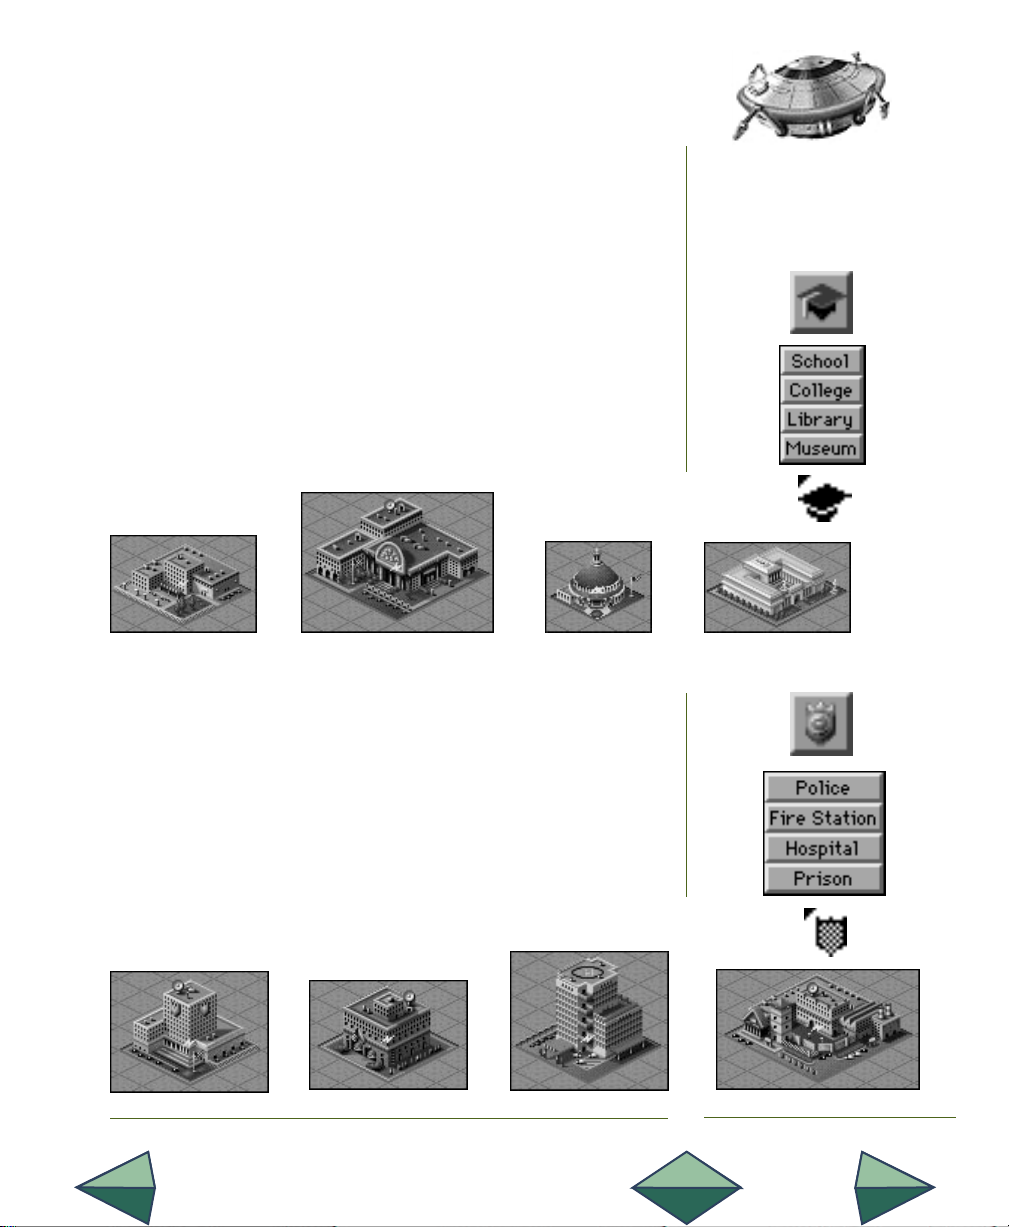
already commercial, residential or a different density industrial, it will be rezoned and you will be charged. You cannot
rezone an area that is already developed.
Cost: Light Industrial $5 per tile, Dense Industrial $10 per tile.
EDUCATION
Education is a multi-function tool that lets you provide your
citizens with everything they need to improve their minds.
Click and hold on the Education button to open a submenu
with the following smart choices: School, College, Library and
Museum. When this tool is active, the cursor will appear as a
mortarboard.
Cost: $250 per school, $1,000 per college, $500 per library,
$1,000 per museum.
School College Library Museum
CITY SERVICES
City Services is a multi-function tool that lets you provide your
city with those necessities of life that we all wish weren’t
necessary. Click and hold on the City Services button to open
a submenu with the following unpleasant choices: Police, Fire
Station, Hospital and Prison. When this tool is active, the
cursor will appear as a badge.
Cost: $500 per police station, $500 per fire station, $500 per
hospital, $3,000 per prison.
Police Station Fire Station Hospital Prison
Page 69
Page 74

™
THE ULTIMATE CITY SIMULATOR
RECREATION
Recreation is a multi-function tool that lets you provide your
citizens with places to have a little rest, relaxation and plain
old fun. Click and hold on the Recreation button to open a
submenu with the following exciting choices: Small Park, Big
Park, Zoo, Stadium, Marina. When this tool is active, the cursor
will appear as a bunch of balloons!
Cost: $20 per small park, $150 per big park, $3,000 per zoo,
$5,000 per stadium, $1,000 per marina.
Small Park
Big Park Zoo Stadium Marina
SIGNS
The Sign tool lets you label streets, buildings and points of
interest in your city. When this tool is active, the cursor will
appear as a little sign. To make a sign, activate the Sign tool and
click on the place where you want it to appear. When the dialog
box opens, type in the words you want the sign to say, then
click DONE. There is no cost for placing signs.
The display of your signs can be turned on and off with the
Display Signs button.
This is how most municipal planning and zoning systems are supposed to work:
When meaningful changes to a city’s makeup are suggested, planners select options
for review and assemble reports for discussion. If these discussions become
controversial, the reports are analyzed by elected (political) officials and a decision
is made, in theory, based upon a thorough study of options, facts and findings.
XVII
SimCity 2000 — ReferencePage 70
Page 75

QUERY
Query is a tool for closely inspecting different parts of your
city. When this tool is active, the cursor appears as a magnifying glass. To get information, activate the tool, then click
anywhere. A dialog box will open, and display fascinating
facts about the spot where you clicked.
Once you have viewed the dialog box, you can usually just
click anywhere to make it go away. Sometimes the Query
dialog box allows you to rename buildings (like stadiums).
In these cases, you will have to click on the DONE button to
close the box. Click on RENAME if you want to change the
name of the queried building. There is no cost to use the
Query tool.
There is a keyboard shortcut for the Query tool—just hold
down the Shift key and click anywhere in the terrain.
ROTATE COUNTER-CLOCKWISE
Click on this button to rotate the entire city limits 90 degrees
counter-clockwise. There is no cost for rotating.
ROTATE CLOCKWISE
Click on this button to rotate the entire city limits 90 degrees
clockwise. There is no cost for rotating.
ZOOM OUT
Click here to zoom out for a smaller, farther-out view in the City
window. There are three zoom levels. If you are currently
zoomed all the way out, this button will be ghosted and
unavailable. There is no cost for zooming.
ZOOM IN
Click here to zoom in for an enlarged, closer view in the City
window. There are three zoom levels. If you are currently
zoomed all the way in, this button will be ghosted and unavailable. There is no cost for zooming.
Page 71
Page 76
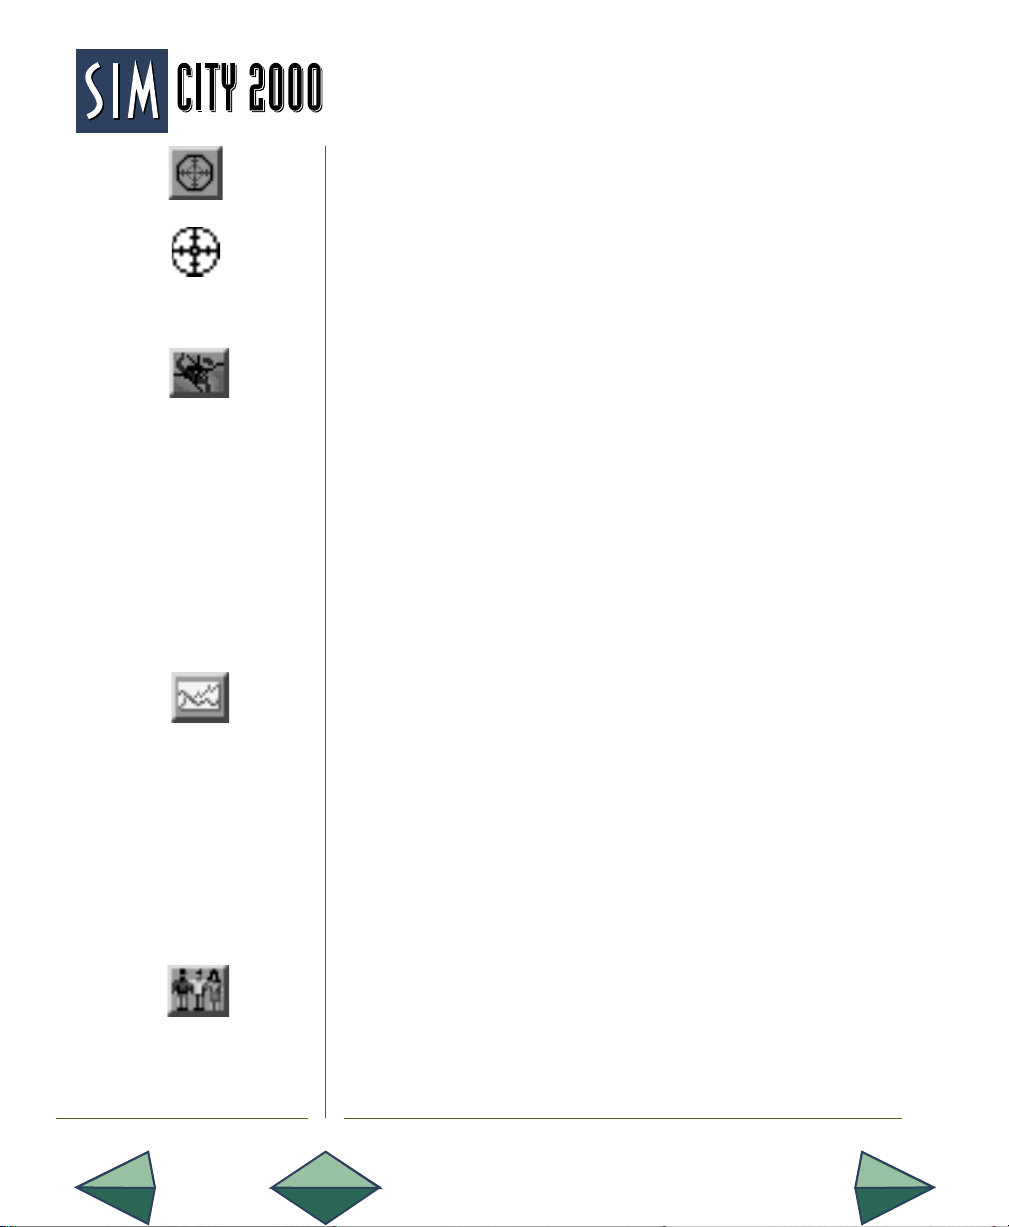
THE ULTIMATE CITY SIMULATOR
™
CENTER
The Center tool lets you pick a place in your city to be centered
in the City window. Just activate the tool and click anywhere in
the city. When Center is active, the cursor will appear as a
target sight. There is a keyboard shortcut for activating the
center tool—hold down the Control key. There is no cost for
centering.
MAP WINDOW BUTTON
The Map Window button can open the Map window in two
modes: momentary and stationary. Click and hold the button
to momentarily pop up a small map of the entire city limits. A
rectangle somewhere in the map will outline the area of the city
that is visible in the City window. The map will disappear when
you release the button.
If you click the button and drag it away from the toolbar, the
Map window will open (and stay there), complete with its own
toolbar for different map displays. Complete information on
the Map window can be found later in this section of the
manual.
GRAPHS WINDOW BUTTON
The Graphs Window button can open the Graphs window in
two modes: momentary and stationary. Click and hold the
button to momentarily pop up a graph of city data. The graph
will disappear when you release the button.
If you click the button and drag it away from the toolbar, the
Graphs window will open (and stay there), complete with its
own toolbar for different graph displays. Complete information on the Graphs window can be found later in this section of
the manual.
POPULATION WINDOW BUTTON
The Population Window button can open the Population window in two modes: momentary and stationary. Click and hold
the button to momentarily pop up a population graph. The
SimCity 2000 — ReferencePage 72
Page 77
graph will disappear when you release the button.
If you click the button and drag it away from the toolbar, the
Population window will open (and stay there), complete with
three buttons for different population displays. Complete information on the Population window can be found later in this
section of the manual.
CITY INDUSTRY WINDOW BUTTON
The City Industry Window button can open the City Industry
window in two modes: momentary and stationary. Click and
hold the button to momentarily pop up an industry graph. The
graph will disappear when you release the button.
If you click the button and drag it away from the toolbar, the
City Industry window will open (and stay there), complete with
three buttons for different industrial displays. Complete information on the City Industry window can be found later in this
section of the manual.
NEIGHBORS WINDOW BUTTON
The Neighbors Window button can open the Neighbors window in two modes: momentary and stationary. Click and hold
the button to momentarily pop up a display of your city and its
neighboring cities, with their individual and collective populations. The display will disappear when you release the button.
If you click the button and drag it away from the toolbar, the
Neighbors window will open (and stay there). Complete information on the Neighbors window can be found later in this
section of the manual.
BUDGET WINDOW BUTTON
Click here to open the Budget window. (There is no momentary
view.) Complete information on the Budget window can be
found later in this section of the manual.
Page 73
Page 78
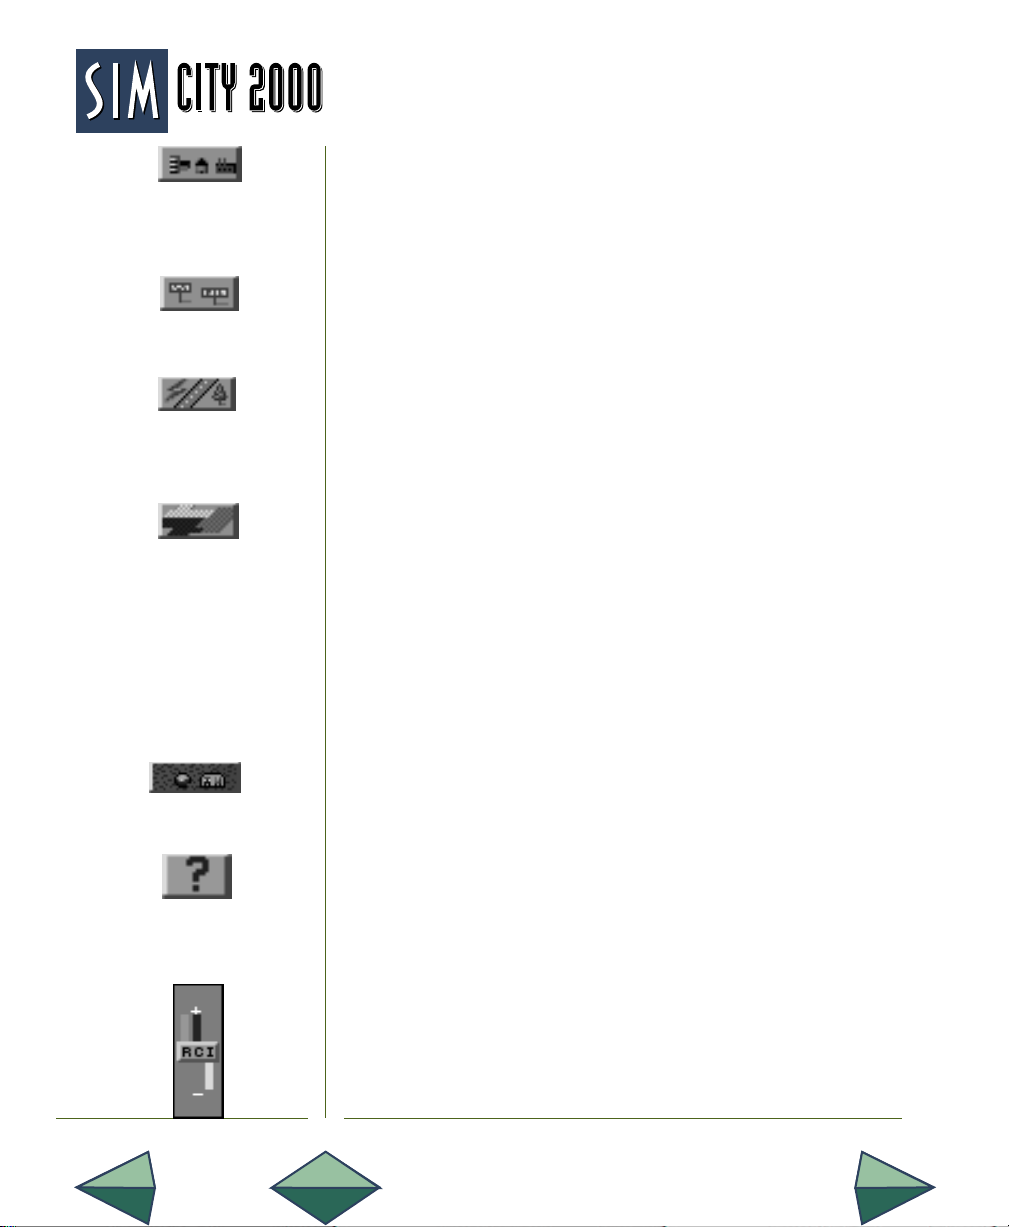
THE ULTIMATE CITY SIMULATOR
™
SHOW BUILDINGS
Click here to toggle on and off the display of all buildings in the
City window. The buildings won’t really go away—they’ll just
be invisible until you turn them back on.
SHOW SIGNS
Click here to toggle on and off the display of all signs in the City
window. The signs will be invisible until you turn them back on.
SHOW INFRASTRUCTURE
Click here to toggle on and off the display of all miscellaneous
city infrastructure items in the City window (roads, rails,
subway lines, power lines, water pumps and subway stations).
SHOW ZONES
This button works differently depending on whether you’re
looking at the normal or underground view. In the normal view,
clicking here toggles on and off the display of all buildings in
zones. It doesn’t affect city-owned buildings like police and fire
stations, educational facilities, depots or power plants, but
does include ports and military bases. In underground view, it
toggles on and off a color display that lets you know where
your zones are without jumping back upstairs.
SHOW UNDERGROUND
Click here to toggle between the surface and the underground
displays.
HELP
Click here for a friendly reminder that you can get help on each
of these buttons by holding down the Shift key and clicking on
the button in question.
DEMAND INDICATOR
The Demand Indicator gives you a constant readout of what
types of zones the Sims in your city need. Depending on the
size of your city, the indicator can take up to a few minutes to
respond to your changes, so be patient.
SimCity 2000 — ReferencePage 74
Page 79

THE TERRAIN TOOLBAR
When the City window is in terrain-editing mode, it has the
Terrain toolbar—your control center for modifying and
customizing landscapes. It can be moved around your screen
by clicking and dragging the bar at the top. There is no charge
for any terrain modifications in terrain-editing mode. All the
tools in the Terrain toolbar are explained below.
Make
Coast
Make River
Sliders
COAST
The Coast button, when depressed, creates a coastline
along one side of the next landscape that is generated.
Generate New
Landscape
Raise Terrain
RIVER
The River button, when depressed, creates a river through
the next landscape that is generated.
MOUNTAIN, WATER AND TREE SLIDERS
These sliders let you adjust the amount of the surface of
Place Water
Place Tree
your city that is covered by mountains, water and trees.
Click and drag the slider bars to the levels you want. The
higher the sliders, the more mountains, water or trees
you get. The lower the sliders, the less you get.
MAKE
Click here to generate a new landscape based on the
Coast button, the River button and the three sliders.
RAISE TERRAIN
Click on the Raise Terrain button, then click or click and drag
on the terrain to raise the land. Clicking on water will eventually raise the waterbed above sea level and turn it into dry land.
When Raise Terrain is active, the cursor appears as three
upward-pointing arrows.
Stretch
Terrain
Raise Sea
Level
Zoom Out
Rotate
Counter-
Clockwise
Center
Lower Terrain
Level
Terrain
Lower Sea
Level
Place
Stream
Place
Forest
Zoom In
Rotate
Clockwise
Help
Leave Terrain
Mode and Go to
City Mode
LOWER TERRAIN
Click on the Lower Terrain button, then click or click and drag
on the terrain to lower the land. Clicking on dry land will
eventually lower it below sea level and turn it into a lake or
Page 75
Page 80

THE ULTIMATE CITY SIMULATOR
™
stream. When Lower Terrain is active, the cursor will appear
as three downward-pointing arrows.
STRETCH TERRAIN
The Stretch Terrain button lets you grab the land and stretch
it up or down. Just click and hold on the terrain, then drag it
either up or down. When Stretch Terrain is active, the cursor
will appear as an up-and-down-pointing arrow.
LEVEL TERRAIN
The Level Terrain button lets you pick an altitude and quickly
bring the land around it either up or down to match your chosen
level. Just click and hold at the altitude you want, then drag the
cursor around the area you want leveled. When Level Terrain is
active, the cursor will appear as a flat, four-way arrow.
RAISE SEA LEVEL
Click here to raise the sea level in the terrain by one tile.
LOWER SEA LEVEL
Click here to lower the sea level in the terrain by one tile.
PLACE WATER
The Place Water tool lets you create lakes and streams by
clicking where you want your water to appear. When this tool
is active, the cursor appears as a water droplet.
PLACE STREAM
The Place Stream tool lets you send streams flowing down
slopes into the valleys below. Click where you want the stream
to begin. When this tool is active, the cursor appears as a
babbling brook.
PLACE TREE
The Place Tree tool lets you add trees to the landscape. When
active, the cursor will appear as a tree. Each click will place either
one or two trees. Click repeatedly on a single tile to create dense
thickets, and click and drag across many tiles to create forests.
Hold down the Shift key while using Place Tree to remove trees.
SimCity 2000 — ReferencePage 76
Page 81

PLACE FOREST
The Place Forest tool works like Place Tree, except it places
trees on a number of tiles with each click. When active, the
cursor will appear as a tiny little forest. Hold down the Shift key
while using Place Forest to remove forests.
ZOOM OUT
Click here to zoom out for a smaller, farther-out view in the City
window. There are three zoom levels. If you are currently zoomed
all the way out, this button will be ghosted and unavailable.
ZOOM IN
Click here to zoom in for an enlarged, closer view in the City
window. There are three zoom levels. If you are currently zoomed
all the way in, this button will be ghosted and unavailable.
ROTATE COUNTER-CLOCKWISE
Click here to rotate the entire city limits 90 degrees counterclockwise.
ROTATE CLOCKWISE
Click here to rotate the entire city limits 90 degrees clockwise.
CENTER
The Center tool lets you pick a place in your city to be centered in
the City window. Just activate the tool and click anywhere in the
city. There is a keyboard shortcut for activating the Center tool—
hold down the Control key. When Center is active, the cursor
appears as a target sight.
HELP
Click here for a friendly reminder that you can get help on each
of these buttons by holding down the Shift key and clicking on
the button in question.
DONE
Click here when you are done editing the terrain and are ready
to switch over to city-building mode.
Page 77
Page 82

THE ULTIMATE CITY SIMULATOR
™
Map Window
Close
Box
Map
Toolbar
City Window
Rectangle
Title
Bar
IN GENERAL
The Map window shows your complete city limits at once with
vital information in a number of different map displays. It can be
opened by selecting Map from the Windows menu. It can also be
opened—in two ways—with the Map button on the City toolbar.
Zoom Box
If you click and hold on the Map button, the
map (just the map—no Title bar or frame)
will pop up, and then go away when you
release the button. If you click and drag the
button, the full Map window will appear.
The Map window can be moved around
the screen by clicking and dragging the
Title bar. It can be closed by clicking the
Close box.
The Map window has two sizes. Click the Zoom box to toggle
between the two sizes. This may vary on different computers;
check your machine-specific Addendum.
All map displays include the terrain. Trees and forests are
green, water is blue and the land is different shades of brown—
the higher the altitude, the lighter the shade.
Somewhere in the map is a rectangle that outlines the area of
the city that currently shows in the City window. Clicking on the
map moves the rectangle to the place where you clicked, then
redraws the City window to show the rectangle’s new contents.
THE MAP TOOLBAR
The Map toolbar has a number of buttons that let you see a
number of different map displays. The pop-up map, which has
no toolbar, always shows the last-selected display. Some of the
buttons on the toolbar have submenus for even more displays.
In maps that display information in shades of grey, the darker
the grey, the higher, heavier or denser the item being mapped.
SimCity 2000 — ReferencePage 78
Page 83

CITY FORM
The City Form button controls two map displays. Click and
hold on it to open a submenu that lets you choose between
displaying structures and zones.
Structures shows buildings and city infrastructure, including
roads, rails, etc. Zones shows the areas that have been zoned.
Residential zones are shown green, commercial zones are blue
and industrial zones are yellow.
ROADS
The Roads button controls three map displays. Click and hold
on it to open a submenu that lets you choose between displaying roads, rails and traffic density.
Roads and Rails show the transportation pathways in your
city. Traffic density shows the relative amount of traffic in
different parts of the city in shades of grey.
POWER GRID
The Power Grid button activates a display of the power grid in
your city. Powered zones are shown in yellow, zones that have
lost power are shown in red, and power lines are shown in white.
WATER SYSTEM
The Water System button activates a display of the water grid
in your city. Zones that are hooked to the water supply are
shown in yellow, zones that have no water are shown in red,
and water pipes are shown in white.
POPULATION
The Population button controls two map displays. Click and
hold on it to open a submenu that lets you choose between
displaying population density and the rate of population growth.
Page 79
Page 84

THE ULTIMATE CITY SIMULATOR
™
Population Density shows the relative number of Sims in each
part of your city in shades of grey. Rate of Growth shows where
in the city the population is increasing in shades of blue, and
where it is decreasing in shades of red. The darker the blue or
red, the more drastic the population change.
CRIME
The Crime button controls three map displays. Click and hold
on it to open a submenu that lets you choose between displaying crime rate, police power, and police department location.
Crime Rate shows the relative amount of crime in each area of
your city in shades of grey. Police Power shows the relative
amount of police coverage in different areas of the city, also in
shades of grey. Police Departments shows each of your stations as a white square.
POLLUTION
The Pollution button activates a display of the relative amounts
of pollution in your city. This is a reading of all types of
pollution combined, and is shown in shades of grey.
LAND VALUE
The Land Value button activates a display of the relative
property values in the city, shown in shades of grey.
CITY SERVICES
The City Services button controls four map displays. Click and
hold on it to open a submenu that lets you choose between
displaying fire department power, fire department location,
schools and colleges.
Fire Power shows the relative fire coverage of different parts of
your city in shades of grey. Fire Departments, Schools and
Colleges show the locations of these buildings as white squares.
SimCity 2000 — ReferencePage 80
Page 85

MAP MODE BUTTON
This button toggles the City window between its current mode
and Map mode. In Map mode the terrain in the City window
displays the same information as the Map window. You can
return the City window to its previous mode by either clicking
the Map Mode button again or closing the Map window.
The Budget window reports and lets you adjust your city’s
budget. It automatically opens every January, unless AutoBudget (in the Options menu) is on. It can also be opened
manually by selecting Budget in the Windows menu, or by
clicking on the Budget window button in the City toolbar.
The Budget window closes automatically all
by itself after about two minutes. The twominute timer is reset whenever you click on
the window. You can close it any time you
want by clicking on the Done button.
The upper-left corner of the Budget window
displays your city’s name, the current year
and month, and the timer.
Click the Help button for a friendly reminder
that you can get help on each area, item and
button in this window by holding down the
Shift key and clicking.
THE NUMBERS
The Budget window has eight rows of figures that cover all the
city’s revenues and expenses. Below those figures is a summary of the current financial situation and an estimate of what
your finances will be at the end of the year.
Budget Window
Each revenue or expense has:
• The name of the revenue or expense. Shift-click on the name
to bring up a helpful explanation of what it is and what it does.
Page 81
Page 86

THE ULTIMATE CITY SIMULATOR
™
the tax rate you are charging or the amount of funding you
are allotting.
• A year-to-date figure showing the up-to-the-moment amount
that you’ve spent or made.
• An annual estimate of what you will have spent or made at
the end of the year at the current budget settings.
• Detailed books showing a monthly breakdown of the revenue or expense. In some cases the book dialog just shows
information, but some of the books also allow access to
other, more detailed budgeting functions.
• An advisor who reports current status and/or gives suggestions about what you should do.
Note: When the Budget window opens automatically at
the beginning of a new year, the Year-to-Date column
shows the total for the year that just ended and the
Annual Estimate column shows estimated costs for the
year that is just beginning.
Below is a detailed explanation of each budget item.
PROPERTY TAXES
Property taxes are your main source of cash for maintaining
and expanding your city. You can set the overall tax rate for all
zones by clicking on the up- and down-arrows. The minimum
tax is 0%, the maximum is 20%. Any taxes you set here will be
equally applied to all zones. You can independently set the tax
rates for residential, commercial and industrial zones in the
Property Taxes Books.
Clicking on the Books icon displays a detailed report of the
year’s past and projected tax income. For each month, the
following information is given:
• The residential zone tax rate and tax amount
• The commercial zone tax rate and tax amount
SimCity 2000 — ReferencePage 82
Page 87

• The industrial zone tax rate and tax amount
• A running total of the taxes that will come due at the
end of the year
At the bottom of the dialog box, you can set individual
tax rates for the three types of zones. If you change the
tax rates here, the overall rate as shown in the Budget
window will display the average of the three rates.
Click on Done to close the Property Taxes Books.
CITY ORDINANCES
This line item is a summary of the costs and revenues of
all combined city ordinances. These range from education drives to sales taxes to neighborhood watch to an
annual carnival.
Usually, you, as mayor, must approve and establish
these programs, but if your city is doing very well, the
City Council may take it upon itself to enact some
programs that benefit the city. These programs are
viewed and established in the Ordinance window, which
can opened from the Budget window by clicking on the
Community Programs Book icon. The Ordinance window will be described in detail below.
Click Done to return to the Budget window.
BOND PAYMENTS
This is the interest you pay on bond issues.
If you need cash above and beyond the money you make
from property taxes, you can issue municipal bonds,
which is basically a loan from your citizens. All bonds are
issued for $10,000. The interest you pay on outstanding
bonds is prime rate plus 1%, plus an additional percentage based on your city’s current value and loan rating.
Page 83
Page 88

THE ULTIMATE CITY SIMULATOR
™
Clicking on the Interest book icon opens a dialog box with
detailed information and buttons for extra financial transactions.
For each month of the year, the following information is
given: (actual amounts are shown in blue, projected
amounts are shown in red.)
• The bonds you have outstanding
• The average interest rate you pay on the bonds
• The monthly amount of interest you pay on the bonds
• The accumulated total interest paid
Show Bonds displays:
• Your city’s current loan rating
• The total number of bonds you have outstanding
• The current interest rate the bank is paying on your
account
• The interest rate you will pay on a bond if you issue it now
• The current value of your city (the infrastructure)
Loan ratings range from AAA to F. Your rating is based on your
city value. The higher your rating, the more bonds you can
issue and the lower the interest rate you pay on them.
Issue Bond opens a dialog that tells you the current interest rate
for bonds and asks you if you want to issue one. All bonds are
$10,000. If you need or want more than $10,000, then you can issue
two bonds. If you need or want less, too bad—take the $10,000 and
keep what you don’t spend in the bank. If your loan rating or city
value is too low, you won’t be allowed to issue any more bonds.
Repay Bond opens a dialog that tells you the interest rate on
the oldest outstanding bond, and asks if you want to repay it.
Bonds are always repaid from the oldest to the newest. During
the life of the bond, interest accrues monthly, and is paid out
SimCity 2000 — ReferencePage 84
Page 89
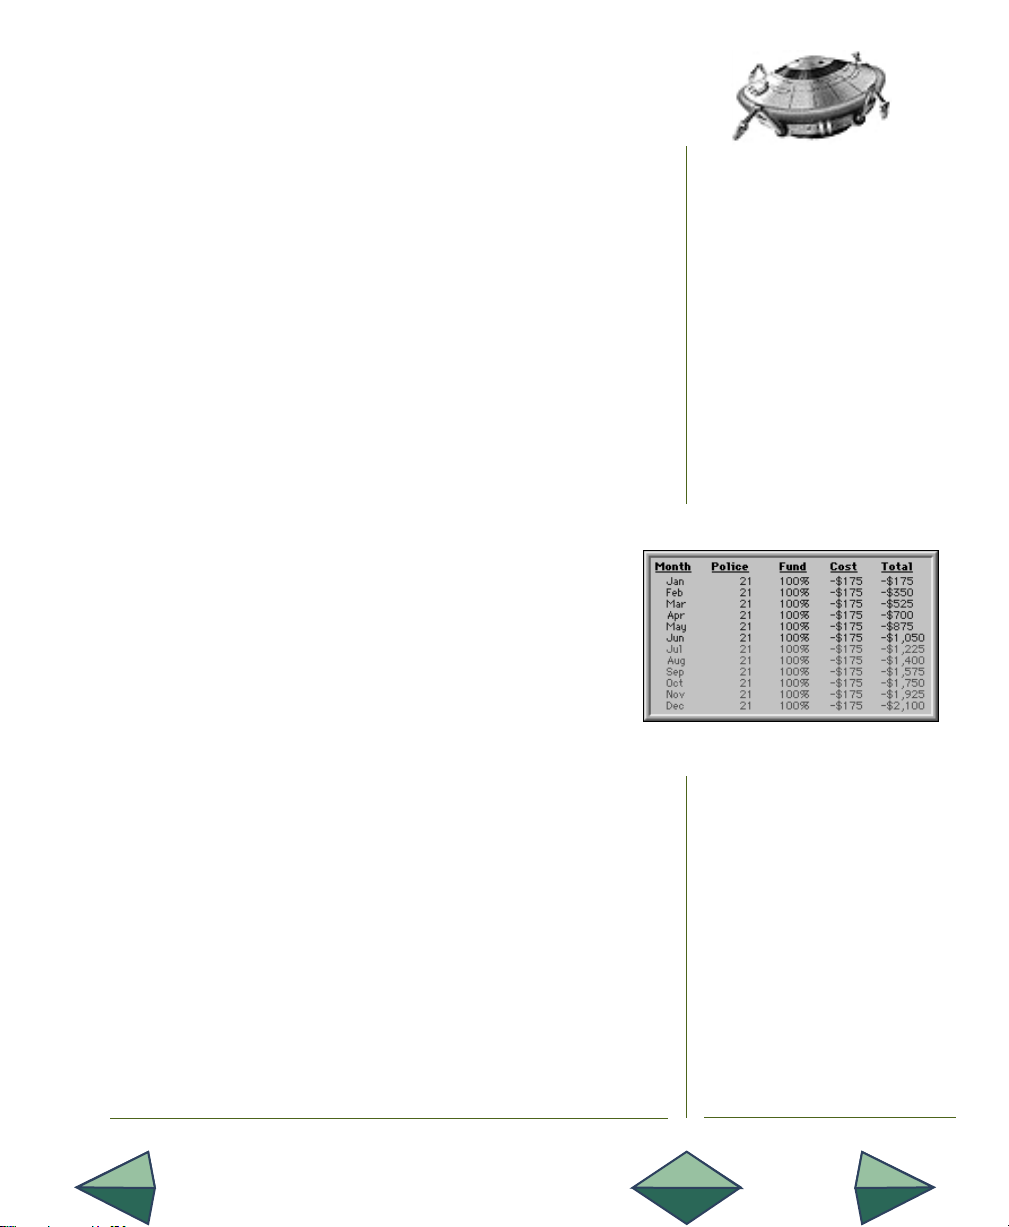
at the end of each year from your city funds. You will pay the
interest every year until you repay the bond, so once you’re
flush with cash, pay them off and get out of debt.
Clicking on Done closes the book.
POLICE DEPARTMENT
This is the cost and funding level for police departments in
your city. You can set the percentage of funding for your
departments by clicking on the up- and down-arrows. In
general, try to keep police funding as high as possible to
prevent rampant crime. Any funding you set will be equally
distributed to all police departments. Complete funding for a
police station is $100 per year.
Clicking on the Books icon displays a detailed report of
the year’s past and projected police funding costs. For
each month, the following information is given:
• The number of police stations in the city
• The funding level you have set
• The actual monthly cost to fund your stations
• A running total of the yearly cost
There are no additional buttons or functions here, so just
click anywhere to close the books.
FIRE DEPARTMENT
This is the cost and funding level for fire departments in your
city. You can set the percentage of funding for your departments by clicking on the up- and down-arrows. In general, try
to keep fire funding as high as possible for both preventing
fires and responding to emergencies. Any funding you set will
be equally distributed to all fire departments. A fully funded
fire station costs $100 per year.
Page 85
Page 90

THE ULTIMATE CITY SIMULATOR
™
Clicking on the Books icon displays a detailed report of the
year’s past and projected fire funding costs. For each month,
the following information is given:
• The number of fire stations in the city
• The funding level you have set
• The actual monthly cost to fund your stations
• A running total of the yearly cost
There are no additional buttons or functions here, so
just click anywhere to close the books.
HEALTH & WELFARE
This is the cost and funding level for medical services in your
city. You can set the percentage of funding for your hospitals
by clicking on the up- and down-arrows. In general, try to keep
funding as high as possible to keep your Sims healthy. If you
keep your funding at 100% for several decades, the average life
expectancy in your city will increase. Any funding you set will
be equally distributed to all hospitals. Complete funding for a
hospital is $75 per year.
Clicking on the Books icon displays a detailed report of
the year’s past and projected medical funding costs. For
each month, the following information is given:
• The number of hospitals in the city
• The funding level you have set
• The actual monthly cost to fund your hospitals
• A running total of the yearly cost
There are no additional buttons or functions here, so just click
anywhere to close the books.
SimCity 2000 — ReferencePage 86
Page 91

EDUCATION
This is the cost and funding level for education in your city.
This funding supports both schools for the children and
colleges for higher learning. Without schools, education in
your city will be entirely based on verbal lore, and you will be
unable to support high-technology industries.
You can set the percentage of funding for education by clicking
on the up- and down-arrows. Any funding you set here will be
equally distributed to all schools and colleges. You can independently set the funding rates for schools and colleges in the
Education books. Complete funding for a school costs $25 per
year, and a college costs $100 per year.
Clicking on the Books icon displays a detailed report of
the year’s past and projected education funding. For
each month, the following information is given:
• The number of schools in the city
• The funding level for schools
• The monthly cost to fund schools
• The number of colleges in the city
• The funding level for colleges
• The monthly cost to fund colleges
• A running total of the yearly cost
At the bottom of the dialog box, you can set individual funding
levels for schools and colleges. If you change the funding levels
here, the overall level as shown in the Budget window will
display the average of school and college funding levels.
Click on Done to close the Education books.
Page 87
Page 92

THE ULTIMATE CITY SIMULATOR
™
TRANSIT AUTHORITY
This is the cost and funding level for maintaining the transportation system in your city. This funding maintains roads, rails,
highways, subways, bridges and tunnels. Without proper funding, your transit systems will deteriorate and commuting and
commerce in your city will fall to pieces.
You can set the overall percentage of funding for your transportation systems by clicking on the up- and down-arrows. Any
funding you set here will be equally distributed to all types of
transportation. You can independently set the funding rates
for roads, rails, highways, subways, bridges and tunnels in the
Transit Authority Books. Complete transit authority funding
per year is: Roads $1 per 10 tiles; Rails $1 per 5 tiles; Highways
$1 per section (4 tiles); Subways $2 per 5 tiles; Bridges $2 per
5 tiles; Tunnels $2 per 5 tiles.
Clicking on the Books icon displays a detailed report of
the year’s past and projected transit authority funding.
For each month, the following information is given:
• The cost of road maintenance
• The cost of rail maintenance
• The cost of highway maintenance
• The cost of subway maintenance
• The cost of bridge maintenance
• The cost of tunnel maintenance
• A running total of all transit costs
At the bottom of the dialog box, you can set individual funding
levels for roads, rails, highways, subways, bridges and tunnels. If you change the funding levels here, the overall level as
shown in the Budget window will display the average of all
these funding levels.
Click on Done to close the Transit Authority Books.
SimCity 2000 — ReferencePage 88
Page 93

THE TOTALS
The bottom of the Budget window shows the totals for:
• Year-to-Date Cash Flow
• Estimated Annual Cash Flow
• Current Funds
• (Estimated) End of Year Funds
The Ordinance window is where community programs and
city ordinances are established and inspected. This window
can be opened either by selecting Ordinance from the Windows menu or by clicking on the City Ordinance Book icon in
the Budget window.
There are five categories of programs and ordinances:
finance, health and safety, education, promotional and
other. Click on the names of each program or ordinance
for an explanation of what they do as well as their pros
and cons.
To enact a program, click in the checkbox to the right of
the program’s name. The cost or projected revenue will
appear to the right of the check. These amounts will vary
with the size and development of your city. The Estimated Annual Costs for all programs is provided in the
lower-right corner of the window.
Click Done to close the Ordinance window.
FINANCE PROGRAMS
1% Sales Tax will add cash to your coffers, but may also inhibit
local commerce.
Ordinance Window
1% Income Tax is a source of city revenues, but may discourage residential growth, and even cause some tax-haters to
move away.
Page 89
Page 94

THE ULTIMATE CITY SIMULATOR
™
Legalized Gambling can provide extra money that can be put
to good use, but brings with it an increase in crime.
Parking Fines are a small, steady source of the green, but tend
to hinder commercial growth a little.
SAFETY & HEALTH PROGRAMS
A Volunteer Fire Department can be an economical way to fight
fires in small communities, but can’t replace the professionals
in a big city or during a forest fire.
A Public Smoking Ban can increase the overall health level in
your city and eventually increase the average life expectancy,
but will cost a small fee to administer.
Free Clinics increase the overall health level in the city, but free
clinics aren’t free—at least not to you.
Junior Sports increases the overall health level of the youth of
your city.
EDUCATION PROGRAMS
A Pro-Reading Campaign will increase the overall education
level in your city, preparing it for an influx of new, high-tech
industries.
An Anti-Drug Campaign can help reduce crime.
Providing CPR Training as a service to your Sims increases the
overall level of health in your city.
Neighborhood Watch helps reduce crime in residential areas,
but at a price.
PROMOTIONAL PROGRAMS
Tourism Advertising may or may not pay off in bringing visitors with their loose dollars to your fair city. If you do advertise
SimCity 2000 — ReferencePage 90
Page 95

for tourists, make sure you have the right attractions, like
marinas, stadiums, parks, zoos, rivers, etc.
Business Advertising can bring new industry into town, but
make sure you can support the businesses with ample water,
power, transportation, and enough residential and commercial space to hold the influx of new citizens. And low taxes
won’t hurt, either.
City Beautification increases residential desirability and land
value.
An Annual Carnival can increase tourist trade and local commerce, and show your Sims a darn good time. The size, cost
and benefit of the carnival varies with your city size.
OTHER PROGRAMS
Energy Conservation establishes an educational drive to conserve electricity by, among other things, adding insulation to
homes and water heaters. This program takes a few years to
ramp up to full effect, but will eventually allow your power
plants to power up to 15% more buildings.
Declaring your city a Nuclear Free Zone costs nothing, but can
make some of your citizens feel safer, and may even attract
new citizens to your fair town. It’s a small plus for residential
desirability and a small minus for industry. A Nuclear Free
Zone will not stop the military from building missile silos or
basing nuclear weapons near your city if you give them permission to build a base.
Homeless Shelters are expensive, but decrease the number of
homeless people and increase the number of residents, increasing the labor pool for commerce and industry and marginally increasing land value.
Page 91
Page 96

THE ULTIMATE CITY SIMULATOR
™
Pollution Controls slightly lower the amount of industrial
pollution in your city, but also make the city slightly less
desirable to industry.
ESTIMATED ANNUAL COST
This section of the Ordinance window summarizes the cost or
income from each category, and gives both year-to-date and
full-year estimated totals.
Population Window
The Population window displays graphs of statistics about
your city’s population. It can be opened by selecting Population from the Windows menu. It can also be opened—in two
ways—with the Population button on the City toolbar.
If you click and hold on the Population button, the population graph (just the graph—no Title bar or frame) will
pop up, and then go away when you release the button. If
you click and drag the button, the full Population window
will appear, complete with buttons for additional displays.
The Population window can be moved around the screen
by clicking and dragging the Title bar. It can be closed by
clicking the Close box. The three buttons on the bottom
of the window let you choose between three different
population-related graphic displays:
Population shows the age distribution of your population, and gives the percentage of the population that is your
potential work force.
Health shows the Life Expectancy (LE) of your population, by
age, and summarizes the LE of your work force.
Education shows the average education level of your citizens
at various ages, expressed in their Education Quotient (EQ). A
high EQ attracts high-tech industry to your city. EQ is affected
by the presence of schools, colleges, libraries and museums.
SimCity 2000 — ReferencePage 92
Page 97

The Industries window displays graphs of statistics about
your city’s industry. It can be opened by selecting Industry
from the Windows menu. It can also be opened—in two ways—
with the Industry button on the City toolbar.
If you click and hold on the Industry button, the industry graph
(just the graph—no Title bar or frame) will pop up, and then go
away when you release the button. If you click and drag the
button, the full Industries window will appear, complete with
buttons for additional displays.
The Industries window can be moved around the screen by
clicking and dragging the Title bar. It can be closed by clicking
the Close box. The three buttons on the bottom of the window
let you choose between three different industry-related graphic
displays:
Ratios shows the distribution of various types of industries in
your city.
Tax Rates shows the rate at which various industries are taxed.
This is the property tax for industry as set in the Budget
window. You can change the rate for individual industries by
dragging the blue bar to the right (increase tax) or left (decrease tax). You may want to lower taxes on an industry to
encourage its growth within your city. You may want to increase taxes to discourage an industry, or to fine it for causing
excess pollution.
Industries Window
Demand shows a graph of which industries’ products are in
demand nationally.
The first step of planning, the selection of options for review, is the most critical and
often the most difficult procedure in this process: rarely is this done well and thoroughly.
Which options are to be examined depends upon the training, intelligence, education,
experience and personal biases of the person or committee selecting options.
XVIII
Page 93
Page 98

THE ULTIMATE CITY SIMULATOR
™
Graphs Window
The Graphs window displays statistical graphs about many
elements of your city. It can be opened by selecting Graphs
from the Windows menu. It can also be opened—in two ways—
with the Graphs button on the City toolbar.
If you click and hold on the Graphs button, the graph (just
the graph—no Title bar or frame) will pop up, and then go
away when you release the button. If you click and drag
the button, the full Graphs window will appear, complete
with buttons for controlling the graphs displayed.
The Graphs window can be moved around the screen by
clicking and dragging the Title bar. It can be closed by
clicking the Close box. The many buttons on the bottom
of the window let you toggle on and off various graphic
displays. Click on the 1 year, 10 year or 100 year button
to set the time scale for the graphs.
Each graph:
• Is shown in a different color
• Has a “marker” letter or symbol at its right end to help you
identify it
• Is followed by a number that gives its current value
City Size, marked with an “S,” is the total city population.
Residents, marked with an “R,” shows the population that isn’t
part of the job market, including children, elderly and spouses
not employed outside of the home.
Commerce, marked with a “C,” shows the number of people
employed in commercial jobs.
Industry, marked with an “I,” shows the number of people
employed in industrial jobs.
Traffic, marked with a “T,” shows the average density of your
road network including buses, but not trains or subways. For
this graph, traffic is considered road congestion, not the total
amount of travel.
SimCity 2000 — ReferencePage 94
Page 99

Pollution, marked with a “P,” shows the growth or decline in
the general level of pollution in the city.
Value, marked with a “V,” shows the fluctuations of the average
land value in the city by graphing the median home price.
Crime, marked with an “X,” shows the changing crime rate in
your city.
Power%, marked with a “p,” shows the remaining capacity of
your power plant(s). When you get to 0 you’ll start to have
brownouts.
Water%, marked with a “w,” shows the remaining capacity of
your water system. When you get to 0 you’ll need more wells
and pumps.
Health, marked with an “h,” shows the growth or decline of the
overall health level of the citizens of your city.
Education, marked with an “e,” shows the ever-changing average level of education that the citizens of your city have
reached.
Unemployment (Unemp.), marked with a “u,” shows the changing number of people that are out of work in your city.
Gross National Product (GNP), marked with a “g,” shows the
total value of goods and services produced by the residents of
SimNation. This affects the market for industrial goods produced in your city.
National Population (Nat’l Pop), marked with an “n,” shows the
changes in SimNation’s total population.
Fed Rate, marked with “%,” is the prime interest rate as set by
SimNation’s Federal Reserve Board.
Page 95
Page 100

THE ULTIMATE CITY SIMULATOR
™
Neighbors Window
City planning in the United States has most often used economic and technological
(scientific) variables to drive decisions regarding its municipalities. It is interesting to
wonder how our new communities might develop if we based decisions on the
The Neighbors window displays your city’s population along with
the population of its neighboring cities and the total population of
SimNation. Use this window to compare your city with the cities
that you compete with for people and other resources, and to see
just how big a part of the whole nation you are (or aren’t).
The Neighbors window can be opened by selecting
Neighbors from the Windows menu. It can also be
opened—in two ways—with the Neighbors button on
the City toolbar.
If you click and hold on the Neighbors button, the window, with no Title bar or frame, will pop up, and then go
away when you release the button. If you click and drag
the button, the full Neighbors window will appear, and
stay until you make it go away by clicking in the Close box.
You can move the window around on the screen by clicking
and dragging the Title bar.
answers to questions like:
“What is it you are trying to achieve in a human community?”
and “What does this natural landscape and topography suggest
is the most appropriate use of this environment?”
XIX
SimCity 2000 — ReferencePage 96
 Loading...