

Page 1
INSTALLATION INSTRUCTIONS
Product Revision
7160-0445, 7160-0446
Description
DODGE DURANGO CONSOLE
Rev.A
Printing Spec:
Form
INST-581
PS-001
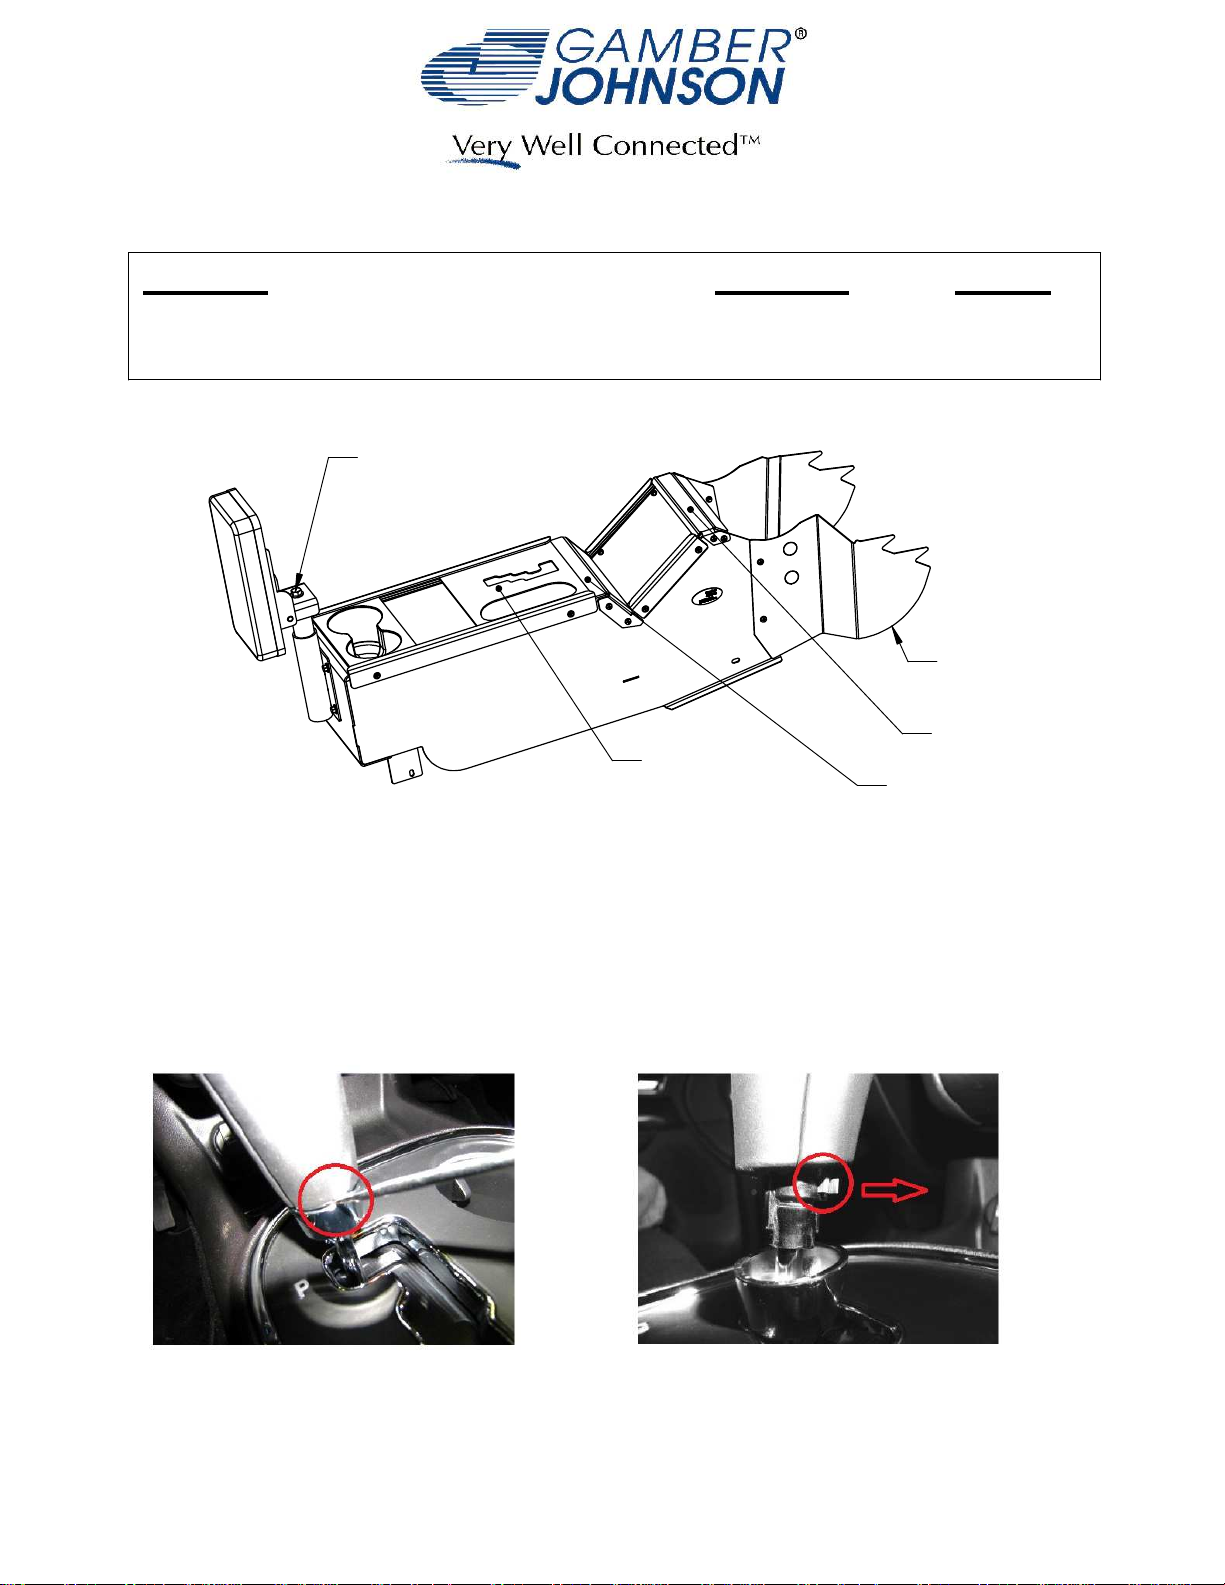
ARMREST HEIGHT
AND ANGLE ADJ.
DASH FILL
EXTENSION
TOP PLATE
SHIFTER GATE
PLATE
SPREADER PLATE
Vehicle Disassembly
1. Begin by disassembling vehicle OEM console.
2. Set vehicle parking brake and place shifter into neutral position. Disconnect
vehicle battery.
3. Using a small flat head screwdriver, pry down on chrome ring around shifter
knob (Fig 1).
4. Pull out the shifter retaining clip on passenger side of shifter knob (Fig 2).
5. Pull up to remove shifter knob and chrome ring.
Fig 1 - Shifter Removal
Product Mounting Disclaimer
Product Mounting Disclaimer
Gamber-Johnson is not liable under any theory of contract or tort law for any loss, damage, personal injury, special, incidental or consequential damages for personal injury or other damage
Gamber-Johnson is not liable under any theory of contract or tort law for any loss, damage, personal injury, special, incidental or consequential damages for personal injury or other damage
of any nature arising directly or indirectly as a result of the improper installation or use of its products in vehicle or any other application. In order to safely install and use Gamber-Johnson
of any nature arising directly or indirectly as a result of the improper installation or use of its products in vehicle or any other application. In order to safely install and use Gamber-Johnson
products full consideration of vehicle occupants, vehicle systems (i.e., the location of fuel lines, brakes lines, electrical, drive train or other systems), air-bags and other safety equipment is
products full consideration of vehicle occupants, vehicle systems (i.e., the location of fuel lines, brakes lines, electrical, drive train or other systems), air-bags and other safety equipment is
required. Gamber-Johnson specifically disclaims any responsibility for the improper use or installation of its products not consistent with the original vehicle manufactures specifications
required. Gamber-Johnson specifically disclaims any responsibility for the improper use or installation of its products not consistent with the original vehicle manufactures specifications
and recommendations, Gamber-Johnson product instruction sheets, or workmanship standards as endorsed through the Gamber-Johnson Certified Installer Program.
and recommendations, Gamber-Johnson product instruction sheets, or workmanship standards as endorsed through the Gamber-Johnson Certified Installer Program.
© copyright 2011 Gamber-Johnson, LLC
If you need assistance or have questions, call Gamber-Johnson at 1-800-456-6868
Fig 2 - Retaining Clip
Page 2
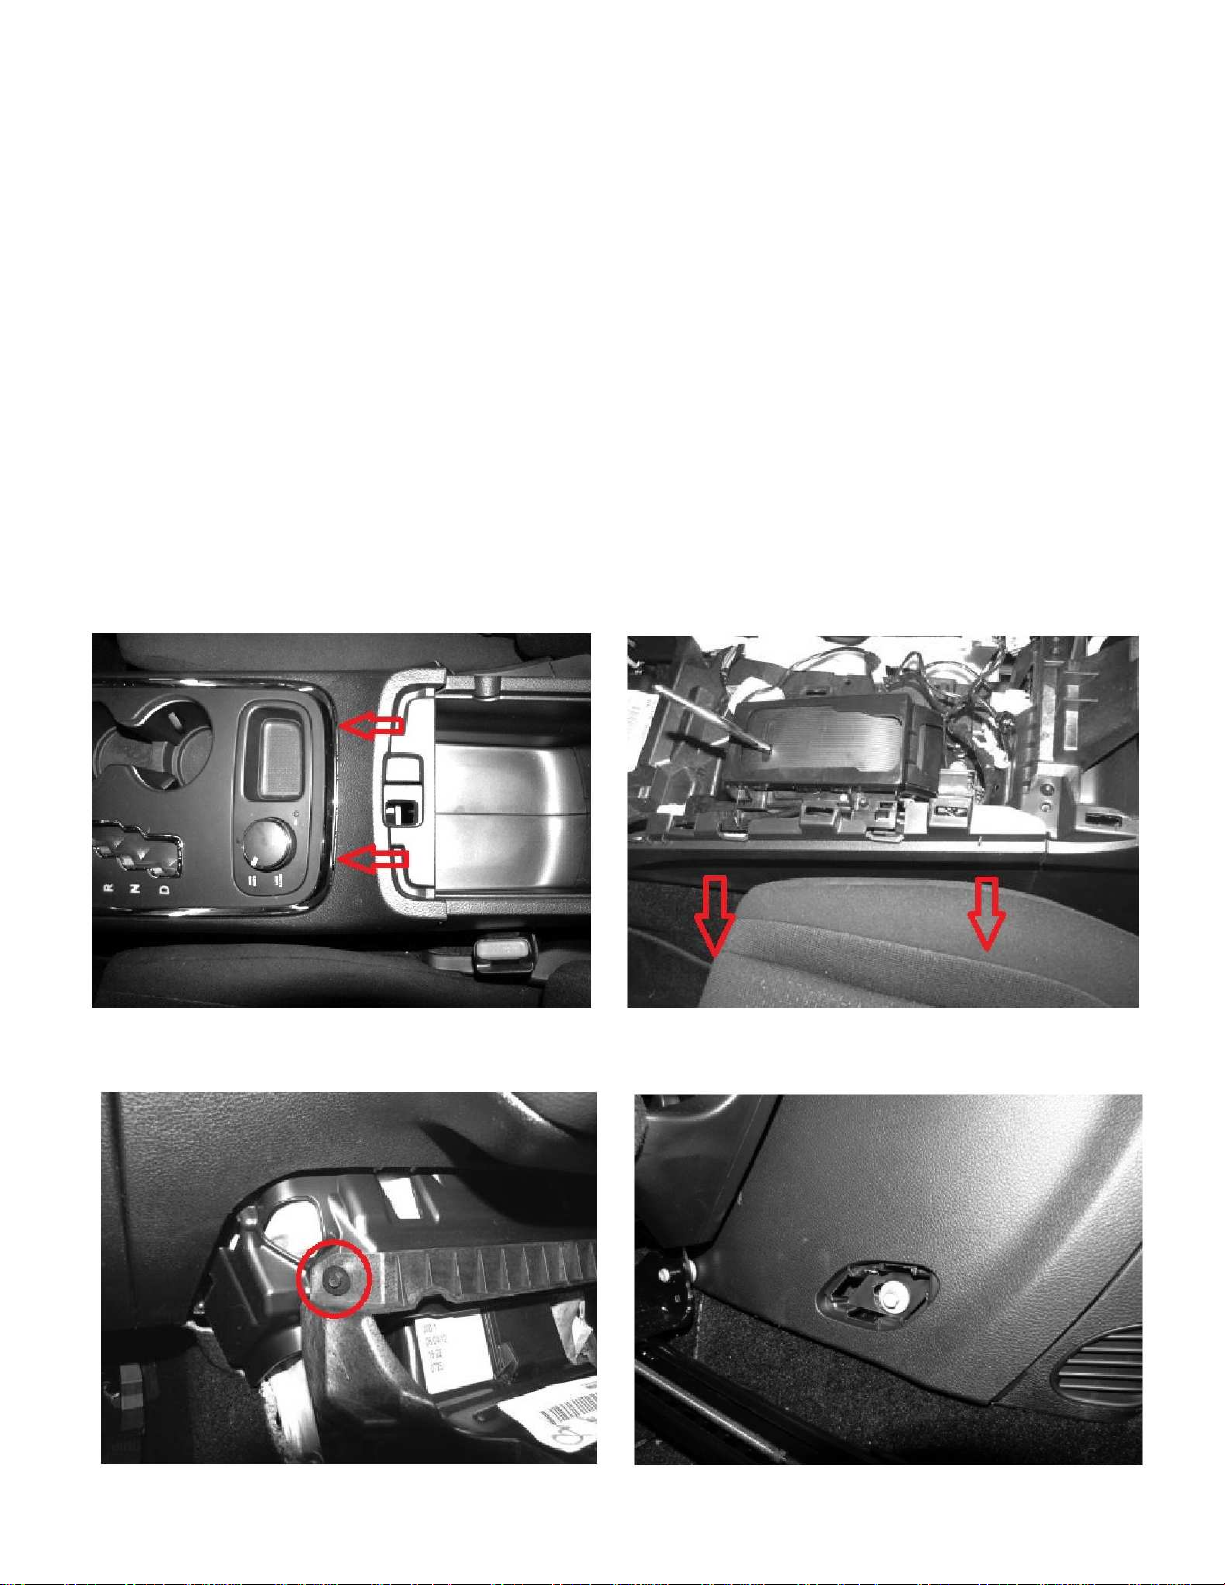
6. Gently pull up at storage bin/low range switch (behind shifter) to remove
console top (Fig 3).
7. Disconnect all harness for the console top.
8. Pop the storage bin or low range switch out of console top.
9. Pull to remove side trim pieces from console (Fig 4).
10. Remove two bolts at the front of the console (Socket M10)
11. Remove three bolts retaining the shifter assembly (Socket M10).
12. Unplug the interlock harness on the back of the shifter assembly.
13. Remove shifter assembly from console and set on driver side foot well being
careful not to damage shifter linkage cable.
14. Unplug the main harness from the 12v accessory jacks. Pull out Christmas tree
fasteners so harness can be laid in passenger foot well (Fig 7).
15. Remove two screws at the front of the console sub structure (Fig 5).
16. Slide seats all the way forward. From the back seats, pop out rear bolt covers
on the side of the console and remove bolts (Socket M10) (Fig 6).
17. Remove console sub structure from vehicle.
18. Recommended: Stuff something (clean rag) into the HVAC tube under the
front of the dash to protect the electronics from excess heat in cold weather.
Fig 5 - Front Sub Structure Screws
Fig 4 - Side Trim PiecesFig 3 - Pry Up Console Top
Fig 6 - Rear Mounting Bolts
Page 3

Console installation
1. Unpack console and remove Top Plate, Spreader Plate and Shifter Gate Plate.
2. Slide console partially into vehicle.
3. Place shifter assembly into console.
4. Bolt shifter assembly into console using OEM hardware.
5. Loosely bolt console box into vehicle using OEM hardware at front and rear of
box.
6. Reinstall Spreader Plate and Top Plate.
7. Tighten console box mounting hardware.
8. Route main harness through box and plug in shifter interlock harness.
9. Install storage bin/low range switch into cutout in Shifter Gate Plate.
10. Using needle nose pliers, carefully pry out the spring clips on the storage
bin/low range switch to secure it into the Shifter Gate Plate (Fig 8).
11. Install Shifter Gate Plate into console by applying a proper length of the
provided Dual Lock ™ reclosable fastener to the back side of the plate and
pressing into place at front of console.
12. Place shifter knob chrome ring and shifter knob onto shifter pole.
13. Reinstall the shifter retaining clip into shifter knob and snap chrome ring into
place.
14. Install Dash Fill Extensions using the provided hardware.
15. Reconnect vehicle power and test movement of shifter through the Shifter
Gate Plate.
Fig 7 - Harness and Shifter Removed Fig 8 - Low Range Spring Clips
 Loading...