

Page 1

Service Manual
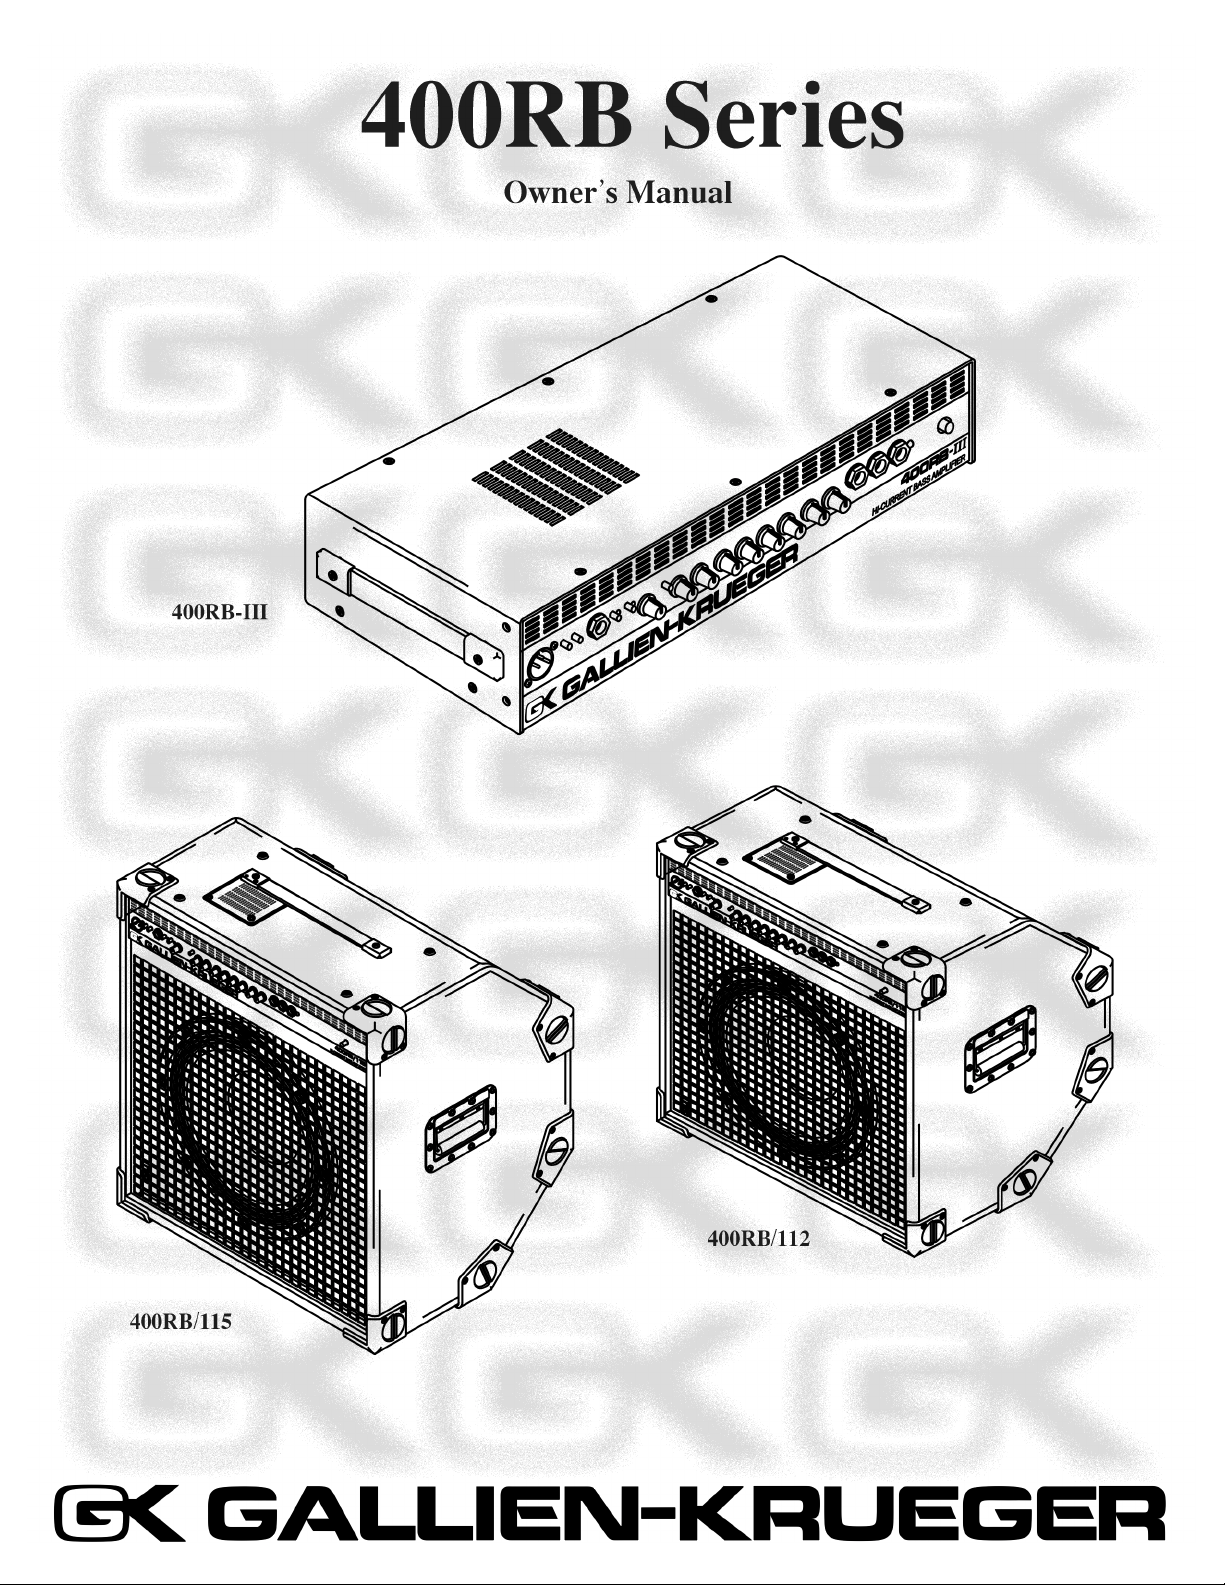
400RB-III Series
Page 2

Table of Contents
Operating Instructions 3
Turn On / Calibration Procedure 20
Schematics 21
Bill of Materials 22
Note: As of 1/99, there are no Engineering Change Orders (ECOs) for this model. New ECOs will be re-
leased as they are issued.
Page 3
Page 4
400RB Series
Table Of Contents
Table of Contents
*All Features and specifications are subject to change without notice
**This list is subject to change without notice.
Introduction.....................................................................
Quick Start.......................................................................
Sound Tips.......................................................................
Safety Information..........................................................
Installation and Maintenance........................................
Front Panel Controls.....................................................
Rear Panel Controls......................................................
400RB Series Combos...................................................
Tech Talk.......................................................................
Specifications.................................................................
Notes..............................................................................
.
3
5
6
7
8
9
10
11
12
14
15
Gallien-Krueger
2240 Paragon Dr.
San Jose, CA, 95131
phone: 408-441-7970
fax: 408-441-8085
www.gallien-krueger.com
2
Page 5
Congratulations
400RB Series
Your purchase of a new Gallien-Krueger 400RB Series
product is surely the result of much careful consideration on your part. For our part, we at GallienKrueger are pleased that you chose us, and are
determined that you will be a satisfied customer. In
choosing a 400RB Series product, you own an
amplifier with many unique features, that can take
you where you have never been before.
To get the most out of your new purchase please take a
few minutes to read through this manual. If you are in a
hurry, we suggest you at least read through the Quick
Start section before setting up your new rig. This will
help get you started and give you a few quick tips, but is
not a substitute for reading the rest of the manual.
Your amplifier should have come with the following
items, please check the contents of the box to ensure that
you have everything.
Included with your 400RB Head:
400RB 1
Rack mount ears with hardware 2
Power cord 1
Owner’s manual 1
Warranty card 1
Safety instructions sheet 1
If your 400RB Series amplifier or combo did not
come with all the items listed, or if you encounter
problems while setting up your new equipment,
please contact your local dealer, or us as soon as
possible at:
Gallien-Krueger, Inc.
2240 Paragon Drive
San Jose, CA 95131
phone: (408) 441-7970
fax: (408) 441-8085
Internet: www.gallien-krueger.com
Email: sales@gallien.com
We wish you a lifetime of good playing and remember to always have fun!
Introduction
Included with your 400RB Combo:
400RB/112, or /115 1
Power Cord 1
Owner’s Manual 1
Warranty Card 1
Safety Instructions Sheet 1
3
Page 6

Always Listening
I have never seen the point in doing things the way
others have done them. I also have not been very
interested in following the latest fad. I am a
Stanford educated engineer who worked his way
through school as a musician. Like all musicians, I
have lugged amplifiers up stairways and into car
trunks, always wondering why these things had to
be so heavy, bulky, and hard to handle.
As I am the principal innovator at
Introduction
reflect my attitudes and life experiences. I don’t model
my designs after other manufacturer’s products (as
some of our competitors are proud of reciting).
Instead, I believe new and old problems are best solved
with new solutions. Having taken our own path,
products enjoy a unique, unmatched sound, allowing
the artist using them every opportunity to make an
original statement.
Having supported my products for over thirty years, I
have learned from the story they tell.
is a reflection of that story, and has a commitment to
support that legacy. Just as the products I created
thirty years ago are still telling their story, the products
we create today will be talking to us tomorrow.
We’ll be listening,
GKGK
GK, our products
GKGK
Gallien-KruegerGallien-Krueger
Gallien-Krueger
Gallien-KruegerGallien-Krueger
400RB Series
GKGK
GK
GKGK
Robert Gallien
4
Page 7

Quick Start
The 400RB Series is designed to be simple to operate.
All controls have a well defined purpose and are well
behaved. These directions will take you through the
basics and give you a good start for setting up your
sound.
400RB Series
Quick Start
First:
Set the power switch to Off and connect the supplied
power cable from the amplifier AC receptacle to an AC
power outlet of proper voltage and power rating (see
safety information on page 7 for details).
Next:
Connect your speaker cabinets to the amplifier
outputs marked 240W. Be sure not to exceed the
recommended speaker load listed below.
Maximum Recommended Speaker Load:
One 4 Ohm, or two 8 Ohm cabinets.
If you are using an RBH series cabinet, set the
crossover switch to full range.
Then:
Set all EQ controls and the Boost control to 12
o’clock. The Voicing Filters should be turned all the
way down to get a flat response. Set the Volume and
Master Volumes at 0. If you have a five string bass,
push the button marked String Bass in.
Now:
Set the master control to 12 o’clock and slowly bring
the Master volume up. Do not turn the Volume
control in the input section past 12 o’clock unless you
want an overdrive effect. If you have a bass with
passive electronics make sure the controls are all the
way up. If you have a bass with active electronics,
turn all of the EQ controls on the bass to the middle
or flat position.
At This Point:
You should be hearing your bass quite well. You can
use the Volume and Master to achieve a comfortable
sound level.
turn up the Master control first.
Remember:Remember:
Remember: If you need more volume,
Remember:Remember:
Next:
Using an instrument cable, connect your bass to the
Input jack and turn the power switch on and play. If
the clip LED flashes, push the button marked
in. This will prevent you from overdriving the preamp.
-10db-10db
-10db
-10db-10db
5
Page 8

400RB Series
Sound Tips
The 400RB Series has several unique features which,
if used properly, will obtain that sound you have been
searching for.
The Equalizer:
The Equalizer is used to fine tune your sound. When
adjusting it, do it just a little at a time. These are
Sound Tips
active circuits, and small changes can make a big
difference in your sound. With a little experimentation you will find that this equalizer is very easy to
use, never sounds weird and provides you with a large
variety of great sounds, unique to GK.
Contour:
Increasing the Contour level will scoop out midrange frequencies while boosting the highs and lows.
The sound, once again, is unique to GK and unavailable on any other Bass amp.
String Bass:
The way a Bass amp deals with the instrument low
string is a critical part of it’s sound. In fact, a five
string instrument requires an entirely different low
end response than a four string instrument. No
equalizer can make the necessary adjustments to
accommodate both. However, the String Bass button
on the 400RB Series does just that. When it is out, the
400RB is voiced like the 800RB (the world’s classic
four string amp). Push it in and the 400RB is voiced
for five string instruments. For some playing styles
you may want it in, even with a four string instrument.
Boost/Master:
Turning up the Boost control, will add a little growl to
your tone. This is an unmistakable GK trade mark
sound, that you will grow to appreciate. Raising the
Boost while lowering the Master will add more growl
while keeping the sound level the same. Growl is
actually a small amount of even order harmonic
distortion, that sounds great through a woofer. For
most playing situations, the Master is set between 12 &
3 o’clock. The cleanest sound is obtained by setting
the Master above 12 o’clock, and going above 3
o’clock for maximum power situations.
Direct Out:
The 400RB provides a low noise, high quality
balanced direct out for connection to PA and recording consoles. With the Pre/Post EQ switch set to “Pre”
(Out), the direct output signal is fed directly from our
low noise, high headroom, FET input stage providing
a low noise output superior to external direct boxes
and impedance transformers. The Direct Output
signal is only effected by the -10dB Pad, and Tuning
Mute controls. This allows you to adjust your tone
and volume on stage without changing the Direct Out
signal level and confusing your sound man.
Changing the Pre/Post EQ switch to “Post” (In),
sends the “GK sound” and preamp response to the
Direct Out jack. This gives you complete control over
the Direct Out’s tone and volume. In addition, a
Ground (Gnd) Lift switch is included to remove hum
and buzz when connecting to equipment powered by
a different ground system.
6
Page 9

Safety Information
400RB Series
V erify Line Voltage and Amperage Before
Use:
Your new 400RB Series Bass Amp has been factory
configured for use with:
.
.
.
Connecting the amplifier to a line with specifications
other than indicated above can create a safety and fire
hazard, and may damage the amplifier. If you have any
questions about the voltage requirements for your
specific model, or about the line voltage in your area,
contact your dealer before plugging the unit into a wall
outlet.
Verify AC Circuit Capacity Before Use:
The high power output of your amplifier may require
heavy current draw under Full-Load conditions. To
insure proper performance and avoid potential safety
hazards, we recommend connection to line circuits with
Amperage specified “as above”. Connecting multiple
amplifiers to the same circuit, or connecting the amplifier to the same circuit used by other heavy-power
devices, such as high-wattage lights, may cause circuit
breakers to trip. It is always a good idea to avoid using
any audio equipment on the same AC circuit as equipment with motors, such as air conditioners or refrigerators. This will lessen to possibility of power
variation and electrical start-up noise affecting your
sound.
120 Volt/60Hz 20 Amp circuit for USA &
Canada.
230 Volt/50Hz 10 Amp circuit for Europe
& Australia.
100 Volt/50Hz 20 Amp circuit for Japan.
Proper AC circuit for all other countries.
Do Not Use Extension Cords:
To avoid safety hazards, use only the power cord
supplied with your unit. If a replacement cord is
used, make certain that it is of consistent quality
and gauge as the original. We do not recommend
using extension cords with this product. As with all
electrical devices, do not run power cords under
rugs or carpets or place heavy objects on them.
Damaged power cords should be replaced immediately with cords meeting factory specifications.
Handle The AC Power Cord Gently:
When disconnecting the power cord from an AC
outlet, always pull the plug, never pull the cord. If
you do not intend to use the amplifier for a considerable length of time, disconnect the plug from the
AC outlet.
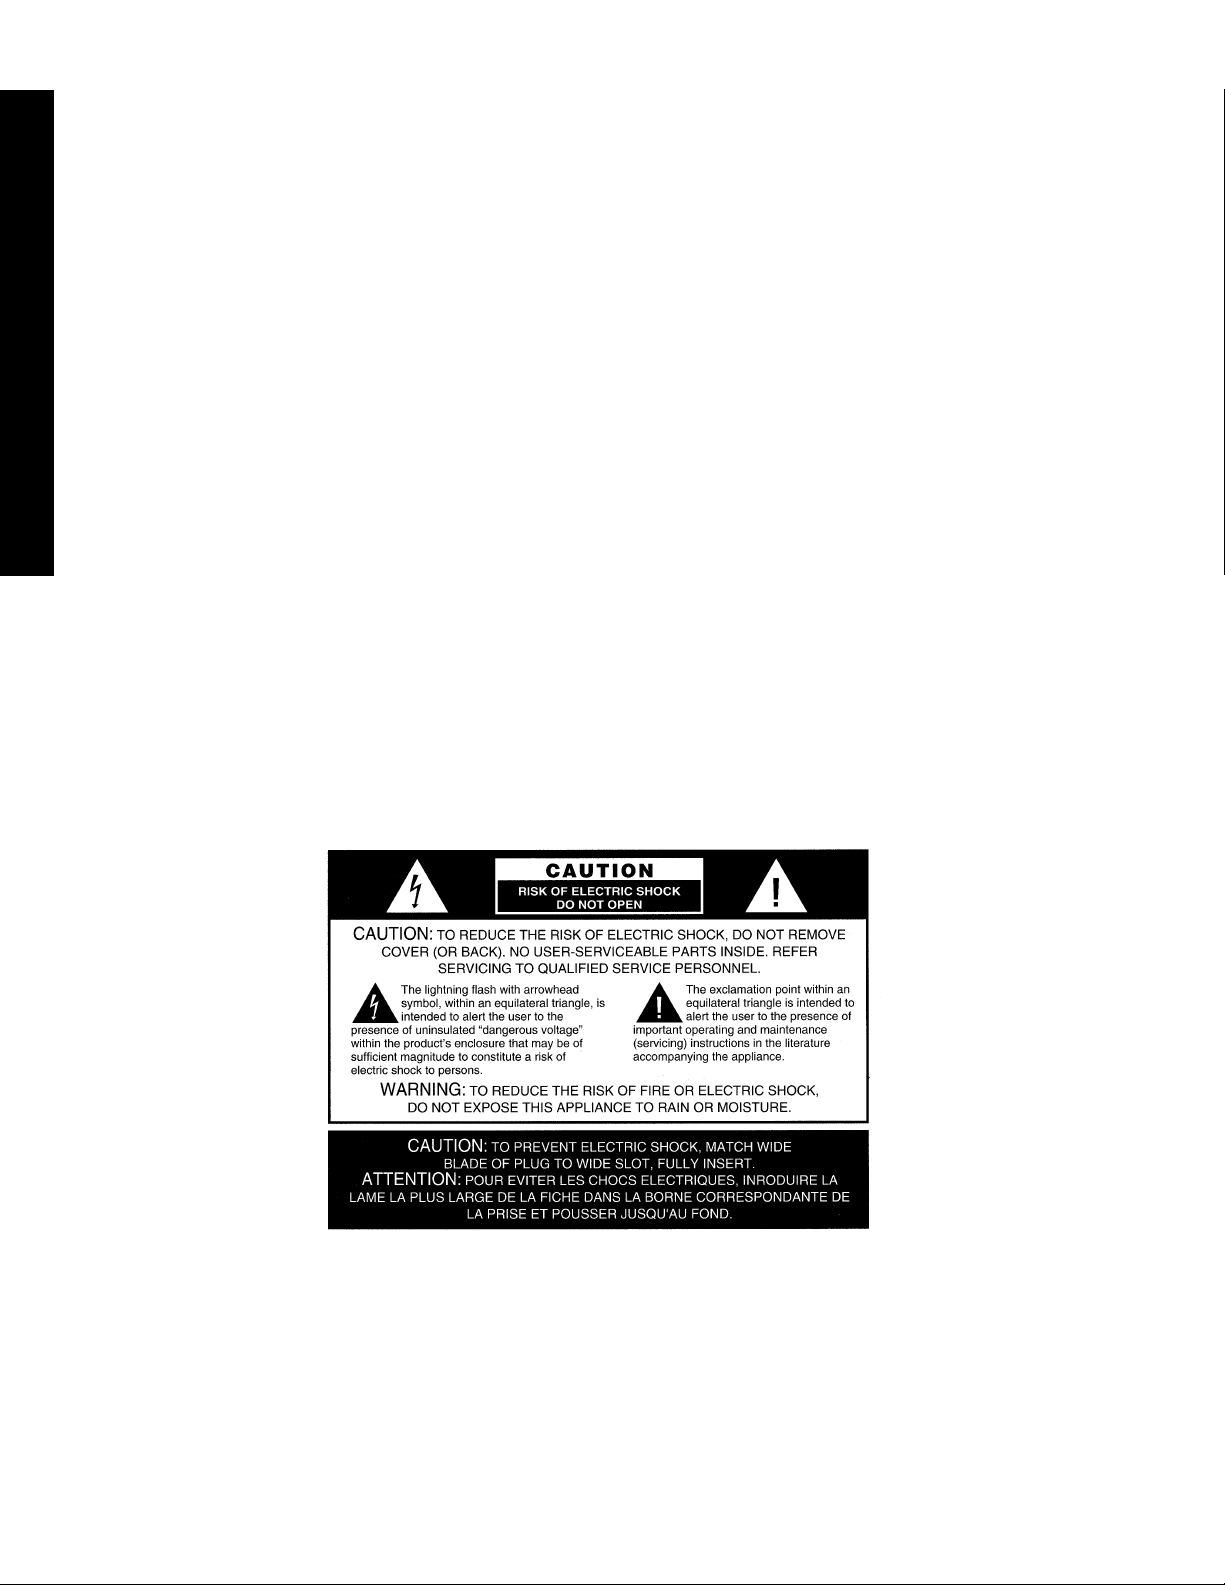
Do Not Open The Amplifier Enclosure:
There are no user-serviceable components inside
this product. Opening the amplifier enclosure may
present a shock hazard, and modification to the
product will void your warranty. If liquid enters the
unit, or any metal object such as a paper clip, wire,
or staple accidentally falls inside the enclosure,
disconnect the unit from the AC power source
immediately and consult an authorized service
station.
Unpacking:
The carton and packing materials used in shipping
your new amplifier were specially designed to
cushion it from the shocks and vibration that occur
during transport. We suggest that you save the
carton and packing materials for use in shipping,
in the event you move, or the amplifier needs repair.
Safety Information
7
Page 10

Installation and Maintenance
400RB Series
Installation:
.
.
Installation & Maintenance
.
.
.
To insure proper operation and to avoid
potential safety hazards, place the unit on a
firm, level surface. When installing the unit
in a rack, be sure the mounting hardware can
support the amplifier’s weight. To save space
in your rack, the 400RB’s feet can be
removed using a Philips head screwdriver.
Make certain that proper space is provided
for ventilation. The 400RB Series requires at
least ½ inch clearance above for proper
ventilation. Never block the fan vent holes in
the top or front of the amplifier. If the
amplifier will be installed in a rack or other
enclosed area, make sure that there is
sufficient air movement within the enclosure
to allow proper cooling. Consult your dealer
for more information.
Avoid installation in extremely hot or cold
locations, and areas that are exposed to direct
sunlight, or near heating equipment.
Avoid moist or humid locations.
Remember, power amplifiers generate heat.
The heat sink fins and ventilation slots that
form part of the enclosure are specially
designed to remove this heat. Placing other
electronic equipment near these heatdissipation systems may possibly affect the
long-term reliability of both your amplifier
and the other equipment.
Cleaning:
When the unit gets dirty, wipe it with a clean, soft and
dry cloth. If necessary, first wipe the surface with a
soft cloth slightly dampened with mild, soapy water,
followed by a fresh cloth with clean water. Wipe
immediately with a dry cloth. Never use benzene,
thinner, alcohol, or other volatile cleaning agents.
Do not use abrasive cleaners, as they may damage the
finish of metal parts. Avoid spraying insecticides near
the unit.
Maintenance:
Your new amplifier is rugged. It was built to give you a
lifetime of trouble-free operation, if it is operated in
accordance with the instructions contained in this
manual. The only maintenance required is cleaning. If
you are going to move your amplifier around frequently,
we recommend a road case to protect it from scratches
and road wear.
Moving the Unit:
Before moving the unit, be certain to disconnect any
interconnection cords with other components, and
make sure that you disconnect the unit from the AC
outlet.
8
Page 11
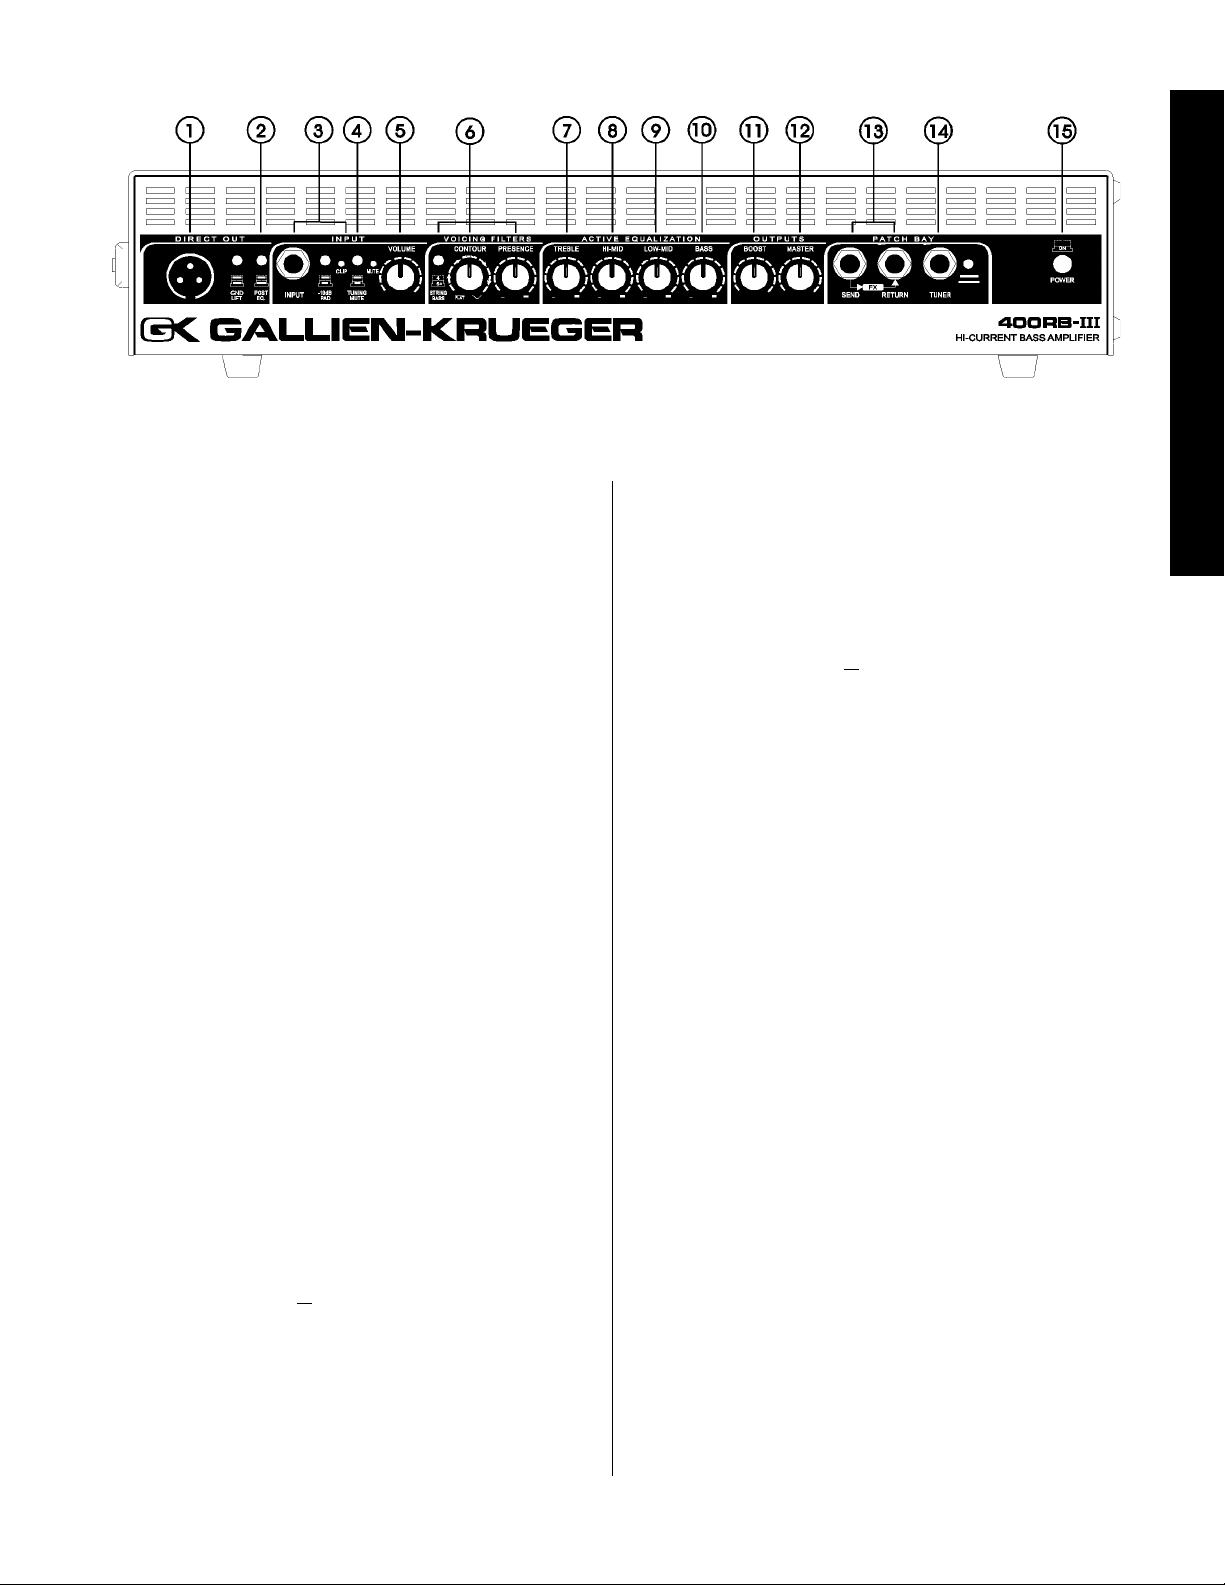
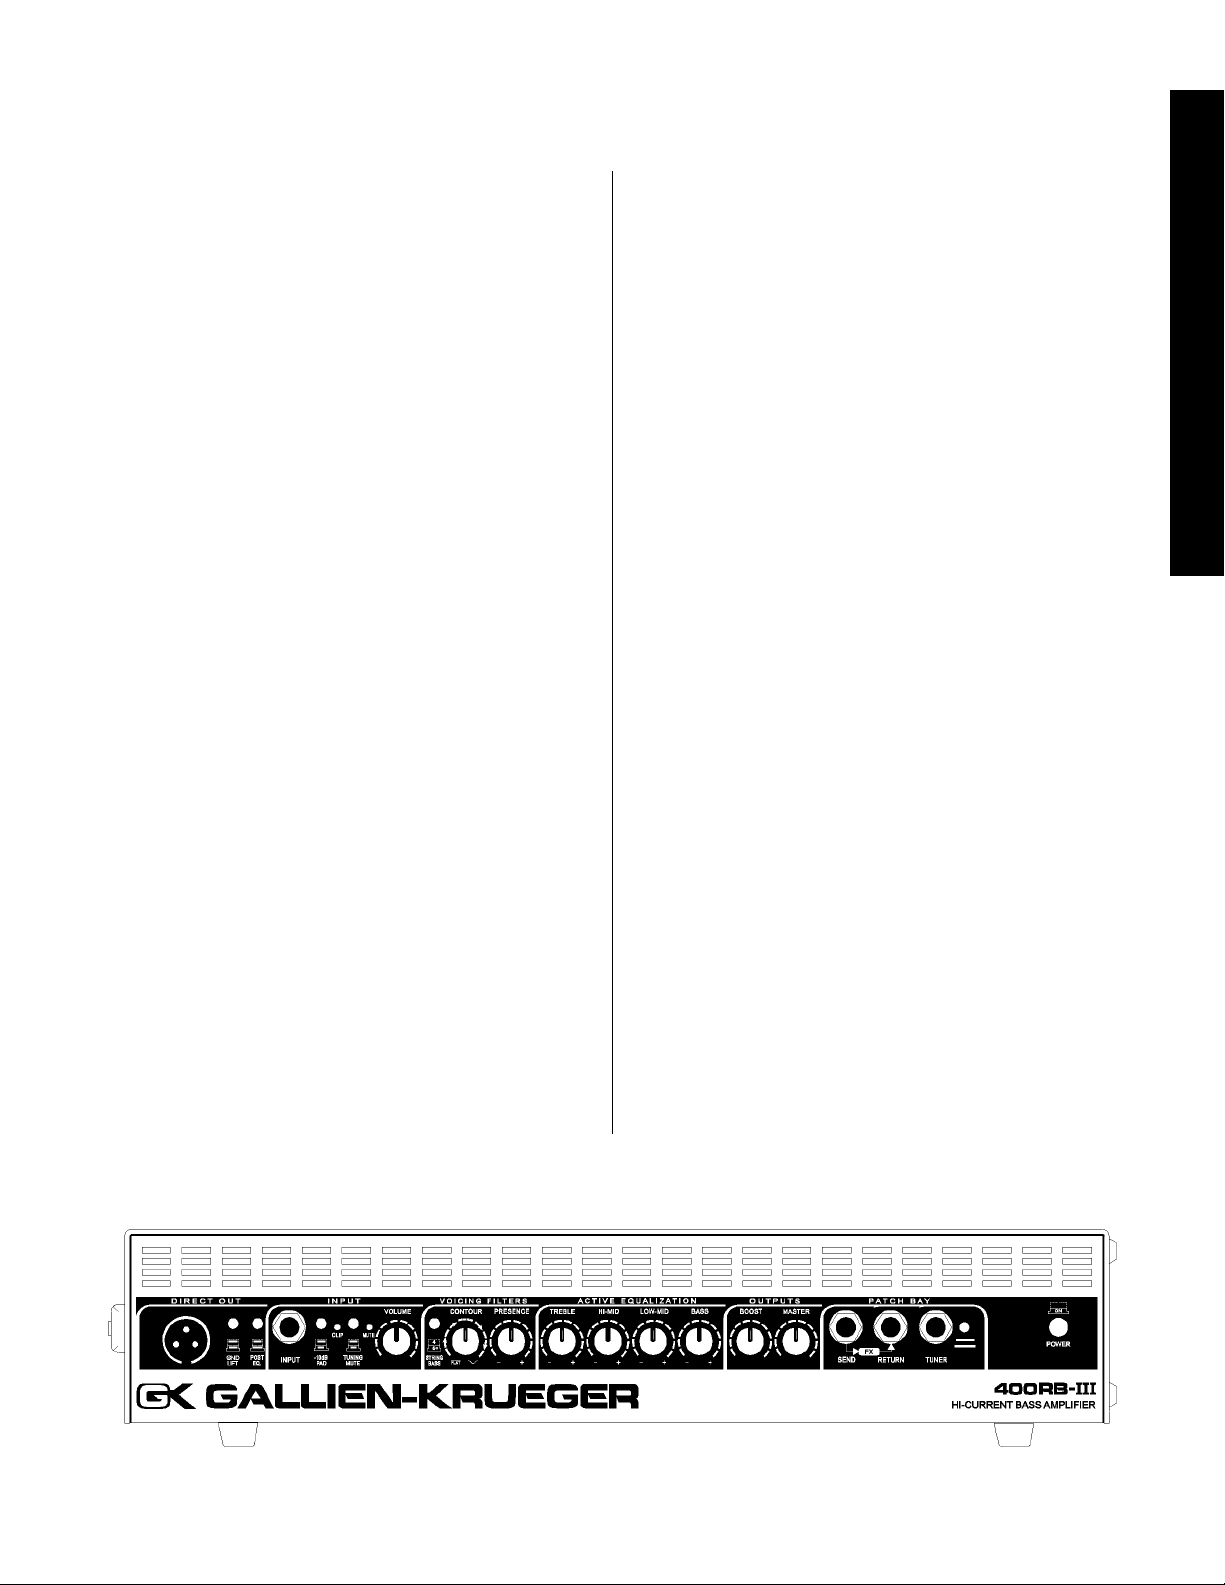
Front Panel Controls
400RB Series
Front Panel Controls
1-Balanced Direct Out:
An electronically balanced output, that you can run
to your P.A. system.
2-Pre/Post EQ Button:
Selects the direct out signal from before or after the
EQ.
3-Input:
A standard ¼” input jack and input attenuator
button. The button is generally left out, except in rare
cases when the clip LED flashes.
4-T uning Mute Button:
Set this switch to “On” when tuning up. No signal
will be sent to the speakers, or the P.A. system.
5-Volume:
Sets pre-amp gain after the input stage. It is used in
conjunction with the input pad, to optimize the
amplifier’s headroom.
6-V oicing Filters:
String Bass:
Setting
this button voices the pre-amp for basses with
“B” tuning. Leave it out and the amp is voiced like the
800RB, for 4 string basses.
Contour:
Drops the mid-range frequencies while boosting lows
& highs.
Presence:
Adds edge and definition to higher frequencies.
Active Equalization:
7-T reble:
Boost and cut at 7kHz+14dB shelving type. Add or
remove edge and definition.
8-High Mid:8-High Mid:
8-High Mid:
8-High Mid:8-High Mid:
Boost and cut at 1 kHz +6dB -10dB, “Q Optimized,”
band pass type. Works on lower string harmonics,
and effects the punch of your sound.
9-Low Mid:
Boost and cut at 250Hz +6dB -10dB, “Q Optimized,”
band pass type. Works on the main body of your
sound.
10-Bass:
Boost and cut at 60Hz +10dB, shelving type. Controls
low end push.
Outputs:
11-Boost:
A post EQ gain stage using GIVE technology which
adds “growl” as it is turned up.
12-Master:
Controls output level of the amplifier.
13-Effects Loop:
Send and return jacks provided for the insertion of
effects after the EQ, but before the boost section.
Some effect units have gain, turning the BOOST
down, will compensate for this.
14-T uner Output
Output to tuner.
15-Power Switch
Turns the amplifier on or off. Should a problem
occur during operation press this switch out first.
9
Page 12

Rear Panel Controls
Rear Panel Controls
1- AC Receptacle:
The power cord is detachable and plugs in here.
2- 240W Jacks:
240W power amp output for Full-Range operation
only. They deliver 240 watts into 4 Ohms. Lower
impedances should not be used. Each jack has a
minimum of 8 Ohms each. Higher impedances such
as 8 Ohms, 16 Ohms, or No Load are acceptable. No
damage will result from operating the amplifier with
the speakers disconnected.
400RB Series
10
Page 13

400RB Series Combos
400RB Series
The 400RB Series combos deliver the 400RB’s unique
features and distinct sound by using a variety of
internal speaker configurations in compact enclosures.
Speaker Configurations:
400RB/112 One 8 Ohm 12″speaker
400RB/115 One 8 Ohm 15″speaker
The 400RB combo electronics are identical to the
400RB head and are rated for the same maximum
power output and speaker load (240W into 4 Ohms).
Maximum power is achieved by connecting one 8
Ohm extension cabinet (such as the 210RBS,
410RBS, or 115RBS) in addition to the combo’s
internal 8 Ohm speaker load. To drive more than one
extension cabinet, the combo’s internal speaker can
be disconnected by unplugging the speaker cable
connected to the combo’s back panel. Below is a
detailed description of the maximum loads the
combos can drive.
400RB Series Combos
Maximum recommended load with the internal
speaker connected:
One 8 Ohm cabinet..
Maximum recommended load with the internal
speaker disconnected:
One 4 Ohm, or Two 8 Ohm cabinets.
11
11
Page 14

Tech Talk
Characteristics of the 400RB:
The 400RB Series is a flexible state-of-the-art bass
amplifier, designed to deliver maximum performance
and simple operation. This is accomplished through
these important features:
.
Tech Talk
.
.
.
.
.
Current Output & Bass Response:
When a power amplifier is pushing several speaker
cones, and a high-power transient like a string slap
comes along, the amp has to tap into a large power
reserve to maintain cone control. It’s kind of like
grabbing a swing at the bottom of it’s travel and
trying to push it the other way - it could knock you
over. If the amplifier doesn’t have this ability, the
sound is unresponsive and less out front. The amp
loses it’s punch and feel at higher playing levels.
Instead of responding to your every command, the
amplifier simply cuts those transients off, leaving you
with the feeling that something is missing in your
sound.
Extremely high current power supply and
power amp circuitry, gets the sound
out of your head.
Four, bass specific bands of active
equalization for precise tone control.
Three voicing filters for shaping and
customizing your sound.
Balanced direct output
eliminates the need for a direct box.
Continuously variable fan cooling.
Designed and Built in the U.S. for years of
reliability and quality service.
400RB Series
There is nothing in the 400RB Series power amp to
come between you and your sound except faithful,
raw power.
Equalization:
The sound you want is in your head, but you just
can’t get it. You think it’s you, your bass or maybe
your amp. Yes, your amp. Standard tone controls and
graphic equalizers don’t get it. Sure, they give you
plenty of variation, but they don’t provide what the
instrument really needs. The fact is, graphic equalizers are intended for room equalization, and are only
put in bass amps because it’s a no-brainer for the
designer. The equalization in Gallien-Krueger
amplifiers reflects 30 years of continuous development and refinement. The GK equalizer is unique to
the industry, it’s not just a normal four band equalizer, each section is a special circuit optimized to
perform a Bass specific job in its range of operation.
These sections are wired in Series, so they add to one
another creating a tremendously flexible equalizer,
that doesn’t sound weird at any setting. Now it is
possible to obtain the sound you desire.
Since most amplifiers have limited output current
capacity, they need “current limiting circuits” to
protect against self-destruction. High-power transients trigger these circuits, which rob the amplifier of
it’s ability to control speaker cones. This creates a
mushy, unresponsive feel to your sound. The 400RB
Series has an extremely high current capacity, over
fifty amps, so it doesn’t need current limiting circuits
for over-load protection.
12
Page 15

Tech Talk
400RB Series
V oicing Filters:
Voicing filters are used to completely revoice the
amplifier. In the case of the Contour and String Bass
controls, the effect is dramatic.
The Contour control tunes between two different
shaping circuits, with greatly different response. With
the control all the way up, the low end is slightly
boosted, the mids are dropped and the high end is
pushed up. This is a contour response not available
with a normal equalizer, and is only found in GK
amplifiers.
The way a Bass amp deals with the instrument low string
is a critical part of it’s sound. In fact, a five string
instrument requires an entirely different low end response than a four string instrument. No equalizer can
make the necessary adjustments to accommodate both,
however the String Bass button on the 400RB Series
does just that. When it is out, the 400RB is voiced like
the 800RB (worlds classic four string amp). Push it
in and the 400RB is voiced for five string instruments.
For some playing styles you may want it in, even with
a four string instrument…at least now, you have a
choice!
“G.I.V.E.” T echnology:
As in all GK pre-amps, the 400RB Series pre-amp
incorporates what we call G.I.V.E (Gate Induced Valve
Effect) Technology. We use field effect devices with
the gate biased in a way that emphasizes the optimum
harmonic content of the signal.
Cool Running = Reliability:
T o cool the 400RB we’ve designed a temperature sensitive fan cooling system. When the amp is under a light
load, the fan is off or running at a low speed, reducing fan
noise. As the amp works harder, the fan speed increases
to keep everything cool.
Smart Protection Circuitry:
The 400RB’s protection circuitry constantly monitors
for unsafe operating conditions such as short circuits,
miswired speaker cables, blown speakers, improper
ventilation and incorrect speaker configurations. In
addition, protection is provided during power up/
power down. If the 400RB senses any unsafe operating conditions, the output signal is immediately
muted and the power light changes from Green to
Red. The amplifier will remain muted until the fault
is removed. If the protection circuit activates while
playing, turn the amplifier off and check the amplifier speaker output connections. Be sure that you are
not exceeding the maximum recommend load
described in this manual. If the problem persists,
contact GK directly for technical advice.
Low Noise Operation:
The 400RB Series uses a high gain, high headroom,
low noise input stage. It has such a large dynamic
range (60v p-p) that very few instruments can
overdrive it. Even most basses with “active” electronics do not need the input attenuator to be set. The
benefit to you is less hiss from your horn, and overall,
less noise.
Tech Talk
In Closing:
You should now have a thorough understanding of
how your new 400RB Series amplifier works and what
advantages it can offer you in getting “your” sound.
We thank you for reading the Owner’s Manual and
wish you the best of times! Please send us your
comments via www.gallien-krueger.com or email us
at sales@gallien.com.
13
Page 16

Block Diagram
Specifications
400RB Series Specifications:
400RB Series
Output Power:
240W Amplifier 150W @ 8 Ohms
240W @ 4 Ohms
Input Section:
Maximum Input Level 0.6V Rms
With -10dB pad 1.6V Rms
Input Impedance 1M Ohm
Send output impedance 220 Ohm
Return input impedance 50k Ohm
Tuner Output Impedance 10k Ohm
Direct Output Impedance 500 Ohms
Equalizer:
Bass +10db @ 60Hz
Lo-Mid +6db/-10dB @ 250Hz
Hi-Mid +6db/-10dB @ 1kHz
Treble +14db @ 7kHz
Voicing Filters:
String Bass Button +11db@20Hz
Contour +2db@50Hz /
-10db@500Hz /
+3db@7kHz
Presence +9db@10kHz
Noise -90db referenced to 240W,
“A” weighted
Cooling Continuously Variable-Speed
fan
Dimensions(HxWxD): 3 1/2” x 17” x 8 ¼”
(2 Rack Spaces)
Weight: 15lbs
Power Requirements:
U.S.A./Canada 120V/60Hz-410W
(at full power)
Europe 230V/50Hz-410W
(at full power)
Japan 100V/50Hz-410W
(at full power)
Amplifier Protection: Full short circuit, thermal,&
RF protection.
Stable into reactive and
mismatched loads.
Five second muted warm-up.
14
Page 17

400RBIII BASS AMPLIFIER
TURN-ON PROCEDURE
SETUP:
1 . V ariac on zero
2 . T op cover of amplifier removed (for easy access to the amplifier outputs)
3 . Oscilloscope probe (GND) to chassis ground and (+) to tip of ¼” output jack.
4 . Set the volts/div of the oscilloscope to 20V and the time base to 1ms
5 . Turn bias pot R21 on the power amp board all the way down (counter-clockwise)
6 . Connect a DMM, set to 20mV scale DC, to the 2-pin BIAS header on the power amp
7 . Set the VOICING FILTERS and the main VOLUME to zero, all other controls to 10, and all
switches OUT
8 . Set the function generator to output a 200 Hz, 5mV (-46 dBV) sine wave
POWER AMP BIAS AND OUTPUT TEST :
1 . With the amplifier power switch on, slowly raise the Variac voltage to 60V , the
power LED should switch from RED to GREEN. Observe the ammeter for excessive
current draw (idle current should not exceed 2A)
2 . Raise the V ariac to 120V
3 . Adjust trim-pot R21 to obtain a steady , 5mV reading on the DMM
4 . Connect the amp output to a 4 ohm non-inductive dummy load
5 . Connect the function generator to the INPUT jack of the amplifier
6 . Raise the main VOLUME for slight clipping on the output, approximately 33Vrms
7 . Press the –10 dB switch IN. The output should drop to approximately 13Vrms
8 . Press the –10 dB switch OUT . Turn the BOOST to zero. Output should be 3.8Vrms
9 . Turn the WOOFER MASTER to zero, output should be 0 volts
10 . Turn the main VOLUME back down to zero
TONES AND FIL TERS TEST:
1 . Set the VOICING FIL TERS to zero, all other controls to the center (12 o’clock) and all switches out.
2 . Disconnect the load from the amplifier output.
3 . Change the ‘scope setting to 2V/Div and 1ms time base.
4 . Set the function generator to output a 200 Hz square wave at 5mVrms (-46 dBV)
5 . Turn the CONTOUR to 10 and compare the output to Figure 3 on the waveforms
page. Turn the CONTOUR back to zero
6 . Turn the PRESENCE to 10 and compare the output to Figure 4. Turn the
PRESENCE back to zero
7 . One at a time, turn each ACTIVE EQ knob all the way up and all the way down and
compare the output to the corresponding figures on the waveforms page. Remember to reset each knob to its center (12 o’clock) position
before proceeding to the next tone control
NOISE TEST :
1 . Remove the function generator from the INPUT jack
2. Connect a speaker to the amp output jack
3 . Turn all knobs to 10 and leave all switches out
4. Listen for any unusual noise, there should be no pops or crackling sounds
5 . Connect an AC voltmeter, set to 1V scale. Amp output noise level <225mV
6 . Set the VOICING FILTERS to zero, the noise level should be <210mV
7 . Turn the BOOST to zero, the noise level should be <25mV
8 . Turn the VOLUME to zero, the noise level should be <1mV
END OF PROCEDURE
Page 18

Page 19

Page 20

6120D.sch-1 - Thu Jan 27 07:50:16 2000
Page 21

Page 22

Page 23

Page 24

Page 25

Page 26

Page 27

Page 28

Page 29

400RB-III INDENTED BILL OF MA TERIALS 1/26/00-SW
NOTE: Level 1 refers to main assembly numbers, and level
LVL PART# DESCRIPTION QTY REF . DESIG.
1 080-0043-A TRANSFORMER 400RB-III,120V 1
1 091-0008-0 FUSE,5MM,5A,125V,FAST,UL,CSA 1
1 095-0005-0 CORD,IEC,3X18GA,10A,6',DOM 1
1 100-0020-0 BUMPER,ROUND RUBBER,1/2"X.14" 4
1 100-0029-0 BUTTON,CLYIN,BLK CAP PUSH SWITCH 1 pwr switch
1 100-0035-0 CABLE TIE,BLACK,4"-18 LB 5
1 100-0042-0 HANDLE,RUBBER,6.5" 1
1 100-0076-0 FOOT ,RUBBER,ROUND,5/8DIA. X 5/8" 4
1 100-0098-0 KNOB,GRA Y ,6X15MM SPLINE SHAFT 9
1 100-0126-0 HOLDER,CABLE TIE .75" SQUARE,ADHESIVE BK 2
1 111-0041-0 BOLT,4-40,1/4,PHP,CAD 3 board-chassis
2 refers to board level components
Main asssembly numbers are in bold face, while
commonly used parts are italicized.
1 111-0061-0 BOLT,4-40,3/8,PHP,CAD 2 pwr switch
4 111-0101-0 BOLT,4-40,5/8,PHP,CAD. 4 sink-chassis
1 111-4060-0 SCREW,4AB,3/8,FHP 82^,B.Z. 2 xlr,direct out
1 111-6001-0 NUT,4-40,KEP SMALL 1 gnd terminal
1 111-7011-0 WASHER,#4,SPLIT 9 (2)-pwr sw.,(3)bd-chassis,(4)-sink-chassis
1 112-8060-0 TR-BOLT,6-32,3/8,PHP ,B.Z. 2 handle
1 112-9060-0 TR-BOLT,6-32,3/8,FHP,B.Z. 10 top cover
1 113-3060-0 SCREW,8AB,3/8,PHP,B.O. 2 pwr cord con.
1 113-8100-0 TR BO L T ,8-32,5/16,PHP,B.O. 4 feet
1 115-2220-0 BOLT,5/16-18,2 3/4",CARRIAGE,B.Z. 1 transformer
1 115-6000-0 NUT,5/16-18,HEX,CAD 1 transformer
1 115-7008-0 WASHER,8MM,BELLEVILE,SPRING STEEL 2 transformer
1 137-0575-C 700RB/400RB RACK EAR 1
1 137-0593-B 700RB/400RB TOP COVER 1
1 137-0651-A 400RB CHASSIS 1
1 150-0001-0 400RB-III CARTON 1
1 150-0003-0 700RB PACK 1
1 150-0019-0 BAG,POLY 18X24XC [2 MIL.] 1
1 150-0023-0 BAG,POLY 10 X 16 1 1/2 MILL 1
1 152-0002-0 BAG,4"X16",FOR PWR CORD 1
1 153-0007-0 LABEL,GK SERIAL NO. 1
1 160-0012-A 400RB-III OWNERS MANUAL 1
Page 30

LVL PART# DESCRIPTION QTY REF . DESIG.
1 202-0050-A WIRE ASSY ,26GA,BLK,17",2PIN 1
1 206-0120-D 400RB-III,PRE AMP BOARD ASSY 1
1 250-0121-D 400RB-III,POWER AMP MODULE 1
1 602-0007-0 GK WARRANTY CARD 1
1 GK160-0000 GK SAFETY SHEET 1
1 HA202-0004 WIRE ASSY ,26GA,BLK,7",7PIN,UL/CSA 1
1 NI202-0100 WIRE ASSY,18GA,BLK,17.5",.250F/.250F 1
1 NI202-0101 WIRE ASSY ,18GA,WHT,17.5",.250F/.250F 1
206-0121-D 400RB-III PowerAmp Assembly
LVL PART# DESCRIPTION QTY REF . DESIG.
2 001-2060-0 LM555CN TIMER 1 U1
2 010-0000-0 2SC3381BL,NPNX2,80V ,100MA,2-10M1B 1 Q4
2 010-0001-0 2SC3478,NPN,180V,100MA 2 Q7,10
2 010-0003-0 2SC3502-F,NPN,200V,100MA,TO-126 1 Q14
2 010-0012-0 MPSA06 NPN 80V 500MA TO-92 6 Q2,6,11,12,27,28
2 010-1002-0 2SA1376,PNP,180V,100MA,TO-92 2 Q3,9
2 010-1003-0 2SA1380-F,PNP,200V,100MA,TO-126 1 Q13
2 010-1013-0 MPSA56 PNP 80V 500MA TO-92 3 Q1,5,8
2 012-0002-0 2SC4793 NPN 200V 1.5A 2-10R1A 3 Q15,17,18
2 012-0003-0 2SC5242,NPN,230V,15A,2-16C1A 3 Q20,21,22
2 012-1002-0 2SA1837 PNP 200V 1.5A 2-10R1A 3 Q16,19,26
2 012-1003-0 2SA1962,PNP,230V,15A,2-16C1A 3 Q23,24,25
2 020-0004-0 1N755A,ZENER,7.5V,500MW,DO-35 1 D7
2 020-0150-0 1N965B,ZENER,15V,5%,500MW,DO-35 2 D6,10
2 020-1000-0 1N4148 ,RECT-FAST ,200MA,100V,4NS,DO-35 10 D1,3,4,5,8,9,11
2 020-1022-0 BAV20,DIODE RECT,200V 2 D2,12
2 020-2106-0 1N4004,RECT,1A,150V,DO-41 2 D14,15
2 023-0112-0 BRIDGE,25A,200V,VERT,PC,MP25S-02 1 BR1
2 030-2102-0 CAP,CER,AX,102,10%,50V,X7R 4 C16,21,26,27
2 030-2103-0 CAP,CER,AX,103,10%,50V,X7R 1 C3
2 030-2104-0 CAP,CER,AX,104,10%,50V,X7R 3 C4,5,15
2 030-2271-0 CAP,CER AXIAL,271,10%,50V,NPO 1 C7
2 031-0106-1 CAP,ELEC,RAD,106,20%,25V,NP 1 C17
2 031-1336-0 CAP,ELEC,RAD,336,-10%+50%,25V 1 C10
2 031-2105-0 CAP,ELEC,RAD,105,-10/+20%,50V 1 C14
2 031-2106-0 CAP,ELEC,RAD,106,-10%+50%,50V 4 C6,12,13,20
2 031-2107-0 CAP,ELEC,RAD,107,-10%+50%,50V 3 C8,9,11
Page 31

LVL PART# DESCRIPTION QTY REF . DESIG.
2 031-3129-0 CAP,ELEC,RAD,129,20%,63V 2 C28,29
2 031-3476-0 CAP,ELEC,RAD,476,20%,63V 4 C1,2,18,19
2 032-4104-0 CAP,PE,104,10%,100V 1 C25
2 032-7104-0 CAP,PE,104,20%,250V 2 C31,32
2 034-7103-0 CAP,CERAMIC DISK,103,10%,X-250V 1 C30
2 035-8100-0 CAP,MICA,10PF,5%,500V 1 C24
2 035-8131-0 CAP,MICA,130PF,5%,500V 2 C22,23
2 050-0101-0 RES,CF,10,1/8W,5% 2 R32,40
2 050-0471-0 RES,CARBON FILM,47 OHM,1/8W,5% 2 R33,38
2 050-1001-0 RES,CARBON FILM,100 OHM,1/8W,5% 2 R8,9
2 050-1003-0 RES,CARBON FILM,10K OHM,1/8W,5% 1 R22
2 050-1004-0 RES,CARBON FILM,100K OHM,1/8W,5% 2 R1,2
2 050-1501-0 RES,CARBON FILM,150 OHM,1/8W,5% 2 R15,27
2 050-1801-0 RES,CARBON FILM,180 OHM,1/8W,5% 1 R48
2 050-2003-0 RES,CARBON FILM,20K OHM,1/8W 5% 2 R29,30
2 050-2202-0 RES,CARBON FILM,2.2K OHM,1/8W,5% 2 R19,20
2 050-3302-0 RES,CARBON FILM,3.3K OHM,1/8W,5% 1 R5
2 050-4701-0 RES,CARBON FILM,470 OHM,1/8W,5% 4 R25,34,39,47
2 050-4702-0 RES,CARBON FILM,4.7K OHM,1/8W,5% 1 R23
2 050-4703-0 RES,CARBON FILM,47K OHM,1/8W,5% 1 R3
2 050-6801-0 RES,CARBON FILM,680 OHM,1/8W,5% 1 R37
2 050-6802-0 RES,CARBON FILM,6.8K OHM,1/8W,5% 1 R18
2 051-0270-0 RES,CARBON FILM,2.7 OHM,1/4W,5% 2 R43,44
2 051-1001-0 RES,CARBON FILM,100 OHM,1/4W,5% 1 R49
2 051-1003-0 RES,CARBON FILM,10K OHM,1/4W,5% 2 R42,45
2 051-4701-0 RES,CARBON FILM,470 OHM,1/4W,5% 2 R12,13
2 051-4703-0 RES,CARBON FILM,47K OHM,1/4W,5% 1 R46
2 054-.330-0 RES,WIRE WOUND,.33 OHM,1W,5% 1 R28
2 055-.220-0 RES,CERAMIC WW,.22 OHM,2W ,5% 6 R50,51,52,53,54
2 055-0101-0 RES,METAL OXIDE,10 OHM,2W ,5% 2 R60,61
2 056-0100-0 RES,WIRE WOUND,1.0 OHM,5W,10% 1 R62
2 060-1000-0 RES,METAL FILM,10.0 OHM,1/8W ,1% 2 R56,57
2 060-1001-0 RES,MET AL FILM,100 OHMS,1/8W,1% 1 R31
2 060-1002-0 RES,METAL FILM,1.00K,1/8W ,1% 7 R6,11,14,16,17
2 060-1003-0 RES,METAL FILM,10.0K OHM,1/8W ,1% 1 R4
2 060-1213-0 RES,METAL FILM,12.1 K OHM,1/8W ,1% 2 R7,10
2 060-2492-0 RES,METAL FILM,2.49K,1/8W ,1% 2 R58,59
Page 32

LVL PART# DESCRIPTION QTY REF . DESIG.
2 060-3742-0 RES,METAL FILM,3.74K OHM,1/8W ,1% 1 R35
2 060-4322-0 RES,METAL FILM,43.2K OHM,1/8W ,1% 1 R41
2 060-7501-0 RES,MET AL FILM,750 OHM,1/8W,1% 1 R24
2 070-0520-0 POT,500 OHM TRIM,VERT 1 R21
2 081-0055-0 INDUCTOR,2UH,20A,AIR CORE 1 L1
2 091-1001-0 THRM BRKR 85C +/-5,0-DIFF ,PC 1 J1
2 092-0001-0 CON,IECX3,10A,250V ,PC TERM 1 J2
2 092-0066-0 FASTON,M,PC,.250" 11 T1,2,3,4,5,6,7,8,9,10,11
2 092-0082-0 JACK,1/4",MONO,PC,GROUNDING 2 J3,4
2 093-0025-0 HDR,.1X2,VERT,MALE,LOCK,GOLD 1 P 4
2 093-0051-0 HDR,2MMX2,VERT,MALE,LOCK 1 P1
2 093-0080-0 HDR,.156X3,VERT ,MALE,LOCK,SQR PINS,TIN 1 P5
2 093-2005-0 HDR,2MMX7,VERT,SHROUDED 1 P2
2 094-0004-0 FUSE CLIP ,5MM, P .C. MOUNT 2 F3
2 145-0121-D 400RB-III,POWER AMP BOARD RAW 1
250-0120-D Power Amp Module Assy.
LVL PART# DESCRIPTION QTY REF . DESIG.
1 010-0003-0 2SC3502-F,NPN,200V,100MA,TO-126 1 Q14
1 010-1003-0 2SA1380-F,PNP,200V,100MA,TO-126 1 Q13
1 086-0000-0 FAN, 24V DC, 160MA, 80X80MM, HIGH SPEED 1
1 093-0506-0 HSG,.1X2,LOCKING,CRIMP 093-0909 1 For fan wires
1 093-0909-0 TERM,CRIMP,.1,22GA,093-0509 2 for 093-0508-0
1 095-0006-0 HEAT SHRINK 3/16 IN 3 Around fan cable
1 105-0001-0 INSULA TOR T APE,1"X7MIL ADHESIVE BACK 0
1 105-0005-0 INSULAT OR,9MIL,T O-126,GRY,GREASLESS 2 Q13,14
1 111-0250-0 BOLT,4-40,1 3/8",PHP,ZINC 4 Fan to heat sink
1 111-7011-0 WASHER,#4,SPLIT 18 (4) fan-heat sink, (14) transistors-bd.
1 111-7021-0 WASHER,#4,FLAT,CAD 4 fan to heat sink
1 111-8061-0 TR-BOLT,4-40,3/8,PHP,CAD 8
1 111-8081-0 TR-BOLT,4-40,1/2,PHP,CAD 6 output transistors board
1 132-0024-B 700/400RB HEAT SINK 1
1 153-0105-0 LABEL,BLANK,.9"X.25" 2
1 202-6000-A WIRE ASSY ,14GA,GRN,3",CHASSIS GROUND 1 to IEC ground terminal
1 207-0121-D 400RB-III,POWER AMP BOARD ASSY 1
206-0120-D 400RB-III Preamp Assembly
LVL PART# DESCRIPTION QTY REF . DESIG.
2 001-1030-1 TL072CP, LOW NOISE JFET OPAMP 5 U1,2,3,4,5
Page 33

LVL PART# DESCRIPTION QTY REF . DESIG.
2 010-1013-0 MPSA56 PNP 80V 500MA TO-92 1 Q 2
2 010-2010-0 J113 N-JFET 35V 2MA TO-92 1 Q 1
2 010-2040-0 J406 DUAL N-CH JFET 8PIN DIP 1 Q3
2 020-0120-0 1N759A,ZENER,12V ,5%,400MW,DO-35 10 D2,3,4,5,10,11,12
2 020-1000-0 1N4148 ,RECT-FAST,200MA,100V,4NS,DO-35 2 D6,7
2 025-0012-0 LED,RED/GRN,5MM,630NM/560NM,15MCD/15MCD 1 D1
2 025-0101-0 LED,GRN,3MM,565NM,6MCD,10MA,40DEG 1 D8
2 025-0116-0 LED,RED,3MM,635NM,6MCD,10MA,40 DEG 1 D9
2 030-2102-0 CAP,CER,AX,102,10%,50V ,X7R 1 C1
2 030-2103-0 CAP,CER,AX,103,10%,50V ,X7R 3 C19,20,31
2 030-2104-0 CAP,CER,AX,104,10%,50V,X7R 6 C7,13,23,28,36,44
2 030-2221-0 CAP,CER,AX,221,10%,50V,NP0 2 C9,42
2 030-2222-0 CAP,CER,AX,222,10%,50V ,X7R 3 C21,22,24
2 030-2224-0 CAP,CER AXIAL,224,20%,50V,Z5U 1 C2
2 030-2470-0 CAP,CER AXIAL,47 PF ,10%,50V ,NPO 1 C17
2 030-2472-0 CAP,CER AXIAL,472,10%,50V,X7R 6 C4,25,26,29,48,49
2 030-2561-0 CAP,CER AXIAL,561,10%,50V,X7R 1 C27
2 030-4100-0 CAP,CER AXIAL,10 PF,10%,100V 1 C40
2 030-4101-0 CAP,CER AXIAL,101,5%,100 V,COG 2 C18,45
2 031-0106-1 CAP,ELEC,RAD,106,20%,25V,NP 7 C3,8,11,12,30,39
2 031-0107-0 CAP,ELEC,RAD,107,+/-20%,16V ,LOW LEAKAGE 1 C43
2 031-1336-0 CAP,ELEC,RAD,336,-10%+50%,25V 1 C10
2 031-2106-0 CAP,ELEC,RAD,106,-10%+50%,50V 4 C32,33,46,47
2 031-2227-0 CAP,ELEC,RAD,227,-10%+50%,50V 2 C37,38
2 031-2335-0 CAP,ELEC,RAD,335,20%,50V 2 C6,34
2 050-1001-0 RES,CARBON FILM,100 OHM,1/8W,5% 1 R11
2 050-1002-0 RES,CARBON FILM,1K OHM,1/8W,5% 1 R8
2 050-1003-0 RES,CARBON FILM,10K OHM,1/8W,5% 1 R1
2 050-1004-0 RES,CARBON FILM,100K OHM,1/8W,5% 7 R3,5,7,10,59,66,67
2 050-1005-0 RES,CARBON FILM,1M OHM,1/8W,5% 3 R35,54,71
2 050-1203-0 RES,CARBON FILM,12K OHM,1/8W,5% 10 R4,12,25,27,30,31
2 050-1503-0 RES,CARBON FILM,15K OHM,1/8W,5% 1 R68
2 050-2201-0 RES,CARBON FILM,220 OHM,1/8W,5% 1 R15
2 050-2202-0 RES,CARBON FILM,2.2K OHM,1/8W,5% 4 R2,44,58,60
2 050-2203-0 RES,CARBON FILM,22K OHM,1/8W,5% 1 R20
2 050-2204-0 RES,CARBON FILM,220K OHM,1/8W,5% 2 R40,53
2 050-2205-0 RES,CARBON FILM,2.2M OHM,1/8W,5% 1 R48
Page 34

LVL PART# DESCRIPTION QTY REF. DESIG.
2 050-3302-0 RES,CARBON FILM,3.3K OHM,1/8W,5% 1 R46
2 050-3303-0 RES,CARBON FILM,33K OHM,1/8W,5% 2 R39,67
2 050-3904-0 RES,CARBON FILM,390K OHM,1/8W,5% 1 R52
2 050-4701-0 RES,CARBON FILM,470 OHM,1/8W,5% 4 R55,57,65,69
2 050-4702-0 RES,CARBON FILM,4.7K OHM,1/8W,5% 2 R13,49
2 050-4703-0 RES,CARBON FILM,47K OHM,1/8W,5% 5 R19,22,24,29,33
2 050-4704-0 RES,CARBON FILM,470K OHM,1/8W,5% 4 R18,23,26,32
2 050-5102-0 RES,CARBON FILM,5.1K OHM,1/8W,5% 1 R63
2 050-5602-0 RES,CARBON FILM,5.6K OHM,1/8W,5% 6 R9,16,17,34,36,42
2 050-5603-0 RES,CARBON FILM,56K OHM,1/8W,5% 1 R50
2 050-6802-0 RES,CARBON FILM,6.8K OHM,1/8W,5% 1 R62
2 050-8202-0 RES,CARBON FILM,8.2K OHM,1/8W,5% 1 R64
2 060-1002-0 RES,METAL FILM,1.00K,1/8W ,1% 2 R75,76
2 060-1213-0 RES,METAL FILM,12.1 K OHM,1/8W ,1% 2 R73,74
2 060-1274-0 RES,METAL FILM,127K,1/8W ,1% 1 R37
2 070-1513-0 POT,50K-15A,7MM,KNURL,.1W 1 R61-volume pot
2 070-1514-0 POT,50KB,7MM,KNURL,.1W 6 R14,21,28,38,43,51-boost, presence, EQ’s
2 070-1522-0 POT,2KB,7MM,KNURL,.1W 2 R6,56-master, contour pots
2 090-0007-0 SWITCH,8A/128A,250V,PP,PCB 1 S1- power swich
2 090-0012-0 SWITCH,MINI PP,DPDT,.1A BRK/MAKE,PC TER 5 S2,3,4,5,6-all switches
2 092-0010-0 FASTON,M,PC,.25" 2 J1,2
2 092-0081-0 JACK,1/4",MONO,PC,NON GROUNDING 4 J6,7,8,9-tuner, input, send, return jacks
2 092-0084-0 C0N,XLR,MALE,PC,PL,SCREW MNT 1 J5-direct out jack
2 093-0051-0 HDR,2MMX2,VERT,MALE,LOCK 1 J3
2 093-2005-0 HDR,2MMX7,VERT,SHROUDED 1 J4
2 100-0119-0 SPACER,LED,NYLON,.250" 3
2 145-0120-D 400RB-III,PRE AMP BOARD RAW 1
 Loading...