

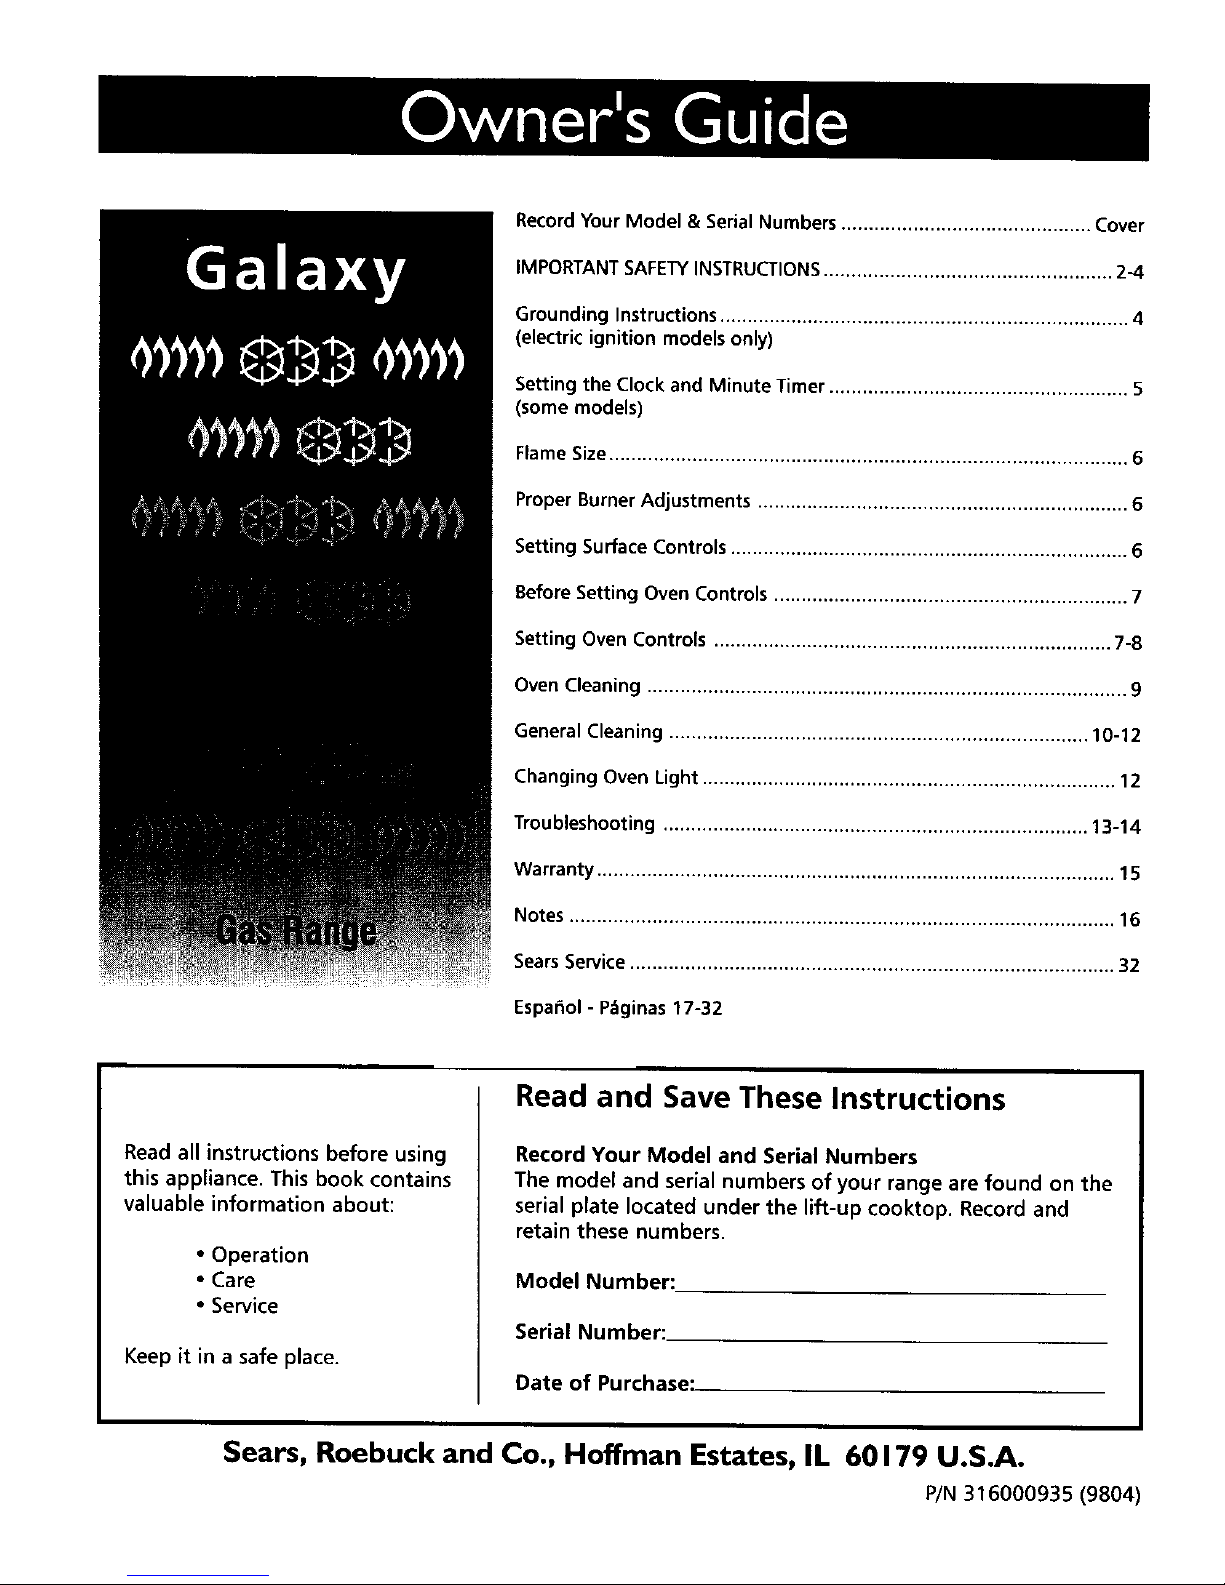
Galaxy range, Gas Range Owner's Manual
Read all instructions before using
this appliance. This book contains
valuable information about:
• Operation
• Care
• Service
Keep it in a safe place.
Record YourModel & Serial Numbers ............................................. Cover
IMPORTANTSAFETYINSTRUCTIONS.................................................... 2-4
Grounding Instructions.......................................................................... 4
(electricignition modelsonly)
Setting the Clock and Minute Timer ...................................................... 5
(some models)
Flame Size.............................................................................................. 6
Proper Burner Adjustments ................................................................... 6
Setting SurfaceControls ........................................................................ 6
Before Setting Oven Controls ................................................................ 7
Setting Oven Controls ........................................................................ 7-8
Oven Cleaning ....................................................................................... 9
General Cleaning ............................................................................ 10-12
Changing Oven Light ........................................................................... 12
Troubleshooting ............................................................................. 13-14
Warranty .............................................................................................. 15
Notes ................................................................................................... 16
SearsService........................................................................................ 32
Espafiol - P-_ginas17-32
Read and Save These Instructions
Record Your Model and Serial Numbers
The model and serial numbers of your range are found on the
serial plate located under the lift-up cooktop. Record and
retain these numbers.
Model Number:
Serial Number:
Date of Purchase:
Sears, Roebuck and Co., Hoffman Estates, IL 60179 U.S.A.
P/N 316000935 (9804)

IMPORTANT SAFETY INSTRUCTIONS
Read all instructions before using
this appliance. Save these
instructions for future reference.
This guide contains important safety symbols and
instructions. Please pay special attention to these
symbols and follow all instructions given. Here is a brief
explanation of the use of these symbols.
Thissymbol will help alert you to
situations that may causeserious bodily harm, death or
property damage.
This symbol will help alert you to
situations that may cause bodily injury or property
damage.
If the information in this
manual is not followed exactly_ a fire or
explosion may result causing property
damage, personal injury or death.
FOR YOUR SAFETY:
Do not store or use gasoline or other
flammable vapors and liquids in the vicinity
of this or any other appliance.
WHAT TO DO IF YOU SMELL GAS:
Do not try to light any appliance.
Do not touch any electrical switch; do
not use any phone in your building.
Immediately call your gas supplier from a
neighbor's phone. Follow the gas
supplier's instructions.
if you cannot reach your gas supplier, call
the fire department.
nstallation and service must be performed
by a qualified installer, servicer or the gas
supplier.
• User Servicing--Do not repair or replace any part of
the appliance unless specifically recommended in
the Owner's Guide or Installation Instructions. All
other servicing should be done only by a qualified
technician to reduce the risk of personal injury or
damage to the range.
• Never modify or alter the construction of a range
by removing leveling legs, panels, wire covers, anti-
tip brackets/screws, or any other part of the
product.
• Remove all tape and packaging wrap before using
the range. Destroy the carton and plastic bags after
unpacking the range. Never allow children to play
with packaging material.
• Proper Installation_Be sure your appliance is
properly installed and grounded by a qualified
technician in accordance with the National Gas
Code ANSI Z223.1--1atest edition, or in Canada
CAN/CGA B149.1, and CAN/CGA B149.2, and the
National Electrical Code ANSI/NFPA No. 70--latest
edition, or in Canada CSA Standard C22.1,
Canadian Electrical Code, Part 1, and local code
requirements. Install only per installation instructions
provided in the literature package for this range.
Know how to disconnect the electrical power to the
range at the circuit breaker or fuse box in case of an
emergency.
®
®
•All ranges can tip.
• Injury to persons could result.
• Install anti-tip device packed with range.
• See InstaLlation Instructions.
To reduce the risk of tipping of the
range, the range must be secured by properly installed
antl-tip bracket(s) provided with the range. To check if
the bracket(s) is installed properly, grasp top rear edge of
range, carefully tilt forward to make sure range is
properly anchored. Refer to the Installation Instructions
for proper anti-tip bracket(s) installation.
Stepping, leaning or sitting on the
doors or drawers of this range can result in serious
injuries and may also cause damage to the range. Do
not allow children to climb or play around the range. The
weight of a child on an open door may cause the range
to tip, resulting in serious burns or other injury.
Do not store items of interest to
children in the cabinets above a range or on the
backguard of a range. Children climbing on the range
to reach items could be seriouslyinjured,
I_1_ Do not use the oven or broiler drawer
for storage,
IMPORTANT SAFETY INSTRUCTIONS
• Storage in or on Appliance-Flammable materials
should not be stored in an oven, near surface
burners or in the broiler drawer. This includes
paper, plastic and cloth items, such as cookbooks,
plasticware and towels, as well as flammable liquids.
Do not store explosives, such as aerosol cans on or
near the range. Flammable materials may explode and
result in fire or property damage.
• Do not leave children alone. Children should not be
left alone or unattended in the area where an
appliance is in use. They should never be allowed to
sit or stand on any part of the appliance.
• DO NOT TOUCH SURFACE BURNERS, AREAS NEAR
THESE BURNERS, OVEN BURNER OR INTERIOR
SURFACES OF THE OVEN. Areas near surface burners
may become hot enough to cause burns. During and
after use, do not touch, or let clothing or other
flammable materials touch these areas until they have
had sufficient time to cool. Among these areas are the
cooktop, surfaces facing the cooktop, the oven vent
openings and surfaces near these openings, oven door
and window.
• Wear Proper Apparel--Loose-fitting or hanging
garmentS should never be worn while using the
appliance. Do not let clothing or other flammable
materials contact hot surfaces.
Never use your appliance for warming
or heating the room.
• Do Not Use Water or Flour on Grease Fires--
Smother the fire with a pan lid, or use baking soda,
a dry chemical or foam-type extinguisher.
• When heating fat or grease, watch it closely. Fat or
grease may catch fire if allowed to become too hot.
• Use Only Dry Potholders--Moist or damp
potholders on hot surfaces may result in burns
from steam. Do not let the potholders touch the
flame or burners, Do not use a towel or other bulky
cloth instead of a potholder.
• Do Not Heat Unopened Food Containers--Build-up
of pressure may cause the container to burst and
result in injury.
• Remove the oven door from any unused range if it
is to be stored or discarded.
• IMPORTANT--Do not attempt to operate the oven
during a power failure. If the power fails, always
turn the oven off and remove food. If the oven is
not turned off and the power resumes, the oven will
begin to operate again. Food left unattended could
catch fire.
IMPORTANT INSTRUCTIONS FOR USING YOUR
COOKTOP
• Know which knob controls each surface heating unit,
Use Proper Flame Size--Adjust flame
size so it does not extend beyond the edge of the utensil
bottom. The use of undersized utensilswill expose a
portion of the burner flame to direct contact and may
result in ignition of clothing. Proper relationship of
utensil to flame will also improve efficiency.
• Utensil Handles Should Be Turned Inward Over
Cooktop and Not Extend Over Adjacent Surface
Burners--To reduce the riskof burns, ignition of
flammable materials, and spillage due to unintentional
contact with the utensil, the handle of the utensil
should be positioned so that it is turned inward and
does not extend over adjacent surface burners.
• Never Leave Surface Burners Unattended at High
Settings--Boilovers cause smoking and greasy
spillovers that may ignite, or a pan that has boiled dry
may melt.
• Protective Liners---Do not use aluminum foil to line
surface burner pans, oven bottom or any other part
of the range. Only use aluminum foil as
recommended for baking if used asa cover placed on
the food. Any other use of protective liners or
aluminum foil may interfere with heat and air
distribution, and combustion. Damage to the range or
personal injury may result.
• Glazed Cooking Utensils_Only certain types of glass,
glass/ceramic, ceramic, earthenware, or other glazed
utensils are suitable for rangetop service without
breaking due to the sudden change in temperature.
Check the manufacturer's recommendations for
rangetop use.
• Do Not Use Decorative Surface Burner Covers. If a
burner is accidentally turned on, the decorative cover
will become hot and possiblymelt. You will not be
able to see that the burner is on. Burns will occur if the
hot covers are touched. Damage may also be done to
the cooktop or burners because the covers may cause
overheating. Air will be blocked from the burner and
causecombustion problems.
3
IMPORTANT SAFETY INSTRUCTIONS
IMPORTANT INSTRUCTIONS FOR USING YOUR
OVEN
• Use Care When Opening Door--Stand to the side of
the range when opening the door of a hot oven. Let
hot air or steam escape before you remove or replace
food in the oven.
• Keep Oven Vent Ducts Unobstructed. The oven is
vented below the backguard. Touching the surfacesin
this area when the oven isoperating may causesevere
burns.Also, do not place plastic or heat-sensitive items
on or near the oven vent. These items could melt or
ignite.
• Placement of Oven Racks. Always place oven racksin
desired location while oven is cool. If rack must be
moved while oven is hot. useextreme caution, Use
potholders and grasp the rack with both hands to
reposition, Do not let potholders contact the oven
burner flame or interior of the oven, Remove all
utensils from the rack before removing rack.
• Do not use the broiler pan without its insert.
Dripping fat drains through the insert and iskept away
from the high heat of the broiler,
• Do not cover the broiler insert with aluminum foil.
Exposed fat and grease could ignite.
• Do not touch a hot light bulb (some models) with a
damp cloth. Doing socould causethe bulb to break.
Disconnectthe range or turn off the power to the
range before removing and replacing light bulb.
IMPORTANT INSTRUCTIONS FOR CLEANING
YOUR RANGE
• Clean the range regularly to keep all parts free of
grease that could catch fire. Pay particular attention
to the area underneath each surface burner.
• Exhaustfan ventilation hoodsand grease filters should
be kept clean. Do not allow greaseto accumulate.
Greasydeposits in the fan could catch fire. Referto the
hood manufacturers instructions for cleaning.
• Kitchen cleaners/aerosols--Always follow the
manufacturer's recommended directions for use. Be
aware that excess residue from cleaners and aerosols
may ignite causing damage and/or injury.
SAVE THESE
INSTRUCTIONS
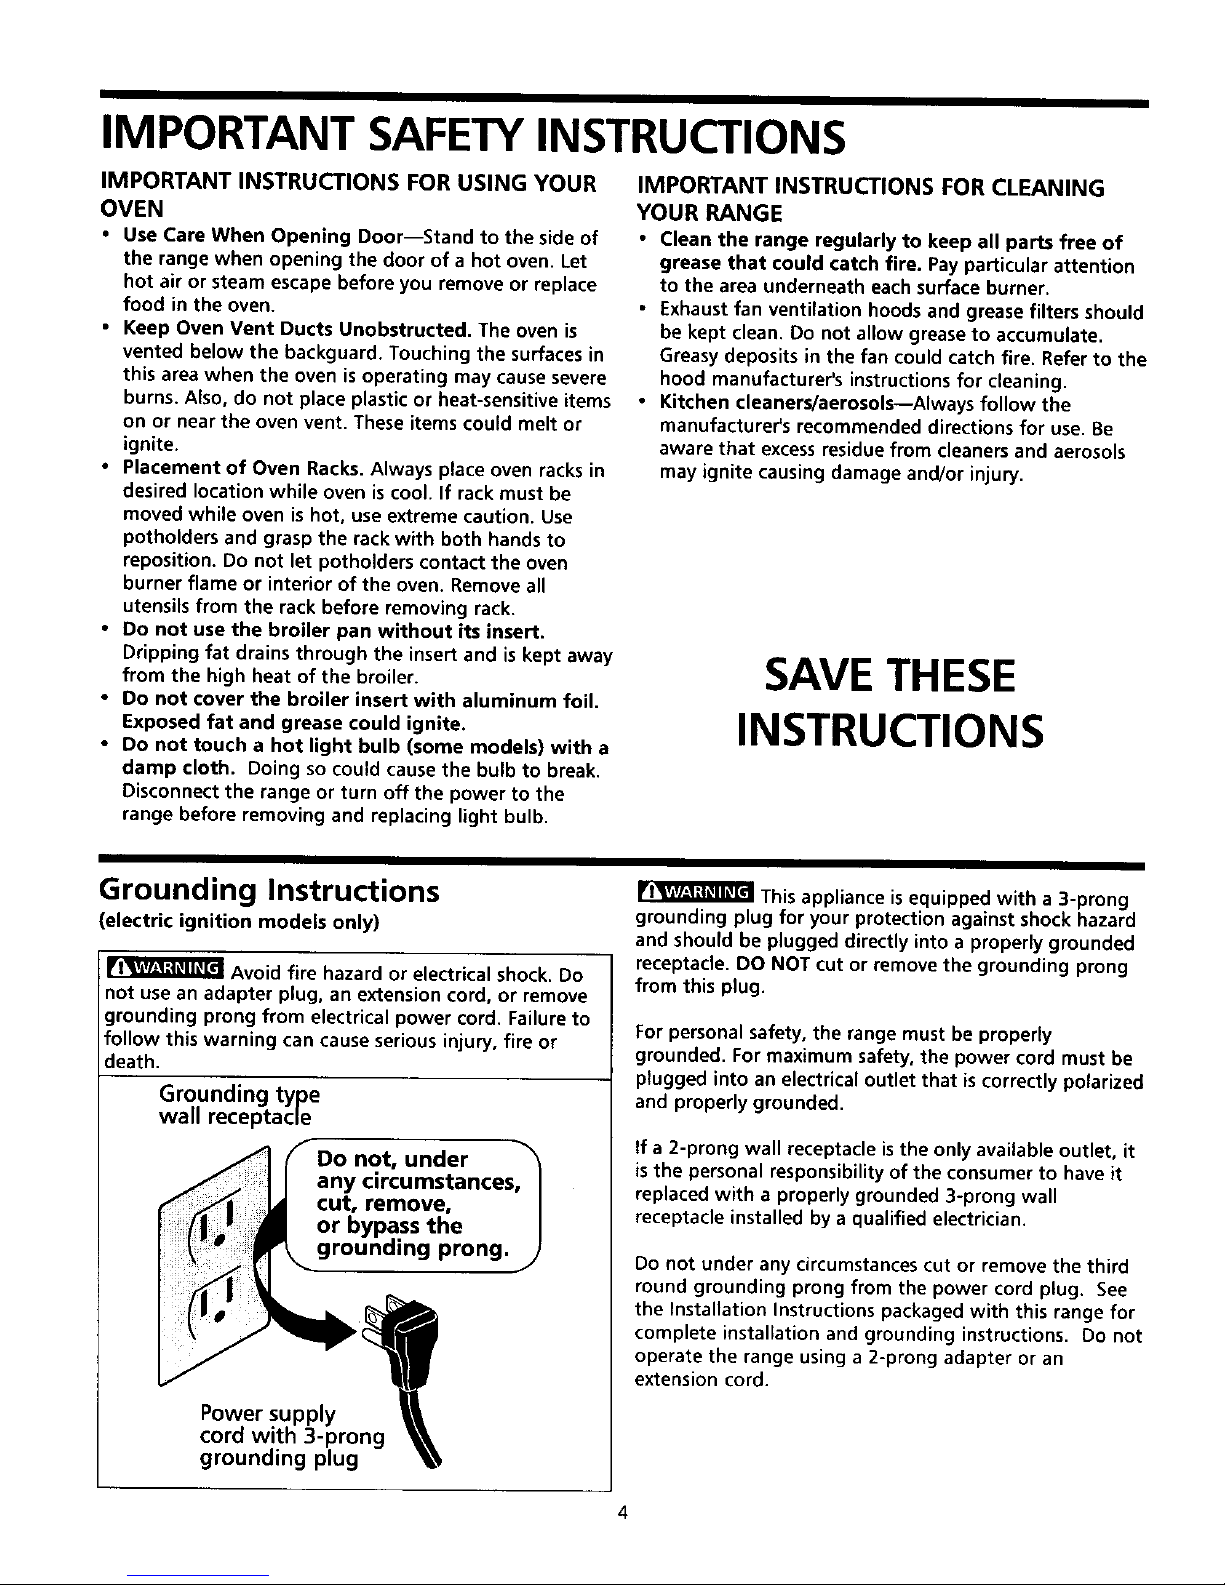
Grounding Instructions
(electric ignition models only)
Avoid fire hazard or electrical shock. Do
not usean adapter plug, an extension cord, or remove
grounding prong from electrical power cord. Failureto
follow this warning can cause serious injury, fire or
death.
Grounding type
wall receptacle
Power supply
cord with 3-prong
grounding plug
This appliance isequipped with a 3-prong
grounding plug for your protection against shock hazard
and should be plugged directly into a properly grounded
receptacle. DO NOT cut or remove the grounding prong
from this plug.
Forpersonal safety, the range must be properly
grounded. For maximum safety, the power cord must be
plugged into an electrical outlet that is correctly polarized
and properly grounded.
If a 2-prong wall receptacleisthe only available outlet, it
isthe personal responsibilityof the consumer to have it
replaced with a properly grounded 3-prong wall
receptacle installed by a qualified electrician.
Do not under any circumstances cut or remove the third
round grounding prong from the power cord plug. See
the Installation Instructions packaged with this range for
complete installation and grounding instructions. Do not
operate the range using a 2-prong adapter or an
extension cord,
4
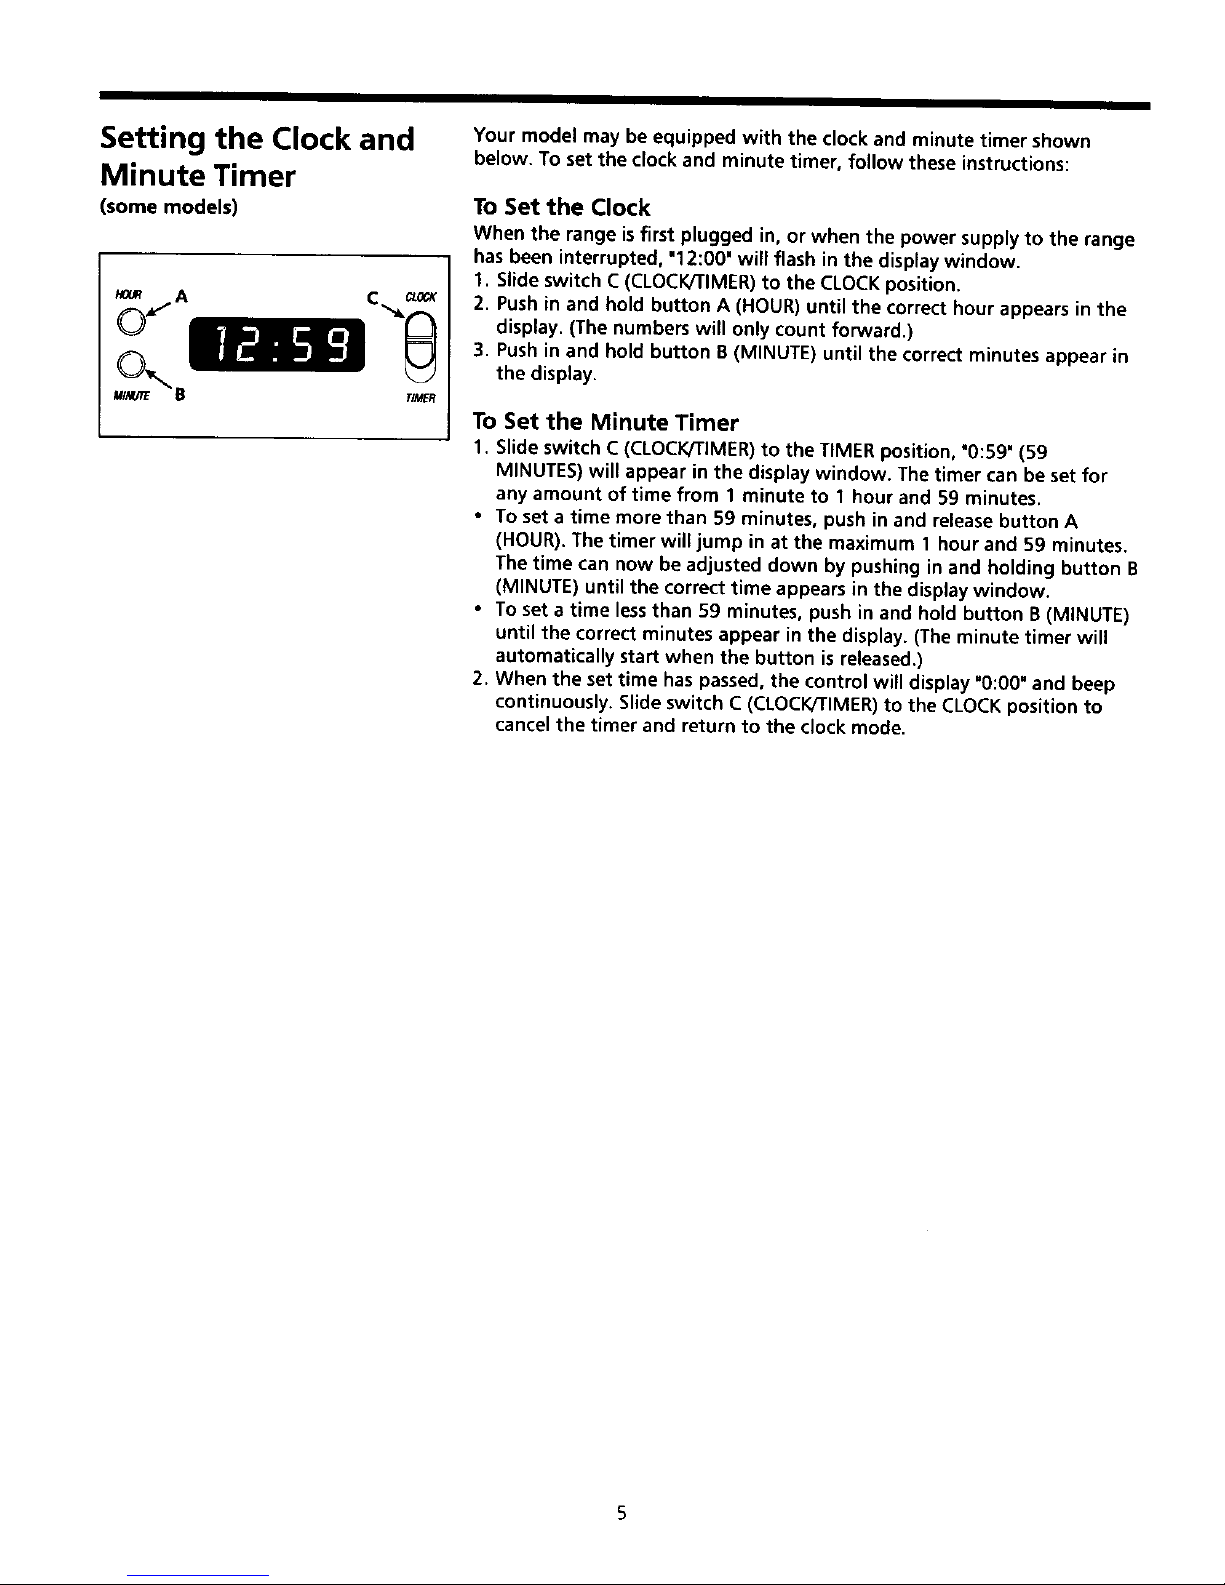
Setting the Clock and
Minute Timer
(some models)
U_B TI_R
Your model may be equipped with the dock and minute timer shown
below. To set the clock and minute timer, follow these instructions:
To Set the Clock
When the range is first plugged in, or when the power supply to the range
has been interrupted, "12:00" will flash in the display window.
1. Slide switch C (CLOCK/TIMER) to the CLOCK position.
2. Push in and hold button A (HOUR) until the correct hour appears in the
display. (The numbers will only count forward.)
3. Push in and hold button B (MINUTE) until the correct minutes appear in
the display.
To Set the Minute Timer
1. Slide switch C (CLOCK/TIMER) to the TIMER position, "0:59" (59
MINUTES) will appear in the display window, The timer can be set for
any amount of time from 1 minute to 1 hour and 59 minutes.
• To set a time more than 59 minutes, push in and release button A
(HOUR). The timer will jump in at the maximum 1 hour and 59 minutes.
The time can now be adjusted down by pushing in and holding button B
(MINUTE) until the correct time appears in the display window.
• To set a time less than 59 minutes, push in and hold button B (MINUTE)
until the correct minutes appear in the display. (The minute timer will
automatically start when the button is released.)
2. When the set time has passed, the control will display "O:O0"and loeep
continuously. Slide switch C (CLOCK!TIMER) to the CLOCK position to
cancel the timer and return to the clock mode.
 Loading...