

Page 1
Instruction Manual
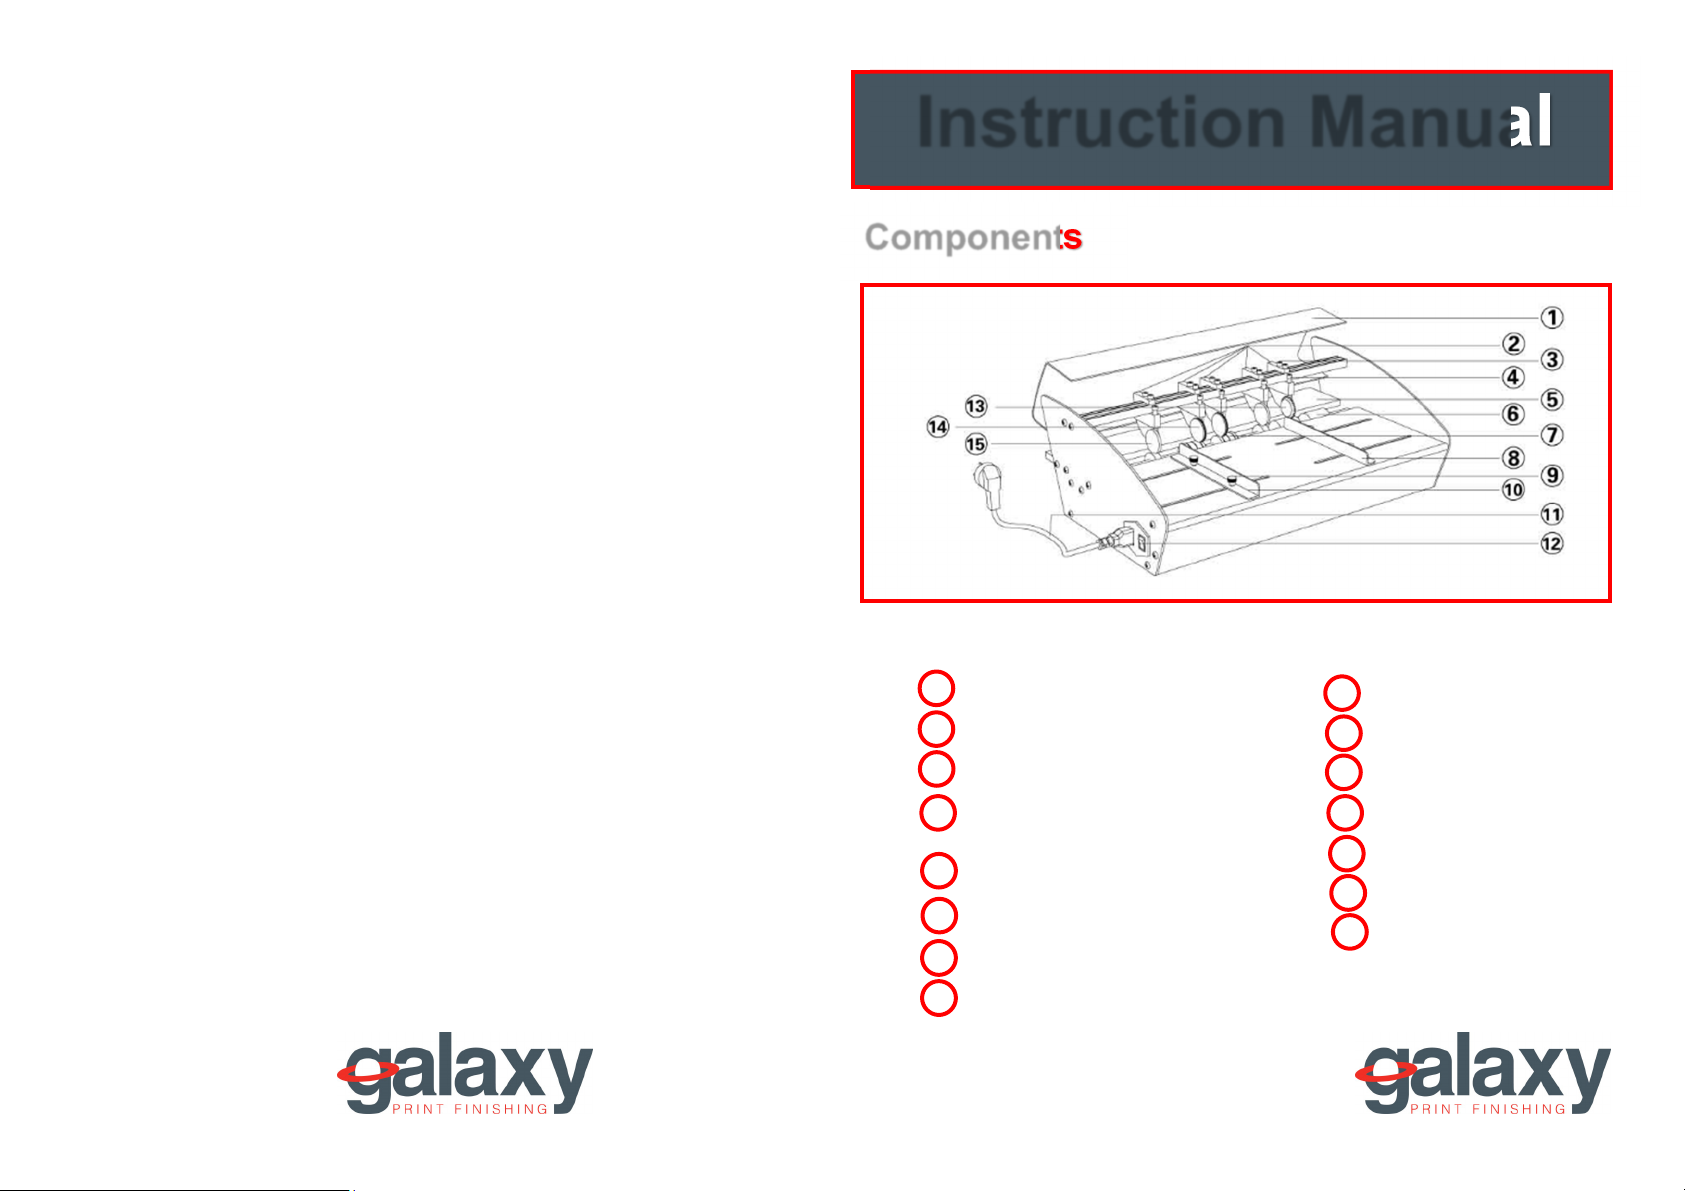
Components
For additional parts, contact
www.galaxyprintfinishing.com
Phone: +44(0)1618832722
The Print Finishing specialist
Cover
1
2
Tool rest
3
Head screw
Pressure adjusting
4
screw
5
Paper platform
Bottom wheel
6
Rolling groove wheel
7
Right paper positioning
8
Adjusting screw
9
Left paper positioning
10
Power line
11
Power switch
12
Perforate wheel
13
(optional)
14
Creasing wheel
15
Paper press wheel
Page 2
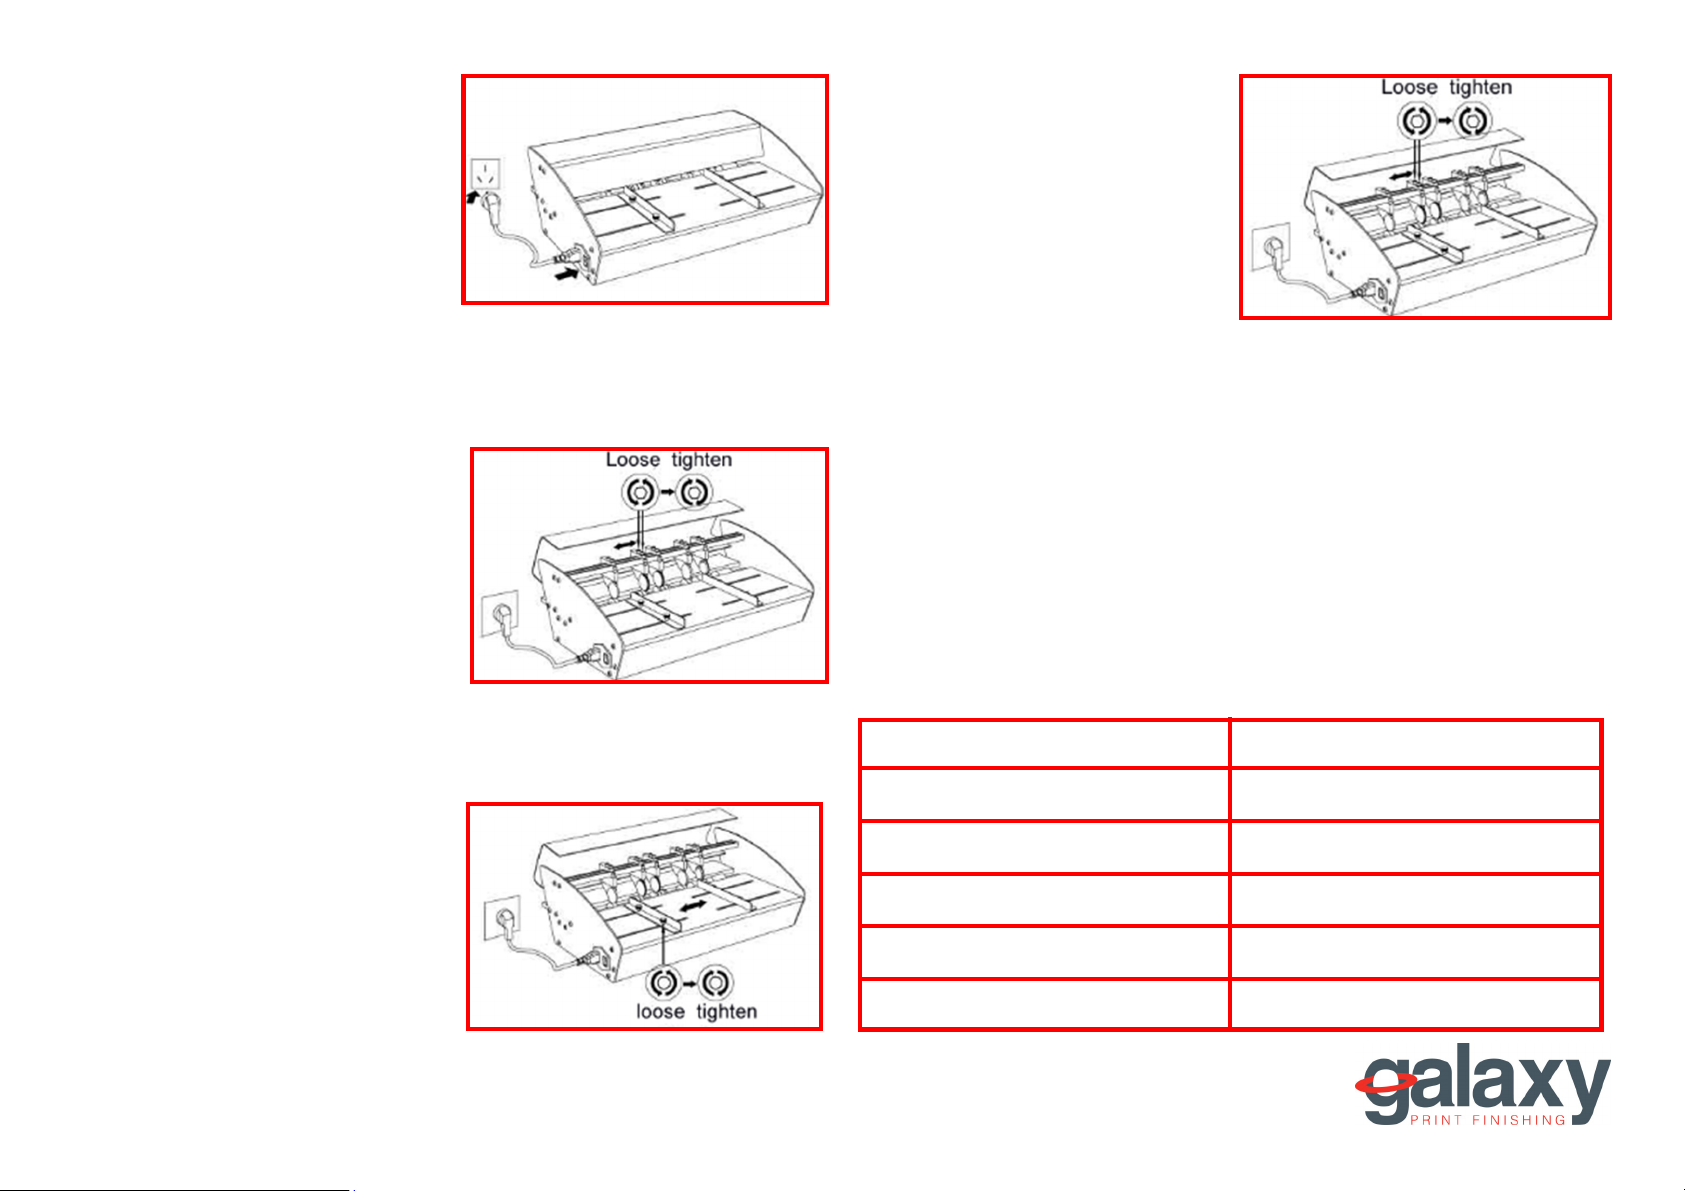
1. Remove the machine
from the box and place
on a flat surface.
2. Adjust the creasing
position and the
indention / depth
according to your
needs, the upper indent
should align with the
centre of the crease.
4. Insert paper/card and
adjust the creasing
pressure as well as
feeding pressure on the
paper feeding wheels
5. Caution when using the machine,
always make sure the safety lid is
closed and always make sure to switch
off the machine when not in use or
when changing or moving the blades.
Specification
3. Adjust paper position
accordingly.
Creasing wheel 4
Feeding wheel 2
Perforating wheel 1 (optional)
Dimension 510x325x172mm
N.G 9.9kg
POWER 220V-240V 50HZ-60HZ
 Loading...