

Page 1
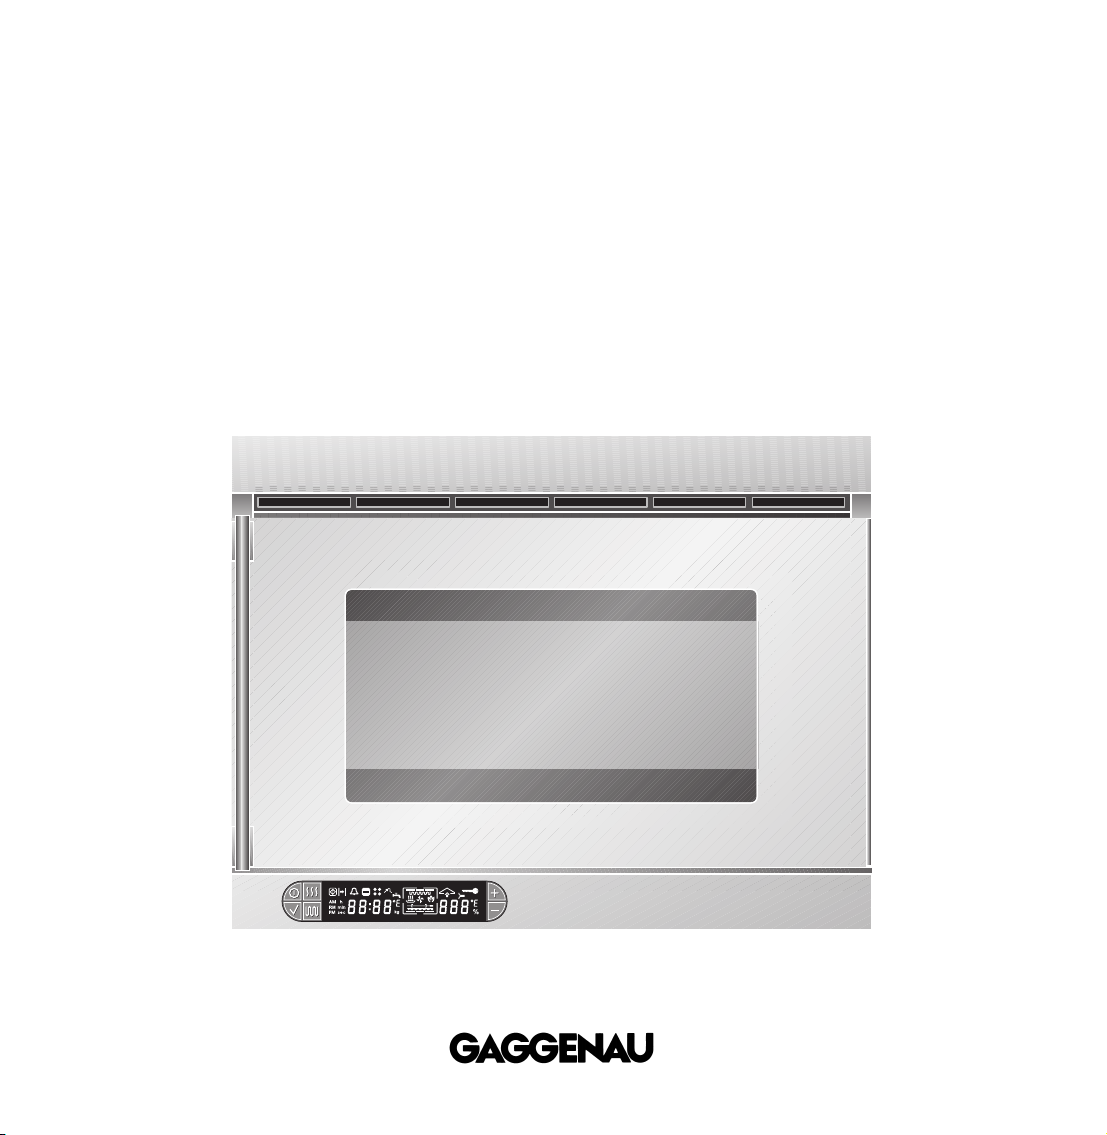
Operating and assembly instructions
EM 220/221
Built-in microwave oven with grill
Page 2

EM 220/221
1
1. Important Notes Page 3-5
Operating for the first time Page 3
About use Page 3
General safety information Page 4
Safety information concerning microwave operation Page 5
2. Features and operating principles Page 6-9
Features Page 6
Cooking methods Page 7
What you should know about utensils Page 8
Cookware overview table Page 9
3. Operation Page 10-12
Microwave oven Page 10
Grilling Page 11
Combined operation Page 12
4. Further functions Page 13-16
3-stage programming Page 13-14
Options menu, setting the clock Page 15
Child lock Page 15
5. Practical tips Page 17
6. Cleaning and care Page 18
7. Troubleshooting Page 19
8. Maintenance Page 20-21
General Page 20
Disassembly of the front window Page 21
9. Assembly instructions Page 22-23
Technical data Page 22
Installation notes Page 22
Installation Page 23
Page 3
2
Congratulations on buying your new
microwave oven with grill.
Before switching your appliance on for the first
time, we would like you to familiarize yourself with
your new appliance. In this manual you will find
important notes on safety and operation. These
will serve to ensure your personal safety and the
lasting value of your appliance.
You will find notes on Page 4 that you ought to
observe before operating the appliance for the
first time.
The chapters entitled “Features" and “Operation"
tell you all about what your appliance can do and
how you operate it.
The chapter entitled “Cleaning and Care" gives
tips on how to keep your appliance looking good.
And now we wish you lots of fun cooking.
Page 4

Operating for the first time
Remove the packaging from the appliance and
dispose of it according to local regulations.
Be careful to remove all accessories from the
packaging. Keep packaging elements and plastic
bags away from children.
This appliance is labelled in accordance
with the European Directive 2002/96/EG
concerning used electrical and electronic
appliances (waste electrical and
electronic equipment - WEEE). The
guideline determines the framework for the return
and recycling of used appliances as applicable.
Check the appliance for transport damage before
installing it.
The appliance must only be connected by an
authorised specialist, paying attention to
the relevant regulations of the power supply
companies and the regional construction
regulations.
Observe the assembly instructions!
The serial number of the appliance can be found on
the quality control slip which is included with these
instructions. This quality control slip should be kept,
for guarantee reasons, together with your operating
and assembly instructions.
Read through these instructions attentively before
operating your appliance for the first time. Keep the
instruction manual near your appliance for further
reference.
Thoroughly clean the appliance and accessories
before using them for the first time. This will
eliminate any 'newness’ smells and soiling (see
chapter “Cleaning and care”).
After first installation or a power failure, 08:00 and
the time unit symbol flash in the display. You can set
the current time by pressing the
+ and – keys.
When you press any key, the displayed time of day
is set as the current time of day.
About use
The appliance is intended solely for household use
and must not be put to any other uses.
Use the appliance to prepare meals only. Do not use
the appliance to heat up the room in which it is
installed.
Operation is only possible when the door is closed.
In the event of malfunction, first check your
household fuses. If the power supply is in proper
working order, but the appliance is still not
functioning, please inform your specialist dealer or
your nearest Gaggenau after-sales service.
1. Important Notes
3
Page 5

4
General safety information
Do not operate the appliance if it is damaged.
Caution: the appliance heats up during operation.
Keep children away. Only operate the appliance
under supervision.
When connecting electrical appliances in the
proximity of the oven, make sure that connecting
cables do not come into contact with hot cooking
surfaces.
Caution! You will subject yourself to an accident
risk if you close the door improperly. You might jam
and crush your fingers and hands.
Caution: risk of burns. The grill heating element
gets very hot during operation; observe appropriate
caution when removing food.
Caution: fire risk! Never place combustible items
in the cooking compartment, as they could ignite
when switched on unintentionally.
The microwave must only be switched on when
foodstuffs (or beverages) are located in the cooking
compartment. Switching on the empty appliance
could overload the appliance. An exception to this
rule is for the short-term testing of cookware (see
“Information about cookware”).
The appliance door must always shut tight. For this
reason, any food residue or cooking remains must
be removed from the door seal area before use.
In the event that the appliance door or door seal is
damaged or broken (glass panel), the appliance
must not be used until it has been repaired by a
qualified customer service technician.
Caution: Children must only be permitted to
operate the appliance without supervision if
comprehensive instructions have been given with
regard to safe operation and the dangers of
improper use.
Protect your microwave appliance from excess heat
and dampness. Condensation will often accumulate
on the door window, inner walls and bottom. This
process is quite normal, and is not detrimental to
appliance functions. However, to prevent the buildup of excess water, simply wipe the condensation
from these surfaces after use.
To avoid jeopardising the electrical safety of the
appliance, do not use high-pressure or steam jet
cleaning devices.
Isolate the appliance from the mains during every
maintenance operation. To do this, remove the
mains plug or switch off the corresponding fuse.
Repairs must be carried out by authorised
specialists, thus ensuring electrical safety.
The cooking compartment lamp may be replaced
by a qualified customer service technician only.
Do not open the appliance housing. This appliance
operates at high voltages.
As the user, you are responsible for maintenance
and proper use in the household. No warranty
claims can be lodged for any damage resulting
from failure to observe these instructions.
Subject to technical change without notice.
Page 6

Safety information concerning
microwave operation
Foodstuffs that are cooked in containers made from
plastic, paper or other combustible materials must
be carefully monitored during the heating process.
The appliance door must not be opened if smoke
can be seen within the cooking compartment. In
this case, switch off the appliance and switch off
the cooker’s automatic circuit breaker in the fuse
box.
Never place foodstuffs directly into the appliance,
but in their packaging or appropriate receptacle.
Take care that any boiled-over liquid cannot
penetrate the internal appliance components.
Risk of scalding! When heating up liquids, always
place a teaspoon in the receptacle with the liquid
to prevent boiling retardation. Boiling retardation
means that the liquid reaches boiling point without
producing the customary vapour bubbles. The
slightest vibration of the receptacle can then cause
the liquid to boil over or spit violently, which in turn
can lead to personal injury such as scalding.
Baby food: When heating up baby food, always
insert the receptacle without the lid or teat. Once
heated, the baby food should be stirred or shaken
thoroughly in order to distribute the heat evenly.
Always test the temperature of the food before
feeding your baby.
Risk of scalding!
Risk of explosion!
Never heat up food or
beverages in sealed containers.
Risk of explosion! Alcoholic beverages must not
be heated to a high temperature.
Never heat up food in heat-retaining packaging, as
this may ignite. Food-stuffs that are cooked in
containers made from plastic, paper or other
combustible materials must be carefully monitored
during the heating process.
Food wrapped in plastic foil may explode, and the
foil melt when heated in a microwave.
Never cook eggs in their shells or heat up cooked
eggs, as they may crack or explode. The same
applies to shellfish and crustaceans. For fried or
poached eggs, always prick the yolk before
cooking.
For foodstuffs with hard crusts or skins, such as
apples, tomatoes, potatoes and sausages, always
prick the skin before cooking to prevent the skin
from bursting.
When drying herbs, fruit, bread or mushrooms in
the microwave, the drying process must be
carefully monitored, as overdrying can create a fire
hazard.
Never heat up cooking oil in the microwave, as it
may ignite.
Porcelain or ceramic cookware often features
small perforations in the handles or lid. These
perforations conceal a cavity below. Any liquid that
penetrates this cavity may cause the cookware to
crack.
Selecting a heat setting or cooking time that is
much too high may cause the foodstuff to ignite and
the appliance to be damaged.
Food that is cooked or heated in the microwave
transfers a large amount of heat to the cookware,
which can therefore become very hot. For this
reason, oven gloves should always be used.
5
Page 7

6
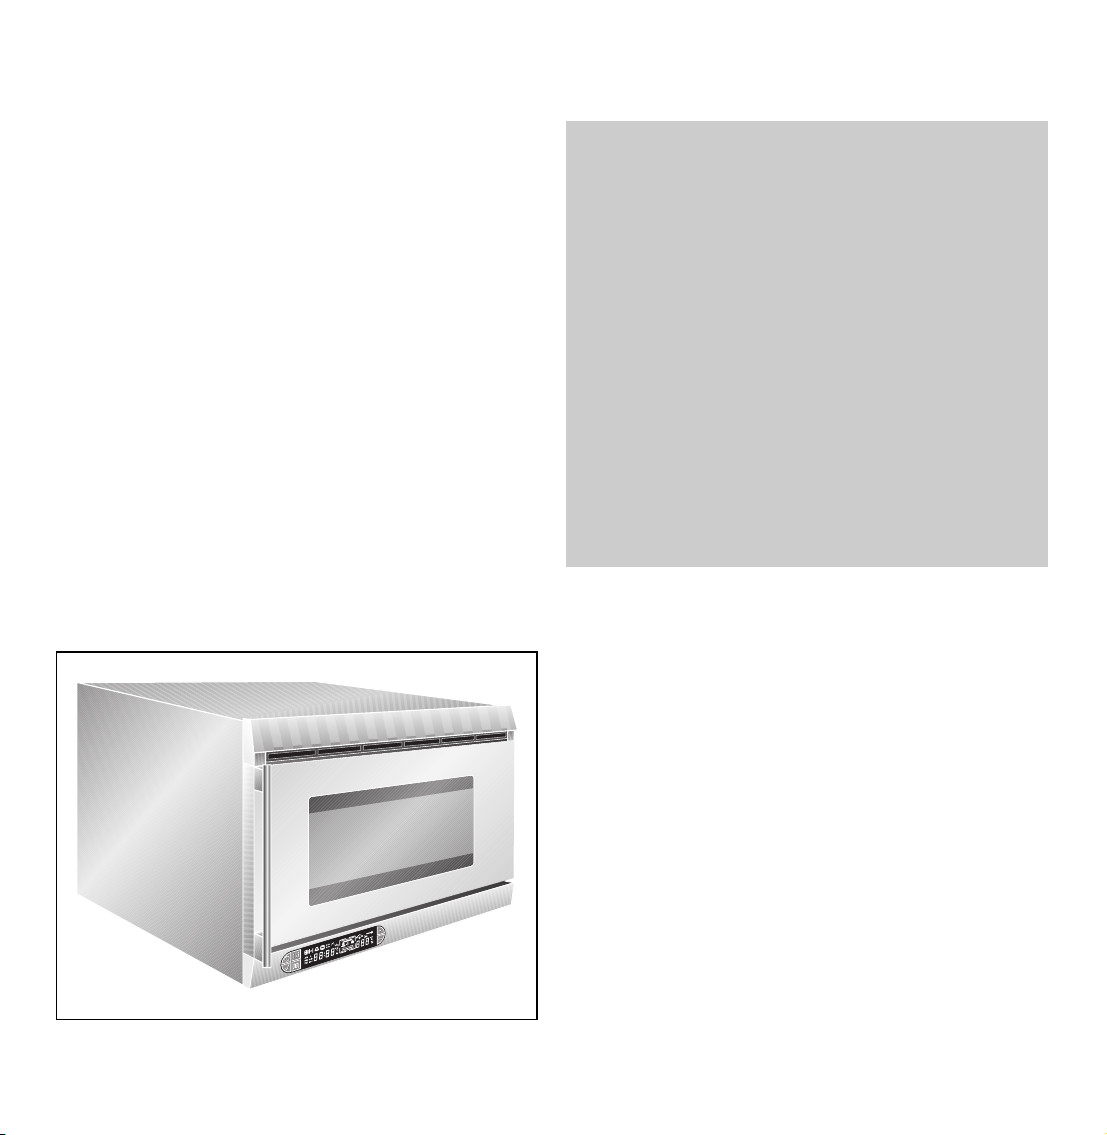
Features
Symbols in the display
1 Grill heating element
2 Oven lighting
3 Ventilation slots
4 Display with control keys
5 Glass tray for defrosting and grilling
6 Oven door
7 Cancel key
8 Microwave key
9 Plus key
10 Start key, Confirmation key
11 Grill key
12 Time display
13 Microwave power setting display or
temperature display in grilling mode
14 Minus key
2. Features and operating principles
7 89
10 11 12 13 14
Operation symbol,
child lock symbol
Time symbol
Grill symbol
Microwave symbol
Heating symbol
in grilling mode
1 23
45 6
Page 8

Cooking methods
Microwave operation
Microwaves are converted to heat when applied to
foodstuffs. The micro-wave oven is ideal for quick
defrosting, warming, melting and cooking.
Microwave power settings
850 W: Quick heating of beverages and liquids.
600 W: Heating and cooking of meals.
425 W: Cooking of meat and heating of sensitive
meals.
200 W: Simmering and raising.
100 W: Gentle defrosting of sensitive meals.
Grill operation
The high-power grill provides intensive heating of
the food surface, and thus an even degree of
browning. The temperature can be set within the
range from 100 - 220 °C in 5 ° steps, enabling you to
control the grill power according to the optimum
cooking method for the respective food-stuff:
reduced power for sensitive foods, e.g. au gratin
dishes, and full power for intensive browning, e.g.
steaks.
Grill with combined microwave oven
The grill and microwave oven are operated
simultaneously. Not only is the food crispy and
brown, but it cooks more quickly and uses less
energy.
The appliance features a cooling fan which
switches on while the appliance is operating. When
the appliance is switched off, the cooling fan
continues operating for some time.
The oven lighting comes on during operation and
when the door is open.
A flashing symbol in the display shows that a value
has not yet been confirmed and can be set.
To end the cooking process prematurely, simply
press the Cancel key twice.
On completion of the cooking duration, an audible
signal will sound, and the appliance switches itself
off automatically.
After a power cut, the switched on appliance stays
switched off for safety reasons. Press the
confirmation key to continue a set program.
7
Page 9

What you should know about utensils
Use utensils made of temperature-resistant glass,
porcelain, ceramics or earthenware. Heat-resistant
plastic designed for micro-waves can also be used.
These materials allow microwaves to penetrate.
Suitable:
glass, porcelain, ceramics and earthenware or
heat-resistant plastic.
Metal does not allow microwaves to penetrate.
Foods in closed metal containers will not heat. You
can however use open, flat, metal containers, e.g.
aluminium trays provided these are not deeper than
2-3 cm. Make sure that metal objects are at least
2 cm from the oven walls and the inner side of the
door; possible sparking can destroy the glass on
the inner side of the door.
In many cases you can use serving dishes. This
saves on washing-up. Only use crockery decorated
with silver and gold if it is guaranteed by the
manufacturer as suitable for microwave.
If you are uncertain as to whether you can use a
specific container, you can conduct a utensil test:
place the empty utensil in the appliance for
20 seconds at »850 W«. If it becomes hot or should
there even be sparks, it is not suitable.
Important!
The microwave should not be switched on
without food. The only exception is the utensil
test.
Heated food gives off heat. Utensils can therefore
become hot. When removing food always use an
oven glove.
8
Page 10

Type of utensil
Heat-resistant glass and
porcelain (without metal
parts, e.g. Pyrex or
Jenaer Glas)
Non-heat-resistant glass
or porcelein
(e.g. serving dishes)
Glass ceramics and
vitro-ceramics made of
heat and frost resistant
materials (e.g. Arcoflam)
Ceramics, earthenware
1
Plastic 2, heat resistant
to min. 200 °C
Cardboard, paper
Roasting utensils of
metal, e.g. enamel or
cast iron
Baking tins, painted
black or non-stickcoated
Microwave
yes
yes
yes
yes
yes
limited
only for particular
applications
no
Grill
yes
no
yes
no
no
no
yes
no
Combined operation
yes
no
yes
yes
yes
no
only for particular
applications
yes
9
Cookware overview table
1
Without glaze with metal content
2
Observe the maximum temperatures specified by the manufactures!
Page 11

10
Microwave oven
Setting procedure
• Press the microwave key. The microwave power
setting of 850 W is shown on the display.
• Select the desired power setting between 100 850 W using the +/– keys. The value is shown on
the display. Confirm the chosen value with the
confirmation key.
• Use the +/– keys to select the cooking time.
Confirm the chosen value with the confirmation
key.
• The cooking process begins and the time counts
down in seconds.
• When the cooking process is finished, a signal
is sounded and the appliance switches off
automatically.
Additional information
You can enter a cooking time of up to 90 minutes.
The cooking time and the microwave power setting
can be changed at any time during operation.
By pressing the cancel key or opening the door,
the cooking process is interrupted. It continues as
soon as the door is reclosed and the start key
repressed.
Should you wish to end the cooking process
prematurely, simply press the cancel key twice.
3. Operation
Page 12

Grilling
Setting procedure
• Press the grill key. The temperature of 190 °C is
shown on the display.
• Select the desired temperature between
100 - 220 °C using the +/– keys. The value is
shown on the display. Confirm the chosen value
with the confirmation key.
•
Operation without timer: Press the confirmation
key again. The grilling process begins without the
timer running. The heating symbol lights up, until
the appliance has reached the programmed
temperature.
•
Operation with timer: Use the +/– keys to select
the grilling time. Confirm the chosen value with
the confirmation key. The grilling process begins
and the time counts down in seconds. The heating
symbol lights up, until the appliance has reached
the programmed temperature.
When the grilling process is finished, a signal
is sounded and the appliance switches off
automatically.
Additional information
Always grill with the oven door closed.
You can enter a cooking time of up to 90 minutes.
The grilling time and the temperature setting can
be changed at any time during operation.
By opening the door the grill is switched off
temporarily, the programmed time, however,
continues to run. The grilling process recontinues,
as soon as the door is closed.
Should you wish to end the grilling process
prematurely, simply press the cancel key twice.
11
Page 13

Combined operation
Setting procedure
• Press the microwave key. The microwave power
setting of 850 W is shown on the display.
• Select the desired power setting between 100 850 W using the +/– keys. The value is shown on
the display. Confirm the chosen value with the
confirmation key.
• Use the +/– keys to select the cooking time. Then
press the grill key. The temperature of 190 °C is
shown on the display.
• Select the desired temperature between
100 - 220 °C using the +/– keys. The value is
shown on the display. Confirm the chosen value
with the confirmation key (you need to press the
confirmation key twice).
• The cooking process begins and the time counts
down in seconds.
• When the cooking process is finished, a signal
is sounded and the appliance switches off
automatically.
Additional information
You can enter a cooking time of up to 90 minutes.
The cooking time, the microwave power setting
and the temperature setting can be changed at any
time during operation.
By pressing the cancel key or opening the door,
the cooking process is interrupted. It continues as
soon as the door is reclosed and the start key
repressed.
Should you wish to end the cooking process
prematurely, simply press the cancel key twice.
12
2x
Page 14

3-stage programming
When simmering or defrosting foodstuffs in the
microwave, it is often the case that you require two
or three heat settings one after the other. It is
possible to program your microwave appliance to
implement such procedures automatically.
If you use a specific setting frequently, you can
store this setting in your microwave oven and
conveniently select it when required.
You can store five programs. Each program can
include up to three stages. All cooking methods
can be stored in any given order.
You can easily select a stored program, the
different stages will automatically run consecutively.
The total time of all the cooking stages is displayed,
and counted down in seconds and/or minutes.
The cooking time cannot be changed during
operation.
A stored setting can be changed or replaced at any
time with another setting.
Setting procedure
• Press the confirmation key and keep it pressed
until a signal is sounded. P1 is shown on the
display. Using the +/– keys you can now select the
desired storage number (P1 – P5).
• Repress the confirmation key and keep it pressed
until a signal is sounded. P11 is shown on the
display, i.e. the first storage number, the first
program stage. Now you can select the desired
setting for this program stage.
• The order of the setting is: cooking time >>
microwave power setting >> grill temperature.
Use the +/– keys to select the desired values, by
pressing the + and – at the same time you select
the value 0. Press the microwave key to access
the next menu step.
• Press the microwave key, when you have entered
all three values, in order to access the second
program stage. Now you can select the desired
setting for the second program stage.
• Press the microwave key, when you have entered
all three values, in order to access the third
program stage. Now you can select the desired
setting for the third program stage.
• Finally press the confirmation key and keep it
pressed until a signal is sounded, to store all
stages for this storage number. Press the cancel
key, in order to exit the programming mode.
Please note: the programming mode will
automatically end without storing any values, should
you interrupt programming it for a longer period of
time.
By pressing the grill key you can go one step back
in the programming, for example to change or to
check a value.
Selecting a stored program
• Press the confirmation key and keep it pressed
until a signal is sounded. P1 is shown on the
display. Using the +/– keys you can now select the
desired storage number (P1 – P5).
• Repress the confirmation key. The programm
starts automatically. The total cooking time of the
program is shown on the display.
You will find an example of a 3-stage-
programming on the next page.
4. Further functions
13
Page 15

An example of 3-stage programming
This example will lead you step by step through
storing a program with the following program
stages under the storage number P3:
1. 20 minute microwave operation at 100 W
2. 6 minute combination mode grill and micro-wave
at 425 W and 210 °C grill temperature
3. 8 minute grill operation at 170 °C
Setting procedure
• Press the confirmation key and keep it pressed
until a signal is sounded.
P1 is shown on the
display. Press the + key, until
P3 is shown on the
display.
• Repress the confirmation key and keep it pressed
until a signal is sounded.
P31 is shown on the
display, i.e. the third storage number, the first
program stage.
• Now you can select the desired cooking time:
press the + key, until
20:00 is shown on the
display. Press the microwave key.
----
is shown
on the display.
• Now you can select the desired microwave power
setting: press the + key, until
100 is shown on the
display. Press the microwave key.
• In this program stage you want to use microwave
operation only, therefore press the microwave key
again.
P32 is shown on the display, i.e. the third
storage number, the second program stage.
• Now you can select the desired cooking time:
press the + key, until
06:00 is shown on the
display. Press the microwave key.
----
is shown
on the display.
• Now you can select the desired microwave power
setting: press the + key, until
425 is shown on the
display. Press the microwave key.
• Now you can select the desired grill temperature:
in this program stage you want to use combination
mode, therefore press the + key, until
210 is
shown on the display.
• Press the microwave key, in order to access the
third program stage.
P33 is shown on the display,
i.e. the third storage number, the third program
stage.
• Now you can select the desired cooking time:
press the + key, until
08:00 is shown on the
display. Press the microwave key.
----
is shown
on the display.
• In this program stage you want to use grill
operation only, therefore press the microwave key
again.
• Now you can select the desired grill temperature:
press the + key, until
170 is shown on the display.
• Finally press the confirmation key and keep it
pressed until a signal is sounded, to store all
stages for this storage number. Press the cancel
key, in order to exit the programming mode.
Please note: the programming mode will
automatically end without storing any values, should
you interrupt programming it for a longer period of
time. By pressing the grill key you can go one step
back in the programming, for example to change or
to check a value.
Selecting the stored program
• Press the confirmation key and keep it pressed
until a signal is sounded.
P1 is shown on the
display. Press the – key, until
P3 is shown on the
display.
• Repress the confirmation key. The programm
starts automatically. The total cooking time of the
program is shown on the display.
14
Page 16

Options menu, setting the clock
With the aid of the options menu, you can program
the following settings of your microwave oven:
• choose between °C and °F on the grilling
temperature display.
• choose between 12h and 24h (am/pm) on the time
display.
• switch the day time in the display on or off.
• set the clock.
Setting procedure
• Keep the confirmation key pressed and
additionally press the grill key, until a signal is
sounded. Use the +/– keys to select the desired
grilling temperature display ( °C or °F). Press the
confirmation key to store the setting.
• Press the grill key to access the next menu step.
Use the +/– keys to select the desired time
display (12h or 24h). Press the confirmation key to
store the setting.
• Press the grill key to access the next menu step.
Use the +/– keys to switch the day time in the
display ON or OFF. Press the confirmation key to
store the setting.
• Press the grill key to access the next menu step.
Use the +/– keys to set the time of day. Press the
confirmation key to store the setting and exit the
options menu.
Please note: the time of day can only be set, if,
in the previous option, you have chosen the time
display ON.
Setting the clock after first installation
After first installation, 08:00 flashes in the display.
You can set the current time by pressing the
+ and
– keys. Confirm by pressing the confirmation key.
15
Page 17

Child lock
The child lock prevents inadvertent activation of the
oven.
Switching on
• Press the confirmation key and keep it pressed.
Simultaneously press the cancel key and keep
them both pressed.
• A signal is sounded. The child lock symbol on the
display flashes. The child lock is activated, the
appliance can not be switched on.
Switching off
• Press the confirmation key and keep it pressed.
Simultaneously press the cancel key and keep
them both pressed.
• A signal is sounded. The child lock symbol on the
display goes off. The appliance can now be
switched on as normal.
16
Page 18

Practical tips on microwave use
When defrosting, always place the food in an open
container (without lid) or in the glass tray.
When defrosting meat, you will obtain the best
results when the meat pieces, e.g. minced meat,
have been frozen flat within the container.
Take particular care not to overcook the food!
Cooking in a microwave means short cooking and
heating times. It can be very easy to forget about
when the food will be ready. To be on the safe side,
use a slightly shorter cooking time, check the food,
and then continue cooking if necessary.
Flat pieces of food will cook quicker than thick
pieces. For this reason, distribute the food as
evenly as possible in the respective container. You
should also avoid placing pieces of food on top of
each other.
The containers into which the food is placed should
be closed properly. If you do not have the matching
lid for a container, simply use a plate, heat-resistant
plastic foil or special microwave foil.
The greater the volume of food, the longer the
cooking/heating time will be. The rule of thumb is:
double the volume = double the time, half the
volume = half the time.
Never insert too much at once into the microwave.
Small amounts will cook much better than large
amounts. Furthermore, it is often more efficient to
cook or heat two portions separately than at the
same time.
For some foodstuffs, it may be necessary to stir (e.g.
stew) or turn (e.g. large roast) the food.
In microwave cooking, it is no longer necessary to
add the customary amounts of oil or water.
Moistening the food with water and brushing roasts
with oil is sufficient.
Use salt and other condiments sparingly, as
microwave cooking generally retains most of the
food’s characteristic taste.
Having removed the cooked food from the
microwave, you should allow the food to stand for a
while. This enables the heat to distribute itself more
evenly, and also ensures a 'persistent' cooking
effect.
Practical tips on grilling
Use only well-hung meat with all fat and sinews
removed. Rinse the meat briefly, dab dry with
kitchen roll and then season. Do not season the
meat with salt until it has been grilled.
Beef or pork steaks should be cut approx. 2 – 3 cm
thick. Push flatter pieces together to form a round
slice, place a piece of string around the outside
and tie together.
It is recommended to insert the glass tray on the
first or second level.
When grilling, always close the oven door.
Turn the food once after approximately 2/3 of the
cooking time. It is recommended to turn the food
with a pair of barbecue tongs. Do not prick the food
with a fork, otherwise the juices will run out and the
meat will be dry.
Remember, red meat, e.g. beef, browns more
quickly than white meat, e.g. veal and pork. Grilled
white meat or even fish fillet is often only lightly
browned on the outside, but is still cooked and
juicy on the inside.
17
5. Practical tips
Page 19

18
How to avoid soiling the oven
When heating food, in particular meals on plates,
always cover the food. Upturned plates, special
microwave film or plate covers of microwavecompatible plastic are all suitable covers.
When preparing meat in sauces, as well as
vegetables or side dishes, always use covered
microwave-compatible containers.
Pierce poultry skin several times before grilling.
Use a fork or toothpick. In this way blisters will not
form, fat escapes and skin is crispier.
Do not allow food to cook for too long in combined
mode. Overheating quickly results in unnecessary
soiling.
Meat and poultry dishes as well as other fatty foods
are best prepared on combined mode in a high,
open container (e.g. Pyrex, Arcoflam).
Tilt down grill heating element
You can tilt down the grill heating element in order
to clean the oven interior easily.
Only clean the
microwave oven when it is cold.
Turn the two
locking clips to the front. Then carefully tilt down
the grill heating element.
Caution: Never switch on
the oven when the grill heating element is tilted
down. Securely fasten the grill heating element
after cleaning. The locking lugs should face to the
rear.
Looking after your appliance
Appliance exterior
All you need to do is wipe the outside with a damp
cloth and then dry it with a soft cloth. Do not use any
abrasive sponges. Do not use stainless steel
cleaner or caustic, abrasive or strongly alkaline
cleaning agents (such as oven spray) because
these are aggressive to the panel surface. If such
agents are accidentally used, immediately wipe
them off with water.
Regularly clean the door seal and remove any food
residue or cooking remains from the door seal area.
The appliance door must always shut tight.
Oven
Mostly it is sufficient to wipe the oven with a damp
cloth. If soiling is more pronounced, e.g. in the area
of the grill, use mild cleaners. Before cleaning
allow the appliance to cool down. Never use oven
spray or grill cleaner. If the bottom of the oven
interior is soiled, it can be cleaned with a cleaning
agent suitable for ceramic (ceran) hobs. If you have
prepared meals which give off a strong smell, heat
a cup of water with a few drops of lemon juice for
1– 2 minutes at 850 W setting. This helps to
dissipate any odour. Then remove moisture with a
cloth.
Glass tray
Soak the glass tray immediately after use in water
with washing up liquid. In this way any soiling which
remains can be easily removed with a brush or
washing-up sponge. The glass tray is dishwasherproof.
6. Cleaning and care
Note:
to avoid jeopardising the electrical safety of the
appliance, do not use high-pressure or steam jet
cleaning devices – risk of short circuits!
Caution, risk of burns! Before cleaning,
please wait until the oven has cooled to
hand-warm.
Page 20

Should your appliance malfunction for any reason,
this is often due to a minor problem which you
yourself can eliminate. The table below contains
some advice to help you.
19
7. Troubleshooting
Fault Possible cause Remedy
The appliance cannot be No electricity. Check the domestic fuse.
switched on.
The appliance cannot be The child lock is switched on. Switch off the child lock.
switched on, the child
lock symbol blinks.
The microwave does not Door not completely closed. Check whether the door is
switch on. jammed by foreign objects or
food remains. Ensure that
door seal surfaces are clean.
Start button not pressed. Press the Start button.
The cooking process Microwave heat setting Select a higher setting.
takes longer than usual. is too low.
A greater amount of food Double the amount –
than usual was inserted. double the time.
The food was colder than usual. Reposition or turn over the
food during the cooking
process.
After first installation, the The appliance is on Disconnect the appliance
child lock symbol lights in show room mode. from the power supply.
the display. The oven does Reconnect the appliance and
not heat up when switched on. within 3 minutes carry out the
following procedure: touch
the
+ key and keep it
pressed down. Press the
cancel key, until you
hear a signal and the child
lock symbol goes off.
Page 21

20
The appliance must always be disconnected
from the mains when being repaired.
If the appliance does not function correctly, check
the household fuses first.
If the power supply is functioning correctly, but your
appliance still does not work, please contact your
dealer or your local Gaggenau customer service
agency. Specify the appliance type. The serial
number and type of the appliance can be found on
the quality control slip which is included with these
instructions.
Repairs may only be carried out by authorised
electricians, in order to guarantee the safety of the
appliance.
Unauthorised tampering with the appliance will
invalidate any warranty claims.
For technical reasons the lamp cover cannot be
removed. Lamp must only be replaced by
Gaggenau after-sales service.
8. Maintenance
Important
Do not detach the lamp cover.
Page 22

21
Disassembly of the front window
The oven door is actively ventilated. Dust and
grease particles may therefore settle after some
time. Detach the front window to remove this
soiling.
Proceed as follows:
• Remove the bottom screw from the door handle.
• Remove the top screw from the door handle and
detach the door handle.
• Hold the front window with one hand and lightly
shake the door to and fro. The glass window can
be removed towards you.
You can now clean the front window.
Install in the reverse order.
In doing so, make sure that you first insert the
window on the hinge side and that you hold it with
one hand to stop it from falling out.
Page 23

Technical data
Total connected load: 220-240 V AC, 16 A
Heating power:
Grill: 1 800W
Total output: 3 600W
Technical modifications without notice.
Installation notes
Pay attention to Chapter 1 (Important notes).
The appliance must only be connected by an
authorised specialist, paying attention to the
relevant regulations of the power supply companies
and the regional construction regulations.
The installing technician is responsible for the
correct functioning of the appliance at the time of
installation. He must instruct the user on how to
disconnect the appliance in an emergency.
We accept no liability for damage caused by failure
to comply with these instructions.
The appliance must always be disconnected from
the mains when being repaired or in an emergency.
To do this, remove the mains plug or switch off the
corresponding fuse.
Repairs and maintenance work must be carried out
by trained after-sales technicians.
Electrical connection rates and information on the
rating plate must agree with each other.
The wiring schematic that is placed on the outer
panel of the appliance shows the connection variant
again.
Do not use any extension leads!
The electrical safety of the appliance is guaranteed
only if the earthing system belonging to the
domestic installation is installed in accordance with
regulations.
The manufacturer is not liable for damage that
might arise as the result of improper or non-existent
earthing of the appliance.
You can optionally connect the appliance to
230 V 1N
~~
or 400 V 2N
~~
by way of a properly
installed socket or junction box.
If the appliance is connected to 230V 1N
~~
, a 16 A
fuse must be installed or, if it is connected to
400 V 2N
~~
, it must be fused with 2 x 10 A.
As standard, the appliance is designed for a rated
voltage 230V 1N
~~
and, in accordance with the
rating plate, it can be converted for connection to
400 V 2N
~~
. Insofar as necessary, the regulations of
the local electricity works must be observed.
On installation, an isolating device with a contact
gap of at least 3 mm (e.g. fuse or LS switch) must
be installed. Pay attention to fire protection
regulations in the proximity of heat-sensitive and
fire hazard substances.
When connecting the mains lead, you must at least
use a cable of the type H05 VV-F 3 x 1.5 mm
2
.
22
9. Assembly instructions
Page 24

Installation
Proceed as follows:
• When unpacking the appliance, check it for
transport damage.
• Please remove the adhesive tapes that protect the
door during transport.
• A flexible cable should be used as the mains lead.
The cross-section must be selected according to
the rated current consumption and the type of
connection.
• Push the appliance into the item of furnishing. Use
the included wood screw to fix it to the face side
of the cabinet on the handle side, directly
underneath the top panel.
Note: use a spirit level to check that the microwave
oven is installed exactly horizontally.
• After installing, ensure that wires are protected
against contact.
• Finally test the microwave oven for correct
functioning.
• Thoroughly clean the appliance and accessories
before using them for the first time.
(see ”Cleaning and Care”)
5080010701 en 07.05 EB 23
place electrical junction box
above the appliance
minimum distance of 10 cm
between wall and appliance
Anschluss über dem
Gerät vorsehen
560
min.
900
min.
560
450
75
58
10
445
37,5
Seitlicher Wandabstand
zum Gerät
min. 10 cm
590
542
455
Page 25

GAGGENAU HAUSGERÄTE GMBH
CARL-WERY-STR. 34 · D-81739 MÜNCHEN
Y (0 89)45 90-03
FAX (089) 45 90-23 47
www.gaggenau.com
 Loading...