

Page 1

Instruction manual
CX 482
Full surface induction cooktop
Page 2

en
Table of contents
Instruction manual
8
Intended use 4
(
Important safety information 5
]
Causes of damage 7
Overview 7
7
Environmental protection 8
Tips for saving energy 8
Environmentally-friendly disposal 8
f
Induction cooking 8
Advantages of induction cooking 8
Cookware 8
*
Getting to know your appliance 10
Cooking surface 10
The control panel 10
Overview of the menus 11
Cooking position display 12
Residual heat indicator 12
1
Operating the appliance 13
First-time use 13
Switching the hob on and off 13
Configuring cooking position settings 13
Chef's recommendations 14
s
Transfer function 23
Activation 23
‚
Wireless temperature sensor 24
Preparing and maintaining the wireless temperature
sensor 24
Connecting the wireless temperature sensor to the
control panel 25
Cleaning 25
Replacing the battery 26
Declaration of Conformity 26
Ü
Cooking sensor mode 27
Cooking processes with the cooking sensor 27
Benefits 28
Tips for cooking with cooking sensor mode 28
Setting the boiling point 28
Setting procedure 29
Recommended dishes 30
‰
Dynamic cooking for an item of cookware 34
Activation 34
Deactivating 34
‹
Teppanyaki mode 35
Suitable cookware 35
Activation 35
Deactivating 35
u
Dynamic cooking 16
Activation 16
Deactivating 16
ˆ
Professional cooking 17
Activation 17
Deactivating 18
O
Time-setting options 18
Cooking timer 18
Stopwatch function 19
Short-term timer 20
v
Booster function for pots 21
Activating 21
Deactivating 21
x
Booster function for pans 22
Recommendations for use 22
Activating 22
Deactivating 22
z
Keep warm function 23
Activating 23
Deactivating 23
A
Childproof lock 36
Activation 36
Deactivating 36
Childproof lock 36
Š
Pause function 36
Activation 36
Deactivating 36
b
Automatic safety cut-out 36
Q
Basic settings 37
To go to the basic settings 38
o
Home Connect 38
Connection to your home network 38
Home Connect settings 41
Software update 43
Remote diagnostics 43
About data protection 44
Declaration of Conformity 44
2
Page 3

e
Hood control 44
Setting up 45
Disconnecting from the network 45
Control the hood via the hob 46
Ventilation control settings 47
D
Cleaning 48
Hob 48
Hob surround 48
{
Frequently Asked Questions (FAQ) 49
3
Trouble shooting 52
Warnings and fault messages 52
Tips 52
Demo mode 53
4
Customer service 54
Product number (E no.) and production number (FD no.)
54
en
Additional information on products, accessories,
replacement parts and services can be found at
www.gaggenau.com and in the online shop
www.gaggenau.com/zz/store
3
Page 4

en Intended use
m 8Intended use
Intended use
Read these instructions carefully. Please keep
the instruction and installation manual, as well
as the appliance certificate, in a safe place for
later use or for subsequent owners.
Check the appliance after removing it from the
packaging. If it has suffered any damage in
transport, do not connect the appliance,
contact the Technical Assistance Service and
provide written notification of the damage
caused, otherwise you will lose your right to
any type of compensation.
Only a licensed professional may connect
appliances without plugs. Damage caused by
incorrect connection is not covered under
warranty.
This appliance must be installed according to
the installation instructions included.
This appliance is intended for private domestic
use and the household environment only. The
appliance must only be used for the
preparation of food and beverages. The
cooking process must be supervised. A short
cooking process must be supervised without
interruption. Only use the appliance in
enclosed spaces.
This appliance is intended for use up to a
maximum height of 4000 metres above sea
level.
Do not use covers. These can cause accidents,
for example due to overheating, catching fire or
materials shattering.
This appliance may be used by children over
the age of 8 years old and by persons with
reduced physical, sensory or mental
capabilities or by persons with a lack of
experience or knowledge if they are supervised
or are instructed by a person responsible for
their safety how to use the appliance safely and
have understood the associated hazards.
Children must not play with, on, or around the
appliance. Children must not clean the
appliance or carry out general maintenance
unless they are at least 15 years old and are
being supervised.
Keep children below the age of 8 years old at a
safe distance from the appliance and power
cable.
When using the Cooking sensor mode, set the
cooking position on which you have placed the
saucepan with the cooking sensor.
If you wear an active implantable medical
device (e.g. a pacemaker or defibrillator),
check with your doctor that it complies with
Council Directive 90/385/EEC of 20th June
1990, DIN EN 45502-2-1 and DIN EN 45502-22, and that it has been chosen, implanted and
programmed in accordance with VDE-AR-E
2750-10. If these conditions are satisfied, and
if, in addition, non-metal cooking utensils and
cookware with non-metal handles are used, it is
safe to use this induction hob as intended.
Only use safety devices or child protection
grilles approved by ourselves. Unsuitable
safety devices or child protection grilles may
result in accidents.
This appliance is not intended for operation
with an external clock timer or a remote control.
4
Page 5

Important safety information
en
m (Important safety
information
Important safety information
m Warning – Risk of fire!
▯ Hot oil or grease ignite very easily. Never
leave hot fat or oil unattended. Never use
water to put out burning oil or fat. Switch
off the hob. Extinguish flames carefully
using a lid, fire blanket or something
similar.
Risk of fire!
▯ The cooking surface becomes very hot. Do
not set any combustible objects on the hob.
Do not store any objects on the hob.
Risk of fire!
▯ The appliance gets hot. Do not keep
combustible objects or aerosol cans in
drawers directly underneath the hob.
Risk of fire!
▯ The hob switches off automatically and can
no longer be operated. It may switch on
unintentionally at a later point. Switch off
the circuit breaker in the fuse box. Contact
the after-sales service.
Risk of burns!
▯ Do not use hob covers here.They can
cause accidents, for example due to
overheating, catching fire or materials
shattering.
m Warning – Risk of burns!
▯ The cooking positions and the adjacent
areas, particularly the hob frame (if
present), become extremely hot. Never
touch the hot surfaces. Keep children away
from the appliance.
Risk of burns!
▯ The hotplate heats up but the display does
not work. Switch off the fuse in the fuse
box. Inform technical after-sales service.
Risk of burns!
▯ Metal objects on the hob quickly become
very hot. Never set metal objects, such as
knives, forks, spoons, lids, or other objects
that contain metal on the hob.
Risk of fire!!
▯ After each use, always turn off the hob at
the main switch. Do not wait until the hob
turns off automatically after the pan is
removed.
m Warning – Risk of electric shock!
▯ Incorrect repairs are dangerous. Repairs
may only be carried out and damaged
power cables replaced by one of our
trained after-sales technicians. If the
appliance is defective, unplug the
appliance from the mains or switch off the
circuit breaker in the fuse box. Contact the
after-sales service.
Risk of electric shock!
▯ Do not use any high-pressure cleaners or
steam cleaners, which can result in an
electric shock.
Risk of electric shock!
▯ A defective appliance may cause electric
shock. Never switch on a defective
appliance. Unplug the appliance from the
mains or switch off the circuit breaker in the
fuse box. Contact the after-sales service.
Risk of electric shock!
▯ Cracks or fractures in the glass ceramic
may cause electric shocks. Switch off the
circuit breaker in the fuse box. Contact the
after-sales service.
m Warning – Hazard due to magnetism!
The wireless cooking sensor is magnetic.The
magnetic elements may damage electronic
implants, e.g. pacemakers or insulin pumps.
People fitted with electronic implants should
therefore not carry the cooking sensor in their
pockets and always keep it at least 10 cm away
from their pacemaker or similar medical device.
m Warning – Risk of fault!
A fan is located on the underside of this hob. If
a drawer is located on the underside of the
hob, do not store any small or sharp objects,
paper or tea towels in it. These may be sucked
in and damage the fan or impair the cooling.
There must be a clearance of at least 2 cm
between the contents of the drawer and the fan
entry point.
5
Page 6

en Important safety information
m Warning – Risk of injury!
▯ The wireless cooking sensor is powered by
a battery, which may become damaged if it
is exposed to high temperatures. Remove
the sensor from the cookware and store it
away from any heat sources.
Risk of injury!
▯ The cooking sensor may be very hot when
removing it from the saucepan. Wear oven
gloves or use a tea towel to remove it.
Risk of injury!
▯ When cooking in a bain marie, the hob and
cooking container could shatter due to
overheating. The cooking container in the
bain marie must not directly touch the
bottom of the water-filled pot. Only use
heat-resistant cookware.
Risk of injury!
▯ Saucepans may suddenly jump due to
liquid between the pan base and the
cooking position. Always keep the cooking
position and saucepan bases dry.
6
Page 7

]
Causes of damage
Causes of damage
Caution!
– Rough pan bases may scratch the hob.
– Avoid leaving empty pots and pans on the cooking
position. Doing so may cause damage.
– Do not place hot pans on the control panel, the
indicator area, or the hob frame. Doing so may
cause damage.
– Hard or pointed objects dropped on the hob may
damage it.
– Aluminium foil and plastic containers will melt if
placed on the cooking position while it is hot. The
use of laminated sheeting is not recommended on
the hob.
Overview
Causes of damage
en
The table below lists the commonest kinds of damage:
Damage Cause Remedy
Stains Food boiling over Remove any food that has boiled over immediately with a
glass scraper
Unsuitable cleaning agents Only use cleaning agents that are suitable for this type of hob
Scratches Salt, sugar and sand Do not use the hob as a work surface or storage space
Rough pan bases can scratch the hob Inspect the cookware
Discolouration Unsuitable cleaning agents Only use cleaning agents that are suitable for this type of hob
Wear caused by cookware Lift pots and pans when moving them.
Blistering Sugar, food with a high sugar content Remove any food that has boiled over immediately with a
glass scraper
7
Page 8

en Environmental protection
7
Environmental protection
Environmental protecti on
In this section, you can find information about saving
energy and disposing of the appliance.
Tips for saving energy
f
Induction cooking
Induction cooking
Advantages of induction cooking
Induction cooking is fundamentally different from
traditional cooking methods, as heat builds up directly
in the item of cookware. This offers numerous
advantages:
▯ Always use a matching lid with your cookware.
Cooking without a lid consumes significantly more
energy. Use a glass lid. This allows you to see into
the pan without removing the lid.
▯ Use cookware with a flat base. Uneven bases
increase the energy consumption.
▯ Always place items of cookware inside the usable
area of the cooking surface.
▯ Use small pots and pans to cook small quantities.
Using cookware that is big but barely filled requires
a lot of energy.
▯ Cook with as little water as possible. This saves
energy and preserves the vitamins and minerals in
vegetables.
▯ Switch to a lower power level in good time. This
prevents energy from being wasted.
Environmentally-friendly disposal
Dispose of packaging in an environmentally-friendly
manner.
This appliance is labelled in accordance with
European Directive 2012/19/EU concerning
used electrical and electronic appliances
(waste electrical and electronic equipment WEEE). The guideline determines the
framework for the return and recycling of used
appliances as applicable throughout the EU.
The wireless cooking sensor is battery-powered.
Dispose of spent batteries in an environmentally
responsible manner.
▯ Saves time when boiling and frying.
▯ Energy savings.
▯ Easier to care for and clean. Spilled food does not
burn on as quickly.
▯ Heat control and safety – the hob increases or
decreases the heat supply as soon as the user
changes the setting. If the cookware is removed,
the induction cooking position immediately
interrupts the heat supply without it having been
switched off.
Cookware
Only use ferromagnetic cookware for induction cooking,
such as:
▯ Cookware made from enamelled steel
▯ Cookware made from cast iron
▯ Special induction-compatible cookware made from
stainless steel.
To find out whether your cookware is suitable for
induction cooking, check whether a magnet is attracted
to the base of the item or refer to the manufacturer's
specifications.
Some induction cookware does not have a fully
ferromagnetic base:
▯ If the base of the cookware is only partially
ferromagnetic, only the area that is ferromagnetic
will heat up. This may mean that heat will not be
distributed evenly. The non-ferromagnetic area may
not heat up to a sufficient temperature for cooking.
8
Page 9
Induction cooking
en
▯ The ferromagnetic area will also be reduced if the
material from which the base of the cookware is
made contains aluminium, for example. This may
mean that the cookware will not become sufficiently
hot or even that it will not be detected.
Unsuitable pans
Never use diffuser hobs or pans made from:
▯ common thin steel
▯ glass
▯ earthenware
▯ copper
▯ aluminium
Properties of the base of the cookware
The material(s) from which the base of the cookware is
made can affect the cooking result. Cookware made of
materials that distribute heat evenly, such as saucepans
with a stainless steel sandwich base, save time and
energy.
Cookware with a completely flat base works best. If the
base of the cookware is uneven or embossed, this will
reduce the heat supply.
Empty cookware or cookware with a thin base
Do not heat empty items of cookware and do not use
cookware that has a thin base. The hob is equipped with
an internal safety system. However, an empty item of
cookware can heat up so quickly that the automatic
switch-off function has no time to react and an
excessively high temperature is reached. This could melt
the base of the cookware and damage the glass plate. If
this happens, switch off the hob and do not touch the
cookware. If this no longer works once it has cooled
down, contact our technical after-sales service.
Pan detection
The hob uses the ferromagnetic diameter and material
of the base of the cookware to automatically detect the
position, size and shape of the cookware being used.
Cookware with a base measuring 90 to 340 mm in
diameter is suitable for use.
FP
FP
FP
Note: The cooking position displays may show a size
and shape that is different from the cookware actually
being used. This is normal and does not affect the
functioning of the hob. For more information, see the
section entitled ~ "Frequently Asked Questions
(FAQ)"
.
Cookware that has been removed or is of an
unsuitable size
Always place items of cookware inside the usable area
of the cooking surface. If the cookware is not positioned
correctly, is made of an unsuitable material or is not the
right size, the Õ symbol will appear next to the cooking
position display. Move the cookware or try again with a
different pot or pan.
If you lift the "active" cookware from the cooking surface
for more than 30 seconds, the cooking position
automatically switches off.
9
Page 10
en Getting to know your appliance
*
Getting to know your appliance
Getting to know your appli ance
This section explains how to use the cooking surface,
the control panel and the various different functions of
the appliance.
Note: Depending on the appliance model, individual
details and colours may differ.
Cooking surface
The entire cooking surface of the hob supplies
induction heating. You can place items of cookware
anywhere inside the usable area of the cooking surface.
The position, size and shape of the cookware will be
detected automatically.
Note: Up to 5 items of cookware can be heated at the
same time on the cooking surface.
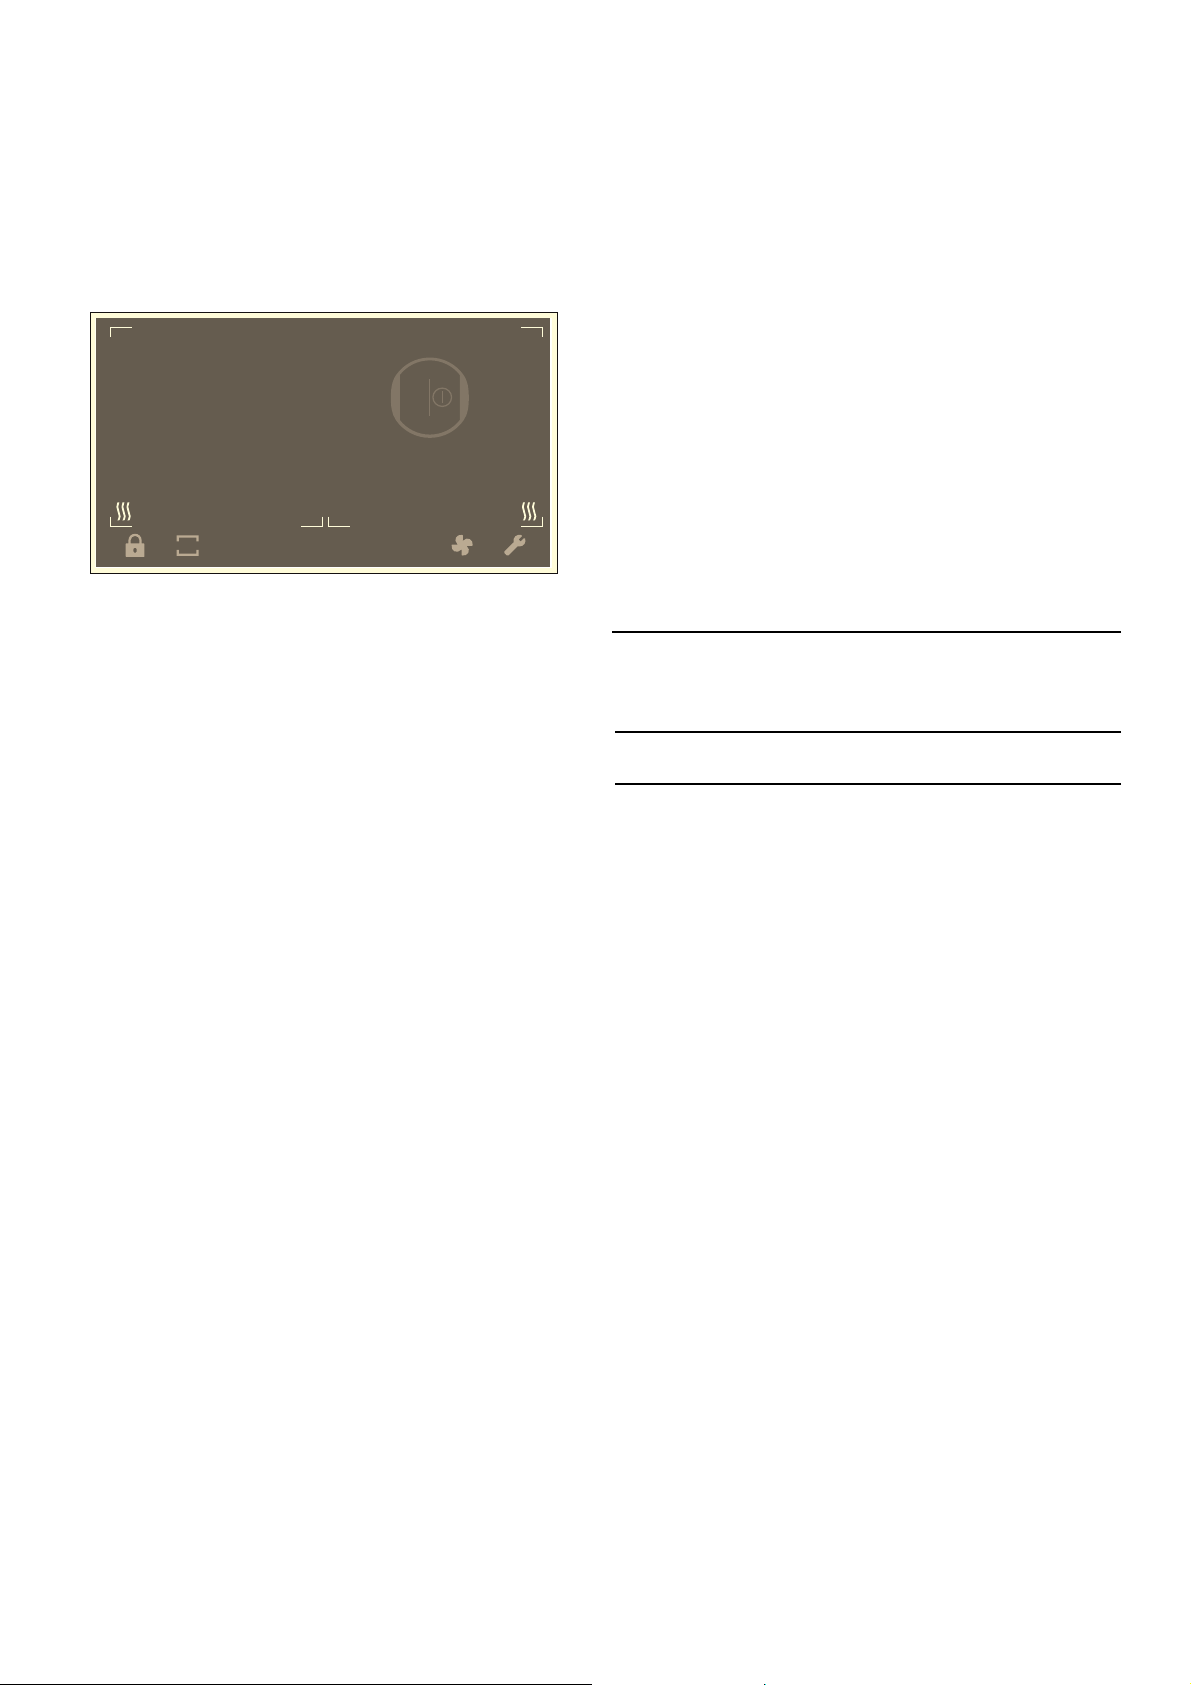
The control panel
The control panel has buttons and a touchscreen
display.
Buttons
The buttons are touch-sensitive. To select a function,
touch the relevant symbol. The available functions will
appear in the display.
Notes
– Always keep the control panel clean and dry.
Moisture can prevent it from working properly.
– Never place hot cookware on the touchscreen
display. The electronics could overheat.
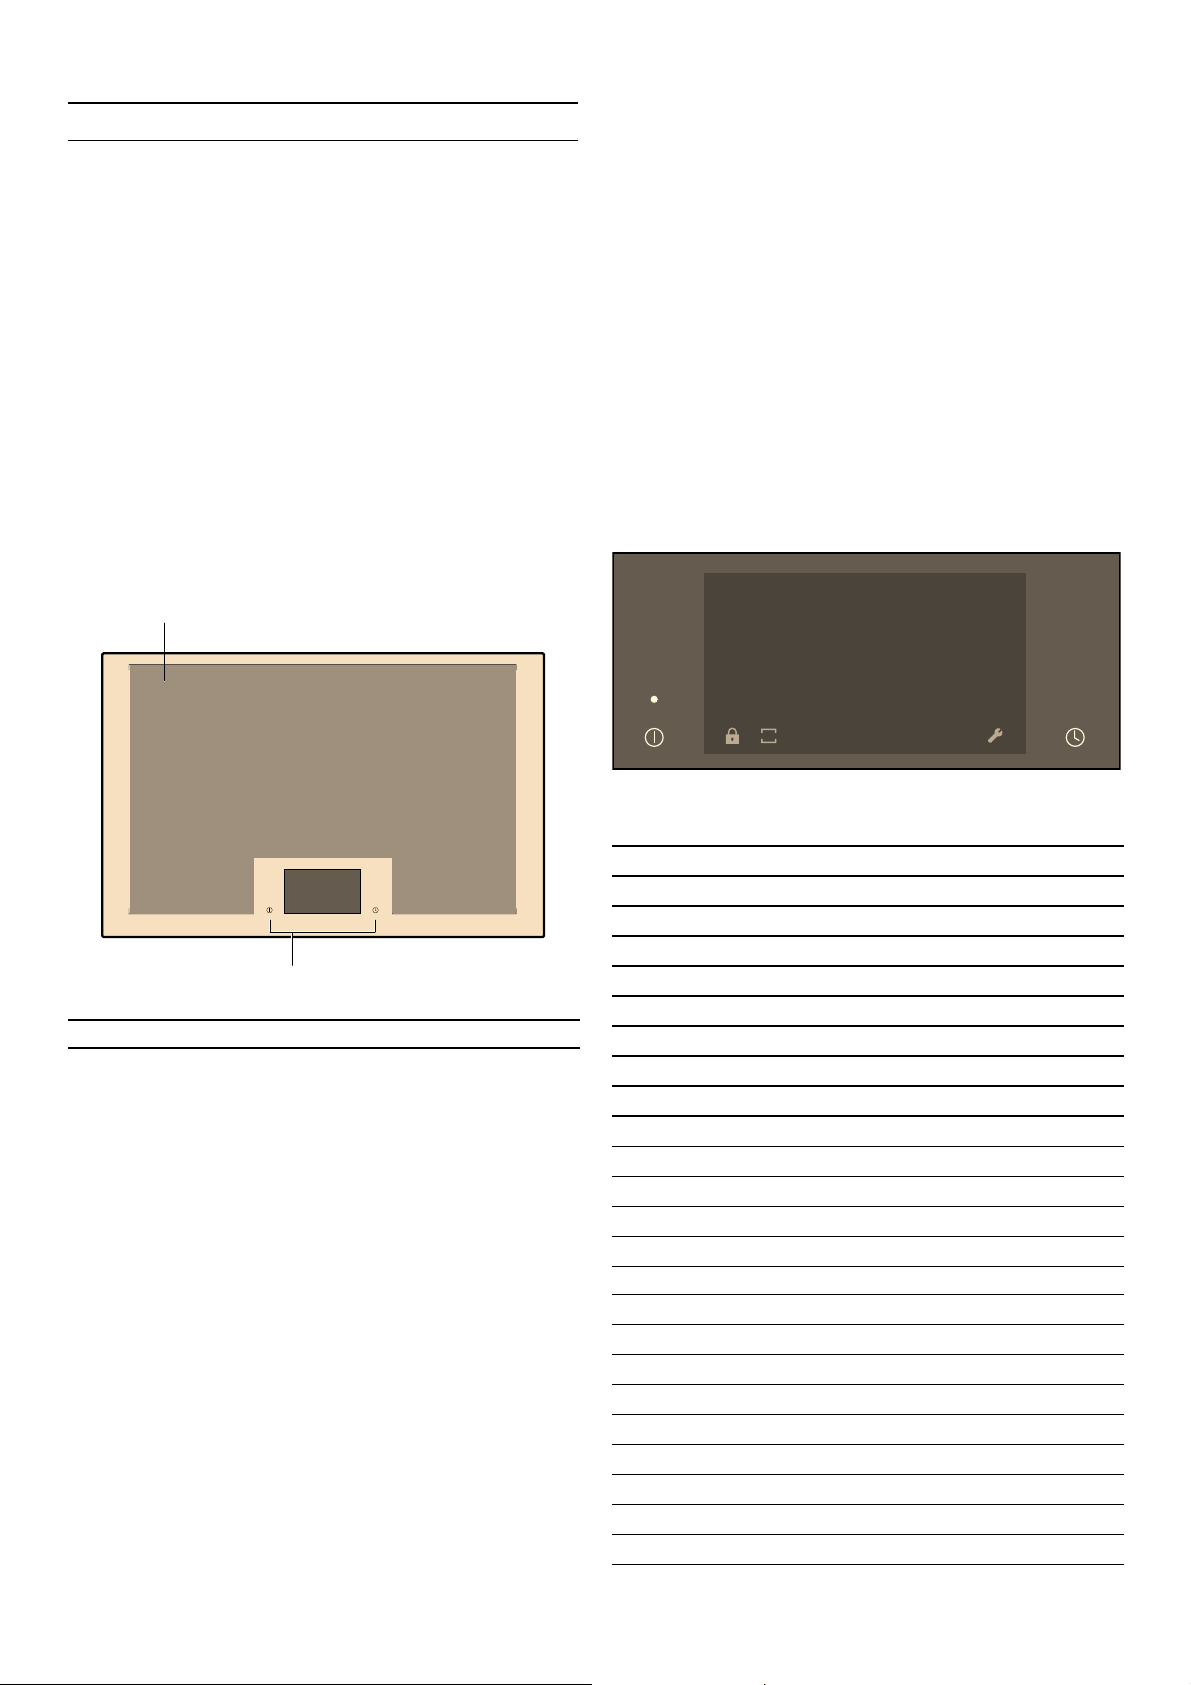
Hob
1 Usable cooking surface
2 Control panel
Buttons
Main switch
#
Time menu
0
Š
®
Childproof lock
¯
Pause function
H
Hob mode
g
Ë
¬
Ê
Ventilation control
S
Basic settings
t
Cooking position
ü#
1.0 - 9.0 Heat settings
Ž
©
£
6
i
Short-term timer
Stopwatch
Dynamic cooking
Professional cooking
Classic cooking
Saucepan booster function
Frying pan booster function
Keep-warm function
Cooking timer
Cookware mode
Dynamic control for an item of cookware
Ð
Classic cooking for an item of cookware
Ñ
Cooking sensor
¨
Teppanyaki
È
10
Page 11
Getting to know your appliance
en
Touchscreen display
The touchscreen display gives you an overview of the
cookware on the cooking surface and the buttons for
activating the various functions.
When an item of cookware is set down on the cooking
surface, the cooking position display for this cookware
is shown on the display.
Overview of the menus
The intuitive menu structure helps you to find your way
around the control panel of your hob. You can find out
more about the most important menus in this section.
Main screen
The main display provides an overview of the indicators
for the cookware on the cooking surface. It displays the
cooking mode, power levels, and the timer functions
that are set for the cooking zones that are switched on.
Function bar
The function bar provides access to a number of
functions and other menus.
Notifications and alerts
Notifications let the user know that the appliance's
status has changed or tell them when they need to
confirm something.
To return to the main screen, touch the G symbol.
Note: The top line of the display lights up orange.
The information makes you aware that a measure is
required.
Follow the instructions in the display and touch the
G symbol to return to the main screen.
Note: The top line of the display lights up blue.
Cooking mode
The hob has various functions for the entire cooking
surface.
Cooking mode Function
¬ Professional cook-
ing
Ê Classic cooking
Ë Dynamic cooking
To access the hob mode menu, touch the g button on
the function bar.
Allows the heat setting to be
selected based on the position of
the cookware on the cooking surface, from right to left.
Allows you to select the heat setting
for the cooking position.
Allows the heat setting to be
selected based on the position of
the cookware on the cooking surface, from front to back.
The following options are shown in the function bar:
▯ ¯ Childproof lock
H Pause function
▯ g Cooking mode
▯ S Ventilation control
▯ t Basic settings
Info menu
The info menu provides you with information about the
appliance or the functions that are currently active.
To access the info menu, touch the = symbol on the
function bar. The sensor will show when the function is
available.
11
Page 12
en Getting to know your appliance
Cookware mode
The hob has various functions for the cooking position.
Cookware mode Function
Ð Dynamic cooking
for an item of cookware
Allows a particular heat setting to
be selected based on the position
of the cookware by moving it from
front to back on the cooking surface.
Ñ Classic cooking for
an item of cookware
Allows the heat setting for each
item of cookware to be selected on
the control panel.
¨ Cooking sensor
You can use the cooking sensor
that is attached to the outside of the
pan to automatically keep the temperature at a set level. Cooking sensor mode is suitable for food that
requires large quantities of water,
oil or fat for boiling or deep-fat frying in the pan.
È Teppanyaki
This enables the teppanyaki surface
to be divided into two sections. This
means you can fry food on one section and keep food warm on the
other section, or use the entire area
to fry food at the same heat setting.
To access the cookware mode menu, tap the cooking
position display and then touch the
i button.
Cooking position display
When you place an item of cookware on the cooking
surface, the indicator for the relevant cooking position
will light up on the touchscreen display.
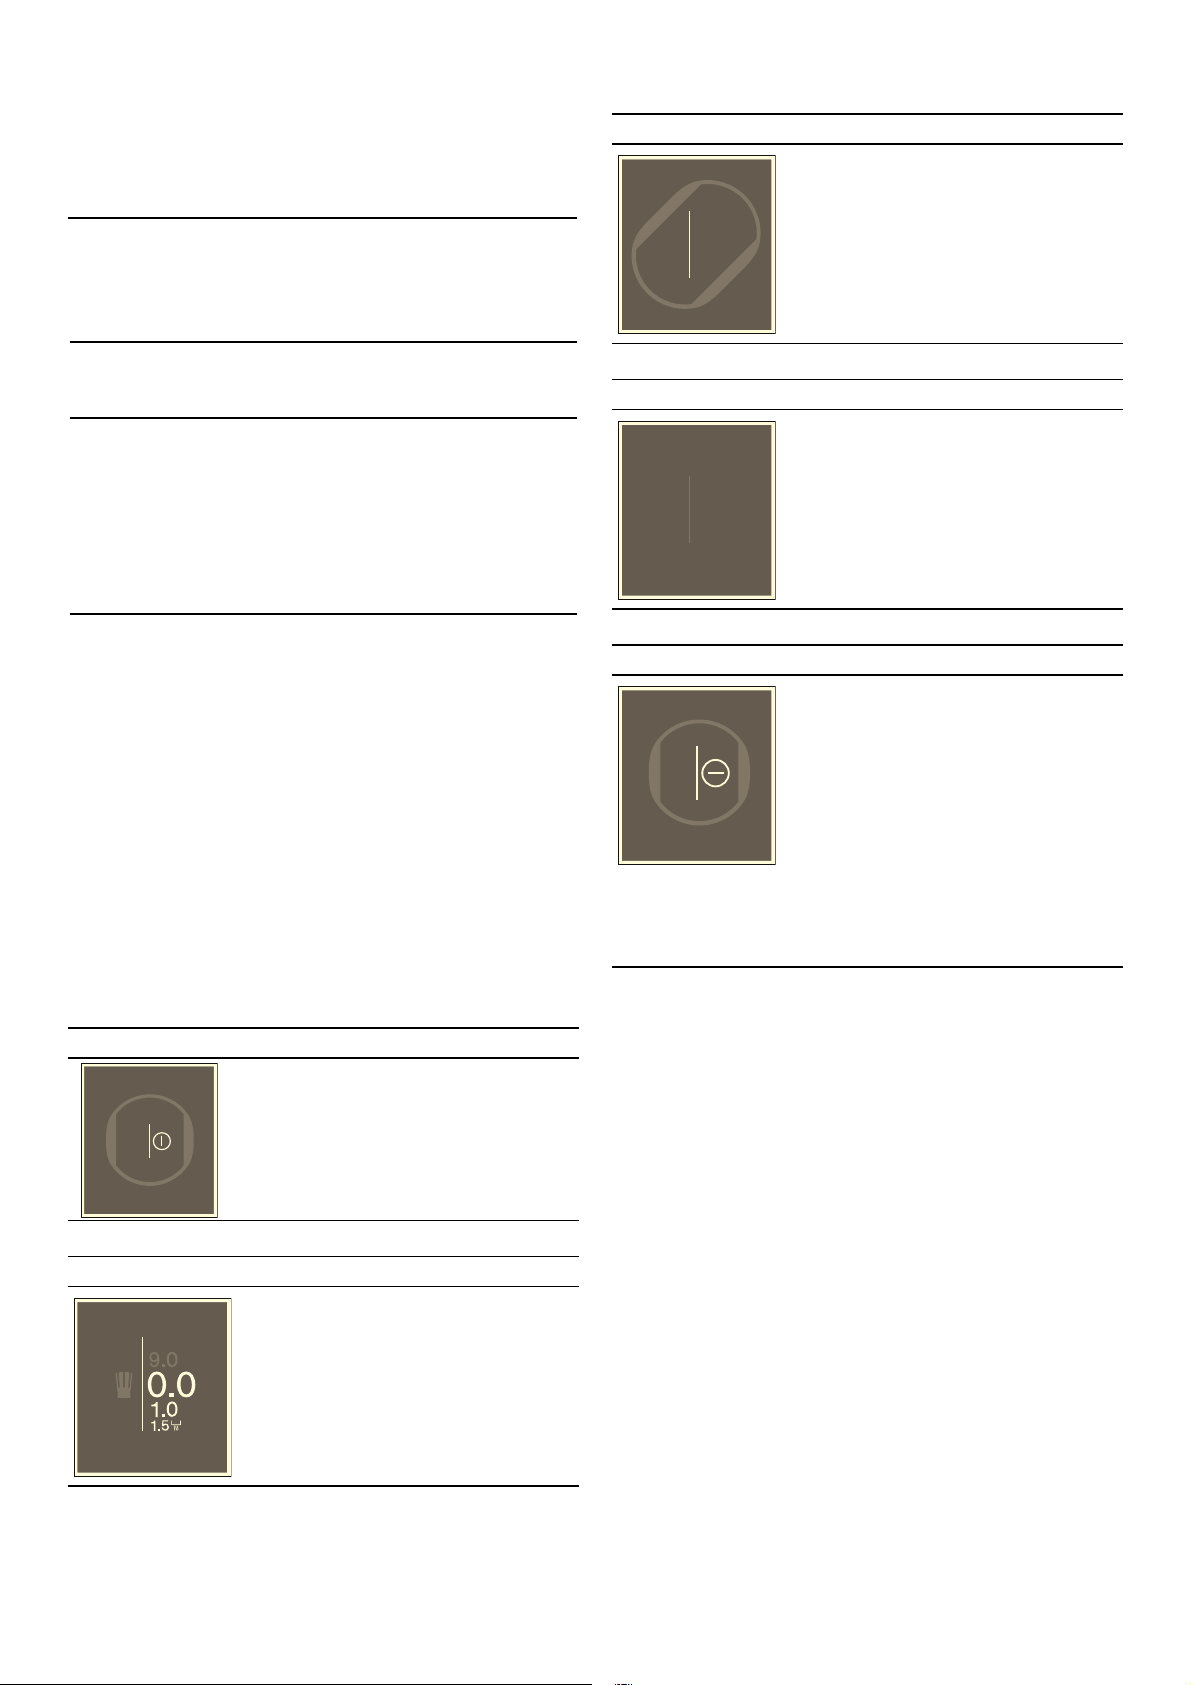
Cooking position switched on
The indicated cooking position has been
K
switched on. The selected power level
PLQ
lights up in the display.
There is no cookware on the cooking position
The cookware has been removed from
K
the cooking position. The selected
PLQ
power level is dimmed.
Other indicators and symbols
The settings for the selected hotplate
cannot be configured.
For more information, touch the display.
Possible causes:
▯ Up to five items of cookware evenly
distributed over the cooking surface
can be heated at the same time.
▯ The cookware is not suitable for use
on an induction hob.
▯ The appliance has exceeded its maxi-
mum power consumption.
Cooking position detected
The cookware was detected on the cooking position. The cooking position display lights up. Touch the # symbol to
select the cooking position.
Cooking position selected
The indicated cooking position has been
selected. You can now set the power
level.
Residual heat indicator
The hob has several residual heat indicators f to warn
you that one or more cooking positions is/are still hot.
One, two or all three bars of the indicator f will light up
depending on how strong the residual heat is. Do not
touch the cooking surface while the indicators are still
lit or immediately after they have switched off.
The residual heat indicators will remain lit for as long as
the cooking surface is still hot, even if you switch off the
hob.
12
Page 13
Operating the appliance
en
1
Operating the appliance
Operating the appliance
This chapter explains how to set a cooking position. The
table shows heat settings and cooking times for various
meals.
First-time use
When you switch on the appliance for the first time, the
menu for selecting the initial settings appears on the
display. Select the settings you require.
Once you have confirmed these settings, the main
screen will appear.
Note: You can change the settings at any time.For
information on how to select these settings, see the
section entitled ~ "Basic settings".
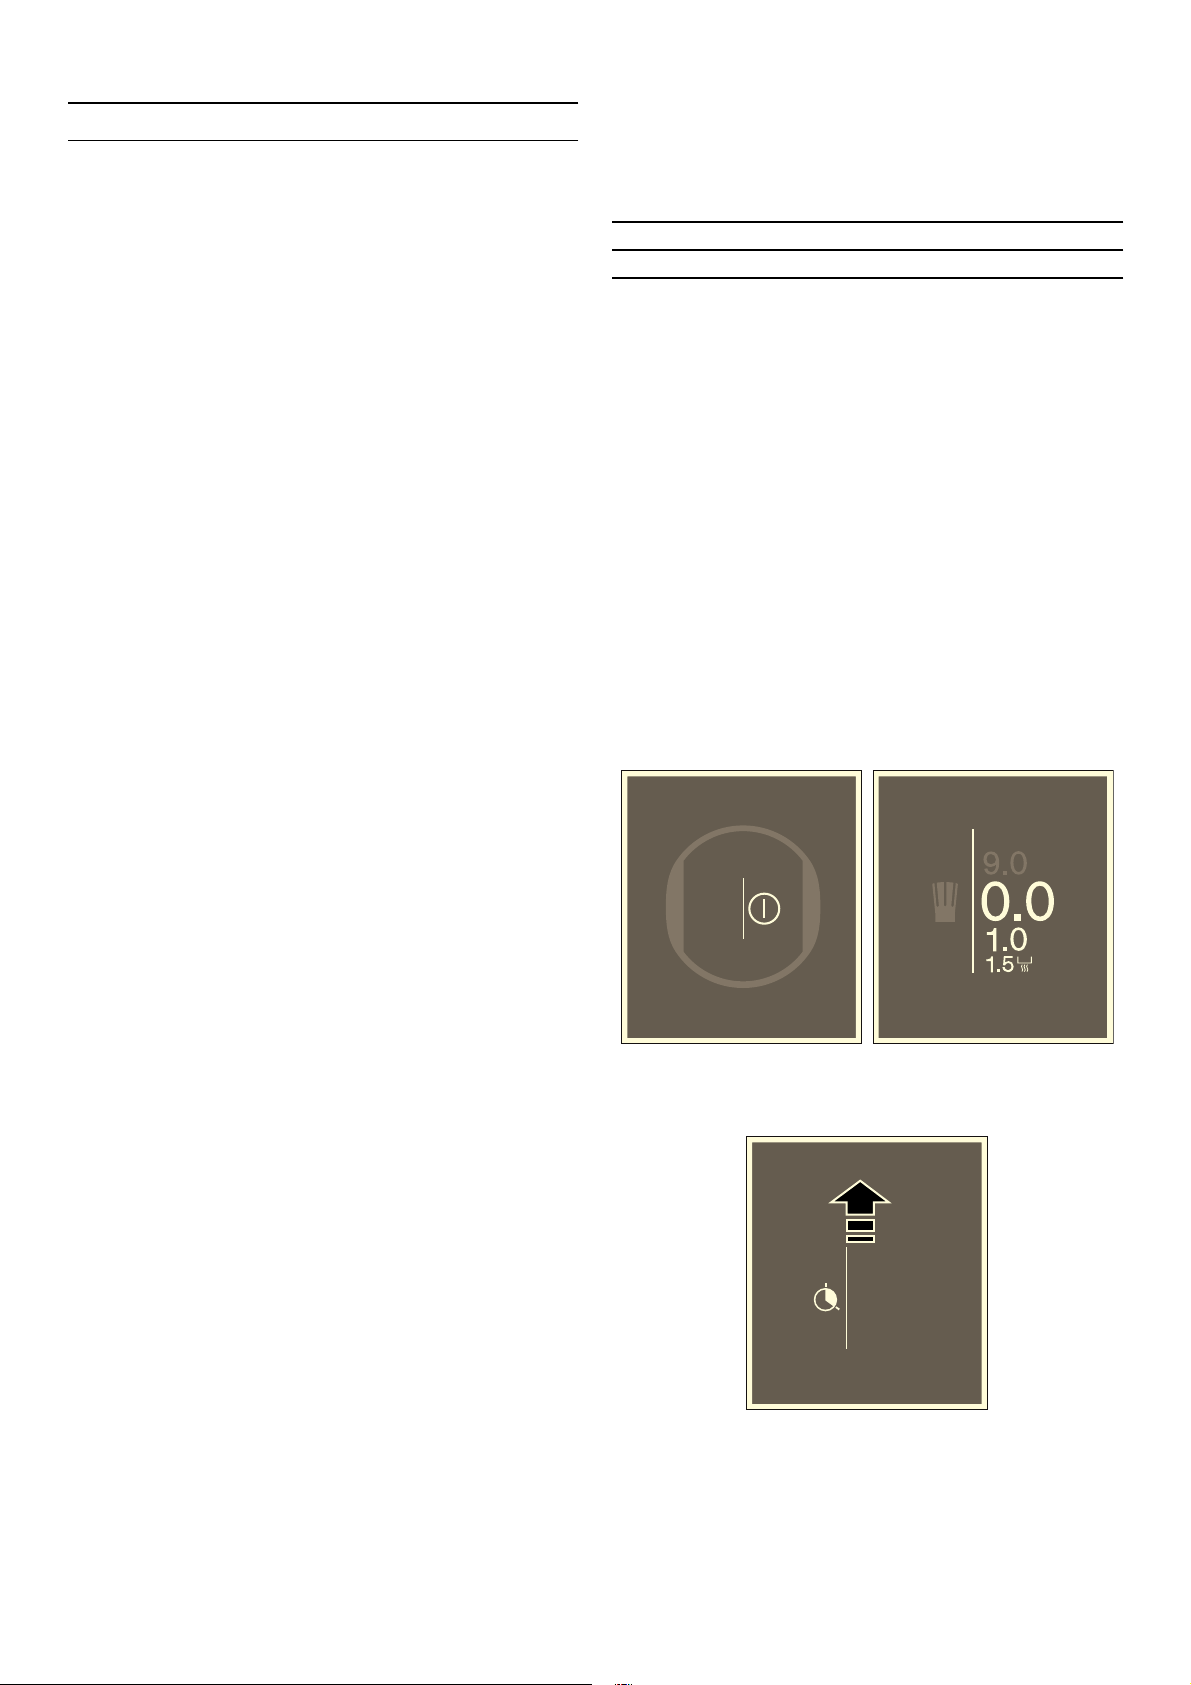
Switching the hob on and off
The main switch is used to switch the hob on and off.
To switch the hob on: Touch the # symbol. The
indicator above the main switch lights up. After a short
switch-on time, the hob will be ready for operation.
Configuring cooking position settings
The required heat setting is selected in the settings
area.
Heat setting 1.0 = lowest setting
Heat setting 9.0 = highest setting
Each heat setting has an intermediate setting ending in
.5.
Notes
– To protect the fragile parts of your appliance from
overheating and electrical overloading, the hob may
temporarily reduce the power.
– In order to prevent the appliance from producing
excess noise, the hob may temporarily reduce the
power.
Selecting a hotplate and heat setting
The hob must be switched on.
1 Place the cookware on the cooking surface.
2 Touch the # symbol for the cooking position on the
touchscreen display. The settings area will light up
on the cooking position display.
To switch the hob off: Touch the # symbol. The display
switches off. All the cooking positions are switched off.
The residual heat indicator will remain lit until the
cooking positions have cooled down sufficiently.
Notes
– The hob will automatically switch off if the cooking
positions have been switched off for more than
30 seconds.
– The settings are stored for 10 seconds after the
hob has been switched off. If you switch the hob
back on during this time, the option to confirm the
previous settings will appear on the main screen.
For information on this setting, see the section
entitled ~ "Basic settings".
3 Within the next 4 seconds, scroll up with your finger
and select the heat setting you require.
To select heat setting 9.0, tap 9.0 directly.
K
PLQ
The heat setting is set.
13
Page 14

en Operating the appliance
Changing the heat setting
Select the cooking position and then set the required
heat setting in the control panel.
Switching off a cooking position
Touch and hold the cooking position display until heat
setting
ó.ó is displayed in the settings area. The
cooking position will switch off.
Note: If you place an item of cookware on the cooking
surface before switching on the hob, this will be
detected when you touch the main switch and the
cooking position display will appear on the touchscreen
display.
Chef's recommendations
Recommendations
▯ When heating up puree, cream soups and thick
sauces, stir occasionally.
▯ Set heat setting 8 to 9 for preheating.
▯ When cooking with the lid on, turn the heat setting
down as soon as steam escapes between the lid
and the cookware. Steam does not need to escape
for a good cooking result.
▯ After cooking, keep the lid on the cookware until
you serve the food.
▯ To cook with the pressure cooker, observe the
manufacturer's instructions.
▯ Do not cook food for too long, otherwise the
nutrients will be lost. The kitchen clock can be used
to set the optimum cooking time.
▯ For a more healthy cooking result, smoking oil
should be avoided.
▯ To brown food, fry small portions in succession.
▯ Cookware may reach high temperatures while the
food is cooking. We recommend that you use oven
gloves.
▯ You can find recommendations for energy-efficient
cooking in section ~ "Environmental protection"
Recommended dishes
The table shows which heat setting is suitable for each
type of food. The cooking time may vary depending on
the type, weight, thickness and quality of the food.
Ongoing cooking
Time (min)
setting
Melting
Chocolate, coating 1.0 - 1.5 -
Butter, honey, gelatine 1.0 - 2.0 -
Heating or keeping warm
Stew, e.g. lentil stew 1.5 - 2.0 -
1
Milk
Heating sausages in water
1
1.5 - 2.5 -
3.0 - 4.0 -
Defrosting and heating
Spinach, frozen 3.0 - 4.0 15 - 25
Goulash, frozen 3.0 - 4.0 35 - 55
Poaching, simmering
Potato dumplings
1
Fish
1
4.5 - 5.5 20 - 30
4.0 - 5.0 10 - 15
White sauces, e.g. Béchamel sauce 1.0 - 2.0 3 - 6
Whisked sauces, e.g. Béarnaise sauce, Hollandaise sauce 3.0 - 4.0 8 - 12
1
Without a lid
2
Turn several times
3
Preheat at setting 8.0-8.5
14
Page 15

Operating the appliance
en
Ongoing cooking
Time (min)
setting
Boiling, steaming, braising
Rice (with double the volume of water) 2.5 - 3.5 15 - 30
Rice pudding
3
2.0 - 3.0 30 - 40
Unpeeled boiled potatoes 4.5 - 5.5 25 - 35
Boiled potatoes 4.5 - 5.5 15 - 30
Pasta
1
6.0 - 7.0 6 - 10
Stew 3.5 - 4.5 120 - 180
Soups 3.5 - 4.5 15 - 60
Vegetables 2.5 - 3.5 10 - 20
Vegetables, frozen 3.5 - 4.5 7 - 20
Stew in a pressure cooker 4.5 - 5.5 -
Braising
Rolled roasting joint 4.0 - 5.0 50 - 65
Pot roast 4.0 - 5.0 60 - 100
Goulash 3
Braising/frying with a small amount of oil
1
3.0 - 4.0 50 - 60
Escalope, plain or breaded 6.0 - 7.0 6 - 10
Escalope, frozen 6.0 - 7.0 6 - 12
Chops, plain or breaded
2
6.0 - 7.0 6 - 12
Steak (3 cm thick) 7.0 - 8.0 6 - 12
Poultry breast (2 cm thick)
Poultry breast, frozen
Rissoles (3 cm thick)
2
2
Hamburgers (2 cm thick)
2
2
5.0 - 6.0 10 - 20
5.0 - 6.0 10 - 30
4.5 - 5.5 20 - 30
6.0 - 7.0 10 - 20
Fish and fish fillet, plain 5.0 - 6.0 8 - 20
Fish and fish fillet, breaded 6.0 - 7.0 8 - 20
Fish, breaded and frozen, e.g. fish fingers 6.0 - 7.0 8 - 15
Prawns and scampi 7.0 - 8.0 4 - 10
Sautéing fresh vegetables and mushrooms 7.0 - 8.0 10 - 20
Asian stir fries (vegetables and pieces of meat) 7.0 - 8.0 15 - 20
Stir fries, frozen 6.5 - 7.5 6 - 10
Pancakes (cooked one after the other) 6.5 - 7.5 -
Omelette (cooked one after the other) 3.5 - 4.5 3 - 10
Fried eggs 5.0 - 6.0 3 - 6
Deep-fat frying 1 (150-200 g per batch in 1-2 l oil, deep-fat fried in batches)
Frozen products, e.g. chips, chicken nuggets 8.0 - 9.0 -
Croquettes, frozen 7.0 - 8.0 -
Meat, e.g. chicken portions 6.0 - 7.0 -
Fish, breaded or beer-battered 6.0 - 7.0 -
Vegetables, mushrooms, breaded, beer-battered or tempura 6.0 - 7.0 -
Small baked items, e.g. doughnuts, beer-battered fruit 5.5 - 6.5 -
1
Without a lid
2
Turn several times
3
Preheat at setting 8.0-8.5
15
Page 16
en Dynamic cooking
u
Dynamic cooking
Dynamic cooking
Use this special function in particular for cooking
processes that require the power levels to be changed
frequently. This allows you to change the power level
quickly and easily during cooking simply by moving the
cookware forwards or backwards.
Activating this function turns the entire cooking surface
into a single cooking area with three different power
levels. The appliance selects which of the default power
levels to use depending on the position of the
cookware. The power level that is assigned to each item
of cookware appears in the relevant cooking position
display.
Activation
1 Touch the g symbol.
2 Touch the Ë symbol followed by the G symbol to
confirm your choice. The three default power levels
are displayed on the main screen.
This function has now been activated.
Set down the cookware
If active cookware is on the cooking position before you
activate the function, the cooking position display
appears without a power level. To confirm the power
level that is assigned, tap on the cooking position
display and then touch the sensor field G.
If new cookware is placed on the cooking position, tap
the cooking position display and then touch the sensor
field G.
Note: If the size of the cookware is not suitable for this
function, the Õ symbol will light up on the cooking
position.
Touch the Õ symbol for information.
To return to the main screen, touch the G symbol.
Default power levels:
Front section = power level
ê.ó
Middle section = power level î.ó
Rear section = power level ò.ó
You can change the default power levels. To change the
power levels, see the section entitled ~ "Basic
settings"
Notes
– The booster function for saucepans and frying pans
and the keep-warm function are not available while
dynamic cooking mode is active.
– While dynamic cooking mode is active, the different
cookware modes will not be available and you will
not be able to set the cooking time.
– If cookware is moved over the cooking surface, the
hob will automatically start searching and the heat
setting of the area on which the cookware has been
detected will be set.
– For more information on the size and positioning of
the cookware, see the section entitled
~ "Induction cooking".
Changing the heat setting
You can change the power levels while you are cooking.
To choose a different power level in the programming
area, touch the area you want to change the power level
of.
Note: If the function is deactivated, the power levels will
return to the default values
Deactivating
1 Touch the g symbol.
2 Select a different hob operating mode and then
touch the G symbol to confirm your selection. The
heat power levels that are assigned to the relevant
cookware are retained.
This function has now been deactivated.
16
Page 17
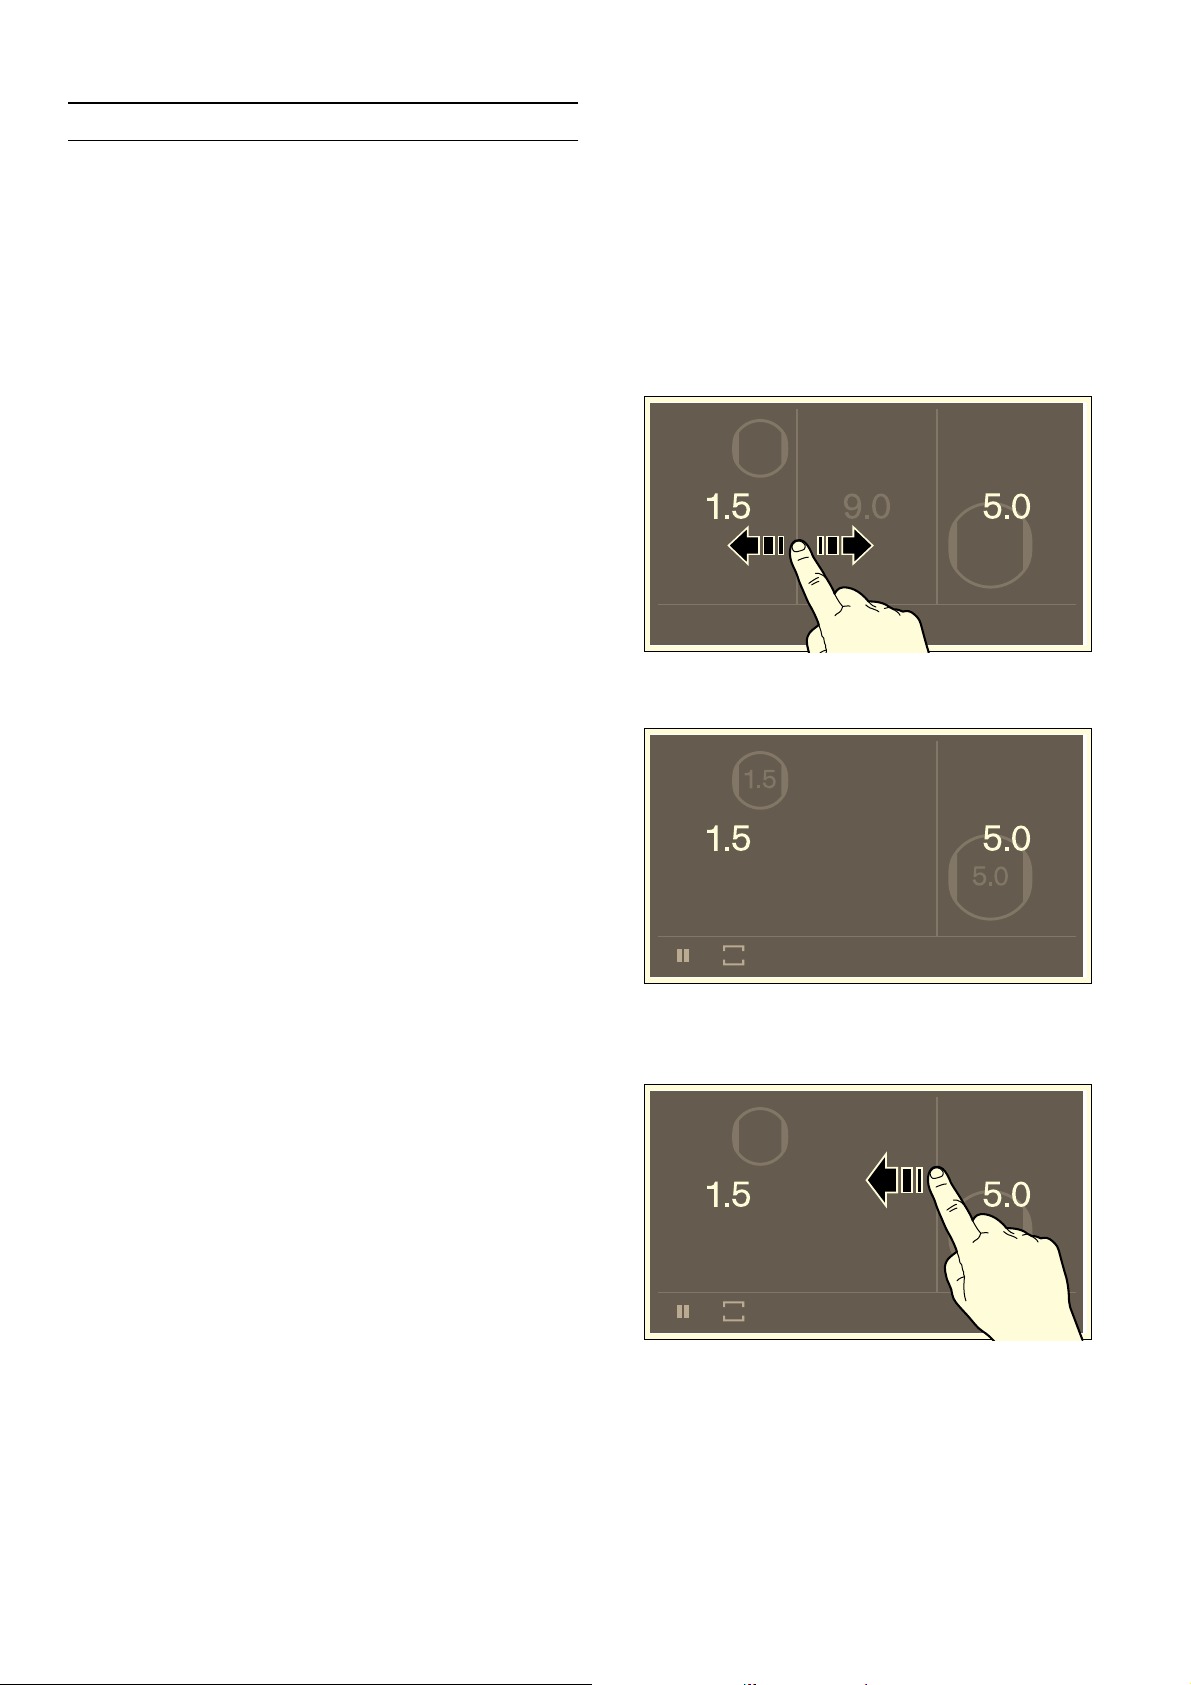
Professional cooking
en
ˆ
Professional cooking
Professional cooking
Use this special function in particular for cooking
processes that require the power levels to be changed
frequently. This allows you to change the power level
quickly and easily during cooking simply by moving the
cookware to the left or right.
Activating this function turns the entire cooking surface
into a single cooking area with three different power
levels. The appliance selects which of the default power
levels to use depending on the position of the
cookware. The power level that is assigned to each item
of cookware appears in the relevant cooking position
display.
Default power levels:
Left-hand section = power level
ò.î
Middle section = power level ê.ó
Right-hand section = power level î.ó
You can change the default power levels. To change the
power levels, see the section entitled ~ "Basic
settings"
Touch the Õ symbol for information.
To return to the main screen, touch the G symbol.
Combining sections
The sections with the default power levels can be
combined to form one large surface with the same
power level.
To do this, touch one of the vertical edges of the middle
section and swipe left or right with your finger to the
end of the adjacent section.
The power level of the combined area is the same as the
power level of the section being expanded.
Notes
– For more information on the size and positioning of
the cookware, see the section entitled
~ "Induction cooking".
– While this function is active, cookware mode and
the booster function for saucepans and frying pans
will not be available and you will not be able to set
the cooking time.
Activation
1 Touch the g symbol.
2 Touch the ¬ symbol followed by the G symbol to
confirm your choice.
The default power levels is displayed on the main
screen.
This function has now been activated.
Set down the cookware
If active cookware is on the cooking position before you
activate the function, the cooking position display
appears without a power level. To confirm the power
level that is assigned, tap on the cooking position
display and then touch the sensor field G.
If new cookware is placed on the cooking position, tap
the cooking position display and then touch the sensor
field G.
Note: If the size of the cookware is not suitable for this
function, the Õ symbol will light up on the cooking
position.
To separate the combined area again, touch one of the
vertical edges of the area and swipe left or right with
your finger until the hidden section reappears.
Changing the heat setting
You can change the power levels while you are cooking.
To choose a different power level in the programming
area, touch the area you want to change the power level
of.
Note: If the function is deactivated, the power levels will
return to the default values
17
Page 18

en Time-setting options
Deactivating
1 Touch the g symbol.
2 Select a different hob operating mode and then
touch the G symbol to confirm your selection. The
heat power levels that are assigned to the relevant
cookware are retained.
This function has now been deactivated.
O
Time-setting options
Time-setting options
The hob has three timer functions:
▯ Setting the cooking time
▯ Stopwatch
▯ Timer
Cooking timer
The cooking position will switch off automatically once
the time that is set has elapsed.
You can set a cooking time of up to 12 hours 59
minutes.
Setting procedure:
1 Select the cooking position and the required heat
setting.
2 Touch the selected power level. The 6 symbol will
light up in the cooking position display.
3 Touch the 6 symbol. 00|00 ‹ will light up on the
cooking position display.
4 Then select the cooking time you require in hours
and minutes.
18
Page 19

Time-setting options
en
5 Touch the ² symbol to confirm the selected time.
The time you have set will appear in the cooking
position display.
The cooking time begins to elapse.
Cooking sensor mode
If a cooking time has been set for a cooking position
and cooking sensor mode is active, the time will not
start to count down until the selected temperature has
been reached.
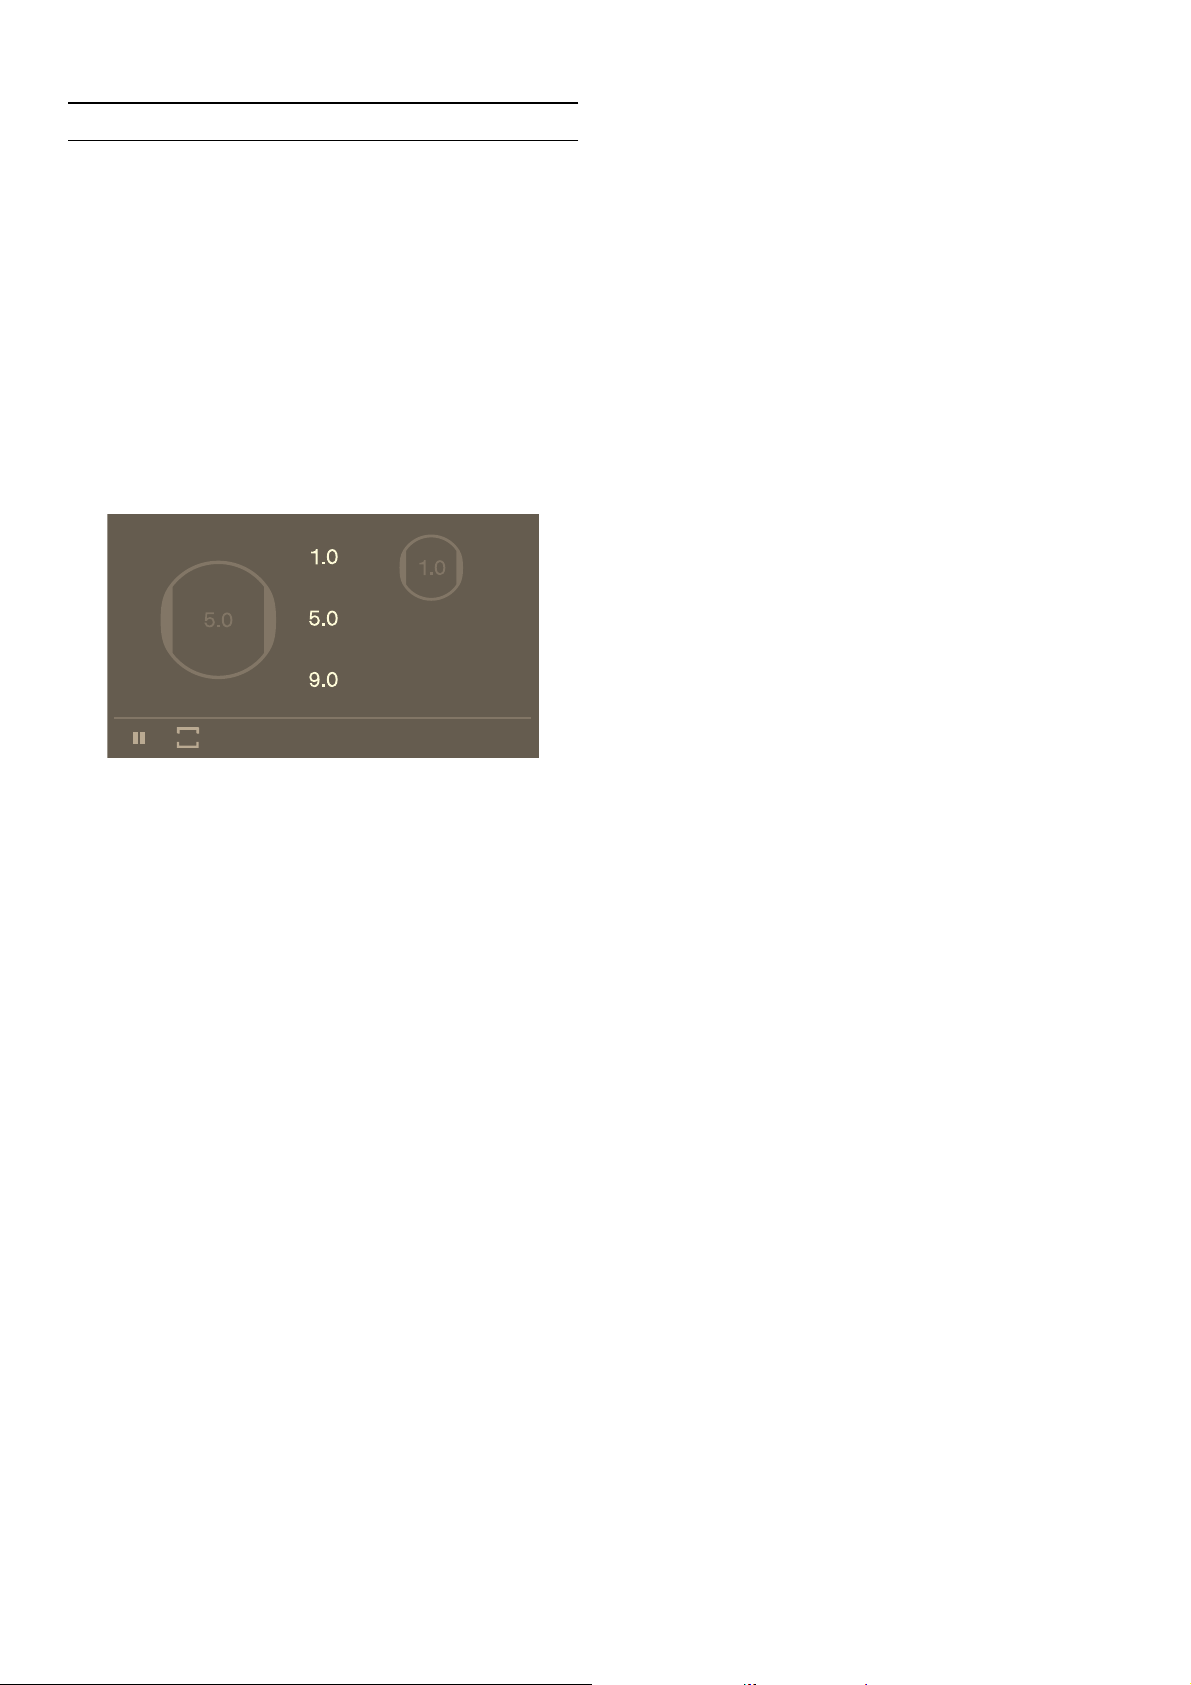
Stopwatch function
The stopwatch function displays the time that has
elapsed since activation.
This functions independently from the cooking positions
and from other settings. This function does not
automatically switch off a cooking position.
Activating
Touch the M button and select the p symbol. Then
touch the ² symbol to confirm your choice. óó.óó and
the p symbol will light up in the function bar.
Changing or deleting the time
Select the 6 symbol.
Change the time that is currently set and then touch the
² symbol to confirm the setting you have chosen.
To delete the time, touch the Ø symbol.
When the time has elapsed
The cooking position will switch off. An audible signal
will sound. The set cooking time will revert to óó.óó
and the heat setting to ó.ó.
Tap the time indicator. The indicators will go out and the
signal tone will stop.
The stopwatch has now been activated. The time will
begin to elapse.
Stopping the stopwatch
Touch the p symbol followed by the H symbol. The
stopwatch will stop and reappear on the main screen.
To start the stopwatch again, press the p symbol
followed by the ² symbol.
Deactivating
Touch the p symbol followed by the Ø symbol. The
stopwatch will stop. The time will reset to óó.óó and
reappear on the main screen.
This function has now been deactivated.
Note: To clear the menu and return to the main screen,
touch the ' symbol.
19
Page 20

en Time-setting options
Short-term timer
You can set a time of up to 9 hours, 59 minutes and 59
seconds on the short-term timer.
You can activate it whether the hob is switched on or
off.
It works independently of the cooking positions and
other settings. This function does not automatically
switch off a cooking position.
Setting procedure:
1 Touch the M button.
2 Touch the Š symbol and confirm your choice by
touching G. óóEóó.óóÕ will light up on the
display.
3 Within the next 10 seconds, scroll up or down with
your finger and set the time in minutes, hours and
seconds.
5HORMDYLVDGRU
Stopping the short-term timer
Touch the Š symbol followed by the H symbol. The timer
will stop and reappear on the main screen.
To start the timer again, press the Š symbol followed by
the ² symbol.
When the time has elapsed
A signal tone will sound. óó.óó will flash on the timer
display.
Touch the Š symbol.The indicators will go out and the
signal tone will stop.
Touching and holding the Š symbol for a few seconds
will activate the stopwatch. The time that has elapsed is
shown on the display in front of the @ symbol.
4 Touch the ² symbol to confirm the selected
setting. The Š symbol and the selected time will
light up in the function bar.
The selected time will start to count down.
Changing or deleting the time
To set a new time on the short-term timer, touch the time
indicator.
If you touch and hold the time indicator for a few
seconds, the time information on the display will go out.
Touch the Š symbol.
Change the time that is currently set and touch the
² symbol to confirm the setting you have chosen.
To delete the time, touch the Ø symbol.
20
Page 21

Booster function for pots
en
v
Booster function for pots
Booster function for pots
The booster function allows large volumes of water to
be heated up more quickly than with power level 9.0.
This function is available if the
Ž symbol is displayed in
the settings area for the cookware.
The saucepan booster function is available for a
maximum of one pan per side of the cooking surface.
If the saucepan booster function is active and you select
a second cooking position on the same side of the
cooking surface, the saucepan booster function will be
deactivated. The cooking position is automatically set to
heat setting 9.0.
Activating
Select the cooking position and scroll up with your
finger until the Ž symbol appears.
The function has now been activated.
Deactivating
Touch the cooking position display and select any
power level in the settings area.
This function has now been deactivated.
Note: Under certain circumstances, the function will
switch off automatically to protect the electronic
components inside the hob.
The cooking position will switch back to power level 9.0
automatically.
If the booster function for saucepans in the centre of
the cooking surface is active, settings can be
implemented for other items of cookware on the leftand right-hand side of the hob.
21
Page 22

en Booster function for pans
x
Booster function for pans
Booster function for pans
The frying pan booster function allows cookware to be
heated up more quickly than with power level 9.0.
After deactivating the function, select the appropriate
power level for your food.
This function is available if the
in the settings area for the cookware.
The frying pan booster function is available for a
maximum of one item of cookware per cooking surface.
If the frying pan booster function is active and settings
for a different cooking position on the same side of the
cooking surface are selected, the pan booster function
will be deactivated and heat setting 9.0 set
automatically.
If the booster function for frying pans in the centre of
the cooking surface is active, settings can be
implemented for other items of cookware on the leftand right-hand side of the hob.
© symbol is displayed
Recommendations for use
▯ Always use cold cookware.
▯ Use cookware with a fully flat base. Do not use
cookware with a thin base.
▯ Never leave empty cookware, oil, butter or lard
unattended when it is being heated.
▯ Do not place a lid on the cookware.
▯ For information on the type, size and positioning of
the cookware, see the section entitled
~ "Induction cooking".
Activating
Touch the cooking position display and select the
© symbol in the settings area.
The function has now been activated.
Deactivating
Touch the cooking position display and select any
power level in the settings area.
This function has now been deactivated.
Note: After 30 seconds, this function automatically
switches itself off.
The cooking position automatically switches back to
power level 9.0.
22
Page 23

z
Keep warm function
Keep warm function
This function is suitable for melting chocolate or butter
and for keeping food warm.
Keep warm function
s
Transfer function
Transfer function
This function lets you transfer the selected power level
or temperature setting and the cooking time from one
cooking position to another.
en
Activating
Select the relevant cooking position and then set the
power level to ò.î£ in the settings area.
Deactivating
Touch the cooking position display and select any
power level in the settings area.
This function has now been deactivated.
If you remove an item of cookware from the cooking
surface or move it, the cooking position it was
previously on stops heating. The settings for the
cooking position will be retained for 30 seconds.
When you place the cookware back in this position, the
same settings will be used.
Activation
1 Place an item of cookware on the cooking surface.
The ˆ symbol will appear on the new cooking
position.
2 Touch the ˆ symbol on the new cooking position
to confirm transfer of the settings. The power level
will light up.
The settings have been transferred to the new cooking
position.
23
Page 24

en Wireless temperature sensor
‚
Wireless temperature sensor
Wireless temperature sensor
You will need to connect the wireless temperature
sensor to the hob before using cooking sensor mode for
the first time.
Preparing and maintaining the
wireless temperature sensor
This section provides information on:
▯ Attaching the silicone patch
▯ Attaching the wireless cooking sensor
▯ Cleaning
▯ Replacing the battery
The silicone patch and temperature sensor can be
purchased from specialist retailers or through our
technical after-sales service or our official website. To
do this, quote the relevant reference number:
00577921 Set of 5 silicone patches
CA060300 Temperature sensor and set of 5 silicone
patches
Adhering the silicone patch
The silicone patch secures the cooking sensor to the
cookware.
When using a saucepan with cooking sensor mode for
the first time, the silicone patch must be attached
directly to this saucepan. Proceed as follows:
Notes
– Do not leave the pan with the silicone patch to soak
soapy water for long periods of time.
– If the silicone patch comes off, attach a new one.
Fitting the wireless temperature sensor
Attach the temperature sensor to the silicone patch and
align it correctly.
Notes
– Ensure that the silicone patch is completely dry
before attaching the cooking sensor.
– Fill the pot so that the contents reach high enough
to cover the cooking sensor's silicone patch.
– To prevent overheating, do not attach the cooking
sensor to other hot cookware.
– Remove the cooking sensor from the pot after
cooking. Store it in a clean, safe place away from
sources of heat.
– You can use up to three cooking sensors at the
same time.
1 That the adhesive area on the pan is free from
grease. Clean the pan, dry it thoroughly and wipe
the adhesive area with a spirit.
2 Remove the protective film from the silicone patch.
Adhere the silicone patch to the outside of the pan
in the correct place using the enclosed template as
a guide.
3 Press down all over the surface of the silicone
patch, including in the centre.
The adhesive requires one hour to fully harden. Do not
use or clean the pan during this time.
24
Page 25

Wireless temperature sensor
en
Connecting the wireless temperature
sensor to the control panel
To connect the wireless temperature sensor to the
control panel, follow the instructions below:
1 Touch the
2 Select the Cooking sensor pairing option and then
touch the G symbol to confirm your choice.
3 Briefly touch the ¨ symbol on the wireless cooking
sensor within the next 30 seconds.
After a few seconds, the result of the connection
between the cooking sensor and the control panel
will appear on the display.
Then touch the G symbol to confirm.
4 To connect another cooking sensor, touch the
G symbol. To return to the basic settings, touch
the ' symbol.
The Cooking sensor mode is available once the cooking
sensor has been connected to the control panel
correctly.
Notes
– If there is a fault with the cooking sensor, the
connection may not be established correctly for the
following reasons:
– Bluetooth communication error.
– The symbol on the cooking sensor was not
pressed within 30 seconds.
– The battery in the cooking sensor is flat.
Reset the cooking sensor and repeat the
connection procedure.
– If there are problems with the connection due to a
transmission error, repeat the connection
procedure.
If the display continues to indicate a connection
error, contact our technical after-sales service.
t on the main screen.
Cleaning
Do not clean the wireless temperature sensor in the
dishwasher.
Temperature sensor
Clean the temperature sensor with a damp cloth. Never
clean it in the dishwasher. Do not immerse it in water or
clean it under running water.
Remove the temperature sensor from the saucepan after
cooking. Store it in a clean, safe place (such as in its
packaging) away from sources of heat.
Silicone patch
Clean and dry before attaching to the temperature
sensor. Dishwasher safe.
Note: Cookware with the silicone patch must not be left
to soak for long periods in soapy water.
Temperature sensor window
The sensor window must always be clean and dry.
Proceed as follows:
▯ Remove dirt and oil splatters regularly.
▯ Use a soft cloth or cotton buds and window cleaner
for cleaning.
Resetting the wireless temperature sensor
1 Touch and hold the ¨ symbol on the cooking
sensor for 8-10 seconds.
While you are doing this, the cooking sensor's LED
indicator will light up three times. When the LED
lights up for the third time, it will start to reset the
cooking sensor. Take your finger off the symbol
when this happens.
When the LED switches off, this means that the
wireless cooking sensor has been reset.
2 Repeat the connection procedure.
Notes
– Do not use abrasive cleaning agents such as
scouring pads, scrubbing brushes or cream
cleaners.
– Do not touch the sensor window with your fingers.
This may make it dirty or scratch it.
25
Page 26

en Wireless temperature sensor
Replacing the battery
If the temperature sensor does not light up when the
symbol is pressed, the battery is flat.
Changing the battery:
1 Remove the silicone cover from the lower section of
the temperature sensor housing and remove both
screws using a screwdriver.
2 Open the closure of the temperature sensor.
Remove the battery from the lower section of the
housing and insert a new battery (pay attention to
the correct orientation of the battery poles).
3 Close the closure of the temperature sensor (the
notches for the screws on the closure must align
with the notches on the lower section of the
housing). Tighten the screws with a screwdriver.
4 Reattach the silicone cover to the lower section of
the temperature sensor housing.
Caution!
Do not use any metal objects to remove the battery.
Do not touch the battery connection points.
Note: Use only high-quality batteries of the type
CR2032 in order to guarantee a long service life.
Declaration of Conformity
Gaggenau Hausgeräte GmbH hereby declares that the
appliance with wireless temperature sensor function
meets the basic requirements and other relevant
provisions of the Directive 2014/53/EU.
A detailed RED Declaration of Conformity can be found
online at www.gaggenau.com on the product page for
appliance in the additional documents.
The logos and the Bluetooth® brand are registered
trademarks and property of Bluetooth SIG, Inc. These
trademarks are used by Gaggenau Hausgeräte GmbH
under licence. All other trademarks and brand names
are owned by the respective companies.
26
Page 27

Cooking sensor mode
en
Ü
Cooking sensor mode
Cooking sensor mode
The cooking sensor processes make cooking easy and
guarantee exceptional results.
The wireless cooking sensor measures the temperature
of the cookware continuously. This allows cooking to be
precisely regulated and the temperature to be
maintained at the required level at all times in order to
prevent excessively vigorous boiling and to achieve
perfect cooking results.
You can add your food once the selected temperature
has been reached. The temperature is automatically
kept constant without you having to change the heat
setting.
Cooking sensor mode is available anywhere on the
cooking surface if you have a wireless cooking sensor.
The wireless cooking sensor forwards the temperature
of the cookware to the control panel.
The hob has a wireless cooking sensor. If required, this
can be purchased at a later point from specialist
retailers, or through our technical after-sales service or
our online shop. You can use up to three cooking
sensors at the same time.
Note: You can order it by specifying the reference
number CA060300.
For more information about the cooking sensor, see the
section entitled ~
"Wireless temperature sensor"
Cooking processes with the cooking
sensor
Cooking sensor mode is used to select the best cooking
method for each kind of food.
The table shows the different cooking processes that
are available:
Cooking processes Temperature Cookware Suitable for
Keeping warm, heating 70 °C E.g. punch, goulash
Poaching in milk 85 °C E.g. panna cotta, rice pudding
Poaching in water 90 °C E.g. rice, quinoa
Boiling 100 °C E.g. pasta, gnocchi, vegetables
Cooking in a pressure cooker 115 °C E.g. home-made broths, pulses
Deep-fat frying at a low temperature * 160 °C E.g. doughnuts, fritters
Deep-fat frying at a medium temperature * 170 °C E.g. breaded fish, meatballs
Deep-fat frying at a high temperature * 180 °C E.g. chips, frozen
*Heat the oil with the lid on and deep-fat fry with the lid off.
27
Page 28

en Cooking sensor mode
Benefits
▯ The cooking position only emits heat when this is
necessary to maintain the temperature. This saves
energy.
▯ The temperature is maintained continuously. This
prevents the food from boiling over. It also means
that you do not have to change the temperature
setting.
▯ Cooking sensor mode will tell you when the water
or oil has reached the optimal temperature for
adding the food (see the exceptions where the food
should be added at the very beginning).
Notes
– Use pans with a thick, flat base.Do not use pans
with a thin or deformed base.
– Fill the pan so that the contents reach high enough
to cover the cooking sensor's silicone patch.
– Do not remove the cooking sensor from the
saucepan during cooking.
– Remove the cooking sensor from the saucepan
after cooking. Be careful as the cooking sensor may
be very hot.
Tips for cooking with cooking sensor
mode
▯ Keeping warm/heating: Portions of frozen products,
e.g. spinach. Place the frozen product in the
cookware. Add the volume of water specified by the
manufacturer.Cover the cookware with a lid. Select
the temperature recommended in the table.
▯ Poaching: This cooking method is suitable for
cooking food at low temperatures, thickening
sauces, reducing stews and cooking with milk.
Select the temperature recommended in the table
for the food you want to cook.
▯ Boiling: This cooking method allows you to boil
water with a lid on without it boiling over. This
temperature control allows water to be boiled more
efficiently. Select the temperature recommended in
the table.
▯ Cooking in a pressure cooker: Follow the
manufacturer's recommendations. After the signal
tone sounds, continue cooking for the
recommended time. Select the temperature
recommended in the table.
▯ Deep-fat frying: It is recommended that you heat oil
with a lid on.Once the signal tone has sounded,
remove the lid and add the food. Select the
temperature recommended in the table for the food
you want to cook.
Notes
– Always cook with the lid on except when using the
"Deep-fat frying" function.
– If an audible signal does not sound, make sure
there is a lid on the pan.If there is a lid on the pan,
the appliance may have reached its maximum power
consumption or the Power management setting
may have been activated. This may affect the time
required to reach the selected temperature. Switch
off or reduce the temperature of the cooking
positions on which the other pans are placed. See
the section entitled ~ "Basic settings"
– Never leave oil unattended when it is being heated.
Use oil that is suitable for deep-fat frying. Do not
mix different cooking fats and oils – e.g. oil and lard
– as such mixtures may foam up when hot.
– If you are not satisfied with the cooking result, e.g.
when boiling potatoes, next time use more water but
keep the recommended temperature setting.
Setting the boiling point
The point at which water starts to boil depends on the
height of your home above sea level. If the water is
boiling too vigorously or not vigorously enough, you can
set the boiling point. Proceed as follows:
▯ Touch the t button and select the basic setting
Cooking sensor calibration.
▯ The basic setting is set to 200-400 m by default. If
your home is between 200 and 400 metres above
sea level, you do not need to set the boiling point. If
it is not, select the setting that matches your home's
height above sea level.
Note: A temperature setting of 100 ºC is sufficient for
efficient boiling, even if the water does not boil very
vigorously. However, the boiling point can be changed.
For example, you can set a lower altitude if you want the
water to boil more vigorously.
28
Page 29

Cooking sensor mode
en
Setting procedure
1 Attach the cooking sensor to the saucepan; see the
section entitled
2 Fill the cookware with a sufficient amount of liquid,
put the lid on and place it on the cooking surface.
See the section entitled ~ "Fitting the wireless
temperature sensor"
3 Touch the cooking position display for the
cookware.
4 Touch the i symbol.
5 Use your finger to scroll up to the ¨ symbol. Then
touch the G symbol to confirm your choice.
.
Deactivating
1 Tap the temperature setting.
2 Touch the i symbol and select a different cookware
mode in the settings area.
3 Touch the G symbol to confirm your choice.
Cooking sensor mode is deactivated.
6 Touch the ¨ symbol on the wireless cooking
sensor as shown on the display.
7 Select the temperature setting.
Cooking sensor mode is now active.
The temperature symbol “ next to the cooking
position will light up gradually until the selected
temperature has been reached. Then an audible
signal will sound and the temperature symbol will
go out.
8 When the signal tone sounds, remove the lid and
add the food. Leave the lid on while cooking.
Tip: If you want to set a more precise temperature, it
can be increased or decreased by 1 to 5 °C. To do this,
touch the selected temperature and then the % symbol.
Then select the required temperature and touch the
G symbol to confirm, or touch the ' symbol to cancel
and exit the menu.
29
Page 30

en Cooking sensor mode
Recommended dishes
The following table shows a selection of dishes and is
arranged by food type. The temperature and the cooking
time depend on the amount, the condition and the
quality of the food.
Meat Temperature Time (min)
Poaching
Sausages
1
Boiling
Meatballs
Stewing poultry
Viennese boiled beef
1
1
1
Cooking in a pressure cooker
Stewing poultry in a pressure cooker
Viennese boiled beef in a pressure cooker
2
2
Deep-fat frying
Deep-fat frying chicken portions
Deep-fat frying meatballs
1
Heat up and cook with the lid on. Add the food after the signal tone sounds.
2
Add the food at the start.
3
Heat the oil with the lid on. Fry one portion after the other without the lid.
3
3
90 °C 10 - 20
100 °C 20 - 30
100 °C 60 - 90
100 °C 60 - 90
115 °C 15 - 25
115 °C 15 - 25
170 °C 10 - 15
170 °C 10 - 15
Fish Temperature Time (min)
Poaching
Braised fish
1
90 °C 15 - 20
Deep-fat frying
Deep-fat frying fish in beer batter
Deep-fat frying breaded fish
1
Heat up and cook with the lid on. Add the food after the signal tone sounds.
2
Heat the oil with the lid on. Fry one portion after the other without the lid.
2
2
170 °C 10 - 15
170 °C 10 - 15
Egg dishes Temperature Time (min)
Boiling
Boiled eggs
1
Add the food at the start.
1
100 °C 5 - 10
30
Page 31

Cooking sensor mode
Vegetables and pulses Temperature Time (min)
Boiling
Broccoli
Cauliflower
Spinach
1
1
1
Brussels sprouts
Green beans
Chickpeas
1
Peas
Lentils
1
2
2
1
100 °C 10 - 20
100 °C 10 - 20
100 °C 5 - 10
100 °C 30 - 40
100 °C 15 - 30
100 °C 60 - 90
100 °C 15 - 20
100 °C 45 - 60
Cooking in a pressure cooker
Vegetables in a pressure cooker
Chickpeas in a pressure cooker
2
2
Haricot beans in a pressure cooker
Lentils in a pressure cooker
2
2
115 °C 3 - 6
115 °C 25 - 35
115 °C 25 - 35
115 °C 10 - 20
Deep-fat frying
Deep-fat frying breaded vegetables
Deep-fat frying vegetables in beer batter
Deep-fat frying breaded mushrooms
Deep-fat frying mushrooms in beer batter
1
Heat up and cook with the lid on. Add the food after the signal tone sounds.
2
Add the food at the start.
3
Heat the oil with the lid on. Deep-fat fry one portion after the other without the lid.
3
3
3
3
170 °C 4 - 8
170 °C 4 - 8
170 °C 4 - 8
170 °C 4 - 8
en
Potatoes Temperature Time (min)
Poaching
Cooking potato dumplings
1
85 °C 30 - 40
Boiling
Gnocchi
Boiling potatoes
1
2
Boiling sweet potatoes
2
100 °C 3 - 6
100 °C 30 - 45
100 °C 30 - 45
Cooking in a pressure cooker
Potatoes in a pressure cooker
2
Sweet potatoes in a pressure cooker
2
115 °C 10 - 20
115 °C 10 - 20
Deep-fat frying
Potatoes in an aromatic sauce
1
Heat up and cook with the lid on. Add the food after the signal tone sounds.
2
Add the food at the start.
3
Heat the oil with the lid on. Deep-fat fry one portion after the other without the lid.
3
160 °C 8 - 12
31
Page 32

en Cooking sensor mode
Pasta and grains Temperature Time (min)
Poaching
Semolina pudding
Parboiled rice
Brown rice
2
3
1
Exotic rice (e.g. basmati, Thai)
Wild rice
Quinoa
Polenta
2
1
3
2
85 °C 5 - 10
90 °C 25 - 35
90 °C 45 - 55
90 °C 8 - 12
90 °C 20 - 30
90 °C 10 - 12
85 °C 3 - 8
Boiling
Durum wheat pasta
Fresh pasta
3
Wholemeal pasta
3
3
Durum wheat pasta, stuffed
Fresh pasta, stuffed
3
3
100 °C 7 - 10
100 °C 3 - 5
100 °C 7 - 10
100 °C 15 - 20
100 °C 5 - 8
Cooking in a pressure cooker
Rice in a pressure cooker
Brown rice in a pressure cooker
1
Heat up and cook with the lid on. Add the food after the signal tone sounds.
2
Add the food at the start.
3
Stir frequently.
2
2
115 °C 6 - 8
115 °C 12 - 18
Soups Temperature Time (min)
Poaching
Instant creamy soups
2
90 °C 10 - 15
Boiling
Home-made broths
Instant soups
2
1
100 °C 60 - 90
100 °C 5 - 10
Cooking in a pressure cooker
Home-made broths in a pressure cooker
1
Add the food at the start.
2
Stir frequently.
1
115 °C 20 - 30
Desserts Temperature Time (min)
Poaching
Rice pudding
Porridge
3
3
Chocolate pudding
3
85 °C 40 - 50
85 °C 10 - 15
85 °C 3 - 5
Boiling
Compote
1
100 °C 15 - 25
Deep-fat frying
Deep-fat frying jam-filled doughnuts
Deep-fat frying ring doughnuts
Deep-fat frying buñuelos
1
Add the food at the start.
2
Heat the oil with the lid on. Deep-fat fry one portion after the other without the lid.
3
Stir frequently.
2
2
2
32
160 °C 5 - 10
160 °C 5 - 10
160 °C 5 - 10
Page 33

Cooking sensor mode
Frozen products Temperature Time (min)
Keeping warm, heating
Vegetables in cream sauce
Defrosting broths
2
4
70 °C 15 - 20
70 °C 15 - 25
Boiling
Green beans, frozen
1
100 °C 15 - 30
Deep-fat frying
Deep-fat frying chips
1
Heat up and cook with the lid on. Add the food after the signal tone sounds.
2
Add the food at the start.
3
Heat the oil with the lid on. Deep-fat fry one portion after the other without the lid.
4
Stir frequently.
3
180 °C 4 - 8
Miscellaneous Temperature Time (min)
Keeping warm, heating
Heating goulash soup
Heating mulled wine
1
1
70 °C 10 - 20
70 °C 5 - 15
en
Poaching
Heating milk
1
Add the food at the start.
1
85 °C 3 - 10
33
Page 34

en Dynamic cooking for an item of cookware
‰
Dynamic cooking for an item of
cookware
Dynamic cooking for an item of cookware
In this function, the default power levels are displayed
when cookware is placed on the cooking surface.
This allows you to change the power level during
cooking simply by moving the cookware forwards or
backwards.
Default heat settings:
To change the default heat settings, see the section
entitled ~ "Basic settings".
Notes
– If this function is not available in the settings area,
the cookware may be too big. Use a smaller item of
cookware.
– If this does not activate when you select the heat
setting, the appliance may have reached its
maximum power consumption. See Power
management
~ "Basic settings".
– For more information on the size and positioning of
the cookware, see the section entitled
~ "Induction cooking".
ò.ó, ð.ó, î.ó, ì.ó and ê.ó.
setting in the section entitled
Activation
Place the cookware on the cooking surface.
1 Touch the cooking position display for the
cookware.
2 Touch the i symbol.
3 Use your finger to scroll down to the Ð symbol.
Then touch the G symbol to confirm your choice.
4 Move the cookware over the cooking surface until
the power level you require is set. The power level
you have selected will appear on the cooking
position display.
Changing the heat setting
You can change the power levels while you are cooking.
To choose a different power level in the programming
area, touch the area you want to change the power level
of.
Note: If the function is deactivated, the power levels will
return to the default values
Deactivating
1 Touch the power level.
2 Touch the i symbol and select a different cookware
mode in the settings area.
3 Touch the G symbol to confirm your choice.
This function has now been deactivated. The power level
you selected previously will be retained.
The function has now been activated.
34
Page 35

Teppanyaki mode
en
‹
Teppanyaki mode
Teppanyaki mode
This mode allows you to split the surface of the
teppanyaki into two halves: A hot area to which a heat
setting is assigned, and an area to which no heat setting
is assigned.
You can change the heat settings during cooking.
Note: If this mode is not available in the settings area,
the cookware may be too big.Use a smaller item of
cookware.
Suitable cookware
Teppanyakis are available that are perfectly suited to
this mode. These can be purchased from specialist
retailers or through our technical after-sales service or
our official website. Quote the relevant reference
number:
▯ GN232110 griddle plate, dimensions 325 x 530 mm
▯ CA051300 griddle plate, dimensions 265 x 415 mm
Then touch the G symbol to confirm your choice.
4 Select the heat setting you require from the settings
area.
The display will show the orientation of the teppanyaki
grill with the power level selected for the cooking
position or the entire area the cookware is taking up.
The symbol for residual heat f will appear on the
cooking position to which no power level has been
assigned.
Activation
Place the cookware on the cooking surface horizontally
or vertically.
1 Tap the cooking position display for the cookware.
2 Touch the i symbol.
3 Scroll upwards with your finger until you reach the
symbol for the teppanyaki grill on the cooking
surface.
Symbol Position
È
À
Á
É
Â
Ã
Note: Only the available symbols for the size of the
teppanyaki grill and its position on the cooking
surface are displayed.
Vertical position, two cooking positions warm
Vertical position, bottom cooking position warm
Vertical position, top cooking position warm
Horizontal position, two cooking positions warm
Horizontal position, right-hand cooking position
warm
Horizontal position, left-hand cooking position
warm
The mode is active.
Changing the heat setting
Touch the assigned area of the heat setting and use
your finger to scroll up or down to the heat setting you
require.
Note: If the orientation of the teppanyaki is changed,
select the appropriate option for the new position on the
cooking surface.
Deactivating
1 Touch the power level.
2 Touch the i symbol and select a different cookware
mode in the settings area.
3 Touch the G symbol to confirm your choice.
The mode is deactivated.
35
Page 36

en Childproof lock
A
Childproof lock
Childproof lock
The childproof lock lets you lock the hob so that it
cannot be switched on accidentally.
Note: You will not be able to activate the childproof lock
if any of the cooking positions are switched on.
Activation
Š
Pause function
Pause function
While the pause function is active, the settings you have
selected appear on the touchscreen display. The heat
setting(s) is/are switched off, however, and the cooking
time(s) you have set have stopped.
If the timer or stopwatch is active, it will continue
running. If the pause function has been activated, the
timer duration cannot be changed.
The hob must be switched on.
Touch and hold the
¯ symbol for approx. 4 seconds.
The 1 symbol lights up.
The childproof lock is activated. The hob is now locked.
Deactivating
The hob must be switched on.
Touch and hold the 1 symbol for approx. 4 seconds.
The ¯ symbol will light up.
This deactivates the childproof lock. The hob is now
enabled.
Childproof lock
With this function, the childproof lock automatically
activates when a hob is switched off.
Switching on and off
You can find out how to switch the automatic childproof
lock on in the ~ "Basic settings" section
The pause function has no effect on the main switch.
You can still switch off the hob at any time.
Activation
Touch the H symbol. The hob will remain locked for 30
minutes. You can now clean the surface of the
touchscreen display, for example, without altering the
settings.
Note: The H symbol will be displayed in the function bar
when cooking is started.
Deactivating
The cooking position automatically switches off after 30
minutes.
To switch the function off before 30 minutes have
elapsed, touch the I symbol and then the G symbol to
confirm.
Note: If you move the cookware across the cooking
surface while the function is still activated, the settings
may be lost.
Note: To deactivate the automatic childproof lock, touch
and hold the 1 symbol for approx. 4 seconds.
b
Automatic safety cut-out
Automatic safety cut-out
If a cooking position is in operation for a long time and
none of the settings are changed, the automatic safety
switch-off function is activated.
The cooking zone will stop heating and a notification
will appear on the display.
Touch the ™ symbol. You can now reprogram the
cooking position.
The point at which the automatic safety switch-off
function is activated depends on the power level that
has been set (after 1 to 10 hours).
36
Page 37

Basic settings
Q
Basic settings
Basic settings
The appliance has various basic settings. You can adapt
these settings to your personal requirements.
Settings Description and options
Brightness You can change the brightness of the touchscreen display.
’
Start screen You can choose whether or not the brand logo will be displayed when you switch on the
[
hob.
Sounds You can select which signal tones you want the appliance to use.
"
kW Power management You can restrict the hob's total power and adapt it to the local mains connection.
Professional cooking – power
¬
levels
Dynamic cooking – power lev-
Ë
els
Single dynamic cooking –
Ð
power levels
You can change the default heat settings of the cooking areas for professional cooking
mode.
You can change the default heat settings of the cooking areas for dynamic cooking
mode.
You can change the default heat settings of the cooking areas for dynamic cooking mode
for an item of cookware.
CAL Cooking sensor calibration Set your height above sea level to adjust the boiling point.
Cooking sensor pairing Connect the wireless cooking sensor to the hob.
¨
Temperature format You can change the temperature format.
r
Language You can change the language used on the display.
Œ
Start mode Select the cooking mode that you want the hob to start with.
â
Appliance index and fabrication
ä
You can view information about your appliance.
date
Automatic restore You can set how long the appliance saves the most recently used settings after it has
ã
been switched off.
Presettings You can restore all settings to the factory settings.
|
Childproof lock You can use the childproof lock to disable the hob and prevent children from using it
¯
without supervision.
Hood control The ventilation system can be controlled from the hob either by connecting the appli-
}
ances to your home network or by directly connecting the ventilation system to the hob.
Home network The hob can be logged into your home network automatically (via WPS) or manually.
¯
--------
en
37
Page 38

en Home Connect
To go to the basic settings
All cooking positions must be deactivated.
1 Touch the t symbol. The basic settings menu will
appear on the display.
2 The default setting is Brightness. To select a
different setting, scroll left or right with your finger.
%ULOOR
3 To change the selected setting, touch the
% symbol.
%ULJKWQHVV
4 Change the selected setting.
o
Home Connect
Home Connect
This appliance is WLAN-enabled and settings can be
sent to the appliance via a mobile device.
If the appliance is not connected to the home network,
the appliance functions in the same way as a hob with
no network connection. The hob can always be operated
via the control panel.
The availability of the Home Connect function depends
on the availability of Home Connect services in your
country. Home Connect services are not available in
every country.You can find more information on this at
www.home-connect.com.
Notes
– Hobs are not designed to be used unattended - you
must always keep an eye on the cooking process.
– Ensure that you follow the safety instructions in this
instruction manual and that these are also observed
when operating the appliance via the Home
Connect app. You must also follow the instructions
in the Home Connect app.~
information" on page 5
"Important safety
– Using the Home Connect app, you can send
settings to your appliance and then have to confirm
them on the appliance. It is not possible to operate
the appliance whilst you are away from home.
– Operation on the appliance always has priority.
During this time, it is not possible to operate the
appliance using the Home Connect app.
%ULJKWQHVV
5 Touch the G symbol to confirm the selection.
The settings are saved.
To cancel and exit the menu, touch the ' symbol.
Exiting the basic settings menu
To exit the basic settings, touch the # symbol on the
main switch.
Connection to your home network
To implement settings via Home Connect, you must have
installed and set up the Home Connect app on your
mobile device.
Refer to the Home Connect documents supplied for
more information.
The appliances must be connected to the same home
network.
38
Page 39

Home Connect
en
Setting up the Home Connect app
Note: You require a mobile device with the latest
version of the relevant operating system.
1 On your mobile device go to the App Store (Apple
devices) or to the Google Play Store (Android
devices).
2 Enter "Home Connect" in the search field.
3 Select the Home Connect app and install on your
mobile device.
4 Start the app and create your Home Connect login
details. The app will guide you through the
registration process. Make a note of your e-mail
address and password.
Automatic registration in the home network
You require a router that has WPS functionality.
Access to the router is required. If you do not have this,
follow the steps under "Manually logging into your home
network".
1 To open the basic settings, touch the
t symbol on
the main screen.
2 Scroll left or right with your finger and select the
Home network setting.
6 A message will be displayed to notify you when the
hob is successfully connected to your home
network. Touch the G symbol to confirm.
+RPHQHWZRUN_1HWZRUNFRQQHFWLRQ
1HWZRUNFRQQHFWLRQVXFFHVVIXO
7 Then, open the Home Connect app on your mobile
device and follow the instructions for establishing
the connection on the display.
8 A message will be displayed to notify you when
connection to the app has been successful. Touch
the G symbol to confirm.
+RPHQHWZRUN_&RQQHFWZLWK$SS
&RQQHFWLRQWRDSSVXFFHVVIXO
1RWDFWLYDWHG
+RPHQHWZRUN
3 The requirements for connecting to Home Connect
are displayed. Touch the G symbol to confirm.
4 Select the Automatic (WPS) option and then touch
the G symbol to confirm your choice.
5 You have 2 minutes to tap the WPS button on the
router, as indicated on the display.
+RPHQHWZRUN_1HWZRUNFRQQHFWLRQ
$FWLYDWH:36IXQFWLRQRQ\RXUURXWHU
ZLWKLQWKHQH[WPLQXWHV
The basic settings menu will reappear on the display,
with information on the type of connection and strength
of the connection to your home network. Touch the
' symbol to return to the main screen or select the
Home network setting to go to the Home Connect
settings.
:/$1ZLWK
+RPHQHWZRUN
The Û symbol will appear on the main screen.
Note: If it is unable to connect, relaunch the assistant or
manually log the appliance into your home network.
_
39
Page 40

en Home Connect
Manual registration in the home network
1 To open the basic settings, touch the
t symbol on
the main screen.
2 Scroll left or right with your finger and select the
Home network setting.
1RWDFWLYDWHG
+RPHQHWZRUN
3 The requirements for connecting to Home Connect
are displayed. Touch the G symbol to confirm.
4 Select the Manual option and then touch the G
symbol to confirm your choice.
5 A message will appear on the display that allows
you to open the network settings on your mobile
device. Touch the G symbol to confirm.
6 You have 5 minutes to log in your mobile device
using the SSID "HomeConnect" and password
"HomeConnect".
8 A message will be displayed to notify you when the
hob is successfully connected to your home
network. Touch the G symbol to confirm.
+RPHQHWZRUN_1HWZRUNFRQQHFWLRQ
1HWZRUNFRQQHFWLRQVXFFHVVIXO
9 Then, open the Home Connect app on your mobile
device and follow the instructions for establishing
the connection on the display.
10 A message will be displayed to notify you when
connection to the app has been successful. Touch
the G symbol to confirm.
+RPHQHWZRUN_&RQQHFWZLWK$SS
&RQQHFWLRQWRDSSVXFFHVVIXO
0DQXDOQHWZRUNFRQQHFWLRQ
(VWDEOLVKDFRQQHFWLRQZLWKWKH+RPH&RQQHFW
:/$1RQ\RXUPRELOHGHYLFHZLWKLQWKHQH[W
PLQXWHV7KHSDVVZRUGLV+RPH&RQQHFW
7KHQRSHQWKHDSS
_
7 Then, open the Home Connect app on your mobile
device.
The basic settings menu will reappear on the display,
with information on the type of connection and strength
of the connection to your home network. Touch the
' symbol to return to the main screen or select the
Home network setting to go to the Home Connect
settings.
:/$1ZLWK
+RPHQHWZRUN
The Û symbol will appear on the main screen.
Note: If it is unable to connect, relaunch the assistant or
manually log the appliance into your home network.
40
Page 41

Home Connect settings
You can adjust Home Connect to suit your requirements
at any time.
In the basic settings for your hob, navigate to the Home
Connect settings to display network and appliance
information.
Settings Description
Connection Enables the Wi-Fi network to be switched on and off.
Ö
Connect with App You can connect to one or more Home Connect accounts.
Î
Settings via the app You can choose whether to allow cooking settings to be sent.
}
Delete network settings Delete all network settings from appliance
‡
Note: The Connection setting is only displayed if there
is currently no connection to your home network. All
other settings are only displayed if the appliance is
already connected to your home network.
Wi-Fi symbols
The Wi-Fi indicator on the main control panel changes
depending on the status of the connection and the
availability of the Home Connect server.
Home Connect
en
Symbol Description
Û
Ö
î
ï
Ü
Ý
Ù
Ú
Home network available and settings in the app
enabled
Home network available and settings in the app
disabled
Not connected to the Home Connect server and
settings in the app enabled
Not connected to the Home Connect server and
settings in the app disabled
No Wi-Fi network available and settings in the
app enabled
No Wi-Fi network available and settings in the
app disabled
Remote maintenance performed and Wi-Fi network available
Remote maintenance performed and no Wi-Fi
network available
41
Page 42

en Home Connect
Deactivating Wi-Fi
The Home Connect function can be used as long as WiFi has been activated.
Note: In networked standby mode, the appliance
requires a maximum of 2 W.
To deactivate Wi-Fi, proceed as follows:
1 To open the basic settings, touch the
t symbol on
the main screen.
2 Scroll left or right with your finger and select the
Home network setting.
3 Select the Connection option.
&RQQHFWHG
&RQQHFWLRQ
4 Select the Not connected option.
This deactivates Wi-Fi; the Û symbol will go out on the
control panel.
Disconnecting from your home network
You can disconnect the hob from the network at any
time.
Note: If the hob is disconnected from the network, it is
not possible to operate it using Home Connect.
Connecting to your home network
1 To open the basic settings, touch the t symbol on
the main screen.
2 Scroll left or right with your finger and select the
Home network setting.
3 Select Connection.
4 Follow the instructions in the section entitled
"Manually logging into your home network" or
"Automatic login to your home network".
Connect to the app
If the Home Connect app is installed on your mobile
device, you can connect it to the hob.
You can connect more than one mobile device to the
hob.
Notes
– The appliance must be connected to your home
network.
– The Home Connect app must be opened and
configured on your mobile device.
– If your extractor hood is directly connected, first
disconnect the hob from your home network and
then repeat the connection process.
1 To open the basic settings, touch the t symbol on
the main screen.
2 Scroll left or right with your finger and select the
Home network setting.
3 Touch Connect with App.
1 To open the basic settings, touch the t symbol on
the main screen.
2 Scroll left or right with your finger and select the
Home network setting.
3 Select Delete network settings.
'HOHWHQHWZRUNVHWWLQJV
4 Touch the G symbol to confirm your choice.
This disconnects the appliance from your home network;
the Û symbol will go out on the control panel.
Note: The network connection will also be deleted if you
restore the factory settings on your appliance.
&RQQHFWZLWK$SS
An additional Home Connect account can be connected
to the hob. To do this, touch Connect with App.
4 Follow the instructions in the app to complete the
connection process.
42
Page 43

Home Connect
en
Settings via app
Using the Home Connect app, you can easily access the
basic settings for your hob and send settings for the
cooking positions to the hob.
Notes
– If the appliance is being operated by means of the
controls on the appliance itself, this mode of
operation always has priority. When the controls on
the appliance itself are being used, you will not be
able to operate it via the Home Connect app.
– The transfer settings option is activated by default.
– If the settings transfer option has been deactivated,
only the hob's operating statuses will be displayed
in the Home Connect app.
1 To open the basic settings, touch the
the main screen.
2 Scroll left or right with your finger and select the
Home network setting.
3 Touch
Settings via App.
'HDFWLYDWHG
t symbol on
Software update
Using the software update function, the hob's software
can be updated (e.g. for the purpose of optimisation,
troubleshooting or security updates). To use the app,
you must first register as a Home Connect user, install
the app on your mobile device and connect to the Home
Connect server.
The Home Connect app will tell you when a software
update is available. You can start the software update
via the app or the hob. To do this, refer to the
instructions on the display.
Once the update has been successfully downloaded,
you can install it via the Home Connect app if you are
connected to your local area network.
The Home Connect app will notify you when the update
has been successfully installed.
Notes
– You can continue to use the hob as normal while
updates are downloading.
– Depending on your personal settings in the app,
software updates can also be set to download
automatically.
– We recommend that you install security updates as
soon as possible.
6HWWLQJVYLDDSS
4 To activate the settings transfer option, touch Yes;
to deactivate the settings transfer option, touch No.
Confirming settings
Once the settings have been transferred to a cooking
position, a confirmation message will appear on the
hob's touchscreen display.
Remote diagnostics
If a fault occurs, the after-sales service can use remote
diagnostics to access your appliance.
Contact the after-sales service, making sure that your
appliance is connected to the Home Connect server
and checking that the remote diagnostics service is
available in your country.
Note: For more information and to check whether the
remote diagnostics service is available in your country,
please visit the Help & Support area of the Home
Connect website for your country: www.homeconnect.com
43
Page 44

en Hood control
About data protection
When your appliance is connected for the first time to a
WLAN network, which is connected to the Internet, your
appliance transmits the following categories of data to
the Home Connect server (initial registration):
▯ Unique appliance identification (consisting of
appliance codes as well as the MAC address of the
installed WiFi communication module).
▯ Security certificate of the WiFi communication
module (to ensure a secure IT connection).
▯ The current software and hardware version of your
domestic appliance.
▯ Status of any previous resetting to factory settings.
This initial registration prepares the Home Connect
functions for use and is only required when you want to
use these Home Connect functions for the first time.
Note: Ensure that the Home Connect functions can be
used only in conjunction with the Home Connect app.
Information on data protection can be accessed in the
Home Connect app.
e
Hood control
Hood control
You can connect this appliance to a suitable extractor
hood and then control the functions of the hood via your
hob.
There are various options for connecting the appliances
together:
Home Connect
Two appliances can be connected using the Home
Connect app provided that both of them are Home
Connect-compatible.
Refer to the Home Connect documents supplied for
more information.
Declaration of Conformity
Gaggenau Hausgeräte GmbH hereby declares that the
appliance which features Home Connect is in
accordance with the basic requirements and the other
relevant provisions of the directive 2014/53/EU.
A detailed RED Declaration of Conformity can be found
online at www.gaggenau.com on the product page for
appliance in the additional documents.
2.4 GHz band: max. 100 mW
5 GHz band: max. 100 mW
BE BG CZ DK DE EE IE EL
ES FR HR IT CY LV LT LU
y
HU MT NL AT PL PT RO SI
SK FI SE UK NO CH TR
5 GHz Wi-Fi: for indoor use only
Connecting appliances directly
If the appliance is connected directly to an extractor
hood, it cannot be connected to your home network as
well. The appliance functions as a hob with no network
connection. The hob can always be operated via the
control panel.
44
Page 45

Hood control
en
Connecting appliances via your home network
If the appliances are connected to each other via your
home network, both the hood controls and Home
Connect can be used to operate the hob.
Notes
– Make sure you follow the safety instructions in the
instruction manual for your extractor hood and that
these are complied with even when operating the
appliance via the hood controls on the
hob.~
– If the appliance is being operated by means of the
controls on the extractor hood, this mode of
operation always has priority. It is not possible to
use the hood controls on the hob during this time.
– In networked standby mode, your appliance
requires a maximum of 2 W.
"Important safety information" on page 5
Setting up
To set up the connection between the hob and cooker
hood, the hob must be switched on.
Connecting directly
Make sure that the extractor hood is switched off.
For more information refer to the section entitled
"Connecting to the hob" in the instruction manual for
your extractor hood.
If you wish to change the setting, select the
control
required.
Connecting via your home network
You require a router that has WPS functionality.
Access to your router is required. If you do not have this,
follow the steps listed under "Direct connection".
When you begin, make sure that the extractor hood is
connected to the same home network.
1 To open the basic settings, touch the t symbol on
2 Scroll left or right with your finger and select the
3 Select the
4 Press the WPS button on the router within the next
5 You have 2 minutes to initiate the connection
Once the process is complete, a message will be
displayed, informing you of the result of the connection
process. If the connection has been successfully
established, the S symbol for ventilation control from
the hob will appear on the main screen.
Note: Connection can only be established when both
appliances are connected to your home network and the
connection process has been initiated for both of them.
If the time allowed for connecting has already expired
for one of the two appliances, initiate the connection
process again.
option S again and then change the setting as
the main screen.
Hood control setting }.
Home network option and then touch
the
G symbol to confirm your choice.
2 minutes.
A message will be displayed to notify you when the
hob is successfully connected to your home
network.
process on the extractor hood. See extractor hood
operating instructions.
Hood
Note: If you connect your hob directly to the extractor
hood, it cannot be connected to your home network as
well and you will not be able to use Home Connect.
1 To open the basic settings, touch the t symbol on
the main screen.
2 Scroll left or right with your finger and select the
Hood control setting }.
3 Select the Hood control option and then touch the
G symbol to confirm your choice.
4 You have 2 minutes to initiate the connection
process on the extractor hood. See extractor hood
operating instructions.
Once the process is complete, a message will be
displayed, informing you of the result of the connection
process. If the connection has been successfully
established, the S symbol for ventilation control from
the hob will appear on the main screen.
Disconnecting from the network
The connection to the home network can be deleted.
1 To open the basic settings, touch the t symbol on
the main screen.
2 Scroll left or right with your finger and select the
Hood control setting }.
3 Select the Disconnect Hood control option ‡ and
then touch the G symbol to confirm your choice.
The connections have now been deleted.
Note: The connection to the home network can be reestablished at any time.
45
Page 46

en Hood control
Control the hood via the hob
In the hob's basic settings, you can configure what the
extractor hood should do when the hob or individual
cooking positions are switched on or off.
You can select other settings using the control panel.
Setting the fan
Activation
1 Touch the H symbol on the main screen.
2 Select the fan setting in the settings area. The
following settings are possible:
0 Fan off
1, 2, 3 Fan settings.
Intensity: Low, medium, high
.
<
ž
U Unknown mode
Intensive mode
The following will also be displayed, depending on
which ventilation control setting is selected:
Automatic mode
Fan run-on
Setting the hood lighting
The hood light can be switched on and off using the
control panel for the cooktop.
1 Touch the H symbol on the main screen.
2 Select the ž Brightness option.
3 Select the brightness level.
Depending on the basic settings you have selected, the
light is automatically switched on or off when the hob is
switched on or off.
The selected setting will appear on the main screen next
to the H symbol.
Deactivating
Select fan setting 0.
Setting automatic mode
Activation
1 Touch the H symbol on the main screen.
2 Select the }Hood control option.
3 Select the < Automatic option.
Depending on how the extractor hood sensor is
configured, the fan will start automatically when it
detects smoke. For additional information, see extractor
hood operating instructions.
Deactivating
1 Touch the H symbol on the main screen.
2 Select a different fan setting.
46
Page 47

Ventilation control settings
You can adapt the hood controls on the hob to suit your
needs at any time.
Note: The settings will only be displayed if the
appliance is connected to an extractor hood.
Settings Description
Automatic control You can choose the fan setting at which the extractor hood runs when the hob is
}
switched on.
Run-on function The run-on function keeps the fan running for a certain amount of time after the hob is
ž
switched off.
Brightness You can choose the brightness setting at which the extractor hood light lights up when
ž
the hob is switched on.
Automatic switch off You can choose whether the extractor hood light is automatically switched off when the
¾
hob is switched off.
Disconnect Hood control The connection to the home network can be deleted.
‡
Some of these settings may not be available
--------
Hood control
en
47
Page 48

en Cleaning
D
Cleaning
Cleaning
Suitable maintenance and cleaning products can be
purchased from the after-sales service or in our e-Shop.
Hob
Cleaning
Always clean the hob after cooking. This will prevent
food deposits from becoming burned on. Only clean the
hob after the residual heat indicator has gone out.
Clean the hob with a damp dish cloth and dry it with a
cloth or towel to prevent limescale build-up.
Only use cleaning agents that are suitable for this type
of hob. Observe the manufacturer's instructions on the
product packaging.
Never use:
▯ Undiluted washing-up liquid
▯ Cleaning agents designed for dishwashers
▯ Abrasive cleaners
▯ Harsh cleaning agents, such as oven spray and
limescale remover
▯ Scouring pads
▯ High-pressure cleaners or steam jet cleaners
Hob surround
To prevent damage to the hob surround, observe the
following instructions:
▯ Only use warm soapy water
▯ Wash new dish cloths thoroughly before use.
▯ Do not use harsh or abrasive cleaning agents.
▯ Do not use a glass scraper or sharp objects.
Stubborn dirt is best removed with a glass scraper,
available from retailers. Observe the manufacturer's
instructions.
You can obtain a suitable glass scraper from customer
services or through our online shop.
Using a special sponge for cleaning glass-ceramic hobs
achieves a great cleaning result.
Potential marks
Limescale and
water marks
Sugar, rice starch
or plastic
* Then clean with a damp dish cloth and dry with a cloth or
towel.
Note: Do not use any cleaning agents while the hob is
still hot. This may mark the surface. Make sure that any
residue left by cleaning agents is removed.
Clean the hob as soon as it has cooled
down. You can use a cleaning agent suitable for glass-ceramic hobs.*
Clean immediately. Use a glass scraper.
Caution: Risk of burns.*
48
Page 49

{
Frequently Asked Questions (FAQ)
Frequently Asked Questions (FAQ)
Use
Nothing appears in the display.
The brightness may not be set correctly. Look at the display from above and set the brightness in the basic settings.
For more information about the settings, see the section entitled ~ "Basic settings".
The main display shows a warning message and a signal tone sounds.
Remove any liquid or remnants of food from the control panel. Remove any objects from the control panel.
--------
For instructions on how to deactivate the signal tone, see the section entitled ~ "Basic settings".
Noises
Why can I hear noises while I'm cooking?
Noises may be generated while using the hob depending on the base material of the cookware. These noises are
normal for induction technology. They do not indicate that there is a fault.
Possible noises:
A low humming noise of the kind a transformer makes:
Occurs when cooking at a high power level. The noise disappears or becomes quieter when the power level is
reduced.
Frequently Asked Questions (FAQ)
en
--------
Cookware
Quiet humming:
The cookware may be too small for the cooking position or not suitable for induction cooking. Use a bigger item of
cookware or move it to a different position on the cooking surface.
Quiet whistling:
This happens when the cookware is empty. The noise disappears when water or food is added to the cookware.
High-pitched whistling noises:
These may occur if two cooking positions are used at the highest power level at the same time. The whistling noises
disappear or become quieter when the power level is reduced.
Crackling:
This occurs when using cookware made from layers of different material or when using cookware of different sizes
and different materials at the same time. How loud the noise is may vary depending on the quantity of food you are
cooking and the method you are using.
Fan noise:
The hob is equipped with a fan that automatically switches on at high temperatures. The fan may continue to run
even after you have switched off the hob if the temperature detected is still too high.
Clicking:
Occasional clicking when activating or moving an item of cookware is completely normal.
Now and again, other completely random noises that have nothing to do with the cookware may occur.
Which types of cookware can be used with an induction hob?
For information on which types of cookware can be used with an induction hob, see the section entitled
~ "Induction cooking".
Why is the hob not heating up?
Make sure that the cookware is suitable for use with an induction hob. For information on the type, size and positioning of the cookware, see the section entitled ~ "Induction cooking".
Why is it taking so long for the cookware to heat up or why is it not heating up correctly despite being on a high power
level?
Make sure that the cookware is suitable for use with an induction hob. For information on the type, size and positioning of the cookware, see the section entitled ~ "Induction cooking".
49
Page 50

en Frequently Asked Questions (FAQ)
The depiction of the cookware on the touchscreen display does not match the actual cookware in terms of size and
shape.
The depiction of the cookware on the touchscreen display is purely indicative.
Make sure that the item of cookware is inside the usable area of the cooking surface.
There is cookware on the cooking surface that is not being shown on the touchscreen display.
There are more than eight items of cookware on the cooking surface.
The cookware is too small: A diameter of between 90 and 340 mm is recommended.
Use a bigger item of cookware or cookware that is suitable for induction cooking. Alternatively, move the cookware
to a different position on the cooking surface. For information on which types of cookware can be used with an
induction hob, see the section entitled ~ "Induction cooking".
There are two items of cookware on the cooking surface. However, the touchscreen display displays this as just one item
of cookware.
If two pots or pans are placed very close together on the cooking surface, the touchscreen display may depict them
as one item of cookware.
Move the two items away from each other until the touchscreen display depicts them separately.
There is an item of cookware on the cooking surface. However, the touchscreen display depicts two or more.
The base of the cookware may be deformed or embossed, or the cookware is not suitable for induction cooking.
Check how flat the base of the cookware is and place it back on the cooking surface. For information on the type,
size and positioning of the cookware, see the section entitled ~ "Induction cooking".
Not every item of cookware that is on the cooking surface can be activated.
You can place up to eight items of cookware on the cooking surface but only up to five evenly distributed items can
be used at the same time.
For information on positioning cookware, see the section entitled ~ "Induction cooking".
You can cook with up to three items of cookware on one side. If there is an item of cookware in the centre of the
cooking surface or an item of cookware is too large, the number of "active" pots or pans is restricted.
For information on positioning cookware, see the section entitled ~ "Induction cooking".
One of the items of cookware is not suitable for induction cooking. The Õ symbol appears on the touchscreen dis-
play next to the unsuitable pot or pan.
For information on which types of cookware can be used with an induction hob, see the section entitled
~ "Induction cooking".
The appliance has exceeded its maximum power consumption or the Power management setting has been activated.
Check the installation and correctly configure the Power management setting. See the section entitled ~ "Basic
settings"
The heat setting cannot be increased.
The appliance has reached its maximum power consumption or the Power management setting has been activated.
Switch the positions of the cookware on the cooking surface. Check the installation and correctly configure the
Power management setting.See the section entitled ~ "Basic settings"
The Cooking sensor mode is not available.
The appliance has reached its maximum power consumption or the Power management setting has been activated.
To ensure that the Cooking sensor mode is available, switch off the other cooking positions or reduce the heat setting for the other items of cookware. Switch the positions of the cookware on the cooking surface. Check the installation and correctly configure the Power management setting. See the section entitled ~ "Basic settings"
Bubbles are forming with an uneven distribution within the cookware.
Depending on the power level that is selected, the type of cookware or the combination with other cookware, bubbles may form unevenly. This does not affect the temperature or the cooking process.
For information on the type, size and positioning of the cookware, see the section entitled ~ "Induction
--------
cooking"
50
Page 51

Frequently Asked Questions (FAQ)
Cleaning
How do I clean the hob?
You can achieve the best results by using special glass-ceramic cleaning products. Do not use any harsh or abrasive
cleaning products, dishwater detergent (concentrated) or scouring pads.
--------
For more information on cleaning and caring for your hob, see the section entitled ~
"Cleaning".
Home network
Why will the hob not connect to the home network after the WPS button has been pressed on the router?
Once the "Connect automatically" option has been selected, press the WPS button on the router within the next
two minutes.
If this time has already elapsed, repeat the connection procedure. If the problems persist, restore the appliance to
factory settings; see section ~
"Basic settings".
Why is my mobile device not logging into the Home Connect network?
Use the SSID "HomeConnect" and password "HomeConnect" to connect.
Make sure that you have entered all the characters correctly and that you have used upper and lower case in the rel-
--------
evant places.
en
51
Page 52

en Trouble shooting
3
Trouble shooting
Disconnect the appliance from the mains power supply
and then wait for a few seconds before reconnecting it.
If the message appears again, contact our technical
after-sales service.
Trouble shooting
If a problem or fault occurs in the appliance,
instructions, alerts, warnings or fault messages will be
shown on the display.
Please quote the fault code when you call the technical
after-sales service.
Notes
Warnings and fault messages
– The top line of the display lights up red.
– A fault code is displayed with some fault messages
Warnings are displayed if an internal fault has occurred
that will compromise use of the hob.
Follow the instructions on the display and touch the
G symbol to return to the main screen.
Fault messages are displayed if an internal fault or
(e.g. [E0513])
– If a fault occurs, the appliance does not switch to
standby mode.
– For more information, see the section entitled
~ "Frequently Asked Questions (FAQ)".
malfunction has occurred that makes it impossible to
use the hob.
Tips
Problem Solution
The hob will not switch on. Use other electrical appliances to check whether a short circuit has
occurred in the power supply.
Make sure that the appliance has been connected as shown in the circuit diagram.
If the fault cannot be rectified, inform the technical after-sales service.
The touchscreen display is not responding or has frozen.The touchscreen display is not responding or has
frozen.
The cooking zone's power level cannot be increased. The hob's total power output has been limited. Change the total power
An audible signal sounds if there is something on the
touchscreen display.
The hob responds in an unusual manner or cannot be
operated properly.
The electronics have overheated and have switched off
the affected cooking zone.
The electronics have overheated and all the cooking
zones have been switched off.
There is hot cookware near the control panel. To protect the electronics, the cooking zone has been
switched off.
The cooking zone has overheated and has been
switched off to protect the work surface.
The transfer settings function cannot be activated. The "active" item of cookware has been removed from its position and a
The hob has been operating continuously for an
extended period.
The control panel is damp or there is something on it. Dry the control
panel or remove the object.
under "Maximum power consumption" in the basic settings.
If a very large item of cookware is being used, this may have an effect on
the maximum power level for that half of the hob. Set down the cookware
again.
Remove the object and reset the hob.
Do not place hot cookware on the control panel.
Switch the appliance off using the main fuse or the circuit breaker in the
fuse box. Wait a few seconds before reconnecting the appliance.
Wait until the electronics have cooled down sufficiently. When the fault
code on the display goes out, you can resume cooking.
Remove the cookware that is causing the problem. Wait a few seconds.
When the fault code on the display disappears, you can resume cooking.
Wait until the electronics have cooled down sufficiently before switching
the cooking zone on again.
pot or pan of a different size has been put in its place. Test with the same
item of cookware.
Acknowledge the fault code by touching any of the buttons. You can
cook as usual without using the transfer settings function. Inform the
technical after-sales service.
The automatic safety cut-out function has been activated. See section
52
Page 53

Problem Solution
The cooking sensor has overheated and the cooking
zone has been switched off.
The cooking sensor has overheated and the adjacent
cooking zones have been switched off.
The battery in the cooking sensor is almost flat.
“‰ƒ‹ƒ
“‰ƒ‹„
“‰ƒ‹…
The connection to the cooking sensor has been broken. “‰ƒ‹†
The cooking sensor is faulty. “‰ƒ‹‡
The cooking sensor indicator does not light up and the
cooking sensor is not responding.
The sensor indicator flashes twice. The battery in the
cooking sensor is almost flat. You may be interrupted
the next time you cook by the battery running out.
The sensor indicator flashes three times. The connection to the cooking sensor has been broken.
The hob is unable to connect to your home network or
the extractor hood. “ˆ‹‚‹
The operating voltage is incorrect/outside of the normal operating range. “Š‹‹‹/“Š‹‚‹
The hob is not connected correctly —…‹‹
Wait until the cooking sensor has cooled down sufficiently before activating the function again.
If you are not using the cooking sensor, remove it from the cookware and
keep it away from the other cooking zones and sources of heat. Switch
the cooking zones back on.
Replace the 3 V CR2032 battery. See section ~ "Replacing the
battery"
Switch the function off and then on again.
Inform the technical after-sales service.
Replace the 3 V CR2032 battery. See section ~ "Replacing the
battery"
If this does not solve the problem, press and hold the symbol on the
cooking sensor for 8-10 seconds and then reconnect the cooking sensor to the hob. See section ~ "Connecting the wireless
temperature sensor to the control panel"
If the problem still persists, contact the technical after-sales service.
Replace the 3 V CR2032 battery. See section ~ "Replacing the
battery"
Press and hold the symbol on the cooking sensor for 8-10 seconds and
then reconnect the cooking sensor to the hob. See section
~ "Connecting the wireless temperature sensor to the control
panel"
Switch the hob off and then on again.
If the message appears again, contact our technical after-sales service.
Contact your electricity supplier.
Disconnect the hob from the mains. Make sure that it has been connected as shown in the circuit diagram.
Trouble shooting
en
Demo mode
If the ° symbol appears at the top of the display, this
means that demo mode is activated. The appliance will
not heat up. Disconnect the appliance from the power
supply and then wait for a few seconds before
reconnecting it. Then deactivate demo mode in the
basic settings menu within the next 3 minutes. See the
section entitled ~ "Basic settings"
53
Page 54

en Customer service
4
Customer service
Customer service
Our after-sales service is there for you if your appliance
needs to be repaired. We will always find an appropriate
solution, also in order to avoid after-sales personnel
having to make unnecessary visits.
Product number (E no.) and
production number (FD no.)
Please quote the E number (product number) and the
FD number (production number) of your appliance when
contacting our after-sales service.
The rating plate bearing these numbers can be found:
▯ On the appliance certificate.
▯ On the underside of the hob.
The product number (E no.) can also be found on the
glass-ceramic hob. You can check the after-sales
service index (KI) and production number (FD no.) by
going to the basic settings. Refer to the section entitled
~ "Basic settings" to find out how to do this.
Please note that a visit from an after-sales service
engineer is not free of charge in the event that the
appliance has been misused, even during the warranty
period.
Please find the contact data of all countries in the
enclosed customer service list.
To book an engineer visit and product advice
GB 0344 892 8988
Calls charged at local or mobile rate.
IE 01450 2655
0.03 € per minute at peak.
Off peak 0.0088 € per minute.
AU 1300 368 339
NZ 09 477 0492
Trust the expertise of the manufacturer, and rest
assured that the repair will be carried out by trained
service technicians using original spare parts for your
domestic appliance.
54
Page 55

Page 56

*DJJHQDX+DXVJHUlWH*PE+
&DUO:HU\6WUDH
0QFKHQ
*(50$1<
ZZZJDJJHQDXFRP
en
9001351292 (980604)
*9001351292*
 Loading...