


Gaggenau
Instruction manual
BM 450/451
BM 454/455
BM 484/485
Combi-microwave oven

2
Table of contents
Instruction manual
Important safety information 3
Causes of damage 6
Environmental protection 6
Environmentally-friendly disposal 6
Tips for saving energy 6
Getting to know the appliance 7
Display and operating controls 7
Function selector positions 8
Symbols 8
Colours and display 8
Automatic door opening 9
Additional information ( 9
Cooling fan 9
Accessories 9
Special accessories 9
Before using for the first time 10
Setting the language 10
Setting the time format 10
Setting the clock 10
Setting the date format 10
Setting the date 11
Setting the temperature format 11
Ending initial set-up 11
Heating up the oven 11
Cleaning accessories 11
Activating the appliance 12
Standby 12
Activating the appliance 12
Microwave 12
Notes regarding ovenware 12
Microwave output setting 12
Setting the microwave 13
Oven 13
Setting the heating function and temperature 13
Rapid heating 14
Safety shut-off 14
Full surface grill 14
Setting the full surface grill 14
Combination mode 15
Setting the combination mode 15
Sequential operation 16
Setting sequential operations 16
End of cooking time 17
Automatic programmes 18
Setting a programme 18
Individual adjustment 18
Instructions for automatic programmes 19
Programme table 20
Individual recipes 21
Recording a recipe 21
Programming a recipe 22
Entering names 22
Starting recipes 23
Change recipe 23
Deleting recipes 23
Timer functions 24
Calling up the timer menu 24
Timer 24
Stopwatch 25
Long-term timer 26
Child lock 26
Activate the child lock 26
Deactivating the child lock 26
Basic settings 27
Cleaning 29
Cleaning agents 29
Trouble shooting 30
Power cut 31
Demo mode 31
Replacing the oven light bulb 31
Technical data 32
Aftersales service 32
Settings table and tips 33
Defrosting 33
Defrosting and heating up or cooking frozen food 34
Heating food 35
Cooking food 36
Microwave tips 36
Cakes and pastries 36
Baking tips 38
Roasting and grilling 38
Tips for roasting and grilling 40
Bakes, gratins 40
Frozen convenience products 41
Test dishes 41
Acrylamide in foodstuffs 42
: Additional information on products, accessories,
replacement parts and services can be found at
www.gaggenau.com and in the online shop
www.gaggenau-eshop.com

3
m Important safety information
Read these instructions carefully. Only then
will you be able to operate your appliance
safely and correctly. Retain the instruction
manual and installation instructions for future
use or for subsequent owners.
This appliance is only intended to be fully fitted
in a kitchen. Observe the special installation
instructions.
Check the appliance for damage after
unpacking it. Do not connect the appliance if it
has been damaged in transport.
Only a licensed professional may connect
appliances without plugs. Damage caused by
incorrect connection is not covered under
warranty.
This appliance is intended for domestic use
only. The appliance must only be used for the
preparation of food and drink. The appliance
must be supervised during operation. Only use
this appliance indoors.
This appliance may be used by children over
the age of 8 years old and by persons with
reduced physical, sensory or mental
capabilities or by persons with a lack of
experience or knowledge if they are
supervised or are instructed by a person
responsible for their safety how to use the
appliance safely and have understood the
associated hazards.
Children must not play with, on, or around the
appliance. Children must not clean the
appliance or carry out general maintenance
unless they are at least 8 years old and are
being supervised.
Keep children below the age of 8 years old at a
safe distance from the appliance and power
cable.
Always slide accessories into the cooking
compartment correctly. See description of
accessories in the instruction manual.
Risk of fire!
▯ Combustible items stored in the cooking
compartment may catch fire. Never store
combustible items in the cooking
compartment. Never open the appliance
door if there is smoke inside. Switch off
the appliance and unplug it from the mains
or switch off the circuit breaker in the fuse
box.
Risk of fire!
▯ Using the appliance for anything other than
its intended purpose is dangerous and may
cause damage.
The following is not permitted: drying out
food or clothing, heating slippers, grain or
cereal pillows, sponges, damp cleaning
cloths or similar.
For example, heated slippers and grain or
cereal pillows may catch fire, even several
hours after they have been heated.The
appliance must only be used for the
preparation of food and drinks.
Risk of fire!
▯ Food may catch fire. Never heat food in
heat-retaining packages.
Do not leave food heating unattended in
containers made of plastic, paper or other
combustible materials.
Do not select a microwave power or time
setting that is higher than necessary.
Follow the information provided in this
instruction manual.
Never use the microwave to dry food.
Never defrost or heat food with a low water
content, e.g. bread, at too high a
microwave power or for too long.
Risk of fire!
▯ Cooking oil may catch fire. Never use the
microwave to heat cooking oil on its own.
Risk of explosion!
Liquids and other food may explode when in
containers that have been tightly sealed. Never
heat liquids or other food in containers that
have been tightly sealed.

4
Risk of serious damage to health!
▯ The surface of the appliance may become
damaged if it is not cleaned properly.
Microwave energy may escape. Clean the
appliance on a regular basis, and remove
any food residue immediately. Always keep
the cooking compartment, door seal, door
and door stop clean; refer also to Cleaning
section.
Risk of serious damage to health!
▯ Microwave energy may escape if the
cooking compartment door or the door
seal is damaged. Never use the appliance
if the cooking compartment door or the
door seal is damaged. Contact the aftersales service.
Risk of serious damage to health!
▯ Microwave energy will escape from
appliances that do not have any casing.
Never remove the casing. For any
maintenance or repair work, contact the
after-sales service.
Risk of electric shock!
▯ Incorrect repairs are dangerous. Repairs
may only be carried out and damaged
power cables replaced by one of our
trained after-sales technicians. If the
appliance is defective, unplug the
appliance from the mains or switch off the
circuit breaker in the fuse box. Contact the
after-sales service.
Risk of electric shock and serious injury!
▯ The cable insulation on electrical
appliances may melt when touching hot
parts of the appliance. Never bring
electrical appliance cables into contact
with hot parts of the appliance.
Risk of electric shock!
▯ Do not use any high-pressure cleaners or
steam cleaners, which can result in an
electric shock.
Risk of electric shock!
▯ When replacing the cooking compartment
bulb, the bulb socket contacts are live.
Before replacing the bulb, unplug the
appliance from the mains or switch off the
circuit breaker in the fuse box.
Risk of electric shock!
▯ A defective appliance may cause electric
shock. Never switch on a defective
appliance. Unplug the appliance from the
mains or switch off the circuit breaker in
the fuse box. Contact the after-sales
service.
Risk of electric shock!
▯ The appliance is a high-voltage appliance.
Never remove the casing.
Risk of burns!
▯ The appliance becomes very hot. Never
touch the interior surfaces of the cooking
compartment or the heating elements.
Always allow the appliance to cool down.
Keep children at a safe distance.
Risk of serious burns!
▯ Accessories and ovenware become very
hot. Always use oven gloves to remove
accessories or ovenware from the cooking
compartment.
Risk of burns!
▯ Alcoholic vapours may catch fire in the hot
cooking compartment. Never prepare food
containing large quantities of drinks with a
high alcohol content. Only use small
quantities of drinks with a high alcohol
content. Open the appliance door with
care.
Risk of burns!
▯ Foods with peel or skin may burst or
explode during, or even after, heating.
Never cook eggs in their shells or reheat
hard-boiled eggs. Never cook shellfish or
crustaceans. Always prick the yolk when
baking or poaching eggs. The skin of
foods that have a peel or skin, such as
apples, tomatoes, potatoes and sausages,
may burst. Before heating, prick the peel or
skin.
Risk of burns!
▯ Heat is not distributed evenly through baby
food. Never heat baby food in closed
containers. Always remove the lid or teat.
Stir or shake well after the food has been
heated. Check the temperature of the food
before it is given to the child.
Risk of burns!
▯ Heated food gives off heat. The ovenware
may become hot. Always use oven gloves
to remove ovenware or accessories from
the cooking compartment.
Risk of burns!
▯ Airtight packaging may burst when food is
heated. Always observe the instructions on
the packaging. Always use oven gloves to
remove dishes from the cooking
compartment.

5
Risk of scalding!
▯ When you open the appliance door, hot
steam may escape. Open the appliance
door with care. Keep children at a safe
distance.
Risk of scalding!
▯ Water in a hot cooking compartment may
create hot steam. Never pour water into the
hot cooking compartment.
Risk of scalding!
▯ There is a possibility of delayed boiling
when a liquid is heated. This means that
the liquid reaches boiling temperature
without the usual steam bubbles rising to
the surface. Even if the container only
vibrates a little, the hot liquid may suddenly
boil over and spatter. When heating,
always place a glass rod/spoon in the
container. This will prevent delayed boiling.
Risk of scalding!
▯ The accessible parts become hot during
operation. Never touch the hot parts. Keep
children at a safe distance.
Risk of injury!
▯ Scratched glass in the appliance door may
develop into a crack. Do not use a glass
scraper, sharp or abrasive cleaning aids or
detergents.
Risk of injury!
▯ Unsuitable ovenware may crack. Porcelain
or ceramic ovenware can have small
perforations in the handles or lids. These
perforations conceal a cavity below. Any
moisture that penetrates this cavity could
cause the ovenware to crack. Only use
microwave-safe ovenware.

6
Causes of damage
Caution!
– Creation of sparks: Metal e.g. a spoon in a glass
must be kept at least 2 cm from the oven walls
and the inside of the door. Sparks could
irreparably damage the glass on the inside of the
door.
– Water in the cooking compartment when the
cooking compartment is hot: Never pour water
into the cooking compartment when the cooking
compartment is hot. Steam will be created. The
temperature change can cause damage to the
glass floor panel.
– Foil containers: Do not use foil containers in the
appliance. They damage the appliance by
producing sparks.
– Moist food: Do not store moist food in the closed
cooking compartment for long periods.
Do not use the appliance to store food. This can
lead to corrosion.
– Cooling with the appliance door open: Only leave
the cooking compartment to cool with the door
closed. Do not trap anything in the appliance
door. Even if the door is only slightly ajar, the
fronts of adjacent units may be damaged over
time.
– Heavily soiled seal: If the seal is very dirty, the
appliance door will no longer close properly
during operation. The fronts of adjacent units
could be damaged. Always keep the seal clean.
– Transporting the appliance: Do not carry or hold
the appliance by the door handle. The door
handle cannot support the weight of the
appliance and could break.
– Operating the microwave without food: Operating
the appliance without food in the cooking
compartment may lead to overloading. Never
switch on the appliance unless there is food in
the cooking compartment. An exception to this
rule is a short crockery test (see the section
"Microwave, suitable crockery").
– Microwave popcorn: Never set the microwave
power too high. Use a power setting no higher
than 600 watts. Always place the popcorn bag on
a glass plate. The disc may jump if overloaded.
Environmental protection
Environmentally-friendly disposal
Dispose of packaging in an environmentally-friendly
manner.
Tips for saving energy
▯ Only preheat the oven if this is specified in the
recipe or in the operating instructions table.
▯ Use dark, black lacquered or enamelled baking
tins when baking. They absorb the heat
particularly well.
▯ It is best to bake several cakes one after the
other. The oven is still warm. This reduces the
baking time for the second cake.
▯ For longer cooking times, you can switch the oven
off 10 minutes before the end of the cooking time
and use the residual heat to finish cooking.
This appliance is labelled in accordance with
European Directive 2012/19/EU concerning
used electrical and electronic appliances
(waste electrical and electronic equipment WEEE). The guideline determines the
framework for the return and recycling of used
appliances as applicable throughout the EU.
7
Getting to know the appliance
Use this section to familiarise yourself with your new
appliance. The control panel and the individual
operating controls are explained. You will find
information on the cooking compartment and the
accessories.
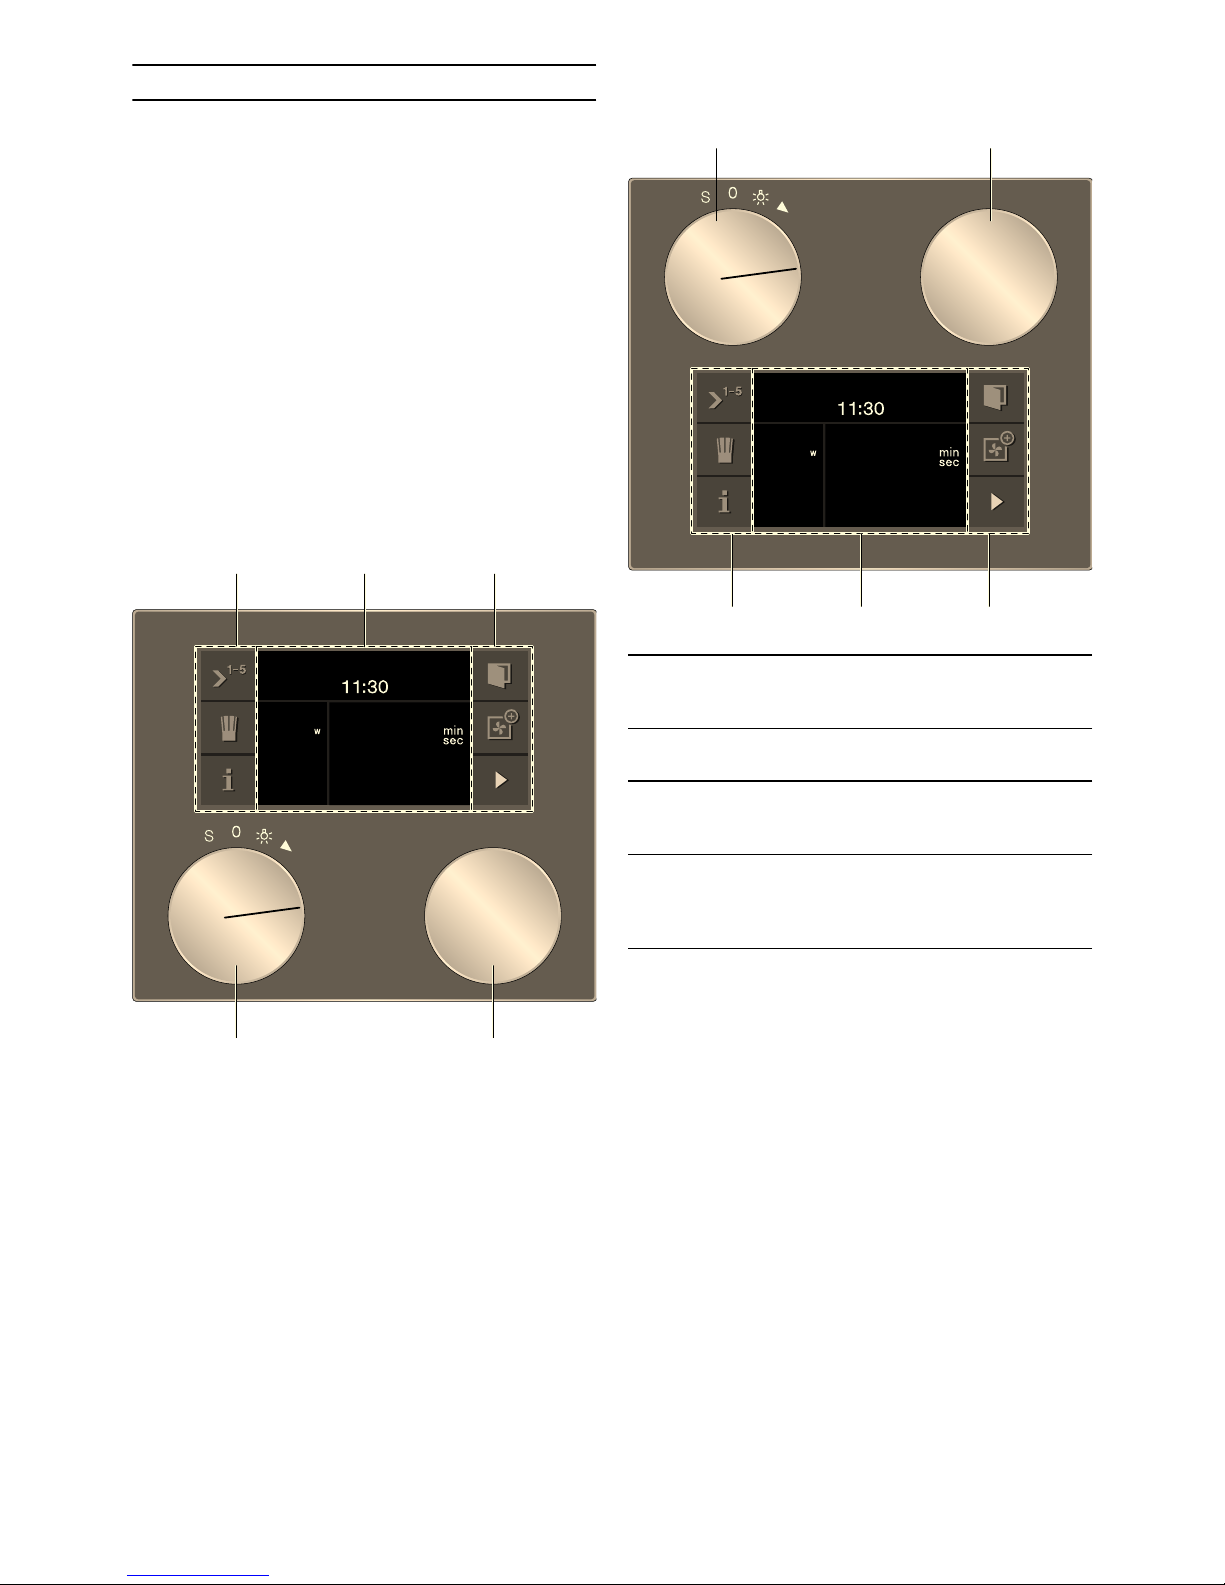
Display and operating controls
These instructions are valid for different versions of
the appliance. Depending on the appliance model,
individual details may differ.
All versions of the appliance are operated in an
identical manner.
Operating controls on the upper side of the
appliance
Operating controls on the lower side of the
appliance
--------
1 Control panel These areas are touch sensitive.
Touch a symbol to select the corresponding function.
2 Display The display shows, for example,
current settings and options.
3 Rotary selector You can use the rotary selector to
make the settings in the different
operation modes.
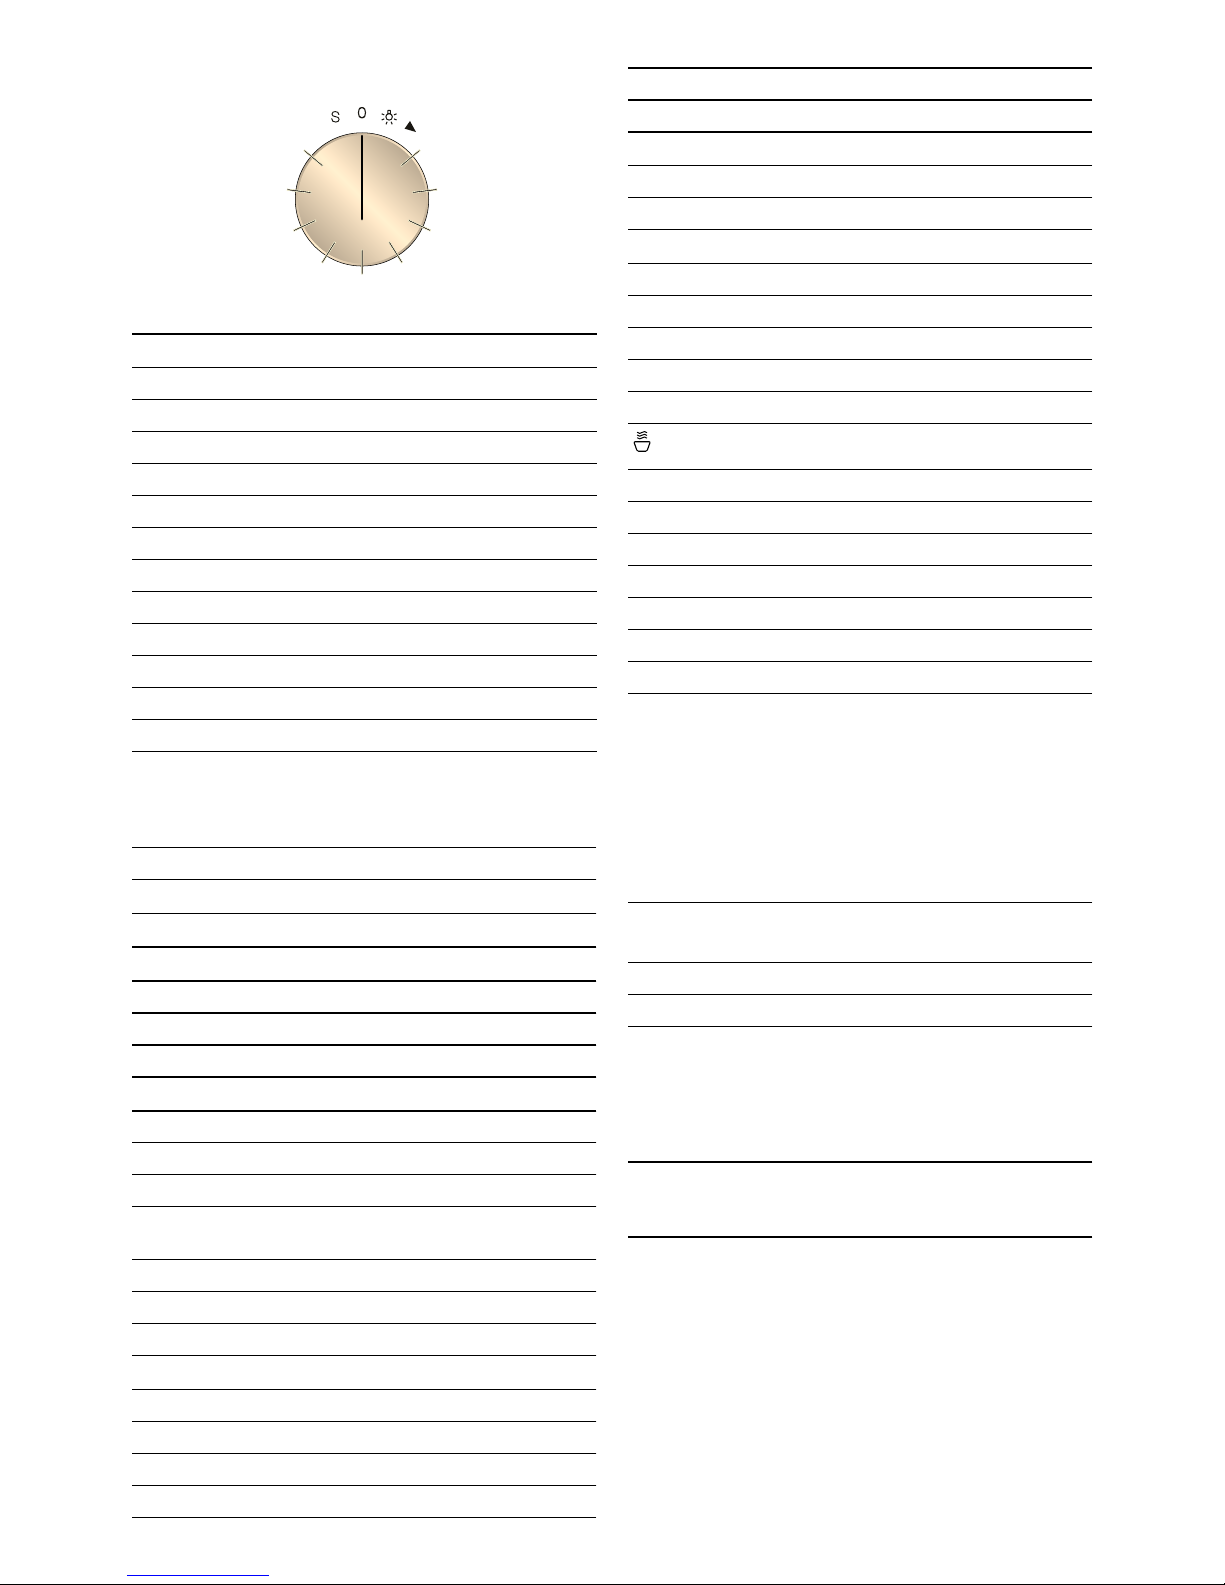
4 Function selector The function selector is used to
select the microwave output, type
of heating, basic settings or the
light.
8
Function selector positions
Symbols
--------
Colours and display
Colour
The different colours are used to guide the user in the
relevant setting situations.
Display
The appearance of symbols, values and displays
changes depending on the situation.
Position Function
0 Zero setting
ž Light
2 1000 W microwave
3 600 W microwave
4 360 W microwave
5 180 W microwave
6 90 W microwave
7 H Hot air
8 R Full surface grill + hot air
9 Z Full surface grill + circulated air
10 Q Full surface grill
S Basic settings
Symbol Function
I
Start
Ø
Stop
H
Pause/End
' Cancel
Ž Delete
™ Confirm/save settings
C
Selection arrow
! Open appliance door
( Call up additional information
* Call up additional tips
i Call up automatic programmes, individual
recipes
‡ Save
% Edit settings
0 Child lock
M
Call up timer menu
/ Call up long-term timer
h Sequential operation
g Record menu
4 Enter name
l Delete letters
6 Microwave, leave meal to rest
°
Demo mode
“ Heating up with status indicator
’ Rapid heating with status indicator
Š
Timer
p Stopwatch
Automatic programmes:
n Weight
o Cooking result
W Defrosting
Cooking, Combi cooking
Combination mode:
> Call up oven
< Remove oven
; Add oven
= Call up microwave
: Remove microwave
9 Add microwave
orange Initial settings
Main functions
blue Basic settings
white Values which can be set
Zoom Values and symbols that have just been
selected are displayed in an enlarged
format.
Reduced display screen
After a short time, the display is reduced
and only the most important information
is displayed. This function is preset and
can be changed in the basic settings.

9
Automatic door opening
The appliance door springs open when you touch the
! symbol and you can open it fully by using the
recessed handle on the side.
Automatic door opening does not work if the child
lock is activated or there is a power cut. You can open
the recessed handle on the side by hand.
Additional information (
By touching the ( symbol, you can call up additional
information.
Before starting, you are shown information, for
example, on the type of heating which has been set.
This allows you to check if the current setting is
suitable for your meal.
During operation, you are shown information, for
example, on the elapsed and remaining time and/or on
the current cooking compartment temperature.
Note: Once the oven has heated up, slight deviations
in temperature are normal during continuous
operation.
Cooling fan
Your appliance has a cooling fan. The cooling fan
switches on during operation. The hot air escapes
above the door.
The cooling fan continues to run for a certain time
after operation.
Caution!
Do not cover the ventilation slots. Otherwise, the
appliance will overheat.
Notes
‒ The appliance remains cool during microwave
operation. The cooling fan will still switch on. The
fan may run on even when microwave operation
has ended.
‒ Condensation may appear on the door window,
interior walls and floor. This is normal and does
not adversely affect microwave operation. Wipe
away the condensation after cooking.
Accessories
The accessories can be inserted into the appliance at
four different heights.
Note: Microwaveable ovenware can be placed on the
oven floor (level 0).
Special accessories
You can order the following special accessories from
your specialist dealer:
Only use the accessories as specified. The
manufacturer accepts no liability if these accessories
are used incorrectly.
Wire rack
For ovenware, cake tins, grilling
and frozen meals.
Note: You can pull the wire rack
two thirds of the way out without
it tipping. This allows meals to be
removed more easily.
Glass tray
For large roasts, moist cakes,
bakes and gratins. This can act
as a splash guard if you are grilling meat directly on the wire
rack. For this, slide the glass tray
in at level 1.
The glass tray can also be used
as a standing surface during
microwave operation.
Glass rod
For heating liquids in narrow
containers. It is used to prevent
delayed boiling. When heating
liquids, always place a glass
rod/spoon in the container.
BA 476 310 Handle, stainless steel for
BM 450/451/454/455
BA 476 330 Handle, aluminium for
BM 450/451/454/455
BA 478 310 Handle, stainless steel for
BM 484/485
10
Before using for the first time
Here you will find everything you need to do before
using the microwave to prepare food for the first time.
First read the section on Safety information.
The appliance must be fully installed and connected to
the mains.
After connection to the mains, the "Initial settings"
menu appears in the display. You can now make
settings for your new appliance.
▯ Language
▯ Time format
▯ Time
▯ Date format
▯ Date
▯ Temperature format
Notes
‒ The "Initial settings" menu appears only when the
appliance is switched on for the first time after
being connected to the mains or when the
appliance has been without electricity for several
days.
After the appliance is connected to the mains, the
GAGGENAU logo is displayed for approx. 30
seconds before the "Initial settings" menu is
automatically displayed.
‒ You may change the settings at any time (refer to
the Basic settings section).
Setting the language
The preset language appears in the display.
1 Turn the rotary selector to select the required
display language.
2 Confirm with ™.
Note: If the language is changed, the system restarts.
This takes a few seconds.
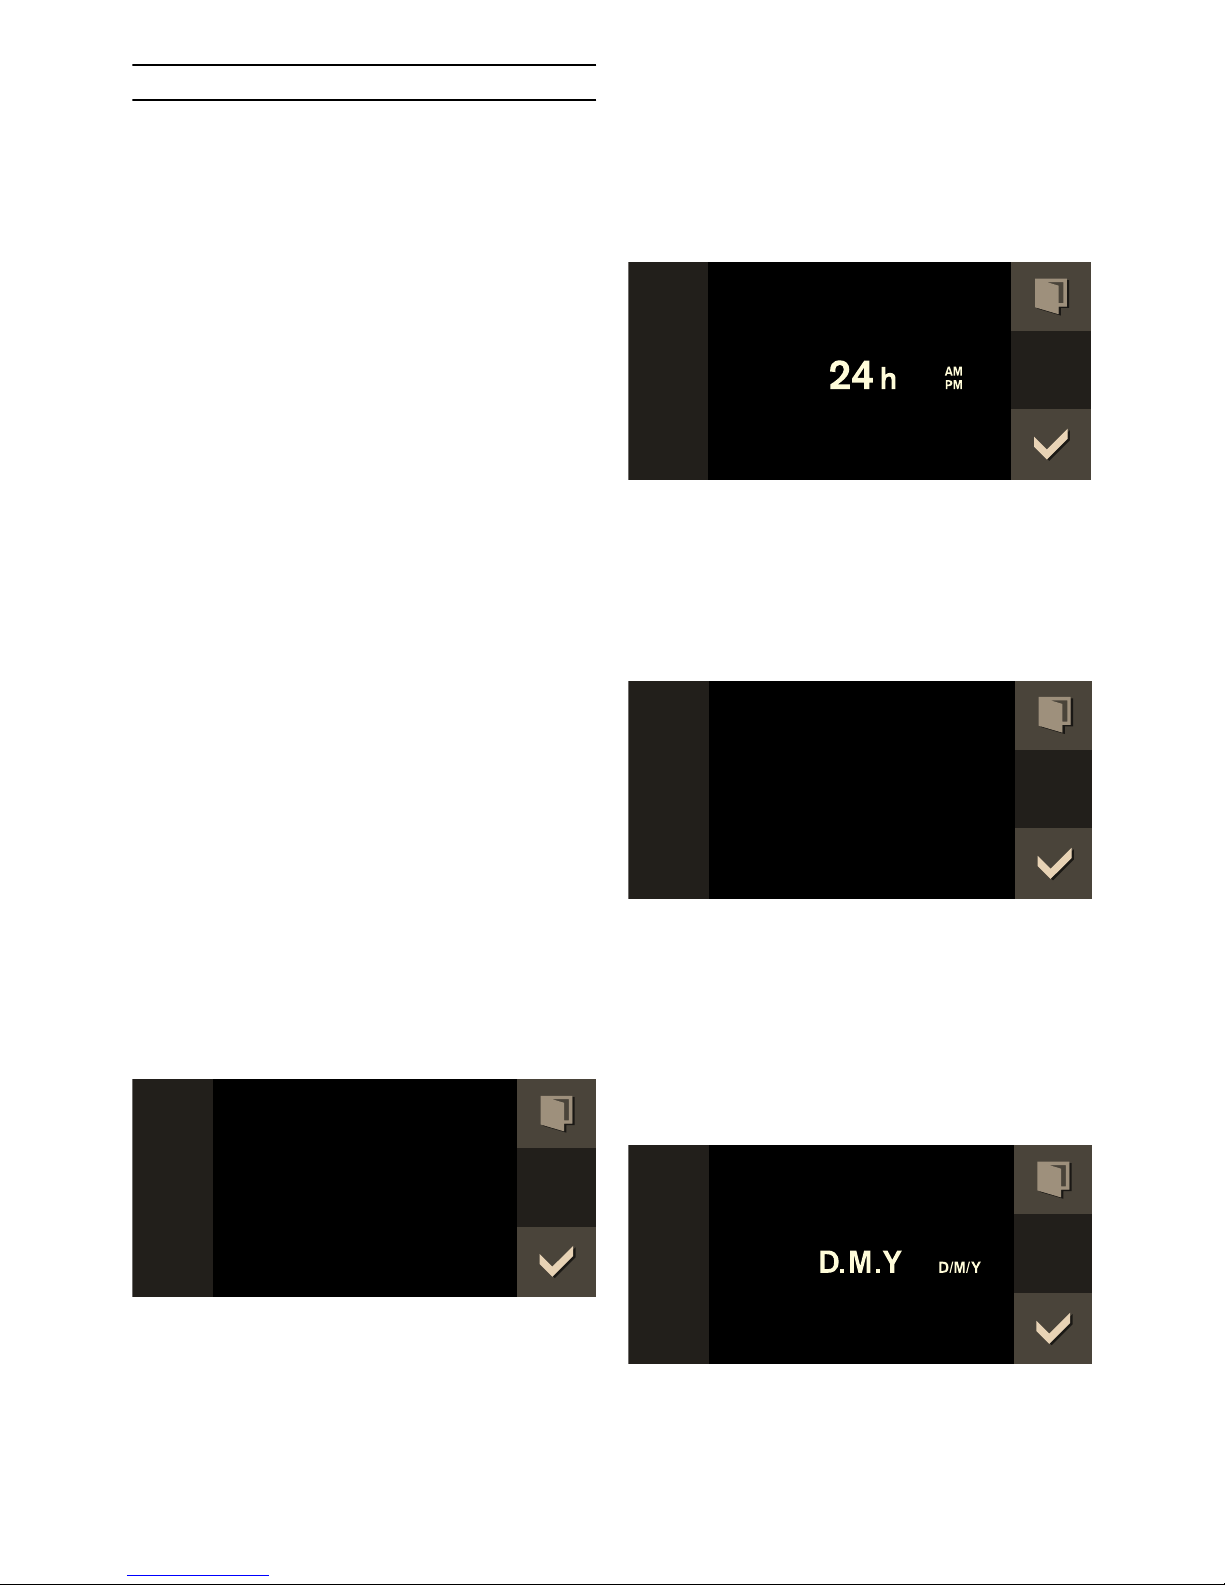
Setting the time format
The two possible formats 24h and AM/PM appear in
the display. The default is the 24h format.
1 Use the rotary selector to select the desired
format.
2 Confirm with ™.
Setting the clock
The time is shown in the display.
1 Set the desired time using the rotary selector.
2 Confirm with ™.
Setting the date format
The three possible formats D.M.Y, D/M/Y and M/D/Y
appear in the display. The default is the D.M.Y format.
1 Use the rotary selector to select the desired
format.
2 Confirm with ™.
'HXWVFK
6SUDFKH
7LPHIRUPDW
7LPH
'DWHIRUPDW

11
Setting the date
The preset date appears in the display. The day
setting is already active.
1 Set the day using the rotary selector.
2 Touch the C symbol to switch to the month
setting.
3 Set the month using the rotary selector.
4 Touch the C symbol to switch to the year setting.
5 Set the year using the rotary selector.
6 Confirm with ™.
Setting the temperature format
The two possible formats °C and °F appear in the
display. The default setting is °C.
1 Use the rotary selector to select the desired
format.
2 Confirm with ™.
Ending initial set-up
"Initial set-up complete" appears in the display.
Confirm with ™.
The appliance enters standby mode and the standby
screen appears. The appliance is now ready for
operation.
Heating up the oven
Ensure that no packaging remnants have been left in
the cooking compartment.
To remove the new cooker smell, heat up the oven
when it is empty and closed. One hour with R Full
surface grill + Hot air at 200 °C is ideal. For
instructions on how to set this type of heating, refer to
the Oven section.
Cleaning accessories
Before using the accessories for the first time, clean
them thoroughly using hot detergent solution and a
soft cloth.
'DWH
7HPSHUDWXUHIRUPDW
,QLWLDOVHWXS
FRPSOHWH
12
Activating the appliance
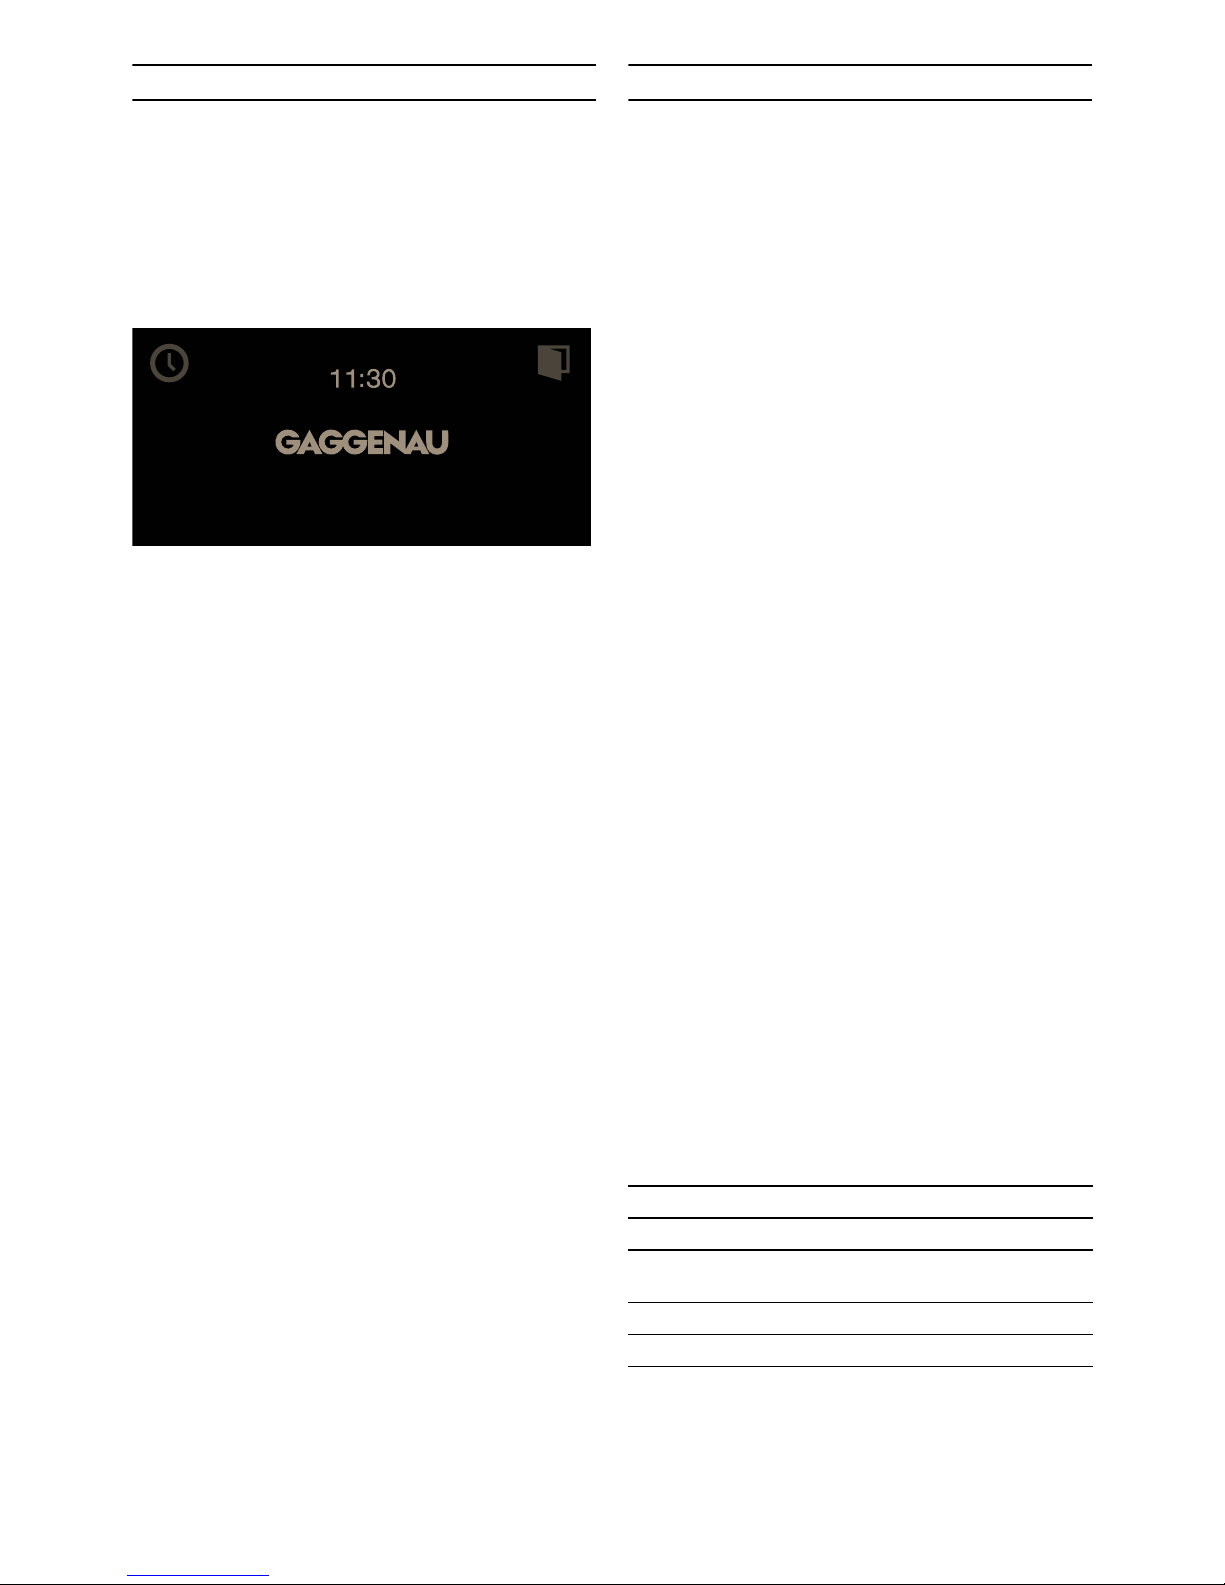
Standby
The appliance goes into standby mode if no function
has been set or the child lock is activated.
The brightness of the control panel is dimmed in
standby mode.
Notes
‒ Different displays are available for standby mode.
The default setting is the GAGGENAU logo and
the clock. To change the display, refer to the Basic
settings
section.
‒ The brightness of the display depends on the
vertical viewing angle. You can adjust the display
using the "Brightness" setting in the basic
settings.
Activating the appliance
To exit standby mode, you can either
▯ Turn the function selector,
▯ Touch a control panel,
▯ Open or close the door.
You can now set the desired function. You can read
about how to set functions in the respective chapters.
Notes
‒ When "Standby screen = off" is selected in the
basic settings, you must turn the function selector
to exit standby mode.
‒ The appliance returns to the standby screen if you
have not made any settings for a long time after
activation.
‒ When the door is open, the interior lighting
switches off after a short time.
Microwave
Microwaves are converted to heat in foodstuffs. The
microwave can be used solo, i.e. on its own, or in
combination with a different type of heating.
Note: In the Tables and tips section, you will find
examples for defrosting, heating and cooking with the
microwave oven.
Notes regarding ovenware
Suitable dishes are heat-resistant ovenware made of
glass, glass ceramic, porcelain, ceramic or heatresistant plastic. These materials allow microwaves to
pass through. You can also use serving dishes. This
saves you having to transfer food from one dish to
another. You should only use ovenware with decorative
gold or silver trim if the manufacturer guarantees that
they are suitable for use in microwaves.
Metal ovenware is unsuitable. Metal reflects
microwaves. Food in covered metal containers will
remain cold.
Caution!
Metal e.g. a spoon in a glass must be kept at least 2
cm from the oven walls and the inside of the door.
Sparks could irreparably damage the glass on the
inside of the door.
Ovenware test: Do not switch on the microwave unless
there is food inside. The following ovenware test is the
only exception to this rule. Perform the following test
if you are unsure whether your ovenware is suitable for
use in the microwave: Heat the empty ovenware at
maximum power for between 30 and 60 seconds.
Check the temperature of the ovenware during this
period. The ovenware should still be cold or warm to
the touch. The ovenware is unsuitable if it becomes
hot or sparks are generated.
Microwave output setting
You can select the following microwave output
settings:
Note: The microwave output can be set to 1000 watts
for a maximum of 30 minutes. A duration of 90 minutes
is possible with all other output settings.
90 W For defrosting delicate foods
180 W For defrosting and continued cooking
360 W For cooking meat and heating deli-
cate foods
600 W For heating and cooking food
1,000 W For heating liquids
13
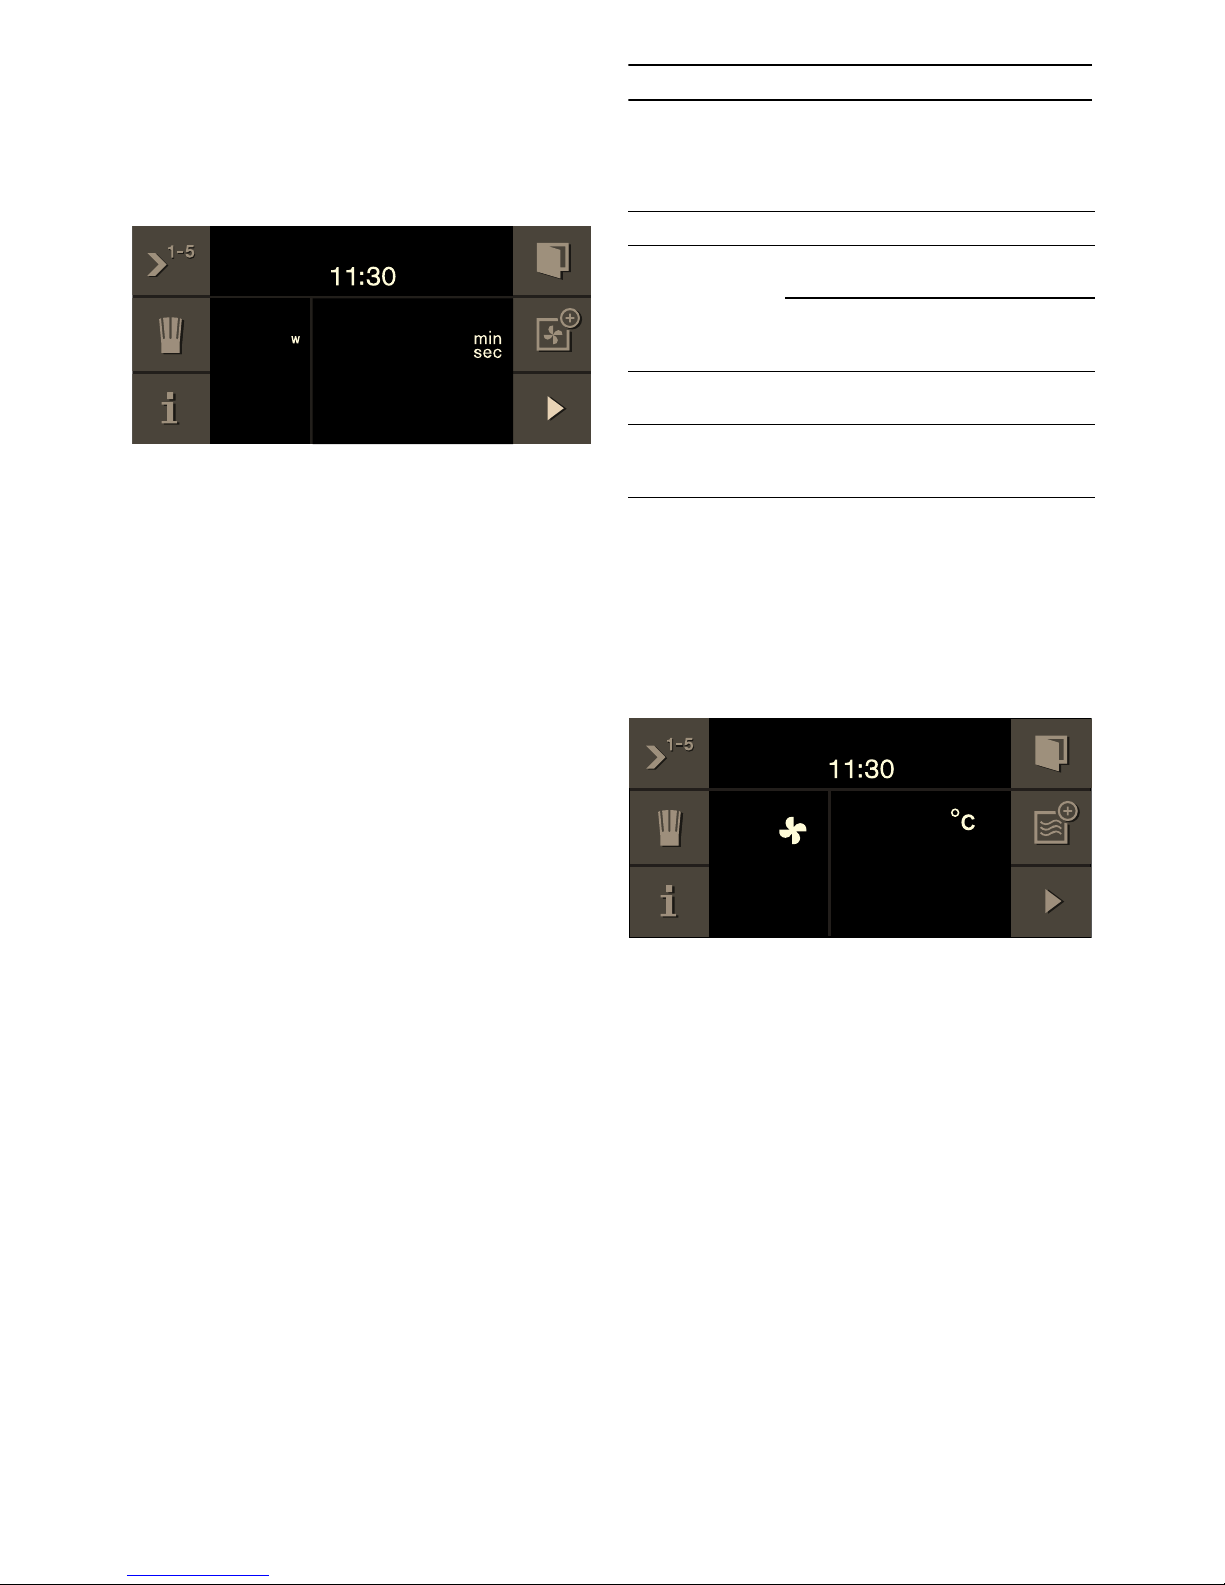
Setting the microwave
1 Set the required microwave output setting using
the function selector.
2 Set the cooking time using the rotary selector.
3 Press
I to start.
The operation begins. The cooking time starts
counting down.
An audible signal sounds once the cooking time has
elapsed. The signal stops early if you touch the ™
symbol, open the appliance door, or set the function
selector to 0. The microwave operation has finished.
If you open the oven door during operation, the
microwave operation is paused. After closing the door,
touch the
I symbol. The operation continues.
You can change the cooking time at any time using the
rotary selector.
You can change the output at any time using the
function selector. Press I to restart.
You can call up the elapsed cooking time using the (
symbol. Touch the ™ symbol to return to the standard
display.
Pause:
The operation can be paused using the H symbol. Use
the I symbol to continue.
Switching off:
To stop the operation and cancel the settings, turn the
function selector to 0.
Note: It is normal for the fan to continue operating
even when the door is open.
Oven
In oven mode, you can select from the following types
of heating:
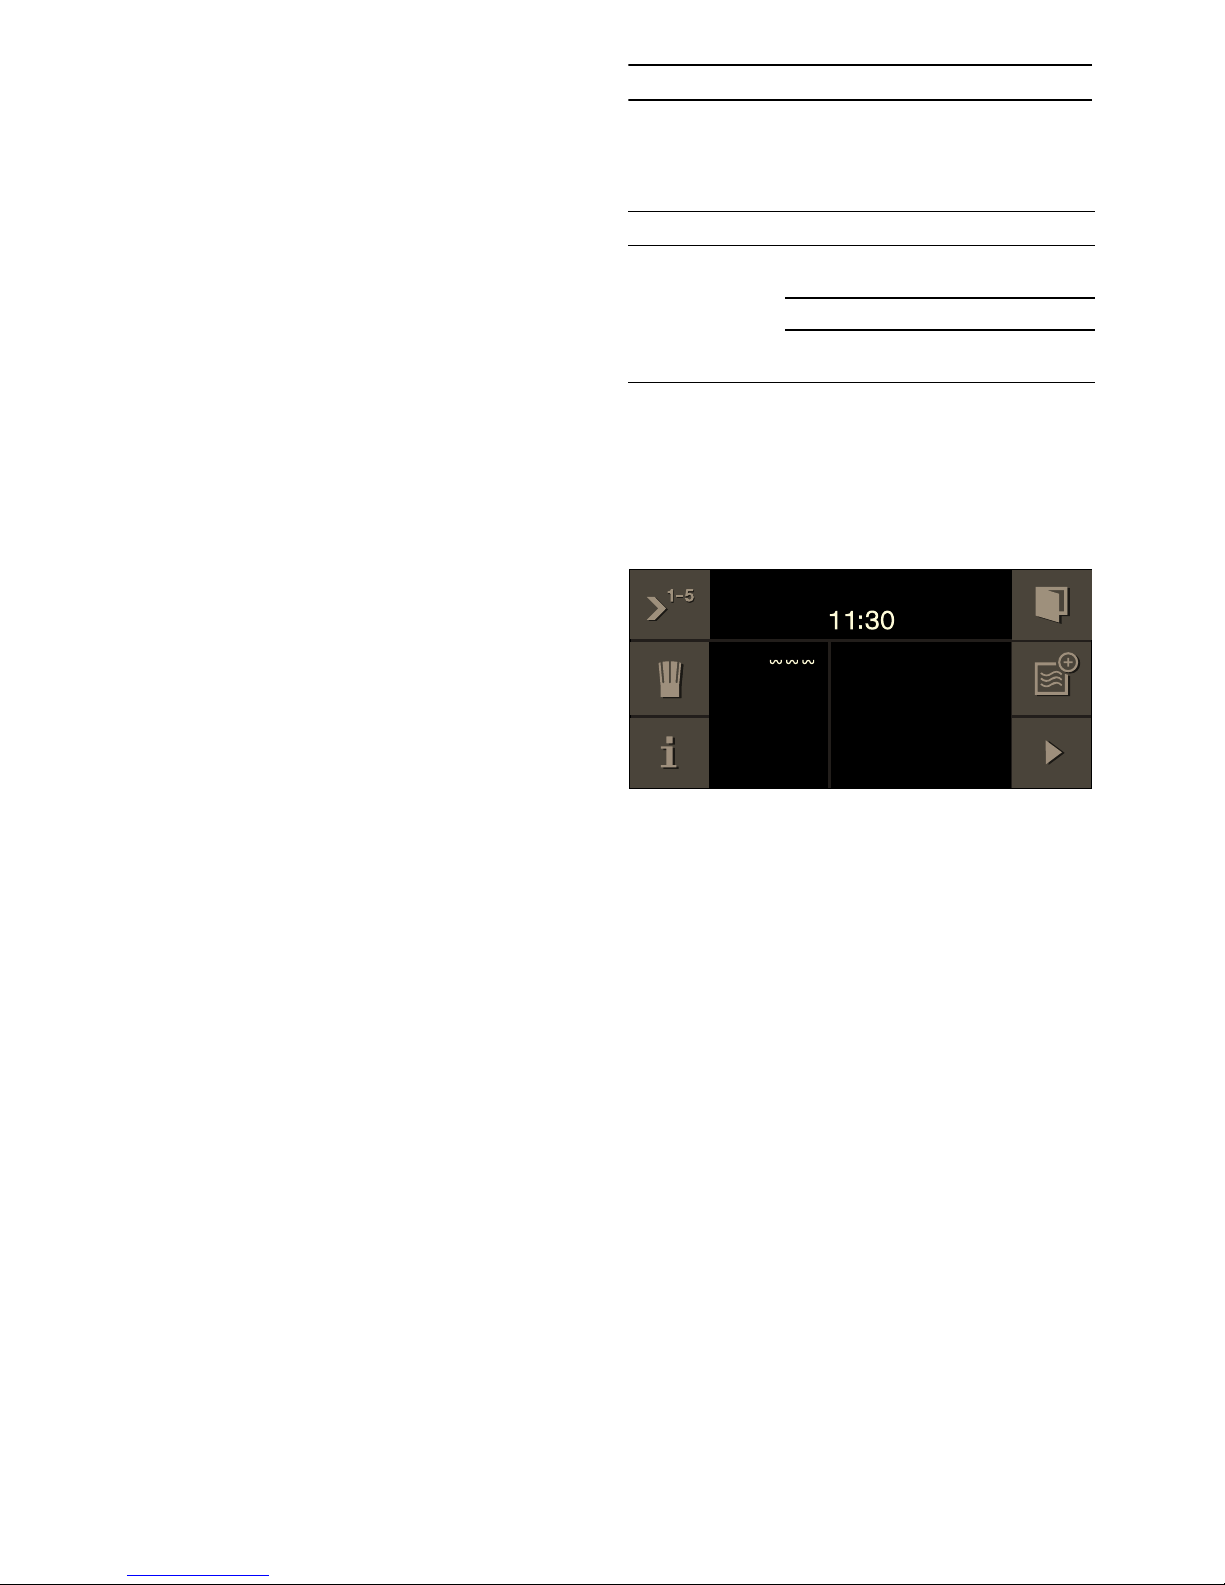
Setting the heating function and
temperature
1 Use the function selector to set the required
heating function, e.g. "Hot air".
The H symbol for "Hot air" and the default
temperature 180 °C appear in the display.
2 Set the temperature using the rotary selector.
Note: If required, you can now set the cooking
time for your dish and delay the cooking-time end
to a later time. Touch the h symbol; the
sequential operation menu is displayed. Use C to
select and set the 6 "Cooking time" function.
Use C to select and set the 5 "Cooking-time
end" function.
You can find more detailed information on this in
the Sequential operation section.
3 Press I to start.
The “ heat-up symbol appears in the display (only
after the oven temperature has been set to 100 °C).
The bars continuously display the heating status.
When the set temperature has been reached, a signal
sounds and the “ heat-up symbol goes out.
If the "Rapid heating" function is activated, the ’
symbol for "Rapid heating" appears.
Note: You can activate or deactivate a heat-up signal
in the basic settings. This signal sounds when the
required temperature is reached.
Type of heating Temperature Use
H Hot air 40 °C Proving yeast dough,
defrosting cream cakes
100-250 °C Baking cakes, small
baked products and
pizza on the glass tray
R Full surface
grill + hot air
100-250 °C Roasting pieces of
meat
Z Full surface
grill + circulated air
100-250 °C For bakes, toppings
and whole poultry
14
You can change the temperature at any time using the
rotary selector.
You can change the heating function at any time using
the function selector. Press I to restart.
Pause:
The operation can be paused using the H symbol. Use
the
I symbol to continue.
Switching off:
To stop the operation and cancel the settings, turn the
function selector to 0.
Calling up the current temperature:
Touch the ( symbol to display the current oven
temperature for several seconds (from 100 °C). Use
the ™ symbol to return to the standard display.
Note: During continuous operation after heating up,
slight deviations in temperature are normal,
depending on the heating function.
Rapid heating
The "Rapid heating" function brings your appliance to
the desired temperature quickly.
To ensure an even cooking result, only put your food in
the cooking compartment when the "rapid heating"
phase is complete.
You must activate the "Rapid heating" function in the
basic settings (refer to the Basic settings section).
Safety shut-off
For your protection, the appliance is equipped with an
automatic safety shut-off. Any heating process is
switched off after 12 hours if the oven is not operated
in this time. A message appears in the display.
Exception:
The long-term timer has been programmed.
Set the function selector to 0, then the appliance can
be operated again as usual.
Full surface grill
In grill mode, you can select one of three grill
settings:
Setting the full surface grill
1 Use the function selector to set the full surface
grill.
The Q full surface grill symbol and grill setting 3
appear in the display.
2 Use the rotary selector to set the grill setting.
Note: If required, you can now set the cooking
time for your dish and delay the cooking-time end
to a later time. Touch the h symbol; the
sequential operation menu is displayed. Use C to
select and set the 6 "Cooking time" function.
Use C to select and set the 5 "Cooking-time
end" function.
You can find more detailed information on this in
the Sequential operation section.
3 Press I to start.
You can change the grill setting at any time using the
rotary selector.
You can change the operation mode at any time using
the function selector. Press I to restart.
Pause:
The operation can be paused using the H symbol. Use
the I symbol to continue.
Switching off:
To stop the operation and cancel the settings, turn the
function selector to 0.
Heating function Grill setting Use
Q Full surface
grill
1 (low) For soufflés and deep
bakes
2 (medium) For flat bakes and fish
3 (high) For steaks, sausages
and toast
 Loading...