

GADGETREE DIGITAL DOOR PEEPHOLE
Operating Instructions
8069219
Thank you for choosing the Gadgetree Digital Door Peephole.
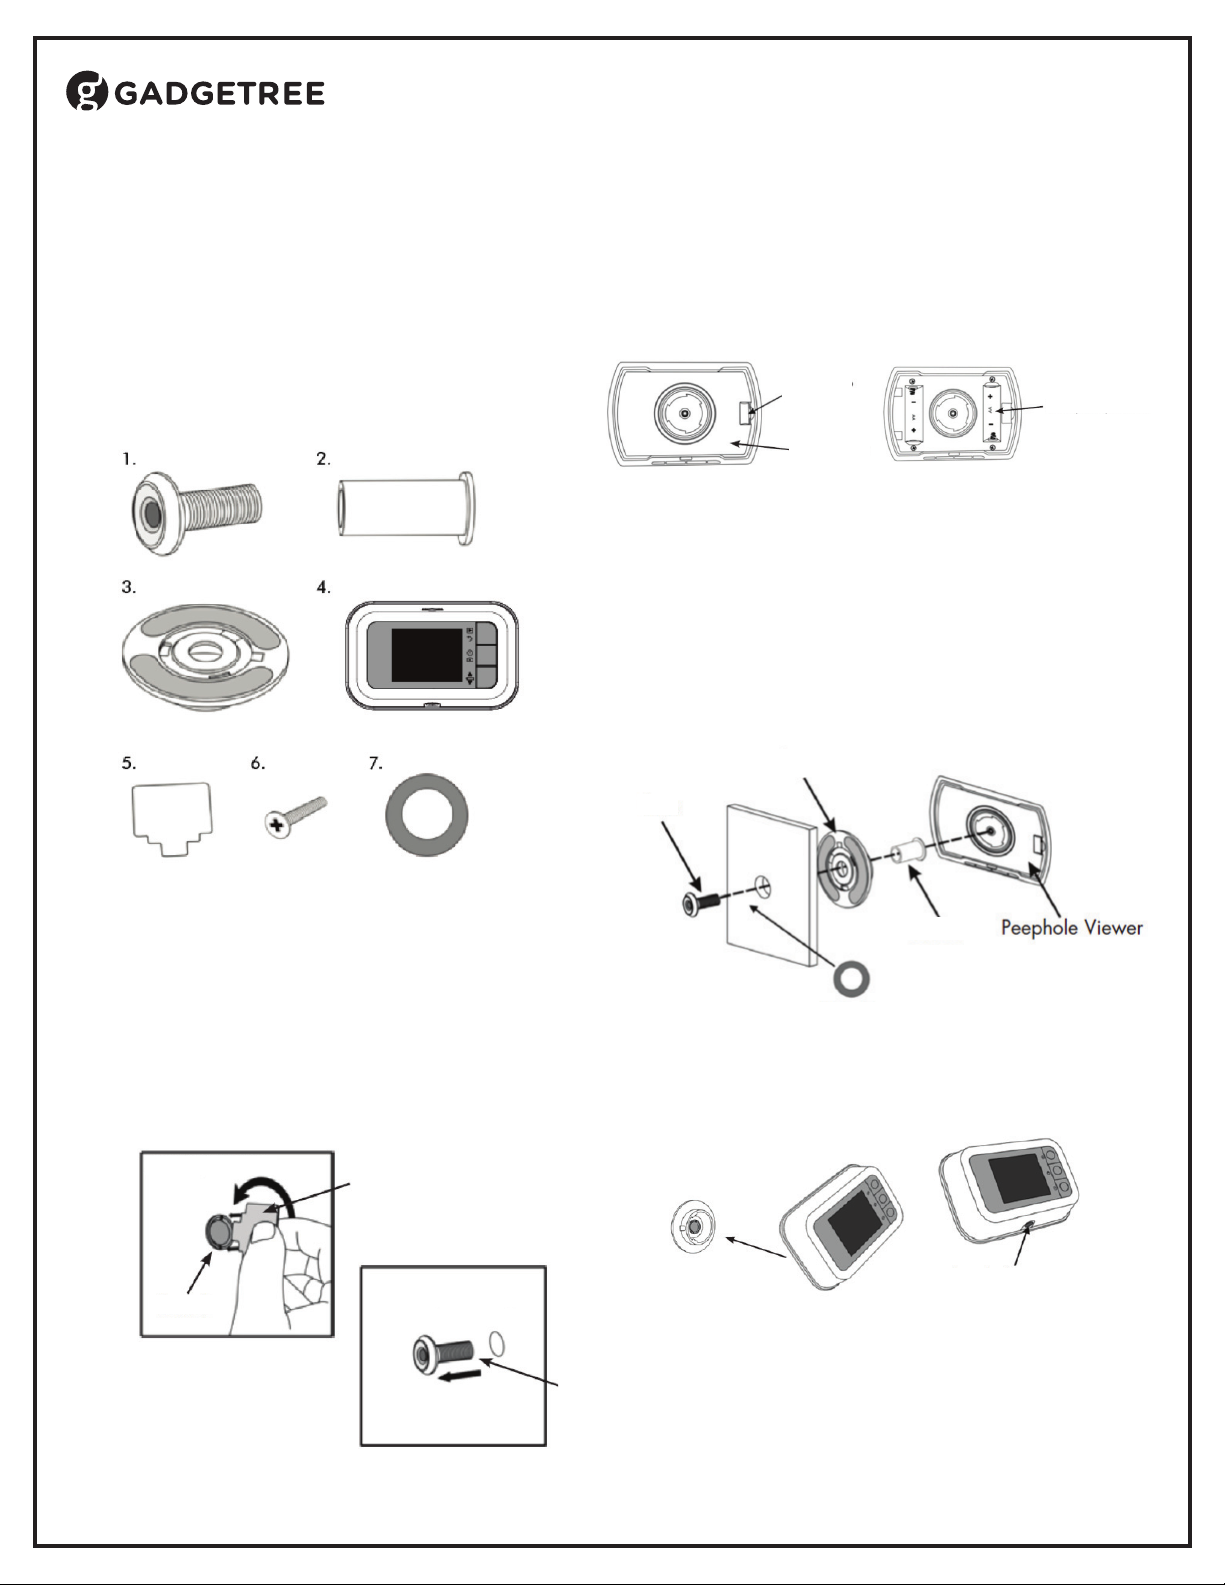
IDENTIFYING THE PARTS
1. Lens
2. Barrel
3. Base Flange
4. Digital Peephole Viewer
5. Remove/Install Tool
6. 2 x Locking Screws
7. Washer
INSTALLATION
• Remove the battery cover from the peephole viewer by pressing down
and pulling the side tab. Insert 2 AA batteries (not included) according
to the polarity (+/-) marked in the battery compartment. Replace battery
cover. We recommend Infi niCell batteries for maximum performance
Side tab
Battery cover
Note: For holes wider than 9/16" (14mm), place the washer over the
existing hole before inserting the lens. For narrow holes, use a 9/16"
(14mm) bit to widen the existing hole.
• Remove any debris before proceeding with installation
• Insert the new lens through the front side of the door
• Pass the barrel through the base fl ange and insert the barrel into the
hole on the backside of the door. With your other hand press on the
new lens, and turn the barrel with your hand clockwise until it begins to
tighten. Note: Before completely tightening the barrel, make sure the
engraved arrowhead on the base fl ange is pointing upward at the 12
o’clock position. Use the Remove/Install Tool to tighten
• Place the peephole viewer over the base fl ange at an angle as shown
below
Flange
Lens
Door
Battery
compartment
INSTALLATION
FOR DOORS WITH NO EXISTING PEEPHOLE
• Find the centre of the door and mark at the desired height
• Drill a 9/16" (14mm) hole through the door using a standard power drill
• Remove any debris from the hole and proceed to INSTALLATION
FOR DOORS WITH AN EXISTING PEEPHOLE
Remove Existing Peephole Viewer
• Use the Remove/Install Tool to loosen the eyepiece on your existing
peephole. Insert the small tip of the tool into the barrel and turn it
counterclockwise. Once the barrel is loosened, use your fi ngers to
unscrew it from the backside of the door.
Note: You may have to hold the lens with your other hand while you
remove the barrel
Door (Inside)
Barrel
• Pull to remove the existing lens
from the front side of the door
Remove/Install
Door (Outside)
Lens
Barrel
Washer
• Rotate the peephole viewer clockwise until it stops
• Insert the locking screw into the screw hole located on the underside
of the peephole viewer. Tighten the locking screw with a Phillips
screwdriver to securely lock the peephole viewer into place
Base fl ange
Insert locking
screw here
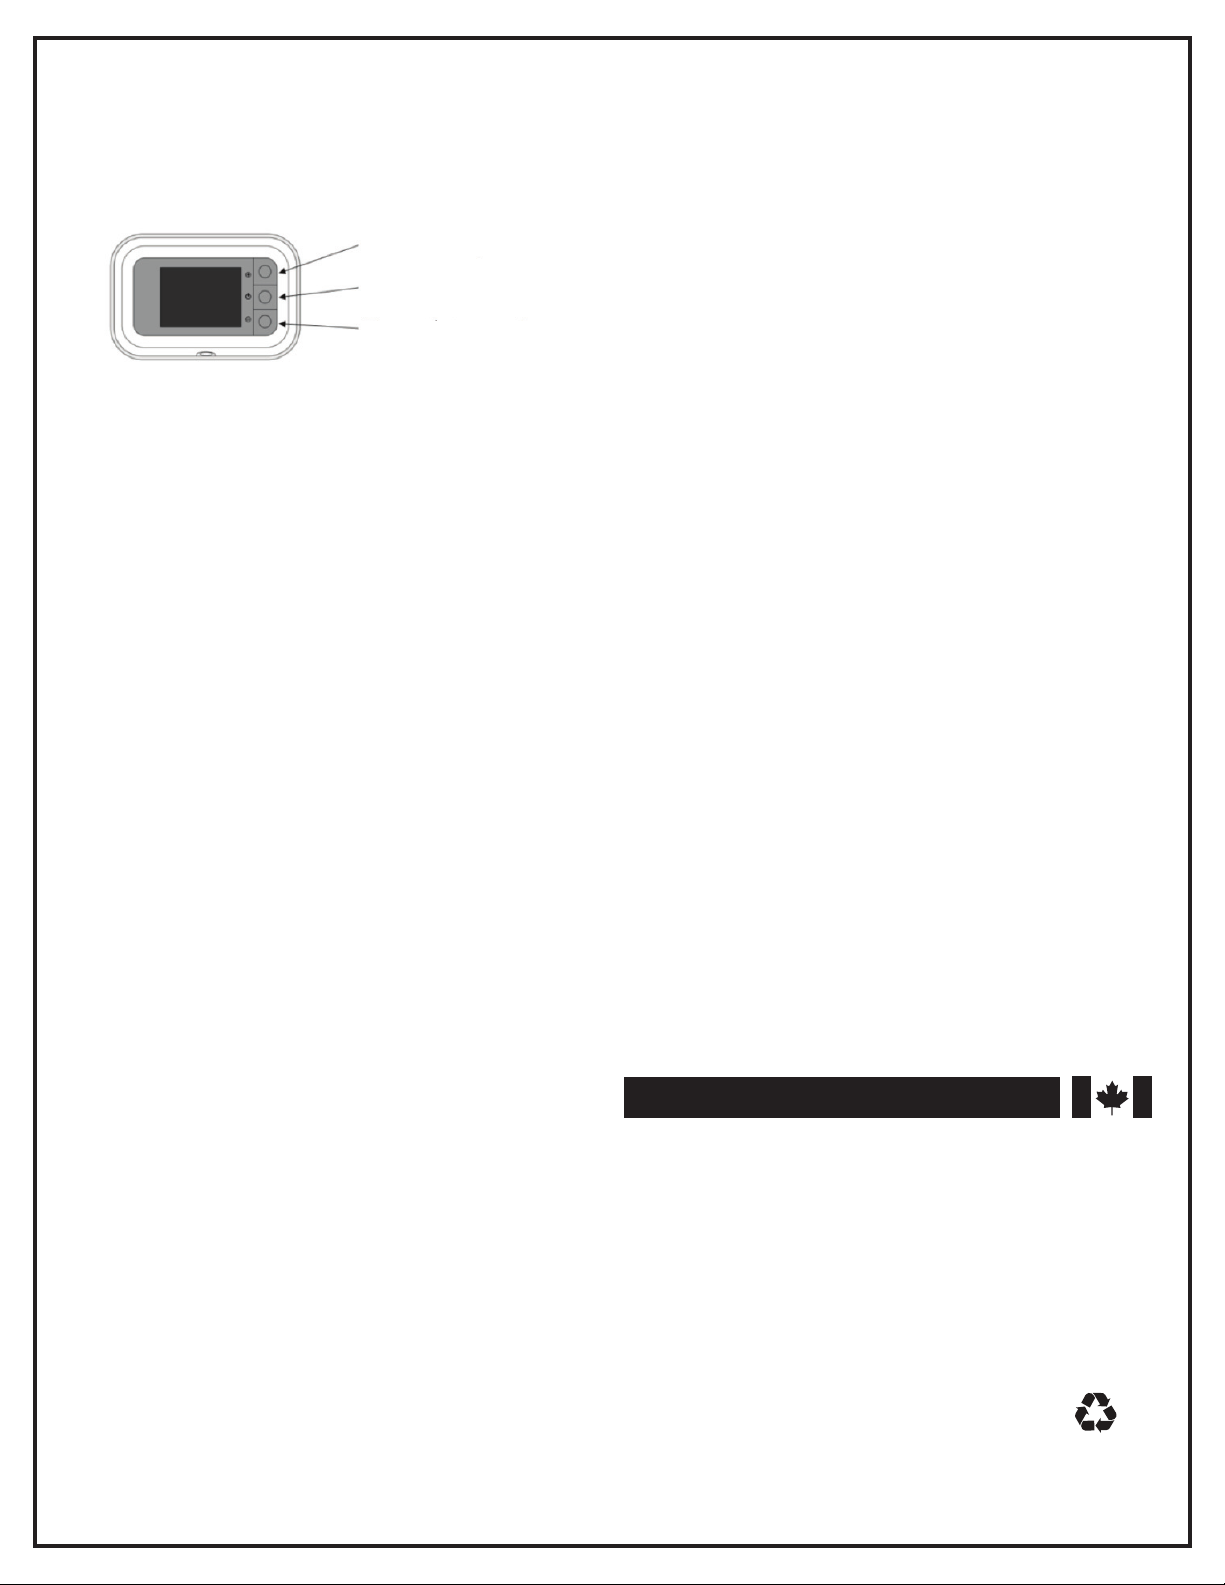
OPERATION
• To operate, press the ON button. The LCD screen will turn ON in 3
seconds. Press the (+) button to zoom in. Press the (-) button to zoom
out. Note: The screen will automatically turn off after 13 seconds
Zoom in up to 3x
ON/OFF
Zoom out up to 3x
THE SOURCE – WARRANTY
The Source warrants that this product will be free from defects in materials
and workmanship for a period of six (6) months from the date of purchase.
Within this period, simply take the product and your proof of purchase
to any The Source store or participating dealer and the product will be
replaced (where available) without charge. Any product which has been
subject to misuse or accidental damage is excluded from this warranty.
This warranty is only applicable to a product purchased through The Source
company-owned stores or participating dealers in Canada where the warranty is included with the product. While this warranty does not confer any
legal rights other than those set out above, you may have additional statutory rights which will vary under the laws of the various countries, states,
provinces and other governmental entities in which The Source operates.
This warranty is subject to all statutory rights you may have in Canada.
Imported by:
The Source,
Barrie, Ontario, Canada, L4M 4W5
Manufactured in China
www.thesource.ca
Please Recycle
© 2017 The Source
All rights reserved.
 Loading...