

Futura Stainless Steel, Hard Anodised Operating Instructions Manual
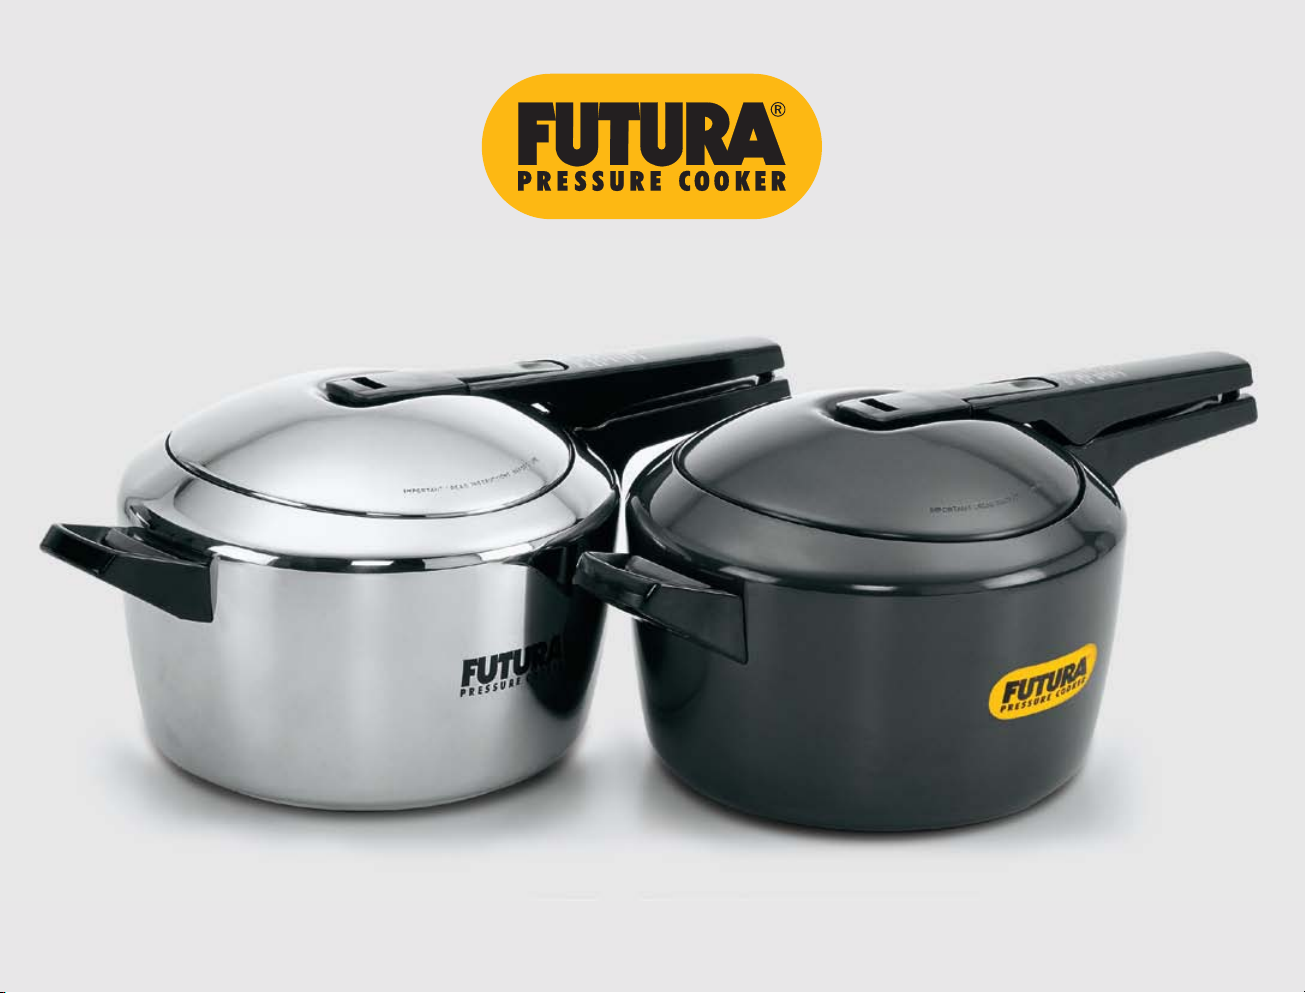
OPERATING INSTRUCTIONS
STAINLESS STEEL HARD ANODISED

IMPORTANT SAFEGUARDS
1. Read all instructions.
2. Do not touch hot surfaces. Use handles.
3. Close supervision is necessary when the
pressure cooker is used near children.
4. Use the appropriate heat source(s)
according to the instructions for use.
5. Do not place the pressure cooker in a
heated oven.
6. Do not wash the hard anodised Futura
Pressure Cooker in a dishwasher. The body
and grid of the Futura Stainless Steel Pressure
Cooker may be washed in a dishwasher; do
not wash the lid, sealing ring or pressure
regulator in the dishwasher.
7. Extreme care must be used when moving
a pressure cooker containing hot liquids.
8. Do not use pressure cooker for any use
other than its intended use.
9. This appliance cooks under pressure of
103 kPa (15 lbs/in
in scalding injury. Do not use it unless it is
properly closed. See “How to Close the Futura”
on page 3.
10. Always check that the steam vent is
clear immediately before closing the lid for
pressure cooking.
11. The pressure regulator is an accurately
weighted device to regulate operating
pressure. Never place anything over the
pressure regulator while cooking.
12. When starting to pressure cook, close the
lid WITHOUT the pressure regulator in position
on the steam vent. Place the pressure regulator
on the steam vent ONLY AFTER steam starts to
2
). Improper use may result
come out of the steam vent steadily. See “Trial
Run” on page 10.
13. As a general rule, place a minimum of one
cup water for the first 10 minutes of pressure
cooking time and one-half cup for every
subsequent 10 minutes or part thereof. Total
contents including water should not exceed
as stated in the next point.
2
14. Do not fill the unit over
cooking foods that expand during cooking
such as rice or dried vegetables, do not fill the
unit over
which sprout, never fill the cooker more than
1
/3 full. Over filling may cause a risk of clogging
the steam vent and developing excess pressure.
See Food Preparation Instructions i.e. “Product
Information” on page 7.
15. Be aware that certain foods, such as
applesauce, cranberries, pearl barley, oatmeal
or other cereals, split peas, noodles, macaroni,
rhubarb, or spaghetti can foam, froth and
sputter, and clog the pressure release device
(steam vent). These foods should not be
cooked in a pressure cooker.
16. After cooking meat with a skin which may
swell under the effect of pressure, do not prick
the meat while the skin is swollen; you might
be scalded.
17. When the normal operating pressure is
reached, turn the heat down so all the liquid,
which creates the steam, does not evaporate.
18. Never attempt to force open the pressure
cooker. Do not open the pressure cooker until
the unit has cooled and internal pressure has
been released. If the handles are difficult to
move apart, this indicates that the cooker is
still pressurized – do not force it open. Any
1
/2 full. When cooking dal/pulses
/3 full. When
pressure in the cooker can be hazardous. See
Operating Instructions i.e. “Futura Cooking Tips”
on page 14.
19. Never use fingertip control of pressure
regulator for reducing pressure in the case of
liquid or frothing foods.
20. Do not use the pressure cooker for
pressure frying with oil.
21. Never use the hard anodised cooker body
for deep frying or light frying for more than
20 minutes at a time or as an oven for dry
heating or baking, since the strength of the
metal may decrease to a dangerous level. With
a stainless steel pressure cooker, dry heating
may damage the bottom cladding.
22. The safety valve fuses and operates
automatically in the event of excess pressure.
If it fuses, please shut off the heat. When cool,
replace the safety valve with a genuine Futura
safety valve. See page 33.
23. Do not attempt to make any changes to
the pressure regulator and safety valve. Repairs
other than the replacement of sealing ring,
plastic handles, safety valve and the pressure
regulator must be done only by an authorised
person. All replacement parts must be genuine
Futura parts.
24. In case of use on an electric hot plate, use
a plate of diameter equal to or less than that
of the base of the pressure cooker.
25.
SAVE THESE
INSTRUCTIONS.
1
FUTURA PRESSURE COOKER
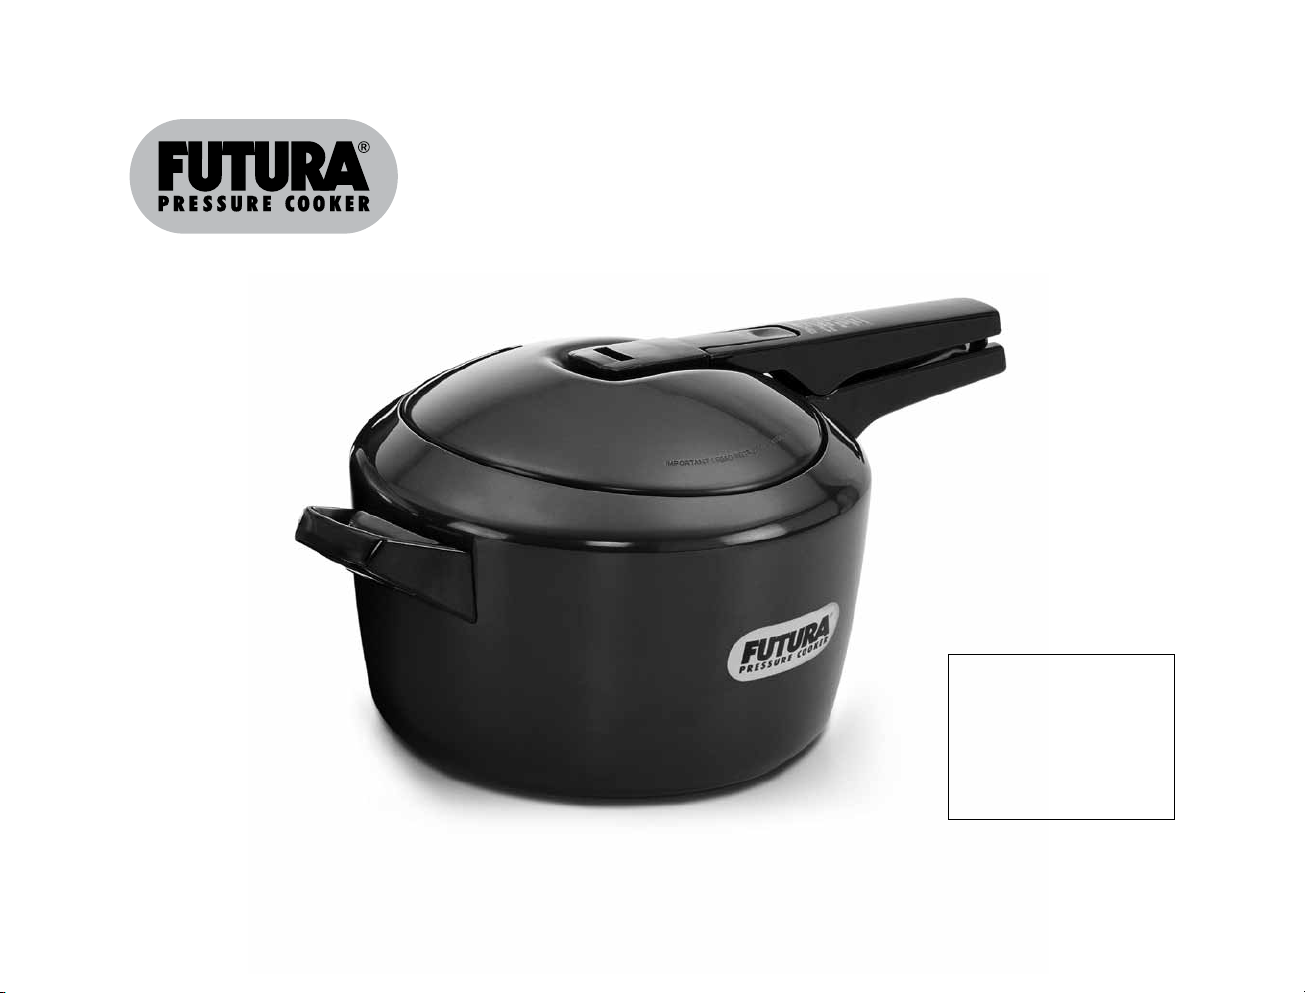
OPERATING INSTRUCTIONS
All the photographs in this
Manual except on the cover
are of the hard anodised
Futura Pressure Cooker and its
accessories but the functions
and methods demonstrated
apply also to the Futura Stainless
Steel Pressure Cooker.
Hawkins Cookers Limited is the proprietor of the trademarks ‘Hawkins’ and ‘Futura’ in India and in various other countries throughout the world. The Futura pressure cooker is manufactured by Hawkins
Cookers Limited, Maker Tower F 101, Cuffe Parade, Mumbai 400 005, India. Design registered in Benelux 15533. 2011 Copyright reserved. All Rights Reserved. Edited and published by Neil Vasudeva on
behalf of Hawkins Cookers Limited. Printed in 2011 at Usha Multigraphs Pvt. Ltd., Lower Parel, Mumbai 400 013.
2
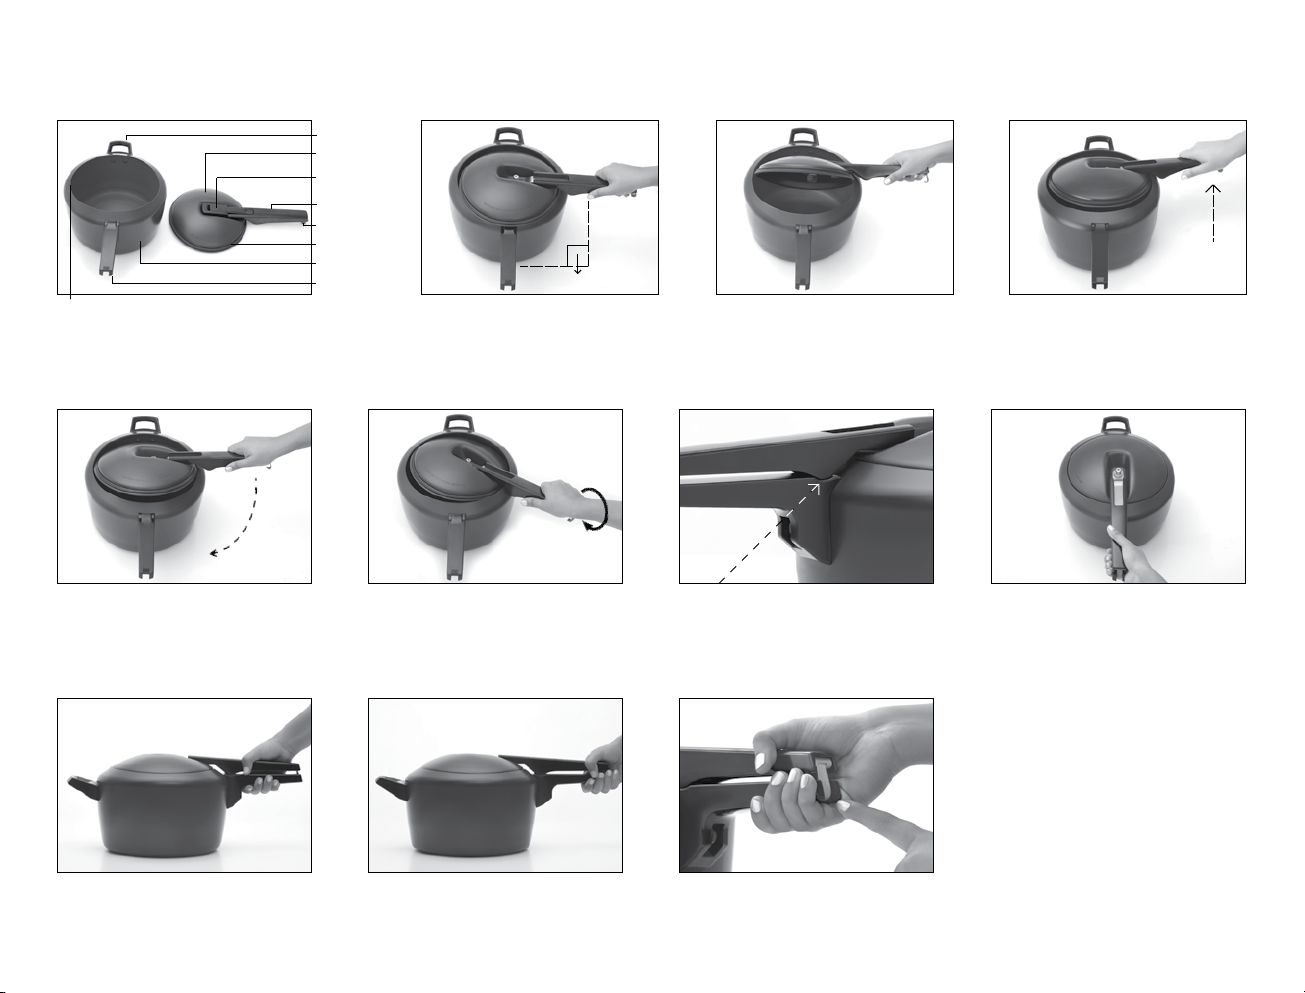
Parts of the pressure cooker
How to Close the Futura
1
The opening of the cooker body –
which is oval and not round – is a
special design for maximum safety.
Remove the pressure regulator
from the lid (see page 7).
5
Move lid handle towards
body handle.
Short handle
Lid
Pressure
regulator
Lid handle
Latch
Sealing ring
Cooker body
Body handle
Lower rest of lid into cooker body
by slight twist of wrist of hand
holding lid handle.
2
Place the lid above the opening
of the cooker body. The lid
handle must be at the right
angle to the body handle.
The right angle
3 4
Wrong
Lower the side of the lid nearest the short handle into the cooker. Do
not tilt the lid deeply. The minimum tilt that will get the lid into the
cooker body should be used so that the lid does not touch the food
inside the cooker. Push the lid forward toward the short handle till it
touches the wall of the cooker body.
76
Place the lid handle on the body
handle. Hold on to lid handle.
8
Centralize the lid. Ensure the
sealing ring is correctly aligned
with the opening.
Right
9
Difficult
Squeeze the lid handle and body handle together at the end. This requires the
least force.
10
Easy
3
11
Before pressure cooking, see
and follow instructions on Trial
Run, pages 10 and 11.
By now, the handles should have
latched automatically. If not, latch
the handles.

How to Open the Futura
1 2
5
Wrong Right
Hold the lid handle. Lower the lid slightly into the cooker. Do not tilt the lid
deeply. The minimum tilt that will get the lid out of the cooker body should
be used so that the lid does not touch the food inside the cooker.
Lid
Pressure
regulator
Lid handle
Latch
Body handle
Cooker body
Short handle
Difficult Easy
Squeeze the lid handle and body handle together at the end. This requires
the least force.
3 4
76
Push the lid forward towards the
short handle.
Release the latch.
8
Move the lid handle to the right,
to the position shown and...
9
Raise lid edge out of cooker body
with a slight twist of wrist of hand
holding lid handle.
10
Move the lid handle to the right.
As you move the lid handle, raise
the lid edge out of the cooker body.
11
For additional steps to be
taken to open the Futura after
pressure cooking, see page 11,
Trial Run, steps 7 and 8.
The right angle
When the lid handle is at the right
angle to the body handle, remove
the lid toward you.
4

CONTENTS
Useful General Information
PAGE
IMPORTANT SAFEGUARDS 1
How to Close the Futura 3
How to Open the Futura 4
Useful General Information 5
Product Information: Getting to Know Your Futura 7
Trial Run 10
Futura Cooking Tips 12
Measurements 15
Pressure Cooking Time Charts 16
Rice 16
Meat 18
Poultry 19
Seafood 19
Vegetables 20
Legumes 22
Using Grid, Separators and Molds 25
Care and Cleaning 27
What to Do if This Happens 29
Capacity/Volumes for the Futura Pressure Cookers 29
Special Instructions for the
Futura Stainless Steel Pressure Cooker 30
Parts and Service 32
Do-it-Yourself Repairs 33
Principles of Pressure Cooking
Ordinary open-pot cooking is done at the boiling point of water
which produces steam at sea level at 100°C (212°F). Pressure cooking
works by sealing the steam in a pot so that there is a rise in pressure to
a safe, controlled extent which raises the boiling point of water and
therefore the cooking temperature. The steam permeates through the
food, tenderising it, infusing it with flavour, preserving nutrients, colour,
texture and juices and cooking much faster. The Futura Pressure Cooker
cooks food at 121°C (250°F) at a pressure of 15 lb per square inch
(1 kg per square cm).
Benefits of Futura Pressure Cooking
Futura pressure cooking can reduce normal cooking times by as
much as half. Economical foods such as legumes (lentils, dried peas
and beans) and tough cuts of meat can be cooked to perfection in a
fraction of the normal time. Because food cooks faster in a pressure
cooker, you save fuel, and therefore money. Scientific literature indicates
that certain nutritive elements such as proteins and vitamins are better
retained by pressure cooking. Steaming is ideal for low-calorie, low-fat
cooking. The higher temperature while pressure cooking gives more
hygienic food. Closed cooking in steam under pressure may better evoke
the natural flavours of the food – producing delicious results. A wide
range of foods, whether parts of recipes or entire meals, can be cooked
in your Futura.
5

Advantages of Futura
Beautifully integrated form and function
Stay-cool Handles
Safe
Pressure-locked Safety Lid. When there is pressure inside the
•
cooker, the lid is pressure-locked like a modern jetliner door.
It cannot be opened until the pressure has fallen to a safe level.
Automatic Safety Valve is positioned such that, if it operates, the
•
steam and food are deflected safely downwards.
Unique Pressure Regulation
•
The pressure regulating system gives you the convenience of
direction-controlled, fingertip pressure release and minimizes
clogging of the steam vent.
Two Maximum Food Level Lines are marked inside the cooker
•
body for convenience when filling and for safety to avoid overfilling.
Trouble-Free
Longer Lasting Sealing Ring. As the lid fits from inside, the
•
sealing ring does not get rubbed sideways every time the pressure
cooker is opened or closed. Also, the sealing ring is not exposed to
food acids in the pressure cooker due to the protection given to it
by the rim of the lid.
The Futura Pressure Cooker
The Futura Pressure Cooker has a beautiful, durable black finish
given by 60 micron thick hard anodising which will not tarnish, pit
or corrode. The hard anodised finish stays looking new for years and
allows the pressure cooker to absorb heat faster making it more
energy-efficient. The base of the Futura is 6.35 mm thick.
The Futura Stainless Steel Pressure Cooker
The Futura Stainless Steel Pressure Cooker is made of high quality,
polished, durable stainless steel. It has a 7 mm thick base which contains
a 4.9 mm thick aluminium disc sandwiched in stainless steel for
efficient heat dispersion.
DO NOT ATTEMPT TO COOK IN THE FUTURA WITHOUT FIRST
READING CAREFULLY THE REMAINING INSTRUCTIONS.
Extra-thick Base
•
The base stays flat and heats quickly and evenly. It is ideal for light
frying before pressure cooking and for quick and economical cooking
on electric, gas, ceramic and halogen stoves.
Rust Proof Components. The Futura Pressure Cooker has stainless
•
steel handle bar and handle brackets to withstand rust.
6
Product Information: Getting to Know Your Futura
Illustrated instructions on how to close and open the Futura
are given on page 3 and page 4. Closing and opening is easy once you
have understood it and practiced it a few times.
The stated volume of all pressure cookers is that of the cooker body.
Cooking capacity in a pressure cooker is less than its full volume. The
pressure cooker body should never be filled more than two-thirds its
capacity. This is to safeguard against blocking the steam vent and to
leave enough space to allow steam to circulate. Certain foods, however
– liquid foods such as soups and foods such as lentils, beans, and rice
which expand during cooking and/or froth – should not be loaded more
than half the capacity of the cooker body. Any food which froths
excessively and sprouts out of the cooker – such as soybeans and Indian
lentils (especially tuvar dal and moong dal) – should not be loaded more
than one-third the capacity of the cooker; if sprouting still occurs,
reduce quantity further suitably until sprouting stops. The two-third
and half levels are indicated inside the cooker body as ‘Maximum Food
Level’ and ‘Maximum Food Level for Certain Foods’ respectively.
The volumes of the two-thirds, half and one-third capacities for each
size of Futura pressure cooker are given in a chart on page 29.
The cooker body comes fitted with a body handle screwed on to a
body handle bracket attached to the cooker body. There is a short
body handle (except for 2 Liter and 3 Liter models) attached to the
cooker body, which helps carry the cooker when it is loaded.
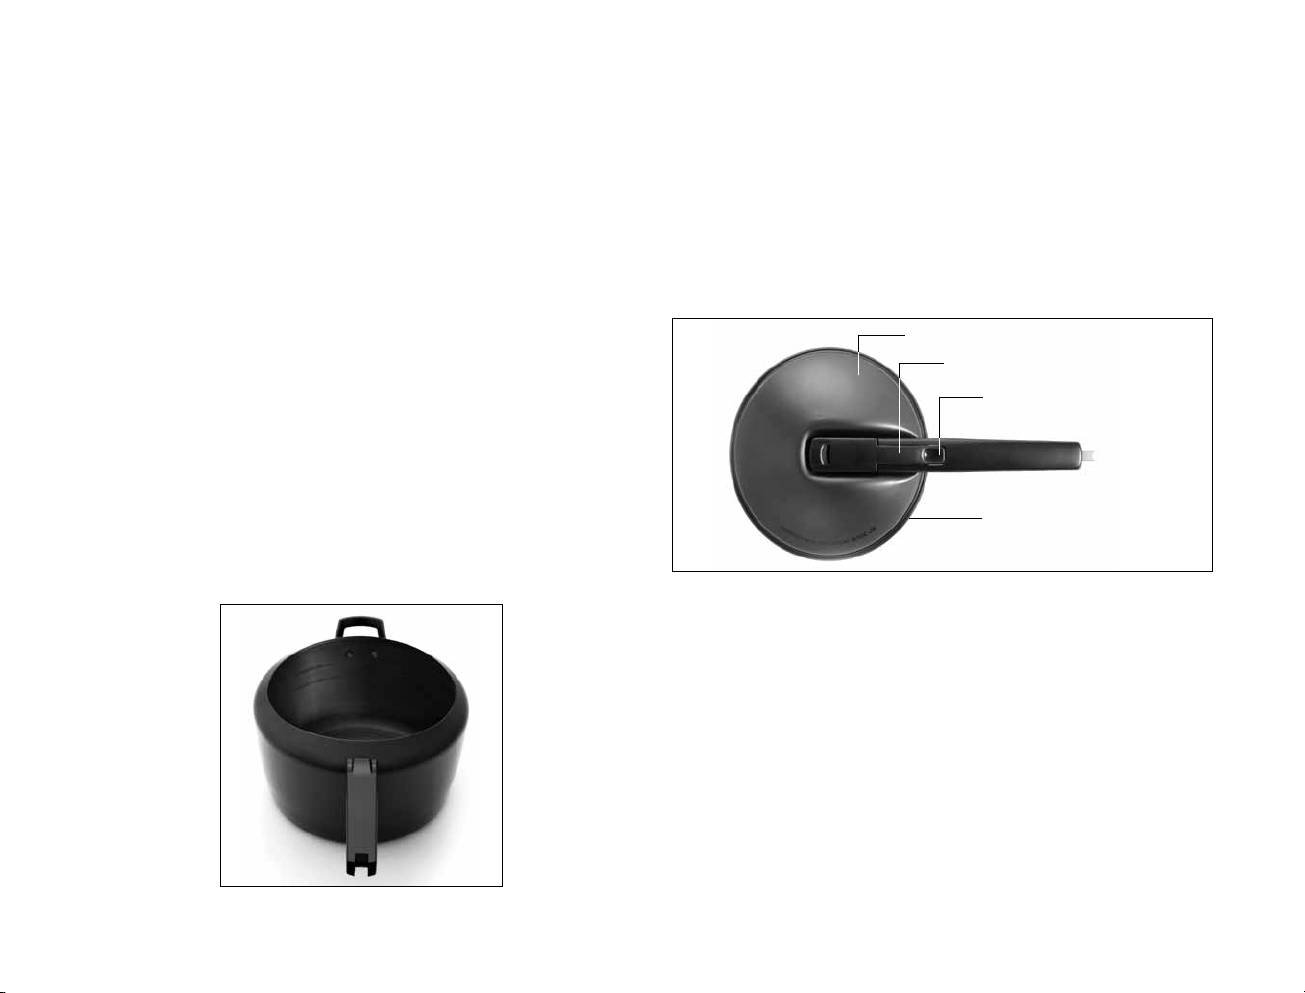
LID
pressure reguLator
fIngertIp controL
seaLIng rIng
LID ASSEMBLY
The lid comes assembled with the detachable pressure regulator
and sealing ring. The pressure regulator automatically maintains the
cooking pressure of about 15 pounds per square inch/psi (1 kg per square
cm) and can be used for pressure release by fingertip control. The
pressure regulator has a light spring clip strong enough to prevent it
falling off should the lid be inverted. To remove the pressure regulator
from a hot lid: invert the lid; grasp the narrow end which drops lower
than the handle with the fingertips and gently twist off.
MAXIMUM FOOD LEVELS
7

INVERT LID...
GRASP NARROW END AND TWIST OFF
When attaching the pressure regulator, it must be placed on the
steam vent and pressed into position. When the pressure regulator is
pressed down on the steam vent, there is a slight click which indicates
the pressure regulator is in the correct position. To place the pressure
regulator on to the steam vent if the lid is hot: hold the narrow part of
the pressure regulator between thumb and middle finger; place on steam
vent; press pressure regulator until it fits into position with a click.
HOLD BETWEEN THUMB AND
MIDDLE FINGER...
PLACE ON STEAM VENT AND PRESS
DOWN FIRMLY UNTIL IT CLICKS
The rubber sealing ring, which comes fitted on the lid, can be
removed from the lid curl with the fingers. The sealing ring can be easily
fitted by first putting the lid handle through the sealing ring
and patting and pushing it down all along the lid curl until it is
seated properly. The sealing ring works best if the side with the words
‘’OTHER SIDE UP’’ faces down.
PUT THE LID HANDLE THROUGH THE
SEALING RING...
SETTLE IT COMFORTABLY
IN THE LID CURL
With the pressure regulator detached and sealing ring removed,
the top view of the lid shows the lid curl, the steam vent, the metal
handle and the plastic handle.
steam vent
metaL hanDLe
PRESSURE REGULATOR
LID curL
pLastIc hanDLe
The steam vent is the outlet for excess steam and seats the pressure
regulator, which clips on to it. The steam vent also attaches the metal
handle to the lid.
8

melts at the required temperature and releases pressure. The safety
valve can be replaced as shown on page 33.
MOVEMENT OF METAL HANDLE:
FRONT VIEW
MOVEMENT OF METAL HANDLE:
SIDE VIEW
The attachment of the metal handle to the lid is designed with
extra space for deliberate ‘’play’’ (movement) between the metal handle
and the lid to ensure proper sealing.
UNDERSIDE OF LID
STEAM VENT NUT
SAFETY VALVE
LID HANDLE SCREWS
LATCH
On the underside of the lid, the steam vent nut secures the steam
vent. The steam vent nut has thirteen holes so that even if a few holes
are clogged, the other holes will allow the escape of steam. Always keep
the steam vent clean and check before every use by looking through it.
FUSIBLE ALLOY...
...WHICH MELTS WHEN REQUIRED
The lid handle screws secure the lid plastic handle to the metal
handle. The outside screw also holds the latch at the end of the handle.
GRID
A grid comes with every Futura. The use of the grid is explained on
page 25.
If the normal escape of steam is blocked, the safety valve will
operate. The safety valve will also operate if there is insufficient water in
the pressure cooker and it boils dry, causing the temperature to rise
beyond the normal operating range. The fusible alloy in the safety valve
9

Trial Run
Even if you have used a pressure cooker previously, take a trial run
before cooking in your Futura. This section will take you step-by-step
through your trial run in about 30 minutes.
1. Preliminary Steps
Remove label and wash cooker, removing any adhesive with
vegetable oil. Read pages 1 to 9. Identify parts. Remove and place the
pressure regulator on the steam vent, the sealing ring on the lid curl.
Close and open the pressure cooker a few times.
2. Placing Cooker on Stove
Pour 2 cups/480 ml water in
cooker body. Remove pressure
regulator from steam vent. Look
through steam vent and ensure
it is clear.
Check and adjust the seating
of the sealing ring on the lid curl by
patting down snugly. Close cooker
(without pressure regulator). Place
STEAM VENT
cooker on high heat.
3. Placing the Pressure Regulator
Once steam is coming out of
the steam vent steadily, place the
pressure regulator on the steam vent
and press down firmly. Keep fingers
on the pressure regulator and away
from the steam when placing the
pressure regulator on the steam vent.
ONCE STEAM ISSUES STEADILY
FROM STEAM VENT...
A light click will tell you that the pressure regulator is in position.
PLACE PRESSURE REGULATOR
ON STEAM VENT
PRESS DOWN FIRMLY
UNTIL IT CLICKS
4. Ensuring a Steam-tight Seal
When water boils, hot air and/or steam should issue only from the
steam vent. If steam comes out around the edge of the lid, check the
centralization of the lid thus: unlatch and reposition the lid by moving
the lid slightly towards the spot where steam is escaping and relatch.
DO NOT TOUCH LID with bare hands since it will be hot.
WRONG: STEAM COMING
OUT FROM EDGE OF LID
RIGHT: NO STEAM
LEAKAGE
10
 Loading...