

Page 1
®
FUSIONENTERTAINMENT.COM
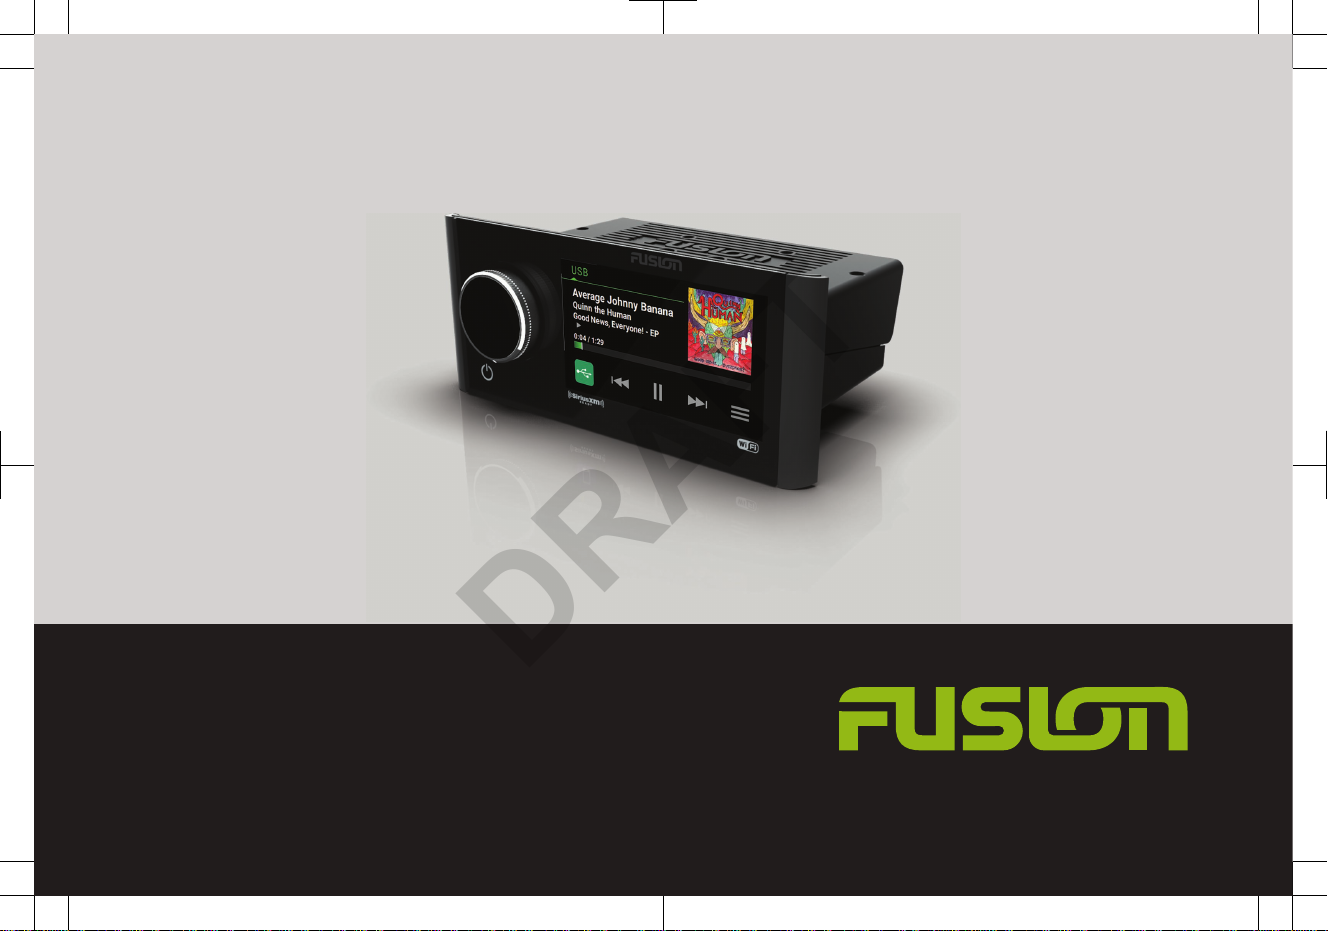
FUSION® Apollo 770
Quick Start Manual
ENGLISH
DRAFT
Page 2

Getting Started
WARNING
See the Important Safety and Product Information guide in the product box for
product warnings and other important information.
Stereo Controls
À
Dial • Turn to adjust the volume.
◦
When adjusting the volume, press to switch between zones.
◦ When adjusting the volume, press and hold for at least one second
to adjust the subwoofer levels.
◦ On a screen with tabs, press and hold for at least one second to
switch the tab.
• Turn to move through the menus or adjust a setting.
• When in a menu, press to select the highlighted option.
Á
Source
Icon
Press to change the source (page 2).
Â
Select to open a menu for the current source.
Not available on all sources.
Select to open the stereo settings menu.
• Press to turn on the stereo.
•
Press to mute the stereo.
• Press and hold to turn off the stereo.
Adjusting the Volume
1
Turn the dial to adjust the volume.
2
If necessary, press the dial to switch between zones.
TIP: To control all zones at the same time, you can press the dial until
GLOBAL is highlighted, or use the touchscreen to adjust the
GLOBAL zone.
Selecting a Source
1
Select the source icon.
The source icon is in the lower-left corner of the stereo screen, and shows the
source that is currently selected.
2
Select a source.
Playback Controls
The on-screen playback controls may change depending on the source selected.
Select to pause media playback.
Select to play media or resume media playback.
• Select to skip to the previous track, when using an applicable source.
•
AM, FM, or SiriusXM source:
◦ Select to tune to the previous station or preset.
◦ Hold for faster tuning (manual mode only).
• DAB source: Select to return to the previous DAB station in the ensemble.
When you reach the beginning of the current ensemble, the stereo
automatically changes to the last available station in the previous ensemble.
2 Quick Start Manual
DRAFT
Page 3
• Select to skip to the next track, when using an applicable source.
•
AM or FM, or SiriusXM source:
◦ Select to tune to the next station or preset.
◦ Hold for faster tuning (manual mode only).
• DAB source: Select to advance to the next DAB station in the ensemble.
When you reach the end of the current ensemble, the stereo automatically
changes to the first available station in the next ensemble.
On the AM, FM, or DAB source, select to cycle through the tuning modes (auto
or manual) and presets (when two or more presets are saved).
Press and hold to save the current station as a preset.
On the Aux or SPDIF source, select to increase the gain for the connected
source.
On the Aux or SPDIF source, select to decrease the gain for the connected
source.
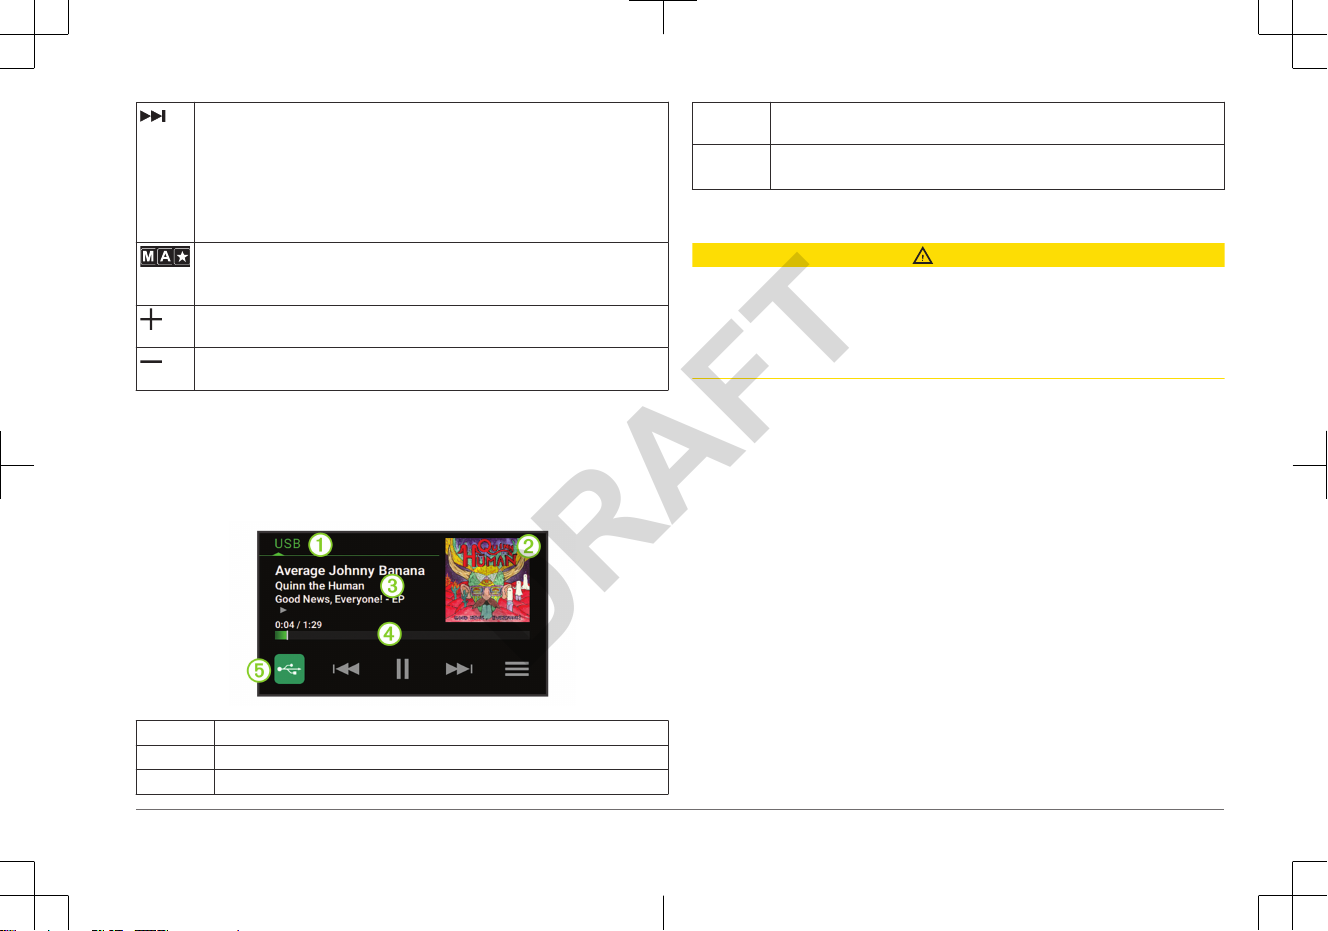
Stereo Screen
The information displayed on the stereo screen varies depending on the source
selected. The on-screen playback controls may change depending on the source
selected (page 2). This example shows the stereo playing a track from USB
device connected to the USB port.
À
Source
Á
Album art (if available from a compatible source)
Â
Track details (if available)
Ã
Elapsed time, track duration, and the current track number out of the total
number of tracks in the playlist (if available)
Ä
Source icon
Select to change the source (page 2).
Media Player Connection
CAUTION
Always disconnect your media player from the stereo when not in use and do not
leave it in your vessel.
This helps reduce the risk of theft and damage from
extreme temperatures.
Do not remove the media player or use your stereo in a distracting manner while
operating the vessel. Check and obey all marine laws in association with use.
The stereo accepts a variety of media players, including smartphones and other
mobile devices. You can connect a compatible media player using a
Bluetooth
®
wireless connection or a USB connection to the USB port.
NOTE: If you connect a supported media player to the USB port, you must either
disable Bluetooth on the media player, or unpair the Bluetooth connection from
the stereo to avoid possible media-playback issues.
USB Device Compatibility
You can use a USB flash drive or the USB cable included with your media player
to connect a media player or mobile device to the USB port.
The stereo is compatible with Android™ devices that support MTP mode.
The stereo is compatible with media players and other USB mass storage
devices, including USB flash drives. Music on USB drives must meet these
conditions:
• The USB mass storage device must be formatted using the FAT32 or NTFS
file system.
• The music files must be formatted as MP3, AAC (.m4a), FLAC, or WAV files.
Connecting a USB Device
You can connect a USB device to the USB port on the stereo.
Quick Start Manual 3
DRAFT
Page 4

1
Locate the USB port on the back of the stereo.
2
Connect the USB device to the USB port.
3
Select the USB source.
Connecting a Compatible Bluetooth Device
You can play media from a compatible Bluetooth device using the Bluetooth
wireless connection.
You can control the music playback with the media app on a Bluetooth device or
using the FUSION-Link™ remote control app (page 6).
1
Select the BT source.
2
Select > DISCOVERABLE to make the stereo visible to your compatible
Bluetooth
device.
3
Enable Bluetooth on your compatible Bluetooth device.
4
Bring the compatible Bluetooth device within 10 m (33 ft.) of the stereo.
5
On your compatible Bluetooth device, search for Bluetooth devices.
6
On your compatible Bluetooth device, select the stereo from the list of
detected devices.
7
On your compatible Bluetooth device, follow the on-screen instructions to pair
and connect to the discovered stereo.
When pairing, your compatible Bluetooth device may ask you to confirm a
code on the stereo. The stereo does not display a code, but it does connect
correctly when you confirm the message on the Bluetooth device.
8
If your compatible Bluetooth device does not immediately connect to the
stereo, repeat steps 1 through 7.
The DISCOVERABLE setting is disabled automatically after two minutes.
Bluetooth Range Information
The stereo and Bluetooth wireless devices have a range of 10 m (33 ft.). For
optimal performance, the Bluetooth wireless device should also have a clear line
of sight to the stereo.
Connecting to a Garmin® Watch
For more information about the watch, see the watch manual at
www.garmin.com
/manuals.
1
Following the instructions in the watch manual, install the FUSION-Link Lite
™
app from the Connect IQ™ store onto the watch.
2
On the stereo, select the BT source.
3
Select
> DISCOVERABLE.
The stereo remains discoverable for two minutes.
4
Bring the watch within 3 m (10 ft.) of the stereo.
NOTE: Stay 10 m (33 ft.) away from other
ANT® devices while pairing.
5
Open the FUSION-Link Lite app on the watch.
The first time you open the app on the watch, the watch automatically pairs
with and connects to the stereo. If you need to pair to another stereo, in the
FUSION-Link Lite app, select Settings > Pair new.
6
Control the audio playback using the FUSION-Link Lite app on the watch.
After the devices are paired, they connect automatically when they are turned on,
within range, and the app is open on the watch.
Playing Media
Setting the Tuner Region
You must select the region you are in to receive AM and FM stations properly.
If you are connected to a compatible SiriusXM® tuner and antenna, and have a
subscription (USA only), you must select the region you are in to receive
SiriusXM stations properly.
NOTE: SiriusXM is not available in all regions.
If you are connected to a compatible DAB module and antenna (not included),
you must select the region you are in to receive DAB stations properly.
NOTE: DAB stations are not available in all regions.
1
Select
> > TUNER REGION.
4 Quick Start Manual
DRAFT
Page 5

2
Select the region you are in.
Changing the Radio Station
1
Select an applicable source, such as FM.
2
Select repeatedly to move through the tuning modes, and select an
option:
•
Select Auto to scan and stop on the next available station.
• Select Manual to select a station manually.
• Select Preset to select a saved station preset.
3
Select
or to tune to the station.
Scanning for DAB Stations
Before you can scan for DAB stations, you must connect a compatible DAB
module and antenna (not included) to the stereo. Because DAB signals are
broadcast in select countries only, you must also set the tuner region to a
location where DAB signals are broadcast.
1
Select the DAB source.
2
Select to scan for available DAB stations.
When scanning is complete, the first available station in the first ensemble
found begins playing.
NOTE: After the first scan is complete, you can select again to re-scan for
DAB stations. When the re-scan is complete, the system starts playing the
first station in the ensemble you were listening to when you started the rescan.
Changing DAB Stations
1
Select the DAB source.
2
If necessary, select to scan for local DAB stations.
3
Select or to change the station.
When you reach the end of the current ensemble, the stereo automatically
changes to the first available station in the next ensemble.
FUSION PartyBus™ Networking
The FUSION PartyBus networking feature allows you to connect multiple
compatible stereos and zone stereos together on a network, using a combination
of wired or wireless connections.
A
FUSION PartyBus device connected to the network can stream sources from
and control media playback on another FUSION PartyBus device connected to
the network.
You can connect up to eight FUSION PartyBus devices on a network.
In the image above, a Apollo 770 stereo À connects to a wireless router Á and
to two Apollo SRX400 zone stereos Â. You can connect a
FUSION PartyBus
zone stereo to a single speaker zone Ã. You can connect a FUSION PartyBus
stereo to multiple speaker zones Ä to cover a larger area.
FUSION PartyBus devices connected to the network can stream media from and
control media playback on other devices on the network, but cannot control the
volume of other devices on the network. You can adjust the volume of speakers
or speaker zones connected to the stereo only.
Streaming from a FUSION PartyBus Device on the Network
Before you can stream from a device on the network, you must set up and
configure your FUSION PartyBus devices according to the installation
instructions.
Quick Start Manual 5
DRAFT
Page 6

1
Select the source icon.
The source icon is in the lower-left corner of the stereo screen, and shows the
source that is currently playing.
2
Select PARTYBUS
The device shows a list of available FUSION PartyBus devices on the
network.
3
Select the device you want to stream from.
The stereo begins streaming the same source as the connected FUSION
PartyBus device, and a green border appears around the device screen. All
media playback functions affect both devices.
Stopping Streaming from a FUSION PartyBus Device on the Network
If you are streaming from a FUSION PartyBus device on the network, you must
disconnect from the device before you can play local sources on the stereo.
1
Select the source icon.
The source icon is in the lower-left corner of the stereo screen, and shows the
source that is currently selected.
2
Select PARTYBUS > LEAVE PARTYBUS.
DSP Settings
This device features digital signal processing (DSP). You can configure the DSP
settings to adjust the speakers so they sound the best in their installed locations.
All DSP settings are configured using the FUSION-Link remote control app
(page 6). See the owner's manual for more information.
More Information
FUSION-Link Remote Control App
You can use the FUSION-Link remote control app on your compatible Apple® or
Android device to adjust the stereo volume, change the source, control playback,
select and manage radio presets, and adjust some stereo settings. .
The app communicates with the stereo using the Bluetooth connection for the
mobile device. You must connect your compatible device to the stereo using
Bluetooth
to use the app.
If you are using a FUSION PartyBus device on a network with a Wi‑Fi® access
point, the app can communicate with the device using the network for greater
range.
For information about the FUSION-Link remote control app for compatible Apple
or Android devices, go to the Apple App StoreSM or the Google Play™ store.
Getting the Owner's Manual
You can get the latest owner's manual and translations of manuals from the web.
1
Go to www.fusionentertainment.com/marine.
2
Select your product.
3
Select Manuals & Downloads.
4
Select a manual.
Registering Your Apollo 770
Help us better support you by completing our online registration today.
• Go to www.fusionentertainment.com.
• Keep the original sales receipt, or a photocopy, in a safe place.
物質宣言
部件名称 有毒有害物质或元素
铅 汞 镉 六价铬 多溴联苯 多溴二苯醚
印刷电路板组件 X O O O O O
屏幕/背光 X O O O O O
金属零件 X O O O O O
电缆 电缆组件 连接器 X O O O O O
6 Quick Start Manual
DRAFT
Page 7

本表格依据 SJ/T11364 的规定编制。
O: 代表此种部件的所有均质材料中所含的该种有害物质均低于
(GB/T26572) 规定的限量
X: 代表此种部件所用的均质材料中, 至少有一类材料其所含的有害物
质高于
(GB/T26572) 规定的限量
*該產品說明書應提供在環保使用期限和特殊標記的部分詳細講解產品
的擔保使用條件。
產
品
Quick Start Manual 7
DRAFT
Page 8

®
F USI ON E N TER TA IN M E NT. CO M
FUSION SUPPORT
New Zealand 09 369 2900
Australia 1300 736 012
Europe +44 (0) 370 850 1244
USA 623 580 9000
Pacific +64 9 369 2900
Garmin®, ANT®, FUSION®, and the Fusion logo are trademarks of Garmin Ltd. or its subsidiaries, registered in the USA and other countries. Apollo™,
Connect IQ™, FUSION-Link™, FUSION-Link Lite™, and FUSION PartyBus™ are trademarks of Garmin Ltd. or its subsidiaries. These trademarks may not be
used without the express permission of Garmin.
Apple® and App StoreSM are trademarks of Apple Inc. Android™ and Google Play™ are a trademarks of Google Inc. Bluetooth® word mark and logos are
owned by the Bluetooth SIG, Inc. and any use of such marks by Garmin is under license. NMEA 2000®, and the NMEA 2000 logo are registered trademarks
of the National Marine Electronics Association. SiriusXM® is a registered trademark of SiriusXM Radio Inc. Wi‑Fi® is a registered mark of Wi-Fi Alliance
Corporation. Other trademarks and trade names are those of their respective owners.
190-02382-90_01
March 2018
Printed in Taiwan
DRAFT
 Loading...