

Furuno USA 9ZWRTR104 User Manual
6.23.2 How to manually acquire a target
You can manually acquire a target from both the radar display and the radar display
overlay.
1. Tap the target to acquire to show the pop-up menu.
2. Tap [Acquire].
After you acquire a target, the radar marks the target with a broken square and a vector appears within 30 s. The vector indicates the direction of the target. Within 90 s
after you acquire the target, the first tracking step is finished and the target is tracked
continuously. At this point, the broken square changes to a solid circle.
6. RADAR
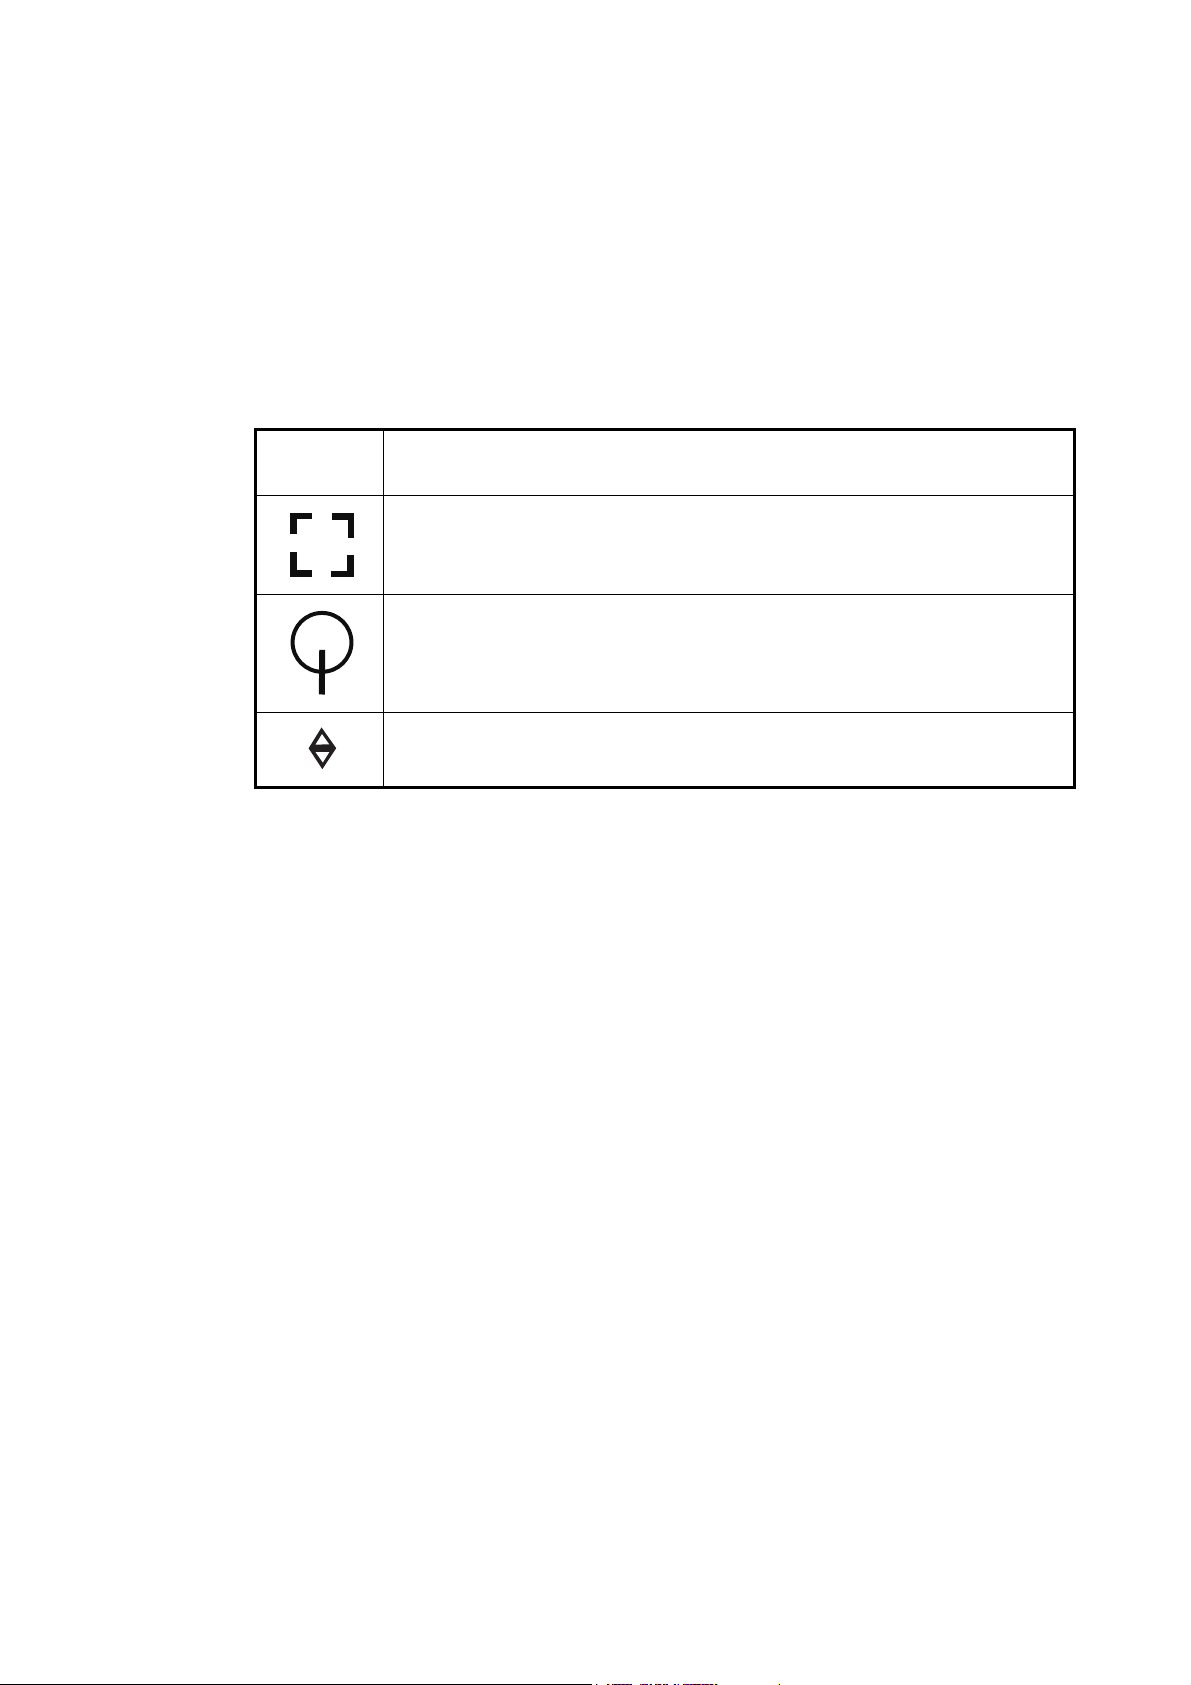
ARPA
Symbol
At acquisition of the target.
30 s after the acquisition, the plotting symbol changes to a small circle,
which indicates steady-state tracking. A vector appears to show the direction of the target.
A lost target is indicated by a diamond symbol, created from two equal triangles.
Note 1: For successful acquisition, the target must be within 0.05 to 16 NM from your
ship and not hidden in sea or rain clutter.
Note 2: When the capacity for manual acquisition is reached, you cannot acquire
more targets. Cancel tracking of non-threatening targets to acquire additional targets
manually.
Meaning
6.23.3 How to automatically acquire a target
Any target that enters the ARPA acquisition area is acquired and tracked automatically. When a target enters the area, the buzzer sounds.
1. Create a guard zone referring to section 6.13.
2. Tap a line on the guard zone to show the pop-up menu. Turn on [Auto Acquire].
The dotted lines for the guard zone turn into solid lines.
6-23
6. RADAR
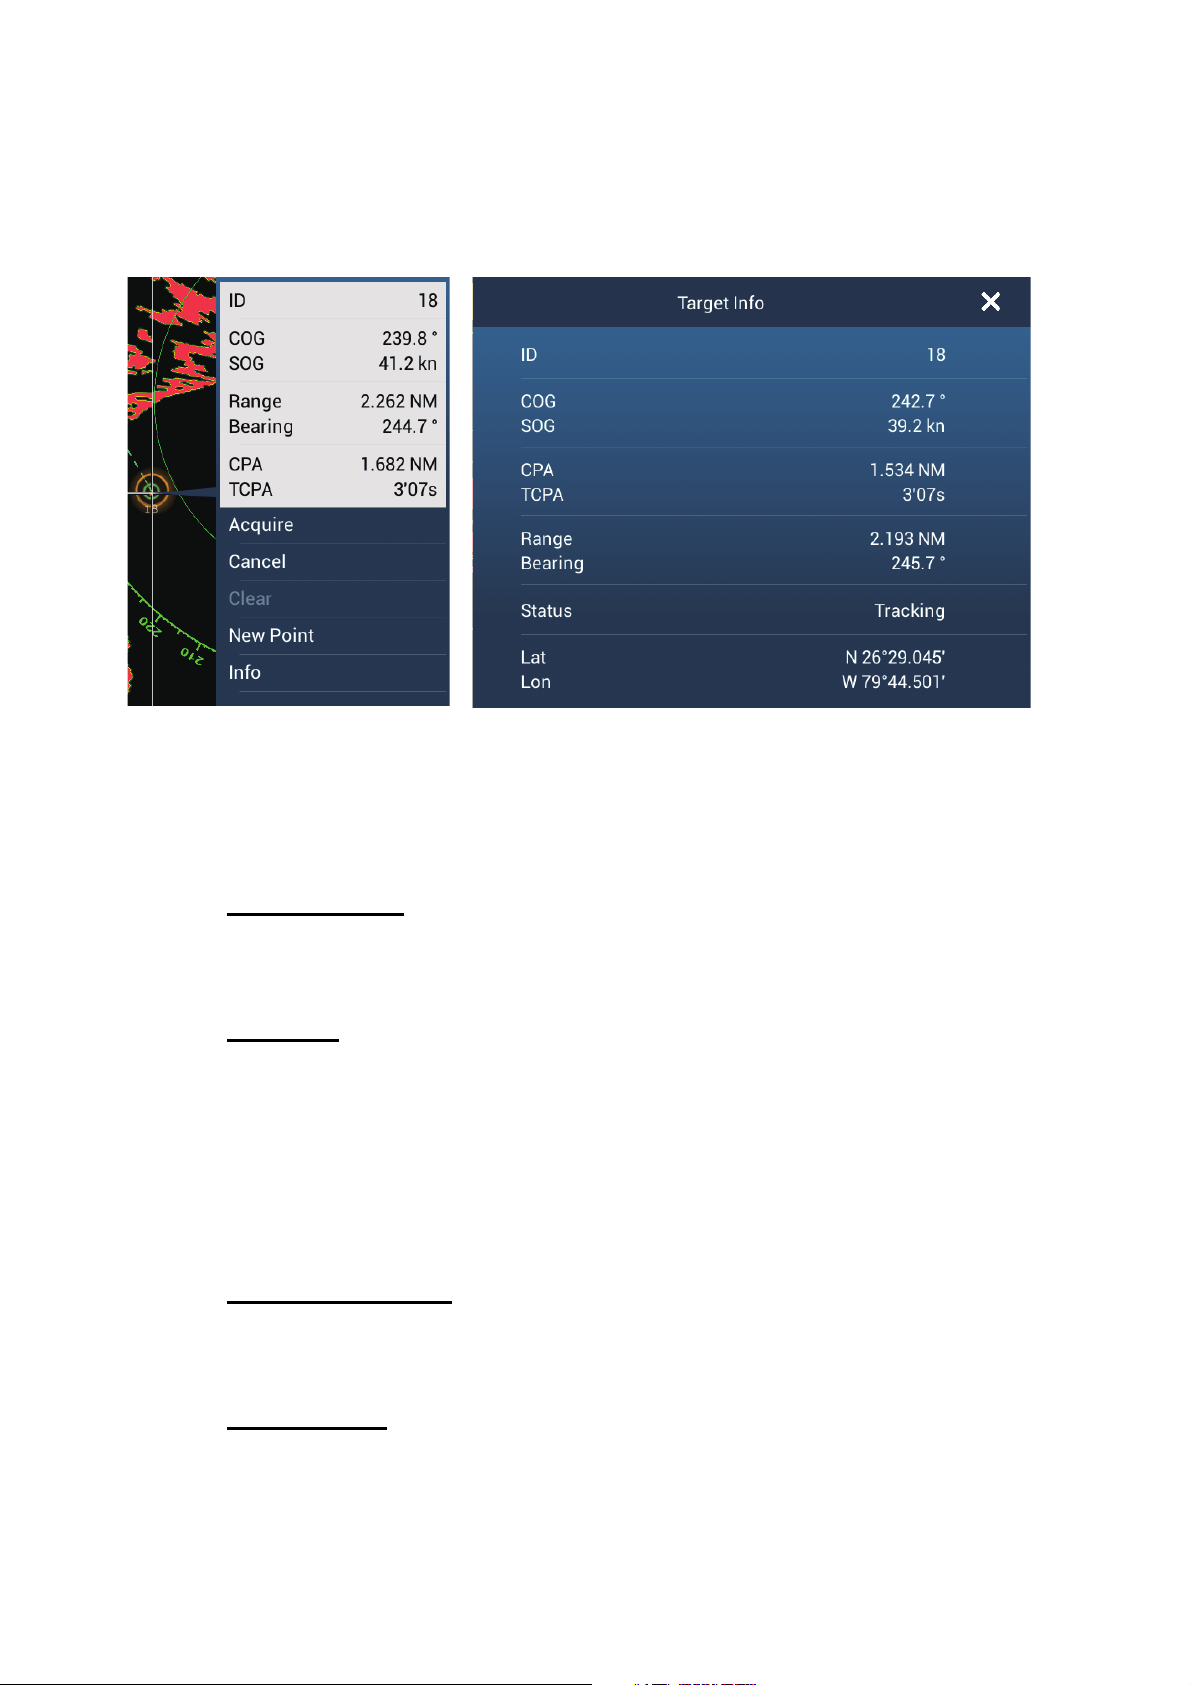
6.23.4 How to display target data
You can find the bearing, range, etc. of an ARPA target. Tap the ARPA target to get
its information. For detailed information, tap the ARPA target to display the pop-up
menu then tap [Info]. The detailed information display can also be shown by selecting
the simple information display.
S
Simple information Detailed information
6.23.5 How to stop tracking targets
You can stop tracking ARPA targets separately or all together.
Individual target
1. Tap the ARPA target to display the pop-up menu.
2. Tap [Cancel] to delete the target from the screen.
All targets
1. Tap the screen to show the pop-up menu then tap [Targets].
2. Tap [Cancel All] to delete all targets from the screen.
6.23.6 How to clear a lost target
An ARPA target not detected in five scans becomes a lost target. You can clear lost
targets separately or all together.
Individual lost target
6-24
1. Tap the lost target to display the pop-up menu.
2. Tap [Clear] to delete the lost target from the screen.
All lost targets
1. Tap the screen to show the pop-up menu then tap [Targets].
2. Tap [Clear Lost] to delete all lost targets from the screen.

6.23.7 CPA/TCPA alarm
This alarm helps you keep your ship away from collision by warning of targets on a
collision course. The ARPA continuously monitors the predicted range at the Closest
Point of Approach (CPA) and predicted time to CPA (TCPA) of each tracked target.
When the predicted CPA or TCPA is less than their set values, the alarm sounds and
the message "CPA/TCPA Alarm" appears and flashes at the top of the screen.
Make sure that the gain, sea and rain controls are correctly adjusted before you use
this alarm.
CPA/TCPA alarm ranges must be set correctly according to the size, tonnage, speed,
turning performance and other characteristics of your ship.
How to set the CPA/TCPA alarm
1. Open the home screen, then tap [Settings] - [Targets].
2. Turn on [CPA/TCPA Alarm].
3. Tap [CPA Alarm Value] or [TCPA Alarm Value] to display the software keyboard.
4. Set the value, then tap to confirm.
6. RADAR
5. Tap the close button to finish.
How to acknowledge the CPA/TCPA alarm
The CPA/TCPA alarm sounds when the CPA and TCPA of an ARPA target are within
the CPA/TCPA alarm range. The alarm indication "CPA/TCPA Alarm" appears and
flashes at the top of the screen. To acknowledge the alarm and stop the audio alarm
and flashing of the indication, tap the indication "CPA/TCPA Alarm" (see
paragraph 2.11.7). (The ARPA vector must be displayed at least 30 seconds to calculate CPA and TCPA.)
How to deactivate the CPA/TCPA alarm
1. Open the home screen, then tap [Settings] - [Targets].
2. Turn off [CPA/TCPA Alarm].
3. Tap the close button to finish.
6-25

6. RADAR
This page is intentionally left blank.
6-26
7. FISH FINDER (SOUNDER)
This chapter describes the functions of the built-in fish finder.
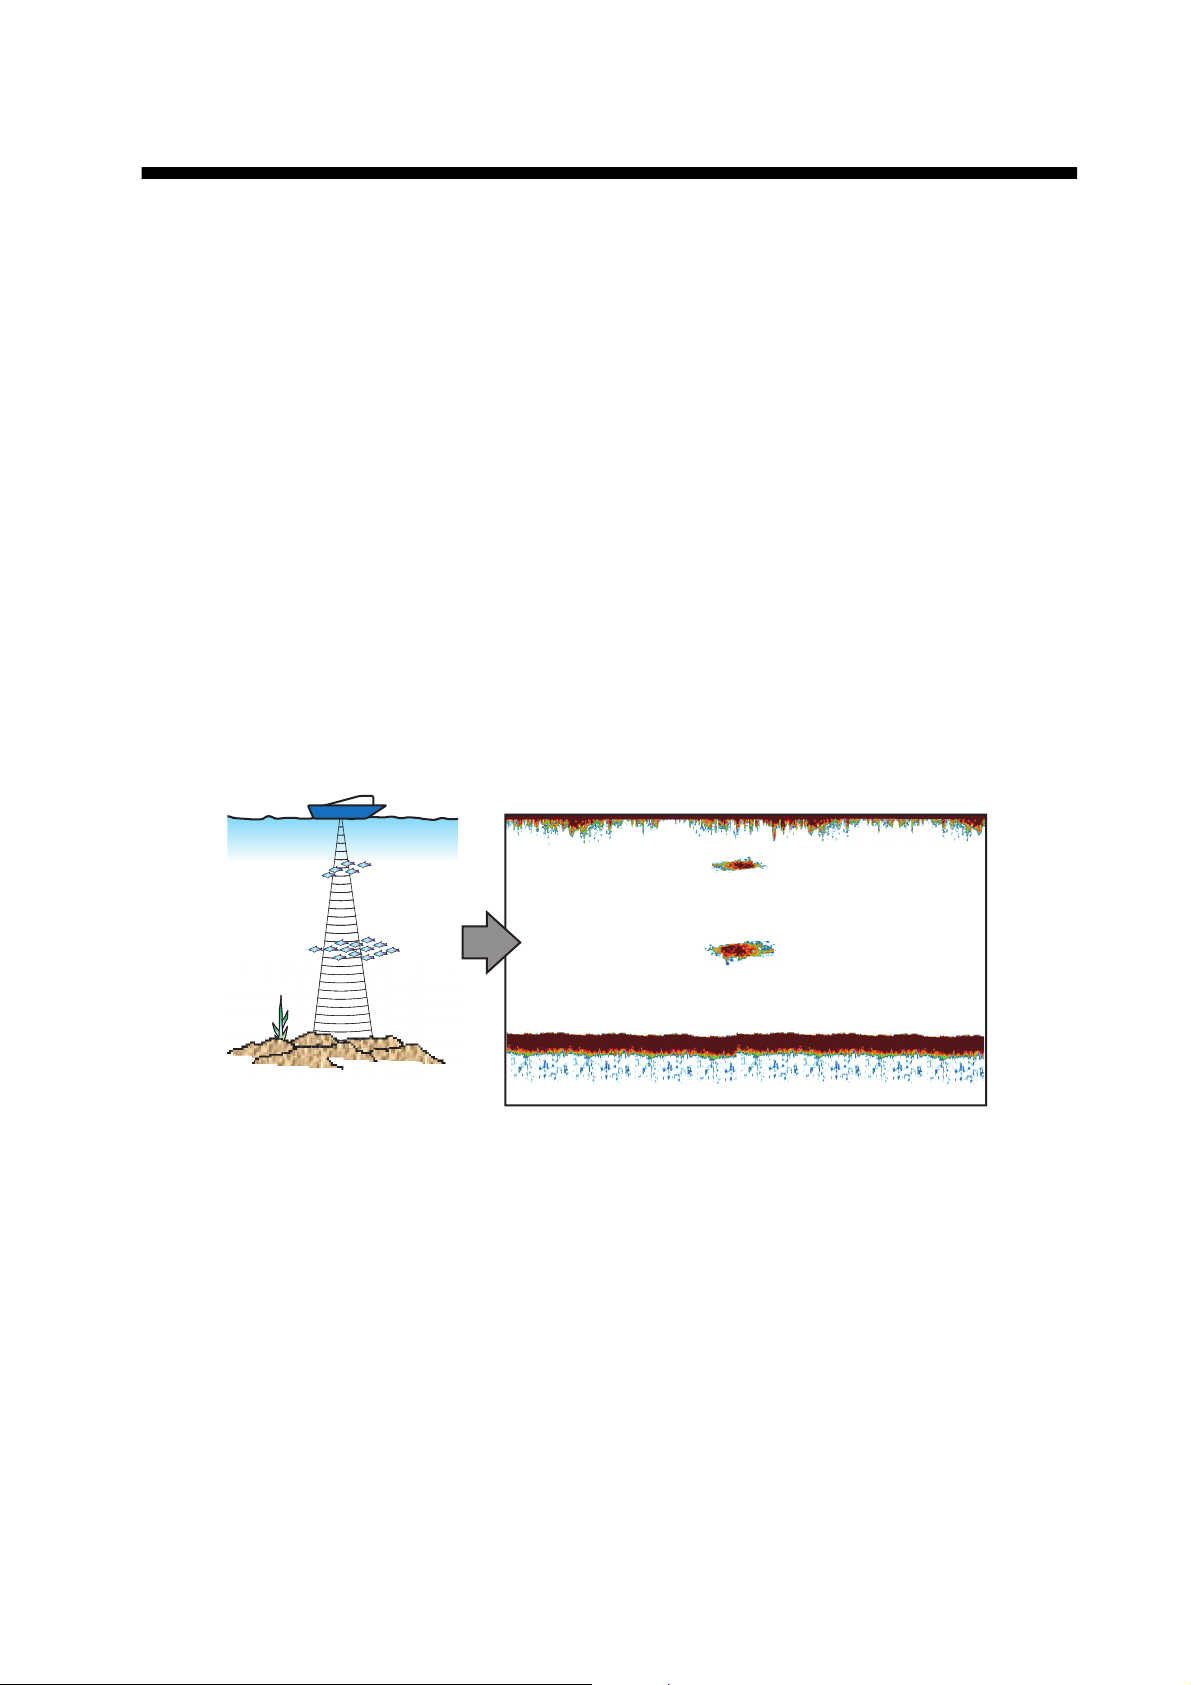
7.1 How the Fish Finder Operates
The fish finder calculates the distance between its transducer and underwater objects
like fish, lake bottom or seabed. The results are shown in different colors or shades of
gray according to echo strength.
The ultrasonic waves transmitted through water move at a constant speed of approximately 4800 feet (1500 meters) per second. When a sound wave “hits” an underwater
object like fish or sea bottom, part of the sound wave is reflected toward the source.
To find the depth to an object, the fish finder calculates the time difference between
the transmission of a sound wave and the time the reflected sound wave is received.
The picture displayed by the fish finder contains a series of vertical scan lines. Each
line is a "picture" of the objects under the boat. The series of pictures are put side-byside across the screen to show the contours of the bottom and echoes from fish. The
amount of history of objects that have moved under the boat can be less than a minute
to more than one minute depending on the picture advance speed.
7-1
7. FISH FINDER (SOUNDER)
7.2 How to Select a Display
Your fish finder has six display modes. These modes are single frequency, dual frequency, bottom zoom, bottom lock, A-scope, and bottom discrimination.
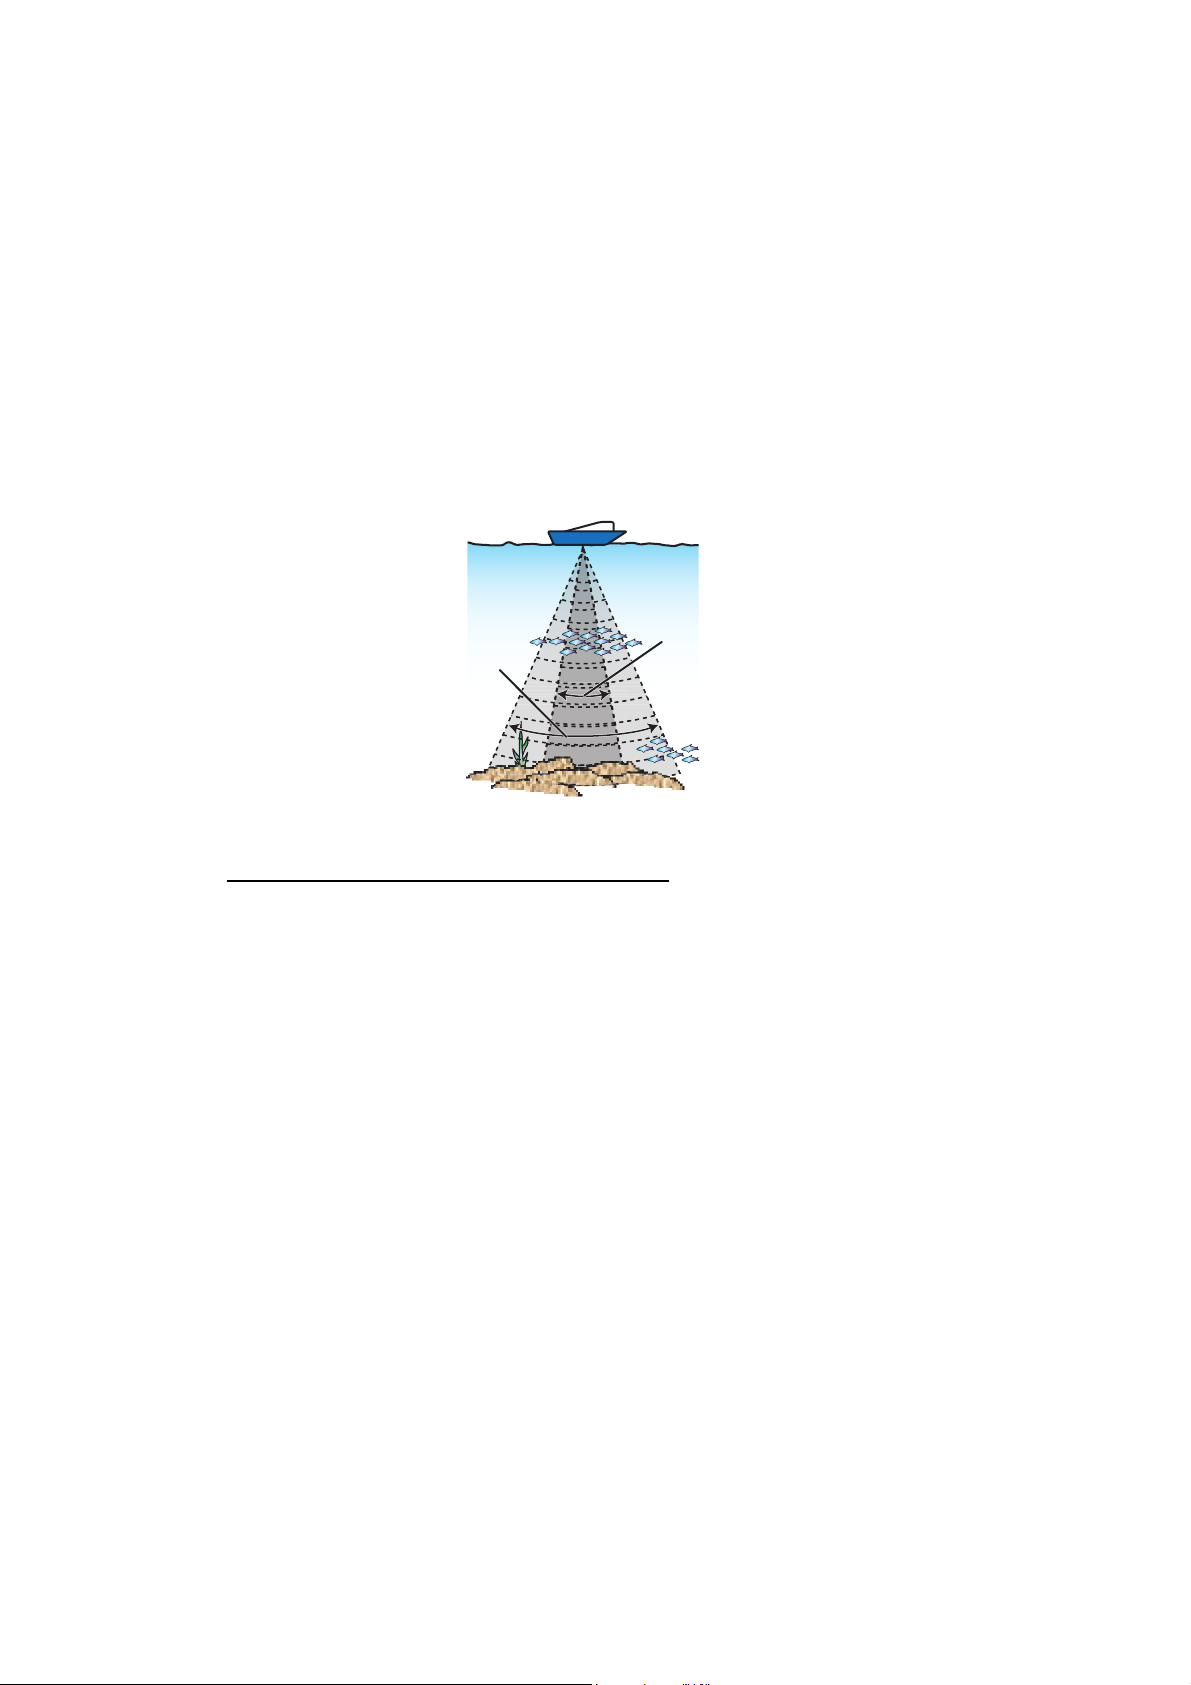
7.2.1 Single frequency display
The single frequency display shows either the low-frequency or high-frequency picture
on all the screen. Select a frequency according to your purpose.
• A low frequency gives a wide detection area. Use the low frequency for general
search and to find bottom conditions.
• A high frequency gives better resolution. Use the high frequency to inspect a school
of fish.
Low
frequency
High
frequency
Detection area
How to select a single frequency display
1. Tap the screen to show the pop-up menu.
2. Tap [Mode].
3. Turn on [Single Freq.].
4. Tap [Frequency].
5. Turn on [HF] (high frequency) or [LF] (low frequency).
7-2
 Loading...