

Furuno USA 9ZWRTR093, 9ZWRTR090, 9ZWRTR091, 9ZWRTR095 User Manual
Chapter 1: Operational Overview
Context-Sensitive (Pop-up) Menus
In addition to the menus, context-sensitive menus display commands relevant to the
selected object or active display. Context menus let you quickly access useful commands according to the selected object or active display. To display a context-sensitive menu, hit the right-button key ( ) while an object is selected, or hit the same
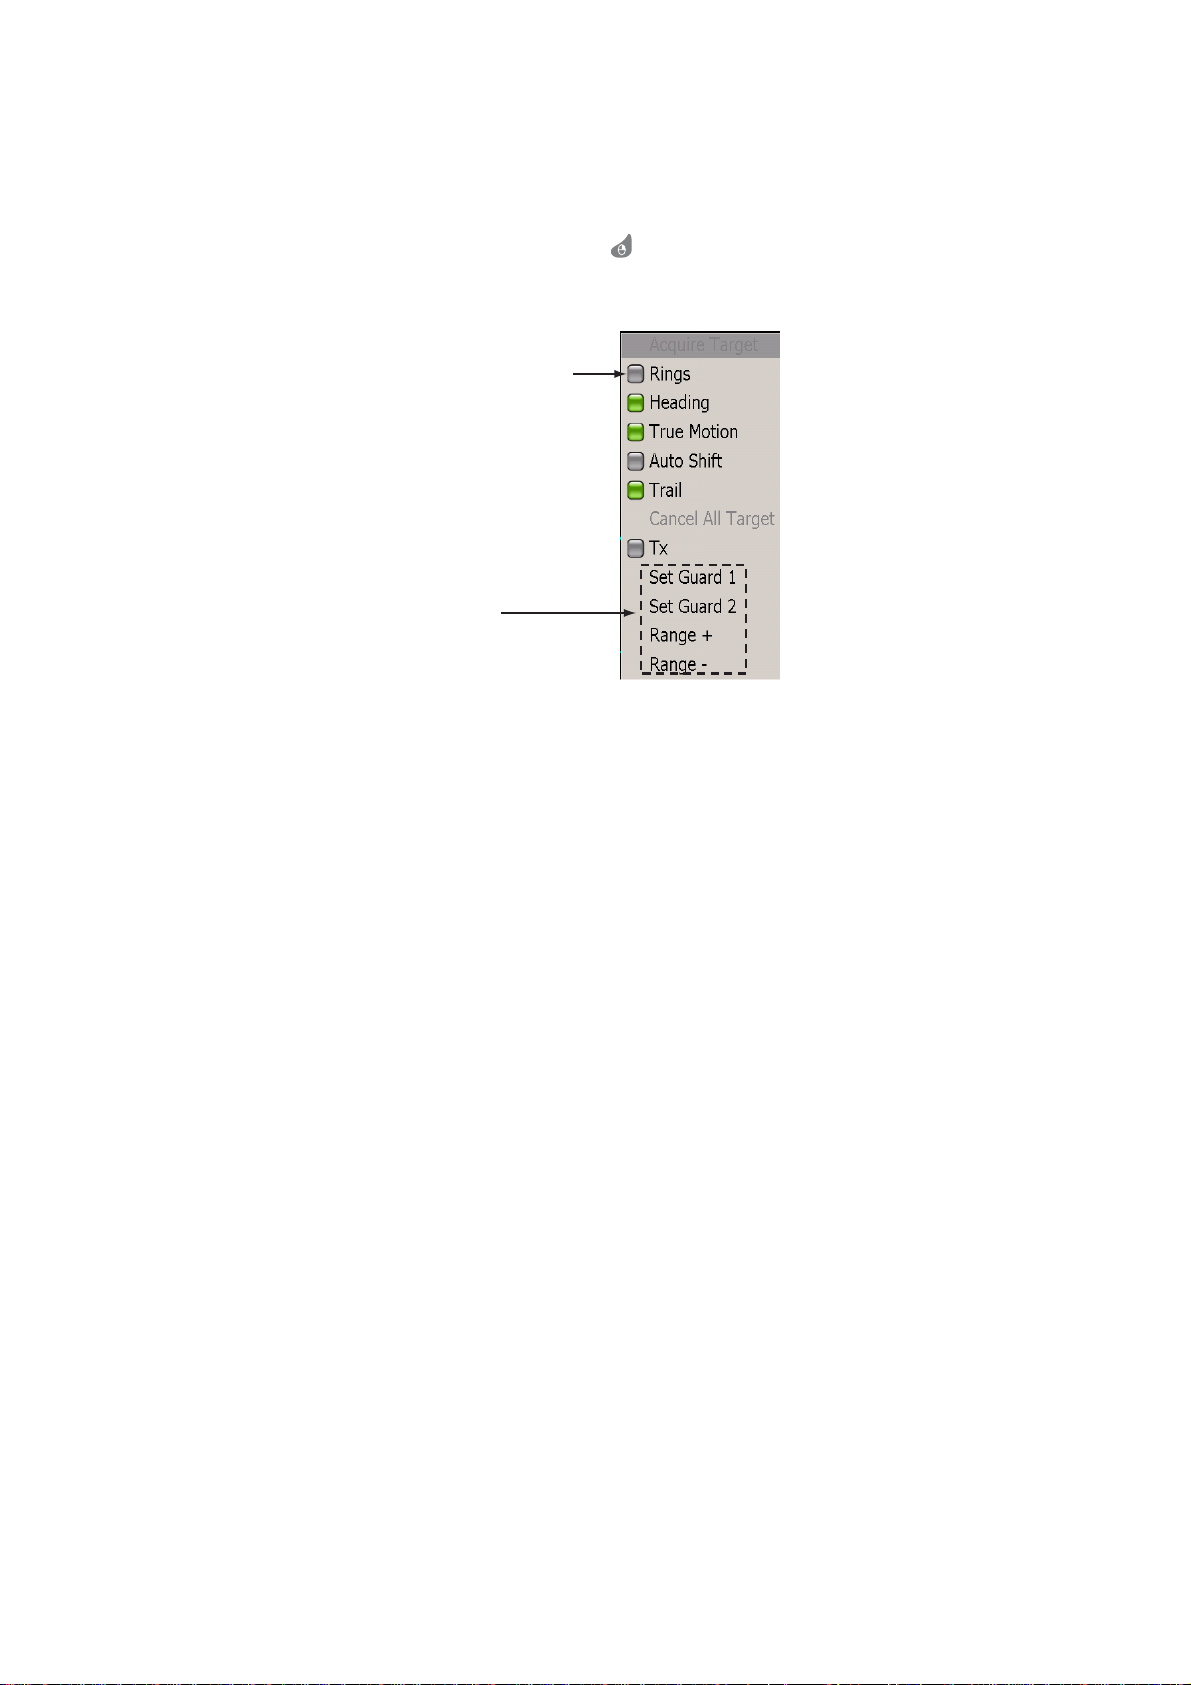
key anywhere on the active display. The illustration below shows the Radar pop-up
menu.
Item status box
Green: ON
Gray: OFF
No box
Push RotoKnob
to process item.
Pop-up menu for radar
To process items on a pop-up menu:
1. Rotate the Rotary Knob to select item.
2. To turn an item on or off, push the Rotary Knob to color the item’s status box in
green to turn it on, or gray to turn it off.
3. For items which have no status box, push the Rotary Knob to proceed to the next
level.
1-11
Chapter 1: Operational Overview
NavData
The four NavData boxes (default quantity) at the bottom off the display show various
navigation data. You can select what to display and add or remove boxes freely. The
data that can be displayed depends on your system configuration. To hide or show the
boxes, use the DATA/VOL key. NavData can be configured with the NavData pop-up
menu and from the NavData menu.
To change the contents of a NavData box:
1. Put the cursor in the NavData box to process and hit the right-button key to show
the NavData pop-up menu.
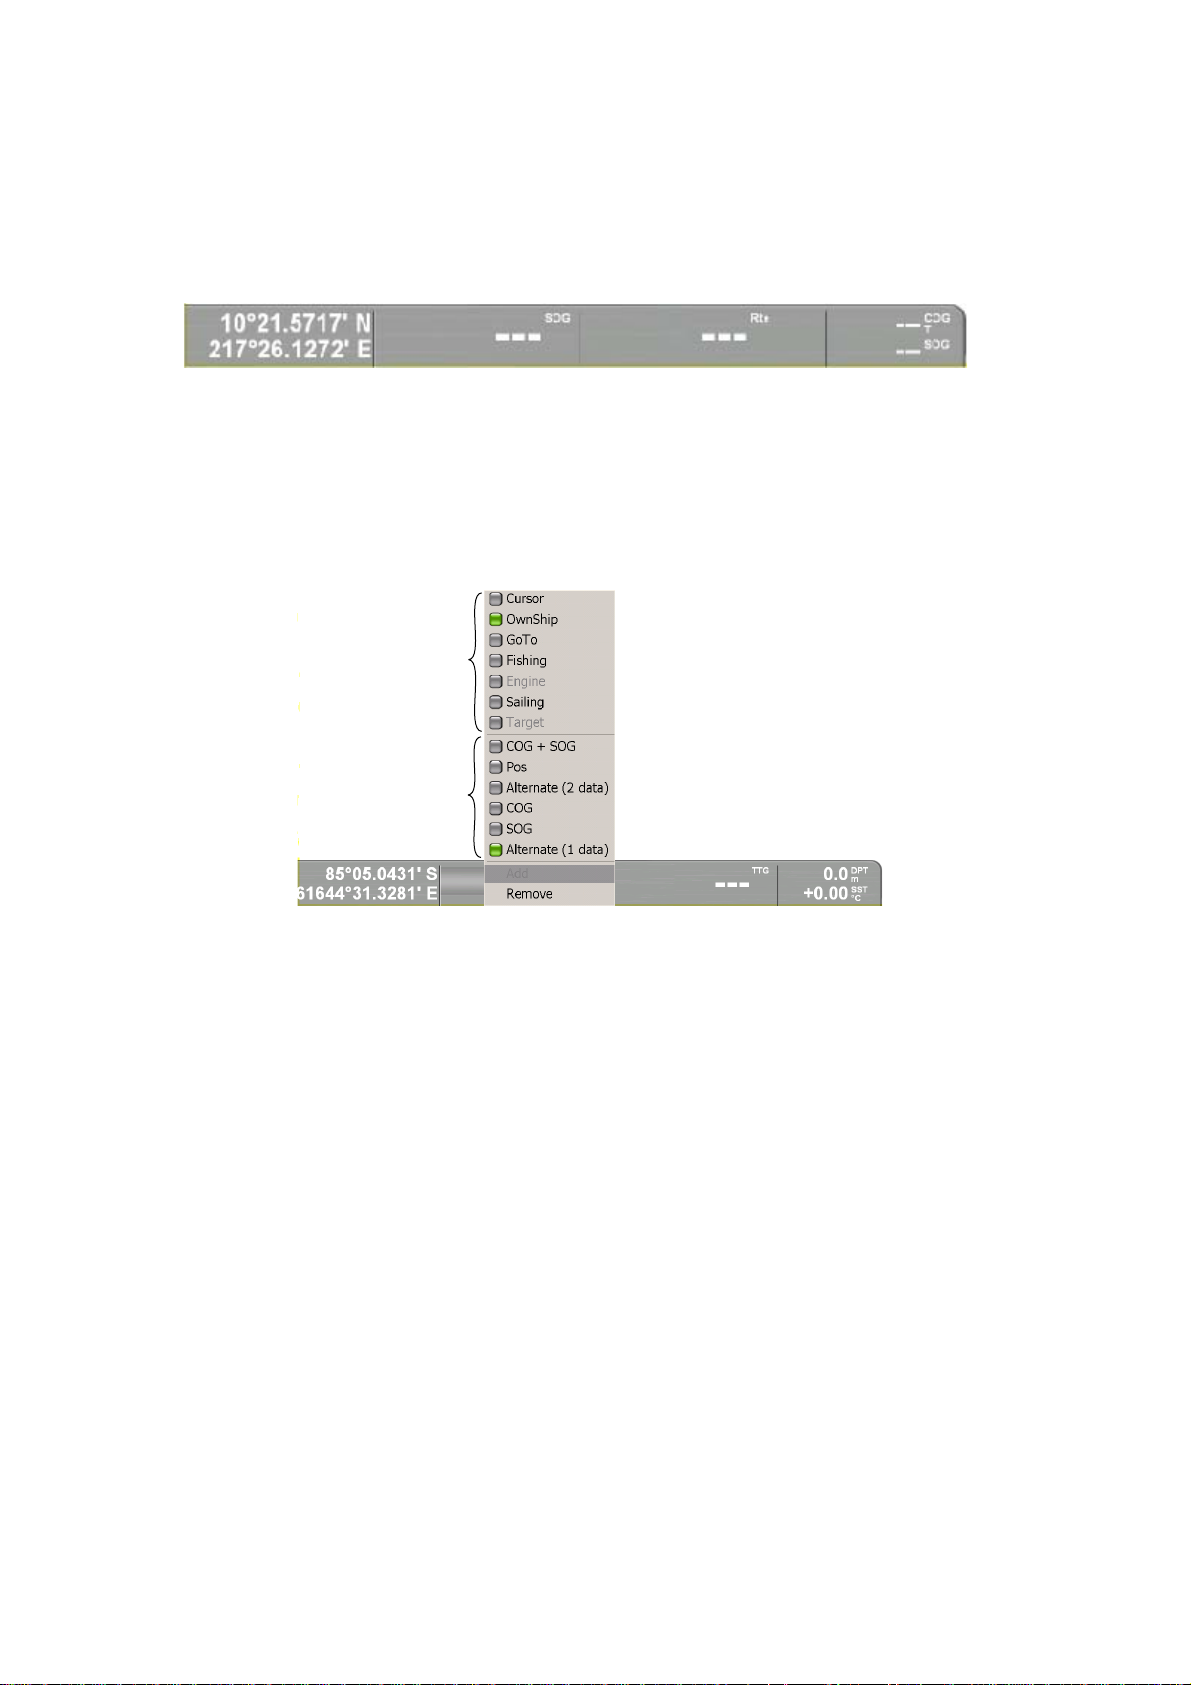
The status box of the currently selected NavData category and available data are
colored green.
NavData boxes
Data category
Available data*
* Contents chan
2. If the data you wish to show is displayed in the available data area, rotate the
Rotary Knob to select it and then push the Rotary Knob. If not, rotate the Rotary
Knob to select applicable data category and then push it to change the available
data.
3. Do one of the following depending on your selection.
Turn item ON or OFF: Display status box in green to turn item on, or gray to turn
it off.
Alternate (2 data): Display the two items above this item alternately.
Alternate (1 data): Display the two items above this item alternately.
Add: Add a NavData box. (Available if less than four boxes are showing.)
Remove: Remove a NavData box.
ge according to data category.
NavData pop-up (cursor category)
1-12
4. Push the Rotary Knob to confirm selection and close the pop-up menu.
1.9 Menu Overview
The menu system consists of 14 main menus and accompanying sub menus. The
main menus are Routes, Waypoints, Chart, Radar, Fish finder (under development),
NavData, Tracks, Targets, Weather, Alarms, General setup, Memory card processing,
System configuration, and Own boat data.
1. Press the MENU key to open the menu.
The menu most pertinent to the current operating mode appears. If an alarm has
been violated, the Alarm menu automatically appears.
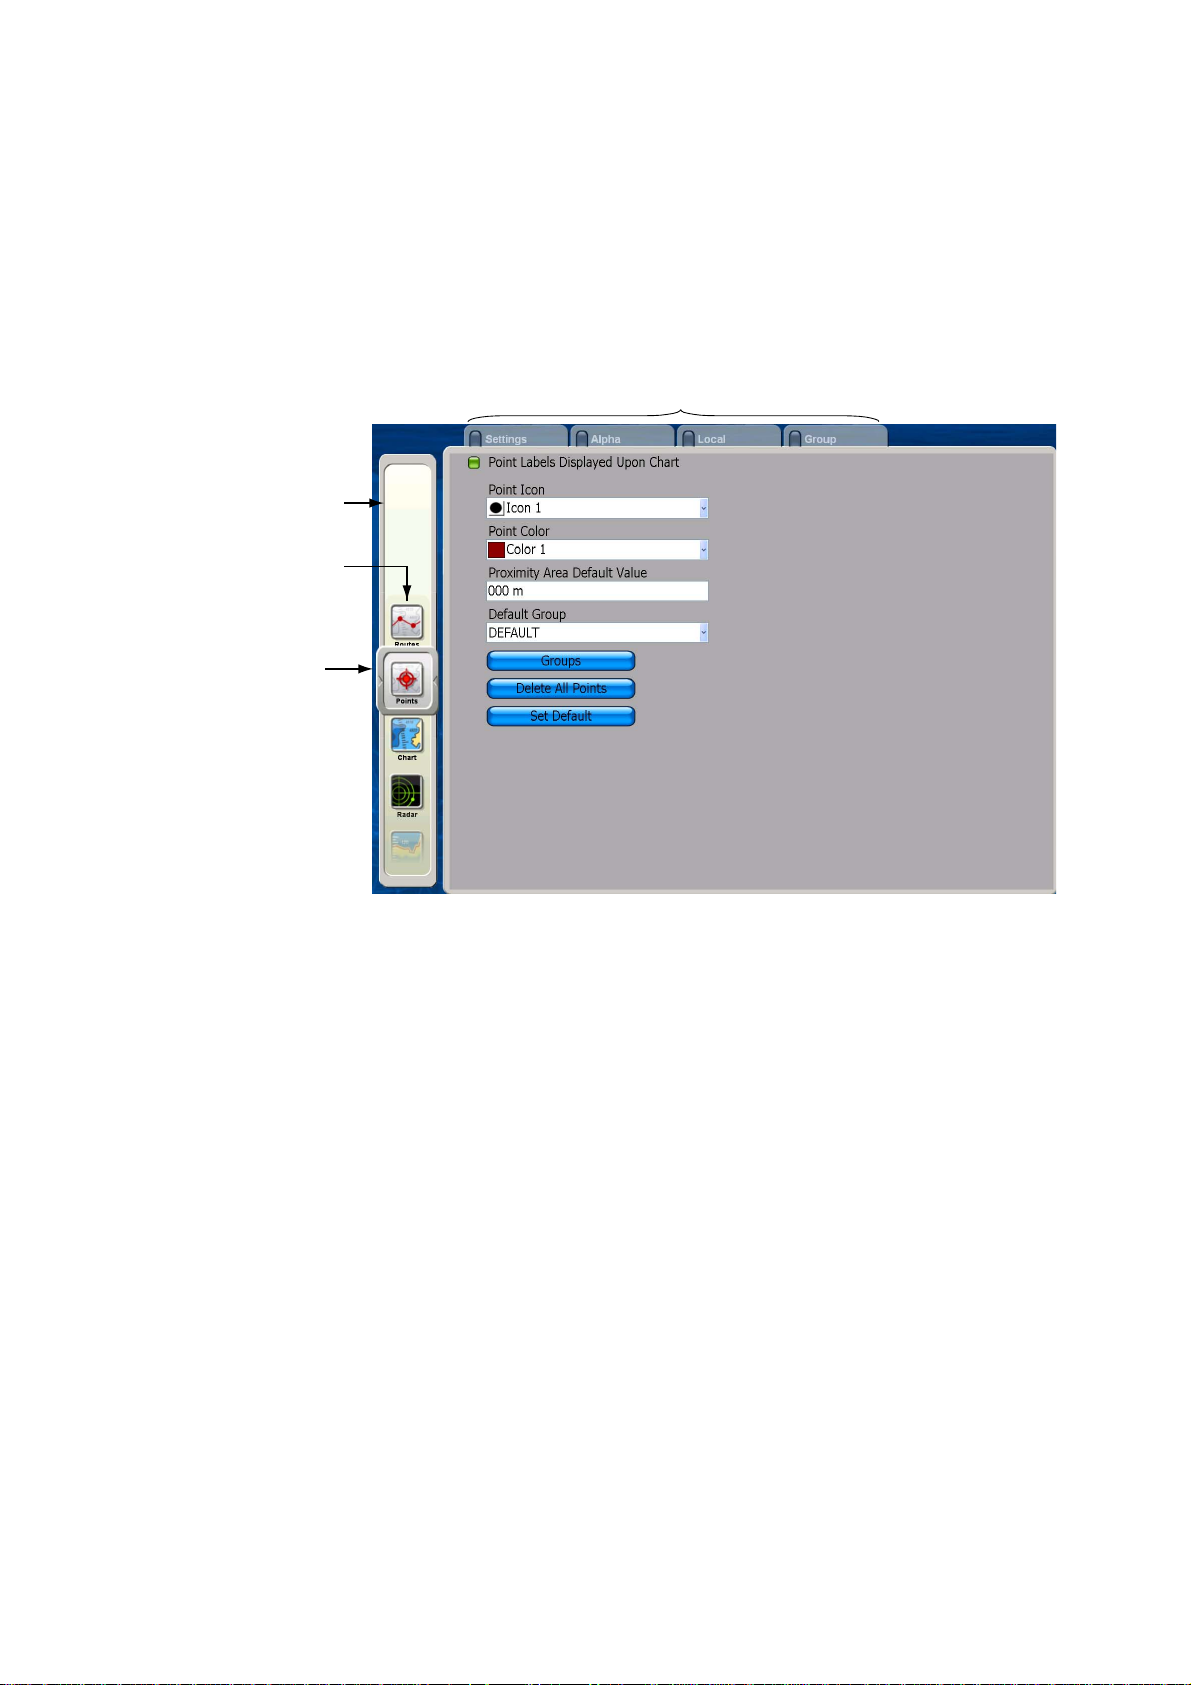
Menu bar
Menus
Chapter 1: Operational Overview
Tabs for sub menus (click to open)
Menu selector
(Moves up and
down with
ROTOkey rotation.)
2. Rotate the Rotary Knob to choose a menu and then push the Rotary Knob.
The background color of the menu selector changes from gray to green to indicate
active menu. To switch to a different menu, hit the CANCEL key to change the
background color back to gray. The CANCEL key can also be used for the same
purpose while working in a sub menu.
1-13
Chapter 1: Operational Overview
Menu selector
(Background is
green for active
menu.)
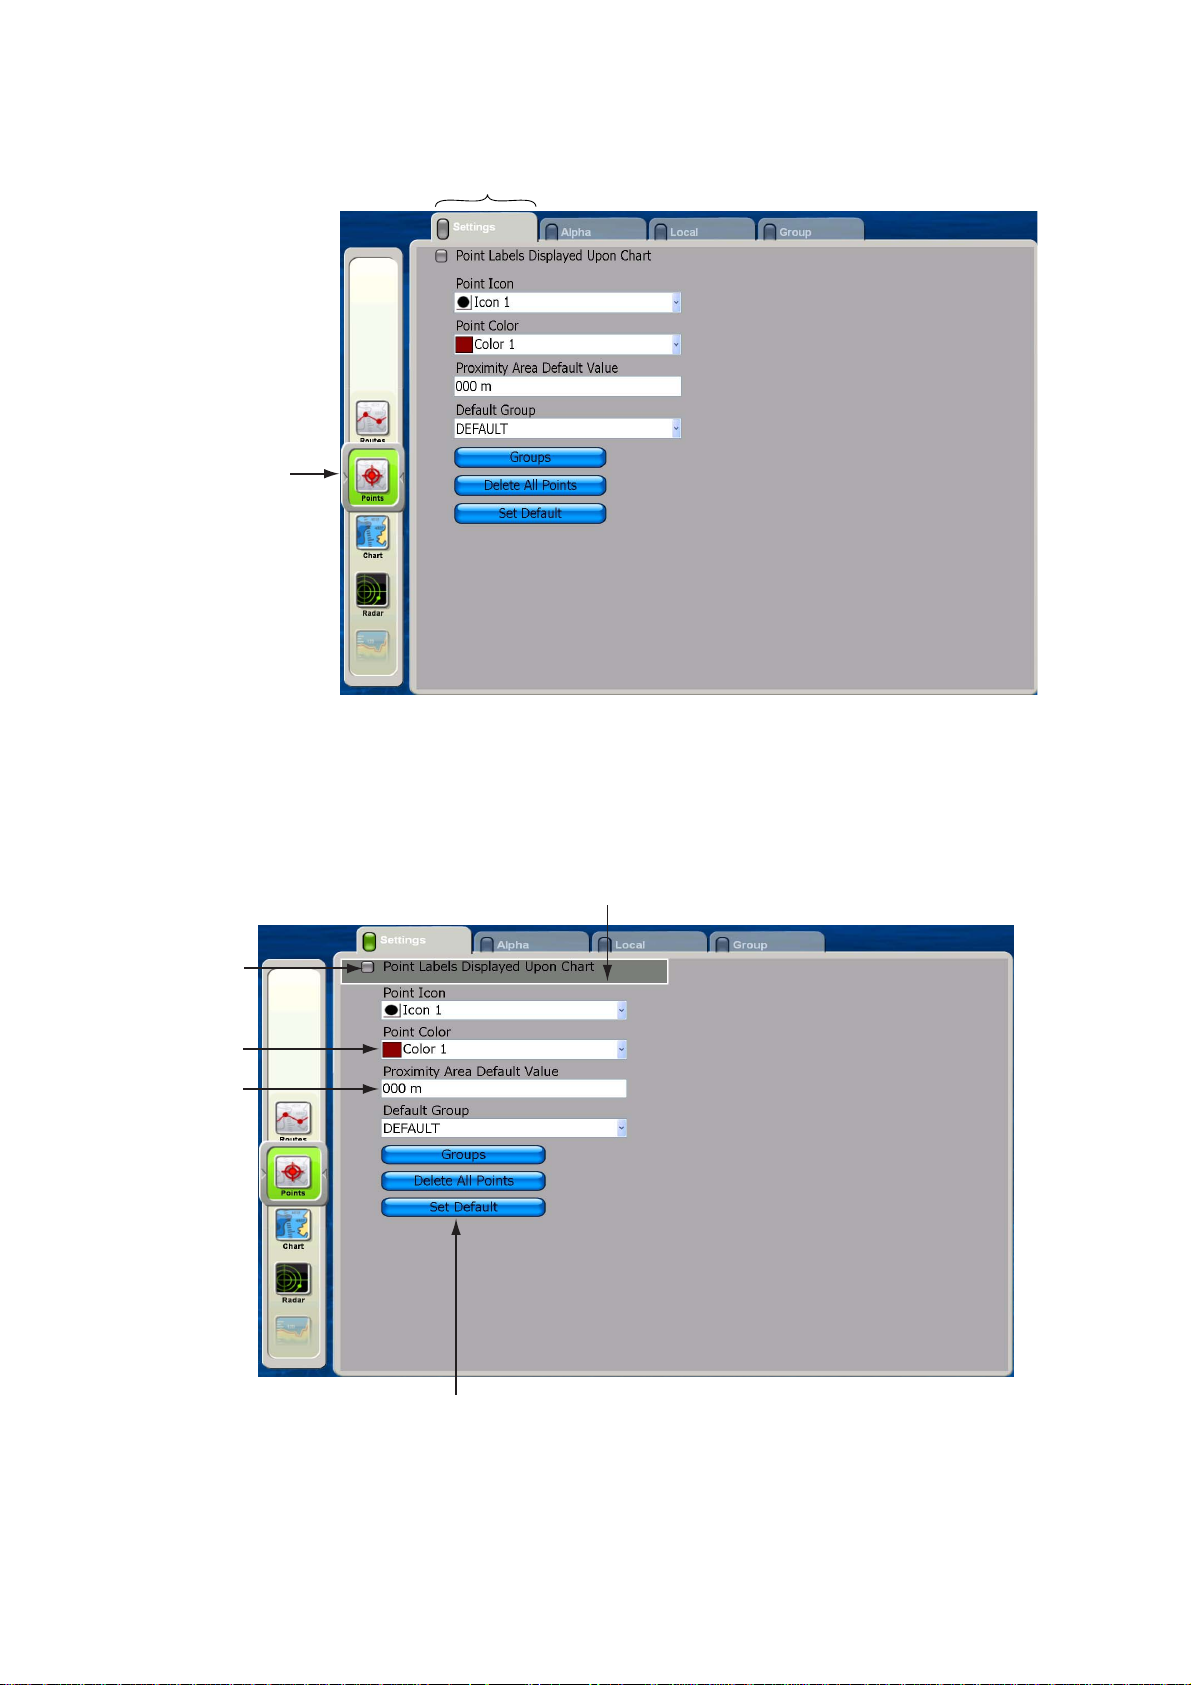
Tab is magnified and light gray
to indicate current selection.
Status box
Green: ON
Gray: OFF
Combo box
Data input
box
3. To a select a sub menu when there are multiple sub menus, rotate the Rotary
Knob to choose desired sub menu and push the Rotary Knob. For example,
choose the Settings sub menu.
The cursor highlights the first item in the sub menu in gray and the square on the
tab of the currently selected sub menu changes from gray to green to denote
active sub menu.
Current selection is highlighted in gray
1-14
For quick restoration of all default
settings for current sub menu
Chapter 1: Operational Overview
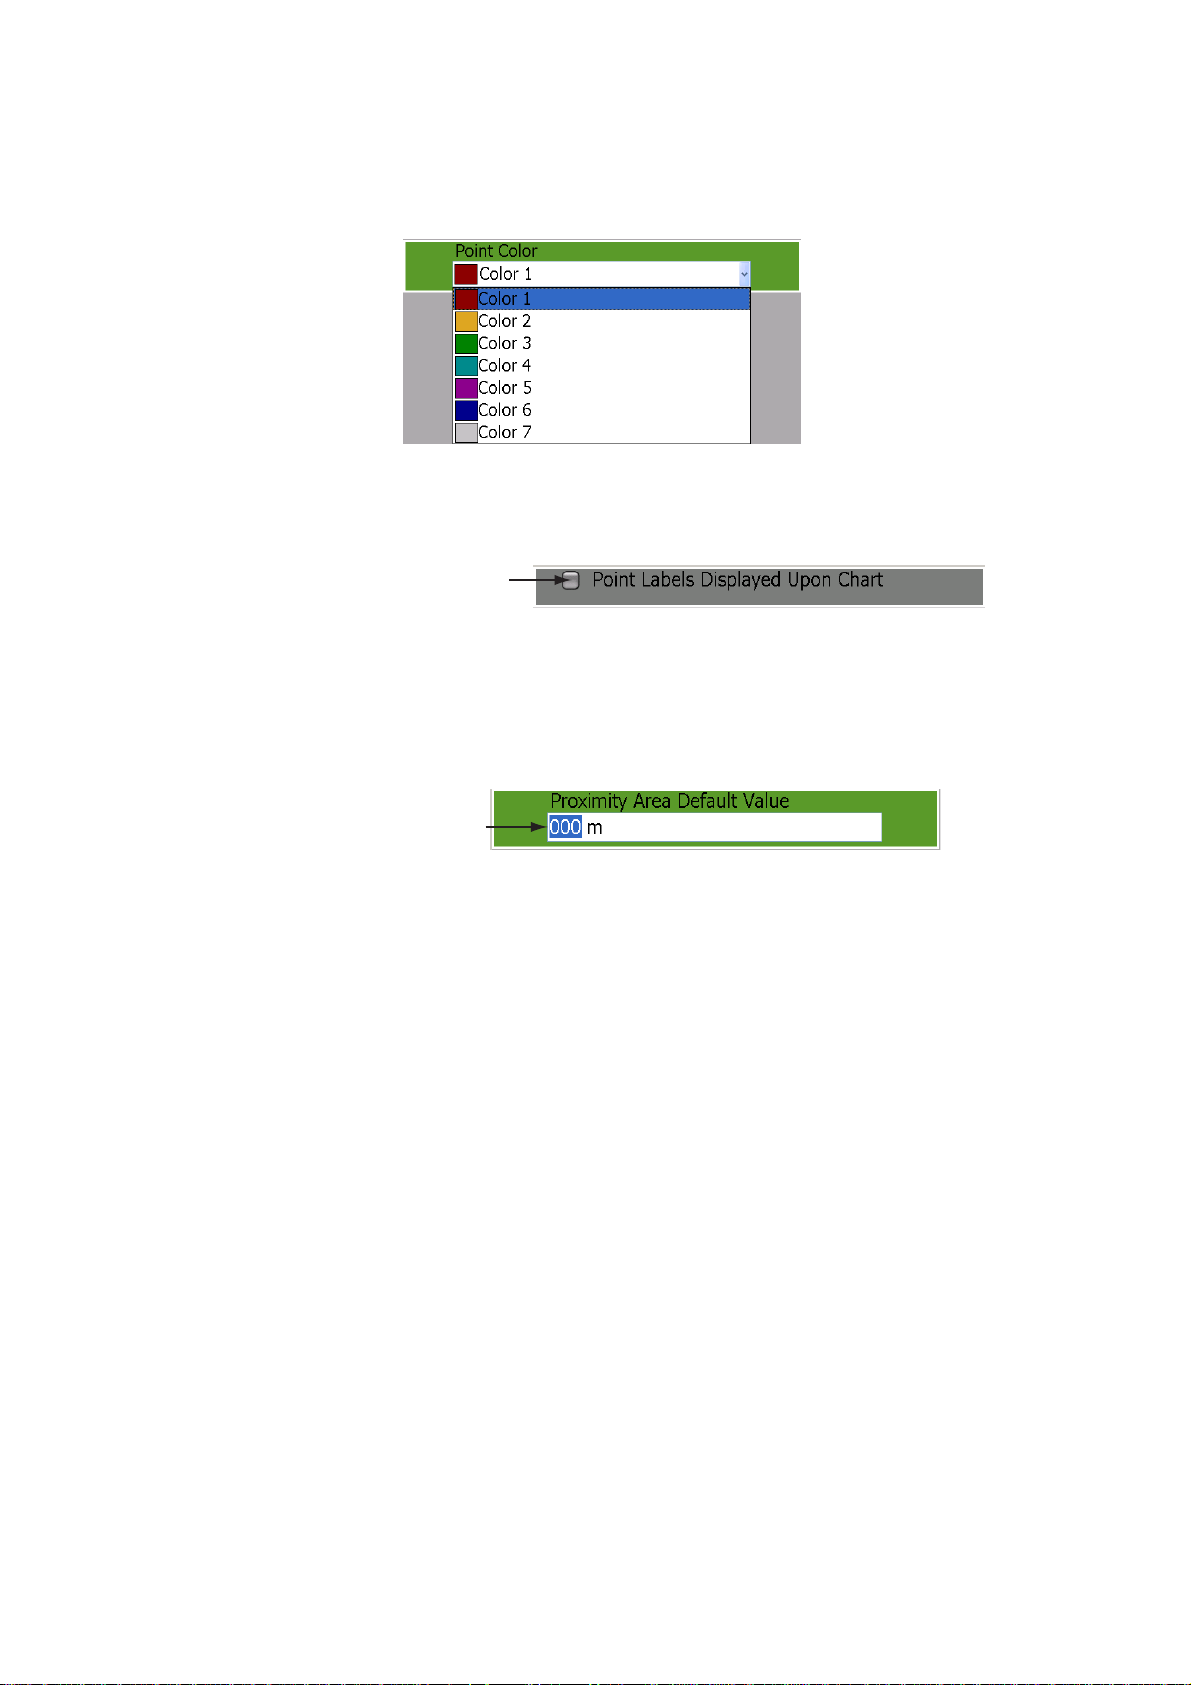
4. Rotate the Rotary Knob to select menu. Do one of the following depending on
menu item selected.
Combo box: push the Rotary Knob to open the box, rotate the Rotary Knob to
choose option, and then push the Rotary Knob to confirm selection.
ON/OFF item: Items which you turn on or off have a status box before them. To
switch an item on or off, choose it and push the Rotary Knob to color the status
box green to turn the item on, or gray to turn it off.
Show in green to turn ON;
gray to turn OFF
Alphanumeric data input: Use the Cursorpad to put the cursor to the right of the
alphanumeric data to change and push the Rotary Knob. Rotate the Rotary Knob
to choose alphanumeric (A-Z, 0-9) desired and push it to confirm selection.
Rotate the Rotary Knob clockwise to proceed in forward alphanumeric order;
counterclockwise to go in reverse order.
Value changes with
knob rotation.
1-15
Chapter 1: Operational Overview
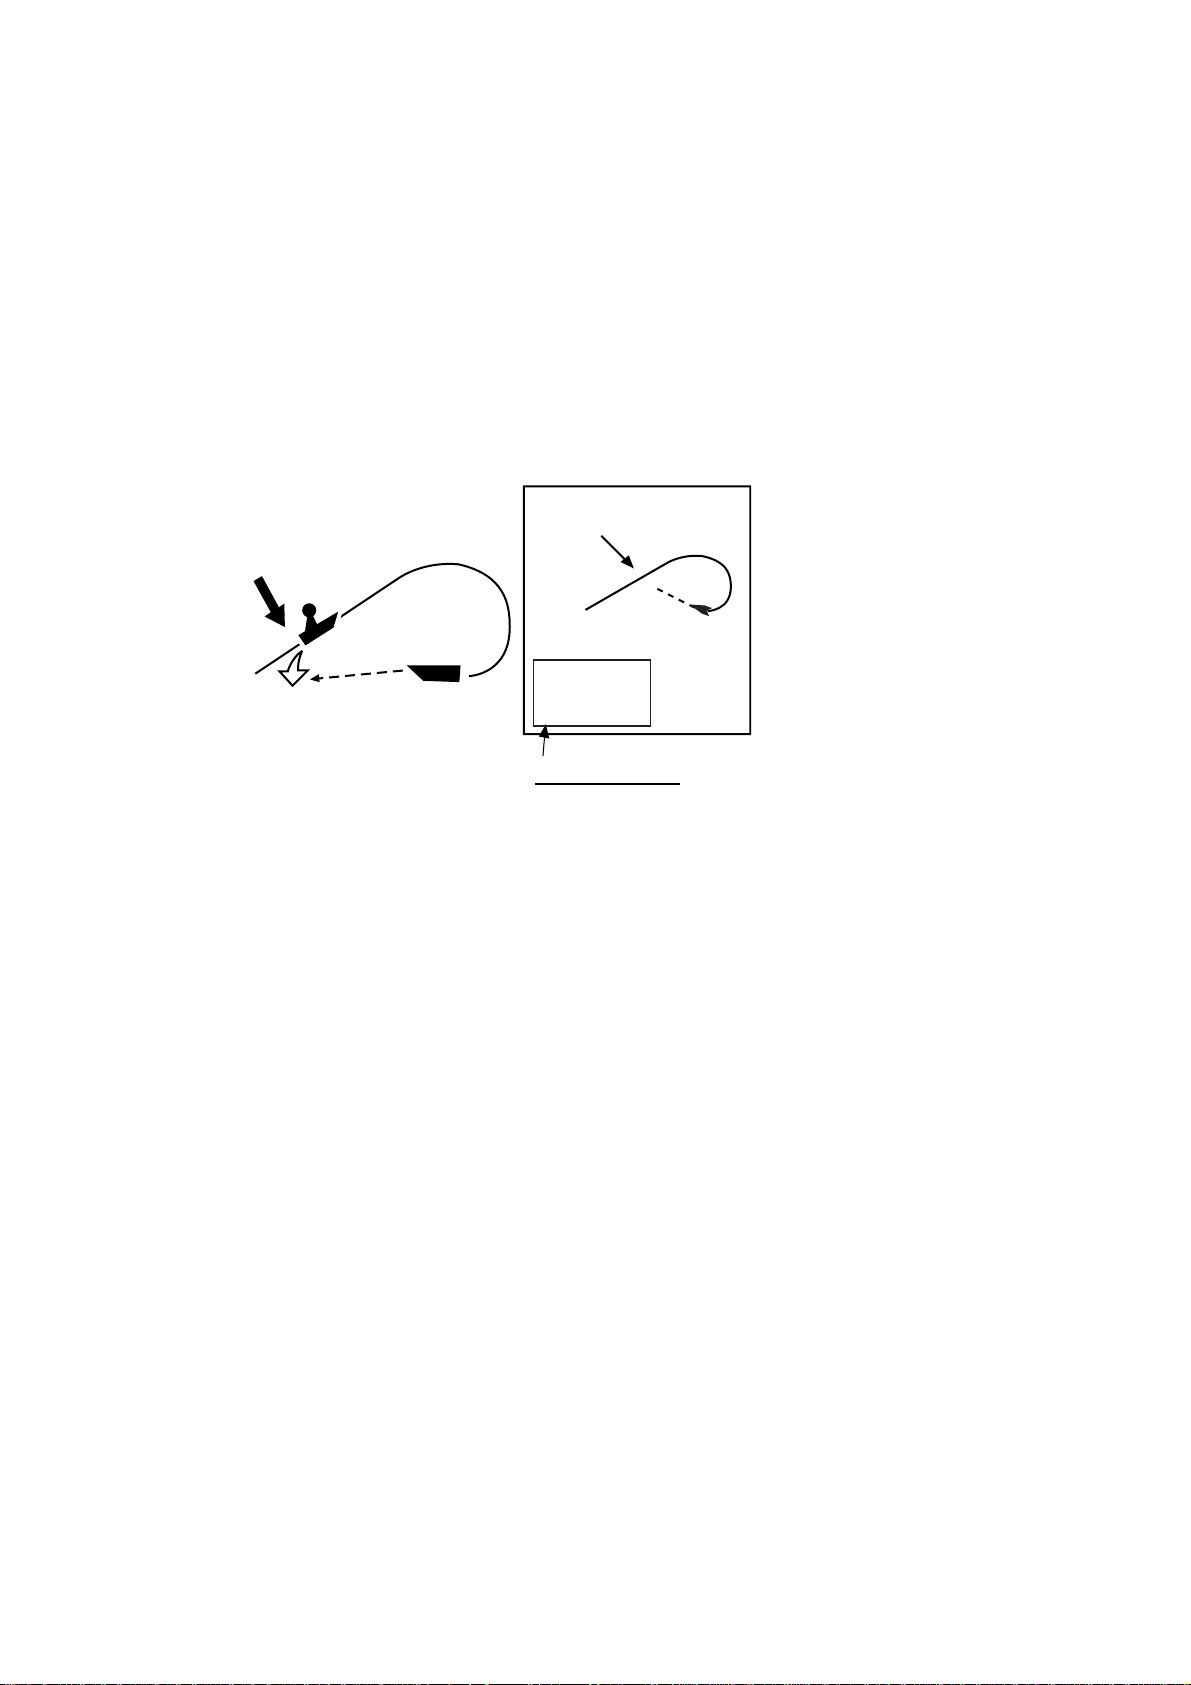
1.10 Man Overboard (MOB) Function
Use the MOB function if you lose a person or object overboard. You need either position data from a navigation device, or heading and speed data to calculate position by
dead reckoning. The MOB feature is available on any mode.
To mark MOB position, long-push the SAVE/MOB key. Then, the following occurs:
• The MOB symbol is placed at current position.
• The MOB data box appears and shows range and bearing from current position to
MOB position.
• Other units in the NavNet network are informed of MOB activation via an MOB
message.
MOB
mark
M
(MOB)
Range, bearing
Man
overboard
Current
position
M
162.5°
O
B
MOB Data Box
Bearing and range
to MOB position
M
0.49 nm
1-16
Chapter 1: Operational Overview
t
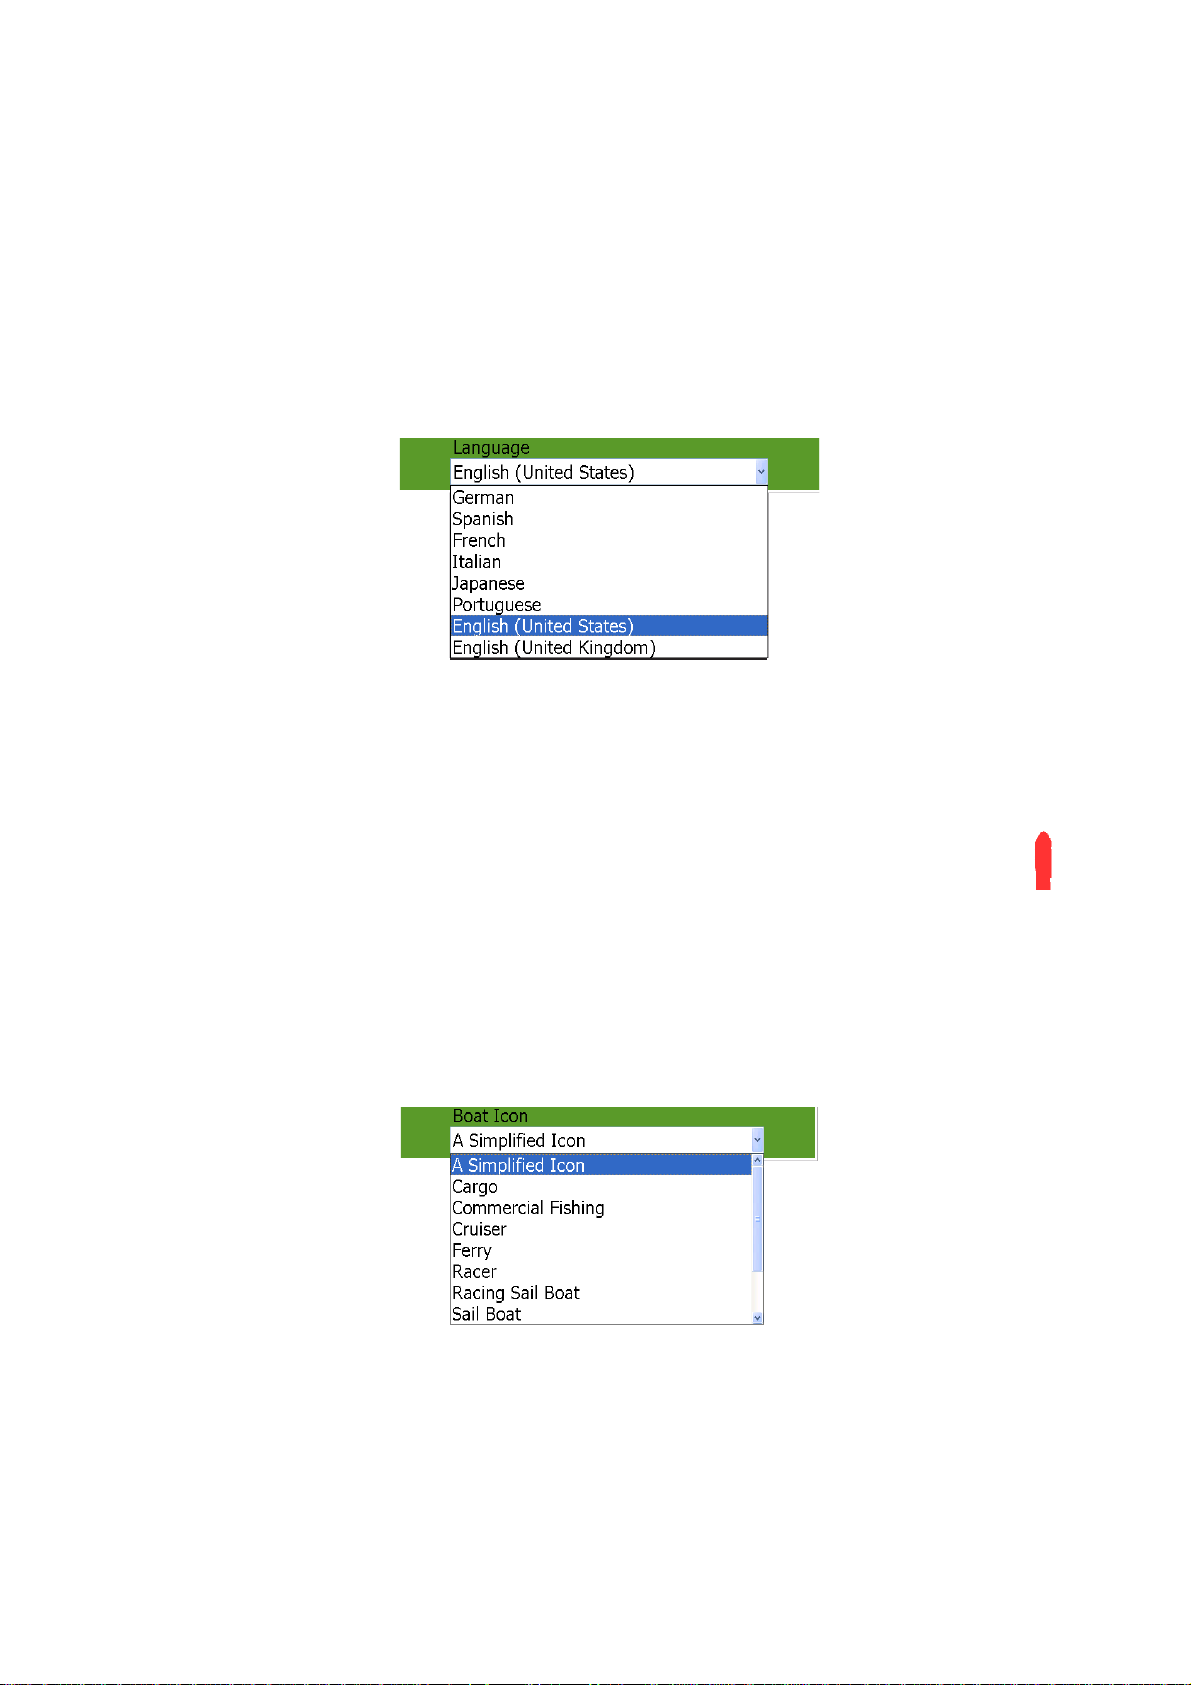
1.11 Selecting Language, Boat Characteristics
Selecting Language
The default interface language is American English. Language is also available in British English, German, Spanish, French, Italian, Japanese, and Portuguese.
1. Press the MENU key to open the menu.
2. Choose the System menu.
3. Choose the Settings sub menu.
4. Choose Language and push the Rotary Knob.
5. Rotate the Rotary Knob to select your language and push the Rotary Knob.
6. Press the MENU key to close the menu.
Setting Your Boat’s Characteristics
The boat icon (red) marks current position, and the default configuration looks
like the figure shown right. If you would like to show your boat realistically on
the screen, boat type and boat length can be set from the menu. Boat types
available are cargo, commercial fishing vessel, cruiser, ferry, racer, racing
sailboat sport fishing, and work boat.
1. Press the MENU key to open the menu.
2. Open the My NavNet menu and choose the Settings sub menu.
3. Choose the Boat Icon combo box and push the Rotary Knob to show the boat icon
options.
Boa
icon
4. Rotate the Rotary Knob to choose the boat icon which best matches your own
boat and push the Rotary Knob.
5. Rotate the Rotary Knob to choose Boat Length and push the Rotary Knob.
6. Rotate the Rotary Knob to set the length of your boat and push the Rotary Knob.
7. Press the MENU key to close the menu.
1-17

Chapter 1: Operational Overview
1.12 Entertainment
In addition to its navigation functions, the MFD BB can also provide music, radio and
video for your enjoyment. Connected to a PC you can listen to your favorite MP3 tunes
and watch video via the Windows Media Player. If you have a satellite radio receiver,
the wide variety of satellite radio music and talk shows are just a few clicks away. Listen through the built-in speaker or connect a pair of USB speakers for stereo sound.
To enable the entertainment feature, long-push the Rotary Knob on any mode to show
the ROTOkeys, select Entertain and push the Rotary Knob.
1-18
 Loading...