

Furuno USA 9ZWR110 User Manual

13. Create map file for RainMap
Map size for
RainMap
Paste several
screen together
13.1. Required software
・ Image software: Paint.NET, Photoshop, SAI, etc. (Require to use a layer)
This manual is explained by using Paint.NET.
・ Software to confirm map: RainMap.exe
13.2. Web Browser
・ Main map: OpenStreetMap
・ Confirm a map: Use website to confirm distance from the center position by such as “Draw
circles on the Google Map” .
http://www.nanchatte.com/map/circleService-e.html
13.3. Display
High resolution monitor recommended (2560x1440)
13.4. Overview
1) Capture the map screen from homepage.
2) Paste it to the image software.
3) Slide a map of homepage to capture the best part.
4) Paste it and to combine a map.
5) Repeat this procedure “1” to “4” to create a size for RainMap. (Maximum radius range of
view for RainMap is 50km, therefore it might need about 100km)
6) Adjust color of combined images.
7) Create bmp file.
8) Create txt file of map copyright.
S2E-17-0056_A
50
13.5. Create a map
Click it to
show a point
Mark will be
shown when to
point a mouse to
a search results.
[Map setting]
Center position:Radar position
Map :11
Type of map :Transit map
13.5.1. Cut maps
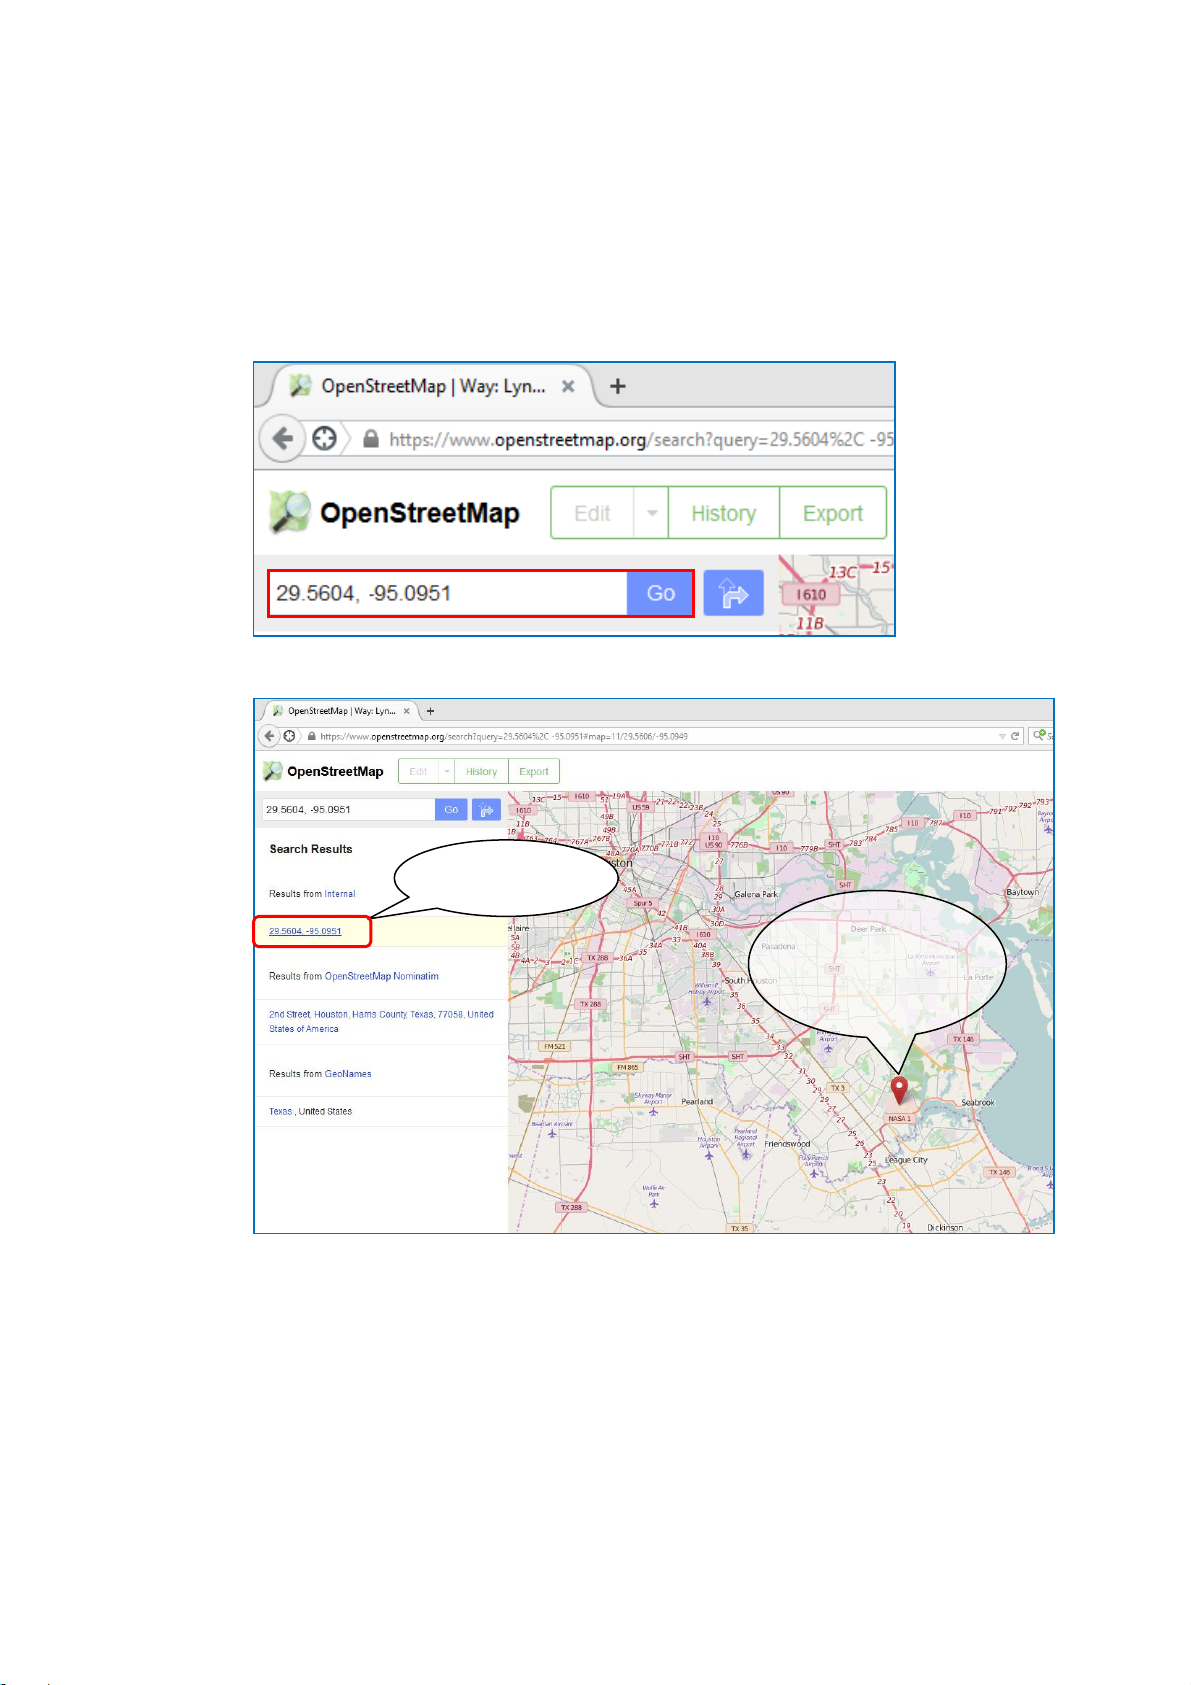
1. <OpenStreetMap>
Open website of OpenStreetMap from browser.
1) Click [Go] after entered Lon/Lat of radar position.
2) Click the target of Lon/Lat to move a map and display.
S2E-17-0056_A
51

S2E-17-0056_A
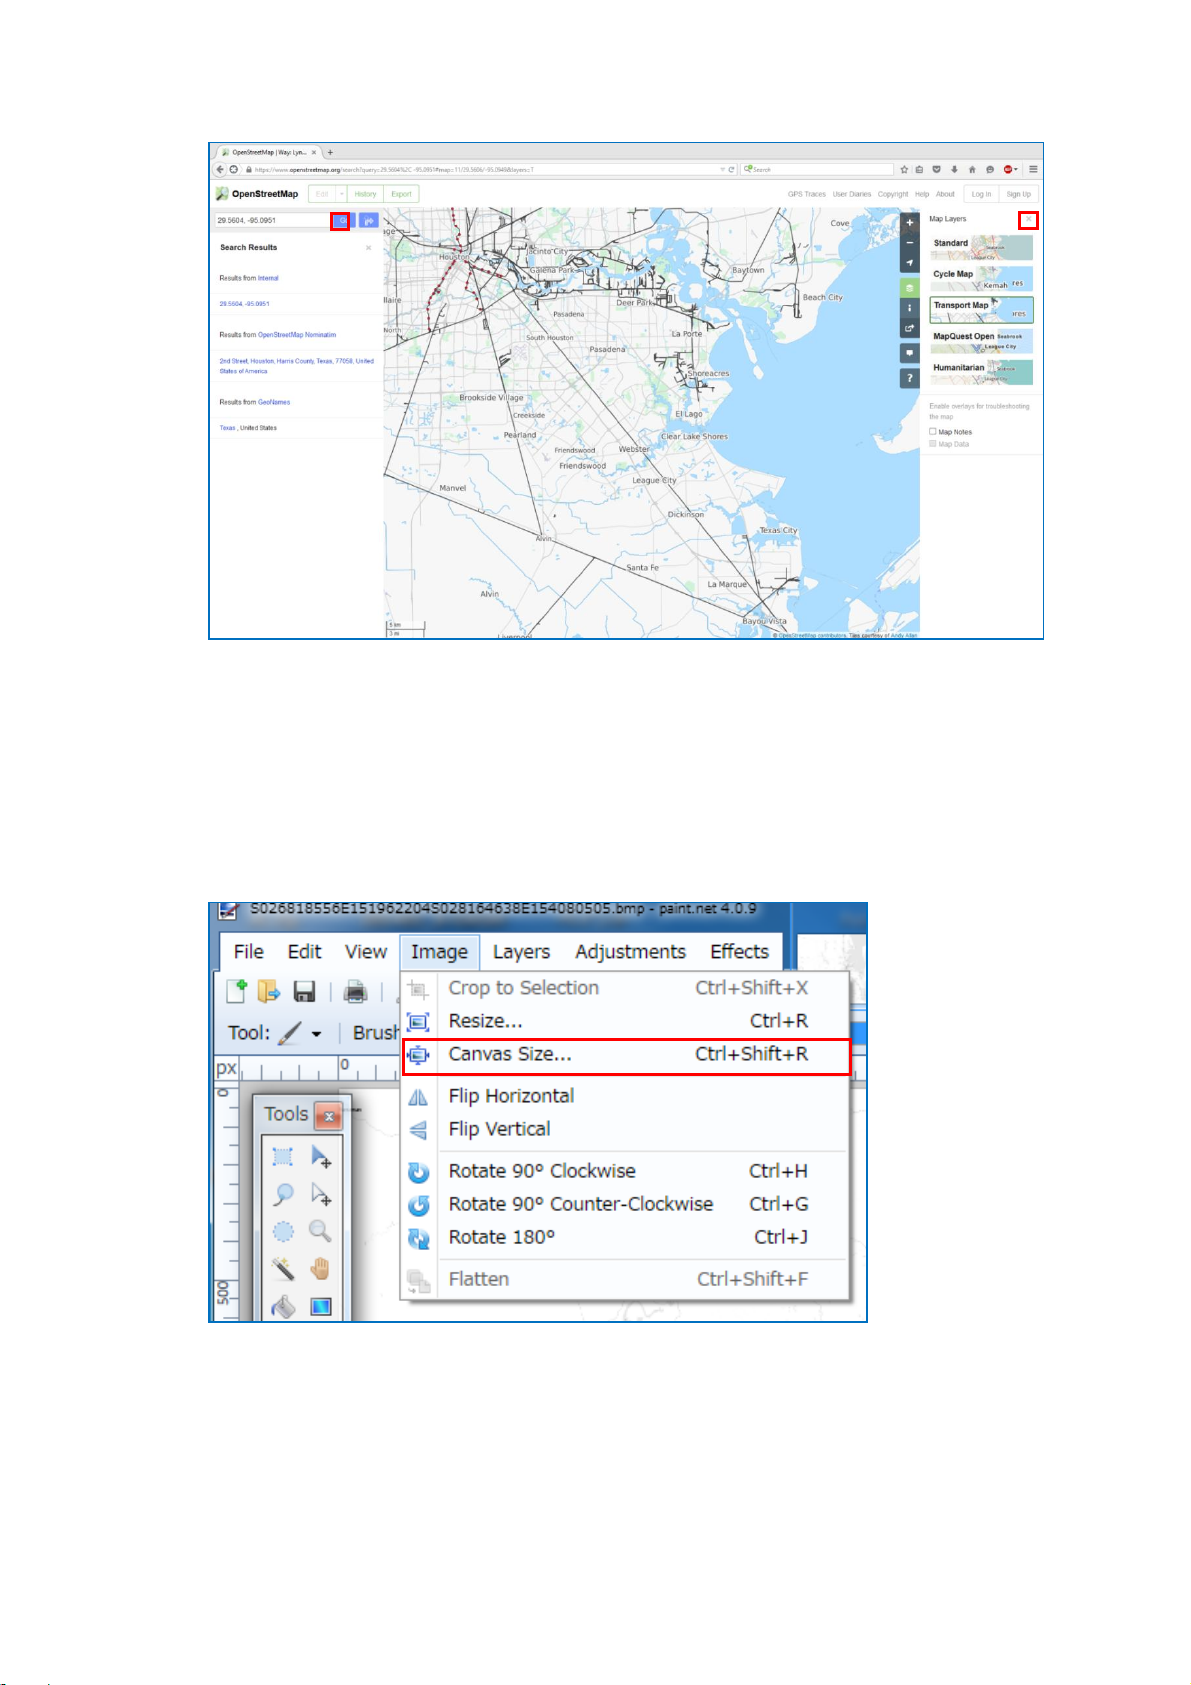
2. <OpenStreetMap>
Click [+] or [-] button or change scale number of URL directly to11.
http://www.openstreetmap.org/#map=11/29.5624/-95.2089&layers=T )
3. <OpenStreetMap>
Change layer to transport map.
Click [Layer] Select [Transport Map] from windows of [Map Layers].
52
S2E-17-0056_A
4. <OpenStreetMap>
Close [Search result] and [Map layer] windows to enlarge capture screen.
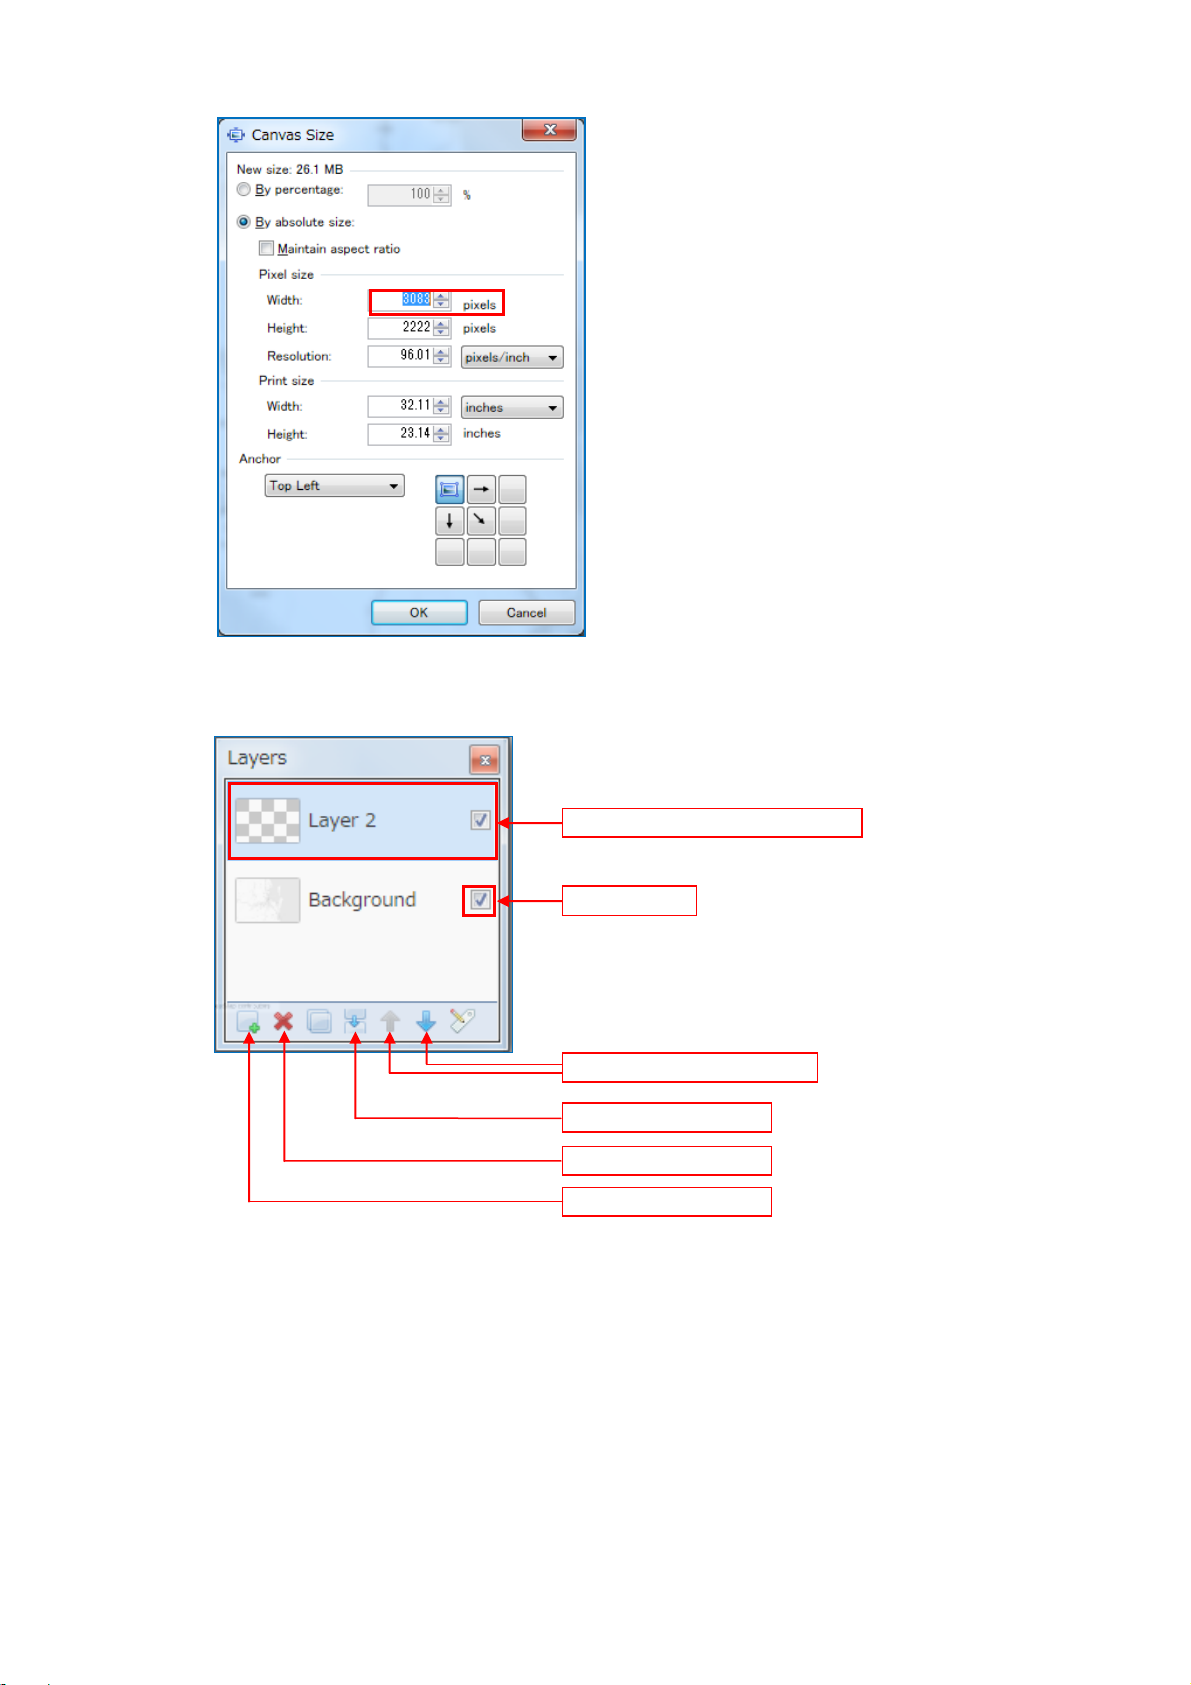
5. <Paint.NET>
Setup canvas size on Paint.NET.
[Canvas Size]
Width :3500 pixel
Height :3000 pixel
Cut a map about 100km from the center position.
・Select [Canvas Size] -> [Image] from menu bar.
53
S2E-17-0056_A
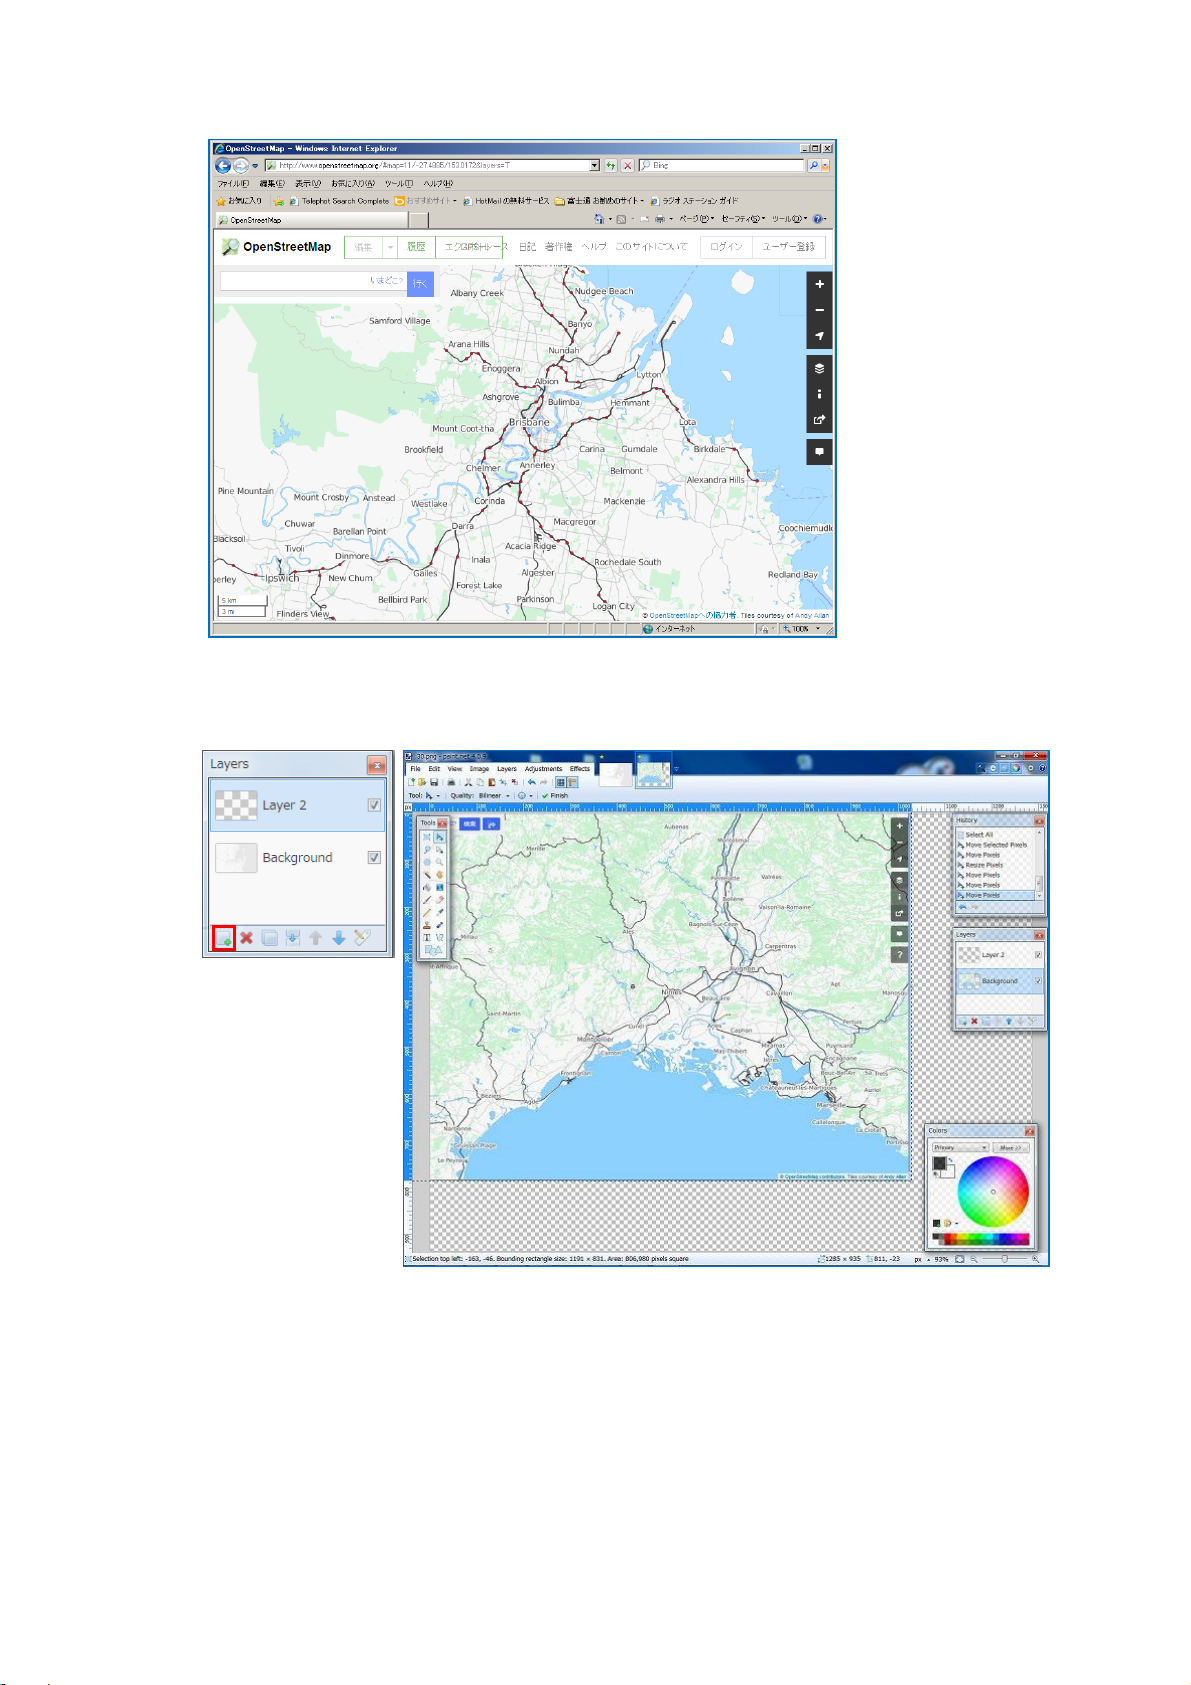
Check box
Move Layer Up/Down
Merge Layer down
Delete Layer
Add New Layer
Activate Layer is highlighting
・Set a pixel size of canvas size.
6. <Paint.NET>
To indicate [Windows] -> [Layer] if windows of layer is not shown on the screen.
Caution:
1) Activate layer is highlighting. Confirm to use active layer before copy, paste, and others.
(Display screen is not always activating)
2) Before activate other layer with a range selected, it must deselect range in case of other layer
is effective to a select range of previous layer!
*It could release a select range from [Edit] -> [Deselect]
54
S2E-17-0056_A
7. <OpenStreetMap>
Press [Alt] + [PrtSc] to copy a map screen of OpenStreetMap.
8. <Paint.NET>
Click [Add New Layer] at a windows of Layers (New layer would be highlighted), then click
[Paste] to paste a screen of Open StreetMap into a new layer.
55
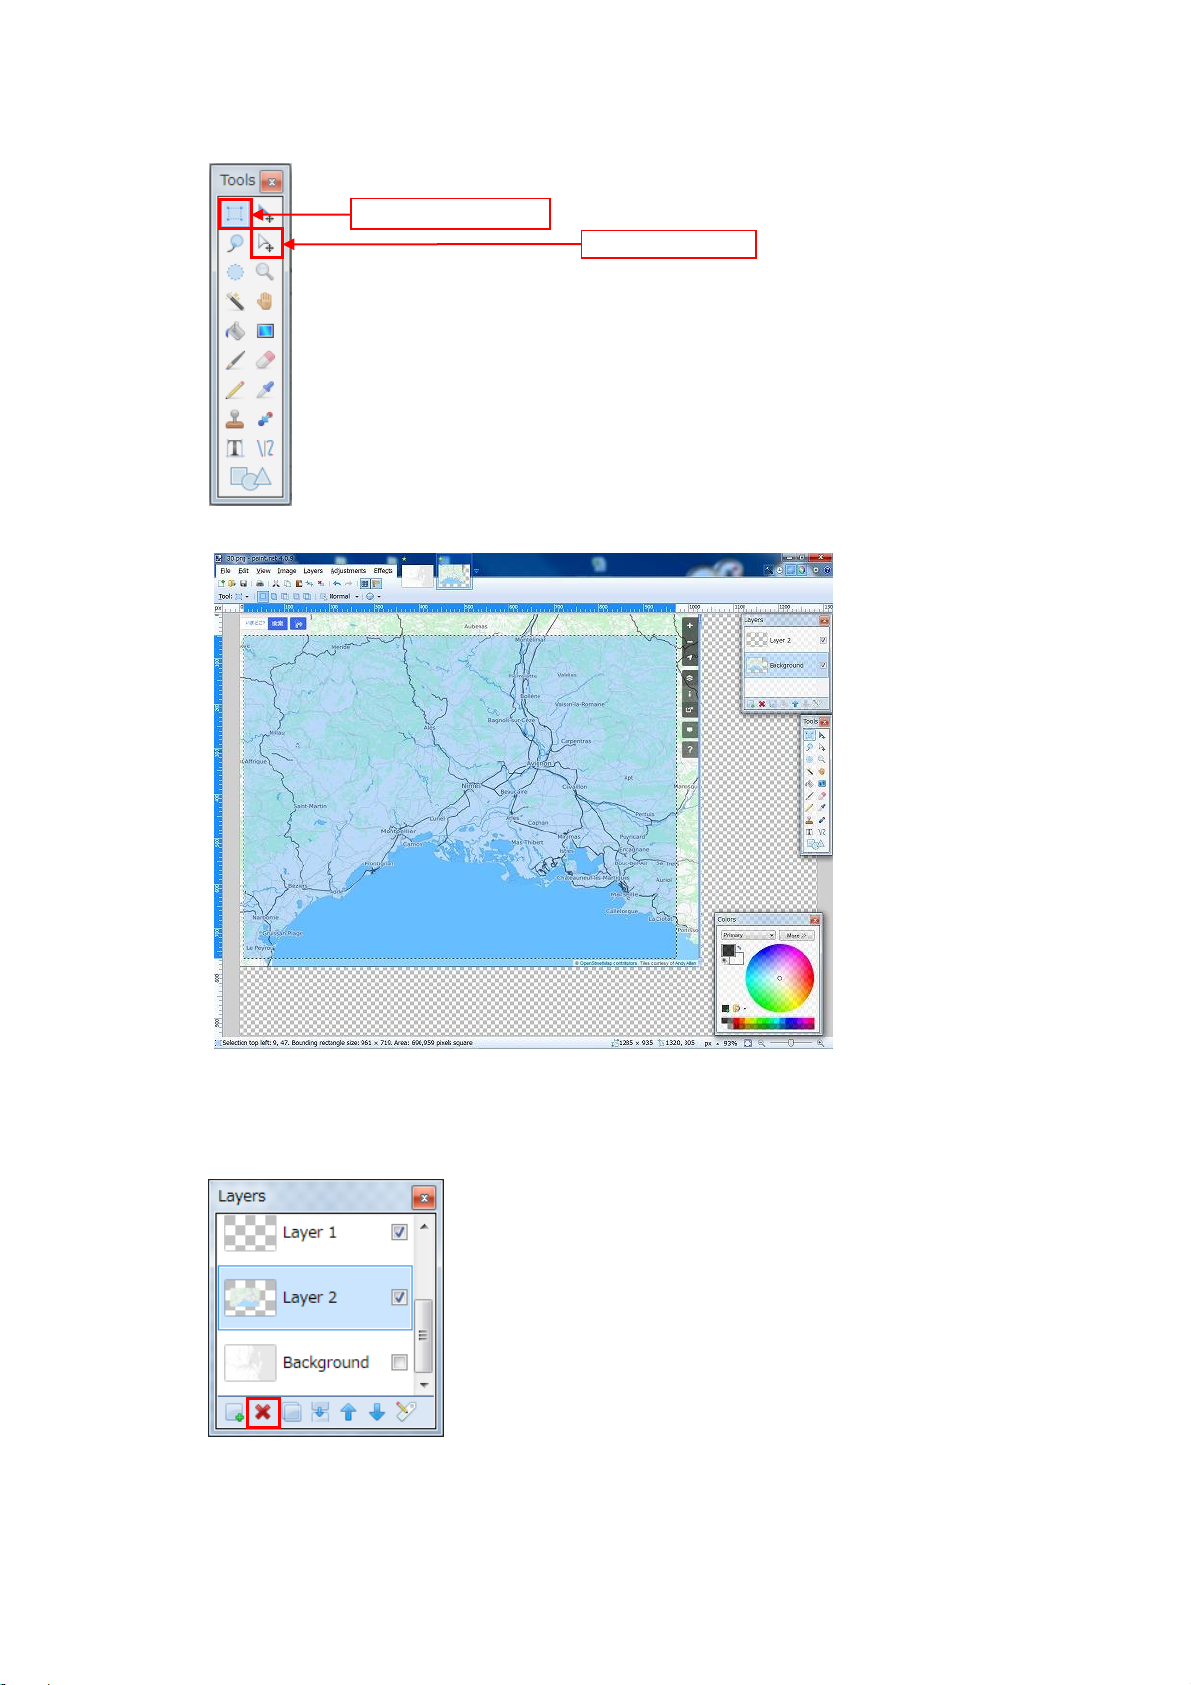
9. <Paint.NET>
Rectangle Select
Move Selection
10. <Paint.NET>
S2E-17-0056_A
Copy only a part of map from procedure “8” and Select [Tools] -> [Rectangle Select]. It
could make a fine adjust by using [Move Selection].
Select only a part of map and click [Copy].
Click [Add New Layer], it would be highlighted on new layer, then click [Paste] to paste a map
into a new layer. (A part of map that copy at procedure “9” would be pasted)
56
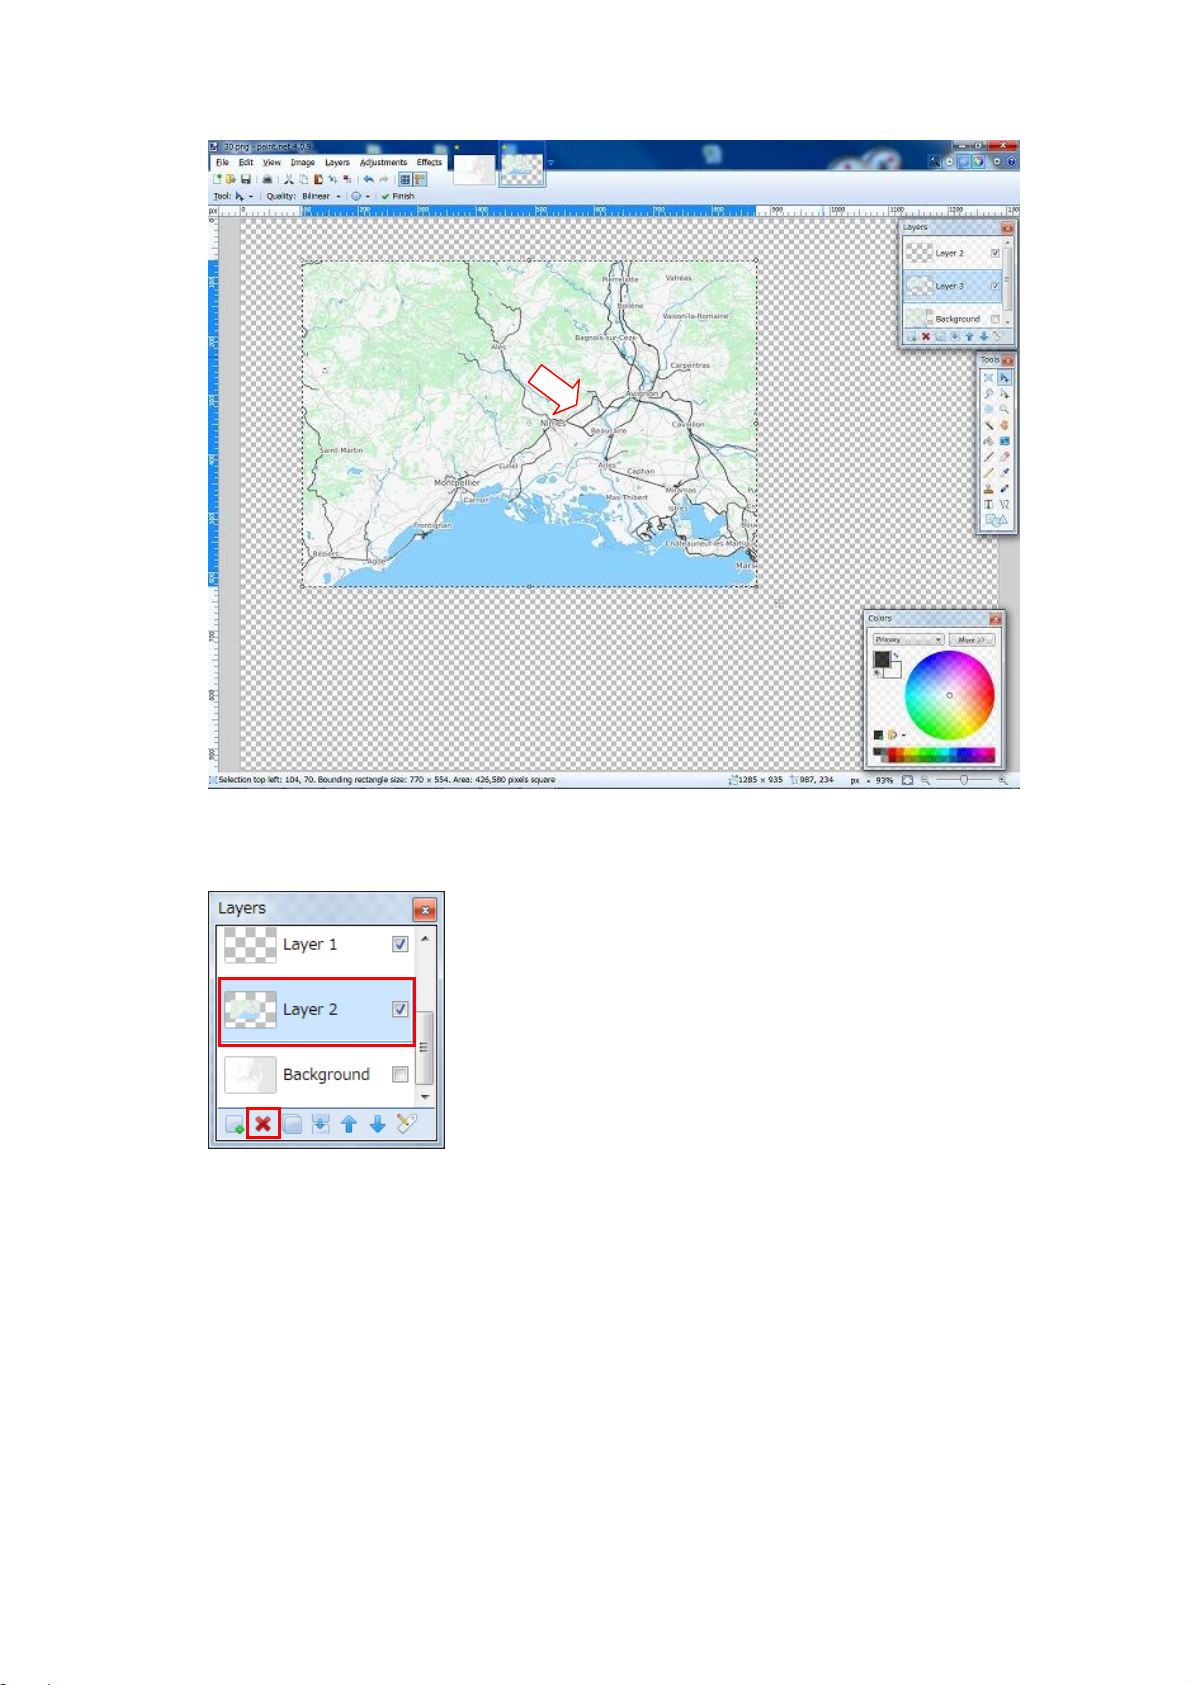
11. <Paint.NET>
12. <Paint.NET>
S2E-17-0056_A
Move the pasted screen to the center of canvas and bring radar position to the center.
Delete unnecessary layer of without having map (procedure “8”). Confirm the highlight before
click [Delete] button.
57
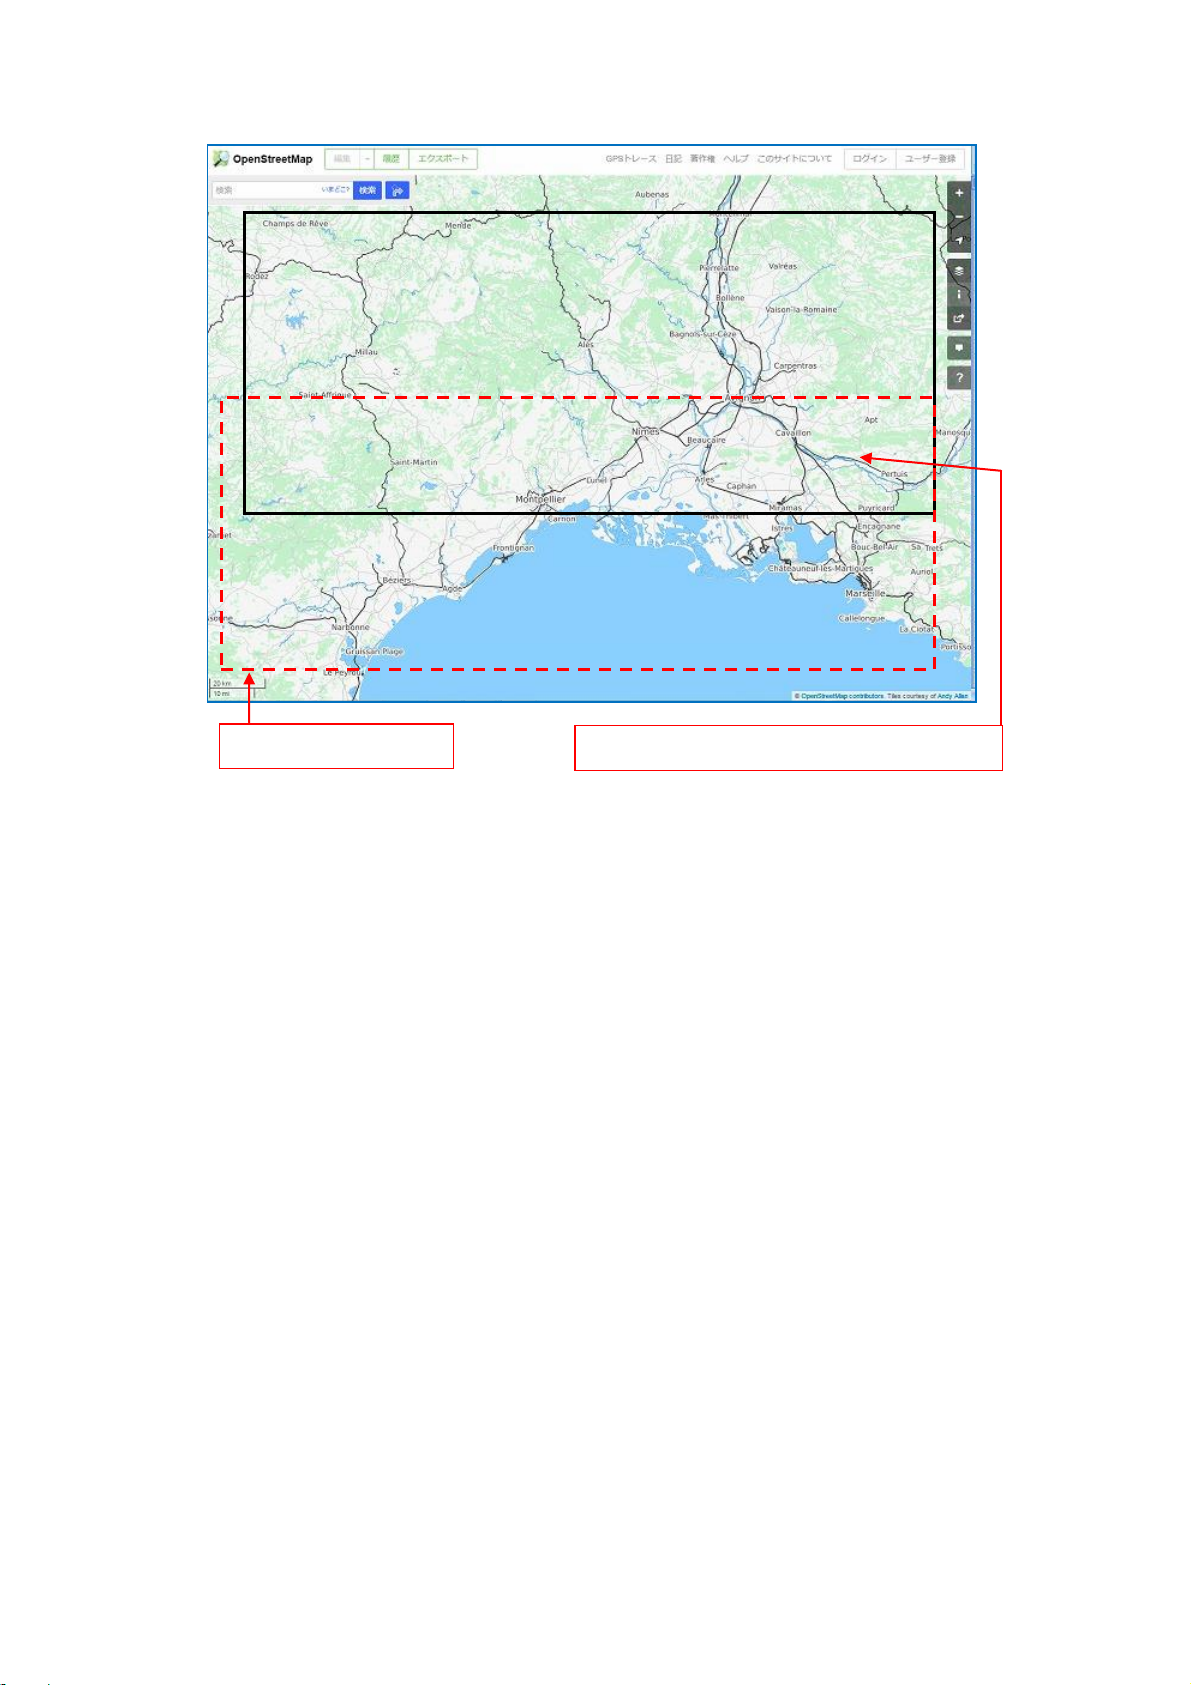
13. <OpenStreetMap>
Previous copy range
Pile up a little with the previous copy range
Slide a map display position of OpenStreetMap. (Pile up a little with the previous copy range.)
14. <Paint.NET>
Copy a map screen -> Add new layer by Paint.NET -> Confirm that added layer is selected ->
Paste a copy screen.
Copy new layer after selected a part of map only. (Refer the procedure “7” to “10”)
15. <Paint.NET>
Delete unnecessary layer. (Refer the procedure “12”)
S2E-17-0056_A
58
 Loading...