

Page 1

32” HD LED TV
Téléviseur HD à DEL de 32po
TV LED HD 32”
Instruction Manual
Manuel d’instructions
Manual de instrucciones
* Product picture is for reference only.
* L’image du produit est donnée uniquement à titre indicatif.
* La imagen del producto es solo una referencia.
Model/Modèle/Modelo: FDHS32M4A
Page 2

Welcome
Thank you for purchasing this Furrion® HD LED TV. Before operating your new product, please
read these instructions carefully. This instruction manual contains information for safe use,
installation and maintenance of the product.
English
The manufacturer does not accept responsibility for any damages due to not observing these
instructions.
If you have any further questions regarding our products, please contact us at
support@furrion.com
Supplier’s Declaration of Conformity
47 CFR § 2.1077 Compliance Information
Unique Identifier
Trade Name: Furrion
Model No.: FDHS32M4A
Responsible Party – U.S. Contact Information
Furrion Innovation Center & Institute of Technology
52567 Independence Ct., Elkhart, IN 46514, USA
Toll free:1-888-354-5792; Email: support@furrion.com
FCC Compliance Statement
This device complies with Part 15 of the FCC Rules. Operation is subject
to the following two conditions: (1) This device may not cause harmful
interference, and (2)this device must accept any interference received,
including interference that may cause undesired operation.
2
Page 3

Contents
Welcome .................................................................................................2
Contents .................................................................................................3
Safety Warnings ....................................................................................4
Important Safety Instructions .........................................................................................................4
Safety Precautions .............................................................................................................................. 7
Function Overview ................................................................................9
Control Panel .........................................................................................................................................9
Rear Panel ............................................................................................................................................. 10
Unimote ................................................................................................................................................... 11
About Your HD LED TV .......................................................................13
Features ................................................................................................................................................. 13
Power Source ...................................................................................................................................... 13
Before Operation................................................................................. 14
What’s in the Box ................................................................................................................................ 14
Prepare your Remote Control ...................................................................................................... 14
Getting Started ....................................................................................15
Change Settings .................................................................................. 16
Setup Setting ....................................................................................................................................... 16
Picture Setting ..................................................................................................................................... 19
Sound Setting ..................................................................................................................................... 20
Time Setting ......................................................................................................................................... 21
Lock Setting ........................................................................................................................................ 22
Channel Setting ..................................................................................................................................25
PC Setting ............................................................................................................................................ 26
USB Mode ............................................................................................................................................ 28
English
Troubleshooting ................................................................................. 29
Specifications .................................................................................... 30
3
Page 4

Safety Warnings
CAUTION
English
CAUTION: TO REDUCE THE RISK OF
ELECTRIC SHOCK, DO NOT REMOVE COVER
(OR BACK). NOUSER-SERVICEABLE PARTS
INSIDE. REFER SERVICING TO QUALIFIED
SERVICE PERSONNEL.
shock. For the safety of everyone in your
household, please do not remove product
covering.
operating and maintenance problems.
safety connection to electrical earth.
WARNING: To reduce the risk of fire or electric
shock, this apparatus should not be exposed
to rain / moisture or placed in the vicinity of
objects filled with liquids (such as vases).
CAUTION: To prevent electric shock, fully
insert the plug. For regions with polarized
plugs: Please match wide blade to wide slot.
Important Safety Instructions
1. Read these instructions.
2. Keep these instructions.
3. Heed all warnings.
4. Follow all instructions.
5. Do not use this apparatus near water.
6. Clean only with a dry cloth.
7. Do not block any of the ventilation
openings. Install in accordance with the
manufacturer’s instructions.
4
RISK OF ELECTRIC SHOCK
DO NOT OPEN
This ‘bolt of lightning’ indicates
uninsulated material within your
unit which may cause an electric
The ‘exclamation mark’ calls
attention to features within the
enclosed literature to prevent
This equipment is a Class II or
double insulated electrical
appliance. It has been designed in
such a way that it does not require a
8. Do not install near any heat sources such
as radiators, heat registers, stoves or
other apparatus (including amplifiers) that
produce heat.
9. Do not defeat the safety purpose of
the polarized or grounding-type plug.
Apolarized plug has two blades with one
wider than the other. A grounding type
plug has two blades and a third grounding
prong. The wide blade or the third prong
are provided for your safety. When the
provided plug does not fit into your outlet,
consult an electrician for replacement of
the obsolete outlet.
10. Protect the power cord from being walked
on or pinched, particularly at plugs,
convenience receptacles and the point
where they exit from the apparatus.
11. Only use attachments/accessories
specified by the manufacturer.
12. Use only with a cart, stand,
tripod, bracket or table
specified by the manufacturer
or sold with the apparatus.
When a cart is used, use
caution when moving the cart/apparatus
to avoid injury from tip-over.
13. Unplug this apparatus during lightning
storms or when unused for long periods
of time.
14. Refer all servicing to qualified service
personnel. Servicing is required when
the apparatus has been damaged in any
way, such as if the power-supply cord or
plug is damaged, liquid has been spilled
or objects have fallen into the apparatus,
or when the apparatus has been exposed
to rain or moisture, does not operate
normally, or has been dropped.
15. Apparatus should not be exposed to
dripping or splashing, and objects filled
with liquids, such as vases, should not be
placed on the apparatus.
16. An outside antenna system should not
be located in the vicinity of overhead
power lines or other electric light or power
Page 5

Safety Warnings
circuits, or where it can fall into such
power lines or circuits. When installing an
outside antenna system, extreme care
should be taken to eliminate touching
power lines or circuits as contact might
be fatal.
17. Do not overload wall outlets, extension
cords, or integral convenience
receptacles as this can result in a risk of
fire or electric shock.
18. Never push objects of any kind into this
product through openings as they may
touch short-out parts or dangerous
voltage points that could result in a fire
or electric shock. Never spill liquid of any
kind on the product.
19. If an outside antenna is connected to the
television equipment, be sure the antenna
system is grounded so as to provide
some protection against voltage surges
and built up static charges. Section 810
of the National Electrical Code provides
information with respect to proper
grounding of the mast and supporting
structure, grounding of the lead-in wire
to an antenna discharge unit, size of
grounding conductors, location of antenna
discharge unit, connection to grounding
electrodes, and requirements for the
grounding electrodes.
EXAMPLE OF ANTENNA GROUNDING AS PER
THE NATIONAL ELECTRICAL CODE
ANTENNA
LEAD IN WIRE
GROUND CLAMP
ELECTRIC SERVICE
EQUIPMENT
NEC-NATIONAL
ELECTRICAL
CODE S2898A
ANTENNA
DISCHARGE UNIT
(NEC SECTION 810-20)
GROUNDING CONDUCTORS
(NEC SECTION 810-21)
GROUND CLAMPS
POWER SERVICE GROUNDING
ELECTRODE SYSTEM
(NEC ART 250, PART H))
20. NOTE TO CABLE/TV INSTALLER: This
reminder is provided to call the CATV
system installer’s attention to Article 82 0-40
of the National Electric Code (U.S.A.).
The code provides guidelines for proper
grounding and, in particular, specifies that
the cable ground shall be connected to
the grounding system of the building, as
close to the point of the cable entry as
practical.
21. When replacement parts are required,
be sure the service technician uses
replacement parts specified by the
manufacturer or those that have the
same characteristics as the original part.
Unauthorized substitutions may result in
fire, electric shock or other hazards.
22. Upon completion of any service or repairs
to this unit, ask the service technician to
perform safety checks to determine that
the unit is in proper operating condition.
23. When you connect the product to other
equipment, turn off the power and unplug
from the wall outlet. Failure to do so may
cause an electric shock and serious
personal injury. Read the owner’s manual
of the other equipment carefully and
follow the instructions when making any
connections.
24. Sudden high volume may cause hearing
or speaker damage. When you use
headphones (if the unit is equipped with
a headphone jack), keep the volume at a
moderate level. If you use headphones
continuously with high volume, you may
suffer hearing damage.
25. Do not allow the product to output
distorted sound for extended periods of
time. This may cause speaker overheating
and fire.
26. The socket-outlet must be installed near
the unit and easily accessible.
27. The mains plug is used as the disconnect
and shall remain readily operable.
28. Batteries (battery pack or installed
batteries) should not be exposed to
excessive heat such as direct sunlight, fire
or other heat sources.
English
5
Page 6

Safety Warnings
CONDENSATION
Moisture will form in the operating section
of the unit if the unit is brought from cool
English
surroundings into a warm room or if the
temperature of the room rises suddenly.
When this happens the unit’s performance
will be impaired. To prevent this, let the unit
stand in its new surroundings for about an
hour before switching on, or make sure the
room temperature rises gradually.
Condensation may also form during the
summer if the unit is exposed to the breeze
from an air conditioner. In such cases, change
the location of the unit.
HOW TO HANDLE THE LCD PANEL
● Do not press hard or jolt the LCD panel.
Itmay cause the LCD panel glass to break
and injury may occur.
● If the LCD panel is broken, make
absolutely sure you do not touch the
liquid in the panel. This may cause skin
inflammation.
● If the liquid gets in your mouth,
immediately rinse and consult with your
doctor. Also, if the liquid gets in your eyes
or touches your skin, consult your doctor
after rinsing for at least 15 minutes in clean
wa te r.
Possible Adverse Effects on LCD Panel: If
a fixed (non-moving) pattern remains on the
LCD panel for long periods of time, the image
can become permanently engrained and
cause subtle but permanent ghost images.
This type of damage is NOT COVERED BY
YOUR WARRANTY. Never leave your LCD
panel on for long periods of time while it is
displaying the following formats or images:
● Fixed images, such as stock tickers, video
game patterns, TV station logos and
websites.
● Special formats that do not use the entire
screen. For example, viewing letterbox
style (16:9) media on a normal (4:3) display
(black bars at top and bottom of screen);
or viewing normal style (4:3) media on a
wide screen (16:9) display (black bars on
left and right sides of screen).
The following symptoms are not signs
of malfunction but technical limitation.
Therefore we disclaim any responsibility for
these symptoms.
● LCD panels are manufactured using
an extremely high level of precision
technology, however sometimes parts
of the screen may be missing picture
elements or have luminous spots. This is
not a sign of a malfunction.
● Do not install the LCD panel near
electronic equipment that produces
electromagnetic waves. Some equipment
placed too close to LCD may cause
interference.
● Effect on infrared devices – there may be
interference while using infrared devices
such as infrared cordless headphones.
Power source: This LED TV is designed
to operate on 100~240 volt 50/60 Hz,
AC current. Insert the power cord into a
100~240volt 50/60 Hz outlet.
To prevent electric shock, do not use the LED
TV’s (polarized) plug with an extension cord,
receptacle, or other outlet unless the blades
and ground terminal can be fully inserted to
prevent blade exposure.
Warning: To reduce the risk of fire or electric
shock, do not expose this apparatus to rain or
moisture.
Caution: Never remove the back cover of the
LED TV as this can expose you to very high
voltages and other hazards. If the TV does
not operate properly, unplug the LED TV and
call your authorized dealer or service center.
Adjust only those controls that are covered
in the instructions, as improper changes or
modifications not expressly approved by
Furrion could void the user’s warranty.
6
Page 7
Safety Warnings
1.5 inches
COMPLIANCE
FCC Statement
Note: This equipment has been tested and
found to comply with the limits for a Class B
digital device, pursuant to Part 15 of the FCC
Rules. These limits are designed to provide
reasonable protection against harmful
interference in a residential installation. This
equipment generates, uses and can radiate
radio frequency energy and, if not installed
and used in accordance with the instructions,
may cause harmful interference to radio
communications.
However, there is no guarantee that
interference will not occur in a particular
installation. If this equipment does cause
harmful interference to radio or television
reception, which can be determined by
turning the equipment off and on, the user is
encouraged to try to correct the interference
by one or more of the following measures:
– Reorient or relocate the receiving
antenna.
– Increase the separation between the
equipment and receiver.
– Connect the equipment into an outlet on
a circuit different from that to which the
receiver is connected.
– Consult the dealer or an experienced
radio/TV technician for help.
WARNING: Changes or modifications to
this unit not expressly approved by the party
responsible for compliance could void the
user’s authority to operate this equipment
under FCC Rules.
This device complies with part 15 of the FCC
Rules. Operation is subject to the following
two conditions:
1. This device may not cause harmful
interference.
2. This device must accept any interference
received, including interference that may
cause undesired operation.
Safety Precautions
WARNING: Never place a television set in
an unstable location. A television set may
fall, causing serious personal injury or death.
Many injuries, particularly to children, can be
avoided by taking simple precautions such as:
– Using cabinets or stands recommended
by the manufacturer of the television set.
– Only using furniture that can safely
support the television set.
– Ensuring the television set is not
overhanging the edge of the supporting
furniture.
– Not placing the television set on tall
furniture (for example, cupboards or
bookcases) without anchoring both
the furniture and the television set to a
suitable support.
– Not placing the television set on
cloth or other materials that may be
located between the television set and
supporting furniture.
– Educating children about the dangers
of climbing on furniture to reach the
television set or its controls.
If your existing television set is being retained
and relocated, the same considerations as
above should be applied.
The unit emits heat when in operation. Do
not place any covers or blankets on the unit,
this may cause overheating. Do not block
ventilation holes, or set up near radiators.
Do not place in direct sunlight. When placing
on a shelf, leave 4 inches (10 cm) free space
around the entire unit.
4 inches
English
7
Page 8

Safety Warnings
4 inches
Wire
Clamp
Screw
4 inches
Wire
Wire
Screw
Clamp
Wire
Wire
Wire
1.5 inches
1.5 inches
Notes when mounting the LED
TV on the wall
English
If the unit is to be mounted on the wall,
contact the retailer where you purchased the
LED TV for advice, and have the equipment
professionally installed. Incomplete or
improper installation may cause injury to you
and/or damage to the LED TV.
WARNING:
● Do not use this TV with wall mounts that
allow the TV to tilt vertically. Vertical tilting
wall mounts may cause structural damage
to the TV.
● Use ONLY fixed or horizontal swiveling
wall mounts with this TV.
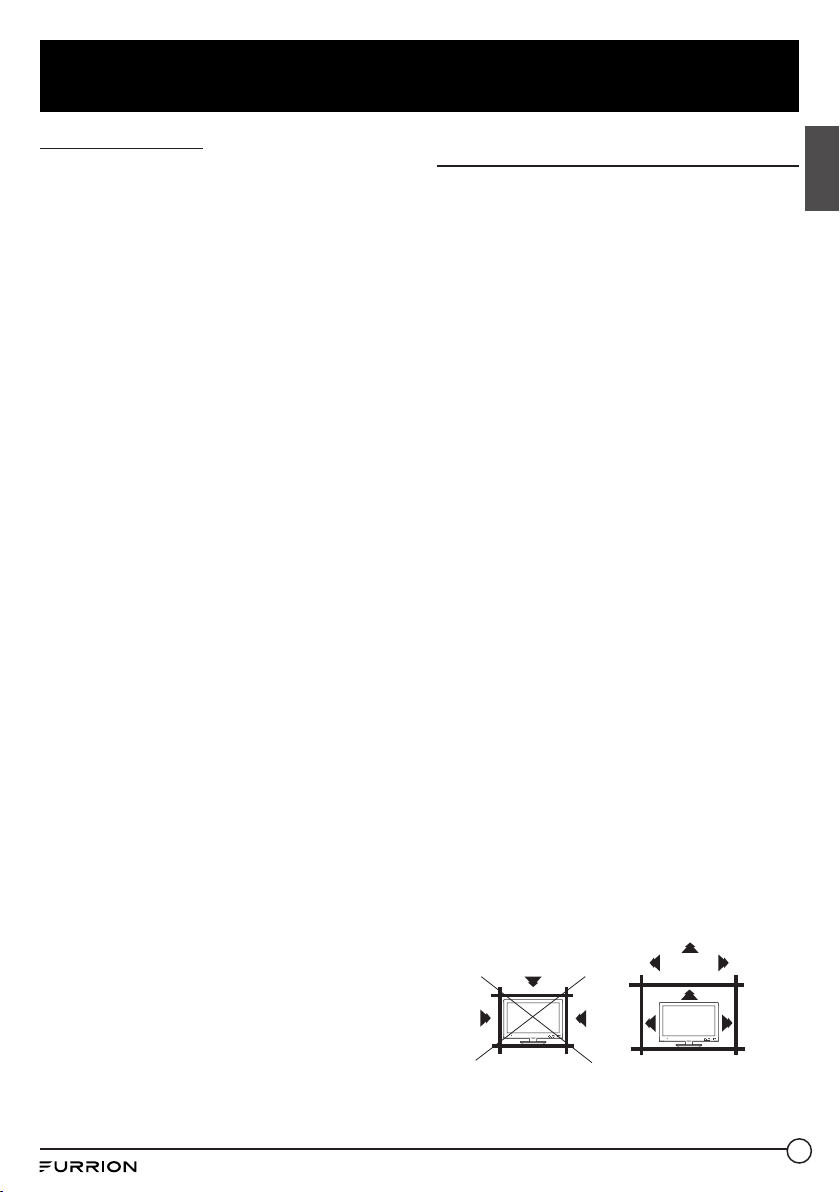
Notice for TV Cabinet
If the unit is to be mounted on a cabinet
smaller than the length of the unit, it could
result in an unstable location. The unit may
tumble over, making a risk of personal,
possibly fatal injury. This would also damage
the product seriously. Accordingly, Furrion
accepts no responsibility or liability for any
injuries or property damage resulting from the
improper installation.
YES !! NO !!
8
Page 9

Function Overview
Control Panel
1
VOL+
2
VOL-
3
CH+
4
CH-
5
MENU
6
SOURCE
7
POWER
* Please note that the button layout of the
controls may vary from model to model.
Item Button Function
1
2
3
4
5
6
7
VOL+
VOL-
CH+
CH-
MENU
SOURCE
POWER
Press to increase volume
Press to decrease volume
Press to skip to the next channel
Press to skip to the previous
channel
Press to enter the main menu
Press to select the input source
Press to switch the TV on/off
English
9
Page 10

Function Overview
EARPHONE
OUT
USB
AUDIO
IN
L- -R
AUDIO
OUT
R- -L
R
L
OPTICAL
OUT
HDMI 1 IN
2
3
5
6
8
9
10
11
4
HDMI 2 IN
ARC
HDMI 3 IN
VGA IN
PC AUDIO
IN
R
L
1
7
Pb
Pr
RF IN
Y
VIDEO
Rear Panel
English
Item Connection Function
RAUDIO
1
OUTL
EARPHONE
2
3
4
5
OUT
OPTICAL
OUT
L-AUDIO
IN-R
Y
VIDEO
P
P
HDMI 1 IN
6
HDMI 3 IN
7
8
9
10
11
HDMI 2 IN
ARC
VGA IN
PC AUDIO
IN
RF IN
USB
Connects to the AUDIO IN ports
of an audio device
Connects to the 3-conductor
(TRS) phone connector of an
earphone. Compatibility with
earphones with 4-conductor
(TRRS) phone connectors is not
guaranteed.
Connects to the OPTICAL AUDIO
IN port of an audio device.
Connects to the AUDIO OUT
ports of an audio device.
Connects to the COMPONENT
VIDEO OUT ports of a DVD
Player, Cable Box or other
B
compatible device.
R
Connects to the HDMI OUT port
of a DVD Player, Games Console,
Cable, Box or other HDMI device.
CEC Consumer Electronics
Control
When connected to the
CEC compatible Furrion
Entertainment Systems or other
CEC Compatible devices, the TV
links with the system to give extra
functionality. Please see page 17
Connects to the HDMI OUT port
of a DVD Player, Games Console,
Cable Box or other HDMI device.
ARC Audio Return Channel
When connected with a HDMI1.4
cable to an ARC compatible
audio system, the TV links with
the device to give extra audio
functionality.
Connects to the VGA OUT port of
a PC to use the TV as a monitor.
Connects to the AUDIO OUT port
of a PC.
Connects to the ANTENNA,
CABLE, or CABLE BOX
USB Port, view pictures and listen
to MP3s via a compatible USB
stick
* The configuration of the connection ports
may vary from model to model.
10
Page 11

Function Overview
Unimote
1
2
3
4
5
6
7
8
9
10
11
12
English
Item Button Function
TV
48
47
46
45
44
50
43
42
41
40
39
1
2
3
4
5
6
7
8
9
FIREPLACE
NUMBER
BUTTONS
S.MODE
P.MODE
INFO/OSD
F.LIST
EPG
Switches to TV mode
Selects Furrion Fireplace
remote control functions.
* Please refer to your Furrion
Fireplace manual for more
information.
Press to turn the TV/
Entertainment System on/off
Enters numbers or select
channels
Toggles between single &
double digit input
Cycles through sound modes
Cycles through picture modes
Under TV mode, press to
display information on the
selected TV channel
Under Stereo mode, press to
display DVD playback status
Displays the favorites list
Displays the program guide
10
11
12
13
14
15
SOURCE
NAVIGATION
BUTTONS
VOL+/-
STEP
13
14
15
16
17
18
19
20
21
22
23
24
25
38
37
49
36
35
34
33
32
31
30
29
28
27
26
Cycles through input sources
Confirms selections
Increases/decreases volume
Ejects DVD/ CD
During playback, press to
select the previous track/
chapter. Press and hold to
rewind. Automatic or Manual
tuning in radio mode
Press to forward frame by
frame during DVD/ VCD
playback.
Dial or accept a call (when the
system is connected to a cell
phone)
16
DVD/USB
Selects DVD/USB
11
Page 12

Function Overview
Item Button Function
17
English
18
19
20
21
22
23
24
AM/FM
SLEEP/
CLOCK
MTS/AUDIO
RDM
RPT
SEARCH/
GOTO
ZOOM
SEL
Selects AM/FM/WB Radio
Sets the sleep timer
Cycles through MTS sound
modes
Toggles random playback
mode on & off
Press to select repeat playback
modes.
Jumps to a specific time on a
DVD/VCD/MP3/WMA or CD
Press to enlarge screen images
Toggles between Volume,
Bass, Treble & Balance; Hours
& Minutes for adjusting
Toggles radio reception
25
LOC*/SLOW
strength;
Press to start slow motion
playback.
26
ST#/ANGLE
Toggles Stereo & Mono sound/
switches viewing angles on
compatible media.
27
EQ
Toggles the sound mode
Cinema, Rock, Classic & Flat
Press to display subtitles on
28
SUBT
compatible media.
Repeatedly press to cycle
through subtitle options.
29
PBC/TITLE
Displays DVD/VCD Title lists/
Toggles PBC (Play Back
Control) on & off
30
PROG
31
A-B
Uses to start the programmed
playback function
Press to start the A-B repeat
function (playback loop of a
segment of track)
32
SETUP
33
CC
Enters the Setup menu for the
entertainment system
Toggles Closed Captions On
& Off
Item Button Function
34
35
AV
AUX/ARC
Selects AV Mode
Selects AUX/ ARC Mode
Press to scan radio stations:
Abrief press searches through
each stored station. Press &
36
APS
hold to scan and store the 6
strongest stations.
End or reject a call (when the
system is connected to a cell
phone)
During playback, press to
37
select the next track/ chapter.
Press and hold to fast forward.
Automatic or Manual tuning in
radio mode
38
39
40
41
42
43
44
45
46
47
48
49
50
CH+/-
EXIT
FAV
C.LIST
AUTO
DISPLAY
ASPECT
STEREO
MENU
Stops playback
Channel Up/Down
Toggles audio On or Off
Exits the current menu
Displays the channel list
Displays the channel list
Automatically adjusts the
picture in PC mode
Toggles on screen on the
selected source On & Off
Cycles through available
display aspect ratios
Toggles between the current
and previous channels
Switches to Stereo mode
Starts, Pauses or restarts
playback
Enters the main menu
12
Page 13

About Your HD LED TV
Features
Closed Caption Decoder With Full Text Mode - Displays text captions or full screen text on
the screen for hearing impaired viewers.
Picture Adjustments Using The Remote Control - The On-Screen display allows precise
remote control adjustment of BRIGHTNESS, CONTRAST, COLOR, TINT and SHARPNESS.
Programmable TV Sleep Timer - Operable from the remote control, the TV can be
programmed for up to 240 minutes to turn off automatically.
On-Screen 3 Language Display - You can select one of 3 languages, English, Spanish or
French for on-screen programming.
HDMI/Component Video Jacks - A VCR, DVD player, satellite receiver or other audio/video
component can be connected to this unit.
Power Source
NOTE:
● Please make sure to insert the cord securely at both the LED TV and the wall outlet.
● The AC Cord has a polarized type AC line plug. If the supplied AC cord does not match your
AC outlet, contact a qualified electrician.
WARNING:
● DO NOT CONNECT THIS UNIT TO THE POWER USING ANY DEVICE OTHER THAN THE
SUPPLIED AC CORD. DOING SO MAY CAUSE FIRE, ELECTRIC SHOCK, OR DAMAGE.
● DO NOT USE WITH A VOLTAGE OTHER THAN THE POWER VOLTAGE SPECIFIED. DOING
SO MAY CAUSE FIRE, ELECTRIC SHOCK, OR DAMAGE.
CAUTION:
● WHEN THE UNIT IS NOT BEING USED FOR EXTENDED PERIODS OF TIME(E.G., AWAY
ON A TRIP), IN THE INTEREST OF SAFETY, BE SURE TO UNPLUG IT FROM THE AC
OUTLET.
● DO NOT PLUG/UNPLUG THE AC CORD WHEN YOUR HANDS ARE WET. DOING SO MAY
CAUSE ELECTRIC SHOCK.
● IF YOU NEED TO REPLACE THE SUPPLIED AC ADAPTER OR AC CORD, THE SPECIFIED
ONE IS RECOMMENDED. CONTACT YOUR DEALER TO PURCHASE A FACTORY
REPLACEMENT.
English
13
Page 14

Before Operation
What’s in the Box
Thanks for purchasing this Furrion HD LED
English
TV. First, check the contents of your box with
the parts checklist below:
● HD LED TV
● Unimote
● AAA battery × 2
● Quick Start Guide
● Warning Card
● Warranty Leaflet
● Wall-mount screws x 4 (PWM 5x8 mm)
● TV Stand
● Screws for TV stand x 4 (BBH 4x15 mm)
Prepare your Remote
Control
BATTERY INSTALLATION
1. Open battery compartment cover.
2. Install two AAA batteries.
NOTE: Use two “AAA” size batteries. The
batteries may last approximately one
year depending on how much the remote
control is used. For best performance, it
is recommended that batteries should be
replaced on a yearly basis, or when the
remote operation becomes erratic. Do not
mix old and new batteries or different types.
BATTERY PRECAUTIONS
These precautions should be followed when
using batteries in this device:
● Use only the size and type of batteries
specified.
● Be sure to follow the correct polarity when
installing the batteries as indicated in the
battery compartment. Reversed batteries
may cause damage to the device.
● Do not mix different types of batteries
together (e.g. Alkaline and Carbon-zinc) or
old batteries with fresh ones.
● If the device is not to be used for a long
period of time, remove the batteries to
prevent damage or injury from possible
battery leakage.
● Do not try to recharge batteries not
intended to be recharged; they can
overheat and rupture. (Follow battery
manufacturer’s directions.)
● Please use caution when inserting
batteries to avoid battery damage. If the
spring terminal in the remote control
remains in contact with a side of a
damaged battery it can cause a short
circuit. Never use damaged batteries
as they can become very hot and are
dangerous.
3. Close the cover of the battery
compartment.
14
Page 15

Getting Started
The Setup Wizard window appears the first
time you turned on the TV. It will assist you
to configure the TV and scan for available
channels.
IMPORTANT: Make sure the antenna or
cable TV system connection is made.
1. Press POWER button on the TV control
panel or button on the remote control
to switch on the TV. The power indicator
will change to green. The Setup Wizard
window appears on the screen.
NOTE: It may take a few seconds before
the Setup Wizard window appears on the
screen.
2. Use or key to highlight TV Location,
then press or to select Home Mode or
Store Mode.
NOTE: When you select Store Mode it
will remind you Store Mode consumes
more energy. Select Yes to enter or No to
cancel.
Press or to highlight Go to next
step, press OK or to go to the next step.
English
4. Use or key to highlight Time Zone,
then press or to select desired time zone.
Use or key to highlight Daylight
Saving Time, then press or to select
On or Off.
Use or key to highlight Time Format,
then press or to select 12-hour or
24-hour.
Press or to highlight Go to next step,
press OK or to go to the next step.
3. Use or key to highlight Menu
Language, then press or to select the
desired language.
Press or to highlight Go to next
step, press OK or to go to the next step.
5. Use or key to highlight Air/Cable,
then press or to select Air or Cable
base on your connection.
Press or to highlight Go to next
step, press OK or to start the auto scan.
The Setup Wizard will scan for available
channels automatically. The scanning may
take some time.
15
Page 16

Change Settings
Setup Setting
1. Press MENU button, the setup window will
English
appear on the screen.
2. Use or key to highlight Setup mode.
3. Use or to highlight the item you would
like to reset, then press or to select the
settings.
4. Press MENU to return to the previous menu
or press EXIT at any time to exit the setting.
Setup Menu
Menu
Language
Transparent
OSD Timeout
Selects the menu language
Controls the transparency
level of the menu
The amount time the OSD
stays on the screen
Press or to select English, Franais or Español
Press or to select 0% / 25% / 50% / 75% / 100%
Press or to select 5 S / 15 S / 30 S / 45 S / 60 S
16
Page 17

Change Settings
Closed
Caption
Source Label
Configure
Closed Caption
functions
Allows labeling
of input sources
Setup Menu
CC Mode
Analog CC
Digital CC
Option
* Press OK or
to enter the sub
menu
TV
AV
Component
HDMI1
HDMI2
HDMI3
PC
Media
Press or to select CC On, CC Off or CC On Mute.
Press or to select CC1, CC2, CC3, CC4, Text 1, Text 2,
Text 3 or Text 4.
Press or to select Off, Service1, Service 2, Service 3,
Service 4, Service 5 or Service 6
Mode
Font Style
Font Size
Font Edge
Style
Font Edge
Color
FG Color
BG Color
FG Opacity
BG Opacity
Press or to select Custom, Default, Antenna, Cable,
Satellite, DTV, DVD, Blu-ray, HD-DVD, XBOX, Wii, PS3,
Game, Computer, VCR or DV
*The configuration of the connection ports may vary from
model to model.
Press or to select Default or Custom
Press or to select Default, Font 0,
Font 1, Font 2, Font 3, Font 4, Font 5,
Font 6 or Font 7
Press or to select Default, Normal,
Large or Small
Press or to select Default, None,
Raised, Depressed, Uniform, Left
Shadow or Right Shadow
Press or to select Default, Black,
White, Red, Green, Blue, Yellow,
Magenta or Cyan
Press or to select Default, White,
Red, Green, Blue, Yellow, Magenta or
Cyan
Press or to select Default, Black,
Red, Green, Blue, Yellow, Magenta or
Cyan
Press or to select Default, Solid,
Flashing, Translucent or Transparent
Press or to select Default, Solid,
Flashing, Translucent or Transparent
English
17
Page 18

Change Settings
Other Settings
English
Restore
Default
Setup Wizard
CEC
Blue Screen
Audio Only
Resets settings
to factory
defaults
Starts the Setup
Wizard
Configure CEC
functions
Press or to select On or Off
Press or to select On or Off
Press or to select Yes or No
See Page “Getting Started”.
CEC Control
Device Auto Power
Off
TV Auto Power On
Audio Receiver
(ARC)
Device Lists
Connect
Root Menu
Setup Menu
Press or to select Off or On
Press or to select Off or On
* If On, when the TV is turned off, all HDMI CEC
connected devices will go into standby.
Press or to select Off or On
* If On, when a HDMI CEC connected device is turned,
the TV will turn on and switch to the source the device is
connected to
Press or to select Off or On
* If On, the TV will output audio to an ARC compatible
connected device.
Lists all connected CEC devices
Connects to devices on the CEC devices
Shows the root menu of connected devices
18
Page 19

Change Settings
Picture Setting
1. Press MENU button, the setup window will
appear on the screen.
2. Use or key to highlight Picture mode.
3. Use or to highlight the item you would
like to reset, then press or to select the
settings.
4. Press MENU to return to the previous menu
or press EXIT at any time to exit the setting.
Picture Menu
Picture
Mode
Brightness
Contrast
Color
Tint
Sharpness
Color
Temperature
Advanced
Settings
Selects the display
mode
Controls the brightness
level of the picture
Controls the contrast
level of the picture
Controls the color level
of the picture
Controls picture tint
Controls the sharpness
of the picture
Selects the color mode
Advanced picture
settings
Press or to select Power Saving / Standard / Dynamic, Soft or User
display modes.
Press or to change the brightness to desired level.
* Only adjustable after set “Picture Mode” as “User” mode.
Press or to change the contrast to desired level.
* Only adjustable after set “Picture Mode” as “User” mode.
Press or to change the color to desired level.
* Only adjustable after set “Picture Mode” as “User” mode.
Press or to change the tint to desired level.
* Only available under NTSC mode.
Press or to change the sharpness to desired level.
* Only adjustable after set “Picture Mode” as “User” mode.
Press or to select Normal, Warm or Cool.
Aspect
Noise Reduction
Dynamic
Contrast
English
Press or to select Wide, Zoom, Cinema or
Normal.
Press or to select Middle, High, Off or Low.
Press or to select On or Off.
19
Page 20

Change Settings
Sound Setting
1. Press MENU button, the setup window will
English
appear on the screen.
2. Use or key to highlight Sound mode.
3. Use or to highlight the item you
would like to reset, then press or to
select the settings.
4. Press MENU to return to the previous
menu or press EXIT at any time to exit the
setting.
NOTE: The display menu may vary while
different input source was selected.
Sound Menu
Equalizer
MTS
Audio
Languages
Digital Audio
Output
AVL
Voice
Guidance
Video
Description
Controls the levels of
various sound frequencies
Controls the Multi Channel
TV Sound (Analog
broadcasts only)
If available on digital
broadcast , this selects the
audio language
Selects the Digital Audio
Output mode
Automatic Volume Level increases or decreases the
TV volume to a set level
Controls
the Voice
Guide
functions
Controls the video
description function
Voice Guide
Press or to select Standard, Music, Movie, Sports or User mode
User
Press or to select Stereo, SAP (Secondary Audio when available)
or Mono MTS settings
Press or to select English, French or Spanish language
Press or to select RAW, PCM or Off digital audio output mode
Press or to select On or Off
Voice
Guidance
Volume
Speed
Pitch
Press or to set as On or Off
Press or to select 200 Hz, 500 Hz, 1.5K Hz,
5K Hz, 10K Hz or Balance.
Press or to set as On or Off
Press or to select Low, Middle or High
* Only available after Voice Guidance was set as On
mode
Press or to select Slow, Normal or Fast
* Only available after Voice Guidance was set as On
mode
Press or to select Low, Middle or High
* Only available after Voice Guidance was set as On
mode
20
Page 21

Change Settings
Time Setting
1. Press MENU button, the setup window will
appear on the screen.
2. Use or key to highlight Time mode.
3. Use or to highlight the item you would
like to reset, then press or to select the
settings.
4. Press MENU to return to the previous menu
or press EXIT at any time to exit the setting.
Time Menu
Sleep Timer
Time Zone
Daylight
Saving Time
Time Format
Sets a period of time of
auto switch off the TV
Sets the time zone
Toggles daylight saving
Sets the time display
format
Press or to select Off, 5min, 10min, 15min, 30min, 60min, 90min,
120min, 180min or 240min
Press or to select Pacific, Alaska,Hawaii, Samoa, Newfoundland,
Atlantic, Eastern, Central or Mountain
Press or to set as On or Off
* Only available under TV channel
Press or to set as 12-hour or 24-hour
English
Auto Clock
Clock
Sets automatic time
adjustment
Displays the current date and time
Press or to set as On or Off
21
Page 22

Change Settings
Lock Setting
1. Press MENU button, the setup window will appear on the screen.
English
2. Use or key to highlight Lock mode.
3. Use or key to highlight “Enter Password” and input “0000” to enter the setup window.
4. Use or to highlight the item you would like to reset, then press or to select the
settings.
5. Press MENU to return to the previous menu or press EXIT at any time to exit the setting.
Lock Menu
Press to highlight Enter Password, Use the Number
Change
Password
System
Lock
Changes the User Password
Password locks the system
Buttons (0~9) to enter the password, the Lock setup
window will appear
* Default password is 0000
* If you forgot the password, use 8888 to enter any locked
menu
Press or to set as On or Off
Input Block
22
Password locks inputs
Press or to Block or Unblock
TV
AV
Component
HDMI 1
HDMI 2
HDMI 3
PC
Media
Press or to set as Block or Unblock
Press or to set as Block or Unblock
Press or to set as Block or Unblock
Press or to set as Block or Unblock
Press or to set as Block or Unblock
Press or to set as Block or Unblock
Press or to set as Block or Unblock
Press or to set as Block or Unblock
Page 23

Change Settings
US Rating
Canada
Rating
RRT Setting
Reset RRT
Lock Menu
Set parental locks based on US rating
system
* Only available after System Lock was
set as On mode
Set parental locks based on Canadian
rating system
* Only available after System Lock was
set as On mode
Set parental locks based on Canadian
rating system
* Only available when the DTV code
RRT traffic detected by the system
Restore to default RRT settings
TV
MPA A See US Rating System table
Canada
English
Canada French See Canadian Rating System table
Humor Level See Canadian Rating System table
Intelligence
level
Erotic level
20CHARS
Press OK or to enter the sub menu, then press or to
select Yes or No
Set the rating using age level and genre.
Refer to Age & Genre table for definition
See Canadian Rating System table
See Canadian Rating System table
See Canadian Rating System table
English
23
Page 24

Change Settings
English
ALL
FV
V
S
L
D
Off
G
PG
PG-13
R
NC-17
X
Genre
All
Fantasy Violence
Violence
Sex
Language
Dialogue
US Rating System
All Children
All Ages
Parental Guidance
Parental Guidance below 13
Parental Guidance below 17
17 Years old or above
Adults Only
Age
T V-Y
T V-Y 7
TV- G
TV- PG
TV-1 4
TV-MA
All Children
7 Years old or above
General Audience
Parental Guidance
14 Years old or above
17 Years old or above
Canadian Rating System
Off
C
C8+
G
PG
14+
18+
All Children
All Ages
Children below 8
General Audience
Parental Guidance
Programming contains themes or content
which may not be suitable for viewers
under the age of 14
Adult
24
Page 25

Change Settings
Channel Setting
1. Press MENU button, the setup window will appear on the screen.
2. Use or key to highlight Channel mode.
3. Use or to highlight the item you would like to reset, then press or to select the
settings.
4. Press OK to confirm your selections or settings and enter the sub menus.
5. Press MENU to return to the previous menu or press EXIT at any time to exit the setting.
Channel Menu
Air/Cable
Auto Scan
Favorite
Channel List
Show/Hide
Channel
Number
Channel
Label
Sets the reception type
Automatically scans for
available channels
Adds Channels to the
Favorite list
Lists available channels
Selects the channel to be
shown or hidden
Selects the channel number
for labeling
Allows to define the name
of channels
Press or to select Air or Cable
Press or to select Yes to start Automatically scanning channels or
No to cancel.
Press or to select a channel, then press or OK to select or
deselect as a favorite
Press OK or to list available channels
Press or to select a channel, then press or OK to show or hide
the channel
Press or to select a channel
Press or to select a character, press or to navigate the
characters. (Maximum of 7 characters)
English
25
Page 26

Change Settings
PC Setting
The PC menu is only accessible when a PC is connected to the TV via the VGA connection.
English
Note: After connecting a PC, press
1. Press MENU button, the setup window will appear on the screen.
2. Use or key to highlight Setup mode.
3. Use or to highlight PC Settings item , then OK or to enter, PC Menu table.
4. Use or to highlight the item you would like to reset, then press or to select the
settings.
5. Press MENU to return to the previous menu or press EXIT at any time to exit the setting.
H-Pos
V-Pos
Clock
Phase
Auto
Configures the horizontal position of the TV image.
Configures the vertical position of the TV image.
Adjusts the pixel Clock (vertical) for a clearer image.
Adjusts the phase Clock (horizontal) for a clearer image.
Automatically adjusts the PC settings.
SOURCE
button and select PC. Press OK or to enter.
PC Menu
Press or to move the screen horizontally
Press or to move the screen vertically
Press or to adjust
Press or to adjust
Press OK or to adjust all PC settings
automatically
26
Page 27

Change Settings
PC MONITOR DISPLAY MODES
Mode Resolution Refresh Rate
VGA
VGA
VGA
SVGA
XGA
WXGA
WXGA
SXGA
WXGA+
WSXGA+
FHD
* Please note that on non FHD TV’s some functionality may be limited
640 X 480 60 / 75 Hz
720 X 400 70 Hz
1366 X 768 60 Hz
800 X 600 60 / 75 Hz
1024 X 768 60 / 70 Hz / 75 Hz
1280 X 720 60 Hz
1360 X 768 60 Hz
1280 X 1024 60 Hz
1440 X 900 60 Hz
1680 X 1050 60 Hz
1920 X 1080 60 Hz
English
27
Page 28

Change Settings
USB Mode
1. After connecting a flash drive, press SOURCE button and select Media. Press OK or to
English
enter.
2. Use or key to select to view Photo or Music. Press OK or to enter.
3. Use or to navigate the files or folders on the USB drive.
4. Press MENU to return to the previous menu or press EXIT at any time to exit the setting.
When viewing photos, you can use this photo
viewer tool to control slide show, play music
and show file information.
The photo viewer displays .jpg photo format
files.
28
Playback of music is via this music player,
which gives playback controls and
information on the file.
The music player plays MP3 audio format
files.
Page 29

Troubleshooting
Problem Solution/Issue
● Make sure the power cord is plugged in.
TV does not
operate
Normal picture,
but no sound
The remote
control does not
work
Poor sound or no
sound
Poor picture or no
picture
Poor TV reception
Poor Cable /
Satellite TV
Reception
TV shuts off
Black and white
image from the
connected AV
device
● Try another AC outlet.
● Power is off, check fuse or circuit breaker.
● Unplug unit for an hour, then plug it back in.
● Check the volume settings.
● Sound muted? Press MUTE button.
● Try another channel.
● Check audio cable connections.
● Make sure the remote control is in range with no obstructions.
● Check the batteries.
● Correct operating mode set: TV, VCR etc.
● Station or Cable TV experiencing problems, tune to another station.
● Check sound adjustments (Volume or Mute).
● Check for sources of possible interference.
● Station or Cable TV experiencing problems, tune to another station.
● Make sure channels are set into memory.
● Check antenna or Cable TV connections, adjust antenna.
● Check for sources of possible interference.
● Check picture control adjustments.
● Ensure the antenna amplifier is turned on for Antenna TV.
● Adjust the antenna position to a stronger signal receiving angle.
● Check the Antenna connection is tight to the TV.
● Check there is power supplied to the Antenna distribution box.
● Confirm your incoming cable is connected to the correct cable / antenna wall connection
inside the RV.
● Ensure the internal RV coax jump cable is connected to the correct port.
● Ensure antenna amp is turned off for cable signal.
● Check incoming Cable is connected correctly to RV.
● Ensure cable splitter box has power.
● Confirm the incoming cable is connected to the correct cable / Satellite wall connection inside
your RV.
● Ensure the internal RV coax jump cable is connected to the correct port.
● Check Dish has not obstruction.
● Sleep Timer is set.
● Power interrupted.
● Check video connections on both the TV and connected AV device. Ensure the colors match
between the connectors and sockets: green (Y), blue (Pb/Cb) and red (Pr/Cr) for component
connection, and yellow (VIDEO) for composite connection.
● Ensure all video cables are connected firmly.
English
29
Page 30

Specifications
English
H
MODEL, DIMENSION & RESOLUTION
Model
FDHS32M4A
Dimension without Stand
(W*H*D)
28 ¹/ ” x 17/” x 3 /”
(736 x 447 x 79 mm)
INPUT & OUTPUT CONNECTIONS
Model
FDHS32M4A 1 1 1
R-AUDIO
OUT-L
Earphones
Optical
Out
W
L-AUDIO
IN-R
1 x Left
White)
1 x Right
(Red)
Dimension with Stand
(W*H*D)
28 ¹/ ” x 19 ³/ ” x 8/”
(736 x 492 x 208 mm )
Component
Video in
Component
YPBP
Video in
1 x Yellow/Green*
1 x Blue
1 x Red
D
Max Resolution
1366 x 768 @ 60Hz HD
VGA
HDMI
R
(PC)
in
in
3 1 1 1 1
Audio
(PC)
in
RF
USB
in
30
Page 31

Specifications
13"
354 mm
7 "
182 mm
7 "
200 mm
6"
152 mm
7 "
200 mm
VESA MOUNTING PATTERN
Model Width mm Height mm Screw Size Quantity
FDHS32M4A
200 100 PWM 5x8 mm 4
13"
354 mm
English
31
Page 32

Bienvenue
Merci d'avoir acheté ce téléviseur DEL HD Furrion®.Avant d’utiliser votre nouveau produit,
veuillez lire attentivement les présentes consignes. Le présent manuel d’instructions contient
des informations permettant une utilisation, une installation et un entretien en toute sécurité du
produit.
Le fabricant décline toute responsabilité pour tous dommages résultant du non-respect des
présentes consignes.
Français
Si vous avez d’autres questions concernant nos produits, veuillez nous contacter à l’adresse
support@furrion.com
Déclaration de conformité du fournisseur
47 CFR § 2.1077 Informations de conformité
Identificateur unique
Nom commercial : Furrion
N° de modèle : FDHS32M4A
Partie responsable – Coordonnées de la personne-ressource aux
États-Unis
Furrion Innovation Center & Institute of Technology
52567 Independence Ct, Elkhart, IN 46514, États-Unis
Numéro de téléphone gratuit : 1-888-354-5792; Courriel : support@furrion.com
Déclaration de conformité FCC
Cet appareil est conforme à l'article 15 du Règlement de la FCC. Son utilisation
est assujettie aux deux conditions suivantes : (1) Cet appareil ne doit pas
causer d'interférences nuisibles, et (2) cet appareil doit accepter toute
autre interférence reçue, y compris les interférences pouvant entraîner un
fonctionnement non désiré.
32
Page 33

Table des matières
Bienvenue ............................................................................................ 32
Table des matières ............................................................................. 33
Avertissements de sécurité .............................................................. 34
Consignes importantes sur la sécurité ................................................................................... 34
Précautions de sécurité ................................................................................................................. 38
Aperçu des fonctions ........................................................................40
Panneau de commande ................................................................................................................. 40
Panneau arrière .................................................................................................................................. 41
Unimote ................................................................................................................................................. 42
À propos de votre téléviseur HD à DEL ........................................... 44
Fonctionnalités ..................................................................................................................................44
Source d’alimentation ..................................................................................................................... 44
Avant l’utilisation ................................................................................ 45
Contenu de l’emballage .................................................................................................................. 45
Préparez votre télécommande ................................................................................................... 45
Pour commencer ................................................................................ 46
Changer les paramètres ....................................................................48
Paramètre d'installation .................................................................................................................48
Modifier les paramètres .................................................................... 49
Réglage de l'image .............................................................................................................................51
Réglage du son ...................................................................................................................................52
Réglage de l'heure ............................................................................................................................ 54
Réglage du verrouillage ..................................................................................................................55
Réglage de la chaîne ....................................................................................................................... 58
Réglage PC .......................................................................................................................................... 59
Mode USB ............................................................................................................................................. 61
Français
Dépannage .......................................................................................... 62
Caractéristiques ................................................................................. 63
33
Page 34

Avertissements de sécurité
MISE EN GARDE
RISQUE DE CHOC ELECTRIQUE
NE PAS OUVRIR
MISE EN GARDE: POUR RÉDUIRE LE RISQUE
DE CHOC ÉLECTRIQUE, NE RETIREZ PAS LE
COUVERCLE (OU L’ARRIÈRE). AUCUNE PIÈCE
Français
RÉPARABLE PAR L’UTILISATEUR. RENVOYER
L’ENTRETIEN AU PERSONNEL DE SERVICE
QUALIFIÉ.
Le symbole «éclair» indique que
votre appareil contient des
éléments non isolés susceptibles
de provoquer un choc électrique. Pour votre
sécurité et celle de votre entourage, veuillez
ne pas démonter la structure de protection
du produit.
Le «point d’exclamation» a pour
objectif d’attirer votre attention sur
certains aspects de la
documentation accompagnant le produit, afin
d’éviter des problèmes de fonctionnement et
d’entretien.
Cette pièce d’équipement est un
appareil de ClasseII ou un appareil
électrique à double isolation. Il a été
conçu de telle sorte qu’aucun
raccord de mise à la terre ne soit nécessaire.
ATTENTION: Pour réduire le risque d’incendie
ou d’électrocution, cet appareil ne doit pas être
exposé à la pluie ou à l’humidité, et les objets
remplis de liquide, tels que les vases, ne doivent
pas être placés sur cet appareil.
MISE EN GARDE: Pour éviter les chocs
électriques, insérez complètement la fiche.
Pour les régions à prises polarisées: Pour
éviter les chocs électriques, associez la lame
large à la fente large.
Consignes importantes sur la
sécurité
1. Lisez ces instructions.
2. Conservez ces instructions.
3. Tenez compte de tous les avertissements.
4. Suivez toutes les instructions.
5. Ne pas utiliser cet appareil près de l’eau.
6. Nettoyez uniquement avec un chiffon sec.
7. Ne bloquez aucune des ouvertures de
ventilation. Installez conformément aux
instructions du fabricant.
8. Ne l’installez pas à proximité de sources
de chaleur telles que des radiateurs,
des bouches de chaleur, des poêles
ou tout autre appareil (y compris les
amplificateurs) produisant de la chaleur.
9. Ne pas mettre en échec l’objectif de
sécurité de la fiche polarisée ou mise
à la terre. Une fiche polarisée possède
deux lames dont l’une est plus large que
l’autre. Une fiche de type mise à la terre
comporte deux lames et une troisième
broche de mise à la terre. La lame large
ou la troisième broche sont fournies pour
votre sécurité. Lorsque la prise fournie
ne rentre pas dans votre prise, consultez
un électricien pour le remplacement de la
prise obsolète.
10. Protégez le cordon d’alimentation de tout
piétinement ou pincement, en particulier
au niveau des prises, des prises de
courant et du point de sortie de l’appareil.
11. Utilisez uniquement les accessoires /
accessoires spécifiés par le fabricant.
12. Utilisez uniquement avec
un chariot, un support,
un trépied, un support ou
une table spécifié par le
fabricant ou vendu avec
l’appareil. Lorsqu’un chariot est utilisé,
soyez prudent lorsque vous déplacez
la combinaison chariot / appareil pour
éviter les blessures causées par un
renversement.
34
Page 35

Avertissements de sécurité
13. Débranchez cet appareil pendant les
orages ou lorsqu’il n’est pas utilisé
pendant de longues périodes.
14. Confiez toute réparation à un technicien
qualifié. Un entretien est requis lorsque
l’appareil a été endommagé de quelque
manière que ce soit, par exemple si le
cordon d’alimentation ou la fiche est
endommagé, du liquide a été renversé ou
des objets sont tombés dans l’appareil
ou lorsque l’appareil a été exposé à la
pluie ou à l’humidité. ne fonctionne pas
normalement ou a été abandonné.
15. Les appareils ne doivent pas être exposés
aux gouttes ou aux éclaboussures, et
les objets remplis de liquides, tels que
les vases, ne doivent pas être placés sur
l’appareil.
16. Un système d’antenne extérieure ne
doit pas être placé à proximité de lignes
électriques aériennes ou d’autres circuits
électriques ou d’éclairage, ou à un endroit
où il pourrait tomber sur de telles lignes ou
circuits électriques. Lors de l’installation
d’un système d’antenne extérieur, il faut
faire très attention à ne pas toucher de
telles lignes ou circuits électriques, car un
contact avec eux pourrait être fatal.
17. Ne surchargez pas les prises murales,
les rallonges ou les prises de courant
intégrées car cela peut entraîner un risque
d’incendie ou d’électrocution.
18. Ne poussez jamais d’objets de quelque
sorte que ce soit dans ce produit à
travers les ouvertures, car ils pourraient
toucher des points de tension dangereux
ou court-circuiter des pièces, ce qui
pourrait provoquer un incendie ou une
électrocution. Ne jamais renverser un
liquide quelconque sur le produit.
19. Si une antenne extérieure est connectée
au téléviseur, assurez-vous que le
système de l’antenne est mis à la terre
afin de fournir une protection contre les
surtensions et l’accumulation de charges
électrostatiques. La Section 810 du
Code national de l’électricité fournit des
informations concernant la mise à la
terre correcte du mât et de la structure
de support, la mise à la terre du câble
d’entrée vers une unité de décharge de
l’antenne, la taille des conducteurs de
mise à la terre, l’emplacement de l’unité de
décharge de l’antenne, la connexion aux
prises de terre et les exigences relatives
aux prises de terre.
EXEMPLE DE MISE À LA TERRE D’UNE ANTENNE
CONFORME AU CODE NATIONAL DE L’ÉLECTRICITÉ.
CÂBLE D'ENTRÉE
D'ANTENNE
COLLIER DE MISE
À LA TERRE
ÉQUIPEMENT DE
SERVICE ÉLECTRIQUE
CODE NATIONAL DE
L'ÉLECTRICITÉ S2898A
ANTENNE
UNITÉ DE DÉCHARGE
(SECTION 810-20 DU CODE
NATIONAL DE L'ÉLECTRICITÉ)
CONDUCTEURS DE MISE À LA
TERRE (SECTION 810-21 DU CODE
NATIONAL DE L'ÉLECTRICITÉ)
COLLIERS DE MISE À LA TERRE
SYSTÈME D'ÉLECTRODE DE MISE À
LA TERRE DU SERVICE ÉLECTRIQUE
(ART. 250, PARTIE H DU CODE
NATIONAL DE L'ÉLECTRICITÉ)
20. NOTE À L’ATTENTION DES
INSTALLATEURS (TÉLÉVISION/
CÂBLE): Le présent rappel vise à attirer
l’attention des installateurs de systèmes
de télévision/câble sur l’Article 820-40
du Code national de l’électricité des
États-Unis. Le Code fournit des directives
pour une mise à la terre correcte et, en
particulier, dispose que le câble de terre
doit être relié au réseau de mise à la terre
du bâtiment, au plus près que possible du
point d’entrée du câble.
21. Lorsque des pièces de rechange sont
nécessaires, assurez-vous que le
technicien utilise les pièces de rechange
spécifiées par le fabricant ou celles qui
ont les mêmes caractéristiques que la
pièce d’origine. Des substitutions non
autorisées peuvent entraîner un incendie,
un choc électrique ou d’autres dangers.
Français
35
Page 36

Avertissements de sécurité
22. À la fin de toute réparation ou entretien
de cet appareil, demandez au technicien
de service d’effectuer des vérifications de
sécurité pour déterminer si l’appareil est
en bon état de fonctionnement.
23. Lorsque vous connectez le produit à un
autre équipement, mettez l’appareil hors
Français
tension et débranchez tout l’équipement
de la prise murale. Ne pas le faire peut
provoquer un choc électrique et des
blessures graves. Lisez attentivement
le mode d’emploi de l’autre équipement
et suivez les instructions lors des
connexions.
24. Un son soudain et à fort volume peut
causer une perte d’audition ou des
haut-parleurs. Lorsque vous utilisez un
casque (si l’appareil est équipé d’une prise
casque), maintenez le volume à un niveau
modéré. Si vous utilisez un casque en
continu avec un volume sonore élevé, cela
peut causer des dommages auditifs.
25. Ne laissez pas le produit produire un son
déformé pendant une période prolongée.
Cela peut provoquer une surchauffe et un
incendie du haut-parleur.
26. La prise de courant doit être installée près
de l’unité et facilement accessible.
27. La prise secteur est utilisée comme
sectionneur et doit rester facilement
accessible.
28. Les piles (les blocs-piles ou les piles
installées) ne doivent pas être exposées à
une chaleur excessive telle que la lumière
directe du soleil, le feu ou toute autre
source similaire.
CONDENSATION
De l’humidité se forme dans la section de
fonctionnement de l’appareil si l’appareil est
amené d’un environnement frais dans une
pièce chaude ou si la température de la pièce
augmente brusquement. Lorsque cela se
produit, les performances de l’unité seront
altérées. Pour éviter cela, laissez l’appareil
dans son nouvel environnement pendant
environ une heure avant de l’allumer ou
assurez-vous que la température de la pièce
augmente progressivement.
De la condensation peut également se former
pendant l’été si l’appareil est exposé à la
brise d’un climatiseur. Dans ce cas, changez
l’emplacement de l’unité.
COMMENT MANIPULER LE PANNEAU LCD
● N’appuyez pas trop fort et ne secouez pas
le panneau LCD. Cela peut provoquer une
cassure de la vitre du panneau LCD et des
blessures.
● Si le panneau LCD est cassé, assurez-
vous de ne pas toucher le liquide dans
le panneau. Cela peut provoquer une
inflammation de la peau.
● Si le liquide pénètre dans votre bouche,
se gargariser immédiatement et consulter
votre médecin. En outre, sile liquide
pénètre dans vos yeux ou touche votre
peau, consultez votre médecin après un
rinçage d’au moins 15minutes dans de
l’eau propre.
Effets négatifs possibles sur le panneau
LCD: Si un motif fixe (non mobile) reste
sur l’écran LCD pendant de longues
périodes, l’image peut s’incruster de
manière permanente dans le panneau
LCD et provoquer des images fantômes
subtiles mais permanentes. Ce type de
dommage n’est PAS COUVERT PAR VOTRE
GARANTIE. Nelaissez jamais votre panneau
LCD allumé pendant de longues périodes
pendant qu’il affiche les formats ou images
suivants:
● Images fixes, telles que des tickers
boursiers, des modèles de jeux vidéo, des
logos de stations de télévision et des sites
Web.
● Formats spéciaux qui n’utilisent pas tout
l’écran. Par exemple, afficher un média
de style boîte aux lettres (16:9) sur un
affichage normal (4: 3) (barres noires
36
Page 37

Avertissements de sécurité
en haut et en bas de l’écran); ou en
visualisant un média de style normal (4:3)
sur un écran large (16: 9) (barres noires
sur les côtés gauche et droit de l’écran).
Les symptômes suivants ne sont pas des
signes de dysfonctionnement mais une
limitation technique. Par conséquent, nous
déclinons toute responsabilité pour ces
symptômes.
● Les panneaux LCD sont fabriqués à l’aide
d’une technologie de précision de très
haut niveau, mais il arrive parfois que
des éléments d’image manquent ou que
des points lumineux apparaissent sur
certaines parties de l’écran. Ce n’est pas
un signe de dysfonctionnement.
● N’installez pas le panneau LCD à proximité
d’un équipement électronique produisant
des ondes électromagnétiques. Certains
équipements placés trop près de
cet appareil peuvent provoquer des
interférences.
● Effet sur les périphériques infrarouges - Il
peut y avoir des interférences lors de
l’utilisation de périphériques infrarouges
tels qu’un casque sans fil infrarouge.
Source d’énergie: Ce téléviseur LED est
conçu pour fonctionner sur 100 ~ 240volts
50/60 Hz, courant alternatif. Insérez le
cordon d’alimentation dans une prise 100 ~
240volts 50/60 Hz.
Pour éviter les chocs électriques, n’utilisez
pas la prise (polarisée) du téléviseur à DEL
avec une rallonge, une prise ou une autre
prise à moins que les lames et la borne de
mise à la terre puissent être complètement
insérées pour éviter l’exposition des lames.
Attention: Pour réduire le risque d’incendie
ou d’électrocution, n’exposez pas cet
appareil à la pluie ou à l’humidité.
Mise en garde: Ne retirez jamais le
couvercle arrière du téléviseur à DEL car
cela peut vous exposer à des tensions très
élevées et à d’autres dangers. Si le téléviseur
ne fonctionne pas correctement, débranchez
le téléviseur à DEL et appelez votre
revendeur ou centre de service agréé.
Réglez seulement les contrôles qui sont
couverts dans les instructions, car des
changements ou des modifications non
expressément approuvés par Furrion
pourraient annuler la garantie de l’utilisateur.
CONFORMITÉ
Déclaration de la FCC
Remarque: Le présent équipement a été
testé et déclaré conforme aux limitations
pour appareils numériques de classe B,
aux termes de la Section 15 des règlements
de la FCC. Ces limitations sont conçues
pour fournir une protection raisonnable
contre les interférences nocives dans un
environnement domestique. Cet appareil
génère, utilise et peut émettre de l’énergie RF
(radiofréquence) et peut, en cas d’installation
ou d’utilisation non conforme aux instructions,
engendrer des interférences nuisibles au
niveau des communications radio.
Rien ne garantit toutefois l’absence
d’interférences dans le cadre d’une
installation particulière. Si cet équipement
produit des interférences perturbant la
réception de la radio ou de la télévision (ce
que vous pouvez déterminer en éteignant
et en allumant l’équipement), nous vous
recommandons d’essayer d’éliminer les
interférences d’une des façons suivantes:
– Réorientez ou déplacez l’antenne de
réception.
– Augmentez l’espacement entre
l’équipement et le récepteur.
– Branchez l’appareil sur une prise de
courant située sur un circuit différent de
celui sur lequel le récepteur est branché.
– Consultez votre fournisseur ou un
technicien radio/TV expérimenté.
Augmentez la distance entre
l’équipement et le récepteur.
Français
37
Page 38

Avertissements de sécurité
4 pouces
AVERTISSEMENT: Toute modification ou
tout changement apporté(e) à ce produit et
non expressément approuvé(e) par la partie
responsable de la conformité est susceptible
d’engendrer une annulation du droit
d’utilisation de cet équipement par l’utilisateur
aux termes des Règles de la FCC.
Français
1. Le présent appareil ne doit pas causer
d’interférences nuisibles.
2. Le présent appareil doit accepter toutes
les interférences reçues, y compris
celles susceptibles de provoquer un
fonctionnement non souhaité.
Précautions de sécurité
AVERTISSEMENT: Ne placez jamais un
téléviseur à un endroit instable. Il pourrait
tomber et causer des blessures graves, voire
mortelles. Un grand nombre de blessures,
particulièrement aux enfants, peut être évité
au moyen de précautions simples, comme:
– Utilisation d’armoires ou de supports
recommandés par le fabricant du
téléviseur.
– N’utiliser que des meubles pouvant
supporter le téléviseur en toute sécurité.
– S’assurer que le téléviseur ne surplombe
pas le bord des meubles de soutien.
– Ne pas placer le téléviseur sur des
meubles hauts (par exemple, des
armoires ou des bibliothèques) sans
ancrer à la fois le mobilier et le téléviseur
à un support approprié.
– Ne pas placer le téléviseur sur un chiffon
ou d’autres matériaux pouvant être
placés entre le téléviseur et les meubles
de soutien.
– Éduquer les enfants sur les dangers de
grimper sur les meubles pour atteindre le
téléviseur ou ses commandes.
Si votre téléviseur existant est conservé et
déplacé, les mêmes considérations que cidessus doivent être appliquées.
L’unité émet de la chaleur lorsqu’elle est en
marche. Ne placez pas de couvertures ou
de couvertures sur l’appareil, cela pourrait
provoquer une surchauffe. Ne bloquez pas
les orifices de ventilation ou installez-les près
des radiateurs. Ne pas placer en plein soleil.
Lorsque vous le placez sur une étagère,
laissez un espace libre de 4 pouces (10 cm)
autour de l’ensemble de l’unité.
4 pouces
Remarques lors du montage de
la TV LED sur le mur
Si l’unité doit être installée sur le mur,
contactez le revendeur chez qui vous avez
acheté le téléviseur LED pour obtenir des
conseils et faites installer l’équipement par
un professionnel. Une installation incomplète
ou incorrecte peut vous blesser et / ou
endommager le téléviseur LED.
ATTENTION:
● N’utilisez pas ce téléviseur avec des
supports muraux qui permettent au
téléviseur de s’incliner verticalement. Les
supports muraux à inclinaison verticale
peuvent endommager la structure du
téléviseur.
● Utilisez UNIQUEMENT des supports
muraux fixes ou horizontaux pivotants
avec ce téléviseur.
38
Page 39

Avertissements de sécurité
4 pouces
Wire
Clamp
Screw
4 inches
Wire
Wire
Screw
Clamp
Wire
Wire
Wire
1.5 inches
4 pouces
Avis pour le Cabinet TV
Si l’unité doit être montée sur une armoire
plus petite que la longueur de l’unité, cela
pourrait entraîner un emplacement instable
et l’unité pourrait dégringoler, ce qui pourrait
entraîner des blessures personnelles, voire
mortelles. En outre, cela endommagerait
sérieusement le produit. En conséquence,
Furrion n’accepte aucune responsabilité
pour toute blessure ou dommage matériel
résultant d’une mauvaise installation.
Français
Oui!! Non!!
39
Page 40

Aperçu des fonctions
Panneau de commande
1
VOL+
Français
VOL-
CH+
CH-
MENU
SOURCE
POWER
* Veuillez noter que la disposition des
touches des commandes peut varier d’un
modèle à l’autre.
2
3
4
5
6
7
Article Touche Fonction
1
2
3
4
5
6
7
VOL+
VOL-
CH+
CH-
MENU
SOURCE
PUISSANCE
Appuyez pour augmenter le
volume
Appuyez pour diminuer le
volume
Appuyez sur pour passer à la
chaîne suivante
Appuyez sur pour passer à la
chaîne précédente
Appuyez pour accéder au
menu principal
Appuyez pour sélectionner la
source d'entrée
Appuyez pour allumer ou
éteindre le téléviseur
40
Page 41

Aperçu des fonctions
EARPHONE
OUT
USB
AUDIO
IN
L- -R
AUDIO
OUT
R- -L
R
L
OPTICAL
OUT
HDMI 1 IN
2
3
5
6
8
9
10
11
4
HDMI 2 IN
ARC
HDMI 3 IN
VGA IN
PC AUDIO
IN
R
L
1
7
Pb
Pr
RF IN
Y
VIDEO
Panneau arrière
*La configuration des ports de connexion
peut varier d'un modèle à l'autre.
Article Branchement Fonction
RAUDIO
1
2
3
4
5
OUTL
EARPHONE
OUT
OPTICAL
OUT
L-AUDIO
IN-R
VIDEO
P
P
HDMI 1 IN
6
HDMI 3 IN
HDMI 2 IN
7
8
9
10
11
ARC
VGA IN
PC AUDIOINSe raccorde au port de SORTIE AUDIO
RF IN
USB
Se raccorde aux ports d'ENTRÉE
AUDIO d'un périphérique audio
Se raccorde au connecteur
téléphonique à 3conducteurs (TRS)
des écouteurs. La compatibilité avec
des écouteurs munis d'un connecteur
téléphonique à 4conducteurs (TRRS)
n’est pas garantie.
Se raccorde au port d'ENTRÉE AUDIO
OPTIQUE d'un périphérique audio.
Se raccorde aux ports de SORTIE
AUDIO d'un périphérique audio.
Y
Se raccorde aux ports de SORTIE
VIDÉO COMPOSANTE d'un lecteur
b
DVD, d'un décodeur ou de tout autre
appareil compatible.
r
Se raccorde au port de SORTIE HDMI
d'un lecteur DVD, d'une console de jeux,
d'un câble, d'une boîte ou d'un autre
périphérique HDMI.
Norme CEC (Consumer Electronics
Control)
Lorsqu'il est raccordé à un système de
divertissement Furrion compatible
CEC ou à un autre appareil
compatible CEC, le téléviseur se
connecte au système pour offrir une
fonctionnalité supplémentaire.Veuillez
consulter la page 17
Se raccorde au port de SORTIE HDMI
d'un lecteur DVD, d'une console de jeux,
d'un câble, d'une boîte ou d'un autre
périphérique HDMI.
Technologie ARC (Audio Return Channel)
Lorsque le téléviseur est raccordé à un
système audio compatible ARC grâce à
un câble HDMI 1.4, il établit la connexion
avec l’appareil afin d'offrir des
fonctionnalités audio supplémentaires.
Se raccorde au port de SORTIE VGA
d'un PC pour utiliser le téléviseur
comme moniteur.
d'un PC.
Se connecte à l'ANTENNE, au CÂBLE
ou à la BOÎTE DE CÂBLE
Port USB: visionnez des photos et
écoutez des fichiers MP3 à l’aide d’une
clé USB compatible
Français
41
Page 42

Aperçu des fonctions
Unimote
1
2
Français
3
4
5
6
7
8
10
11
12
9
48
47
46
45
44
50
43
42
41
40
39
Article Touche Fonction
Bascule en mode TV.
Sélectionne les fonctions de
contrôle à distance de Furrion
Fireplace.
* Veuillez vous référer au
manuel de votre foyer Furrion
pour plus d'informations.
Appuyez pour allumer ou
éteindre le système de
télévision ou de divertissement
Saisit des numéros ou
sélectionne des chaînes
Bascule entre une entrée à un
et deux chiffres
Fait défiler les modes sonores
Fait défiler les modes d'image
En mode TV, appuyez pour
afficher les informations
sur la chaîne de télévision
sélectionnée
En mode stéréo, appuyez pour
afficher l'état de lecture du DVD
Affiche la liste des favoris
1
2
3
4
5
6
7
8
TV
T V/
FIREPLACE
TOUCHES
NUMÉRIQUES
S.MODE
P.MODE
INFO/OSD
F.LIST
42
13
14
15
16
17
18
19
20
21
22
23
24
25
38
37
49
36
35
34
33
32
31
30
29
28
27
26
9
10
11
12
13
14
15
EPG
SOURCE
TOUCHES DE
NAVIGATION
VOL+/-
STEP
Affiche le guide du programme
Fait défiler les sources d'entrée
Confirme les sélections
Augmente ou diminue le volume
Éjecte DVD ou CD
Pendant la lecture, appuyez
pour sélectionner la piste ou le
chapitre précédent.Appuyez
et maintenez pour rembobiner.
Réglage automatique ou
manuel en mode radio
Appuyez pour avancer image
par image pendant la lecture
d'un DVD ou VCD.
Compose ou accepte un
appel (lorsque le système
est connecté à un téléphone
cellulaire)
Page 43

Aperçu des fonctions
Article Touche Fonction
16
17
18
19
20
21
22
23
24
25
26
27
28
29
30
31
32
33
DVD/USB
AM/FM
SLEEP/
CLOCK
MTS/AUDIO
RDM
RPT
SEARCH/
GOTO
ZOOM
SEL
LOC*/SLOW
ST#/ANGLE
EQ
SUBT
PBC/TITLE
PROG
A-B
SETUP
CC
Sélectionne DVD ou USB
Sélectionne la radio AM/FM/
WB
Règle la minuterie de mise en
veille
Fait défiler les modes sonores
MTS
Active ou désactive le mode de
lecture aléatoire
Appuyez pour sélectionner les
modes de lecture répétée.
Bascule vers un moment précis
d'un DVD/VCD/MP3/WMA
ou CD
Appuyez pour agrandir les
images sur l'écran
Bascule entre le volume, les
graves, les aigus et l'équilibre;
Heures et minutes de réglage
Bascule l'intensité de la
réception radio;
Appuyez pour lancer la lecture
au ralenti.
Bascule entre le son stéréo et
mono et change l'angle de vue
sur un support compatible.
Bascule le mode son Cinema,
Rock, Classic et Flat
Appuyez pour afficher les
sous-titres sur un support
compatible.
Appuyez plusieurs fois pour
faire défiler les options de
sous-titres.
Affiche les listes de titres de
DVD/VCD / Active et désactive
le PBC (le contrôle de lecture)
Utilisé pour démarrer la fonction
de lecture programmée
Appuyez pour lancer la fonction
de répétition AB (lecture en
boucle d’un segment de piste)
Ouvre le menu de configuration
du système de divertissement
Active ou désactive les soustitres codés
Article Touche Fonction
34
35
36
37
38
39
40
41
42
43
44
45
46
47
48
49
50
AV
AUX/ARC
APS
CH+/-
EXIT
FAV
C.LIST
AUTO
DISPLAY
ASPECT
STEREO
MENU
Sélectionne le mode AV
Sélectionne le mode AUX/ARC
Appuyez pour balayer les
stations de radio: Une courte
pression permet d'effectuer
une recherche dans chaque
station mémorisée. Maintenez
enfoncé pour rechercher et
mémoriser les 6stations les
plus puissantes.
Met fin ou rejette un appel
(lorsque le système est
connecté à un téléphone
cellulaire)
Pendant la lecture, appuyez
pour sélectionner la piste
ou le chapitre précédent.
Appuyez longuement pour
avancer rapidement.Réglage
automatique ou manuel en
mode radio
Arrête la lecture
Avance ou recule d'une chaîne
Active ou désactive l'audio
Quitte le menu actuel
Affiche la liste des chaînes
Affiche la liste des chaînes
Ajuste automatiquement
l'image en mode PC
Bascule à l'écran sur la source
sélectionnée activée ou
désactivée
Parcourt les formats d'affichage
disponibles
Bascule entre le canal actuel et
précédent
Bascule en mode stéréo
Démarre, met en pause ou
redémarre la lecture
Accède au menu principal
Français
43
Page 44

À propos de votre téléviseur HD à DEL
Fonctionnalités
Décodeur de sous-titres codés avec mode texte intégral - Affiche des sous-titres ou du
texte plein écran à l'écran pour les personnes malentendantes.
Réglages de l'image à l'aide de la télécommande - L'affichage à l'écran permet un réglage
précis de la luminosité, du contraste, de la couleur, de la teinte et de la netteté à partir de la
télécommande.
Français
Mise en veille programmable du téléviseur - Utilisable à partir de la télécommande, le
téléviseur peut être programmé jusqu'à 240minutes pour s'éteindre automatiquement.
Affichage à l'écran en trois langues - Vous pouvez sélectionner l'une des trois langues
suivantes: anglais, espagnol ou français pour la programmation à l'écran.
Prises HDMI / Prises vidéo composantes - Un magnétoscope, un lecteur DVD, un récepteur
satellite ou un autre composant audio ou vidéo peut être connecté à cet appareil.
Source d’alimentation
REMARQUE:
● Assurez-vous d'insérer correctement le cordon dans le téléviseur à DEL et dans la prise
murale.
● Le cordon d'alimentation en courant alternatif est muni d'une fiche de ligne de type polarisé.
Si le cordon d'alimentation fourni ne correspond pas à votre prise de courant alternatif,
contactez un électricien agréé.
AVERTISSEMENT:
● NE BRANCHEZ PAS CET APPAREIL SUR L'ALIMENTATION ÉLECTRIQUE À L'AIDE D'UN
AUTRE DISPOSITIF QUE LE CORDON D'ALIMENTATION EN COURANT ALTERNATIF
FOURNI.CELA POURRAIT PROVOQUER UN INCENDIE, UN CHOC ÉLECTRIQUE OU DES
DOMMAGES.
● NE PAS UTILISER POUR UNE TENSION AUTRE QUE LA TENSION D’ALIMENTATION
SPÉCIFIÉE.CELA POURRAIT PROVOQUER UN INCENDIE, UN CHOC ÉLECTRIQUE OU
DES DOMMAGES.
ATTENTION:
● LORSQUE CET APPAREIL N'EST PAS UTILISÉ PENDANT UNE LONGUE PÉRIODE (PAR
EXEMPLE, LORS D'UN VOYAGE), POUR DES RAISONS DE SÉCURITÉ, ASSUREZ-VOUS
DE LE DÉBRANCHER DE LA PRISE DE COURANT ALTERNATIF.
● NE PAS BRANCHER OU DÉBRANCHER LE CORDON D'ALIMENTATION LORSQUE VOS
MAINS SONT MOUILLÉES.CELA PEUT CAUSER UN CHOC ÉLECTRIQUE.
● SI VOUS DEVEZ REMPLACER L'ADAPTATEUR OU LE CORDON D'ALIMENTATION EN
COURANT ALTERNATIF FOURNI, IL EST RECOMMANDÉ D'UTILISER L'ADAPTATEUR
SPÉCIFIÉ.CONTACTEZ LE REVENDEUR AUPRÈS DUQUEL VOUS AVEZ ACHETÉ
L'APPAREIL.
44
Page 45

Avant l’utilisation
Contenu de l’emballage
Merci d’avoir acheté ce téléviseur à DEL HD
Furrion. Tout d’abord, vérifiez le contenu
de votre boîte avec la liste de contrôle des
pièces ci-dessous:
● Téléviseur HD à DEL
● Unimote
● Pile AAA × 2
● Guide de démarrage rapide
● Carte d'avertissement
● Dépliant de garantie
● Vis de montage mural x 4 (PWM 5x8mm)
● Support pour téléviseur
● Vis pour support pour téléviseur x 4 (BBH
4x15mm)
Préparez votre
télécommande
INSTALLATION DES PILES
1. Ouvrez le couvercle du compartiment des
piles.
2. Installez deux piles AAA.
REMARQUE: Utilisez deux piles de type
«AAA». Les piles peuvent durer environ
un an en fonction de l’utilisation de la
télécommande. Pour des performances
optimales, il est recommandé de remplacer
les piles tous les ans ou lorsque le
fonctionnement à distance devient irrégulier.
Ne pas mélanger des piles neuves et usagées
ou des piles de différents types.
PRÉCAUTIONS CONCERNANT
LES PILES
Ces précautions doivent être suivies lors de
l’utilisation des piles dans cet appareil:
● Utilisez uniquement des piles de la taille et
du type spécifiés.
● Veillez à respecter la polarité correcte lors
de l'installation des piles, comme indiqué
dans le compartiment des piles. Les piles
inversées peuvent endommager l'appareil.
● Ne combinez pas différents types de
piles (par exemple, alcalines et carbonezinc) ou des piles usagées avec des piles
neuves.
● Si l'appareil ne doit pas être utilisé pendant
une longue période, retirez les piles pour
éviter tout dommage ou blessure par une
possible fuite des piles.
● N'essayez pas de recharger des piles non
destinées à être rechargées; elles peuvent
surchauffer et se fissurer. (Suivez les
instructions du fabricant des piles.)
● Veuillez faire preuve de prudence lors de
l'insertion des piles afin d'éviter de les
endommager. Si la borne à ressort de la
télécommande reste en contact avec le
côté d'une pile endommagée, cela peut
provoquer un court-circuit. N'utilisez
jamais des piles endommagées car elles
peuvent surchauffer et sont dangereuses.
Français
3. Fermez le couvercle du compartiment
àpiles.
45
Page 46

Pour commencer
La fenêtre Setup Wizard (Assistant de
configuration) apparaît la première fois que
vous allumez le téléviseur. Elle vous aidera
à configurer le téléviseur et à rechercher les
chaînes disponibles.
IMPORTANT: Assurez-vous que la
connexion de l'antenne ou du système de
Français
télévision par câble est établie.
1. Appuyez sur la touche POWER du
panneau de commande du téléviseur ou
de la télécommande pour démarrer
le téléviseur. L'indicateur d'alimentation
passe alors au vert.La fenêtre Setup
Wizard (Assistant de configuration)
apparaît à l'écran.
REMARQUE: Cela peut prendre
quelques secondes avant que la
fenêtre Setup Wizard (Assistant de
configuration) apparaisse à l'écran.
2. Utilisez les touches ou pour
mettre en surbrillance TV Location
(Emplacement TV), puis appuyez sur
ou pour sélectionner Home Mode
(Mode Maison) ou Store Mode (Mode
Magasin). REMARQUE: Lorsque
vous sélectionnez Store Mode (Mode
Magasin), un message vous avertira
que la consommation d'énergie est plus
élevée en Store Mode (Mode Magasin).
Sélectionnez Yes (Oui) pour y accéder
ou No (Non) pour annuler. Appuyez sur
ou pour mettre en surbrillance Go to
next step (Passer à l’étape suivante),
puis appuyez sur OK ou pour passer à
l’étape suivante.
3. Utilisez ou pour mettre en
surbrillance Menu Language (Langue
du menu), puis appuyez sur ou
pour sélectionner la langue souhaitée.
Appuyez sur ou sur pour mettre en
surbrillance Go to next step (Passer à
l’étape suivante), puis appuyez sur OK
ou pour passer à l’étape suivante.
4. Utilisez la touche ou pour mettre
en surbrillance Time Zone (Fuseau
horaire), puis appuyez sur ou pour
sélectionner le fuseau horaire souhaité.
Utilisez la touche ou pour mettre
en surbrillance Daylight Saving Time
(Heure d’été), puis appuyez sur ou
pour sélectionner On (Activé) ou Off
(Désactivé). Utilisez la touche ou
pour mettre en surbrillance Time Format
(Format de l’heure), puis appuyez sur
ou pour sélectionner 12heures
ou 24heures. Appuyez sur ou
pour mettre en surbrillance Go to next
step (Passer à l’étape suivante), puis
appuyez sur OK ou pour passer à
l’étape suivante.
46
Page 47

Pour commencer
5. Utilisez la touche ou pour
sélectionner Air/Cable, puis appuyez sur
ou pour sélectionner Air ou Cable en
fonction de votre connexion. Appuyez sur
ou pour mettre en surbrillance Go to
the next step (Aller à l'étape suivante),
appuyez sur OK ou pour lancer le
balayage automatique.
Français
Le Setup Wizard (Assistant de
configuration) recherche automatiquement
les chaînes disponibles. Le balayage peut
durer un certain temps.
47
Page 48

Changer les paramètres
Paramètre d'installation
1. Appuyez sur la touche MENU, la fenêtre de
configuration apparaît à l'écran.
2. Utilisez la touche ou pour sélectionner le
mode Setup (Configuration).
3. Utilisez ou pour mettre en surbrillance
Français
l'élément que vous souhaitez réinitialiser,
puis appuyez sur ou pour sélectionner
les paramètres.
4. Appuyez sur MENU pour revenir au menu
précédent ou appuyez sur EXIT à tout
moment pour quitter le réglage.
Menu Setup
Menu Language
(Langue du menu)
Transparent
OSD Timeout
Sélectionne la langue du
menu
Contrôle le niveau de
transparence du menu
La durée pendant laquelle
l'OSD reste à l'écran
Appuyez sur ou pour sélectionner English, Franais ou
Español
Appuyez sur ou pour sélectionner 0% / 25% / 50% / 75%/
100%
Appuyez sur ou pour sélectionner 5S / 15S / 30S / 45S /
60S
48
Page 49

Modifier les paramètres
Menu Setup
Appuyez sur ou sur pour sélectionner CC On (Soustitrage activé), CC Off (Sous-titrage désactivé) ou CC On
Mute (Sous-titrage sur muet).
Appuyez sur ou pour sélectionner CC1 (Type de soustitrage 1), CC2, CC3, CC4, Text 1, Text 2, Text 3 ou Text 4.
Appuyez sur ou pour sélectionner Off (Désactivé),
Service1, Service 2, Service 3, Service 4, Service 5 ou
Service 6
Mode
Font Style
(Style de
police)
Font Size
(Taille de
police)
Font Edge
Style (Style de
bordure de la
police)
Font Edge
Color (Couleur
de la bordure
de la police)
FG Color
(Couleur du
premier-plan)
BG Color
(Couleur de
l'arrière-plan)
FG Opacity
(Opacité du
premier-plan)
BG Opacity
(Opacité de
l'arrière-plan)
Closed
Caption (Soustitrage)
CC Mode (Mode
sous-titrage)
Analog CC
(Sous-titrage
analogique)
Digital CC
(Sous-titrage
numérique)
Configure les
fonctions de
sous-titrage
Option
* Appuyez sur
OK ou pour
accéder au sousmenu
Français
Appuyez sur ou pour sélectionner
Default (Par défaut) ou Custom
(Personnalisé)
Appuyez sur ou pour sélectionner
Default (Par défaut), Font 0 (Police 0),
Font 1, Font 2, Font 3, Font 4, Font 5,
Font 6 ou Font 7
Appuyez sur ou pour sélectionner
Default (Par défaut), Normal, Large
(Grand) ou Small (Petit)
Appuyez sur ou pour sélectionner
Default (Par défaut), None (Aucun),
Raised (Élevé), Depressed (Déprimé),
Uniform (Uniforme), Left Shadow
(Ombre à gauche) ou Right Shadow
(Ombre à droite)
Appuyez sur ou pour sélectionner
Default (Par défaut), Black (Noir),
White (Blanc), Red (Rouge), Green
(Vert), Blue (Bleu), Yellow (Jaune),
Magenta ou Cyan
Appuyez sur ou pour sélectionner
Default (Par défaut), White (Blanc),
Red (Rouge), Green (Vert), Blue (Bleu),
Yellow (Jaune), Magenta ou Cyan
Appuyez sur ou pour sélectionner
Default (Par défaut), White (Blanc),
Red (Rouge), Green (Vert), Blue (Bleu),
Yellow (Jaune), Magenta ou Cyan
Appuyez sur ou pour sélectionner
Default (Par défaut), Solid (Solide),
Flashing (Clignotant), Translucent
(Translucide) ou Transparent
Appuyez sur ou pour sélectionner
Default (Par défaut), Solid (Solide),
Flashing (Clignotant), Translucent
(Translucide) ou Transparent
49
Page 50

Modifier les paramètres
Menu Setup
TV
Source Label
(Étiquette de la
Français
source)
Autres
paramètres
Restore
Default
(Rétablir par
défaut)
Setup Wizard
(Assistant de
configuration)
CEC
Permet
d’étiqueter les
sources d’entrée
Blue Screen
(Écran bleu)
Audio Only
(Audio
seulement)
Retour aux
réglages par
défaut
Lance l’Assistant
de configuration
Configure les
fonctions CEC
AV
Composant
HDMI1
HDMI2
HDMI3
PC
Media
Appuyez sur ou pour sélectionner On (Activé) ou Off (Désactivé)
Appuyez sur ou pour sélectionner On (Activé) ou Off (Désactivé)
Appuyez sur ou pour sélectionner Yes (Oui) ou No (Non)
Consulter la page «Pour commencer»
CEC Control
(Contrôle CEC)
Device Auto
Power Off (Arrêt
automatique de
l'appareil)
TV Auto Power
On (Allumage
automatique du
téléviseur)
Audio Receiver
(Récepteur radio)
(ARC)
Device Lists (Listes
de périphériques)
Connect
(Branchement)
Root Menu (Menu
principal)
Appuyez sur ou pour sélectionner Custom
(Personnalisé), Default (Par defaut), Antenna (Antenne),
Cable, Satellite, DTV, DVD, Blu-ray, HD-DVD, XBOX,
Wii, PS3, Game (Jeu), Computer (Ordinateur), VCR
(Magnétoscope) ou DV
*La configuration des ports de connexion est susceptible de
varier d'un modèle à l'autre.
Appuyez sur ou pour sélectionner Off (Désactivé)
ou On (Activé)
Appuyez sur ou pour sélectionner Off (Désactivé)
ou On (Activé)
* Si cette fonction est activée lorsque vous éteignez le
téléviseur, tous les appareils HDMI CEC branchés se
mettent alors en veille.
Appuyez sur ou pour sélectionner Off (Désactivé)
ou On (Activé)
* Si cette fonction est activée lorsque vous allumez un
appareil branché sur HDMI CEC, le téléviseur s’allume et
commute sur la source sur laquelle l’appareil est branché.
Appuyez sur ou pour sélectionner Off (Désactivé)
ou On (Activé)
* Si cette fonction est activée, le téléviseur utilise un
appareil connecté compatible ARC comme dispositif de
sortie audio.
Répertorie tous les appareils CEC connectés
Se connecte aux appareils sur les périphériques CEC
Affiche le menu principal des périphériques branchés
50
Page 51

Modifier les paramètres
Réglage de l'image
1. Appuyez sur la touche MENU, la fenêtre de
configuration apparaît à l'écran.
2. Utilisez la touche ou pour mettre en
surbrillance le mode Picture (Image).
3. Utilisez ou pour mettre en surbrillance
l'élément que vous souhaitez réinitialiser,
puis appuyez sur ou pour sélectionner
les paramètres.
4. Appuyez sur MENU pour revenir au menu
précédent ou appuyez sur EXIT à tout
moment pour quitter le réglage.
Menu Picture
Picture Mode
Brightness
(Luminosité)
Contrast
(Contraste)
Color
(Couleur)
Tint (Teinte)
Sharpness
(Netteté)
Color
Temperature
(Température
de couleur)
Advanced
Settings
(Paramètres
avancés)
Sélectionne le mode
d’affichage
Contrôle le niveau de
luminosité de l’image
Contrôle le niveau de
contraste de l’image
Contrôle le niveau de
couleur de l’image
Contrôle la teinte de
l’image
Contrôle le niveau de
netteté de l’image
Sélectionne le mode
de couleur
Paramètres avancés
de l’image
Appuyez sur ou pour sélectionner les modes d'affichage Power
Saving (Économie d'énergie) / Standard / Dynamic (Dynamique), Soft
(Souple) ou User (Utilisateur).
Appuyez sur ou pour changer la luminosité au niveau souhaité.
* Réglable uniquement après avoir réglé le mode «Picture Mode» comme
mode «User».
Appuyez sur ou pour changer le contraste au niveau souhaité.
* Réglable uniquement après avoir réglé le mode «Picture Mode» comme
mode «User».
Appuyez sur ou pour changer la couleur au niveau souhaité.
* Réglable uniquement après avoir réglé le mode «Picture Mode» comme
mode «User».
Appuyez sur ou pour changer la teinte au niveau souhaité.
* Disponible uniquement en mode NTSC.
Appuyez sur ou pour changer la netteté au niveau souhaité.
* Réglable uniquement après avoir réglé le mode «Picture Mode» comme
mode «User».
Appuyez sur ou pour sélectionner Normal, Warm (Chaud) ou Cool
(Froid).
Aspect
Noise Reduction
(Réduction du
bruit)
Dynamic
Contrast
(Contraste
dynamique)
Français
Appuyez sur ou pour sélectionner Wide (Large),
Zoom, Cinema ou Normal.
Appuyez sur ou pour sélectionner Middle
(Moyen), High (Élevé), Off (Désactivé) ou Low
(Faible).
Appuyez sur ou pour sélectionner On (Activé) ou
Off (Désactivé).
51
Page 52

Modifier les paramètres
Réglage du son
1. Appuyez sur la touche MENU, la fenêtre
de configuration apparaît à l'écran.
2. Utilisez la touche ou pour
sélectionner le mode Sound (Son).
3. Utilisez ou pour mettre en
Français
surbrillance l'élément que vous souhaitez
réinitialiser, puis appuyez sur ou pour
sélectionner les paramètres.
4. Appuyez sur MENU pour revenir au menu
précédent ou appuyez sur EXIT à tout
moment pour quitter le réglage.
REMARQUE: Le menu d’affichage est
susceptible de varier lorsqu’une source
d’entrée différente est sélectionnée.
Menu Sound
Appuyez sur ou pour sélectionner les modes Standard, Music
Equalizer
(Égaliseur)
MTS
Audio Languages
(Langues audio)
Digital Audio
Output (Sortie
audio numérique)
AVL
Contrôle les niveaux des
différentes fréquences
sonores
Contrôle le son du
téléviseur multicanal
(diffusion analogique
uniquement)
Si disponible en diffusion
numérique, ceci
sélectionne la langue
audio
Sélectionne le mode de
sortie audio numérique
Contrôle automatique
du volume - augmente
ou diminue le volume
du téléviseur jusqu’à un
niveau défini
(Musique), Movie (Film), Sports ou User (Utilisateur)
User (Utilisateur)
Appuyez sur ou pour sélectionner les paramètres Stereo, SAP
(Audio secondaire si disponible) ou Mono MTS
Appuyez sur ou pour sélectionner une des langues: English,
French ou Spanish
Appuyez sur ou pour sélectionner le mode de sortie audio
numérique RAW, PCM ou Off (Désactivé)
Appuyez sur ou pour sélectionner On (Activé) ou Off
(Désactivé)
Appuyez sur ou pour sélectionner
200Hz, 500Hz, 1.5KHz, 5KHz,
10KHz ou Balance.
52
Page 53

Modifier les paramètres
Menu Sound
Voice Guidance
(Guidage vocal)
Volume
Voice Guidance
(Guidage vocal)
Video Description
(Description de la
vidéo)
Contrôle
les
fonctions
du guide
vocal
Contrôle la fonction de
description vidéo
Voice
Guide
(Guide
vocal)
Speed (Vitesse)
Pitch (Ton)
Appuyez sur ou pour activer ou désactiver
Appuyez sur ou pour activer ou
désactiver
Appuyez sur ou pour sélectionner
Low (Faible), Middle (Moyen) ou High
(Élevé)
* Disponible uniquement lorsque le mode
Voice Guidance (Guidage vocal) a été
activé
Appuyez sur ou pour sélectionner
Slow (Lent), Normal ou Fast (Rapide)
* Disponible uniquement lorsque le mode
Voice Guidance (Guidage vocal) a été
activé
Appuyez sur ou pour sélectionner
Low (Faible), Middle (Moyen) ou High
(Élevé)
* Disponible uniquement après que le
guidage vocal a été défini sur le mode
activé
Français
53
Page 54

Modifier les paramètres
Réglage de l'heure
1. Appuyez sur la touche MENU, la fenêtre de
configuration apparaît à l'écran.
2. Utilisez la touche ou pour sélectionner le
mode Time (Heure).
3. Utilisez ou pour mettre en surbrillance
Français
l'élément que vous souhaitez réinitialiser,
puis appuyez sur ou pour sélectionner les
paramètres.
4. Appuyez sur MENU pour revenir au menu
précédent ou appuyez sur EXIT à tout
moment pour quitter le réglage.
Menu Time
Sleep Timer
(Minuterie de
mise en veille)
Time Zone
(Fuseau
horaire)
Daylight
Saving Time
(Heure d'été)
Time Format
(Format de
l'heure)
Auto Clock
(Horloge
automatique)
Clock
(Horloge)
Définit une période
de mise en veille
automatique du
téléviseur
Règle le fuseau horaire
Permet de passer à
l’heure d’été
Définit le format
d'affichage de l'heure
Permet le réglage
automatique de l’heure
Affiche la date et l’heure en cours
Appuyez sur ou pour sélectionner Off (Désactivé), 5min, 10min,
15min, 30min, 60min, 90min, 120min, 180min ou 240min
Appuyez sur ou pour sélectionner Pacific, Alaska, Hawaii, Samoa,
Newfoundland, Atlantic, Eastern, Central ou Mountain
Appuyez sur ou pour activer ou désactiver
* Uniquement disponible sous la chaîne TV
Appuyez sur ou pour définir 12heures ou 24heures
Appuyez sur ou pour activer ou désactiver
54
Page 55

Modifier les paramètres
Réglage du verrouillage
1. Appuyez sur la touche MENU, la fenêtre de configuration apparaît à l'écran.
2. Utilisez la touche ou pour mettre en surbrillance le mode Lock (Verrouillage).
3. Utilisez la touche ou pour mettre en surbrillance «Enter Password» (Saisir un mot de
passe) et saisissez «0000» pour accéder à la fenêtre de configuration.
4. Utilisez ou pour mettre en surbrillance l'élément que vous souhaitez réinitialiser, puis
appuyez sur ou pour sélectionner les paramètres.
5. Appuyez sur MENU pour revenir au menu précédent ou appuyez sur EXIT à tout moment
pour quitter le réglage.
Menu Lock
Appuyez sur pour mettre en surbrillance Enter
Change
Password
(Modifier le mot
de passe)
System Lock
(Verrouillage du
système)
Modifie le mot de passe de
l'utilisateur
Verrouillage du système par mot de
passe
Password (Saisir un mot de passe), utilisez les touches
numériques (0~9) pour saisir le mot de passe, la fenêtre de
configuration Lock (Verrouillage) s'affiche
* Le mot de passe par défaut est 0000
* Si vous avez oublié votre mot de passe, utilisez 8888 pour
accéder à tous les menus verrouillés
Appuyez sur ou pour activer ou désactiver
Français
55
Page 56

Modifier les paramètres
Menu Lock
TV
AV
Component
Français
Input Block
(Verrouillage
des entrées)
US Rating
(Classification
américaine)
Canada Rating
(Classification
canadienne)
RRT Setting
(Réglage RRT)
Reset RRT
(Réinitialisation
RRT)
Verrouillage des entrées par mot de
passe
Appuyez sur ou pour verrouiller
(Block) ou déverrouiller (Unblock).
Établit des contrôles parentaux
basés sur le système d’évaluation
américain
* Disponible uniquement lorsque le
mode System Lock (Verrouillage
du système) a été activé.
Établit des contrôles parentaux
basés sur le système d’évaluation
canadien
* Disponible uniquement lorsque le
mode System Lock (Verrouillage
du système) a été activé.
Établit des contrôles parentaux
basés sur le système d’évaluation
canadien.
* Disponible uniquement lorsque le
trafic RRT du code DTV est détecté
par le système
Rétablit les paramètres RRT par
défaut
(Composant)
HDMI1
HDMI2
HDMI3
PC
Media
TV
MPA A
Canada
Anglais
Canada
Français
Humor Level
(Niveau
d’humour)
Intelligence
level (Niveau
intellectuel)
Erotic level
20CHARS
(Niveau
d’érotisme)
Appuyez sur OK ou pour accéder au sous-menu, puis
appuyez sur ou pour sélectionner Yes (Oui) ou No
(Non)
Appuyez sur ou pour verrouiller
(Block) ou déverrouiller (Unblock).
Appuyez sur ou pour verrouiller
(Block) ou déverrouiller (Unblock).
Appuyez sur ou pour verrouiller
(Block) ou déverrouiller (Unblock).
Appuyez sur ou pour verrouiller
(Block) ou déverrouiller (Unblock).
Appuyez sur ou pour verrouiller
(Block) ou déverrouiller (Unblock).
Appuyez sur ou pour verrouiller
(Block) ou déverrouiller (Unblock).
Appuyez sur ou pour verrouiller
(Block) ou déverrouiller (Unblock).
Appuyez sur ou pour verrouiller
(Block) ou déverrouiller (Unblock).
Vous pouvez définir la classification
en utilisant le niveau d'âge et le genre.
Consultez les tableaux Âge et Genre
pour les définitions
Consultez le tableau du Système
américain de classification
Consultez le tableau du Système
canadien de classification
Consultez le tableau du Système
canadien de classification
Consultez le tableau du Système
canadien de classification
Consultez le tableau du Système
canadien de classification
Consultez le tableau du Système
canadien de classification
56
Page 57

Modifier les paramètres
Français
Genre
TOUS
FV
V
S
L
D
Tous
Violence fictive
Violence
Sexe
Langage
Dialogue
Système américain de classification
Off
G
PG
PG-13
R
NC-17
X
Tous les enfants
Tout âge
Accord parental
Accord parental pour les enfants de
moins de 13ans
Accord parental pour les enfants de
moins de 17ans
17ans et plus
Adultes uniquement
Âge
T V-Y
T V-Y 7
TV- G
TV- PG
TV-1 4
TV-MA
Tous les enfants
7ans et plus
Grand public
Accord parental
14ans et plus
17ans et plus
Système canadien de classification
Off
C
C8+
G
PG
14+
18+
Tous les enfants
Tout âge
Enfants de moins de 8ans
Grand public
Accord parental
La programmation contient des thèmes
ou du contenu susceptibles de ne pas
convenir aux téléspectateurs de moins
de 14ans
Adultes
57
Page 58

Modifier les paramètres
Réglage de la chaîne
1. Appuyez sur la touche MENU, la fenêtre de configuration apparaît à l'écran.
2. Utilisez la touche ou pour mettre en surbrillance le mode Channel (Chaîne).
3. Utilisez ou pour mettre en surbrillance l'élément que vous souhaitez réinitialiser, puis
appuyez sur ou pour sélectionner les paramètres.
4. Appuyez sur OK pour confirmer vos sélections ou les paramètres et accéder aux sous-
Français
menus.
5. Appuyez sur MENU pour revenir au menu précédent ou appuyez sur EXIT à tout moment
pour quitter le réglage.
Menu Channel
Air/Cable
Auto Scan
(Balayage
automatique)
Favorite
(Favoris)
Channel List
(Liste des
chaînes)
Show/Hide
(Afficher/
Masquer)
Channel
Number
(Numéro de
la chaîne)
Channel
Label
(Étiquette de
la chaîne)
Définit le type de réception
Recherche
automatiquement les
chaînes disponibles.
Ajoute des chaînes à la liste
des favoris.
Présente la liste des
chaînes disponibles.
Sélectionne le numéro de la
chaîne à étiqueter
Sélectionne le numéro de la
chaîne à étiqueter
Permet de définir le nom
des chaînes
Appuyez sur ou sur pour sélectionner Air ou Cable (Câble).
Appuyez sur ou pour sélectionner Ye s pour démarrer le balayage
automatique des chaînes ou No pour annuler.
Appuyez sur ou pour sélectionner une chaîne puis appuyez sur
ou OK pour sélectionner ou désélectionner en tant que favori.
Appuyez sur OK ou sur pour afficher la liste des chaînes disponibles.
Appuyez sur ou pour sélectionner une chaîne, puis appuyez sur
ou OK pour l’afficher ou la masquer
Appuyez sur ou sur pour sélectionner une chaîne.
Appuyez sur ou pour sélectionner un caractère, appuyez sur
ou pour parcourir les caractères.(7caractères au maximum)
58
Page 59

Modifier les paramètres
Réglage PC
Le menu PC n'est accessible que lorsqu'un PC est connecté au téléviseur via la connexion VGA.
Remarque:Après avoir connecté un PC, appuyez sur la touche
SOURCE
et sélectionnez
PC.Appuyez sur OK ou pour accéder.
1. Appuyez sur la touche MENU, la fenêtre de configuration apparaît à l'écran.
2. Utilisez la touche ou pour sélectionner le mode Setup (Configuration).
3. Utilisez ou pour mettre en surbrillance un élément de PC Settings (Réglages PC), puis
OK ou pour accéder au tableau PC Menu.
4. Utilisez ou pour mettre en surbrillance l'élément que vous souhaitez réinitialiser, puis
appuyez sur ou pour sélectionner les paramètres.
5. Appuyez sur MENU pour revenir au menu précédent ou appuyez sur EXIT à tout moment
pour quitter le réglage.
Menu PC
H-Pos
V-Pos
Clock
(Horloge)
Phase
Auto
Configure la position horizontale de l’image du téléviseur.
Configure la position verticale de l’image du téléviseur.
Règle l’horloge des pixels (verticale) pour une image
plus nette.
Règle l’horloge de phase (horizontale) pour une image
plus claire.
Règle automatiquement les paramètres du PC.
Appuyez sur ou sur pour déplacer l’écran
horizontalement.
Appuyez sur ou sur pour déplacer l’écran
verticalement.
Appuyez sur ou sur pour ajuster.
Appuyez sur ou sur pour ajuster.
Appuyez sur OK ou sur pour ajuster
automatiquement tous les paramètres du PC.
Français
59
Page 60

Modifier les paramètres
MODES D’AFFICHAGE ÉCRANPC
Mode Résolution Taux de rafraîchissement
VGA
VGA
VGA
Français
SVGA
XGA
WXGA
WXGA
SXGA
WXGA+
WSXGA+
FHD
640x480 60/75Hz
720x400 70Hz
1366x768 60Hz
800x600 60/75Hz
1024x768 60 / 70Hz / 75Hz
1280x720 60Hz
1360x768 60Hz
1280x1024 60Hz
1440x900 60Hz
1680x1050 60Hz
1920x1080 60Hz
* Veuillez noter que sur les téléviseurs non FHD, certaines fonctionnalités peuvent être limitées
60
Page 61

Modifier les paramètres
Mode USB
1. Après avoir branché une clé USB, appuyez sur le bouton SOURCE, puis sélectionnez Media.
Appuyez sur OK ou pour accéder.
2. Utiliser la touche ou pour sélectionner de voir Photo ou Music. Appuyez sur OK ou
pour accéder.
3. Utilisez ou pour parcourir les fichiers ou dossiers de la clé USB.
4. Appuyez sur MENU pour revenir au menu précédent ou appuyez sur EXIT à tout moment
pour quitter le réglage.
Lorsque vous visionnez des photos, cet outil
de visualisation de photos vous permettra de
contrôler le diaporama, de lire de la musique
et des informations sur le fichier.
La visionneuse de photos affiche les fichiers
photos au format .jpg.
La lecture de la musique s’effectue via
ce lecteur de musique, qui fournit les
commandes de lecture et les informations
relatives au fichier.
Français
Le lecteur de musique lit les fichiers audio au
format MP3.
61
Page 62

Dépannage
Problème Solution/Question
● Assurez-vous que le cordon d'alimentation est branché.
Le téléviseur ne
fonctionne pas
Image normale,
Français
mais sans son
La télécommande
ne fonctionne pas
Son faible ou
inexistant
Image déficiente
ou inexistante
Mauvaise
réception TV
Mauvaise
réception de la
télévision par
câble ou par
satellite
Le téléviseur
s'éteint
Image en noir et
blanc provenant
de l'appareil AV
connecté
● Essayez une autre prise de courant alternatif.
● L'alimentation est interrompue, vérifiez le fusible ou le disjoncteur.
● Débranchez l'appareil pendant une heure, puis rebranchez-le.
● Vérifiez les réglages du volume.
● Son en sourdine? Appuyez sur la touche MUTE.
● Essayez une autre chaîne.
● Vérifiez les connexions des câbles.
● Assurez-vous que la télécommande est dans la zone de portée sans obstacles.
● Vérifiez les piles.
● Corrigez le mode de fonctionnement: TV, VCR etc.
● En cas de problème avec une chaîne ou la télévision par câble, syntonisez sur une autre
chaîne.
● Vérifiez les réglages du son (Volume ou Silence).
● Vérifiez les sources d'interférences possibles.
● En cas de problème avec une chaîne ou la télévision par câble, syntonisez sur une autre
chaîne.
● Assurez-vous que les chaînes sont mémorisées.
● Vérifiez les connexions de l'antenne ou du câble TV, réglez l'antenne.
● Vérifiez les sources d'interférences possibles.
● Vérifiez les réglages de contrôle de l'image.
● Assurez-vous que l'amplificateur d'antenne est allumé pour l’antenne de télévision.
● Réglez la position de l'antenne sur un angle de réception du signal plus fort.
● Vérifiez que la connexion de l'antenne est bien fixée au téléviseur.
● Vérifiez que le boîtier de distribution de l'antenne est alimenté en courant.
● Confirmez que votre câble entrant est branché à la connexion murale câble / antenne
correcte à l'intérieur du boîtier RV.
● Assurez-vous que le câble coaxial interne de saut RV est branché au bon port.
● Assurez-vous que l'amplificateur d'antenne est éteint pour que le signal puisse être capté.
● Vérifiez que le câble d'entrée est correctement branché au boîtier RV.
● Assurez-vous que le répartiteur de câble est sous tension.
● Confirmez que votre câble entrant est branché à la connexion murale câble / satellite
correcte à l'intérieur de votre RV.
● Assurez-vous que le câble coaxial interne de saut RV est branché au bon port.
● Vérifier que l'antenne parabolique n'est pas obstruée.
● La minuterie de veille est activée.
● Alimentation en courant interrompue.
● Vérifiez les connexions vidéo sur le téléviseur et sur l'appareil AV connecté. Assurez-vous
que les couleurs correspondent entre les connecteurs et les prises: vert (Y), bleu (Pb/Cb)
et rouge (Pr/Cr) pour la connexion des composants et jaune (VIDEO) pour la connexion
composite.
● Assurez-vous que les câbles vidéo soient bien connectés.
62
Page 63

Caractéristiques
H
Français
MODÈLE, DIMENSION ET RÉSOLUTION
Modèle
FDHS32M4A
Dimensions sans support
Taille (L × H × P)
28 ¹/ po x 17/po x 3 /po
(736x447x79mm)
CONNEXIONS D’ENTRÉE ET DE SORTIE
Modèle
FDHS32M4A 1 1 1
R-AUDIO
OUT-L
Écouteurs
Sortie
optique
W
L-AUDIO
IN-R
1 x
Gauche
(Blanc)
1 x Droit
(Rouge)
Dimensions avec support
Taille (L × H × P)
28 ¹/ po x 19 ³/ po x 8/po
(736 x 492 x 208mm)
Entrée vidéo
composante
Composante
YPBP
Entrée vidéo
1xJaune/Vert*
1xBleu
1xRouge
R
D
Résolution maximale
1366x768 @ 60Hz HD
Entrée
VGA
(PC)
Entrée
Audio
(PC)
Entrée
RF
Entrée
HDMI
3 1 1 1 1
USB
63
Page 64

Caractéristiques
Français
FDHS32M4A
7 "
182 mm
7 "
200 mm
6"
152 mm
13"
354 mm
7 "
200 mm
13"
354 mm
SCHÉMA DE MONTAGE VESA
Modèle Largeur en mm Hauteur en mm Taille de vis Quantité
200 100 PWM 5x8 mm 4
64
Page 65

Bienvenido
Gracias por elegir este TV LED HD Furrion®. Antes de usar su nuevo producto, lea atentamente
estas instrucciones. Este manual de instrucciones contiene información relativa al uso seguro,
ala instalación y al mantenimiento del producto.
El fabricante no acepta responsabilidad por daños provocados por no seguir estas
instrucciones.
Si tiene más preguntas sobre nuestros productos, contáctenos en support@furrion.com
Declaración de conformidad del proveedor
47 CFR § 2.1077 Información de cumplimiento
Español
Identificador único
Nombre comercial: Furrion
Modelo N.o: FDHS32M4A
Parte responsable – Información de contacto en EE. UU.
Furrion Innovation Center & Institute of Technology 52567
Independence Ct., Elkhart, IN 46514, USA
Línea gratuita:1-888-354-5792; Correo electrónico: support@furrion.com
Declaración de cumplimiento con la Comisión Federal de
Comunicaciones (FCC)
Este dispositivo cumple con el Artículo 15 del Reglamento de la Comisión
Federal de Comunicaciones (FCC). Su uso está sujeto a las siguientes dos
condiciones: (1) Este dispositivo no debe causar interferencias perjudiciales,
y
(2) este dispositivo debe aceptar cualquier interferencia que reciba,
incluidas las interferencias que puedan causar un funcionamiento no
deseado.
65
Page 66

Contenido
Bienvenido .......................................................................................... 65
Contenido ............................................................................................ 66
Advertencias de seguridad ............................................................... 67
Instrucciones de seguridad importantes ................................................................................67
Precauciones de seguridad ...........................................................................................................71
Resumen de funciones .......................................................................72
Panel de control ..................................................................................................................................72
Panel trasero ........................................................................................................................................73
Español
Control remoto ....................................................................................................................................74
Acerca de su TV LED HD ....................................................................76
Funcionalidades .................................................................................................................................76
Fuente de alimentación ...................................................................................................................76
Antes de usar .......................................................................................77
Contenido ..............................................................................................................................................77
Prepare su control remoto .............................................................................................................77
Cómo empezar ................................................................................... 78
Cambiar ajustes ..................................................................................80
Ajustes de configuración general .............................................................................................. 80
Ajustes de imagen ............................................................................................................................ 83
Ajustes de sonido .............................................................................................................................84
Ajustes de hora .................................................................................................................................. 86
Ajustes de bloqueo ...........................................................................................................................87
Ajustes de canales ........................................................................................................................... 90
Ajustes de PC ...................................................................................................................................... 91
Modo USB ............................................................................................................................................ 93
Resolución de problemas ................................................................. 94
Especificaciones ................................................................................ 95
66
Page 67

Advertencias de seguridad
3. Respete todas las advertencias.
PRECAUCIÓN
RIESGO DE DESCARGA ELÉCTRICA
PRECAUCIÓN: PARA REDUCIR EL RIESGO
DE DESCARGA ELÉCTRICA, NO RETIRE
LA CUBIERTA (OLA PARTE POSTERIOR).
NO HAY PIEZAS AL INTERIOR QUE EL
USUARIO PUEDA REPARAR. CONSULTE CON
PERSONAL DE SERVICIO CALIFICADO.
Este “relámpago” indica que el
material no aislado al interior de la
unidad puede causar una descarga
eléctrica. Para la seguridad de todos en su
hogar, no retire la cubierta del producto.
El “signo de admiración” llama la
atención a las características por
las que usted debe leer la
información adjunta detenidamente para
evitar problemas de funcionamiento y
mantenimiento.
Este es un equipo eléctrico de
Clase II, o sea, de aislamiento doble.
Ha sido diseñado para no necesitar
una conexión eléctrica a tierra por
seguridad.
ADVERTENCIA: Para reducir el riesgo
de incendio o descarga eléctrica, este
electrodoméstico no debe exponerse a la lluvia
ni a la humedad, y los objetos llenos de líquidos,
como jarrones, no deben colocarse sobre este.
PRECAUCIÓN: Para evitar descargas
eléctricas, inserte completamente el enchufe.
Para regiones con enchufes polarizados:
Para evitar descargas eléctricas, haga
coincidir la cuchilla ancha con la ranura
ancha.
NO ABRA
Instrucciones de seguridad
importantes
1. Lea estas instrucciones.
2. Guarde estas instrucciones.
4. Siga todas las instrucciones.
5. No use este electrodoméstico cerca del
agua.
6. Limpie sólo con un paño seco.
7. No bloquee ninguna de las aberturas de
ventilación. Instale de acuerdo con las
instrucciones del fabricante.
8. No instale cerca de fuentes de calor como
radiadores, registros de calor, estufas u
otros aparatos (incluidos amplificadores)
que produzcan calor.
9. No anule el propósito de seguridad del
enchufe polarizado o con toma a tierra.
Un enchufe polarizado tiene dos cuchillas,
una más ancha que la otra. Un enchufe de
tipo conexión a tierra tiene dos cuchillas
y una tercera clavija de conexión a tierra.
La cuchilla ancha o la tercera púa se
proporciona para su seguridad. Si el
enchufe proporcionado no encaja en su
tomacorriente, consulte a un electricista
para el reemplazo del enchufe obsoleto.
10. Proteja el cable de alimentación para no
pisarlo o apretarlo, en especial en los
enchufes, receptáculos y en el lugar en el
que sale del electrodoméstico.
11. Utilice únicamente aditamentos/
accesorios especificados por el
fabricante.
12. Úselo únicamente con un
carrito, soporte, trípode,
abrazadera o mesa
especificada por el fabricante
o vendido con el aparato. Cuando se
utiliza un carrito, tenga precaución al
mover el carrito y el electrodoméstico
para evitar lesiones por vuelco.
13. Desenchufe este electrodoméstico
durante tormentas eléctricas o cuando no
se use durante largos períodos de tiempo.
14. Para cualquier reparación, consulte
con personal de servicio calificado.
Se requiere servicio técnico cuando el
electrodoméstico ha sido dañado de
alguna manera, como por ejemplo el
Español
67
Page 68

Advertencias de seguridad
cable de alimentación o el enchufe, si
se ha derramado líquido o si los objetos
han caído en el electrodoméstico o si el
aparato ha estado expuesto a la lluvia o a
la humedad. no funciona normalmente, o
si se ha dejado caer.
15. El aparato no debe exponerse a goteos
o salpicaduras, y los objetos llenos
de líquidos, como jarrones, no deben
colocarse sobre el electrodoméstico.
16. Un sistema de antena exterior no debe
Español
ubicarse cerca de líneas aéreas de
tendido eléctrico ni de otra luz eléctrica o
cerca de circuitos de potencia, o donde
pueda caer en tales líneas o circuitos de
potencia. Al instalar un sistema de antena
exterior, se debe tener mucho cuidado
para evitar tocar dichas líneas o circuitos
ya que el contacto con ellos podría ser
fatal.
17. No sobrecargue las tomas de corriente
de la pared, los cables de extensión ni los
receptáculos integrales ya que esto puede
ocasionar un incendio o una descarga
eléctrica.
18. Nunca introduzca objetos de ningún tipo
en este producto a través de las aberturas,
ya que pueden tocar puntos de voltaje
peligrosos u ocasionar cortocircuitos
en las piezas que podrían provocar un
incendio o descarga eléctrica. Nunca
derrame líquido de ningún tipo sobre el
producto.
19. Si conecta una antena externa al televisor,
asegúrese de que el sistema de la
antena esté conectado a tierra, para así
proteger al producto contra sobrecargas
y acumulación de estática. La Sección810
del Código Eléctrico Nacional entrega
información sobre el cableado a tierra
adecuado del mástil y de su estructura
de soporte, sobre la conexión a tierra
del cable de entrada hacia la unidad de
descarga de la antena, sobre el tamaño
de los conductores a tierra, sobre la
ubicación de la unidad de descarga de
la antena, sobre las conexiones a los
electrodos a tierra y sobre los requisitos
de tales electrodos.
EJEMPLO DE CONEXIÓN A TIERRA DE UNA ANTENA
BAJO EL CÓDIGO ELÉCTRICO NACIONAL
CABLE DE LA
ANTENA
PINZA A TIERRA
EQUIPO DE SERVICIO
ELÉCTRICO
CÓDIGO ELÉCTRICO
NACIONAL (NEC) S2898A
ANTENA
UNIDAD DE DESCARGA
(NEC SECCIÓN 810-20)
CONDUCTORES A TIERRA
(NEC SECCIÓN 810-21)
PINZAS A TIERRA
SISTEMA DE ELECTRODO A
TIERRA DEL SERVICIO ELÉCTRICO
(NEC ART. 250, PARTE H)
20. NOTA PARA EL INSTALADOR DEL TV/
CABLE: Este recordatorio se entrega
al instalador del sistema de CATV en
relación al Artículo820-40 del Código
Eléctrico Nacional (EE. UU.) El código
entrega pautas para un cableado a tierra
adecuado, en particular, especificando
que éste se debe conectar al sistema a
tierra del edificio lo más cercano posible
al punto de entrada del cable.
21. Cuando se necesiten piezas de
repuesto, asegúrese de que el técnico
de servicio utilice las piezas de repuesto
especificadas por el fabricante o aquellas
que tengan las mismas características
que la pieza original. Las sustituciones no
autorizadas pueden provocar incendios,
descargas eléctricas u otros peligros.
22. Al completar cualquier servicio o
reparación a esta unidad, solicite
al técnico de servicio que realice
verificaciones de seguridad para
determinar si la unidad está en
condiciones de funcionamiento
adecuadas.
23. Cuando conecte el producto a otro
equipo, desconecte la alimentación y
desenchufe todo el equipo de la toma de
corriente. De lo contrario, puede provocar
68
Page 69

Advertencias de seguridad
una descarga eléctrica y lesiones
personales graves. Lea atentamente el
manual del propietario del otro equipo y
siga las instrucciones al realizar cualquier
conexión.
24. El sonido repentino de alto volumen
puede causar daños a la audición o al
altavoz. Cuando usa auriculares, (si la
unidad está equipada con un conector
para auriculares) mantenga el volumen
en un nivel moderado. Si usa audífonos
continuamente con un volumen alto,
puede causar daños auditivos.
25. No permita que el producto muestre un
sonido distorsionado durante un período
de tiempo prolongado. Puede provocar el
sobrecalentamiento y el incendio de los
altavoces.
26. La toma de corriente debe instalarse
cerca de la unidad y ser de fácil acceso.
27. El enchufe de la red eléctrica se utiliza
como desconexión y debe permanecer
fácilmente operativo.
28. Las baterías (ya se trate de un paquete
de baterías o baterías instaladas) no
deben exponerse a calor excesivo como,
por ejemplo, exponerse a la luz del sol, al
fuego, etc.
CONDENSACIÓN
Se formará humedad en la sección operativa
de la unidad si traslada la unidad de un
entorno frío a una habitación cálida o si la
temperatura de la sala sube repentinamente.
Cuando esto sucede, el rendimiento de la
unidad se verá afectado. Para evitar esto,
deje que la unidad permanezca en su nuevo
entorno durante aproximadamente una
hora antes de encenderla, o asegúrese
de que la temperatura ambiente aumente
gradualmente.
La condensación también puede formarse
durante el verano si la unidad está expuesta a
la brisa de un acondicionador de aire. En tales
casos, cambie la ubicación de la unidad.
COMO MANEJAR EL PANEL LCD
● No presione con fuerza ni sacuda el panel
LCD. Puede causar que el vidrio del panel
LCD se rompa y que se produzcan daños.
● Si el panel LCD está roto, asegúrese de
que no toque el líquido en el panel. Esto
puede causar inflamación de la piel.
● Si el líquido entra en su boca, haga
gárgaras inmediatamente y consulte con
su médico. Además, si el líquido entra
en contacto con sus ojos o toca su piel,
consulte con su médico después de
enjuagar durante al menos 15 minutos o
más con agua limpia.
Posibles efectos adversos del panel
LCD: Si un patrón fijo (no móvil) permanece
en el panel LCD durante largos períodos
de tiempo, la imagen puede quedar
permanentemente grabada en el panel LCD
y causar imágenes fantasmas sutiles pero
permanentes. Este tipo de daño NO ESTÁ
CUBIERTO POR SU GARANTÍA. Nunca
deje el panel LCD encendido durante largos
períodos de tiempo mientras muestra los
siguientes formatos o imágenes:
● Imágenes fijas, como tableros de
cotizaciones, patrones de videojuegos,
logotipos de estaciones de TV y sitios
web.
● Formatos especiales que no usan toda la
pantalla. Por ejemplo, ver medios de estilo
de buzón (16: 9) en una pantalla normal
(4: 3) (barras negras en la parte superior
e inferior de la pantalla); o viendo medios
de estilo normal (4: 3) en una pantalla
panorámica (16: 9) (barras negras a los
lados izquierdo y derecho de la pantalla).
Los siguientes síntomas no son signos
de mal funcionamiento, sino de limitación
técnica. Por lo tanto, declinamos cualquier
responsabilidad por estos síntomas.
● Los paneles LCD se fabrican utilizando un
nivel extremadamente alto de tecnología
de precisión, sin embargo, a veces,
Español
69
Page 70

Advertencias de seguridad
algunas partes de la pantalla pueden
carecer de elementos de imagen o tener
puntos luminosos. Esto no es un signo de
un mal funcionamiento.
● No instale el panel LCD cerca de un
equipo electrónico que produzca ondas
electromagnéticas. Algunos equipos
colocados demasiado cerca de esta
unidad pueden causar interferencia.
● Efecto en dispositivos infrarrojos: puede
haber interferencias al usar dispositivos
Español
infrarrojos, como auriculares inalámbricos
infrarrojos.
Fuente de alimentación: Este televisor LED
está diseñado para funcionar con 100 ~ 240
voltios 50/60 Hz, corriente alterna. Inserte el
cable de alimentación en una toma de 100 ~
240 voltios 50/60 Hz.
Para evitar descargas eléctricas, no use el
enchufe del televisor LED (polarizado) con
un cable de extensión, receptáculo u otra
toma de corriente a menos que las cuchillas
y el terminal de tierra puedan insertarse
completamente para evitar la exposición de
la cuchilla.
Advertencia: Para reducir el riesgo de
incendio o descarga eléctrica, no exponga
este electrodoméstico a la lluvia o la
humedad.
Precaución: Nunca retire la cubierta
posterior del televisor LED ya que puede
exponerlo a voltajes muy altos y a otros
peligros. Si el televisor no funciona
correctamente, desenchufe el televisor LED y
llame a su distribuidor autorizado o al centro
de servicio.
Ajuste solo los controles que están cubiertos
en las instrucciones, ya que los cambios o
modificaciones incorrectos que no estén
expresamente aprobados por Furrion
podrían anular la garantía del usuario.
70
CUMPLIMIENTO
Declaración FCC
Nota: Este equipo ha sido probado por
cuanto a su cumplimiento con los límites
de un dispositivo digital Clase B, según la
Parte15 de las Reglas FCC. Estos límites
están diseñados para ofrecer una protección
razonable contra interferencia dañina en una
instalación residencial. Este equipo genera,
utiliza e irradia energía de radiofrecuencias;
si no se instala según estas instrucciones,
podría provocar interferencias dañinas a las
radiocomunicaciones.
Sin embargo, no hay garantía de que no
ocurra interferencia en una instalación
particular. Si este equipo provoca
interferencia dañina a la recepción de radio
o televisión, lo cual puede determinarse al
apagar y encender el equipo, se recomienda
al usuario intentar corregir la interferencia
aplicando una o más de las siguientes
medidas:
– Reoriente o reubique la antena de
recepción.
– Aumente la separación entre el equipo y
el receptor.
– Conecte el equipo a una toma de
corriente de un circuito distinto al del
receptor.
– Consulte con el representante de
ventas o con un técnico de radio/TV
experimentado para conseguir ayuda.
ADVERTENCIA: Los cambios o
modificaciones no aprobados expresamente
por la parte responsable del cumplimiento
podrían anular la autoridad del usuario para
operar este equipo bajo las normas FCC.
Este dispositivo cumple con el artículo15 del
Reglamento de la FCC. Su uso está sujeto a
las siguientes dos condiciones:
1. Este dispositivo no puede causar
interferencia dañina.
2. Este dispositivo debe aceptar cualquier
interferencia recibida, incluida
interferencia que pueda provocar un
funcionamiento no deseado.
Page 71

Advertencias de seguridad
4 pulgadas
4 pulgadas
Wire
Clamp
Screw
4 inches
Wire
Wire
Screw
Clamp
Wire
Wire
Wire
1.5 inches
4 pulgadas
Precauciones de seguridad
ADVERTENCIA: Nunca coloque un televisor
en una ubicación no estable. Si se cae un
televisor puede causar lesiones personales
graves o la muerte. Muchas lesiones, en
especial aquellas que les ocurren a los
niños, pueden evitarse tomando medidas de
precaución sencillas como:
– Usando gabinetes o soportes
recomendados por el fabricante del
televisor.
– Solo use muebles que puedan soportar
de manera segura el televisor.
– Asegurarse de que el televisor no se más
grande que el mueble de soporte.
– No coloque el televisor sobre muebles
altos (por ejemplo armarios o
estanterías) sin anclar tanto el mueble
como el televisor a un soporte adecuado.
– No coloque el televisor en un paño
u otros materiales que puedan estar
ubicados entre el televisor y los muebles
de apoyo.
– Eduque a los niños acerca de los peligros
de trepar a los muebles para alcanzar el
televisor o sus controles.
Si va a conserva su televisor existente o va a
colocarlo en otra ubicación, se debe tener las
mismas consideraciones antes mencionadas.
La unidad emite calor cuando está en
funcionamiento. No coloque ninguna
cubierta o manta en la unidad, esto puede
causar sobrecalentamiento. No bloquee los
orificios de ventilación ni los instale cerca de
radiadores. No lo coloque bajo la luz solar
directa. Cuando lo coloque en un estante,
deje 4 pulgadas (10 cm) de espacio libre
alrededor de la unidad.
Notas al montar el televisor
LED en la pared
Si la unidad va a montarse en la pared,
comuníquese con el minorista donde adquirió
el televisor LED para obtener asesoramiento
y haga que el equipo sea instalado
profesionalmente. La instalación incompleta
o incorrecta puede causarle lesiones y/o
dañar el televisor LED.
ADVERTENCIA:
● No use este televisor con soportes de
pared que permiten que el televisor se
incline verticalmente. Los soportes de
pared verticales pueden causar daños
estructurales al televisor.
● Utilice SÓLO montajes de pared giratorios
fijos u horizontales con este televisor.
Aviso para el gabinete de TV
Si la unidad va a montarse en un gabinete
más pequeño que la longitud de la unidad,
podría convertirse en una ubicación inestable
y la unidad podría volcarse, lo que podría
ocasionar lesiones personales, posiblemente
fatales. Además, esto dañaría el producto
seriamente. En consecuencia, Furrion no
acepta ninguna responsabilidad u obligación
por cualquier lesión o daño a la propiedad
que resulte de una instalación incorrecta.
¡Sí! ¡No!
Español
4 pulgadas
71
Page 72

Resumen de funciones
Panel de control
1
VOL+
2
VOL-
3
Español
* Tenga en cuenta que la distribución de los
botones en los controles podría variar de un
modelo a otro.
CH+
4
CH-
5
MENU
6
SOURCE
7
POWER
Elemento Botón Función
1
VOL+
2
VOL-
CH+
3
CH-
4
5
MENU
SOURCE
6
7
POWER
Presione para subir el
volumen
Presione para bajar el
volumen
Presione para pasar al
siguiente canal
Presione para pasar al canal
anterior
Presione para entrar al menú
principal
Presione para elegir la
entrada del televisor
Presione para encender/
apagar el televisor
72
Page 73

Resumen de funciones
EARPHONE
OUT
USB
AUDIO
IN
L- -R
AUDIO
OUT
R- -L
R
L
OPTICAL
OUT
HDMI 1 IN
2
3
5
6
8
9
10
11
4
HDMI 2 IN
ARC
HDMI 3 IN
VGA IN
PC AUDIO
IN
R
L
1
7
Pb
Pr
RF IN
Y
VIDEO
Panel trasero
* La configuración de los puertos de
conexión podría variar entre modelos.
Elemento Conexión Función
1
2
3
4
5
6
7
8
9
10
11
RAUDIO
OUTL
EARPHONE
OUT
OPTICAL
OUT
L-AUDIO
IN-R
VIDEO
HDMI 1 IN
HDMI 3 IN
HDMI 2 IN
ARC
VGA IN
PC AUDIO
RF IN
USB
Se conecta a los puertos de
ENTRADA DE AUDIO de un
equipo de audio
Se conecta a un conector
de audio de 3conductores
(TRS) de un auricular. No se
garantiza la compatibilidad con
auriculares con conectores de
4conductores (TRRS).
Se conecta al puerto de
ENTRADA ÓPTIC DE AUDIO
de un equipo de audio.
Se conecta a los puertos de
SALIDA DE AUDIO de un
equipo de audio.
Y
Se conecta a los puertos
de SALIDA DE VIDEO
POR COMPONENTES
P
B
de un reproductor de DVD,
decodificador de tv cable u otro
P
R
dispositivo compatible.
Se conecta al puerto HDMI
OUT de un reproductor de
DVD, consola de videojuegos,
decodificador de cable u otro
dispositivo HDMI.
CEC Consumer Electronics
Control
Cuando se conecta con
sistemas de entretenimiento
Furrion u otros dispositivos
compatibles con CEC, la TV
se vincula con el sistema
para brindar funcionalidades
adicionales. Consulte la
página17
Se conecta al puerto HDMI
OUT de un reproductor de
DVD, consola de videojuegos,
decodificador de cable u otro
dispositivo HDMI.
ARC Canal de retorno de audio
Cuando se conecta con un
cable HDMI 1.4 a un sistema de
audio compatible con ARC, el
televisor se vincula al dispositivo
para brindar funcionalidades de
audio adicionales.
Se conecta al puerto VGA OUT
de una PC para usar la TV como
monitor.
Se conecta al puerto AUDIO
OUT de una PC.
IN
Se conecta a la ANTENA,
CABLE o DECODIFICADOR.
Puerto USB para ver fotos
y escuchar MP3 desde una
memoria USB compatible.
Español
73
Page 74

Resumen de funciones
Control remoto
1
2
3
4
Español
5
6
7
8
10
11
12
14
15
17
18
19
20
21
22
23
24
25
9
13
16
48
47
46
45
44
50
43
42
41
40
39
38
37
49
36
35
34
33
32
31
30
29
28
27
26
Elemento Botón Función
Pasa a modo TV
Selecciona las funciones de
control remoto para Furrion
Fireplace.
* Consulte el manual de su
Furrion Fireplace por más
información.
Presione para encender/
apagar la TV/Sistema de
entretenimiento
Para ingresar números o
elegir canales
Alterna entre entrada de uno
y dos dígitos
Cambia entre los modos de
sonido
Cambia entre los modos de
imagen
En modo TV, presione para
mostrar información sobre el
canal seleccionado
En modo Estéreo, presione
para mostrar el estado de
reproducción del DVD
Muestra la lista de favoritos
Muestra la guía de
programación
Cambia entre las fuentes de
entrada
Confirma las selecciones
Sube/baja el volumen
Expulsa el DVD / CD
Durante la reproducción,
presione para seleccionar
la pista/capítulo anterior.
Manténgalo presionado para
retroceder. Sintonización
automática o manual en el
modo radio.
Presione para avanzar
cuadro a cuadro en modo
reproducción de DVD / VCD.
Marcar o aceptar una
llamada (cuando el sistema
está conectado a un
teléfono móvil).
Selecciona DVD/USB
1
2
3
4
5
6
7
8
9
10
11
12
13
14
15
16
TV
FIREPLACE
BOTON ES
NUMÉRICOS
S.MODE
P.MODE
INFO/OSD
F.LIST
EPG
SOURCE
BOTONES DE
NAVEGACIÓN
VOL+/-
STEP
DVD/USB
74
Page 75

Resumen de funciones
Elemento Botón Función
17
18
19
20
21
22
23
24
25
26
27
28
29
30
31
32
AM/FM
SLEEP/
CLOCK
MTS/AUDIO
RDM
RPT
SEARCH/
GOTO
ZOOM
SEL
LOC*/SLOW
ST#/ANGLE
EQ
SUBT
PBC/TITLE
PROG
A-B
SETUP
Selecciona radio AM/FB/
WB
Configura el temporizador
de apagado automático
Cambia entre los modos de
sonido MTS
Activa/desactiva el modo de
reproducción aleatoria
Activa los modos de
reproducción repetitiva.
Salta a un tiempo indicado
en un DVD/VCD/MP3/
WMA/CD
Agranda la imagen en
pantalla
Cambia entre volumen,
bajos, agudos y balance;
horas y minutos para ajustar
Cambia la potencia de
recepción de la radio;
Presione para iniciar la
reproducción en cámara
lenta.
Alterna entre sonido estéreo
y mono / cambia los ángulos
de visualización en medios
compatibles.
Cambia el modo de sonido
entre cine, rock, clásico y
plano
Presione para mostrar
los subtítulos en medios
compatibles.
Presione repetidamente
para cambiar entre opciones
de subtítulos.
Muestra las listas de títulos
de DVD/VCD o activa/
desactiva el PCB (Control
de reproducción)
Inicia la función de
reproducción programada
Presione para iniciar la
función de repetición A-B
(bucle de reproducción de
un segmento de pista)
Abre el menú de
configuración del sistema de
entretenimiento
Elemento Botón Función
33
34
35
36
37
38
39
40
41
42
43
44
45
46
47
48
49
50
CC
AV
AUX/ARC
APS
CH+/-
EXIT
FAV
C.LIST
AUTO
DISPLAY
ASPECT
STEREO
MENU
Activa/desactiva los
subtítulos cerrados
Selecciona el modo AV
Selecciona el modo AUX/
ARC
Presione para buscar
estaciones de radio: Si
pulsa brevemente buscará
cada estación guardada.
Si mantiene presionado
buscará y guardará las
6estaciones con mejor
recepción.
Finalizar o rechazar una
llamada (cuando el sistema
está conectado a un
teléfono móvil).
Durante la reproducción,
presione para seleccionar
la pista/capítulo siguiente.
Manténgalo presionado
para avanzar rápido.
Sintonización automática o
manual en el modo radio.
Detener la reproducción
Cambiar canal arriba/abajo
Activa/desactiva el audio
Salir del menú actual
Muestra la lista de canales
favoritos
Muestra la lista de canales
Ajusta automáticamente la
imagen en modo PC
Activa/Desactiva en pantalla
la fuente seleccionada
Cambia entre las relaciones
de aspecto de visualización
disponibles
Cambia entre el canal actual
y el anterior
Pasa a modo estéreo
Inicia, pausa y reinicia la
reproducción
Accede al menú principal
Español
75
Page 76

Acerca de su TV LED HD
Funcionalidades
Decodificador de subtítulos cerrados con modo de texto completo - Muestra leyendas de
texto o texto en pantalla completa para espectadores con discapacidad auditiva.
Ajuste de imagen mediante el control remoto - El cuadro en pantalla permite un ajuste
preciso del BRILLO, CONTRASTE, COLOR, TINTE y DEFINICIÓN con el control remoto.
Temporizador programable de apagado automático - Permite usar el control remoto para
programar la TV para que se apague luego de hasta 240minutos.
Menús en pantalla en 3idiomas - Puede elegir entre inglés, español o francés para la
programación en pantalla.
Conectores de video HDMI/por componentes - Es posible conectar a este equipo un VCR,
Español
reproductor de DVD, receptor satelital u otra entrada de audio/video por componentes.
Fuente de alimentación
NOTA:
● Asegúrese de conectar el cable firmemente tanto a la TV LED como a la toma de corriente.
● El cable de CA tiene un enchufe de CA de tipo polarizado. Si el cable de CA incluido no
coincide con su toma de corriente CA, contacte a un electricista calificado.
ADVERTENCIA:
● NO CONECTE ESTE EQUIPO A LA ALIMENTACIÓN USANDO CUALQUIER OTRO
DISPOSITIVO QUE EL CABLE DE CA INCLUIDO. ESTO PODRÍA CAUSAR UN INCENDIO,
DESCARGA ELÉCTRICA O DAÑO.
● NO USAR CON UN VOLTAJE DISTINTO AL VOLTAJE DE ALIMENTACIÓN INDICADO.
ESTO PODRÍA CAUSAR UN INCENDIO, DESCARGA ELÉCTRICA O DAÑO.
PRECAUCIÓN:
● CUANDO ESTA UNIDAD NO SE USA POR UN TIEMPO PROLONGADO (COMO CUANDO
SE VA DE VIAJE), POR SEGURIDAD DESCONÉCTELO DE LA TOMA DE CA.
● NO ENCHUFE/DESENCHUFE EL CABLE DE CA CON LAS MANOS MOJADAS. ESTO
PODRÍA CAUSAR UNA DESCARGA ELÉCTRICA.
● SI NECESITA SUSTITUIR EL ADAPTADOR DE CA INCLUIDO O EL CABLE DE CA, SE
RECOMIENDA EL ESPECIFICADO. CONTACTE AL PROVEEDOR DEL CUAL ADQUIRIÓ EL
EQUIPO.
76
Page 77

Antes de usar
Contenido
Gracias por elegir este TV LED HD Furrion.
Primero, verifique que su caja contiene las
partes de la siguiente lista:
● TV LED HD
● Control remoto
● 2pilas AAA
● Guía de inicio rápido
● Tarjeta de advertencia
● Folleto de garantía
● 4Tornillos para montaje en pared (PWM
5x8mm)
● Soporte de TV
● 4tornillos para soporte de TV (BBH
4x15mm)
Prepare su control remoto
INSTALACIÓN DE LAS PILAS
1. Abra la tapa del compartimiento de la pila.
2. Instale dos pilas AAA.
NOTA: Use dos pilas de tamaño “AAA”. Las
pilas podrían durar aproximadamente un
año, dependiendo de cuánto use el control
remoto. Para un mejor desempeño, se
recomienda cambiar las pilas una vez por
año, o cuando el funcionamiento del control
se vuelva impredecible. No mezcle pilas
nuevas con viejas o de distintos tipos.
PRECAUCIONES CON LAS
PILAS
Siga estas precauciones al usar pilas en este
dispositivo:
● Use únicamente pilas del tamaño y tipo
especificados.
● Asegúrese de respetar la polaridad
correcta al instalar las pilas, tal como
lo indica el compartimiento de las pilas.
Instalar pilas al revés podría causar daños
al dispositivo.
● No mezcle distintos tipos de pilas (p.ej.
alcalinas y carbono-zinc) o pilas viejas con
nuevas.
● Si no usará el dispositivo por un período
prolongado, quite las pilas para evitar
daños o lesiones por posibles pérdidas de
las pilas.
● No intente recargar pilas no recargables:
podrían sobrecalentarse y romperse. (Siga
las instrucciones del fabricante de las
pilas.)
● Tenga cuidado al colocar las pilas para
evitar dañarlas. Si el resorte del terminal
del control remoto queda en contacto con
un costado de una pila dañada, podría
causar un cortocircuito. Nunca use pilas
dañadas, ya que podrían sobrecalentarse
y volverse un peligro.
Español
3. Cierre la tapa del compartimiento de la
pila.
77
Page 78

Cómo empezar
La primera vez que encienda la TV aparecerá
el Asistente de configuración. El mismo
lo ayudará a configurar la TV y buscar los
canales disponibles.
IMPORTANTE: Asegúrese de haber
conectado la antena o sistema de TV cable.
1. Presione el botón POWER en el panel de
control de la TV o el botón en el control
remoto para encender la TV. El indicador
de encendido se pondrá verde. La
ventana del Asistente de configuración
Español
aparecerá en la pantalla.
NOTA : El Asistente de configuración
podría tardar algunos segundos en
aparecer en pantalla.
2. Use los botones o para resaltar la
ubicación de la TV, luego presione o
para seleccionar Home Mode (Modo
casa) o Store Mode (Modo tienda).
NOTA : Si selecciona Store Mode, le
recordará que el Modo tienda consume
más energía. Seleccione Sí para iniciar el
modo o No para cancelar.
Presione o para resaltar Go to next
step (Ir al siguiente paso), presione OK o
para ir al siguiente paso.
3. Use o para resaltar Menu Language
(Idioma del menú), luego presione o
para elegir el idioma deseado.
Presione o para resaltar Go to next
step (Ir al siguiente paso), presione OK o
para ir al siguiente paso.
4. Use o para resaltar la Time Zone
(Zona horaria), luego presione o p ara
seleccionar la zona horaria deseada.
Use o para resaltar Daylight Saving
Time (Horario de verano), luego presione
o para seleccionar On (Activar) o Off
(Desactivar).
Use o para resaltar Time Format
(Formato de hora), luego presione o
para seleccionar 12-hour (12horas) o
24-hour (24horas).
Presione o para resaltar Go to next
step (Ir al siguiente paso), presione OK o
para ir al siguiente paso.
78
Page 79

Cómo empezar
5. Use o para resaltar Air/Cable
(Antena/Cable), luego presione o p ara
seleccionar Air (Antena) o Cable según
su conexión.
Presione o para resaltar Go to next
step (Ir al siguiente paso), presione OK o
para iniciar la búsqueda automática.
El Asistente de configuración buscará
automáticamente los canales disponibles.
Labúsqueda podría tomar algo de tiempo.
Español
79
Page 80

Cambiar ajustes
Ajustes de configuración general
1. Presione el botón MENU. Aparecerá en
pantalla la ventana de configuración.
2. Use o para resaltar el modo Setup
(Configuración general).
3. Use o para resaltar el elemento que
desea configurar y presione o para
seleccionar el valor deseado.
4. Presione MENU para volver al menú
anterior o presione EXIT en cualquier
Español
momento para salir de la configuración
general.
Menú de configuración general
Menu
Language
(Idioma del
menú)
Transparent
(Transparente)
OSD Timeout
(Tiempo de
menús)
Elije el idioma de los menús
Controla el nivel de
transparencia del menú
El tiempo que permanecen
en pantalla los menús
Presione o para elegir English, Franais o Español
Presione o para seleccionar 0% / 25% / 50% / 75% / 100%
Presione o para seleccionar 5 S / 15 S / 30 S / 45 S / 60 S
80
Page 81

Cambiar ajustes
Menú de configuración general
CC Mode (Modo
de SC)
Analog CC (SC
analógicos)
Digital CC (SC
digitales)
Closed Caption
(Subtítulos
cerrados)
Configura
las funciones
de subtítulos
cerrados
Option (Opción)
* Presione OK o
para entrar al
submenú
Presione o para seleccionar CC On (Activados), CC
Off (Desactivados) o CC On Mute (Activar al silenciar).
Presione o para seleccionar CC1, CC2, CC3, CC4,
Text 1, Text 2, Text 3 o Text 4.
Presione o para seleccionar Off, Service1, Service 2,
Service 3, Service 4, Service 5 o Service 6
Mode (Modo)
Font Style
(Estilo de
fuente)
Font Size
(Tamaño de
fuente)
Font Edge
Style (Estilo
de borde de
fuente)
Font Edge
Color (Color
de borde de
fuente)
FG Color
(Color de
primer plano)
BG Color
(Color de
fondo)
FG Opacity
(Opacidad de
primer plano)
BG Opacity
(Opacidad del
fondo)
Presione o para elegir Default
(predeterminado) o Custom
(personalizado)
Presione o para seleccionar
Default (predeterminada), Font 0,
Font 1, Font 2, Font 3, Font 4, Font 5,
Font 6 o Font 7 (fuentes 1 a 7)
Presione o para elegir Default
(predeterminado), Normal, Large
(grande) o Small (pequeña)
Presione o para seleccionar
Default (predeterminado), None
(ninguno), Raised (elevado),
Depressed (hundido), Uniform
(uniforme), Left Shadow (sombra
izq.) o Right Shadow (sombra der.)
Presione o para seleccionar
Default (predeterminado), Black
(negro), White (blanco), Red (rojo),
Green (verde), Blue (azul), Yellow
(amarillo), Magenta o Cyan (cián)
Presione o para seleccionar
Default (predeterminado), White
(blanco), Red (rojo), Green (verde),
Blue (azul), Yellow (amarillo),
Magenta o Cyan (cián)
Presione o para seleccionar
Default (predeterminado), Black
(negro), Red (rojo), Green (verde),
Blue (azul), Yellow (amarillo),
Magenta o Cyan (cián)
Presione o para elegir Default
(predeterminado), Solid (sólido),
Flashing (parpadeante), Translucent
(traslúcido) o Transparent
(transparente)
Presione o para elegir Default
(predeterminado), Solid (sólido),
Flashing (parpadeante), Translucent
(traslúcido) o Transparent
(transparente)
Español
81
Page 82

Cambiar ajustes
Menú de configuración general
Source Label
(Etiqueta de
entrada)
Español
Other Settings
(Otros ajustes)
Restore Default
(Restablecer
predeterminados)
Setup Wizard
(Asistente de
configuración)
CEC
Permite
etiquetar las
fuentes de
entrada
Blue Screen
(Pantalla
azul)
Audio Only
(Solo audio)
Restablecer
los ajustes de
fábrica
Inicia el
Asistente de
configuración
Configure las
funciones CEC
TV
AV
Componente
HDMI1
HDMI2
HDMI3
PC
Media
Presione o para seleccionar On o Off
Presione o para seleccionar On u Off
Presione o para seleccionar Yes (sí) o No
Consulte la página “Cómo empezar”
CEC Control
(Control CEC)
Device Auto Power
Off (Apagado
automático de
dispositivos)
TV Auto Power
On (Encendido
automático de TV)
Audio Receiver
(Receptor de audio)
(ARC)
Device Lists (Listas
de dispositivos)
Presione o para seleccionar Custom
(personalizada), Default (predeterminada), Antenna
(antena), Cable, Satellite (satélite), DTV, DVD, Bluray, HD-DVD, XBOX, Wii, PS3, Game (videojuego),
Computer (computadora), VCR o DV
* La configuración de los puertos de conexión podría variar
entre modelos.
Presione o para elegir Off u On
Presione o para elegir Off u On
* Si se activa, cuando se apaga la TV todos los
dispositivos conectados por CEC pasarán a modo de
suspensión.
Presione o para elegir Off u On
* Si se activa, cuando se enciende un dispositivo
conectado por HDMI CEC, la TV se encenderá y
mostrará la fuente de entrada a la que está conectado
el dispositivo
Presione o para elegir Off u On
* Si se activa, la TV enviará audio a un dispositivo
compatible con ARC que esté conectado.
Lista todos los dispositivos CEC conectados
82
Connect (Conectar)
Root Menu (Menú
raíz)
Se conecta a los dispositivos en los dispositivos CEC
Muestra el menú raíz de los dispositivos conectados
Page 83

Cambiar ajustes
Ajustes de imagen
1. Presione el botón MENU. Aparecerá en
pantalla la ventana de configuración.
2. Use o para resaltar el modo Picture
(imagen).
3. Use o para resaltar el elemento que
desea configurar y presione o para
seleccionar el valor deseado.
4. Presione MENU para volver al menú
anterior o presione EXIT en cualquier
momento para salir de la configuración
general.
Menú de imagen
Picture Mode
(Modo de
imagen)
Brightness
(Brillo)
Contrast
(Contraste)
Color
Tint (Tinte)
Sharpness
(Nitidez)
Color
Temperature
(Temperatura
del color)
Advanced
Settings
(Ajustes
avanzados)
Selecciona el modo de
visualización
Controla el nivel de
brillo de la imagen
Controla el nivel de
contraste de la imagen
Controla el nivel de
color de la imagen
Controla el tinte de la
imagen
Controla la nitidez de la
imagen
Selecciona el modo
de color
Ajustes de imagen
avanzados
Presione o para seleccionar entre los modos de visualización
Power Saving (ahorro de energía) / Standard (estándar) / Dynamic
(dinámico), Soft (suave) o User (usuario).
Presione o para ajustar el brillo al nivel deseado.
* Solo ajustable tras configurar “Picture Mode” (modo de imagen) en modo
“User“ (usuario).
Presione o para ajustar el contraste al nivel deseado.
* Solo ajustable tras configurar “Picture Mode” (modo de imagen) en modo
“User“ (usuario).
Presione o para ajustar el color al nivel deseado.
* Solo ajustable tras configurar “Picture Mode” (modo de imagen) en modo
“User“ (usuario).
Presione o para ajustar el tinte al nivel deseado.
* Solo disponible en modo NTSC.
Presione o para ajustar la nitidez al nivel deseado.
* Solo ajustable tras configurar “Picture Mode” (modo de imagen) en modo
“User“ (usuario).
Presione o para elegir entre Normal, Warm (cálido) o Cool (frío).
Aspect
(Aspecto)
Noise Reduction
(Reducción de
ruido)
Dynamic
Contrast
(Contraste
dinámico)
Español
Presione o para elegir entre Wide (ancho), Zoom
(ampliar), Cinema (cine) o Normal.
Presione o para elegir entre Middle (medio),
High (alto), Off (desact.) u Low (bajo).
Presione o para seleccionar On o Off.
83
Page 84

Cambiar ajustes
Ajustes de sonido
1. Presione el botón MENU. Aparecerá en
pantalla la ventana de configuración.
2. Use o para resaltar el modo Sound
(sonido).
3. Use o para resaltar el elemento que
desea configurar y presione o para
seleccionar el valor deseado.
4. Presione MENU para volver al menú
anterior o presione EXIT en cualquier
Español
momento para salir de la configuración
general.
NOTA: El menú de imagen podría variar al
seleccionar distintas entradas.
Menú de sonido
Equalizer
(Ecualizador)
MTS
Audio
Languages
(Idiomas de
audio)
Digital Audio
Output
(Salida de
audio digital)
AVL
Controla los niveles de
varias frecuencias de
sonido
Controla el Sonido de
TV multicanal (sólo para
transmisiones analógicas)
Cuando lo permite una
transmisión digital, esto
selecciona el idioma del
audio
Selecciona el modo de
salida de audio digital
Nivel de volumen
automático: sube o baja
el volumen de la TV
hasta alcanzar el nivel
configurado
Presione o para seleccionar modo Standard (estándar), Music
(música), Movie (película), Sports (deportes) o User (usuario)
User
(Usuario)
Presione o para seleccionar modo Stereo (estéreo), SAP (Audio
secundario cuando esté disponible) o Mono
Presione o para elegir idioma English (inglés), French (francés)
o Spanish (español).
Presione o para elegir modo RAW, PCM u Off (desact.)
Presione o para seleccionar On u Off
Presione o para elegir 200Hz, 500Hz,
1.5KHz,
5KHz, 10KHz o Balance.
84
Page 85

Cambiar ajustes
Menú de sonido
Voice
Guidance
(Guía por voz)
Video
Description
(Descripción
de video)
Controla las
funciones
de Guía de
voz
Controla la función de
descripción de video
Voice Guide
(Guía de
voz)
Voice
Guidance
(Guía por
voz)
Volume
(Volumen)
Speed
(Velocidad)
Pitch
(Tono)
Presione o para definir como On u Off
Presione o para definir como On u Off
Presione o para seleccionar Low (bajo), Middle
(medio) o High (alto)
* Solo disponible luego de definir el modo de Voice
Guidance como On
Presione o para seleccionar Slow (lento), Normal
o Fast (rápido)
* Solo disponible luego de definir el modo de Voice
Guidance como On
Presione o para seleccionar Low (bajo), Middle
(medio) o High (alto)
* Solo disponible luego de definir el modo de Voice
Guidance como On
Español
85
Page 86

Cambiar ajustes
Ajustes de hora
1. Presione el botón MENU. Aparecerá en
pantalla la ventana de configuración.
2. Use o para resaltar el modo Time
(hora).
3. Use o para resaltar el elemento que
desea configurar y presione o para
seleccionar el valor deseado.
4. Presione MENU para volver al menú
anterior o presione EXIT en cualquier
Español
momento para salir de la configuración
general.
Menú de hora
Sleep Timer
(Temporizador
de apagado
automático)
Time Zone
(Zona horaria)
Daylight
Saving Time
(Horario de
verano)
Time Format
(Formato
horario)
Auto Clock
(Reloj
automático)
Define un tiempo de
apagado automático de
la TV
Define la zona horaria
Activa el horario de
verano
Define el formato con
que se muestra la hora
Configura el ajuste de
hora automático
Presione o para seleccionar Off, 5min, 10min, 15min, 30min,
60min, 90min, 120min, 180min o 240min
Presione o para seleccionar zona horaria Pacific (Pacífico),
Alaska, Hawaii, Samoa, Newfoundland (Terranova), Atlantic
(Atlántico), Eastern (Este), Central o Mountain (Montaña)
Presione o para definir como On u Off
* Solo disponible bajo canal de TV
Presione o para elegir formato de 12horas o 24horas
Presione o para definir como On u Off
Clock (Reloj)
86
Muestra la fecha y hora actuales
Page 87

Cambiar ajustes
Ajustes de bloqueo
1. Presione el botón MENU. Aparecerá en pantalla la ventana de configuración.
2. Use o para resaltar el modo Lock (bloqueo).
3. Use o para resaltar “Enter Password” (introduzca la contraseña) e introduzca “0000”
para entrar a la ventana de configuración.
4. Use o para resaltar el elemento que desea configurar y presione o para seleccionar
el valor deseado.
5. Presione MENU para volver al menú anterior o presione EXIT en cualquier momento para
salir de la configuración general.
Menú de bloqueo
Presione para resaltar Enter Password (introducir
Change
Password
(Cambiar
contraseña)
System Lock
(Bloqueo del
sistema)
Cambia la contraseña del usuario
Bloquea el sistema con contraseña.
contraseña), use los botones numerales (0~9) para
introducir la contraseña. Aparecerá la ventana de Lock
(bloqueo)
* La contraseña predeterminada es 0000
* Si olvidó la contraseña, use 8888 entrar a cualquier menú
bloqueado
Presione o para definir como On u Off
Español
87
Page 88

Cambiar ajustes
Input Block
(Bloqueo de
entrada)
Español
US Rating
(Clasificación
de EE. UU.)
Canada Rating
(Clasificación
de Canadá)
RRT Setting
(Configuración
de RRT)
Reset RRT
(Restablecer
RRT)
Bloquea las entradas con
contraseña.
Presione o para bloquear o
desbloquear
Activa el bloqueo parental en base
al sistema de clasificación de los
EE. UU.
* Solo disponible luego de definir el
modo de System Lock (bloqueo del
sistema) como On
Activa el bloqueo parental en base al
sistema de clasificación de Canadá
* Solo disponible luego de definir el
modo de System Lock (bloqueo del
sistema) como On
Activa el bloqueo parental en base al
sistema de clasificación de Canadá
* Solo disponible cuando el sistema
detecta tráfico de código RRT en
DTV
Restaurar los ajustes RRT
predeterminados
Menú de bloqueo
TV
AV
Component
(Componente)
HDMI 1
HDMI 2
HDMI 3
PC
Media
TV
MPA A
Canada English
(Inglés de
Canadá)
Canada French
(Francés de
Canadá)
Humor Level
(Nivel de
humor)
Intelligence
level (Nivel de
inteligencia)
Erotic level
(Nivel erótico),
20caracteres
Presione OK o para ingresar al submenú, luego presione
o para seleccionar Ye s (Sí) o No
Presione o para definir como Block
(bloquear) Unblock (desbloquear)
Presione o para definir como Block
(bloquear) Unblock (desbloquear)
Presione o para definir como Block
(bloquear) Unblock (desbloquear)
Presione o para definir como Block
(bloquear) Unblock (desbloquear)
Presione o para definir como Block
(bloquear) Unblock (desbloquear)
Presione o para definir como Block
(bloquear) Unblock (desbloquear)
Presione o para definir como Block
(bloquear) Unblock (desbloquear)
Presione o para definir como Block
(bloquear) Unblock (desbloquear)
Elija la clasificación usando nivel de edad
y género. Consulte las tablas de Edad y
Género para ver las definiciones
Vea la tabla del Sistema de
clasificación de EE. UU.
Vea la tabla Sistema de clasificación
de Canadá
Vea la tabla Sistema de clasificación
de Canadá
Vea la tabla Sistema de clasificación
de Canadá
Vea la tabla Sistema de clasificación
de Canadá
Vea la tabla Sistema de clasificación
de Canadá
88
Page 89

Cambiar ajustes
Español
Género
ALL
FV
V
S
L
D
Todos
Violencia de fantasía
Violencia
Sexo
Lenguaje explícito
Diálogo sugerente
Sistema de clasificación de EE. UU.
Off
G
PG
PG-13
R
NC-17
X
Para todos los niños
Para todas las edades
Guía parental recomendada
Guía parental para menores de 13
Guía parental para menores de 17
17años o más
Solo adultos
Edad
T V-Y
T V-Y 7
TV- G
TV- PG
TV-1 4
TV-MA
Para todos los niños
7años o más
Público general
Guía parental recomendada
14años o más
17años o más
Sistema de clasificación de Canadá
Off
C
C8+
G
PG
14+
18+
Para todos los niños
Para todas las edades
Niños menores de 8
Público general
Guía parental recomendada
Programa con temáticas o contenido
que podría no ser adecuado para
espectadores menores de 14 años.
Adulto
89
Page 90

Cambiar ajustes
Ajustes de canales
1. Presione el botón MENU. Aparecerá en pantalla la ventana de configuración.
2. Use o para resaltar el modo Channel (canal).
3. Use o para resaltar el elemento que desea configurar y presione o para seleccionar
el valor deseado.
4. Presione OK para confirmar sus selecciones o ajustes y entrar a los submenús.
5. Presione MENU para volver al menú anterior o presione EXIT en cualquier momento para
salir de la configuración general.
Español
Menú de canales
Air/Cable
(Aire/cable)
Auto Scan
(Búsqueda
automática)
Favorite
(Favorito)
Channel List
(Lista de
canales)
Show/Hide
(Mostrar/
ocultar)
Channel
Number
(Número de
canal)
Channel
Label
(Etiqueta de
canal)
Define el tipo de recepción
Busca automáticamente los
canales disponibles
Agrega canales a la lista de
favoritos
Lista los canales
disponibles
Selecciona si mostrar u
ocultar un canal
Selecciona si etiquetar un
canal o no
Permite definir el nombre
de los canales
Presione o para seleccionar Air (aire) o Cable
Presione o para seleccionar Yes (Sí) para comenzar la búsqueda
automática de canales o No para cancelar.
Presione o para seleccionar un canal. Luego presione o OK
para marcar o desmarcar como favorito.
Presione OK o para listar todos los canales disponibles
Presione o para seleccionar un canal. Luego presione o OK
para mostrar u ocultar el canal
Presione o para seleccionar un canal
Presione o para seleccionar un carácter, presione o para
cambiar el carácter. (Máximo de 7caracteres)
90
Page 91

Cambiar ajustes
Ajustes de PC
El menú de PC solo está disponible cuando hay una PC conectada a la TV por la conexión VGA.
Nota: Luego de conectar una PC, presione el botón
para entrar.
1. Presione el botón MENU. Aparecerá en pantalla la ventana de configuración.
2. Use o para resaltar el modo Setup (Configuración general).
3. Use o para resaltar el elemento PC Settings (ajustes de PC). Luego OK o para entrar
a la tabla del Menú de PC.
4. Use o para resaltar el elemento que desea configurar y presione o para seleccionar
el valor deseado.
5. Presione MENU para volver al menú anterior o presione EXIT en cualquier momento para
salir de la configuración general.
SOURCE
y seleccione PC. Presione OK o
Español
Picture
Sound
Menu Language English
Transparent
OSD Timeout
Closed Caption
Source Label
PC Settings
Other Settings
Restore Default
Setup Wizard
CEC
Select
H-Pos
V-Pos
Clock
(Reloj)
Phase
(Fase)
Auto
Configura la posición horizontal de la imagen en la TV.
Configura la posición vertical de la imagen en la TV.
Ajusta el reloj de píxel (vertical) para obtener una imagen
más clara.
Ajusta el reloj de fase (horizontal) para obtener una
imagen más clara.
Ajusta automáticamente la configuración para PC
Time
Move
Channel
Lock
Setup
25%
15 S
MENU
EXIT
Menú de PC
Presione o para mover la pantalla
horizontalmente.
Presione o para mover la pantalla
verticalmente.
Presione o para ajustar
Presione o para ajustar
Presione OK o para ajustar automáticamente
toda la configuración para PC
91
Page 92

Cambiar ajustes
MODOS DE VISUALIZACIÓN DE MONITOR DE PC
Modo Resolución Frec. de actualización
VGA
VGA
VGA
SVGA
XGA
WXGA
WXGA
Español
SXGA
WXGA+
WSXGA+
FHD
* Tenga en cuenta que en las TV no Full HD, algunas funcionalidades podrían estar limitadas
640 X 480 60 / 75Hz
720 X 400 70Hz
1366 X 768 60Hz
800 X 600 60 / 75Hz
1024 X 768 60 / 70Hz / 75Hz
1280 X 720 60Hz
1360 X 768 60Hz
1280 X 1024 60Hz
1440 X 900 60Hz
1680 X 1050 60Hz
1920 X 1080 60Hz
92
Page 93

Cambiar ajustes
Modo USB
1. Luego de conectar una memoria USB, presione el botón SOURCE (fuente) y seleccione
Media. Presione OK o para entrar.
2. Use o para elegir Photo (fotos) o Music (música). Presione OK o para entrar.
3. Use o para navegar por los archivos o carpetas de la memoria USB.
4. Presione MENU para volver al menú anterior o presione EXIT en cualquier momento para
salir de la configuración general.
Al ver fotos, esta herramienta para
ver imágenes le permitirá controlar la
presentación, reproducir música y mostrar
información del archivo.
El visualizador de fotos muestra archivos de
imagen de formato .jpg
Para escuchar música use este reproductor,
que le permite controlar la reproducción y
muestra información sobre el archivo.
Español
La herramienta reproduce archivos de sonido
MP3.
93
Page 94

Resolución de problemas
Problema Solución/Causa
● Asegúrese de que el cable de alimentación esté enchufado.
La TV no funciona
Imagen normal,
pero sin sonido
El control remoto
no funciona
Español
Sonido de mala
calidad o ausente
Imagen de mala
calidad o ausente
Mala recepción
de TV
Mala recepción de
TV cable/satelital
La TV se apaga
La imagen del
dispositivo AV
conectado se ve
en blanco y negro
● Pruebe otra toma de CA.
● No hay energía, revise el fusible o interruptor.
● Desenchufe el dispositivo por una hora y luego vuelva a enchufarlo.
● Revise los ajustes de volumen.
● ¿El sonido está silenciado? Presione el botón MUTE.
● Pruebe con otro canal.
● Revise las conexiones de cable de audio.
● Asegúrese de que el control esté dentro del rango de operación y sin obstrucciones.
● Revise las pilas.
● Corrija la configuración del modo de operación: TV, VCR etc.
● La emisora o el sistema de TV cable están experimentando problemas, pruebe con otro canal.
● Revise los ajustes de sonido (Volumen o Silenciar).
● Busque fuentes de posible interferencia.
● La emisora o el sistema de TV cable están experimentando problemas, pruebe con otro canal.
● Asegúrese de que los canales estén guardados en la memoria.
● Revise las conexiones de la antena o TV cable, ajuste la antena.
● Busque fuentes de posible interferencia.
● Revise los ajustes del control de imagen.
● Asegúrese de que el amplificador de la antena esté encendido para TV por antena.
● Oriente la posición de la antena en un ángulo para recibir una mejor señal.
● Revise que la antena esté conectada a la TV firmemente.
● Revise que la caja de distribución de la antena tenga alimentación.
● Verifique que su cable de entrada esté conectado a la conexión de pared para cable/antena
correcta dentro de la casa rodante.
● Asegúrese de que el cable coaxial interno de la casa rodante esté conectado al puerto
correcto.
● Asegúrese de que el amplificador para antena esté desactivado al usar una señal de cable.
● Verifique que el cable entrante esté conectado correctamente a la casa rodante.
● Asegúrese de que la caja de splitter de TV cable esté energizada.
● Confirme que el cable de entrada esté conectado a la conexión de pared para cable/satélite
correcta dentro de su casa rodante.
● Asegúrese de que el cable coaxial interno de la casa rodante esté conectado al puerto
correcto.
● Compruebe que la antena parabólica no esté obstruida.
● Está configurado el temporizador de apagado automático (Sleep Timer).
● Se ha cortado la alimentación.
● Revise las conexiones de video tanto en la TV como en el dispositivo de AV conectado.
Asegúrese de que los colores coincidan entre los conectores machos y hembras: verde (Y),
azul (Pb/Pc) y rojo (Pr/Cr) para conexión por componentes, y amarillo (VIDEO) para conexión
compuesta.
● Asegúrese de que todos los cables están firmemente conectados.
94
Page 95

Especificaciones
H
Español
MODELO, DIMENSIÓN Y RESOLUCIÓN
Modelo
FDHS32M4A
Dimensión sin soporte
28 ¹/ ” x 17/” x 3 /”
(736 x 447 x 79mm)
CONEXIONES DE ENTRADA Y SALIDA
Modelo
FDHS32M4A 1 1 1
R-AUDIO
OUT-L
Auriculares
Salida
óptica
(An*Al*P)
L-AUDIO
IN-R
1 x
izquierda
(blanco)
1 x
derecha
(rojo)
W
Entrada de
video por
componentes
Dimensión con soporte
(An*Al*P)
28 ¹/ ” x 19 ³/ ” x 8/”
(736 x 492 x 208mm)
Entrada de
video por
componentes
YPBP
R
1 x amarillo/verde*
1 x azul
1 x rojo
D
Resolución máx.
1366 x 768 @ 60Hz HD
Entrada
Entrada
HDMI
3 1 1 1 1
VGA
(PC)
Entrada
de audio
(PC)
Entrada
RF
USB
95
Page 96

Especificaciones
Español
FDHS32M4A
7 "
182 mm
7 "
200 mm
6"
152 mm
13"
354 mm
7 "
200 mm
13"
354 mm
PATRÓN DE MONTAJE VESA
Modelo Ancho en mm Alto enmm Tamaño del tornillo Cantidad
200 100 PWM 5x8 mm 4
96
Page 97

Furrion Innovation Center & Institute of Technology
• 52567 Independence Ct., Elkhart, IN 46514, USA • Toll free:1-888-354-5792
©2007-2019 Furrion Ltd. Furrion® and the Furrion logo are trademarks licensed for use by
Furrion Ltd. and registered in the U.S. and other countries.
©2007-2019 Furrion Ltd. Furrion® et le logo Furrion sont des marques déposées par Furrion
©2007-2019 Furrion Ltd. Furrion® y el logotipo de Furrion y son marcas comerciales con
licencia de uso de Furrion Ltd. y están registradas en los Estados Unidos y en otros países.
• Email: support@furrion.com
Ltd. et enregistrées aux Etats-Unis et ailleurs.
FURRION.COM
IM-FAV00054
 Loading...