

Page 1

Business Handset FC4 / FC4 Ex (HS)
connected with Mobility Server Integral
Operating Manual
Order number.
50 0080 7211 EN
V 1.1
Own telephone number: Name of user / user group:
Page 2

2
FC4 / FC4 Ex (HS) connected with Mobility Server
Table Of Contents
General Safety Information ..................................................... 8
Introduction ........................................................................... 14
Putting the FC4 into operation .............................................. 18
Menu selection ...................................................................... 22
Display and softkeys ............................................................................22
Example of menu guidance and menu selection ..................................25
Display, symbols.................................................................... 26
Display layout .......................................................................................26
Symbols in the header line ...................................................................26
Messages in the status line ..................................................................28
Content of text field in the display ........................................................29
Content of footer line ............................................................................ 30
Background picture of idle display ........................................................ 30
Basic rules for operation ....................................................... 31
Switching on the Business Handset .....................................................31
Switching off the Business Handset .....................................................31
Left and right softkey ............................................................................ 31
Number keys ........................................................................................31
Coloured number keys ......................................................................... 31
Selector ................................................................................................32
Double-assignment keys ......................................................................32
Changing to the basic condition ........................................................... 32
Activating the key lock with a key sequence ........................................ 32
Deactivating the key lock......................................................................33
Automatic keyboard lock ...................................................................... 33
Unlocking a locked handset ................................................................. 33
Changing the earpiece volume temporarily during a conversation .......33
Editing texts, capitalisation, numbers ...................................................34
Page 3

3
FC4 / FC4 Ex (HS) connected with Mobility Server
Table Of Contents
Phone calls as usual ............................................................. 36
Calling (block dialling) .......................................................................... 36
Calling from the phonebook ................................................................. 36
Calling from the phonebook, quick access ...........................................37
Calling from the Redial, Missed or Answered calls lists........................38
Automatic redialling of the last dialled calling number ..........................39
Terminating the conversation ............................................................... 39
Answering a call ...................................................................................39
Rejecting a call ..................................................................................... 40
Activating a callback on ”Busy” ............................................................ 40
Deactivating a callback on ”Busy” ........................................................40
Consultation, brokering, retransmission ................................ 42
Open listening, switching the microphone off ........................ 43
Releasing an emergency call with the emergency call button45
Making a phonebook entry .................................................... 46
Making an entry manually .................................................................... 46
Transferring an entry from one of the call lists......................................47
Editing an existing entry in the phonebook ........................................... 48
Setting up functions as a phonebook entry .......................................... 48
Adapting the handset to your requirements .......................... 51
Phone settings ...................................................................... 52
Audio settings > ring tone melody ........................................................ 52
Audio settings > ring tone volume ........................................................ 52
Audio settings > earpiece volume ........................................................ 53
Audio settings > signalling .................................................................... 54
Audio settings > Headset (acoustic call signalling) ............................... 55
Audio settings > tones ..........................................................................56
Display settings > illumination (setup) ..................................................57
Display settings > illumination duration (setup) .................................... 57
Page 4

4
FC4 / FC4 Ex (HS) connected with Mobility Server
Table Of Contents
Display settings > brightness (setup) ................................................... 58
Display settings > colours..................................................................... 59
Phone behaviour > silent charging .......................................................59
Phone behaviour > behaviour in charger.............................................. 60
Phone behaviour > automatic answer (automatic hook off).................. 60
Language > handset language (handset menus) .................................60
Language > text input (character set)................................................... 61
Date / time > time, date, date format .................................................... 61
Emergency number > I55 (setting up an emergency call number) ....... 62
Call charges > call charges ..................................................................63
Call charges > active call...................................................................... 64
Call charges > show call charges ......................................................... 64
Call charges > delete call charges ....................................................... 65
PABX call list ........................................................................................65
Call waiting ...........................................................................................66
Call diversion > set call diversion ......................................................... 66
Call diversion > cancel call diversion .................................................... 67
Call diversion > Follow Me: Authorise ..................................................68
Call diversion > Follow Me: Setup ........................................................68
Call diversion > Follow Me: activate / deactivate ..................................68
Double call: initialise .............................................................................69
Double Call: activate / deactivate ......................................................... 69
Reset .................................................................................................... 70
System Settings .................................................................... 71
Log in ...................................................................................................71
Selection mode .................................................................................... 72
Select system ....................................................................................... 72
Edit system name ................................................................................. 72
Edit handset name (HS-Name) ............................................................ 73
Telephone IDs ......................................................................................73
Software Version .................................................................................. 74
Page 5

5
FC4 / FC4 Ex (HS) connected with Mobility Server
Table Of Contents
Security ................................................................................. 75
PIN (enter a new PIN) .......................................................................... 75
Key lock (automatic) ............................................................................. 75
Handset lock ........................................................................................ 76
Extras .................................................................................... 77
Alarm clock ........................................................................................... 77
Messaging ............................................................................. 79
Receiving a message ............................................................ 80
Message Lists And Call Lists................................................. 81
Transmitting a message ........................................................ 85
Transmitting a fixed text ....................................................................... 85
Transmitting a fixed text with added digits............................................86
Transmitting a direct call.......................................................................87
Technical data / accessories ................................................. 88
FC4 Ex (HS) – Explosion-proof versions ............................... 90
FC4 Ex (HS) – Supplementary safety information ................ 92
FC4 Ex (HS) – Putting into operation .................................... 97
FC4 Ex (HS) – Technical data / accessories ......................... 99
Care, maintenance, ambient conditions .............................. 101
Annex .................................................................................. 102
Menu structure ................................................................................... 102
Glossary .............................................................................. 109
Warranty / Service............................................................... 110
Imprint ..................................................................................111
Page 6

6
FC4 / FC4 Ex (HS) connected with Mobility Server
R
O K
Ü
1
4
G H I
7
P Q R S
0
2
A B C
5
J K L
8
T U V
#
3
D E F
6
M N O
9
W X Y Z
FC4 / FC4 Ex (HS)
1
Nicht für das FC4 Ex! Does not apply to FC4 Ex! N’est pas disponible
pour le combiné FC4 Ex!
8
13
11
9
6
5
3
1
14
2
1
4
7
12
10
15
16
Page 7

FC4 / FC4 Ex (HS) connected with Mobility Server
7
Legende / legend / légende
DGBF
Notruftaste
Buchse 1 für
Hör- / Sprechgarnitur
Hörer
Display
Lautsprecher
für das Freisprechen
Softkey links
Softkey rechts
1.: Selector
2.: Pfeiltasten
zum Blättern
im Menü
1.: Taste ‘R’
2.: Freisprechen
Taste Hörer
1.: Taste ‘1’
2.: Stummschaltung
Zifferntasten
1.: Taste ‘0’
2.: Telefonbuch oder
Anruf- / Nachrichtenliste
1.: Taste Stern
2.: Softkey
umschalten
3.: Klein- /
Großbuchstaben
1.: Taste Raute
2.: Wahlwiederholung
Mikrofon
Emergency
call key
Socket 1 for
headset
Earpiece
Display
Loudspeaker
for handsfree
operation
Left softkey
Right softkey
1st: Selector
2nd: Arrow
keys for paging
through the
menu
1st: ‘R’ key
2nd:
Handsfree
operation
‘Hook on/off’
key
1st: ‘1’ key
2nd: Mute
Number keys
1st: ‘0’ key
2nd: Telephone book or
call / message
list
1st: ‘Star’ key
2nd: Switch
softkey
3rd: Shift
1st: ‘Hash’ key
2nd: Redial
Microphone
Touche d’appel
d’urgence
Prise 1 pour
l’écouteur /
microphone
capsule
d’écoute
Afficheur
Haut-parleur
mains libres
Touche
programmable
de gauche
Touche progr.
de droite
1.: Touche OK
2.: Touche
fléchée pour
feuilleter dans
le menu
1.: Touche ‘R’
2.: Mains libres
Raccrocher /
décrocher le
combiné
1.: Touche ‘1’
2.: Muet
Touches
numériques
1.: Touche ‘0’
2.: Annuaire ou
liste d’appels /
de messages
1.: Touche
‘étoile’
2.: basculer les
touches progr.
3.: majuscules
/ minuscules
1.: Touche
‘dièse’
2.: répétition de
la numérotation
Microphone
1
2
1
3
4
5
6
7
8
9
10
11
12
13
14
15
16
Page 8

FC4 / FC4 Ex (HS) connected with Mobility Server
8
GB
General Safety Information
General safety information for all unit versions
Please read the following information prior to putting the unit and its
batteries into operation for the first time in order to ensure compliance with
the intended use and with environmental protection rules as well as safety,
reliability and system performance.
Approval and EC conformity
Funkwerk Enterprise Communications GmbH herewith declares
that the products FC4 / FC4 Ex (HS) meet the basic requirements
and other relevant regulations of Directive 1999/5/EC (Radio &
Telecommunication Terminal Equipment, R&TTE).
Explosion-proof units are provided with the CE mark of
conformity, followed by the identification no. of the Notified
Body supervising the quality assurance system and by the explosion
protection marking
.
In hazardous areas with potentially explosive atmospheres, only
explosion-proof units may be used.
Observe and follow the special safety instructions for operating
explosion-proof units in hazardous areas with potentially explosive
atmospheres provided in chapter ‘FC4 Ex (HS) – Supplementary
safety instructions’!
The units are intended for being connected to radio interfaces (DECT
TM
)
of our Mobility Servers and, due to their design, are not suited for direct
connection to interfaces of public telecommunication networks.
Please contact your dealer or our service dept. first if there are problems in
operating your unit.
This equipment works according to the DECT TM system in the frequency
range between 1880 MHz and 1900 MHz.
You may request the EC Declaration of Conformity from our service
address or download it from the download section at
http://www.messaging.funkwerk-ec.com
" "
DECT
TM
is a registered trademark of ETSI
Page 9

FC4 / FC4 Ex (HS) connected with Mobility Server
9
GB
Protection against endangering of your hearing
The FC4 / FC4 Ex handsets are equipped with an additional loudspeaker
at the rear of the housing for handsfree talking.
Do not move this rear loudspeaker (call signal, open listening)
directly near your ear!
A level of more than 80 dB (A) as measured at the sound source can be
reached when signalling a call and in open listening (handsfree talking)
and may cause a permanent hearing defect when the distance between
the loudspeaker and the ear is too small or when this effect occurs very
often.
Protection against the influence of electronic body aids
• At present, there is no scientifically founded information about health
hazards caused by radiation from DECT handsets and DECT base
stations.
Still, we recommend that people who wear a pacemaker or other
electronic body aids to always wear the handset on the side of your body
that is away from the pacemaker or body aid.
• In Germany you can find further information in the internet on the web
page of the Federal Office for Radiation Protection. Follow the
regulations of your local authorities, please.
• If necessary, consult your doctor.
• Please contact your hearing aid specialist for questions regarding the
compatibility of the handset with a hearing aid.
Protection of business handset against intervention and environmental influences
• Never unscrew the unit housing screws! The housing may be damaged
and / or become leaky.
• Protect the unit against extreme environmental influences (e.g.
temperatures outside of the range specified in the technical data and
extended direct solar radiation).
• Do not expose the unit to extremely strong magnetic fields such as those
that may occur near induction furnaces and electric welding equipment!
General Safety Information
Page 10

FC4 / FC4 Ex (HS) connected with Mobility Server
10
GB
Protection of other units against malfunctions caused by the
business handset
• Usually, other electronic devices are protected against high-frequency
irradiation. However, if such a unit is insufficiently screened,
malfunctions may result that can be removed by a sufficiently large
distance between both units.
• Switch off the handset wherever the operation of DECT
TM
telephone sets
is forbidden. The use of DECT
TM
telephone sets may be forbidden or
restricted near explosives, fuels and chemicals as well as near medical
facilities. Always observe local information and prohibitions.
Handling batteries, dispatch, storage, battery replacement
• Use batteries only in a proper way. Funkwerk Enterprise
Communications GmbH will not assume any liability for damage
resulting from improper handling of the battery. Observe the ‘Information
on the use of batteries’ in the ‘Putting into operation’ section!
• When batteries leak in extreme cases, liquids (electrolytes) or gases
may escape. Leaks are indicated by unusual deposits on the battery or
on the unit as well as unusual or pungent smell. In such a case, switch
off the unit and dispatch it to the service department.
• Protect yourself against adverse health effects from leaky batteries (e.g.
skin irritation, cauterisation or poisoning) by avoiding direct skin contact
with the escaped electrolyte and by not inhaling leaking gases. In case
of doubt, consult a doctor!
• Switch off the handset prior to dispatch or an extended storage period.
Store or dispatch the handset and the battery in suitable, non-conductive
packaging. Use the original packagings if possible. A battery charge of
roughly 30% is the optimum for storing the battery. During extended
storage periods, the handset battery should be recharged to around 30%
of its capacity every 6 to 24 months. The battery storage temperature for
extended storage periods should be below the usual indoor temperature,
e.g. between 0 °C and 15 °C.
• Do not throw the battery into the fire as it might explode.
• The contact surfaces of the battery must not be short-circuited by
touching them with conductive objects (metal, wire, tools, coins,
electrically conductive packaging material). Connecting the contact
General Safety Information
Page 11

FC4 / FC4 Ex (HS) connected with Mobility Server
11
GB
surfaces of the battery with one another by a conductive material
involves a fire and explosion hazard to the battery.
• After two years of normal use or storage, a lithium ion battery will have
lost about half of its initial capacity due to ageing. The battery capacity is
also additionally reduced by frequent charge/unloading cycles. Such
capacity losses are normal and will not give rise to a warranty claim.
Care information for lithium ion batteries
This section contains information on how to obtain optimum service life
from your battery.
1 Use only the system-compatible charger for charging the batteries!
2 Half-charged batteries can be stored separately from the units for an
extended period (up to several months) at a storage temperature of
0 °C to 15 °C.
3 Batteries mounted on the unit become discharged during an extended
storage period due to the idling current consumption of the phone and
the battery. Charge the batteries in the unit once before the storage
period and then at regular 3-month intervals.
4 Charge flat batteries immediately by placing the unit into its charger.
Discharged batteries can be identified by the ‘Battery flat‘ message or by
the failing unit function. Discharged batteries can be identified by the
‘Battery flat‘ message or by the failing unit function.
5 If the service times of the unit are considerably shorter after extended
unit use, you should replace the battery by a new one.
6 The strongest adverse effect on battery service life for which we cannot
be held responsible is any heavy heating of the battery during storage or
operation. For this reason, never leave the handset or the batteries in
the blazing sun or near heat sources for an extended period.
General Safety Information
Page 12

FC4 / FC4 Ex (HS) connected with Mobility Server
12
GB
Handling of chargers
• All socket-outlets supplying the plug-in power supply units of chargers
must be located near the chargers and be accessible at any time. The
socket-outlets must have been properly installed by qualified personnel.
Before connecting the plug-in power supply unit with the socketoutlet:
Ensure that the available mains voltage is the same as specified on the
power supply unit (e.g. 230 V, 50 Hz).
• Chargers and their plug-in power supply units do not contain any
serviceable parts. Repairs must be made properly by trained personnel.
Have defective or damaged chargers and power supply units replaced
by original parts only, even if only the cord is damaged.
• Be careful when handling damaged plug-in power supply units!
Disconnect the socket-outlet from the supply (remove or switch off fuse
of respective circuit) before pulling a mechanically damaged plug-in
power supply unit out of the socket-outlet!
Touching live parts is life-threatening!
• The chargers and plug-in power supply units are designed for use in an
office-type environment. Protect them against heavy dirt, dust, moisture
and wetness as well as direct heat radiation.
• The chargers and plug-in power supply units are not explosionproof and therefore may be installed and used only outside of
hazardous areas with potentially explosive atmospheres.
End user information on the environmentally friendly disposal of old
units and empty batteries.
• The returning and the environmentally friendly disposal of old electric
and electronic units is governed by the Law on electric and electronic
devices, observe the regulations of your local authorities, please:
– All old electric and electronic devices marked with the
crossed-out rubbish bin as well as their components,
e.g. empty batteries, must not be disposed of together
with unsorted household waste, but must be collected
separately and returned to an environmentally friendly
disposal / reuse.
General Safety Information
Page 13

FC4 / FC4 Ex (HS) connected with Mobility Server
13
GB
General Safety Information
– For this reason, return these units and components to a public
electronic scrap collecting point. All components of these old units
which contain hazardous substances will be collected separately and
disposed of in an environmentally friendly way, according to their
degree of harmfulness. All other components not containing any
hazardous substances are reused as secondary raw materials.
– Dispose of discharged batteries only.
Page 14

FC4 / FC4 Ex (HS) connected with Mobility Server
14
GB
Introduction
Content of present operating manual
This operating manual explains how to put your handset into operation. All
basic rules for operating the functions and settings are described.
Shipping package of one set
Please check the shipping package immediately when you receive your
FC4 in a set.
• Business Handset FC4 or FC4 Ex or FC4 Ex HS
Explosion-proof FC4 Ex (HS) units are fitted with a clip ex works which
must not be removed!
An exception is described in section ‘FC4 Ex (HS) – Supplementary
safety instructions’, ‘Use of bags with explosion-proof units with and
without a clip’.
• MEM-Card
• Interchangeable battery. Explosion-proof units may be operated only with
the explosion-proof battery, part no. 50 1082 8000.
• Charger
Explosion-proof units may be used only with the Desktop Charger
DC4 Professional, part no. 50 1080 9200, and the appropriate plug-in
power supply unit part no. 59 0060 2814.
• Plug-in power supply unit, suitable for the charger. See the previous
item.
• The present Operating Manual
The components of this set are available separately.
Where to use your business handset
The FC4 handsets are suitable for use in an office or in dusty conditions
and for outdoor use. They meet the degree of protection IP 65 (dust-proof
and protected against water jets).
Page 15

FC4 / FC4 Ex (HS) connected with Mobility Server
15
GB
Introduction
Advice on the place of installation
Use an anti-slip pad for your charger, especially on new or polish-treated
furniture. Varnishes or polishes may contain substances that soften the
base of your charger. The softened base can leave unwanted spots on
furniture surfaces. Funkwerk Enterprise Communications GmbH will not be
liable for such damage.
Information for operation
• Switch the unit off if the use of mobile phones is not allowed at your
whereabouts, e.g. near medical equipment and facilities. Observe
corresponding bans!
• Check the battery charge symbol from time to time. Place the handset
into the charger as soon as the empty battery charge indicator starts
flashing and indicates an exhausted battery.
• Observe and follow the safety instructions for the normal version and for
the explosion-proof version of the handset provided in this operating
manual.
Emission of radio signals
The unit meets EC requirements on the emission of radio signals.
As any mobile phone, your business handset is a transmitter and receiver
of radio signals.
The transmitter is designed so that the high-frequency (HF) energy
threshold values recommended by the Council of the European Union will
not be exceeded.
These threshold values are part of comprehensive guidelines defining
allowed HF energy values for the general public. These guidelines were
prepared by independent scientific organisations, using regular and
thorough evaluation of scientific studies.
These guidelines include a substantial safety margin that is to guarantee
the security of persons of any age and health condition.
Page 16

FC4 / FC4 Ex (HS) connected with Mobility Server
16
GB
Conventions and information used in this manual
• Short form of a path
When we show you the way (the path) to a function or a setting, every
path starts from the idle display with the «Menu» entry. This is followed
by the further stations of the path, each separated by the ”>” character.
Example:
Set the date and time. The correct path for this is:
Menu > Setup > Phone settings > Date / Time > ...
• Designations of keys
Designations including the meanings of softkeys are provided in square
brackets.
Examples:
Key [0], key [Star], key [#], right softkey [Menu], selector [OK], selector
[Up arrow]
• Menu names, text entries, displays
Menu names, text entries in select lists and displays are provided in
double pointed quotation marks («...»).
Examples:
«Call lists», «Date / Time», «Calendar», ...
Exception: Menu names and entries in paths, see above.
• References to sections and to headings
Designations of sections and headings in the text are provided in raised
commas (‘...’).
Example:
Observe the ‘Information on the use of batteries’ in the ‘Putting into
operation’ section.
• Hint for an additional information
This symbol indicates useful additional information.
Introduction
Page 17

FC4 / FC4 Ex (HS) connected with Mobility Server
17
GB
• Hint for a tip
6 1 2
This symbol indicates tips.
Example:
Quick access to functions using shortcuts.
Introduction
Page 18

FC4 / FC4 Ex (HS) connected with Mobility Server
18
GB
Putting the FC4 into operation
If your business handset has not yet been assembled
If your handset comes partly unassembled, you have to
• insert the MEM card,
• install the battery and
• remove the protective film from the display if necessary.
• Finally, your service must log in your handset to your telephone system.
Now your handset is ready for operation.
• Now connect the charger
If your business handset comes completely assembled
If your handset comes completely assembled and has been logged into
your telephone system, you only need to connect the charger.
MEM card
You can make phone calls with your handset only when a MEM card has
been inserted. The MEM card is the storage medium for important data of
your handset, for your personal settings and your personal phonebook.
When changing the handset, please remove the MEM card from your
present handset and insert it into the new handset. You can use the new
handset immediately with this MEM card.
Do not use any pointed or sharp objects for changing the MEM card!
Attention !
Observe the safety instructions for handling explosion-proof units.
Page 19

FC4 / FC4 Ex (HS) connected with Mobility Server
19
GB
Putting the FC4 into operation
Inserting the MEM card
• First press the small MEM card out of the larger frame with your finger
(see figure on the left).
• Slide the edge of the MEM card obliquely under the holding points a at
the narrow side of the MEM card compartment (1).
The gold-coloured contacts of the MEM card must face downwards!
• Press the MEM card down until the small lug b grips (2). The lug is
always located opposite of the holding points.
a
b
Inserting the battery
• Slide the battery into the housing (1).
• Push battery down on the locking side until a click is heard (2).
Page 20
FC4 / FC4 Ex (HS) connected with Mobility Server
20
GB
Putting the FC4 into operation
Setting up the charger
Place the charger on a solid, level surface, e.g. on a table. Choose a
location that is protected against direct sunlight and moisture.
• Plug the small connector of the
connecting cord into the charger at the
rear.
• Connect the plug-in power supply unit with
a socket outlet.
The Desktop Charger DC4 Plus with
spare battery charging option may be
used only with a more powerful plugin power supply unit, part no.
59 0060 2814!
The charger is now ready for operation.
Charging the business handset
Place the handset into the charger. You hear a confirmation tone provided
this feature has been activated in the “Phone settings > Audio settings >
Tones > In charger”. The keyboard illumination lights up for a short time
provided this feature has been activated in the “Phone settings > Display
settings > Illumination > Keyboard”.
The handset switches itself on when it has been switched off before being
placed in the charger.
The battery symbol in the symbol line will be moving until the battery is
fully charged. The batteries heat up slightly during the charging process.
This is quite normal.
As soon as the battery is fully charged, charge retention starts. A fully
charged battery is indicated by a green ”Battery charged” symbol with a
flashing frame.
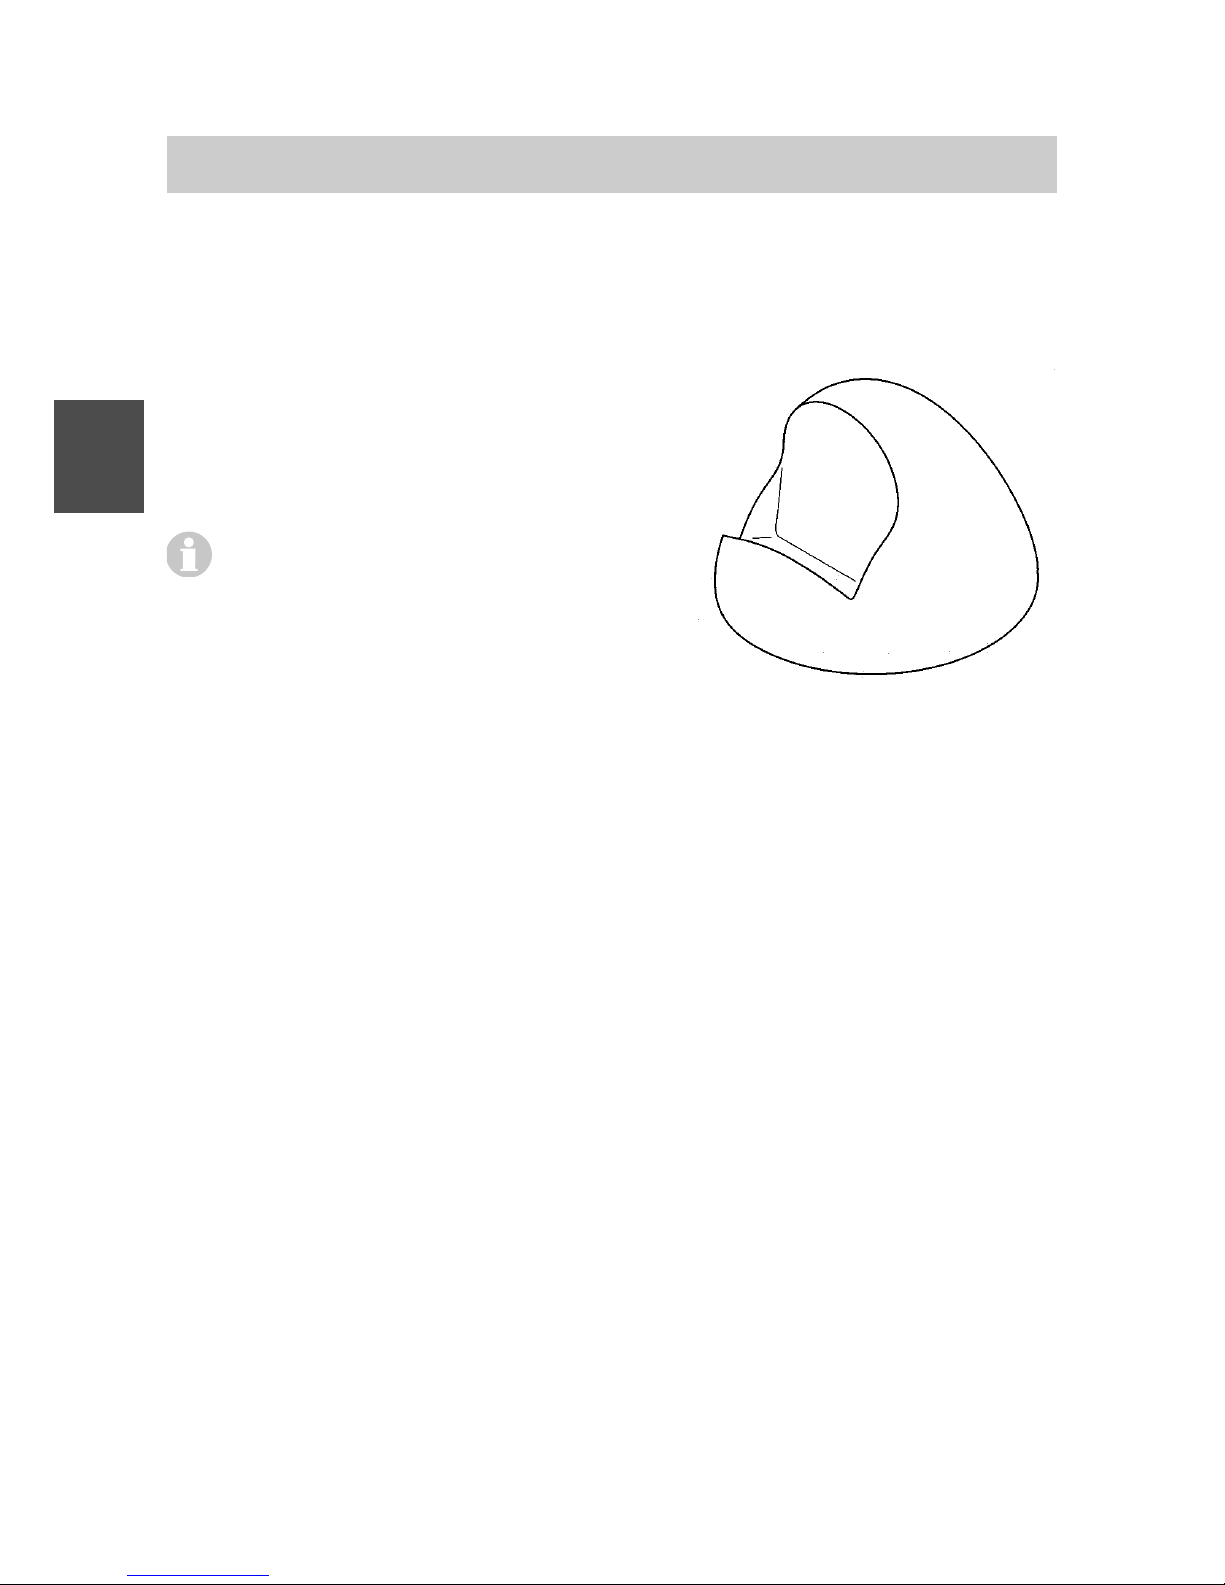
Charging the spare battery
A bay which can be closed with a cover and which is intended for charging
a spare battery is provided on the rear of the Desktop Charger DC4 Plus.
Place a battery with a contact faces facing the charger housing into the
bay and press it gently against the contact springs in the bay.
Charger
Page 21

FC4 / FC4 Ex (HS) connected with Mobility Server
21
GB
As soon as the contact is provided and charging starts, the LED at the
bottom front of the charger lights up red. When the battery is fully charged,
the LED colour changes from red to green. The LED goes out after
removing the battery.
Information on battery use
After installing a battery, place the handset into the charger until the
battery symbol lights up green. The battery is now fully charged.
You may as well leave the handset in the charger for a longer period. The
battery charging management changes over from normal charging to
charge retention as soon as the battery is fully charged and thus prevents
harmful overcharging.
When the handset is not to signal any calls while being placed in the
charger, you must activate the “Silent charging” function (Menu > Setup >
Phone settings > Phone behaviour > Silent charging).
Leave neither the handset nor the battery in the blazing sun. This will
extend the battery’s service life.
Putting the FC4 into operation
Page 22

FC4 / FC4 Ex (HS) connected with Mobility Server
22
GB
Menu selection
Display and softkeys
Symbols (icons) and texts in the display support unit operation.
The display contents and the functions of the softkeys, i.e. the two
unlabelled keys on the left and right beneath the display, depend on the
current unit status (the so-called context).
The respective softkey functions are displayed in the bottom display line
directly above the softkeys.
Calling up the main menu
From the idle display, the right softkey [Menu] brings you to the main
menu. Pressing the left softkey [Back] brings you back to the idle display.
And now to the next item …
Quick menu selection from the main menu
( g r e e n )
( b r o w n )
( o r a n g e )
( b l u e )
4
G H I
7
P Q R S
5
J K L
8
T U V
6
M N O
9
W X Y Z
Number keys for quick selection
By pressing one of the coloured number keys
4
G H I
(green),
6
M N O
(brown),
7
P Q R S
(orange) and
9
W X Y Z
(blue) once, select the sub-menu with the icon
background of the same colour (pre-selection, selection). When pressing
the same key one more time, the selected sub-menu is opened (callingup).
The display header line additionally shows the heading of the selected
sub-menu. The four coloured number keys enable selecting one sub-menu
after the other and reading information about the sub-menu function in the
header line. When pressing the same number key one more time after
selecting any sub-menu, the selected sub-menu is opened. The submenus contain either further menu icons or menu items in the form of text
lines.
6 1 2
Pressing the same key twice is the quick menu selection using a
”double click”.
Page 23

FC4 / FC4 Ex (HS) connected with Mobility Server
23
GB
Shortcuts for menu selection from the main menu
6 1 2
Open the main menu with the right softkey [Menu] and press one of
the coloured number keys
4
G H I
(green),
6
M N O
(brown),
7
P Q R S
(orange)
and
9
W X Y Z
(blue) long until a deep confirmation tone is heard. This
brings you directly into the corresponding sub-menu without
pressing a key a second time.
Alternative way for menu selection from the main menu
You may use the selector key
O K
for calling up the sub-menus instead of
the coloured number keys for quick selection and the shortcuts described
in the items above.
This key offers three functions:
– Pressing on the
O K
[Arrow up]
– Pressing on the
O K
[Arrow down]
– Pressing in the middle
O K
[OK] or on the right softkey [OK]
Now proceed as follows for selecting the sub-menu:
• Using the key functions
O K
[Arrow up] and
O K
[Arrow down] of the selector
key, select the icon of the desired sub-menu in the main menu. The display
headline additionally shows the heading of the selected sub-menu.
• Call up the selected sub-menu with the right softkey [OK]. The submenus contain either further menu icons or menu items in the form of
text lines.
Selection of sub-menus from other menu levels
After selecting a sub-menu in one of the ways described above, you have
the following options:
• When further icons of the next menu level appear in the display, select
one of the available (sub-) menus according to one of the well-known
procedures and call it up.
Menu selection
Page 24

FC4 / FC4 Ex (HS) connected with Mobility Server
24
GB
• When list lines (menu items in the form of text lines) appear in the
display, select the line of the desired (sub-) menu with the functions
O K
and
O K
from the selector key and call it up with the right softkey [OK].
The number of menu levels and the representation as an icon or as a list
line varies in the different (sub-) menus.
An overview of menus is provided in the annex to this manual.
Notes
Menu selection
Page 25

FC4 / FC4 Ex (HS) connected with Mobility Server
25
GB
Example of menu guidance and menu selection
The example below shows the first two menu levels.
Idle display
1 5 : 3 3
M e n u
5 3 6 9
U s e r n a m e
Main menu
M e n u
B a c k
Call lists menu
C a l l l i s t s
B a c k
Menu selection
Press the right softkey [Menu]. The main menu
appears.
Pressing one of the coloured number keys twice
consecutively selects and calls up the desired submenu of the same colour.
Or select the displayed icons one after the other
until you have found the desired menu item by its
heading in the display header line. Call up this
menu item by pressing the key one more time.
E. g.
The «Call lists» menu appears.
Pressing one of the coloured number keys twice
consecutively selects and calls up the desired submenu of the same colour.
Or select the displayed icons one after the other
until you have found the desired menu item by its
heading in the display header line. Call up this
menu item by pressing the key one more time.
Depending on the selected main or sub-menu item,
further menu levels follow, e.g. in the form of list
lines.
Page 26

FC4 / FC4 Ex (HS) connected with Mobility Server
26
GB
Display, symbols
Display layout
The display is sub-divided into four sections:
1 5 : 3 3
M e n uE n d c a l l
I n c o m i n g c a l l
5 3 6 9
G o o d m a n J o n a t h a n
1
2
4
3
햲 Header line, contains some symbols (battery charge condition,
connection, time, reception field strength)
햳 Status line, contains a status icon and a status text
햴 Text field, contains a calling number, a name or a message text
햵 Footer line, contains the function texts for the left and right softkey
Symbols in the header line
Continuous, white indicator: Indication of battery charging
condition from battery charged to battery half charged to
battery almost flat.
Full green battery symbol, frame flashing green: The handset is
in the charger and the battery is fully charged.
Empty battery symbol, frame flashing red: The battery charge will
last only for a short time. Place the handset into the charger.
Yellow battery symbol with a moving charging indicator, frame
flashing yellow: The handset is in the charger, the battery is being
charged, but is not yet fully charged.
Receiver: The handset has a telephone connection.
1 5 : 3
3
Time: Time display on the handset.
Reception field strength: Your handset is within the range of a
base station. You may make phone calls.
Page 27

FC4 / FC4 Ex (HS) connected with Mobility Server
27
GB
Loudspeaker: The handsfree talking loudspeaker on the rear of the
housing is activated.
Do not move the handsfree talking loudspeaker on the rear of
the handset directly near your ear!
See section ‘Safety instructions’, ‘Protection against endangering of
your hearing’.
Mute: The microphone is Off. The person you have called or who
has called you cannot hear you.
Headphones/headset: You make a phone call using the
headphones/headset. The microphone and the loudspeaker of the
handset are automatically switched off.
Special function 1 started
Example 1:
The star key was pressed long while you are in a text entry function.
Then pressing this key changes between different spellings. See
‘Editing texts, capitalisation, numbers’.
Example 2:
The star key was pressed long (until the deep confirmation beep
was heard) in order to activate or deactivate a key lock. See
‘Activating / deactivating a key lock using a sequence of keys’.
No call signal: At least one of the acoustic call signals for internal
calls, for external calls or for received messages is muted. Now the
handset will not ring any more. See also section ‘Phone settings’,
item ‘Audio settings > Signalling’.
The current call signal settings can be found in Menu > Setup >
Phone settings > Audio settings > Signalling.
Display, symbols
1
Pressing a key long: Keep key pressed until a deep confirmation tone is
heard! This tone will not appear when the key tone was deactivated in
Menu > Setup > Phone settings > Audio settings > Tones.
Page 28

FC4 / FC4 Ex (HS) connected with Mobility Server
28
GB
Display, symbols
Messages in the status line
Incoming call: You receive a call, the handset rings. The calling
number and the name of the person calling appear in the text lines
as far as this information is available.
Telephony: You have started a dialling process in order to call
another telephone subscriber. The handset now sets up a telephone
connection with another subscriber. The calling number and the
name of the person calling appear in the display text field as far as
this information is available.
Incoming message: You receive a message.
Outgoing message: You prepare a message to another subscriber
and send it.
Battery warning: The battery is exhausted. You should place the
handset into the charger as soon as possible and charge the
battery!
Battery exhausted message: The battery charge will last only for a
short time. Place the handset into the charger immediately.
System services: You are using a system service of the telephone
system.
Example: You recall the call list or message list (mail list) from the
telephone system.
Lock: The handset is locked. If the feature „emergency call“ has
been set up, the SOS call telephone function or the release of this
call with the emergency call button is available. Unlocking the
handset requires the current PIN.
Page 29

FC4 / FC4 Ex (HS) connected with Mobility Server
29
GB
Content of text field in the display
... in idle condition:
Own calling number, own name
... when a call is coming in:
Calling number and name of person calling as far as these are
available.
... when a call is going out:
Calling number of person called and its name as far as these are
available.
... when a message is coming in:
Received message text.
... when a message is going out:
Transmitted message text.
... while entering a text:
An additional information about the selected text entry mode
capitalisation or numbers. See ‘Basic rules for operation’, section
‘Editing texts, capitalisation, numbers’.
... and in idle mode, according to the situation:
LIST There is an unprocessed call in the call list of the telephone system.
MAIL There is at least one unread text message in the message list of the
telephone system.
mail There is at least one read text message in the message list of the
telephone system.
mail, LIST
There are read text messages and at least one unprocessed call in
the respective lists of the telephone system.
MAIL, LIST
There is at least one unread text message and at least one
unprocessed call in the respective lists of the telephone system.
Display, symbols
Page 30

FC4 / FC4 Ex (HS) connected with Mobility Server
30
GB
Content of footer line
The footer line shows the functions of the two softkeys associated with the
current situation.
Background picture of idle display
The background picture of the idle display can be substituted using the
separately available handset configuration application software
(configuration tool).
Display, symbols
Page 31
FC4 / FC4 Ex (HS) connected with Mobility Server
31
GB
Basic rules for operation
Handset operation involves some functions which occur quite frequently.
Make yourself familiar with these functions.
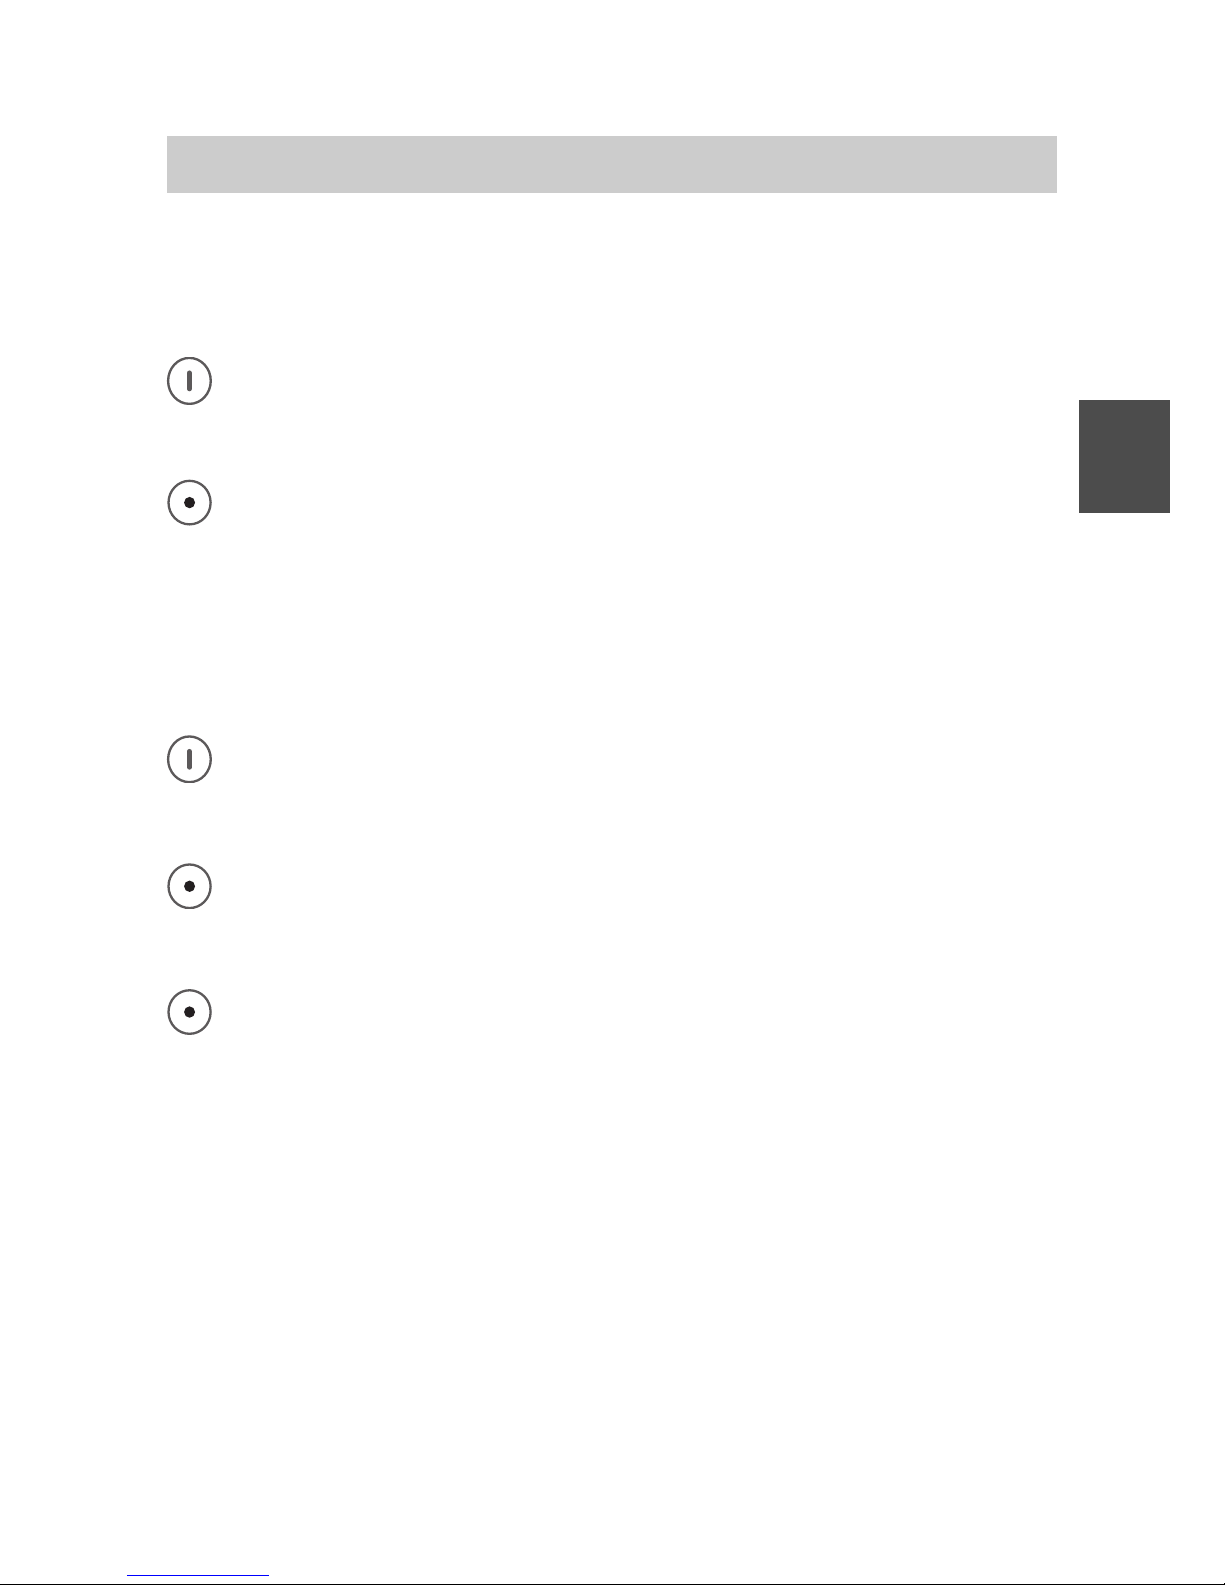
Switching on the Business Handset
The handset is Off. Press the right softkey long.
Switching off the Business Handset
The handset is in its basic condition (idle display). Press the left
softkey long.
Left and right softkey
The functions of the softkeys change, depending on the situation. The
current function is always shown in the display above the key, e.g. [Menu]
or [End call].
The right softkey serves for switching on the handset and for calling
up the function shown above the softkey, e.g. for calling up the main
menu.
The left softkey serves for switching off the handset and for calling
up the function shown above the softkey, e.g. for ending a
connection or for returning to the previous display.
When you are in a menu and press the left softkey long, the
handset goes to the basic condition (idle display).
Number keys
From the basic condition (idle display), pressing any number key will start
a dialling process.
Coloured number keys
The coloured number keys serve for quick selection of a sub-menu while
you are in a menu with coloured icons, e.g. in the main menu.
In that case, the four coloured number keys have the following function:
Page 32

FC4 / FC4 Ex (HS) connected with Mobility Server
32
GB
By pressing one of the coloured number keys
4
G H I
(green),
6
M N O
(brown),
7
P Q R S
(orange) and
9
W X Y Z
(blue) once, select the sub-menu with the icon
background of the same colour (pre-selection, selection).
When pressing the same key one more time, the selected sub-menu is
opened (calling-up).
6 1 2
Pressing the same key twice is the quick menu selection using a
”double click”.
Selector
O K
When pressing in the middle of the selector key, e.g. settings are
completed. Same effect as [OK] button.
O K
or
O K
With the up and down arrow of the selector key, you can scroll
through a menu or a list, e.g. a calling number, message or call list.
Double-assignment keys
Some keys of your handset are assigned to two functions. You can identify
these keys by the additional blue imprints. If you wish to trigger the second
blue function, press the key long. A deep confirmation tone is heard.
Changing to the basic condition
Press the left softkey long to return to the basic condition (idle
display) from any handset condition.
Attention: When the handset is already in the basic condition (idle
display), pressing the left softkey long will switch the handset off!
Activating the key lock with a key sequence
Ü
Locking the keyboard: Press the right softkey [Menu] and the
[Star] key shortly one after another.
Basic rules for operation
Page 33

FC4 / FC4 Ex (HS) connected with Mobility Server
33
GB
1
The variable basic setting of the earpiece level will not influence the
basic setting of the loudspeaker during handsfree talking.
Basic rules for operation
Deactivating the key lock
Bei eingeschalteter Tastatursperre weist der Text [Freigabe] in der Fußzeile über dem rechten Softkey auf diese Sperre hin. When the key lock is
activated, the [Unlock] text in the footer line above the right softkey points
to that lock.
Ü
Deactivating the key lock: Press the right softkey [Unlock] and
the [Star] key one after another. A suitable text in the status line will assist
you in the operation.
Automatic keyboard lock
At Menu > Setup > Security > Key lock, you may set up an automatic,
time-controlled keyboard lock.
6 1 2
The automatic keyboard lock locks the keyboard when no call and
no operation have occurred on the handset during the selected
period. Activating the keyboard lock manually is still possible.
Deactivating the keyboard lock does not require the PIN!
Unlocking a locked handset
When your handset was locked by way of Menu > Setup > Security >
Handset lock, only the emergency call release will work provided that an
emergency number has been set up.
When pressing any other key, the following information appears in the
status line: «HS (handset) locked, enter PIN». At the same time, the PIN
number entry field opens.
Enter the current PIN and confirm the entry by pressing the right softkey
[OK]. The handset is unlocked again.
Changing the earpiece volume temporarily during a conversation
The basic
1
earpiece volume setting can be changed from level 1 (soft) to
level 8 (loud) as described in section ‘Phone settings > Audio settings >
Earpiece volume’.
Page 34
FC4 / FC4 Ex (HS) connected with Mobility Server
34
GB
You may change this setting temporarily when needed during a telephone
call:
You make a phone call without the handsfree talking function
activated.
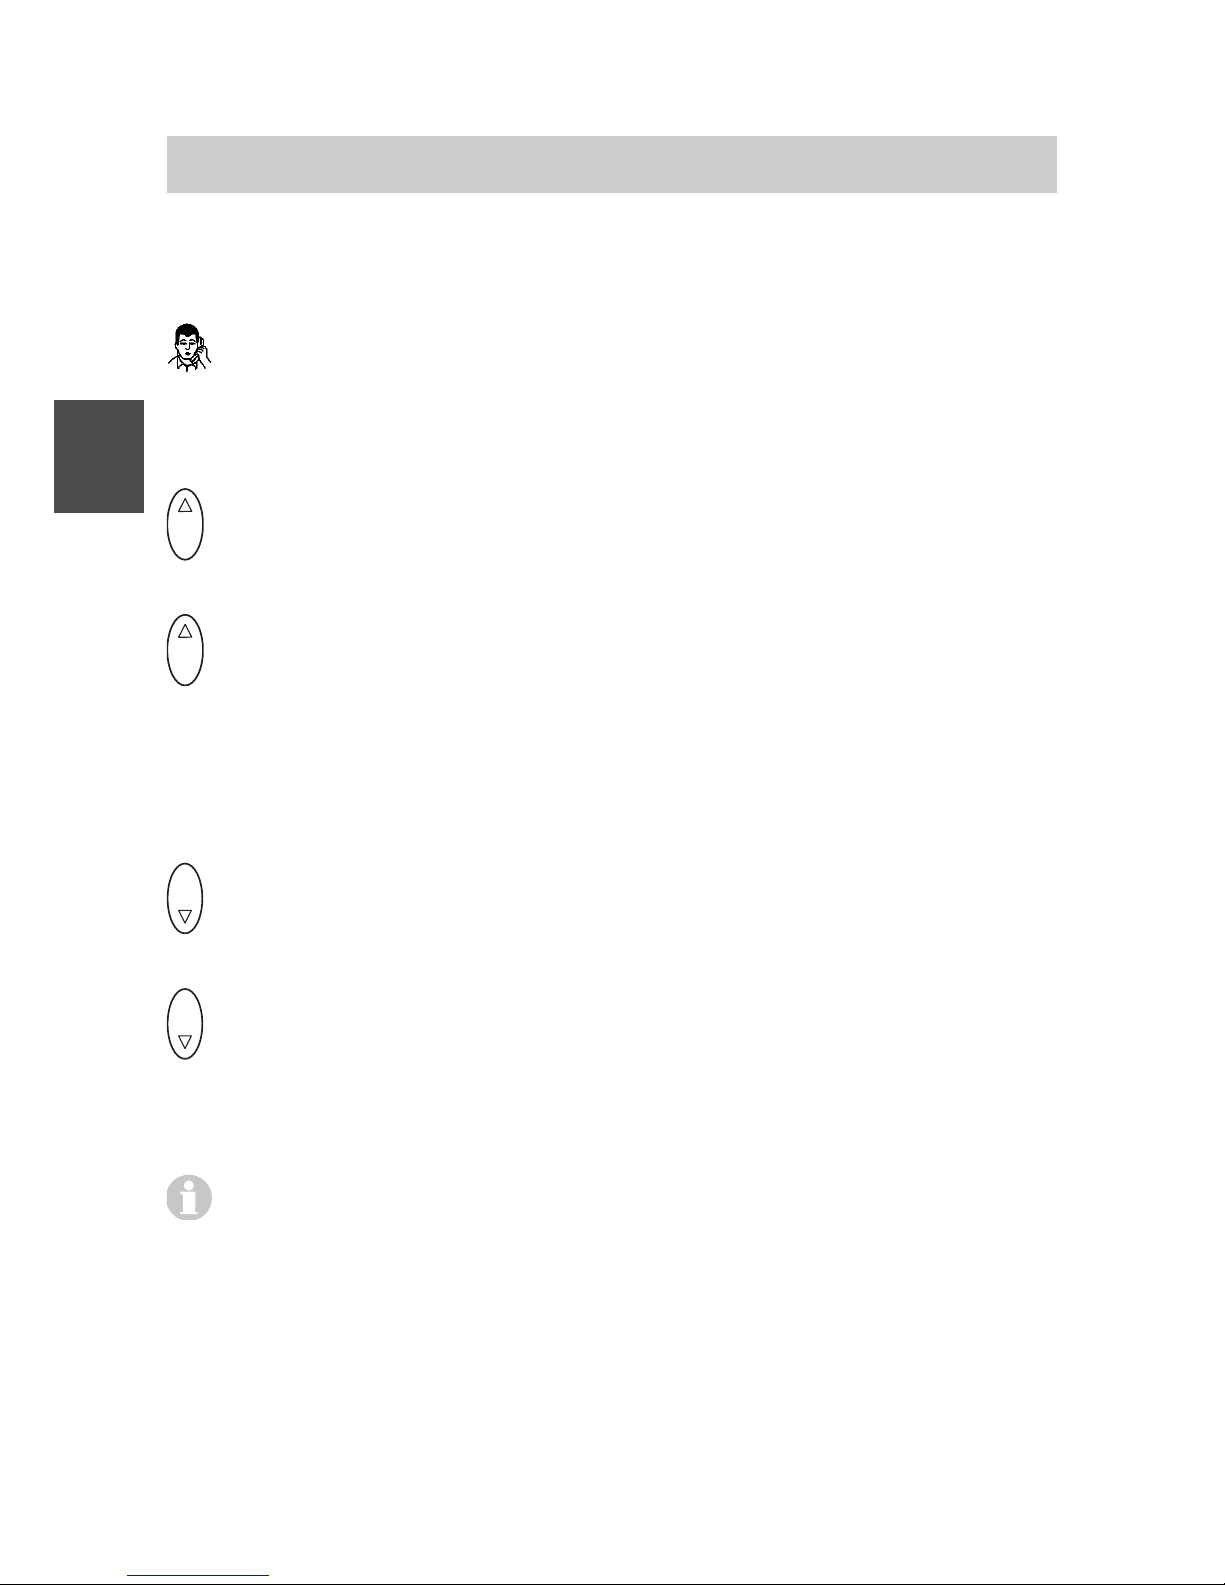
Increasing the volume temporarily
O K
Calling up the function: Press the Up arrow of the selector key long
once until a deep confirmation tone is heard, then ...
O K
Increasing the volume: Press the Up arrow of the selector key
briefly several times. The volume increases by one level step every
time the key is pressed. Continue pressing the key briefly until the
desired volume is reached.
Reducing the volume temporarily
O K
Calling up the function: Press the Down arrow of the selector key
long once until a deep confirmation tone is heard, then ...
O K
Reducing the volume: Press the Down arrow of the selector key
briefly several times. The volume decreases by one level step
every time the key is pressed. Continue pressing the key briefly until
the desired volume is reached.
The new setting remains in force only during the current call. For the
next call, the initially pre-set earpiece volume applies again.
Editing texts, capitalisation, numbers
Examples of text entries include phonebook entries (see call lists), handset
names and system names (see system settings) as well as entry fields for
settings.
Basic rules for operation
Page 35
FC4 / FC4 Ex (HS) connected with Mobility Server
35
GB
Ü
S t a r t
Ü
Ü
Ü
A b c
A B C
a b c
1 2 3
The left softkey [Delete] in entry fields deletes the character to the
left of the cursor.
Ü
The text mode for functions requiring text entry is changed every
time the [Star/Shift] key is pressed long as follows:
(1) «Abc» Every word starts with a capital letter
(2) «ABC» Only capital letters are used
(3) «abc» Only lower case letters are used
(4) «123» Only numbers are used
The basic setting and starting directly after calling up a function
involving a text entry is the (1)
The current text mode is shown at the bottom right in the display.
Basic rules for operation
Page 36

FC4 / FC4 Ex (HS) connected with Mobility Server
36
GB
Phone calls as usual
You can make phone calls with your handset as you are used to from other
phones in your telephone system.
Within the telephone system (internally): Dial the direct extension of the
person you wish to call.
Outside of the telephone system (externally): First dial the exchange dial
number (frequently zero) and then the calling number of the person you
wish to call.
Calling (block dialling)
1
2
A B C
7
P Q R S
6
M N O
dial the calling number, e.g. 1276
Answer (go off-hook). The dialling process starts.
Alternative: Hook off first, then dial the calling number.
Calling from the phonebook
Call up the main menu [Menu] with the right softkey.
4
G H I
4
G H I
4
G H I
4
G H I
Press the green number key four times
(Menu > Call lists > Select Phonebook and call it up)
O K
or
O K
Scroll through the list with the Up and Down arrows of the
selector key and select any list entry for dialling.
Have the complete phonebook entry displayed first, using the right
softkey [OK]. Now …
O K
or
O K
Select the first or the second calling number for dialling using
the Up or Down arrow of the selector key if a second calling number
is available.
Open the list of options with the right softkey [Options].
(Highlight the ‘Call’ item if needed with
O K
or
O K
.)
Page 37

FC4 / FC4 Ex (HS) connected with Mobility Server
37
GB
Confirm the ‘Call’ function with [OK]. The dialling process starts
automatically. Hold the conversation. Terminate the conversation.
As soon as you have highlighted a name entry in the phonebook,
you may start the dialling process with the [Answer] key (hook-off). If
there are two calling numbers for this entry, the first calling number
is dialled automatically.
You may use the selector key for selecting another action from the list
of options instead of the call and execute it with the right softkey [OK].
Instead of entering a calling number, you may add functions to the
phonebook and use them from the phonebook later on. See
sections ‘Making a phonebook entry’, ‘Setting up functions as
phonebook entries‘.
Calling from the phonebook, quick access
6 1 2
The handset is in its basic condition - idle display.
Jump to the phonebook by pressing a character key – e.g. the first
character of the desired name – long and open the entry field for
entering the name.
2
A B C
...
9
W X Y Z
or
O K
or
O K
Immediately complete the name with the
character keys. Wait a few seconds. The phonebook offers a
matching name as a call target.
Or scroll through the list with the Up and Down arrows of the
selector key and select a list entry as the call target.
Hook off. The dialling process starts with the first calling number of
the highlighted subscriber.
Or instead of hooking off …
Have the complete phonebook entry displayed first, using the right
softkey [OK]. Now …
Phone calls as usual
Page 38

FC4 / FC4 Ex (HS) connected with Mobility Server
38
GB
... Further course of action as described in the previous
section ‘Calling from the phonebook’.
Calling from the Redial, Missed or Answered calls lists
Call up the main menu [Menu] with the right softkey.
4
G H I
4
G H I
Press the green number key twice (Menu > Select Call lists
and call up).
6
M N O
6
M N O
or
7
P Q R S
7
P Q R S
or
9
W X Y Z
9
W X Y Z
Select one of the «Redial»,
«Missed calls» or «Answered calls» lists by pressing the
corresponding coloured number key twice and call it up.
O K
or
O K
Scroll through the list with the Up and Down arrows of the
selector key and highlight any list entry.
Hook off. The dialling process starts.
Or instead of hooking off …
Open the list of options with the right softkey [Options].
(Mark the ‘Call’ item if needed with
O K
or
O K
.)
Confirm the ‘Call’ function with [OK]. The dialling process starts.
Hold the conversation. Terminate the conversation.
You may use the selector key for selecting another action from the list
of options instead of the call and execute it with the right softkey [OK].
6 1 2
Quick access to the «Redial» list is from the idle condition of the unit
(idle display) by pressing the key long.
6 1 2
Quick access to the «Missed calls» key is from the idle condition of
the unit (idle display) by pressing the left softkey [List].
Phone calls as usual
Page 39

FC4 / FC4 Ex (HS) connected with Mobility Server
39
GB
The softkey function [List] is available only as long as an entry in the
list of missed calls exists which has not yet been taken note of.
When the idle lighting is Off, a missed call (the left softkey reads
[List]) is signalled by repeated flashing of the «Missed calls» menu
icon.
Automatic redialling of the last dialled calling number
#
Starting automatic redialling: Press the [Hash] key long. The display
shows the last dialled calling number.
Hook off and start the dialling process. Hold the conversation.
Terminate the conversation.
6 1 2
This is a system service function. We recommend using the
«Redial» menu.
Terminating the conversation
Replace (go on-hook).
Answering a call
Your handset rings.
Hook off.
6 1 2
When the handset rings e.g. during a meeting, you can stop the
ringing by pressing the R key. After that, you can take your time for
deciding if you wish to answer or reject the call without the annoying
ringing tone.
When you receive a message during the conversation, the voice
connection will not be interrupted. See ‘Messaging‘ section.
You can find information about missed and answered calls in the
Phone calls as usual
Page 40

FC4 / FC4 Ex (HS) connected with Mobility Server
40
GB
phone lists of the same names. You can e.g. call back these
persons from these lists or transfer their calling numbers into the
phonebook.
See ‘Calling from the Redial, Missed calls or Answered calls lists‘.
Rejecting a call
Your handset rings.
Pressing the left softkey [End call] rejects the calling party. The
calling party hears the busy tone.
Activating a callback on ”Busy”
You call a subscriber. The subscriber is busy.
Ü
2
A B C
Enter the callback system code.
Replace (go on-hook). The display reads ... RRUF.
As soon as the called party is free again, your handset will ring.
Hook off. The connection is set up.
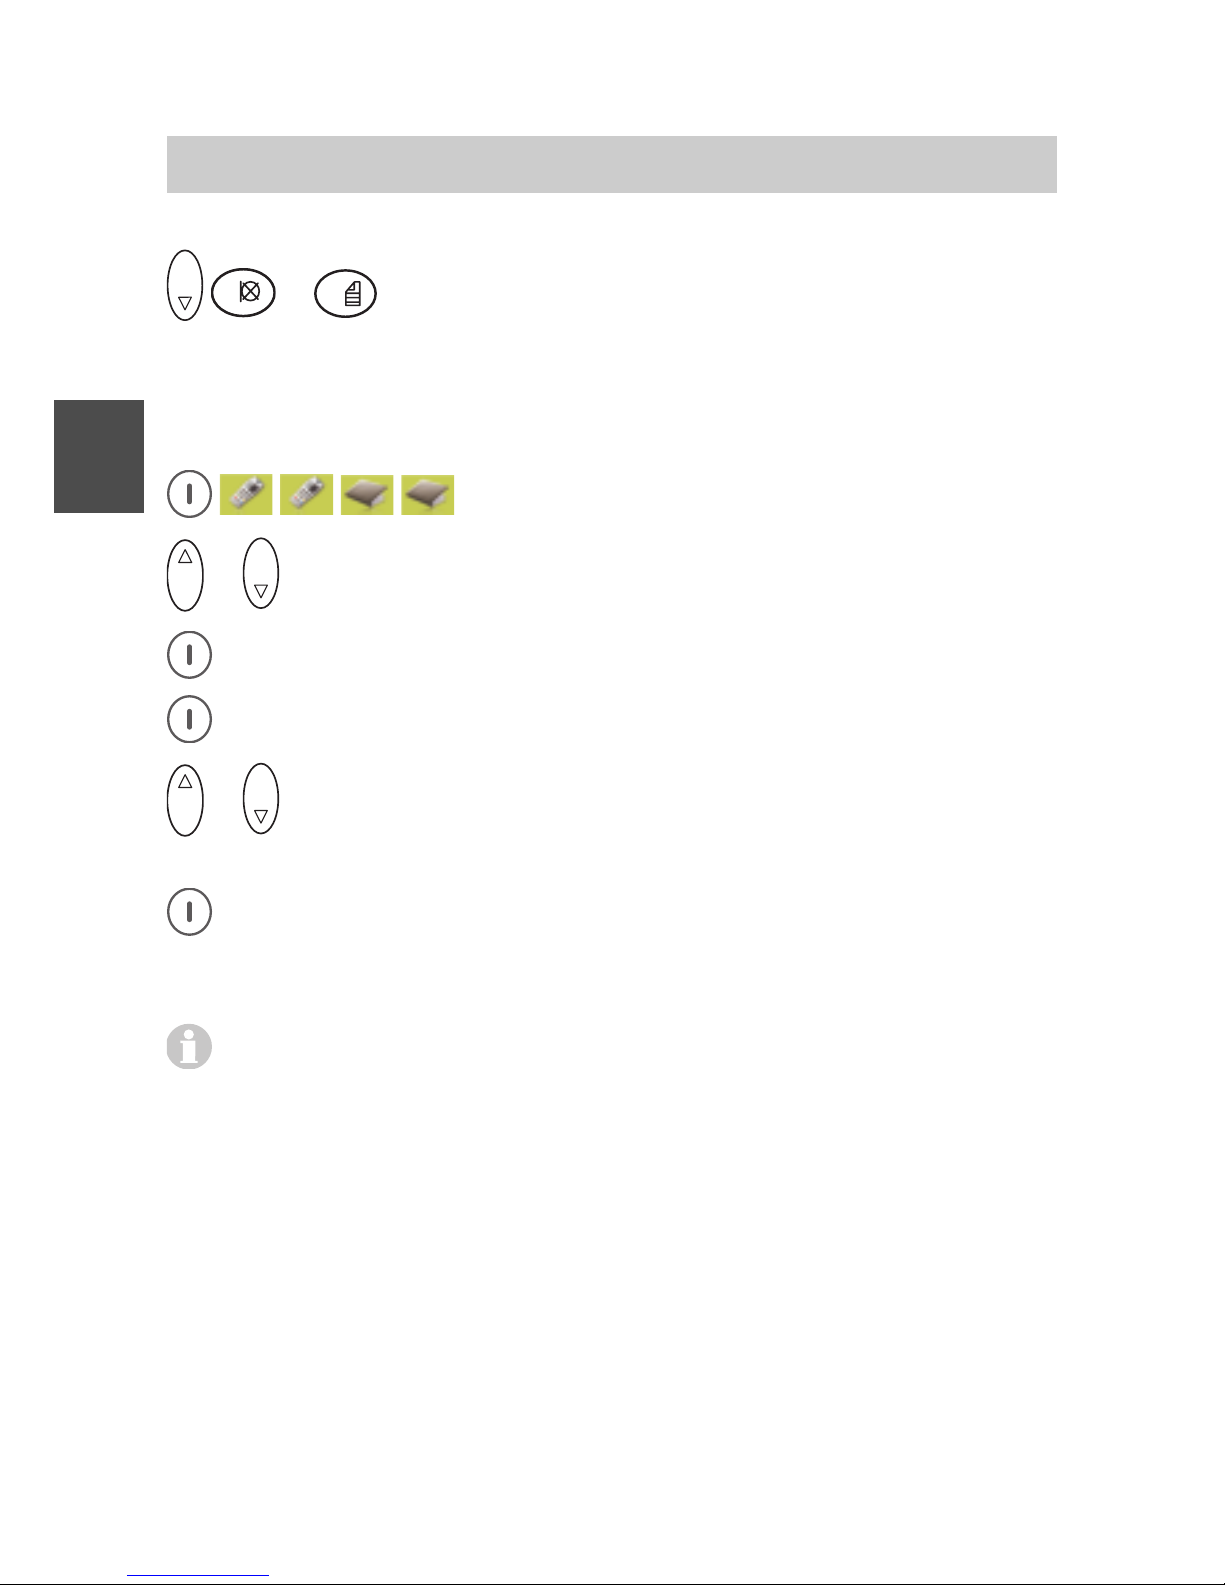
Deactivating a callback on ”Busy”
The display reads ... RRUF for an active callback on “Busy”. You wish to
delete all callbacks set up.
O K
Start the ”Prog” system service for entering system codes by
pressing in the middle of the selector key.
#
2
A B C
Enter the system code for deactivating the callback. The
display reads «RR active, delete?».
O K
Delete by pressing in the middle of the selector key [OK].
A confirmation tone is heard.
Phone calls as usual
Page 41
FC4 / FC4 Ex (HS) connected with Mobility Server
41
GB
Notes
Phone calls as usual
Page 42

FC4 / FC4 Ex (HS) connected with Mobility Server
42
GB
Consultation, brokering, retransmission
While making a phone call, you can consult another person and talk to two
different persons alternatingly. The other person waits during that time. –
In addition, you can retransmit a call from a calling person (call
forwarding).
Starting a consultation
You make a phone call.
R
Start a consultation. The person you have talked to before cannot
hear you.
7
P Q R S
6
M N O
5
J K L
4
G H I
Enter the desired calling number, e.g. 7654. The
display shows the number 7654. The connection with the second
person you wish to talk to is set up. The person you have talked to
before is waiting.
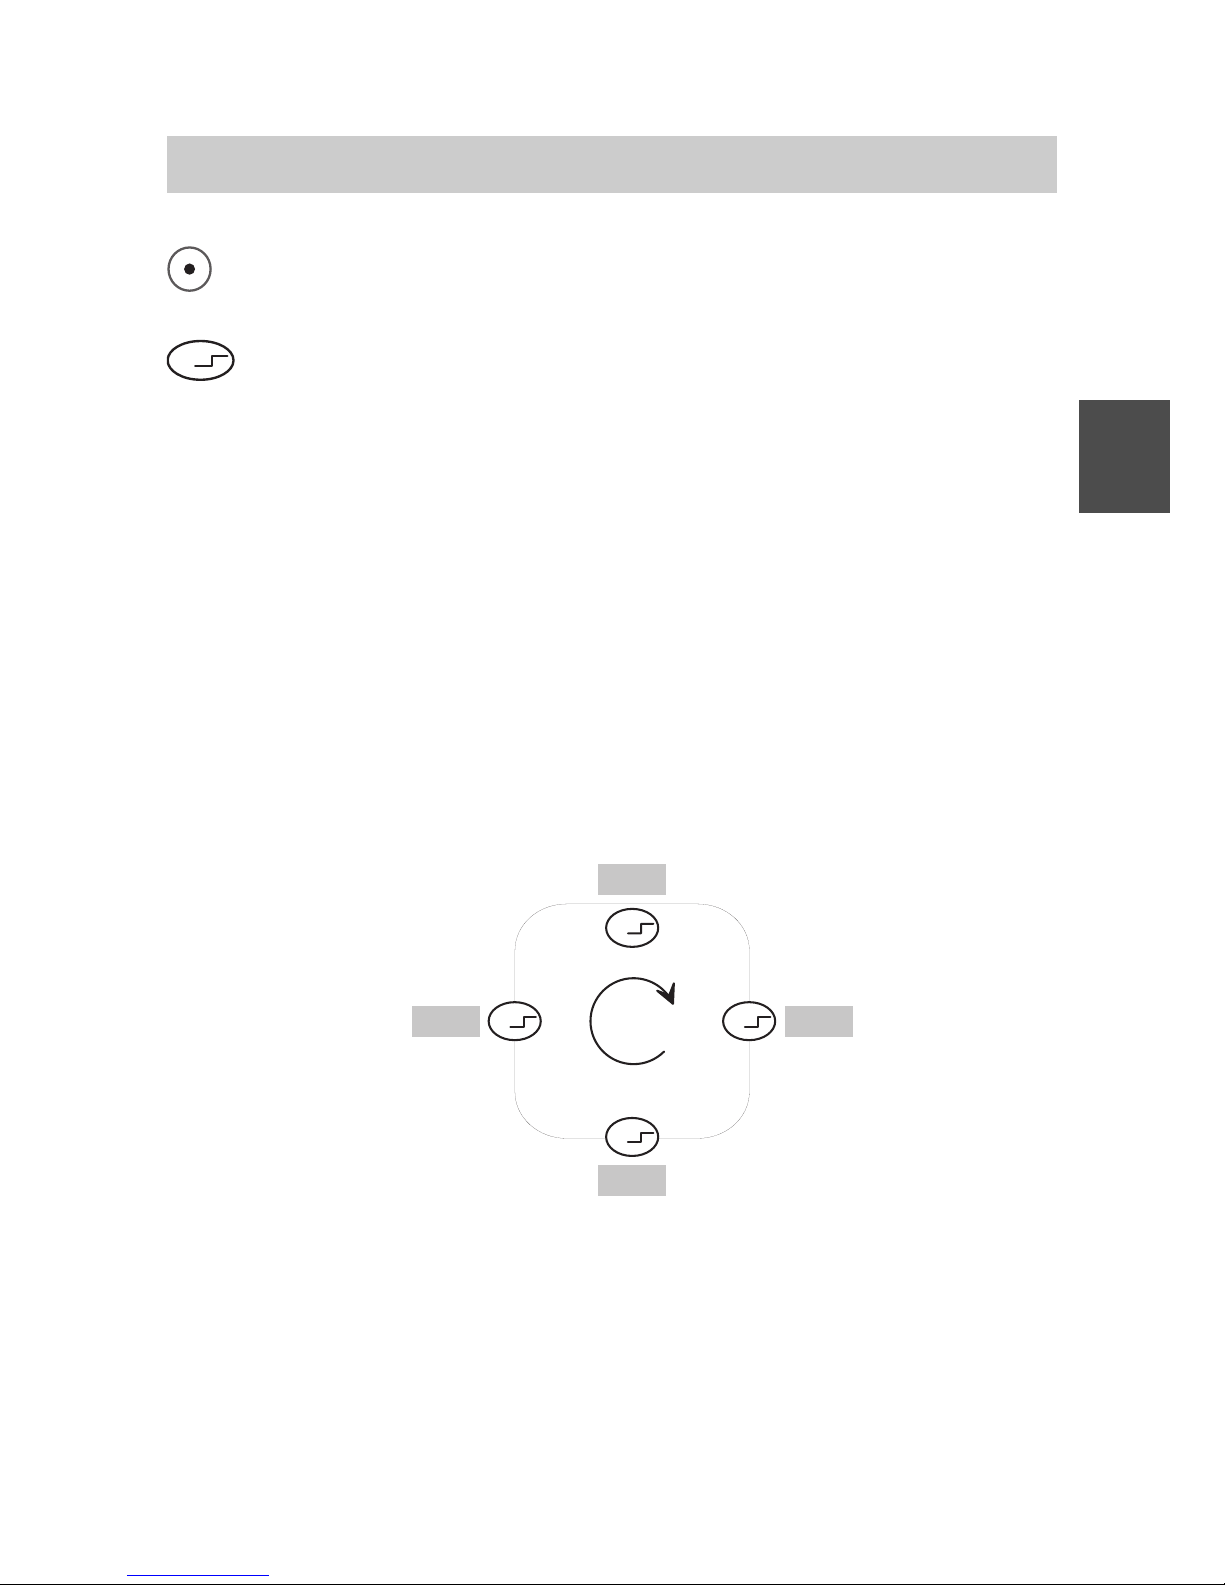
Changing between the two persons during a consultation
R
You can change between the persons you are connected with every
time you press the [R] key. This function is referred to as brokering.
Finishing the consultation
Auflegen. Replace. Your connection with the two persons you are
connected with is terminated. When the two persons you have
talked to have not yet hung up, they are now connected with one
another. See also ‘Retransmitting a call’.
Retransmitting a call
You make a phone call.
R
Start a consultation.
7
P Q R S
6
M N O
5
J K L
4
G H I
Enter the desired calling number, e.g. 7654.
Replace 1.
1
You may retransmit the call without waiting for the called person to answer.
Page 43

FC4 / FC4 Ex (HS) connected with Mobility Server
43
GB
Open listening, switching the microphone off
Your handset is equipped with a handsfree talking feature. When you
activate the handsfree talking function, you can hear the person you are
talking to loud from the loudspeaker on the rear. Moreover, you can talk
without holding the handset in your hands or in front of your mouth.
While making the phone call, you can switch off the microphone in your
handset. The earpiece remains On in that process. The person you are
connected with cannot hear you, but you can hear her/him.
Activating the handsfree talking function
You make a phone call.
R
Activating the handsfree talking function: Press the [R] key long.
The display reads .
Switching the handsfree talking function off again
You make a phone call. The conversation is heard from the
handsfree talking loudspeaker. The display reads .
R
Deactivating the handsfree talking function: Press the [R] key long.
The symbol
disappears from the display.
Switching the microphone off (muting)
You make a phone call.
1
Switching off the microphone: Press the [1] key long. The display
reads .
Switching the microphone on again
The microphone is Off. The display reads .
1
Switching on the microphone: Press the [1] key long. You may
continue your phone call. The symbol
disappears.
Page 44

FC4 / FC4 Ex (HS) connected with Mobility Server
44
GB
At the end of the phone call, the handsfree talking loudspeaker is
switched off and the microphone is switched on again.
6 1 2
When you place your handset into the charger while a conversation
is going on, handsfree talking is activated provided this behaviour is
activated at Menu > Setup > Phone settings > Phone behaviour >
Behaviour in charger.
Open listening, switching the microphone off
Page 45

FC4 / FC4 Ex (HS) connected with Mobility Server
45
GB
Releasing an emergency call with the emergency call button
This emergency call function must be set up in the handset prior to using it
for the first time. See Menu > Phone settings > Emergency (calling)
number > I55.
Releasing an emergency call
Press the emergency call button on the top side long. The
emergency calling number is dialled.
6 1 2
Releasing emergency calls with the red emergency call button
located top left is always possible – regardless if the handset is
locked or unlocked.
Releasing emergency calls with the handset locked is also possible
by pressing the SOS key (right softkey [SOS]
1
) twice. Pressing the
SOS key once prepares the dialling, pressing the key one more time
starts the dialling process.
1
The SOS emergency call is not available when no emergency calling
number has been entered, while a conversation is in progress, when a
call or a message is coming in or when the handset is not within the
range of radio reception of the telephone system.
Page 46

FC4 / FC4 Ex (HS) connected with Mobility Server
46
GB
Making a phonebook entry
Making an entry manually
Call up Menu > Call lists > Phonebook.
O K
or
O K
Highlight the list entry for a <New entry> with the keys.
Using the right softkey [OK], open the entry field for entering the
name of the new entry.
2
A B C
...
9
W X Y Z
Enter a name with the character keys.
O K
Change to the entry of calling number 1.
1
...
0
Enter the first calling number with the number keys.
O K
1
...
0
Change to the entry of calling number 2 if needed. Enter
the second calling number.
O K
1
...
0
If required, change to the entry for Info 1 to Info 3, one
after the other. Enter info texts with a maximum of 20 characters.
Open the list of options with the right softkey [Options].
O K
or
O K
Select «Save» (or «Cancel») with the keys.
Confirm the selection with [OK]. The display goes back to the new
phonebook entry.
6 1 2
When you enter two calling numbers for one name, you should enter
the more important and preferred calling number as calling
number 1.
Page 47

FC4 / FC4 Ex (HS) connected with Mobility Server
47
GB
6 1 2
For a comfortable set-up of many phonebook entries, we offer the
configuration tool. Please contact our sales department if you are
interested.
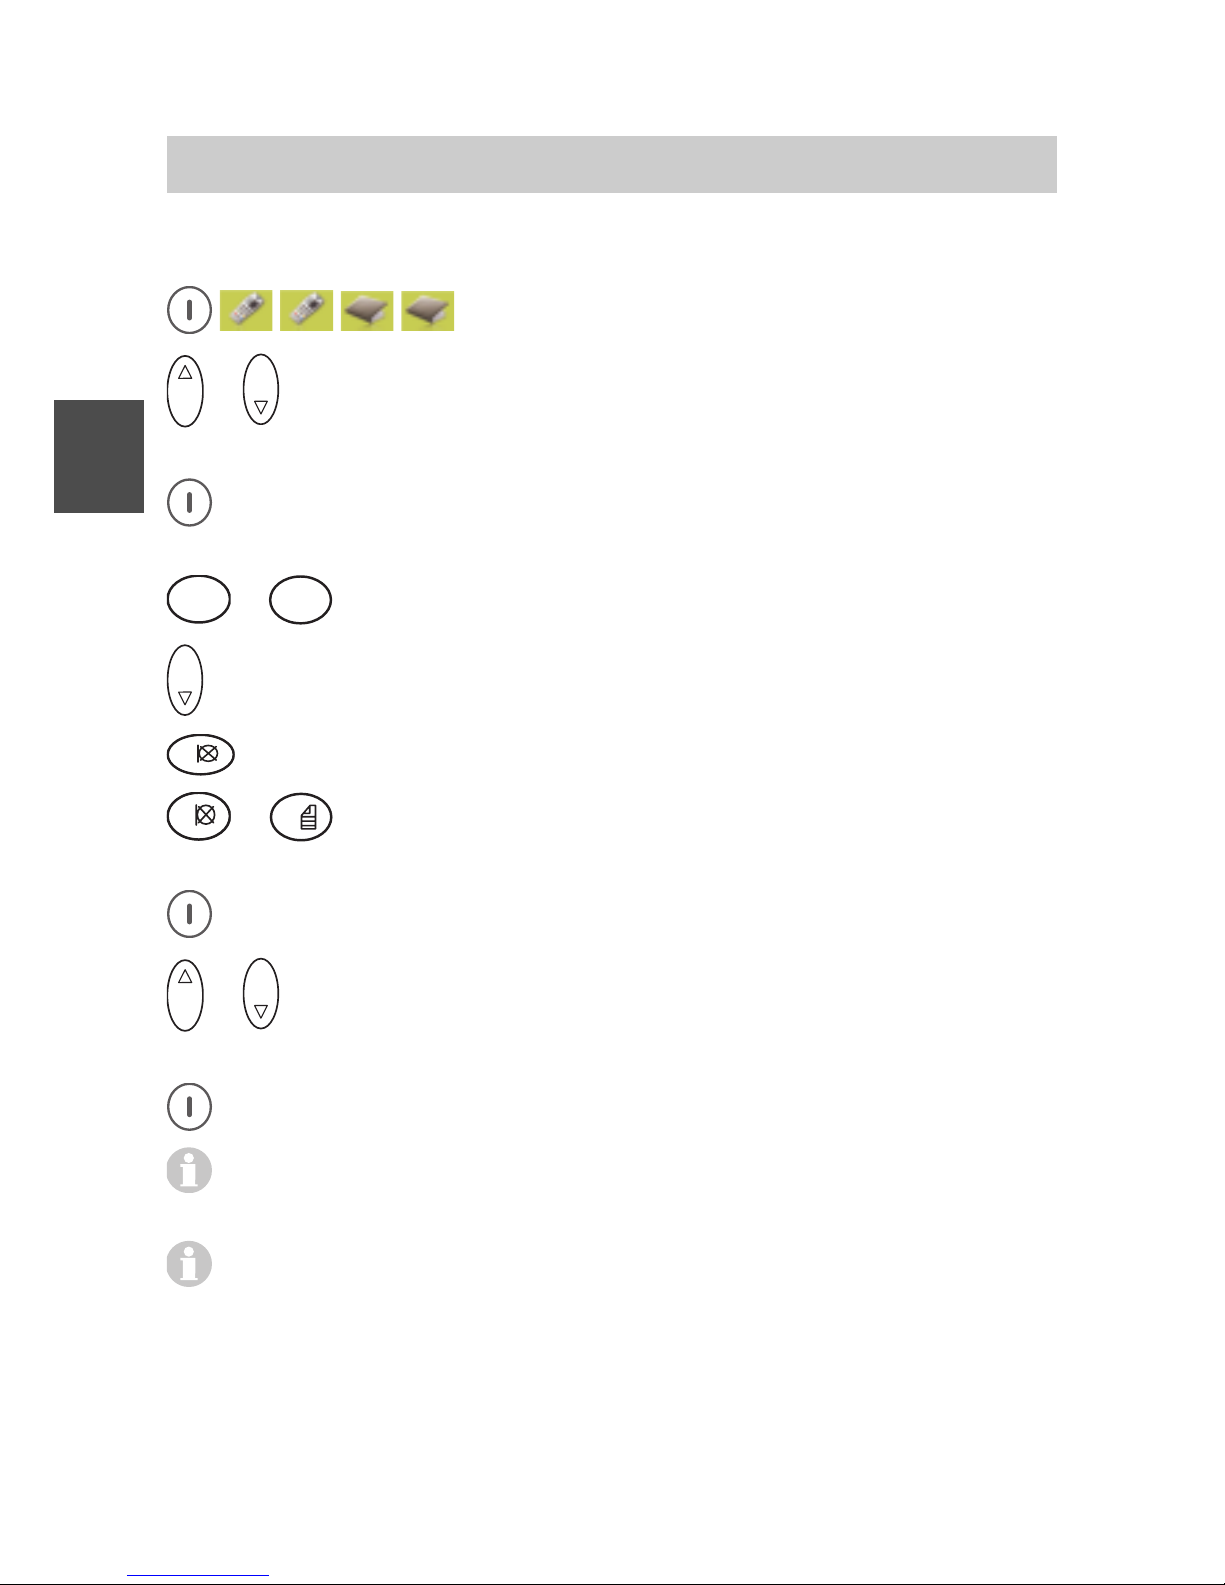
Transferring an entry from one of the call lists
Transferring an entry from one of the «Redial», «Missed calls» or
«Answered calls» lists into the phonebook.
Call up Menu > Call lists, then
Call up «Redial», or
Call up «Missed calls», or
Call up «Answered calls».
O K
or
O K
Using the Up and Down arrows of the selector key, highlight a
list entry.
Open the list of options with the right softkey [Options].
O K
or
O K
Using the Up and Down arrows of the selector key, highlight the
option «Add to phonebook».
Call up the option with the right softkey [OK]. The display goes to
the phonebook and to the «New entry» entry.
Confirm with the right softkey [OK]. The display goes to the entry
field for calling number 1.
Using the right softkey [Insert], transfer the calling number from the
«Redial», «Missed calls» or «Answered calls» lists into the entry
field. The display goes to the name entry field.
2
A B C
...
9
W X Y Z
Enter a name with the character keys.
Making a phonebook entry
Page 48
FC4 / FC4 Ex (HS) connected with Mobility Server
48
GB
Making a phonebook entry
O K
1
...
0
Change to the entry of calling number 2 if needed. Enter
the second calling number.
.... Continue as described under ‘Making an entry manually’.
Editing an existing entry in the phonebook
Call up Menu > Call lists > Phonebook.
O K
or
O K
Using the keys, highlight an existing list entry.
Call up the entry with the right softkey [OK] and view it.
Open the list of options with the right softkey [Options].
O K
or
O K
Using the Up and Down arrows of the selector key, highlight an
option. E.g. «Edit».
Using the right softkey [OK], open the entry field for entering the
name of the new entry.
.... Continue as described under ‘Making an entry manually’.
There are the following options for the selected phonebook entry:
«Call», «Edit», «Delete», «Delete all» (deletes all phonebook
entries), «Memory status» (displays the number of phonebook
entries and the remaining free memory capacity).
Setting up functions as a phonebook entry
When required, you may set up the ‘Send message’ function and the
release of so-called programming functions as phonebook or emergency
call entries.
These functions are released later on by a dialling process from the
phonebook or by pressing the emergency call button.
Page 49

FC4 / FC4 Ex (HS) connected with Mobility Server
49
GB
• Setting up the ‘Send messages’ function
Call up Menu > Call lists > Phonebook.
O K
or
O K
Using the Up and Down arrows of the selector key, highlight the
list entry for a <New entry>.
Using the right softkey [OK], open the entry field for entering the
name of the new entry.
2
A B C
...
9
W X Y Z
Enter a name for the function with the character keys.
O K
Change to the entry of the calling number.
Ü
#
Starting the ‘Send messages’ function: Press the [Star] key
long, then the [#] key.
1
...
0
Using the number keys, enter the calling number of the
message receiver.
Ü
1
Enter the desired fixed text number, using the [Star] and
[Number] keys.
#
Terminate the ‘Send message’ function with the [#] key.
Open the list of options with the right softkey [Options].
O K
or
O K
Select «Save» (or «Cancel») using the keys.
Confirm the selection with [OK].
This function can also be set up as an emergency calling number.
Making a phonebook entry
Page 50
FC4 / FC4 Ex (HS) connected with Mobility Server
50
GB
Making a phonebook entry
• Setting up a programming function
Call up Menu > Call lists > Phonebook.
O K
or
O K
Using the Up and Down arrows of the selector key, highlight the
<New entry> list entry.
Using the right softkey [OK], open the entry field for entering the
name of the new entry.
2
A B C
...
9
W X Y Z
Enter a name for the function.
O K
Change to the entry of the calling number.
1
Starting the ‘Prog.’ function: Press the [1] key long.
1
...
0
Using the number keys, enter the system code (code
numbers) of the prog. function.
Open the list of options with the right softkey [Options].
O K
or
O K
Using the Up and Down arrows of the selector key, select
«Save» (or «Cancel»).
Confirm the selection with [OK].
These functions can also be set up as an emergency calling
number.
The prog. functions and their system codes (code numbers) are
available from the system administrator of the telephone system.
Page 51

FC4 / FC4 Ex (HS) connected with Mobility Server
51
GB
Adapting the handset to your requirements
In the sections ‘Phone settings’, ‘System settings’, ‘Security settings’ and
‘Extras’, you can find information about the settings of your handset and of
the Mobility Server. These settings allow adapting the handset to your
requirements.
If you have to make settings on several handsets, we recommend using
the ‘Configuration Tool’. This tool is an application program including a
MEM card adapter which can be used for editing configuration data as well
as the phonebook entries on the handset MEM card comfortably on the
PC. Please contact our sales department if you are interested.
The descriptions below regarding the changes of settings always
start from the basic condition (idle display) of the switched-on
handset.
The first two phone settings are deliberately explained in detail in
order to make you more familiar with handset operation. The other
settings are explained with a smaller degree of detail.
The order in which the settings are described in this manual is in
line with the menu structure.
For your orientation, the annex includes an overview of this menu
structure.
When a setting (a function or a feature) cannot be edited, please
contact the system administrator of the telephone system. Some
functions must be enabled before they can be used in the telephone
system.
Page 52
FC4 / FC4 Ex (HS) connected with Mobility Server
52
GB
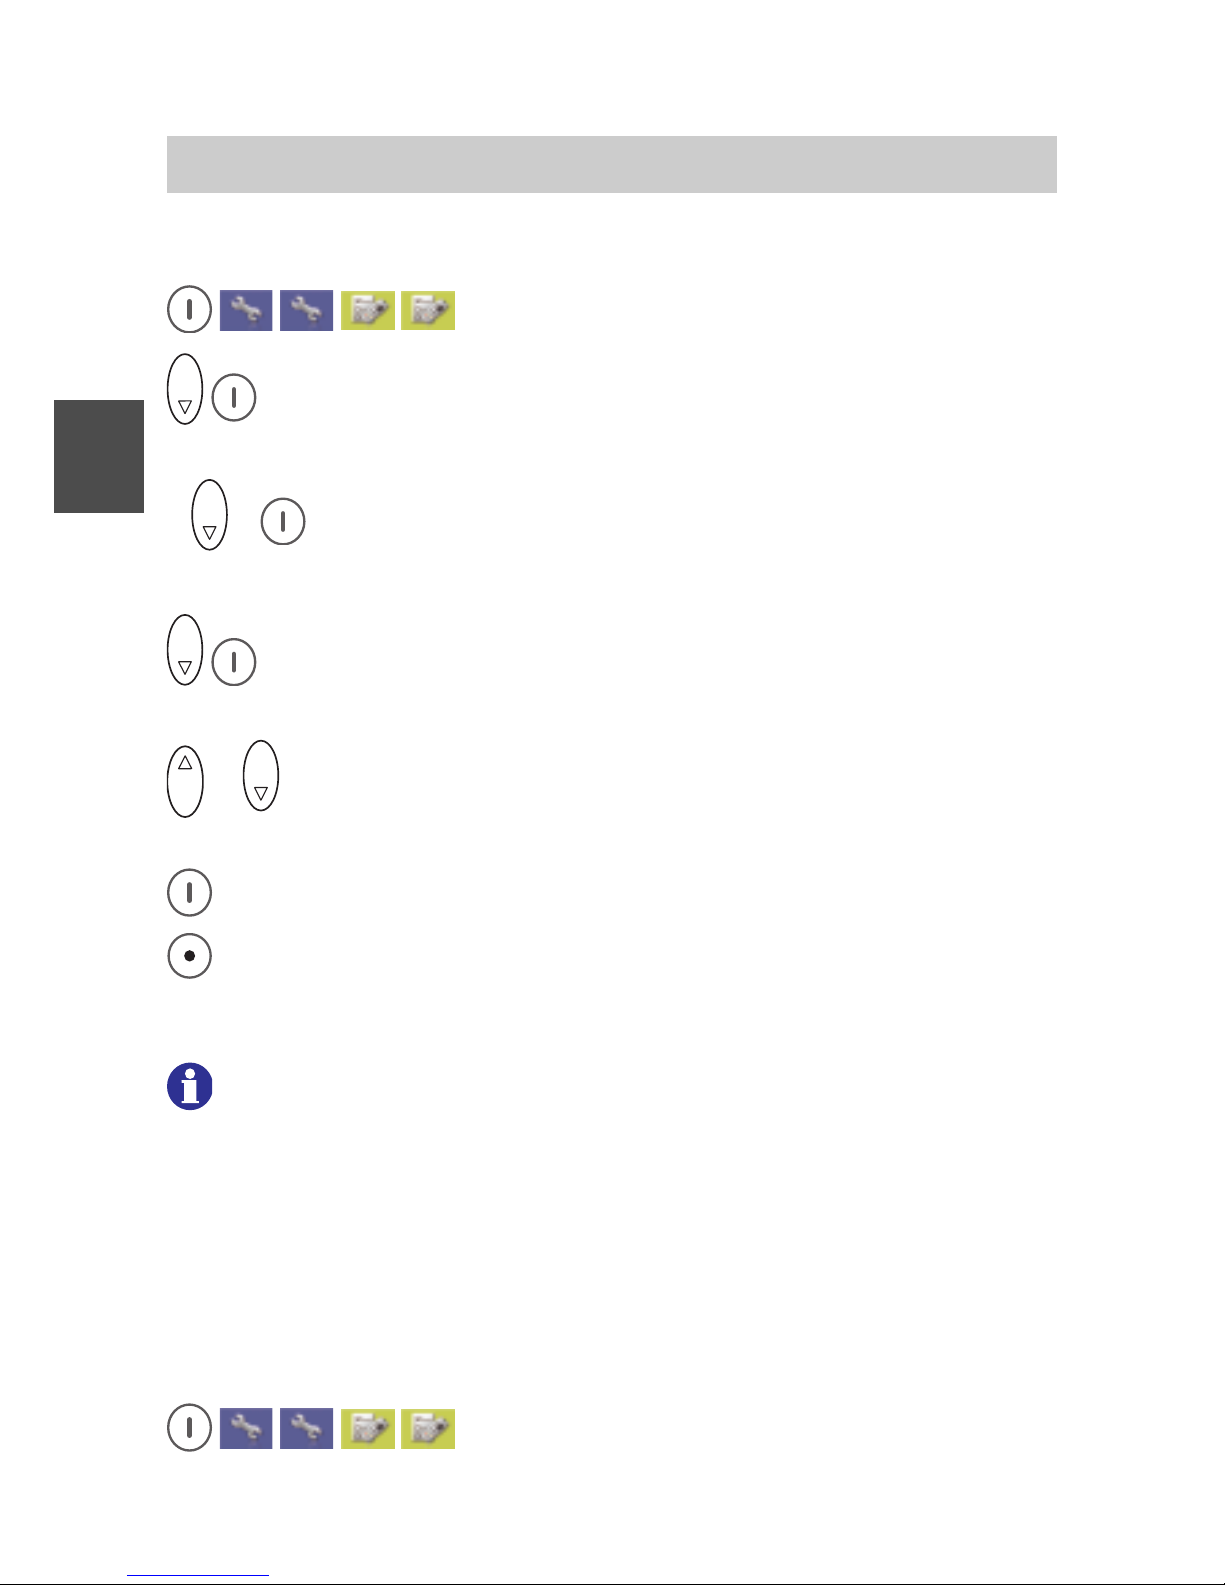
Phone settings
Audio settings > ring tone melody
Call up Menu > Setup > Phone settings.
O K
Select the «Audio settings» entry and call it up with the right
softkey [OK].
(
O K
) If necessary, select the «Ring tone melody» entry. Call up the
selected «Ring tone melody» entry with the right softkey [OK].
O K
Select entry for «external calls» or for «internal calls» and call it up
with the right softkey [Change]. You hear the current melody.
O K
or
O K
Using the Up and Down arrows of the selector key, select one of
the 20 ring tone melodies.
Accept the new ring tone melody with the right softkey [OK].
Go back one level to the audio settings by briefly pressing the left
softkey or go back to the basic condition by pressing the left softkey
long.
6 1 2
When you require a very loud call signalling – e.g. in a loud working
environment – we recommend using the ring tone melody
«klingel08» at maximum ring tone volume. Check the signalling
settings as well. The call tone of the desired signalling for internal or
external calls must be activated and must not be set to the „ring
tone short“ (short call tone). See Menu > Setup > Phone settings >
Audio settings > Signalling.
Audio settings > ring tone volume
Call up Menu > Setup > Phone settings.
Page 53
FC4 / FC4 Ex (HS) connected with Mobility Server
53
GB
O K
Select the «Audio settings» entry and call it up with the right
softkey [OK].
O K
Select the «Ring tone volume» entry and call it up with the right
softkey [OK].
O K
Select entry for «external calls» or for «internal calls» and call it up
with the right softkey [Change].
O K
or
O K
Using the Up and Down arrows of the selector key, vary the 8-
level volume control as needed. The setting below level 1 will result
in a swelling ring tone!
Accept the new volume setting with the right softkey [OK].
Go back one level to the audio settings by briefly pressing the left
softkey or go back to the basic condition by pressing the left softkey
long.
Audio settings > earpiece volume
Call up Menu > Setup > Phone settings, then
....... call up the «Audio settings» entry.
O K
Select the «Earpiece volume» entry and call it up with the right
softkey [OK].
O K
or
O K
Using the Up and Down arrows of the selector key, vary the 8-
level volume control as needed.
Accept the new volume setting with the right softkey [OK].
Phone Settings
Page 54

FC4 / FC4 Ex (HS) connected with Mobility Server
54
GB
Go back one level to the audio settings by briefly pressing the left
softkey or go back to the basic condition by pressing the left softkey
long.
Audio settings > signalling
Call up Menu > Setup > Phone settings, then
....... Call up the «Audio settings» entry.
O K
Select the «Signalling» entry and call it up with the right softkey
[OK].
The display shows a list with three entries. There are up to three
symbols under every entry:
• Loudspeaker symbol for acoustic signalling (
continuous si-
gnal,
short signal),
• Symbol of a vibrating unit for signalling by vibration ( ),
• Lamp symbol for optical signalling ( ).
Every visible symbol indicates that the signalling in question is
activated.
O K
Select entry for «external calls», for «internal calls» or for
«messages» and call it up with the right softkey [Change].
The display shows a list comprising the following for the «external
calls» and «internal calls» entries:
• ring tone ;
short
• vibrator
1
;
short
• illumination ;
Phone Settings
Footer see next page
Page 55
FC4 / FC4 Ex (HS) connected with Mobility Server
55
GB
and for the «messages» entry a list with:
• ring tone ;
• vibrator
1
;
• ilumination ;
O K
or
O K
Using the Up and Down arrows of the selector key, select one
of the lines.
Switch the signalling functions by «Ring tone», «Vibrator» or «Illumination» on or off with the right softkey [Change] (by means of
Checkbox ; or ).
Moreover, when the «Ring tone» or «Vibrator» functions are
activated, the signal length can be changed between single
signalling and continuous signalling until the call is answered or
cancelled.
As soon as only one of the acoustic signallings (ring tones) is
switched off, the header line of the idle display shows the crossed-
out bell symbol
.
Audio settings > Headset (acoustic call signalling)
Call up Menu > Setup > Phone settings, then
....... Call up the «Audio settings» entry.
O K
Select the «Headset» entry and call it up with the right softkey
[OK].
Phone Settings
1
Your handset will not vibrate while being placed in the charger. If you
have selected vibration as a call signal, the ring tone sounds briefly
(short ring tone) when a call is received.
Page 56

FC4 / FC4 Ex (HS) connected with Mobility Server
56
GB
Phone Settings
The display shows two radio buttons for setting the tone output for
call signalling. Either through the headphone only ( ) or through
the headphone and loudspeaker ( + ).
When a headset is connected to the handset, all conversations are
reproduced only through the headset. The handsfree talking function
cannot be used together with the headset.
O K
or
O K
Using the Up and Down arrows of the selector key, select the
desired function (radio button).
Accept the selected function with the right softkey [OK]. The display
goes back to the «Headset» entry.
Audio settings > tones
Call up Menu > Setup > Phone settings, then
....... Call up the «Audio settings» entry.
O K
Select the «Tones» entry and call it up with the right softkey [OK].
The display shows a list with four entries:
• «Key sound» with check box and the radio buttons «Click» and
«Tone», provided the key sound is activated.
Switches the key sound which is heard upon pressing a key on
or off and defines the type of key tone.
• «Coverage» with check box.
Switches the warning tone which is heard upon leaving the
DECT radio coverage on or off.
• «Switch on» with Check Box.
Switches the welcome melody which is heard when switching on
the handset on or off.
• «In charger» with Check Box.
Switches the tone which is heard when the handset is placed in
an operational charger on or off.
Page 57
FC4 / FC4 Ex (HS) connected with Mobility Server
57
GB
O K
or
O K
Using the Up and Down arrows of the selector key, select one
of the lines.
Switching the four functions (Check Box ; or ) on or off with the
right softkey [Change] and, with the key sound activated, selecting
the type of key sound (Radio Button or z).
Accept all changes by pressing the left softkey [Save].
Display settings > illumination (setup)
Call Menu > Setup > Phone settings, then
....... Call up the «Display settings» entry.
....... Call up the «Illumination» entry.
O K
or
O K
Using the Up and Down arrows of the selector key, select an
entry, e.g. «Display».
Switch the selected function «Display illumination», «Keyboard
illumination» or «Idle illumination» on or off (Checkbox ; or ) with
the right softkey [Change].
Accept the new illumination setting with the right softkey [Save]. The
display goes back to the «Illumination» entry.
When the idle lighting is Off, a missed call (the left softkey reads
[List]) is signalled by repeated flashing of the «Missed calls» menu
icon.
Display settings > illumination duration (setup)
Call up Menu > Setup > Phone settings, then
....... Call up the «Display settings» entry.
....... Call up the «Illumination duration» entry.
Phone Settings
Page 58

FC4 / FC4 Ex (HS) connected with Mobility Server
58
GB
O K
or
O K
Using the Up and Down arrows of the selector key, select an
entry.
Accept the new setting with the right softkey [OK]. The display goes
back to the «Illumination duration» entry.
Display settings > brightness (setup)
Call up Menu > Setup > Phone settings, then
....... Call up the «Display settings» entry.
....... Call up the «Brightness» entry.
O K
or
O K
Using the Up and Down arrows of the selector key, set the
brightness.
Accept the new brightness setting with the right softkey [OK]. The
display goes back to the «Brightness» entry.
6 1 2
If you wish to achieve particularly long handset operating times with
one battery charge, we recommend the following settings, according
to your personal requirements:
• Switch off keyboard illumination.
Keyboard illumination is required only in darkness.
• Switch off idle illumination.
The display illumination goes out as soon as the pre-set
illumination duration time has elapsed after the last key was
pressed. After pressing any key, the display illumination lights up
again during the pre-set illumination period.
• Reduce the illumination duration.
After the illumination duration has elapsed, the display
illumination goes out or is reduced to the idle illumination.
• Reduce the brightness.
Phone Settings
Page 59

FC4 / FC4 Ex (HS) connected with Mobility Server
59
GB
Display settings > colours
Call up Menu > Setup > Phone settings, then
....... Call up the «Display settings» entry.
....... Call up the «Colours» entry.
O K
or
O K
Using the Up and Down arrows of the selector key, select a
display colour.
Accept the new colour with the right softkey [OK]. The display goes
back to the «Colours» entry.
Every colour consists of the background colour for header and
footer lines and the background colour for the status line and the
text area.
Phone behaviour > silent charging
Call up Menu > Setup > Phone settings, then
....... Call up the «Phone behaviour» entry.
....... Call up the «Silent charging» entry.
O K
or
O K
Using the Up and Down arrows of the selector key, select an
entry.
Switch the selected function «Silent charging» or «Send detach» on
or off (Checkbox ; or ) with the right softkey [Change].
Accept the new setting with the left softkey [Save]. The display goes
back to the «Silent charging» entry.
When «Silent charging» is activated, all call signallings are
suppressed as long as the handset is in an operational charger. The
person calling gets the ”Busy” signal.
Phone Settings
Page 60

FC4 / FC4 Ex (HS) connected with Mobility Server
60
GB
Phone Settings
When «Send detach» is activated, the handset logs off from the
Mobility Server as soon as it goes to the “Silent charging” condition
or is switched off. The person calling now gets the “NE” signal
(NE = cannot be reached).
Phone behaviour > behaviour in charger
Call up Menu > Setup > Phone settings, then
....... Call up the «Phone behaviour» entry.
....... Call up the «Behaviour in charger» entry.
O K
or
O K
Using the Up and Down arrows of the selector key, select the
«End call» or «Handsfree» entry.
Accept the new setting with the right softkey [OK]. The display goes
back to the «Behaviour in charger» entry.
Phone behaviour > automatic answer (automatic hook off)
Call up Menu > Setup > Phone settings, then
....... Call up the «Phone behaviour» entry.
....... Call up the «Auto answer» entry.
O K
or
O K
Using the Up and Down arrows of the selector key, select the
radio button «No» or «Yes» for «Automatic Off-hook».
Accept the new setting with the right softkey [OK]. The display goes
back to the «Auto answer» entry.
Language > handset language (handset menus)
Call up Menu > Setup > Phone settings, then
....... Call up the «Language» entry.
....... Call up the «Handset language» entry.
Page 61

FC4 / FC4 Ex (HS) connected with Mobility Server
61
GB
O K
or
O K
Using the Up and Down arrows of the selector key, select a
language.
Accept the new language setting with the right softkey [OK]. The
display goes back to the «Handset language» entry.
Language > text input (character set)
Call up Menu > Setup > Phone settings, then
....... Call up the «Language» entry.
....... Call up the «Text input» entry.
O K
or
O K
Using the Up and Down arrows of the selector key, select
«Latin» or «Cyrillic».
Accept the new keyboard language setting with the right softkey
[OK]. The display goes back to the «Text input» entry.
Date / time > time, date, date format
Call up Menu > Setup > Phone settings, then
....... Call up the «Date / Time» entry.
O K
Select the «Time» entry and call it up with the right softkey [OK].
Press the right softkey [Change].
O K
or
O K
Using the Up and Down arrows of the selector key, select the
position of the time input field to be changed.
5
J K L
... Enter new data with the number keys.
Phone Settings
Page 62

FC4 / FC4 Ex (HS) connected with Mobility Server
62
GB
Phone Settings
Accept the new time setting with the right softkey [OK].
Go back by pressing the left softkey briefly.
O K
Select the «Date» entry and call it up with the right softkey [OK].
O K
or
O K
Using the Up and Down arrows of the selector key, select the
position of the date input field to be changed.
5
J K L
... Enter new data with the number keys.
Accept the new date setting with the right softkey [OK].
O K
Select the «Date format» entry and call it up with the right softkey
[OK].
O K
or
O K
Using the Up and Down arrows of the selector key, select a date
format.
Accept the new date format setting with the right softkey [OK].
Go back one level to the «Date / Time» entry by briefly pressing the
left softkey or go back to the basic condition by pressing the left
softkey long.
Emergency number > I55 (setting up an emergency call number)
Call up Menu > Setup > Phone settings, then
....... Call up the «Emergency number» entry.
Page 63
FC4 / FC4 Ex (HS) connected with Mobility Server
63
GB
O K
or
O K
Using the Up and Down arrows of the selector key, select a
system entry, e.g. I55.
Accept the entry of the selected system, e.g. «I55» (Mobility Server)
by pressing the right softkey [OK].
O K
or
O K
Using the Up and Down arrows of the selector key, move the
cursor in an existing calling number and position it to the right of a
digit to be deleted when needed.
When needed, delete the existing emergency number in part (by
pressing the left softkey [Delete] briefly) or completely (by pressing
the left softkey [Delete] long).
5
J K L
... Enter the (new) emergency number with the number keys.
Accept the emergency number entry with the right softkey [OK].
Go back one level to the «Emergency number» entry by briefly
pressing the left softkey or go back to the basic condition by
pressing the left softkey long.
Call charges > call charges
Call up Menu > Setup > Phone settings, then
....... Call up the «Call charges» entry (entering the «Call charges»
menu).
....... Call up the «Call charges» entry (for activating / deacivating the
function).
O K
or
O K
Using the Up and Down arrows of the selector key, select the
radio button «No» or «Yes» for «Call charges».
Phone Settings
Page 64

FC4 / FC4 Ex (HS) connected with Mobility Server
64
GB
Accept the new setting with the right softkey [OK]. The display goes
back to the «Call charges» menu entry.
Call charges > active call
Call up Menu > Setup > Phone settings, then
....... Call up the «Call charges» entry.
....... Call up the «Active call» entry.
O K
or
O K
Using the Up and Down arrows of the selector key, select «No
call charges», «Active call» or «All calls»from the first radio button
group and highlight them with the right softkey [Change].
O K
or
O K
Using the Up and Down arrows of the selector key, select
«Units» or «Amount» from the second radio button group and
highlight them with the right softkey [Change].
Accept the new settings with the left softkey [Save]. The display
goes back to the «Active call» entry.
Call charges > show call charges
Cal up Menu > Setup > Phone settings, then
....... Call up the «Call charges» entry.
....... Call up the «Show call charges» entry.
The call charges counter appears on the display:
Go back one level to the «Call charges» entry by briefly pressing
the left softkey or go back to the basic condition by pressing the left
softkey long.
Phone Settings
Page 65
FC4 / FC4 Ex (HS) connected with Mobility Server
65
GB
Call charges > delete call charges
Call up Menu > Setup > Phone settings, then
....... Call up the «Call charges» entry.
....... Call up the «Delete call charges» entry.
The call charges counter is deleted. The display goes back to the
«Delete call charges» entry.
Go back one level to the «Call charges» entry by briefly pressing
the left softkey or go back to the basic condition by pressing the left
softkey long.
PABX call list
Call up Menu > Setup > Phone settings, then
....... Call up the «Call list» entry.
O K
or
O K
Using the Up and Down arrows of the selector key, select the
radio button «Off» or «On» for the «Call list».
Accept the new setting with the right softkey [OK]. The display goes
back to the «Call list» entry.
6 1 2
We recommend switching the PABX call list off. This avoids transfer of
entries of that list to the handset in the future. Moreover, delete all
existing LIST entries from the PABX call list by calling up the list with
the Up arrow on the selector key and deleting the list entries shown
with the [0] key, one after the other. See section ‘Message and call list’.
Instead of the PABX call list, use the «Answered calls» list under
Menu > Call lists > Answered calls.
After deactivating the PABX call list and deleting the entries, the
message list always opens after pressing the Up arrow of the
selector key or after pressing the [0] key long, provided this list
contains an entry.
Phone Settings
Page 66
FC4 / FC4 Ex (HS) connected with Mobility Server
66
GB
Phone Settings
Call waiting
Call up Menu > Setup > Phone settings, then
....... Call up the «Call waiting» entry.
O K
or
O K
Using the Up and Down arrows of the selector key, select the
radio button «Off» or «On» for the «Call waiting».
Accept the new setting with the right softkey [OK]. The display goes
back to the «Call waiting» entry.
When you allow a call waiting, you get a call waiting tone when
another call is coming in during a phone call. You may now
terminate the first call by hanging up and answer the second call or
change between the first and the second call with the selector key.
Call diversion > set call diversion
Call up Menu > Setup > Phone settings, then
....... Call up the «Call diversion» entry.
....... Call up the «Set call diversion» entry.
O K
or
O K
Using the Up and Down arrows of the selector key, select the
condition from the radio button group for which the call diversion to
be set up is to be effective and accept the selection by pressing the
right softkey [OK].
5
J K L
... Enter the target calling number to which the calls are to be
diverted with the number keys.
Accept the new setting with the right softkey [OK]. The display goes
back to the «Set call diversion» entry.
Every time a call comes in, the telephone system (the Mobility
Server) checks if the condition «on all calls», «on busy», «on not
Page 67
FC4 / FC4 Ex (HS) connected with Mobility Server
67
GB
Phone Settings
reachable» or «on no reply» applies to a call diversion. As soon as
the first fitting condition has been found, the call is diverted.
The above has e.g. the following consequence: When a call
diversion ”on all calls” has been set up, the other call diversion
conditions are not applied even if they were set up, too.
Kontrolle nach Einrichtung einer sofortigen Rufumleitung:
Check after setting up a call diversion „on all calls“:
The idle display shows:
«Your calling number» > «Target calling number of diversion»
Call diversion > cancel call diversion
Call up Menu > Setup > Phone settings, then
....... Call up the «Call diversion» entry.
....... Call up the «Cancel call diversion» entry.
O K
or
O K
Using the Up and Down arrows of the selector key, select the
condition for the call diversion to be deleted from the radio button
group.
Accept the selection with the right softkey [OK]. The display goes
back to the «Delete call diversion» entry.
Follow Me
The ‘Follow Me’ function makes the Mobility Server divert all calls to a
handset A to your own handset B. If you wish to use this function, carry out
the following steps:
• Prepare the function on the handset A.
Without this preparation other handsets cannot divert the calls to
handset A to it without control.
• Enter the calling number of the prepared handset A on your handset B.
• Activate the ‘Follow Me’ function at any time on your handset B.
Page 68
FC4 / FC4 Ex (HS) connected with Mobility Server
68
GB
Phone Settings
Call diversion > Follow Me: Authorise
on handset A ...
Call up Menu > Setup > Phone settings, then
....... Call up the «Call diversion» entry.
....... Call up the «Follow Me: Authorise» entry.
O K
or
O K
Using the Up and Down arrows of the selector key of another
handset, e.g. handset A, select the radio button «activate» or
«deactivate».
This allows or forbids handsets to divert calls to handset A to
themselves.
Accept the new setting with the right softkey [OK] for handset A. The
display on handset A goes back to the «Follow Me: Authorise» entry.
Call diversion > Follow Me: Setup
on handset B ...
Call up Menu > Setup > Phone settings, then
....... Call up the «Call diversion» entry.
....... Call up the «Follow Me: Setup» entry.
5
J K L
... Using the number keys, enter the calling number of the telephone
/ handset – e.g. the calling number of handset A – the incoming calls
of which are to be diverted to your own handset B.
Call diversion > Follow Me: activate / deactivate
on handset B ...
Call up Menu > Setup > Phone settings, then
....... Call up the «Call diversion» entry.
....... Call up the «Follow Me: activate / deactivate» entry.
Page 69

FC4 / FC4 Ex (HS) connected with Mobility Server
69
GB
Execute the action with the right softkey [OK]. The display goes
back to the «Follow Me: activate / deactivate» entry.
This function changes between «Follow Me: activate» and «Follow
Me: deactivate» every time it is called up. When Follow Me is
activated, all calls to handset A are diverted to handset B.
Double call: initialise
Call up Menu > Setup > Phone settings, then
....... Call up the «Double call» entry.
....... Call up the «Double call: Initialise» entry.
5
J K L
... Using the number keys, enter the calling number of the double
call user (telephone / handset).
Accept the setting with the right softkey [OK]. The display goes back
to the «Double call: Initialise» entry.
Now you may activate / deactivate the «Double Call» function as
needed at any time.
Double Call: activate / deactivate
Call up Menu > Setup > Phone settings, then
....... Call up the «Double call» entry.
....... Call up the «Double-Call: activate / deactivate» entry.
O K
or
O K
Using the Up and Down arrows of the selector key, select the
radio button «activate» or «deactivate».
Accept the setting with the right softkey [OK]. The display goes back
to the «Double call: activate / deactivate» entry.
Phone Settings
Page 70

FC4 / FC4 Ex (HS) connected with Mobility Server
70
GB
When Double Call is activated, both units (telephone, handset) will
ring when a call comes in. You may decide freely which unit to use
for answering the call.
Reset
Call up Menu > Setup > Phone settings, then
....... Call up the «Reset» entry.
Cancel this procedure by pressing the left softkey [Back]. The
display goes back to the «Reset» entry.
or
Execute the RESET function with the right softkey [OK]. The display
goes back to the «Reset» entry.
RESET sets all settings including the PIN number back to the unit
delivery status.
The call lists remain intact.
Phone Settings
Page 71

FC4 / FC4 Ex (HS) connected with Mobility Server
71
GB
System Settings
Log in
Call up Menu > Setup > System settings, then
....... Call up the «Log in» entry.
O K
or
O K
Using the Up and Down arrows of the selector key, select a
radio button «System 1» to «System 10». Confirm the selection with
the right softkey [OK].
O K
or
O K
Using the Up and Down arrows of the selector key, select the
radio button «I55». Confirm the selection with the right softkey [OK].
5
J K L
... Enter the PARK (Portable Access Rights Key) with the number
keys if one exists. Confirm with the right softkey [OK].
5
J K L
... Using the number keys, enter the 8-digit AC code (Access code of
telephone system). Confirm with the right softkey [OK].
Logging a handset in to a Mobility Server (I55) is a precondition for
checking in to this system.
A handset can be logged in to several Mobility Servers, e.g. at
different locations, but can be checked in to and used with only one
Mobility Server at a time.
For a handset not yet logged in to a Mobility Server so far, the
entries «System 1» to «System 10» are available.
For logging in, the handset must be within the radio coverage of the
telephone system.
The PARK code and the AC code can be obtained from your system
administrator.
You have two minutes max. available for the log-in procedure.
Page 72
FC4 / FC4 Ex (HS) connected with Mobility Server
72
GB
System Settings
Selection mode
Call up Menu > Setup > System settings, then
....... Call up the «Selection mode» entry.
O K
or
O K
Using the Up and Down arrows of the selector key, select the
radio button «automatic» or «exclusive».
Accept the setting with the right softkey [OK]. The display goes back
to the «Selection mode» entry.
Automatic selection mode: The handset automatically checks in to a
new telephone system.
Exclusive selection mode: You must check in the handset manually
(see «Select system»).
Pre-conditions: The handset is inside the radio coverage, identifies
the telephone system and is logged in to this telephone system.
Select system
Call up Menu > Setup > System settings, then
....... Call up the «Select system» entry.
O K
or
O K
Using the Up and Down arrows of the selector key, select the
radio button of the desired system.
Accept the setting with the right softkey [OK]. The display goes back
to the «Select system» entry.
Edit system name
Call up Menu > Setup > System settings, then
....... Call up the «Edit system name» entry.
Page 73

FC4 / FC4 Ex (HS) connected with Mobility Server
73
GB
O K
or
O K
Using the Up and Down arrows of the selector key, select a
system.
5
J K L
... Using the character keys, edit / delete / newly enter the system
name in the entry field.
Pressing the left softkey [Delete] long deletes the entry in the entry
field.
Pressing briefly on the left softkey [Delete] deletes the character to
the left of the cursor in the entry field.
Accept the entry with the right softkey [OK]. The display goes back
to the entered system name.
Use unambiguous and clear names in order to avoid confusion
when selecting the system manually.
Edit handset name (HS-Name)
This setting only applies to handsets operated with a GAP system.
Call up Menu > Setup > System settings, then
....... Call up the «Edit handset name» entry.
5
J K L
... Using the character keys, edit / delete / newly enter the handset
name in the entry field.
Pressing the left softkey [Delete] long deletes the entry in the entry
field.
Pressing briefly on the left softkey [Delete] deletes the character to
the left of the cursor in the entry field.
Accept the entry with the right softkey [OK]. The display goes back
to «Edit handset name».
Telephone IDs
Call up Menu > Setup > System settings, then
System Settings
Page 74

FC4 / FC4 Ex (HS) connected with Mobility Server
74
GB
System Settings
....... Call up the «Telephone IDs» entry.
Here you can find the IPEI (International Portable Equipment Identity) and the IPUI (International Portable User Identity).
Exit the telephone ID display by pressing the left softkey [Back]. The
display goes back to the «Telephone IDs» entry.
Software Version
Call up Menu > Setup > System settings, then
....... Call up the «Software version» entry.
Here you can find the software version (SW), the revision (Rev.), the
check sum (CRC), the hardware version (HW) and the card
information (Card).
Exit the software version display by pressing the left softkey [Back].
The display goes back to the «Software version» entry.
Page 75

FC4 / FC4 Ex (HS) connected with Mobility Server
75
GB
Security
PIN (enter a new PIN)
Call up Menu > Setup > Security, then
....... Call up the «PIN» entry.
0
... Enter the current PIN with the number keys. In the factory
settings, the PIN is «0000». Accept the new setting with the right
softkey [OK]. The display continues to the entry field for the new
PIN.
0
... Enter the new PIN with the number keys and accept it with the
right softkey [OK]. The display continues to the entry field for
repeating the new PIN.
0
... Repeat the new PIN with the number keys and accept it with the
right softkey [OK]. The display goes back to the «PIN» entry.
The current PIN including the factory settings PIN is always
requested when a locked handset is to be unlocked again.
If the current PIN is different from the one entered in the factory
settings, you have to enter the current PIN even when you wish to
delete a list, e.g. the call list.
Key lock (automatic)
Call up Menu > Setup > Security, then
....... Call up the «Key lock» entry.
Activate or deactivate the automatic key lock with the right softkey
[Change] (Checkbox ; or ).
After you have activated the key lock:
O K
or
O K
Using the Up or Down arrow of the selector key, select the radio
button with the time after which the automatic key lock is to be
activated.
Page 76

FC4 / FC4 Ex (HS) connected with Mobility Server
76
GB
Security
Activate the new time setting with the right softkey [Change].
Accept the new setting with the left softkey [Save]. The display goes
back to the «Key lock» entry.
After you have deactivated the key lock:
Accept the new setting with the left softkey [Save]. The display goes
back to the «Key lock» entry.
With the automatic key lock deactivated, the radio buttons of the
automatic key lock are blocked.
Handset lock
Call up Menu > Setup > Security, then
....... Call up the «Handset lock» entry.
O K
or
O K
Using the Up or Down arrow of the selector key, select
immediate «Handset lock» or «When placing in charger, automatic».
When you have selected immediate «Handset lock»:
Accept the new setting with the right softkey [OK]. The display goes
back to the idle display. The handset is locked.
When you have selected «When placing in charger, automatic»:
Activate or deactivate this function with the right softkey [Change]
(Checkbox ; or ).
Accept the new setting with the left softkey [Save]. The display goes
back to the «Handset lock» entry.
Page 77
FC4 / FC4 Ex (HS) connected with Mobility Server
77
GB
Extras
Alarm clock
Setting the alarm clock function …
Call up Menu > Setup > Extras, then
....... Call up the «Alarm clock» entry.
O K
or
O K
Using the Up and Down arrows of the selector key, select the
«active» entry.
Activate or deactivate the alarm clock function with the right softkey
[Change] (Checkbox ; or ).
O K
or
O K
Using the Up and Down arrows of the selector key, select the
wake time entry field «Alarm time».
5
J K L
... Using the number keys, enter four digits (2-digit hours and 2-digit
minutes).
If an error occurred during the entry, change the selection
temporarily with the Up and Down arrows of the selector key, e.g.
for the «Active» entry, and then back to «Alarm time». Repeat the
«Alarm time» entry.
O K
or
O K
Using the Up and Down arrows of the selector key, select the
«Alarm signal».
Open the «Alarm signal» select list with the right softkey [Change].
O K
or
O K
Using the Up and Down arrows of the selector key, select the
new wake-up melody.
Accept the selection with the right softkey [OK].
Page 78
FC4 / FC4 Ex (HS) connected with Mobility Server
78
GB
Extras
O K
or
O K
Using the Up and Down arrows of the selector key, select the
«Daily» entry.
Activate the wake function with the right softkey [Change] either
daily or once for all times (Checkbox ; or ).
Accept the new wake time setting (alarm time setting) with the left
softkey [Save]. The display goes back to the «Alarm clock» entry.
You can accept the alarm clock function changes made so far at any
time with the left softkey [Save].
When no changes were made, you can exit the «Alarm clock» entry
with the left softkey [Back].
When the alarm clock rings, you can stop the alarm clock function
with the left softkey [Off] or postpone it with the right softkey [Later].
Display: Next wake time hh:mm.
When you do nothing, the alarm clock will repeat the waking
procedure for half an hour.
An activated alarm clock function will wake you up even when the
handset if off. In this process, the handset switches itself on and
after that remains switched on.
6 1 2
You can use the alarm clock function for automatically switching
your handset on at a given time (the wake time) every day.
Page 79

Messaging on Secury Server and Mobility Server I 33 / CS I55
79
GB
Messaging
Messaging 1 enables you to use your handset for receiving or sending
short alphanumeric messages (texts, numbers). You can send messages
to individual users or to groups. In specific cases, the calling number of a
user may deviate from his telephone number.
The messages are fixed pre-defined texts, e.g. «Call text». When needed,
you may add any digits up to the max. message length. The list of fixed
texts is available from your system administrator.
Performance check for the sender:
The sender receives a confirmation if message transmission was
successful.
If the message contained a request for a manual acknowledgement and
the receiver has acknowledged manually, the sender receives this
acknowledgement in addition. Examples: POS !<Call text> or NEG !<Call
text>.
The last 10 messages are saved in the system message list and the last
20 messages in the «Incoming msg.» message list of the handset.
Note:
During reception of a message and during a possibly required manual
acknowledgement, an existing call remains active. The called party hears
the signalling of the message.
Example: User A and user B are holding a telephone conversation. User A
receives a message along with an attention signal.
The voice connection remains intact while the message is transmitted and
during any necessary manual acknowledgement by user A. The handset
microphone of user A remains on so that user B can hear what happens
around user A.
The conversation can be continued after signalling and acknowledgement
are complete.
1
The messaging functions are available only with a Mobility Server which
has a Message Server connected. The Message Server is a supplement
for your Mobility Server.
Page 80

Messaging on Secury Server and Mobility Server I 33 / CS I55
80
GB
Receiving a message
Your handset rings with a special ring tone 1.
As far as this is available, the display shows the telephone number of the
sender and the message, e.g. «5371 Meeting in room 109».
As long as the message is visible, you have the following options:
Switching off the ring tone
R
Press the [R] key.
Deleting the message from the display
Press the left softkey. The message goes to the message list. The
idle display reads «mail».
Deleting the message definitively
0
Press the [0] key.
Manual acknowledgement
Important messages are preceded by an exclamation mark, e.g. « ! Meeting in room 109». In the display «acknowledge» is flashing. You must
acknowledge this message manually. There are two options:
• Positive manual acknowledgement
Press the left softkey. The display reads «+++OK» when the positive
acknowledgement was successfully transmitted.
• Negative manual acknowledgement
Press the right softkey. The display reads «---OK» when the negative acknowledgement was successfully transmitted.
1
The ring tones are different, depending on the urgency.
Page 81

Messaging on Secury Server and Mobility Server I 33 / CS I55
81
GB
Message Lists And Call Lists
System message list
The last 10 messages are stored in a message list
1
which is kept in the
Mobility Server (mail memory). The text “mail” in the basic condition (idle
display) stands for a read system message list whereas the text “MAIL” (in
capitals) points to at least one unread message in the system message
list. View the system list of received messages.
6 1 2
If you wish to open the system message list immediately by
pressing the Up arrow of the selector key or by pressing the [0] key
long, you must switch off the system call list before and after that
delete all entries still existing in the system call list. See Menu >
Setup > Phone settings > (PABX) Call list.
This measure will keep the system call list empty in the future so
that the keys mentioned above can only open the system message
list provided this list contains at least one entry.
Handset message list
The last 20 messages are stored in message list 1 «Incoming Msg.» of the
handset.
Example of menu access to the handset message list from the handset
idle display:
Call up Menu > Message lists > Incoming
message, then ...
O K
or
O K
Using the Up and Down arrows of the selector key, select an
entry.
1
An entry in the message list contains the sender number, text, day and
time and the number of transmission attempts. If several transmission
attempts have been made for the same message, the day and time
always applies to the most recent attempt.
Page 82
Messaging on Secury Server and Mobility Server I 33 / CS I55
82
GB
6 1 2
See also ‘Viewing the system message list / system call list or
select for viewing’ below.
PABX call list
The last 10 unanswered calls are stored in a system call list. You can call
back from the call list. The text «LIST» in the idle display points to at least
one call which has not yet been taken note of. When all calls in the list
have been taken note of, the text «LIST» disappears. The last 10 calls
remain stored in the call list unless they are deleted manually.
6 1 2
See the tip on the previous page.
Handset call list
The last 20 unanswered calls are stored in the «Missed calls» call list of
the handset.
Example of menu access to this list from the handset idle display:
Call up Menu > Call lists > Missed calls, then ...
O K
or
O K
Using the Up and Down arrows of the selector key, select an
entry.
View system message list / system call list or select for viewing
The idle display reads «MAIL LIST», «MAIL», «LIST», «mail LIST», or
«mail».
0
Either press the [0] key long or …
O K
... press the selector key at the top.
When only one of the two lists contains entries, this list is opened
immediately. You may now scroll through the list entries of the
opened list by pressing on the Up or Down arrows of the selector
key. See next page!
Message Lists And Call Lists
Page 83

Messaging on Secury Server and Mobility Server I 33 / CS I55
83
GB
When both lists contain entries, the display reads «Mail list». You
may change between «Mail list» and «Call list» by pressing the Up
or Down arrows of the selector key.
O K
Select the mail list or the call list and
O K
Confirm the selected list with the selector key [OK] in order to open
it (press in the middle of the key).
Scrolling in an open system list
O K
or
O K
Scroll through the list by pressing the Up or Down arrows of the
selector key. The display reads e.g. «6789 Conference 15.05
12:26».
If the message does not fit in one line
If the message comprises more than 16 characters, at first it is shown in
abbreviated form in text line 1. You can have the message having
32 characters max.
1
displayed.
#
Press the [Hash] key long. Instead of the date, the rest of the
message appears in text line 2.
Deleting a message or a call from a list
Have the message or the call displayed, then …
0
Press the [0] key.
Callback to a person calling from the system call list
Have the call or message displayed, then …
Message Lists And Call Lists
1
When the message received has more than 32 characters, the message
is cut off after the 31
st
character. The 32nd character is a dot indicating
that a part of the message has been cut off.
Page 84

Messaging on Secury Server and Mobility Server I 33 / CS I55
84
GB
Answer
6 1 2
Instead of the system lists, use the comfortable message lists and
call lists of the handset at Menu > Message lists > ... and Menu >
Call lists > ... . See also the tips on the previous pages.
Message Lists And Call Lists
Page 85

Messaging on Secury Server and Mobility Server I 33 / CS I55
85
GB
Transmitting a message
Transmitting a fixed text
Ü
Press the [Star] key long, then the right softkey. The display
reads «Mail address».
or
Press the right softkey long. The display reads «Mail address».
or
Call up Menu > Message lists > Outgoing
messages, then
1
2
A B C
3
D E F
4
G H I
Enter the user number.
Ü
Press the star key. The display reads «1234».
7
P Q R S
8
T U V
Enter the number of fixed text 1, e.g. 78. The display reads
«1234*78».
Ü
Press the [Star] key. The display shows the fixed text, e.g.
«1234*Meeting in room».
( You can make corrections and enter another number for another
fixed text with the left softkey.)
#
Press the [Hash] key. The display briefly reads «Message is
transmitted».
Performance check
As described on the next page!
1
The fixed texts are stored centrally. A list of fixed texts is available from
your system administrator.
You may store a full message transmission procedure locally in the
phonebook, e.g.
, #, 1234, Star, 78, # or – after adding 109 – , #,
1234, Star, 78, Star, Star, 109, #. This makes sense e.g. for emergency
calls!
The key sequence
, # stored in the phonebook starts the messaging
when a call is triggered.
Page 86
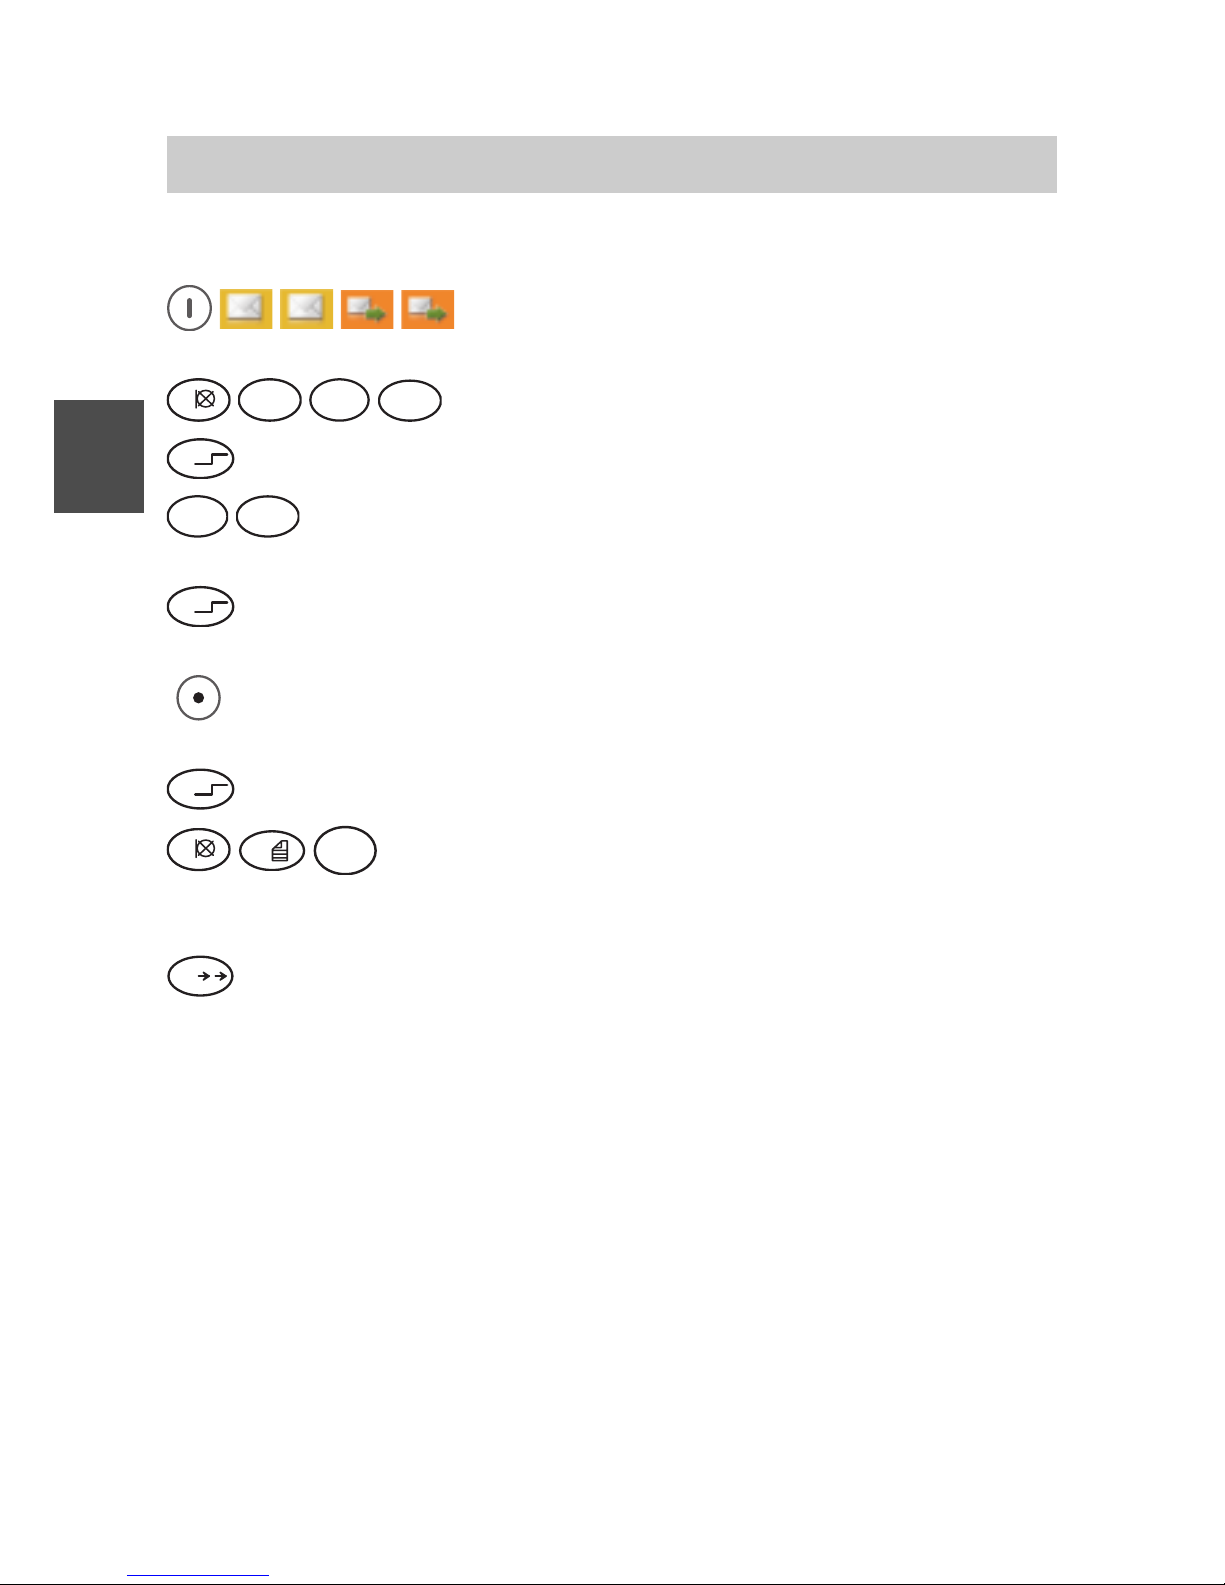
Messaging on Secury Server and Mobility Server I 33 / CS I55
86
GB
Transmitting a message
Transmitting a fixed text with added digits
Call up Menu > Message lists > Outgoing
messages, then
1
2
A B C
3
D E F
4
G H I
Enter the receiver number.
Ü
Press the [Star] key. The display reads «1234*».
7
P Q R S
8
T U V
Enter the number of the fixed text, e.g. 78. The display reads
«1234*78».
Ü
Press the [Star] key. The display shows the fixed text, e.g.
«1234*Meeting in room».
(
You can make corrections and enter another number for another
fixed text with the left softkey.)
Ü
Press the [Star] key.
1
0
9
W X Y Z
Add the desired digits, e.g. 109. The display shows the
fixed text followed by the added digits, e.g. «1234*Meeting in
room 109».
#
Press the [Hash] key. The display briefly reads «Message is
transmitted».
Performance check
If transmission was successful, the display reads «POS Meeting ...» after
a short time.
When the user sends a negative acknowledgement or cannot be reached,
the display reads «NEG Meeting ...» after a short time.
If the user is not known or has failed to react to a message with a request
for manual acknowledgement, the display reads «??? Meeting ...» after a
short time.
Page 87

Messaging on Secury Server and Mobility Server I 33 / CS I55
87
GB
Transmitting a message
Transmitting a direct call
A direct call transmits a fixed text to a fixed addressee (single user or
group) with a fixed direct calling number. In this example, the direct call is:
«Direct call text».
A list of direct calling numbers is available from your system administrator.
Call up Menu > Message lists > Outgoing
messages, then
4
G H I
3
D E F
2
A B C
1
Enter the direct calling number, e.g. 4321.
#
Press the [Hash] key.
Performance check
If transmission was successful, the display reads «POS direct call text»
after a short time.
When the user sends a negative acknowledgement or cannot be reached,
the display reads «NEG direct call text» after a short time.
If the user is not known or has failed to react to a message with a request
for manual acknowledgement, the display reads «??? Direct call text» after
a short time.
Page 88

FC4 / FC4 Ex (HS) connected with Mobility Server
88
GB
Technical data / accessories
Business Handset FC4
Not suitable for operation in potentially explosive atmospheres except for
zone 2 and zone 22 as specified in the manufacturer’s declaration!
Standard: DECT
TM
(Digital Enhanced
Cordless Telecommunications)
Dimensions: 141 mm x 47 mm x 20 mm incl. antenna
141 mm x 47 mm x 30 mm incl. antenna
and clip
Weight of handset: aprox. 112 g (including battery and clip)
Type of battery: Lithium-ion battery
Operating time of handset Talking
1
: 12 hours to 17 hours
(with fully charged battery): Standby 1: 32 hours to 150 hours
Charge time: around 5 hours (for an exhausted battery)
Frequency range: 1,88 GHz ... 1,9 GHz
Radiated power 2: Mean value 10 mW; peak value 250 mW
Allowed operating Handset: – 10 °C to + 55 °C
temperature: Charger: + 5 °C to + 40 °C
Storage temperature: – 25 °C to + 55 °C (storage for a short period,
1 month max.)
0 °C to + 25 °C (12 months max.)
Transport temperature: – 20 °C to + 60 °C
Ring tone volume
3
: 80 dB SPL up to 90 dB SPL max.
at a distance of 30 cm from the sound source
1
The possible operating time depends on the settings of the display and
keyboard illumination. The operating time with and without idle display
illumination is specified. See ‘Phone settings’, ‘Display settings > Illumination ...’.
2
Versions with a reduced radiated power (peak value 50 mW) are
available.
3
SPL is the unweighted Sound Pressure Level. The volume depends on
the selected ring tone.
Page 89

FC4 / FC4 Ex (HS) connected with Mobility Server
89
GB
International IP 65; dust-proof and
protection class 1: protected against water jets (DIN EN 60529)
Accessories for the Desktop Charger DC4 Standard
charging set
2
: for charging one FC4 handset,
Plug-in power supply unit for Europe,
Plug-in power supply unit for Great Britain
Desktop Charger DC4 Plus for
charging an FC4 handset and a spare battery
Plus plug-in power supply unit for Europe
Plus plug-in power supply unit
for Great Britain
Other accessories
1
: Rechargeable spare battery pack
Headphones / headset
Carrying bag
MEM Card Manager
Applicable standards: See EC declaration of conformity
1
Protection class IP 65 only applies as long as the socket for the die
headphones / headset is plugged by the original plug!
2
Some accessories must be ordered separately.
Technical data / accessories
Page 90

FC4 / FC4 Ex (HS) connected with Mobility Server
90
GB
FC4 Ex (HS) – Explosion-proof versions
Overview of changes and supplements to the explosion-proof unit
versions FC4 Ex and FC4 Ex HS
Safety information
We have compiled safety information for you to enable safe handling with
explosion-proof units in a hazardous environment. Absolutely read and
follow this information before entering a hazardous area with an explosionproof FC4 Ex (HS).
Putting into operation
The battery is screwed to the housing with a locking screw. The FC4 Ex
(HS) has its own and specially equipped charger with its own plug-in
power supply unit. Other chargers and plug-in power supply units – e.g.
those intended for the FC4 – must not be used for charging the
FC4 Ex (HS).
Making phone calls / messaging
Operation of the telephone and messaging functions are the same for the
unit versions FC4 and FC4 Ex (HS).
Technical data
The explosions-proof versions FC4 Ex / FC4 Ex HS have a larger housing,
a slightly higher weight and slightly shorter talking and stand-by times than
the FC4 handset.
Accessories
As compared with the FC4 handset, the explosion-proof FC4 Ex /
FC4 Ex HS versions have ...
• a Desktop Charger DC4 Professional with part no. 50 1080 9200 and the
matching plug-in power supply unit with part no. 59 0060 2814. A UK
plug-in power supply unit is available for Great Britain. Please contact
your dealer.
• an explosion-proof battery with part no. 50 1082 8000
• The FC4 Ex may be operated only without headphones/headset. The
socket is permanently plugged with a plug which must not be removed.
Page 91

FC4 / FC4 Ex (HS) connected with Mobility Server
91
GB
• A headphones/headset with part no. 50 1010 5101 is available for the
FC4 Ex HS.
In addition, the FC4 Ex HS handset may be operated with all
headphones/headsets with an explosion protection approval. Read the
safety information!
FC4 Ex (HS) – Explosion-proof versions
Page 92

FC4 / FC4 Ex (HS) connected with Mobility Server
92
GB
FC4 Ex (HS) – Supplementary safety information
Further supplementary information on the use of explosion-proof handsets
in potentially explosive atmospheres in line with the intended use is
provided below.
EC prototype test certificate for the explosion-proof unit versions
The explosion-proof unit versions meet the regulation 94/9/EC. See also
the ”Technical data” section.
For explosion protection according to ATEX, the EC prototype test
certificate
Zelm ..... with the identifier
•
II 2 G Ex e ib IIC T4 (???nmn, neue Kennzeichnung eintragen)
applies for an ambient temperature range Ta= – 10 °C ... + 55 °C.
A list of standards which are met by the explosion-proof units as well as
the dates of issue of these standards can be found in the companion sheet
with part no. 50 1000 930
X. (???nmn, Sachnr. eintragen)
You may request the EC prototype test certificate from our service address
or download it from the internet at
http://www.messaging.funkwerk-ec.com
in the download section.
Use of units in potentially explosive atmospheres
In potentially explosive atmospheres only such units may be used which
comply with the basic safety and health requirements of directive 94/9/EC.
Explosion-proof units meeting this requirement carry the CE mark of
conformity, followed by the identification number of the Notified Body
supervising the quality assurance system and the explosion protection
symbol
.
Hazard degree of hazardous areas
There are hazardous areas (zones) with different hazard degrees. The
units may only be used in those zones which have no higher hazard
degree than that indicated by the manufacturer’s specification of unit
group and category on the unit. The company operating the units and the
system is responsible for defining these zones.
Page 93

FC4 / FC4 Ex (HS) connected with Mobility Server
93
GB
Batteries for explosion-proof units
Operate explosion-proof units only with the matching and approved
explosion-proof batteries! You can identify the allowed combination of unit
and battery from the lettering on the unit housing. The use of other
batteries which are not expressly approved is strictly forbidden as
otherwise the operating permit of the units in hazardous areas will expire
due to the missing explosion protection and because such a unit
constitutes a safety risk!
Allowed combination:
Explosion-proof units may be operated only with the explosion-proof
battery, part no. 50 1082 8000.
Replacing the batteries
The batteries of the explosion-proof units may be replaced only outside of
the hazardous areas. The company operating the system and the units is
responsible for execution of the battery replacement with the necessary
care and for compliance with the designed safety precautions – in that
case proper screwing-on of the battery with the locking screw.
Batteries must not be separated from the unit in hazardous areas with a
potentially explosive atmosphere.
Charging the batteries
The chargers are not explosion-proof and therefore may be installed
and used only outside of hazardous areas. That is why charging of
the batteries is allowed only outside of hazardous areas, too.
Use only the system-compatible Desktop Charger DC4 Professional with
part no. 50 1080 9200 and the associated plug-in power supply unit with
part no. 59 0060 2814.
The use of other chargers is strictly forbidden since the batteries might
overheat and be damaged.
Use of bags for explosion-proof units with and without a clip
If units with a bag are to be used in hazardous areas with potentially
explosive atmospheres, there are two options:
• Use of an explosion-proof unit with a clip along with a bag, part no.
50 1011 7500
FC4 Ex (HS) – Supplementary safety information
Page 94

FC4 / FC4 Ex (HS) connected with Mobility Server
94
GB
• Use of an explosion-proof unit without a clip in a bag, part no.
50 1011 7501
Attention: Explosion-proof units without a clip may be brought into
hazardous areas with potentially explosive atmospheres and operated
there only in the special bag with part no. 50 1011 7501.
In addition, the following conditions must be met:
• Only a qualified electrician with special knowledge in explosion
protection is allowed to remove or fit the clip of an explosion-proof unit.
• The explosion-proof unit without a clip must be put into the special bag
with part no. 50 1011 7501 before bringing it into hazardous areas with
potentially explosive atmospheres.
• It must be ensured that the unit without a clip will not be removed from
the bag with part no. 50 1011 7501 while still staying in hazardous areas.
The use of other protective or carrier bags may constitute an explosion
hazard and is therefore not allowed!
Working on the explosion-proof unit
All work on the unit as well as charging and replacing the batteries must
be carried out outside of the hazardous areas.
All modification on the unit as well as any interventions may only be
carried out by the manufacturer or by qualified persons having been
trained and authorised by the manufacturer.
Putting the unit back into operation after interventions
After each intervention into an explosion-proof unit (repair) and before
putting the unit back into operation, in the Federal Republic of Germany an
authorised testing agency must have properly ascertained and
documented that the unit in question meets the requirements of the
german regulations known as BetrSichV as far as essential explosion
protection features are concerned.
Observe any deviating regulations issued by local authorities of the
country where the units are operated.
(BetrSichV = German regulations on safety and health protection when
making working means available and using them for work, on security
when operating systems needing supervision and on the organisation of
in-house industrial safety measures).
FC4 Ex (HS) – Supplementary safety information
Page 95

FC4 / FC4 Ex (HS) connected with Mobility Server
95
GB
Damaged units
Apparently or only presumably damaged units must never be introduced
into hazardous areas with potentially explosive atmospheres. If an
apparently or presumably damaged unit is present in a hazardous area
with potentially explosive atmospheres, it must be switched off
immediately and removed from the hazardous area. Unintended switching
on and setting into operation again must absolutely be avoided.
Expiry of explosion protection operating permit (Ex certificate)
Any modification of the unit or of unit parts that has not been approved by
the manufacturer will invalidate the operating permit for this unit.
In that case, the unit must not be introduced into hazardous areas with
potentially explosive atmospheres or used there.
Use of headset in potentially explosive atmospheres
FC4 Ex
The use of headphones / headset with an explosion-proof unit version
FC4 Ex is not allowed!
To maintain the explosion protection, the sealing plug is permanently glued
into the socket. When this plug is removed, the operating permit for the
explosion-proof unit expires.
FC4 Ex HS
The explosion-proof handsets with the designation FC4 Ex HS may be
operated either with the headphones / headset, part no. 50 1010 5101 or
with headphones / headsets having their own explosion protection
approval.
The explosion protection of this FC4 Ex HS handset is limited to gas
explosion protection. When this handset is operated without headphones /
headset, the socket must be plugged with the original plug. Otherwise the
operating permit for the explosion-proof unit will expire.
Service adapter socket
On the rear of the explosion-proof unit, a service adapter socket is
provided which in the ex-works condition is plugged with a rubber plug.
The explosion-proof unit may only be brought into hazardous areas with
potentially explosive atmospheres and operated there when the service
FC4 Ex (HS) – Supplementary safety information
Page 96

FC4 / FC4 Ex (HS) connected with Mobility Server
96
GB
adapter socket is plugged with the undamaged original plug.
Operating instructions of company operating the system
The present manual does not substitute the operating instructions to be
prepared by the company operating the system.
FC4 Ex (HS) – Supplementary safety information
Page 97

FC4 / FC4 Ex (HS) connected with Mobility Server
97
GB
FC4 Ex (HS) – Putting into operation
Inserting the MEM card into the FC4 Ex
Inserting the MEM card is the same procedure as for the FC4 handset.
See ‘Putting the FC4 into operation’.
Inserting the battery into the FC4 Ex
Attention: Observe the safety information for replacing the battery of
explosion-proof handsets!
• Slide the battery into the housing (1).
• Push battery down on the screw side until it makes contact with the
housing (2).
• Fasten the battery with the locking screw (Torx T10) (2). The maximum
tightening torque of the screw is 60 Ncm. We recommend using the
screwdriver with part no. 50 1010 5300. This screwdriver is also
available in a set of 5 with the part no. 50 1010 5400.
Setting up the Desktop Charger DC4 Professional with the part no.
50 1080 9200 and the associated plug-in power supply unit (only
outside of potentially explosive atmospheres)
Place the charger on a solid, level surface, e.g. on a table. Choose a
location outside of potentially explosive atmospheres that is protected
against direct sunlight and moisture.
• Plug the small connector of the associated plug-in power supply’s
connecting cord into the socket at the rear of the charger.
• Connect the plug-in power supply unit with a socket outlet.
The FC4 handset and the FC4 Ex handset have different housing
dimensions and therefore use different chargers.
The charger is now ready for operation.
Page 98

FC4 / FC4 Ex (HS) connected with Mobility Server
98
GB
Charging the battery in the FC4 Ex handset
Put the FC4 Ex handset into the Desktop Charger DC4 Professional. You
hear a confirmation tone provided this feature has been activated in the
“Phone settings > Audio settings > Tones > In charger”. The keyboard
illumination lights up for a short time provided this feature has been
activated in the “Phone settings > Display > Illumination > Keyboard”.
The handset switches itself on when it has been switched off before being
placed in the charger.
The battery symbol in the symbol line will be moving until the battery is
fully charged. The batteries heat up slightly during the charging process.
This is quite normal.
As soon as the battery is fully charged, charge retention starts. A fully
charged battery is indicated by a green ”Battery charged” symbol with a
flashing frame.
Charging the spare battery
An open bay intended for charging a spare battery is provided on the rear of
the Desktop Charger DC4 Professional. Put a battery with the contact faces
facing downwards and the locking screw bore facing the outside into the bay
and push it gently against the contact springs in the bay. As soon as the
contact is provided and charging starts, the LED at the bottom front of the
charger lights up red. When the battery is fully charged, the LED colour
changes from red to green. The LED goes out after removing the battery.
Information on battery use
After installing a battery, place the handset into the charger until the
battery symbol lights up green. The battery is now fully charged.
You may as well leave the handset in the charger for a longer period. The
battery charging management changes over from normal charging to
charge retention as soon as the battery is fully charged and thus prevents
harmful overcharging.
When the handset is not to signal any calls while being placed in the
charger, you must activate the “Silent charging” function (Menu > Settings
> Phone settings > Phone behaviour > Silent charging).
Leave neither the handset nor the battery in the blazing sun as high
temperatures shorten the battery’s service life.
FC4 Ex (HS) – Putting into operation
Page 99

FC4 / FC4 Ex (HS) connected with Mobility Server
99
GB
FC4 Ex (HS) – Technical data / accessories
FC4 Ex / FC4 Ex HS handset (explosion-proof version)
Standard: DECT
TM
(Digital Enhanced
Cordless Telecommunications)
Dimensions: 141 mm x 47 mm x 25 mm without a clip
141 mm x 47 mm x 36 mm with a clip
Weight of handset: ca. 140 g (including battery and clip)
Type of battery: Lithium-ion battery
Operating time of handset Talking
1
: 12 hours to 17 hours
(with fully charged battery): Standby 1: 32 hours to 150 hours
Charge time: around 5 hours (for an exhausted battery)
Frequency range: 1,88 GHz ... 1,9 GHz
Radiated power 2: Mean value 10 mW; peak value 250 mW
Allowed operating Handset: – 10 °C to + 55 °C
temperature: Charger: + 5 °C to + 40 °C
Storage temperature: – 25 °C to + 55 °C (storage for a short period,
1 month max.)
0 °C to + 25 °C (12 months max.)
Transport temperature: – 20 °C to + 60 °C
Ring tone volume
3
: 80 dB SPL up to 90 dB SPL max.
at a distance of 30 cm from the sound source
International protection IP 65; dust-proof and
class
4
for FC1 Ex: protected against water jets (DIN EN 60529)
1
The possible operating time depends on the settings of the display and
keyboard illumination. The operating time with and without idle display
illumination is specified. See ‘Phone settings’, ‘Display settings > Illumination ...’.
2
Versions with a reduced radiated power are available
(peak value: 50 mW)
3
SPL is the unweighted Sound Pressure Level. The volume depends on
the selected ring tone.
4
International protection class IP 65 only applies with the glued-in original
plug. Operating the handset with headphones/headset is not allowed!
Page 100

FC4 / FC4 Ex (HS) connected with Mobility Server
100
GB
International protection IP 65; dust-proof and
class
1
for FC1 Ex HS : protected against water jets (DIN EN 60529)
Accessories
2
: Desktop Charger DC4 Professional,
part no. 50 1080 9200 with
plug-in power supply unit for Europe,
part no. 59 0060 2814
Plug-in power supply unit for Great Britain
Rechargeable spare battery pack,
part no. 50 1082 8000
Carrying bag
MEM-Card-Manager
Headphones/headset, part no. 50 1010 5101,
for the FC4 Ex HS
Applied Standards: EC Prototype Test Certificate for explosion
protection
• EN 60079-0
• EN 60079-7
• EN 60079-11
• EN 61241-0
• EN 61241-1
1
International protection class IP 65 only applies as long as the socket
for the die headphones/headset is plugged by the original plugs!
Attention: When this handset is operated without headphones/headset,
the socket must be plugged with the original plug. Otherwise the
operating permit for the explosion-proof unit will expire.
2
Some accessories must be ordered separately.
FC4 Ex (HS) – Technical data / accessories
 Loading...