

Page 1
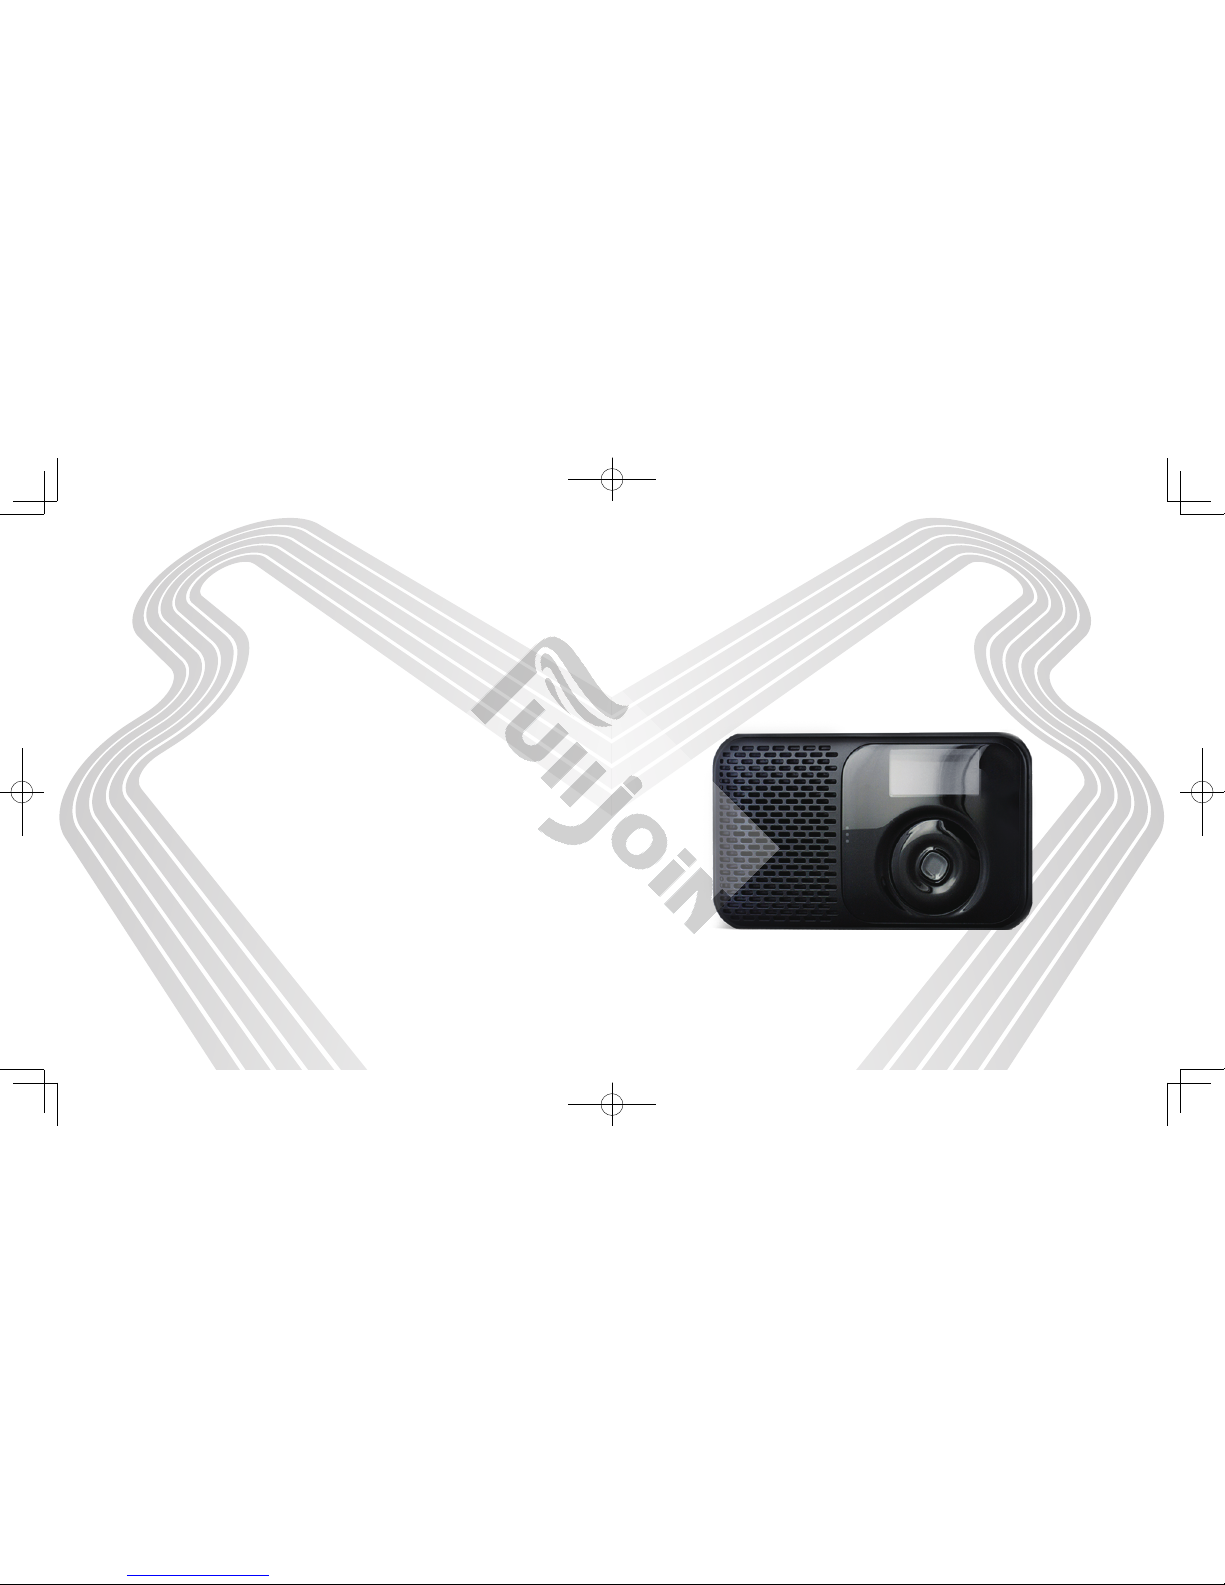
DAB/DAB+ Radio
User Manual
Page 2
DAB&FM
1
Quick Start Guide
Press and hold the Power Button for more than 3 seconds to turn on the
radio. The green power indicator will ash and then stay illuminates and start-up
screen will appear.
DAB Radio
When the DAB mode is selected for the rst time, press the Back Button to
enter into <Region> to select a region, the radio will automatically search for local
DAB and DAB+ radio stations. Selecting <Station List>, it will display all the radio
stations found and play the rst radio station automatically.
FM Radio
Press the Power Button once then switch to FM mode. Press the Back Button to
access the FM Main Menu.
Use the Control Wheel to select <Auto Program> and then press the Enter
Button, some new stations will replace the pre-stored radio stations.
MP3
MP3 les stored into a SD card, it can be played back through the radio by
inserting card into the card slot on the bottom of the radio.
Clock&Alarm
You can manually adjust the clock or use DAB and FM to synchronize the clock.
You can set either a DAB or FM broadcast radio as alarm.
When the alarm sounds, the radio will play the previously selected preset radio
station automatically.
Recording Function
It is possible to record FM or DAB broadcast to SD card. (Please ensure the SD
card was inserted before recording.)
Page 3
DAB&FM
2
DAB&FM
3
User Manual
1. Introduction ..........................................................................................................5
2. Packaging and Specication ...............................................................................5
2.1 Packaging .....................................................................................................5
2.2 Specications ................................................................................................5
2.2.1 DAB Function .......................................................................................5
2.2.2 FM Function...........................................................................................6
2.2.3 MP3 ......................................................................................................6
2.2.4 Time and Alarm......................................................................................7
2.2.5 Battery ...................................................................................................7
2.2.6 General ..................................................................................................7
3. Button Instruction
�����������������������������������������������������������������������������������������������������������8
4. Display Screen ....................................................................................................9
4.1 Playing Screen .............................................................................................9
4.2 Menu Screen ...............................................................................................10
4.3 Information Screen ...................................................................................... 11
4.4 Query Screen .............................................................................................. 12
5. Main Menu .........................................................................................................13
6. Mode Switching .................................................................................................14
7. DAB Menu .........................................................................................................15
7.1 Preset List ..................................................................................................16
7.2 Station List .................................................................................................16
7.3 Local Scan ..................................................................................................16
7.4 Manual Tune .............................................................................................17
7.5 Region .........................................................................................................17
7.6 DRC ............................................................................................................18
7.7 Record ........................................................................................................18
7.8 Sort .............................................................................................................18
7.9 System Setup .............................................................................................18
8. DAB Mode Operation ........................................................................................18
8.1 Basic Operation ..........................................................................................18
8.1.1 Power on DAB for the First Time .........................................................18
8.1.2 Power on DAB after the First Time ......................................................19
8.1.3 Selecting Stations ................................................................................19
8.1.4 Playing Stations ...................................................................................19
8.1.5 Storing Stations ...................................................................................19
8.1.6 Recalling Preset Stations ....................................................................19
8.1.7 Display Station Information..................................................................19
9. FM Radio Menu Introduction and Operation .....................................................20
9.1 Preset List ...................................................................................................20
9.2 Channel List ................................................................................................20
9.3 Seek Mode .................................................................................................. 20
9.4 Tune Mode .................................................................................................. 21
9.5 Auto Program .............................................................................................. 21
9.6 Clear All List ................................................................................................ 21
9.7 Region .........................................................................................................22
9.8 Scan Setting ................................................................................................22
9.9 Audio Setting ...............................................................................................23
9.10 Record ......................................................................................................23
9.11 System Setup ............................................................................................24
10. MP3 ................................................................................................................24
10.1 SD Card ....................................................................................................24
10.2 Audio Setting ............................................................................................25
10.2.1 Play Mode..........................................................................................25
10.2.2 Play Range ........................................................................................ 26
10.2.3 EQ .....................................................................................................26
10.3 MP3 User Interface for Display ................................................................27
10.4 Downloading les from a PC .....................................................................27
11. System Setup Menu Introduction and Operation .............................................28
11.1 Set Power Off Time ...................................................................................28
Page 4
DAB&FM
4
DAB&FM
5
1. Introduction
This digital radio with DAB, DAB+, FM and MP3 functions.
DAB stands for Digital Audio Broadcasting and it is the third-generation
broadcasting system after AM and FM analogue broadcasting. This new
transmission system has great anti-interference performance qualities,and can
eliminate noise and distortion during the transmission process, automatically
correcting errors, can also be amended which leads it to provide near CD-quality
sound.
DAB+ is the updated version of the DAB standard and is used in many European
countries as well as Canada, China and South Korea. The DAB+ standard is
based on HE-AACv2 and can deliver the same high quality sound at a much lower
bit rate.
As DAB Radio isn’t available everywhere in the world,It has FM radio function for
choosing.
In MP3 mode, it can play MP3 music les which stored into SD card.
2. Packaging and Specication
2.1 Packaging
Thank you for choosing the DAB radio, please check the accessories in the box
according to the list as below. If there is anything missing, please contact your
retailer
1. DAB radio device 1pc
2. USB 2.0 cable 1pc
3. Antenna 1pc
4. User Manual 1pc
2.2 Specications
2.2.1 DAB Function
¾
The DAB radio can receive and play all the Band III radio stations, the
11.2 Time Setup ................................................................................................29
11.2.1 Display Time & Date ..........................................................................29
11.2.2 Set Time & Date .................................................................................29
11.3 Alarm .........................................................................................................30
11.4 Brightness .................................................................................................30
11.5 Backlight TimeOut .....................................................................................30
11.6 Reset All ....................................................................................................30
11.7 Info ............................................................................................................30
12.Charging the radio ............................................................................................ 31
13.Using the Antenna ............................................................................................ 31
14.Safety Warning ................................................................................................. 31
Page 5
DAB&FM
6
DAB&FM
7
frequency range of DAB band III is 174.928MHZ-239.2MHZ
¾
Supports Region setting, so the device will search the appropriate band for
the radio stations when the user has set up the default Region.
¾
Supports local searching.
¾
Supports searching by preferred frequency channel.
¾
Supports DRC function.
¾
Supports recording function, and the default recording format is MP2 when
it is in DAB status. The default recording format is AAC when it is in DAB+
status. The capacity is up to the capacity of SD card.
¾
Supports preset, and the maximum number of preset station is 30.
2.2.2 FM Function
¾
Also you can use the device to receive and play FM radio stations, and the
FM frequency range is 87.5MHZ-108MHZ, the interval is 0.1MHZ.
¾
Supports searching and playing strong signal radio stations only.
¾
Supports playing the radio stations only in Mono mode.
¾
Supports searching and storing the radio stations automatically. The
maximum is 30 radio stations in the Channel list.
¾
Supports preset function, and maximum number of preset station is 30.
¾
Supports Tune and Seek mode.
¾
Supports recording function. The default recording format is MP3, and the
capacity is up to the capacity of SD card.
¾
Supports clearing all the pre-stored radio station list, including the preset list
and the channel list.
¾
Supports RDS function.
2.2.3 MP3
¾
The device supports playing music les from SD card.
¾
Playing mode supports <One Time>, <Repeat> and <Shufe> mode.
¾
Playing range can be <Single>, <Directory> and <All> les.
¾
Supports equalizer function.
¾
Supports play, pause, next, previous function.
2.2.4 Time and Alarm
¾
The time can be set up manually or off air using DAB or FM.
¾
The alarm will start with a radio station, and the user can set either a
DAB or an FM radio station at the alarm time, so the radio will turn on
automatically and play the preset radio station.
2.2.5 Battery
1. Build in 1260mAh Li-polymer battery, playing time is over 15 hours when using
the earphone, set the brightness to 0 and make the Speaker Switch to off.
2. Charging time: 5 hours.
3. The charging current: 300mAh
4. Circle times: over 300 times.
2.2.6 General
1. 3.5mm stereo earphone jack.
2. Built in speaker 1.5W
3. Dimension: 73*125*23.4mm (H*W*D)
4. Weight: 145 grams
Page 6
DAB&FM
8
DAB&FM
9
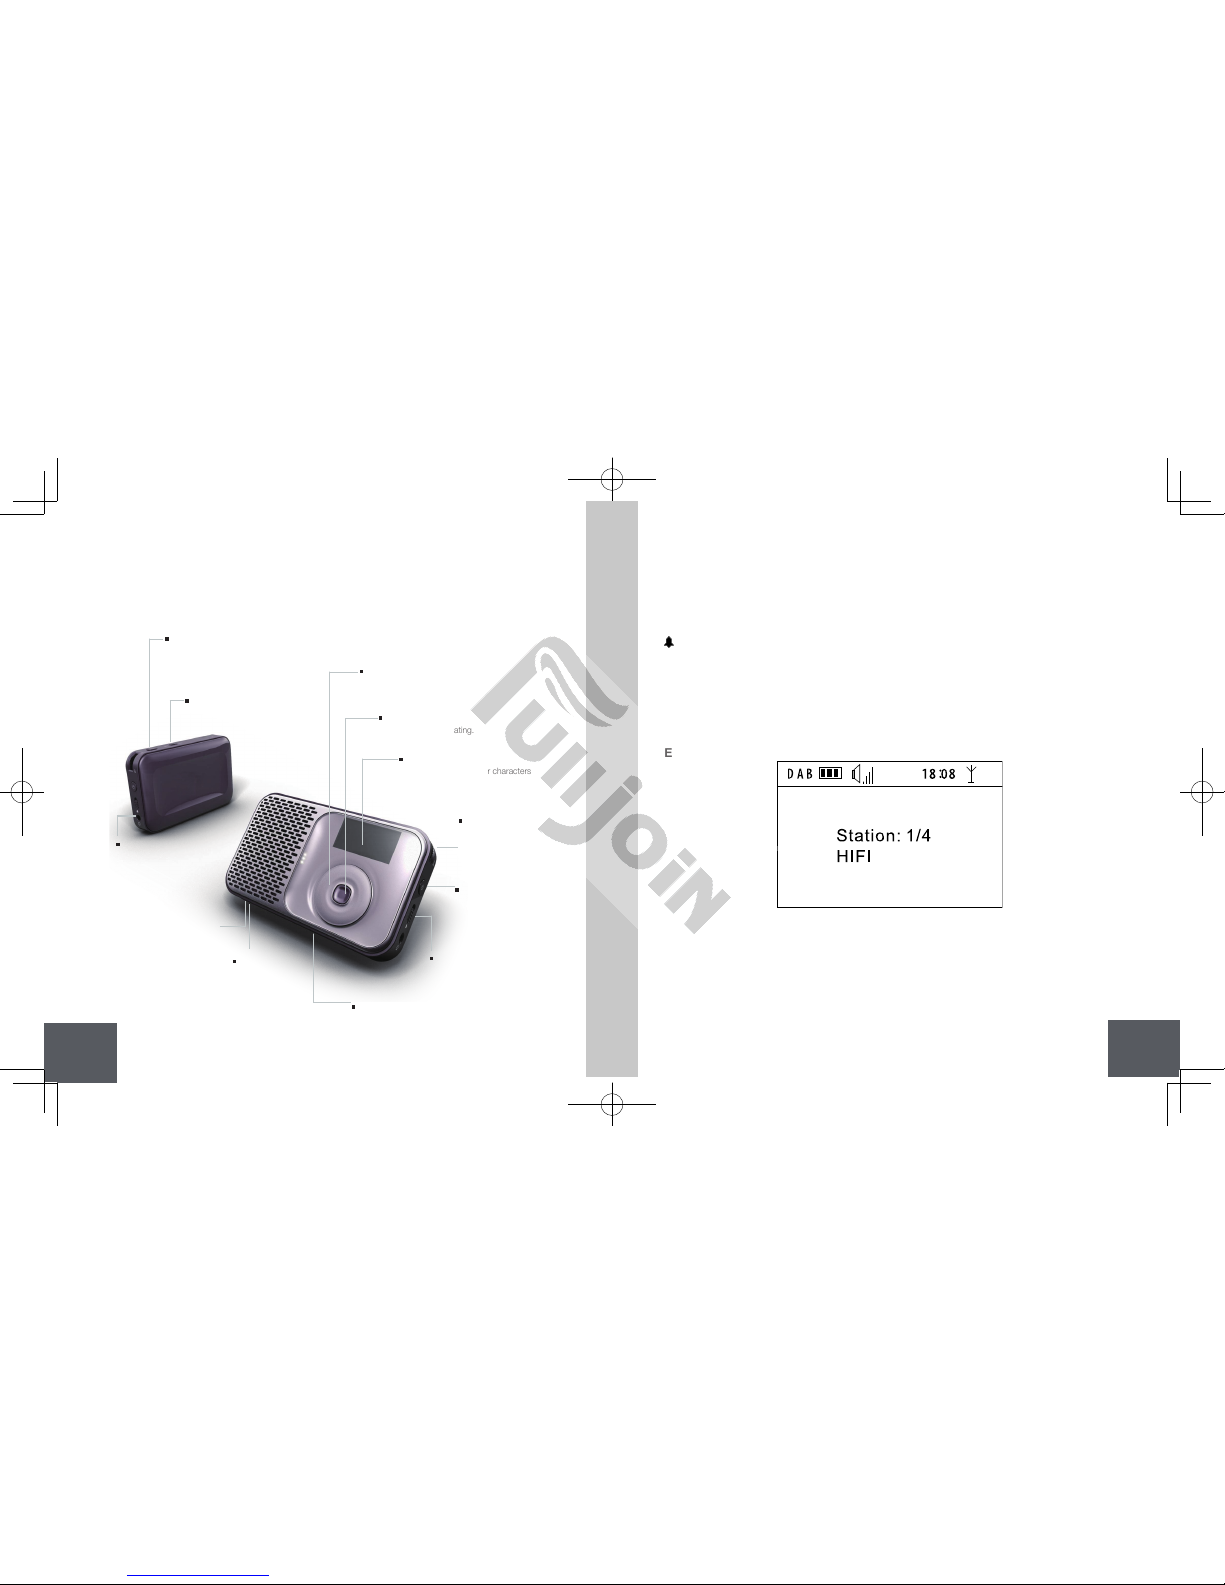
3. Button Instruction
LCD Display
Display all the pictures or characters
info.
Control Wheel
To select the menu entry by circling.
USB 2.0 cable socket
MicroSD Card
Slot
Plug in MicroSD
card to this slot.
Reset
To reset the device to original setting.
Enter Button
To confirm your operating.
Power Button
Long pressing is for
power on and power
off, short pressing is
for mode converting.
Volume
Clockwise rotation
is for higher voice,
and anti-clockwise
is for lower voice.
Back Button
Short pressing back to
upper menu. Long pressing
(3 seconds) back to main
menu under the function.
Speaker Switch
Left is speaker off, right is
speaker on.
Hold Switch
To lock all the buttons.
Headset or
Antenna Socket
Connect 3.5mm
stereo headset or
antenna.
4. Display Screen
4.1 Playing Screen
There are three modes: DAB, FM and MP3.
Battery icon: Displays the battery charge level.
: It will appear after the alarm is set.
VOL: Displays the current volume.
11:01: Displays the current system time.
Signal icon: Displays the signal strength.
In the DAB or FM mode, following a short press of the Enter Button, the radio
information will be displayed on the screen, (Note: only FM stations with RDS will
have information that can be displayed on the screen).
Example as below:
Page 7
DAB&FM
10
DAB&FM
11
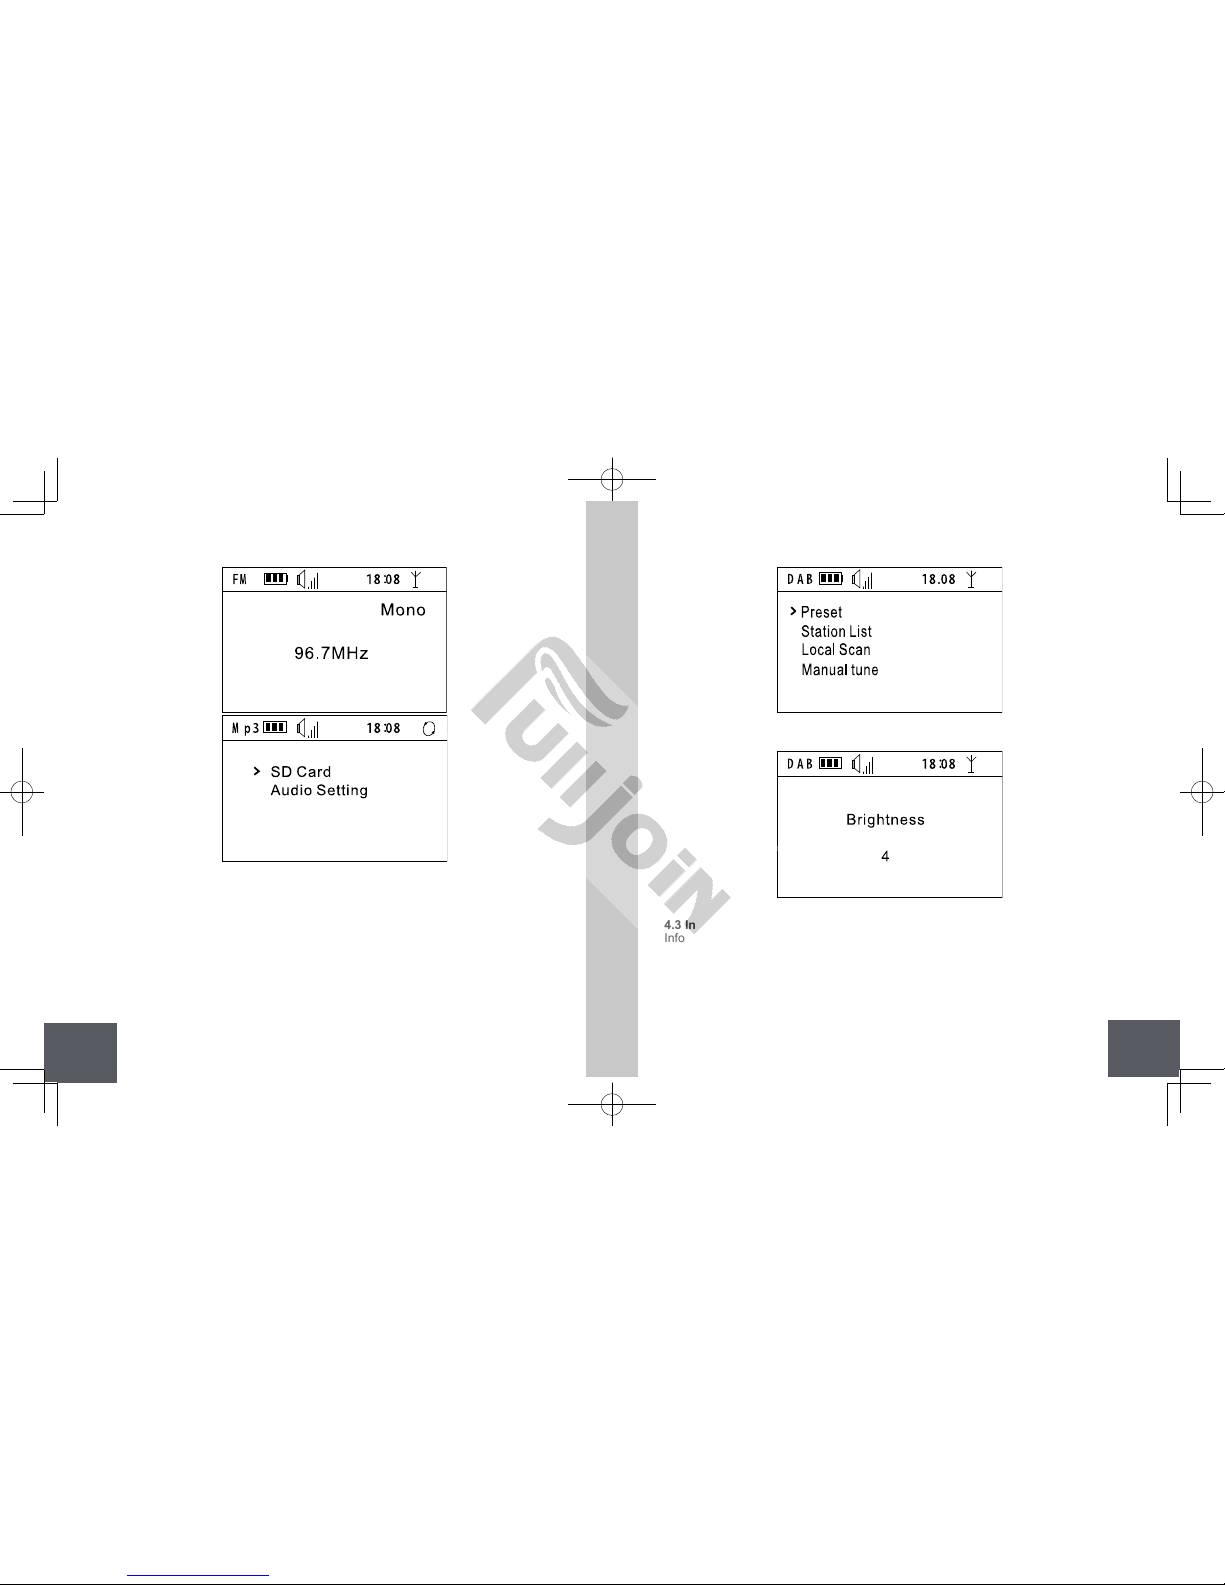
4.2 Menu Screen
A menu screen displays four options, with the currently selected option shows ‘>’.
If more than four options are available, use the Control Wheel to select it.
Make System Setup in the FM or DAB mode
Example: Adjust the Brightness, clockwise is for increasing the brightness, anticlockwise is for decreasing the brightness
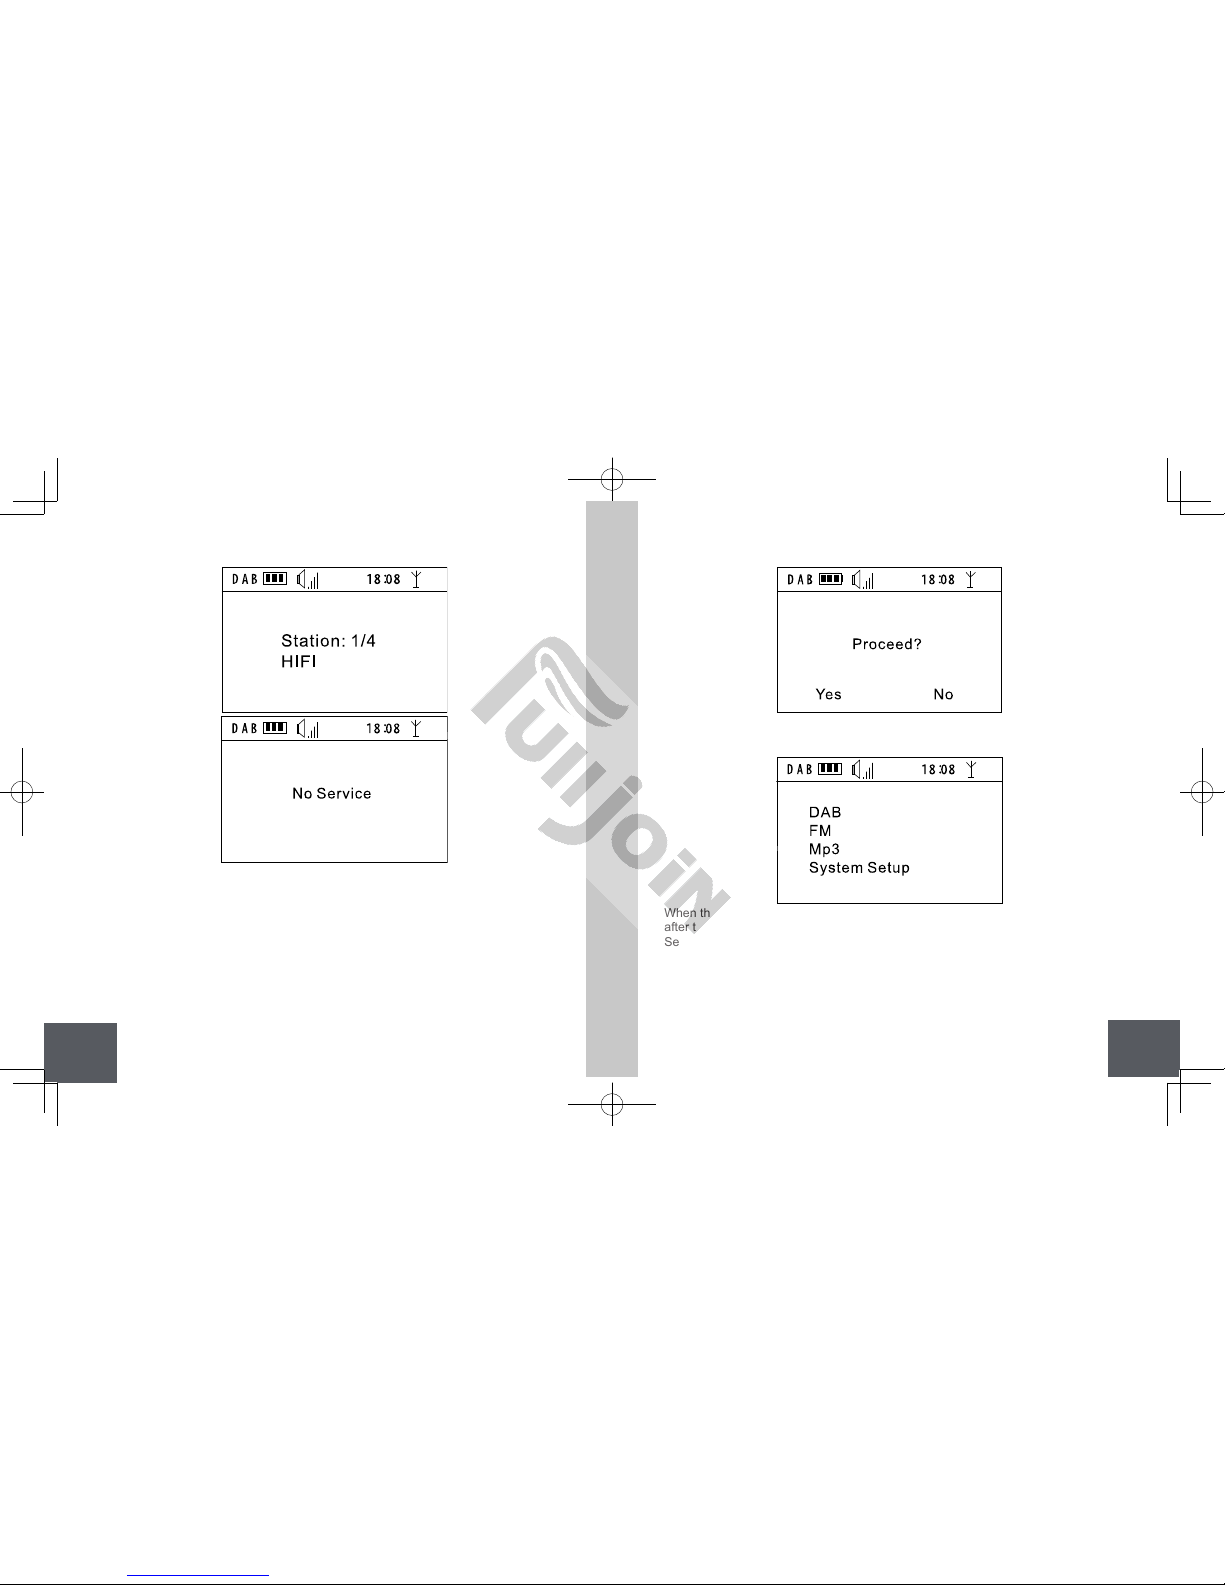
4.3 Information Screen
Information screens are used to display messages to the user.
Example as below:
It will back to the Main interface after 10 seconds if without nding any radio
stations.
Page 8
DAB&FM
12
DAB&FM
13
4.4 Query Screen
A query screen is used to offer the user a choice, you can respond with Yes
(Select Button) or No (Back Button).
Example Query Screen:
5. Main Menu
Main Menu Structure
When the radio is powered on for the rst time, it will show the <Main Menu>
after the start-up screen, there are 4 items: <DAB>, <FM>, <MP3> and <System
Setup>. Users can select <DAB>, <FM> or <MP3> mode.
Users can also select <System Setup> to set system parameters, please refer to
the <System Menu> to study how to set the system parameters.
When the DAB mode is selected, the radio will play the station that was selected
Page 9
DAB&FM
14
DAB&FM
15
last time. When it is powered on for the rst time, select the accordingly region,
it will search for DAB stations automatically, and when the search is nished, the
radio will store the list of DAB stations and display the number of received stations.
It will play the rst station in the list.
When the FM mode is selected, the radio will display the FM screen and will play
the station that was selected last time. When it is powered on for the rst time, the
default frequency is 87.5MHz.
When MP3 mode is selected, the radio will display the MP3 Menu.
6. Mode Switching
Under any menu, with a short press of the Power Button, it will switch among
DAB, FM and MP3 modes.
Each mode starts with a welcome interface, which will last for 1 second. As shown
below:
Access to DAB mode:
Welcome to DAB
Access to FM mode:
Welcome to FM
Access to MP3 mode:
Welcome to MP3
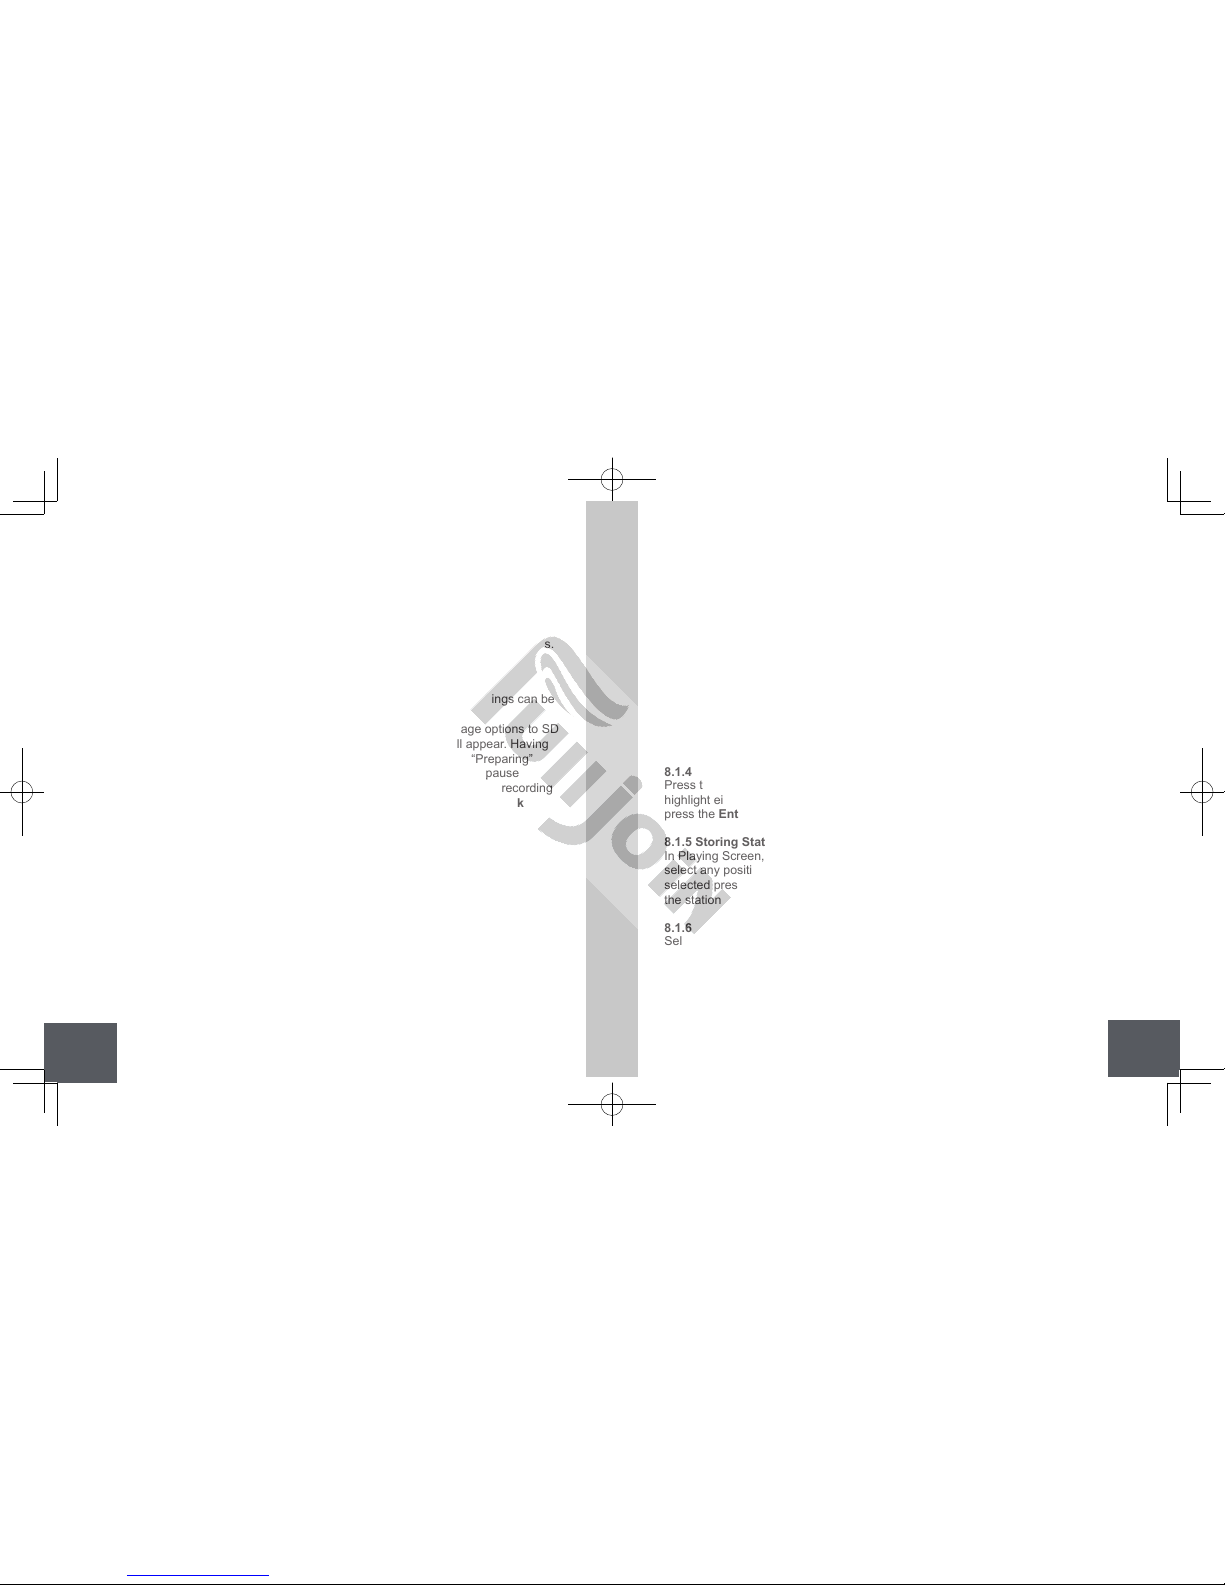
7. DAB Menu
DAB Menu Structure.
Page 10
DAB&FM
16
DAB&FM
17
7.1 Preset List
Display a list of preset stations. The preset stations are stored in the memory of
the DAB radio. A maximum of 30 presets can be stored.
7.2 Station List
Display a list of received stations. The preset stations are stored in the memory of
the DAB radio. A maximum of 30 presets can be stored.
7.3 Local Scan
Searches for local stations using the part of band III allocated to the region. When
<Local Scan> is selected, the radio will search for radio stations automatically and
display the search progress, and when the search is nished, the radio will store
the list of DAB stations, and display the number of radio stations found. Then it will
play the rst station in the list.
7.4 Manual Tune
Select a frequency under <Manual Tune>, then press the Enter Button to
manually search for radio stations on that frequency.
You can step through the list of frequencies each time, the radio will search for all
stations at that frequency. The process will take a few seconds, and when search
nished, the screen will display the number of radio stations found and will play
the rst station found. If no stations are found, it will display “0”. When the search
is nished, the radio will display the Playing Screen.
7.5 Region
You can select the appropriate region from the following: China, Korea, Europe
and UK
The different regions use the following frequency bands:
¾
China Band:7A-11D 176.720 MHZ-213.856 MHZ
¾
Korea Band; 7A-13C 175.280 MHZ -214.736 MHZ
Page 11
DAB&FM
18
DAB&FM
19
¾
Europe Band;5A-13F 174.928 MHZ -239.200 MHZ
¾
UK Band:11B-12D 218.640 MHZ -229.072 MHZ
7.6 DRC
Dynamic Range Control: Some broadcasts contain information to allow the radio
to compress the dynamic range of the audio to assist listening in noisy conditions.
The DRC can be set to three state: high, low and off. The default is off.
7.7 Record
In the DAB mode, you can record your favourite programs. The recordings can be
stored into the SD card.
In the DAB mode, select the <Record> menu; it will offer the storage options to SD
card if present. If SD card is not present, a warning “No card” will appear. Having
selected the desired storage option, the display will change to say “Preparing”
press the Enter Button to start to record. Press the Enter Button to pause
recording, and press the Back Button to stop recording. If you stop the recording
and then press the Enter Button, a new recording will start. Press the Back
Button can exit the recording screen.
7.8 Sort
The stations stored in the <Station List> can be stored either according to the
frequency or in alphanumeric order (which is the default setting).
7.9 System Setup
Please refer to <System Setup Menu introduction and operation> of this manual.
8. DAB Mode Operation
8.1 Basic Operation
8.1.1 Power on DAB for the First Time
When using the DAB mode for the rst time or after a Reset, press the Back
Button to enter into <Region> to select a region, the radio will automatically
search for local DAB and DAB+ radio stations, and when the search is nished, it
will show the <Station List> screen, which will display all of the stations found. It
will play the rst station in the list, and the radio will store all of the stations found.
8.1.2 Power on DAB after the First Time
When using DAB after the rst time, it will play the rst station that was stored in
the station list which was searched in the last time.
8.1.3 Selecting Stations
Turn the Control Wheel in Playing Screen or select <Station List> in the DAB
menu to the <Station List> screen. Press the Enter Button to select the desired
radio stations.
8.1.4 Playing Stations
Press the Back Button to show the DAB menu, turn the Control Wheel to
highlight either<Preset List> or <Station List>, then select the desired stations and
press the Enter Button to play it.
8.1.5 Storing Stations
In Playing Screen, long press the Enter Button will display <Save Preset> menu,
select any position under this menu and press the Enter Button to store the
selected present number. The screen will display “Preset Save”, conrming that
the station has been stored into the <Preset List> menu.
8.1.6 Recalling Preset Stations
Selecting <Preset List> in the DAB menu will display the list of preset stations,
select the desired preset station and press the Enter Button to play it.
8.1.7 Display Station Information
DAB radio with lots of digital information which can be shown with a short press
Page 12
DAB&FM
20
DAB&FM
21
of the Enter Button, then you can get information such as “Ensemble Label”,
”Ensemble Num”, “Service Type”, “Channels Mode” and “Bit Rate”.
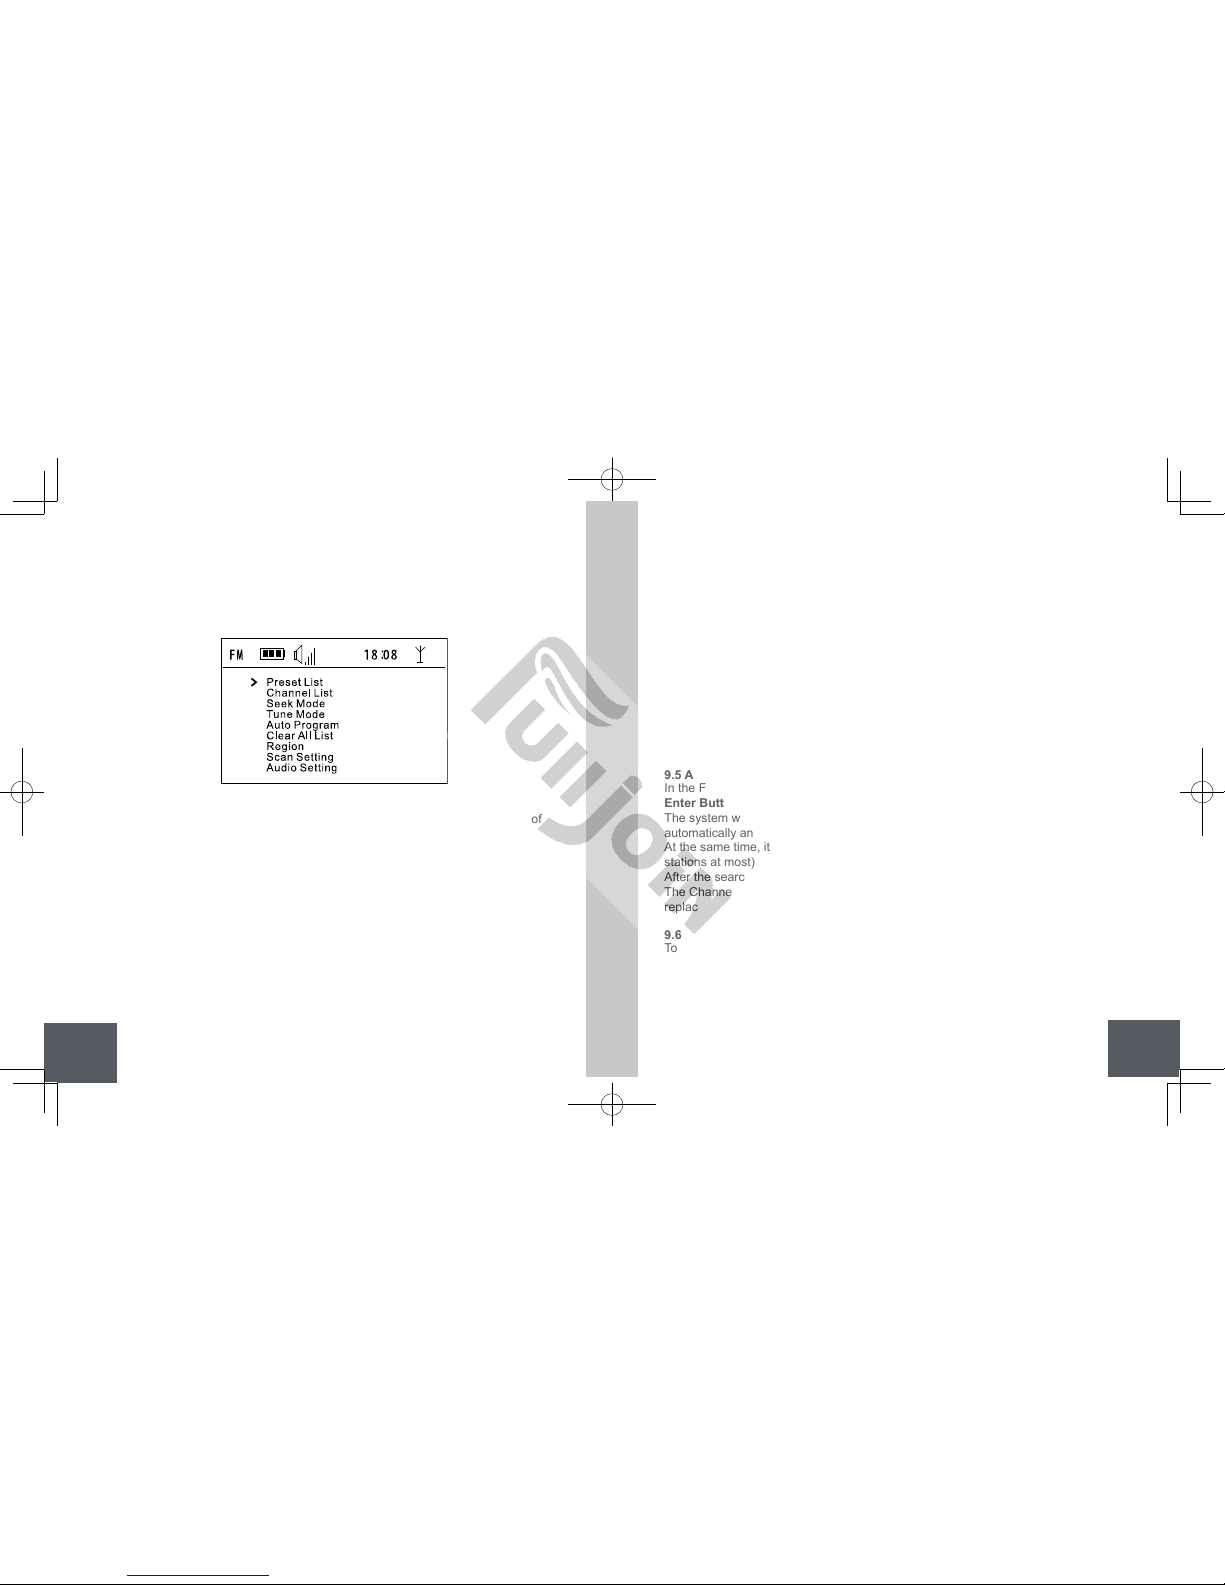
9. FM Radio Menu Introduction and Operation
FM Radio Menu Structure
9.1 Preset List
Display a list of preset stations. The preset stations are stored in the memory of
the radio. Up to 30 FM preset stations can be stored
9.2 Channel List
“Channel List” is a station search automatically generated by <Auto Program>.
The channel list will be updated each time while you select <Auto Program>.
Auto program found stations will be stored in the memory of the DAB radio; up to
30 stations can be stored.
The user can select any station from the list.
9.3 Seek Mode
Press the Back Button to go back to main menu, select <Seek Mode> and press
the Enter Button to search for stations automatically.
Turn the Control Wheel to search for FM stations automatically.
Clockwise is to seek in a frequency decreasing direction and anti-clockwise is to
seek in a frequency increasing direction.
When the seek function nds a radio station, it will stop and play that station
automatically.
9.4 Tune Mode
During the playing screen, press the Back Button to enter the FM main menu.
Turn the Control Wheel to <Tune mode>, press the Enter Button to enter into
<Tune Mode> for manual turning thereafter.
Turn the Control Wheel and the frequency will change by 0.1MHZ per step.
Clockwise is to decrease the frequency, anti-clockwise is to increase the
frequency.
Press the Enter Button until the desired radio stations is located.
9.5 Auto Program
In the FM menu, turn the Control Wheel to select <Auto Program> and press the
Enter Button to enter into <Auto Program> Mode.
The system will search the stations between 87.50MHz~108.00MHz
automatically and will show the frequency.
At the same time, it will store the received stations in the <Channel List>. (30
stations at most)
After the search is completed, it will automatically revert to the Channel List.
The Channel List will show the stored stations, and any pre-stored stations will be
replac
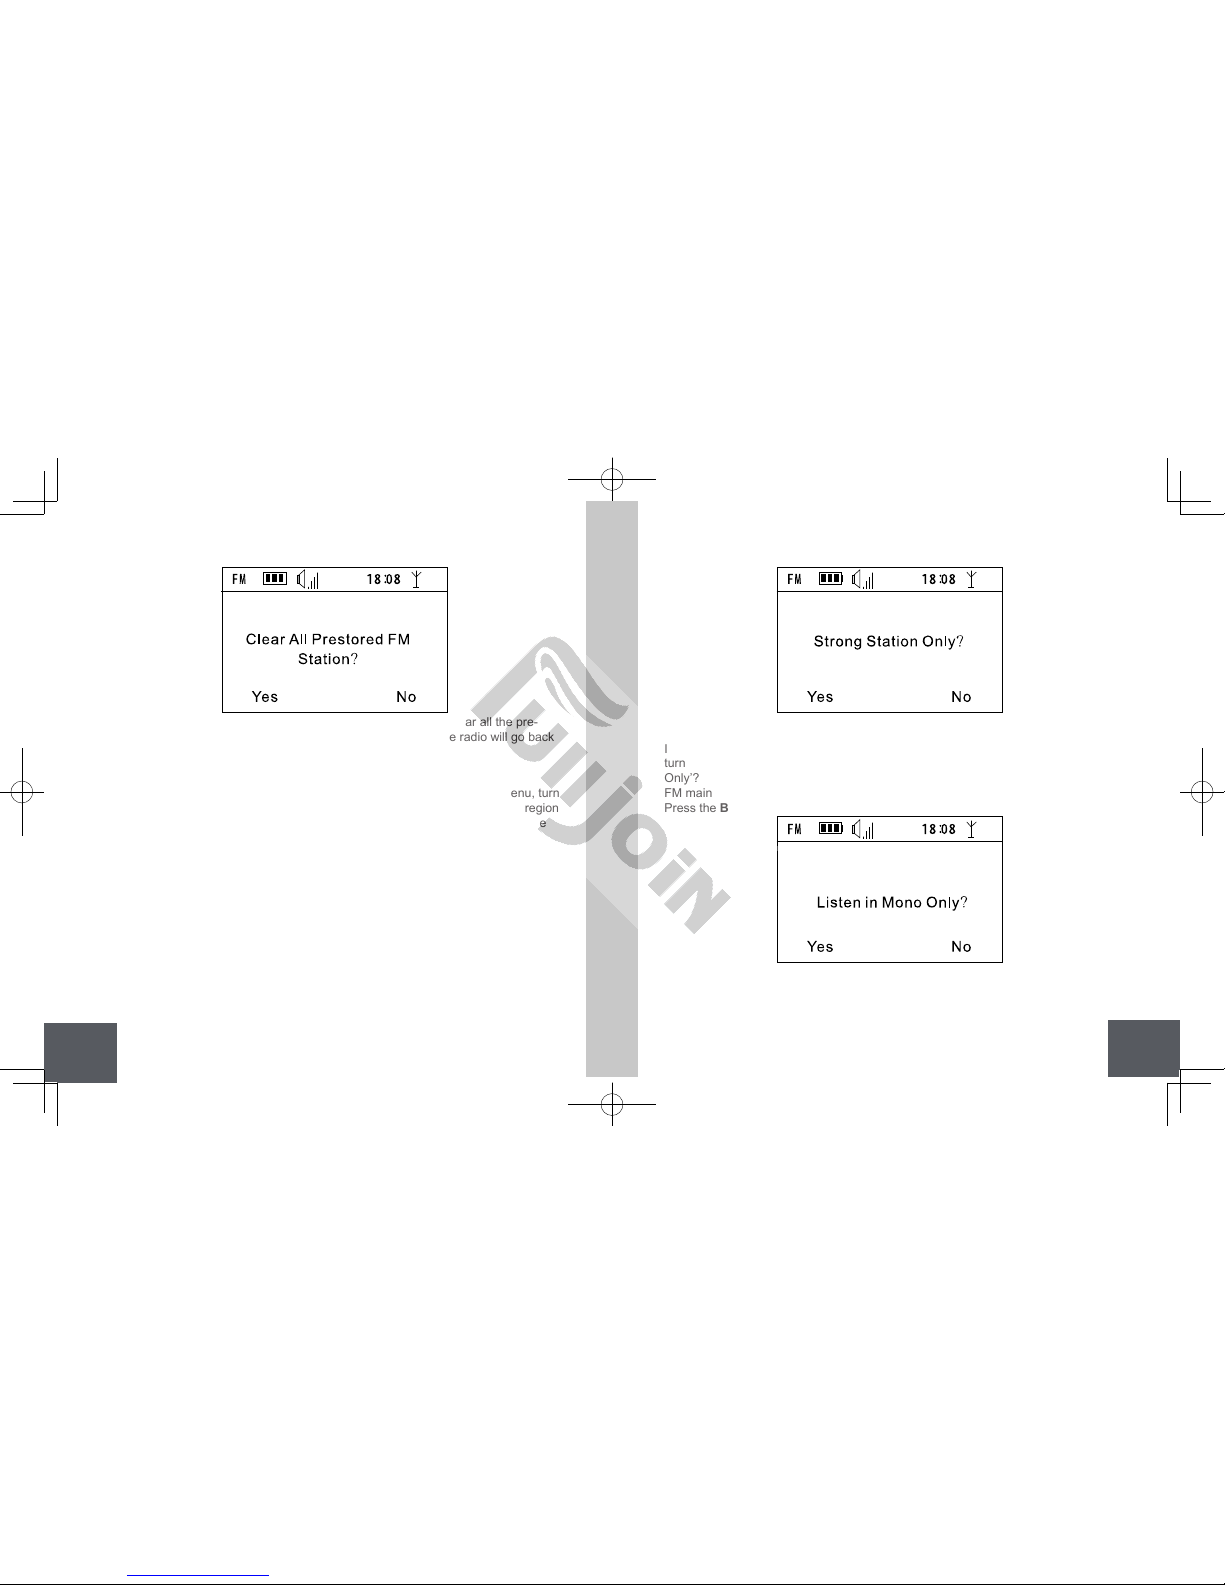
9.6 Clear All List
To access to the <Clear All List> menu during playing, press the Back Button to
display the FM main menu, and turn the Control Wheel to select <Clear All List>
and then press the Enter Button to enter into the menu.
In the <Clear All List >menu, you can delete all the stations in the <Channel List>.
Once selected, the screen prompt appears to conrm this action, as below
Page 13
DAB&FM
22
DAB&FM
23
If you choose “Yes” and press the Enter Button, the radio will clear all the pre-
stored stations in the Preset List and Channel List, and then the radio will go back
to the playing screen.
9.7 Region
In the playing screen, press the Back Button to enter into the FM main menu, turn
the Control Wheel to highlight <Region>, you can select the corresponding region
according to your location. The Region contains: USA, Europe, Japan; press the
Enter Button to save and go back to FM main menu,
9.8 Scan Setting
In the playing screen, press the Back Button and enter into the FM main menu,
turn the Control Wheel to <Scan Setting> and press the Enter Button. The
screen will show ‘Strong Stations Only’? Press the Enter Button, it will be set to
search Strong Stations Only and return to the FM main menu
Press the Back Button, it will not search strong stations only but will return to FM
main menu.
9.9 Audio Setting
In the playing screen, press the Back Button and enter into the FM main menu,
turn the Control Wheel to <Audio Setting>, the interface will show ‘Listen in Mono
Only’? Press the Enter Button will be set to Listen in Mono only and return to the
FM main menu;
Press the Back Button will not do the settings and return to the FM main menu.
9.10 Record
In the FM mode, you can record your favourite programs: the recordings can be
Page 14
DAB&FM
24
DAB&FM
25
stored into the SD card.
Insert the SD card before powering on the device, in the playing screen, press
the Back Button to enter into the FM main menu, turn the Control Wheel to
<Record>screen, and press the Enter Button to start to record.
To pause during the recording, press the Enter Button, and to stop recording,
press the Back Button. If you stop the recording and then press the Enter
Button, a new recording will start. Press the Back Button can exit the recording
screen.
9.11 System Setup
Please refer to <System Setup Menu introduction and Operation> of this user
manual.
10. MP3
MP3 Menu Structure
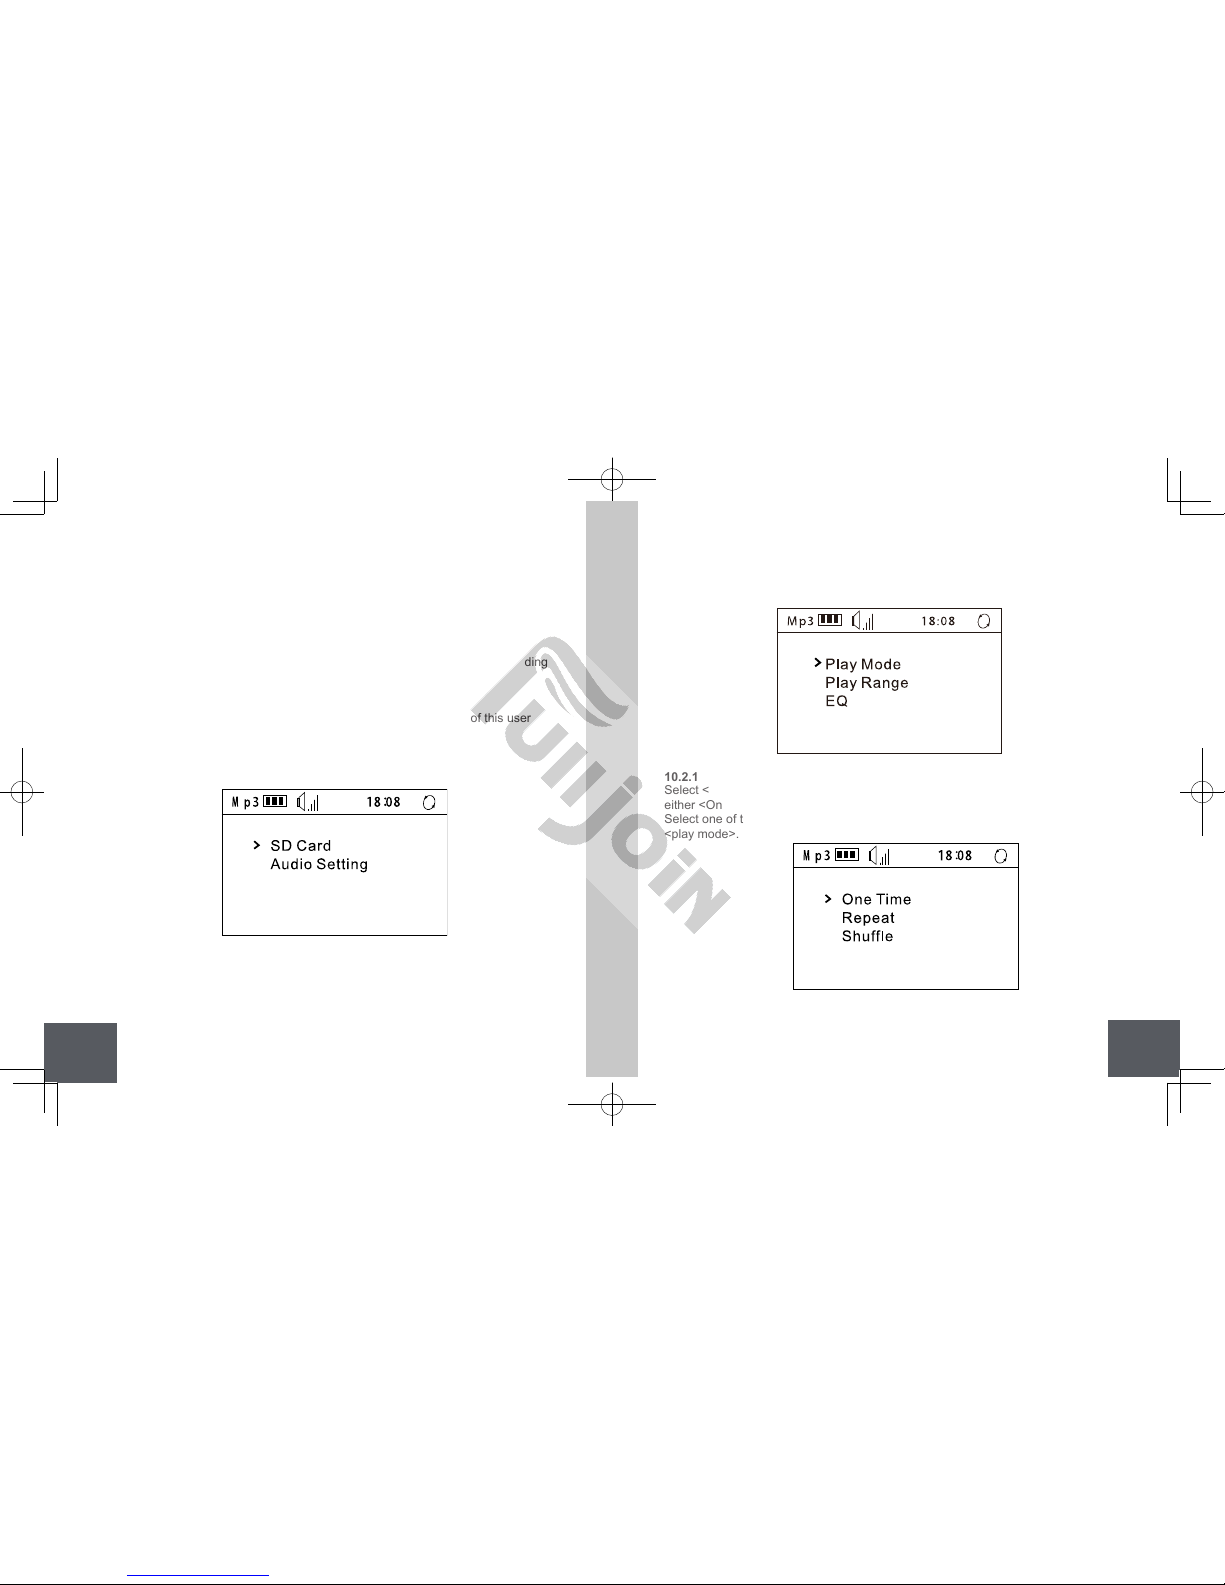
10.1 SD Card
In the MP3 main menu, turn the Control Wheel to SD card, press the Enter
Button to view SD card display and the audio les in SD card.
If there are not any audio les or directories, it will display“NO FILE
”;
If there is an audio le, press the Enter Button to play.
10.2 Audio Setting
10.2.1 Play Mode
Select <Play mode> and press the Enter Button, then it will set the play mode to
either <One Time>, <Repeat> or <Shufe>;
Select one of the three modes, then press the Enter Button to save and return to
<play mode>.
Page 15
DAB&FM
26
DAB&FM
27
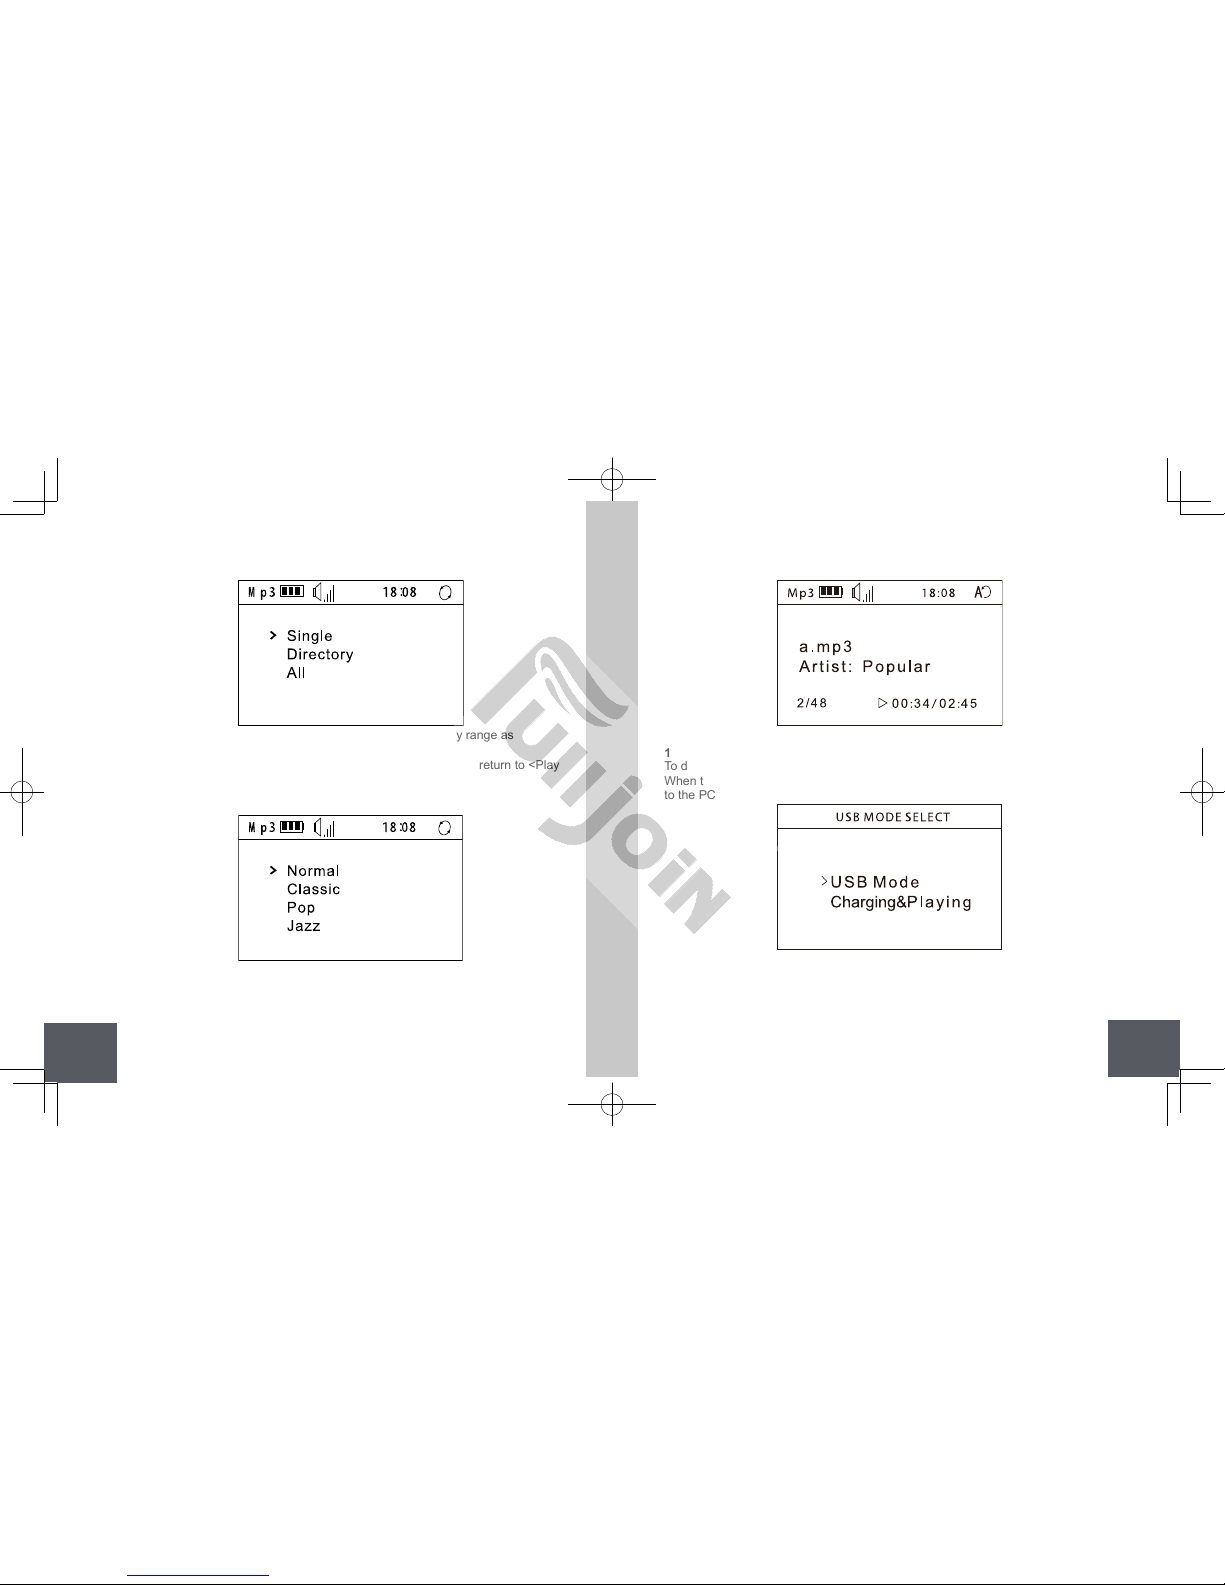
10.2.2 Play Range
Select < play range > and press the Enter Button to set the play range as
<Single>, <Directory>, <All>;
Select one of the three modes, press the Enter Button to save and return to <Play
Range>.
10.2.3 EQ
Select <EQ> to set the equalizer as <Normal>, <Classic>, <Pop>, <Jazz>,
<Bass>, <Rock>;
Select any one of six types, press the Enter Button to save and return to <EQ>.
10.3 MP3 User Interface for Display
10.4 Downloading les from a PC
To download les from a PC use the supplied USB cable.
When the radio is powered on, it will show the screen below when it is connected
to the PC by the USB2.0 cable.
Select <USB Mode>to enter USB mass storage mode.You may copy the songs
from the PC into the radio SD card,and play in MP3 mode.The previous mode will
be shown when the USB cable is unplugged.
When you choose<Charging & Playing Mode>,the <USB MODE SELECT>screen
Page 16
DAB&FM
28
DAB&FM
29
will disappear, and the previous mode will be displayed.
11. System Setup Menu Introduction and Operation
System Setup Menu Structure
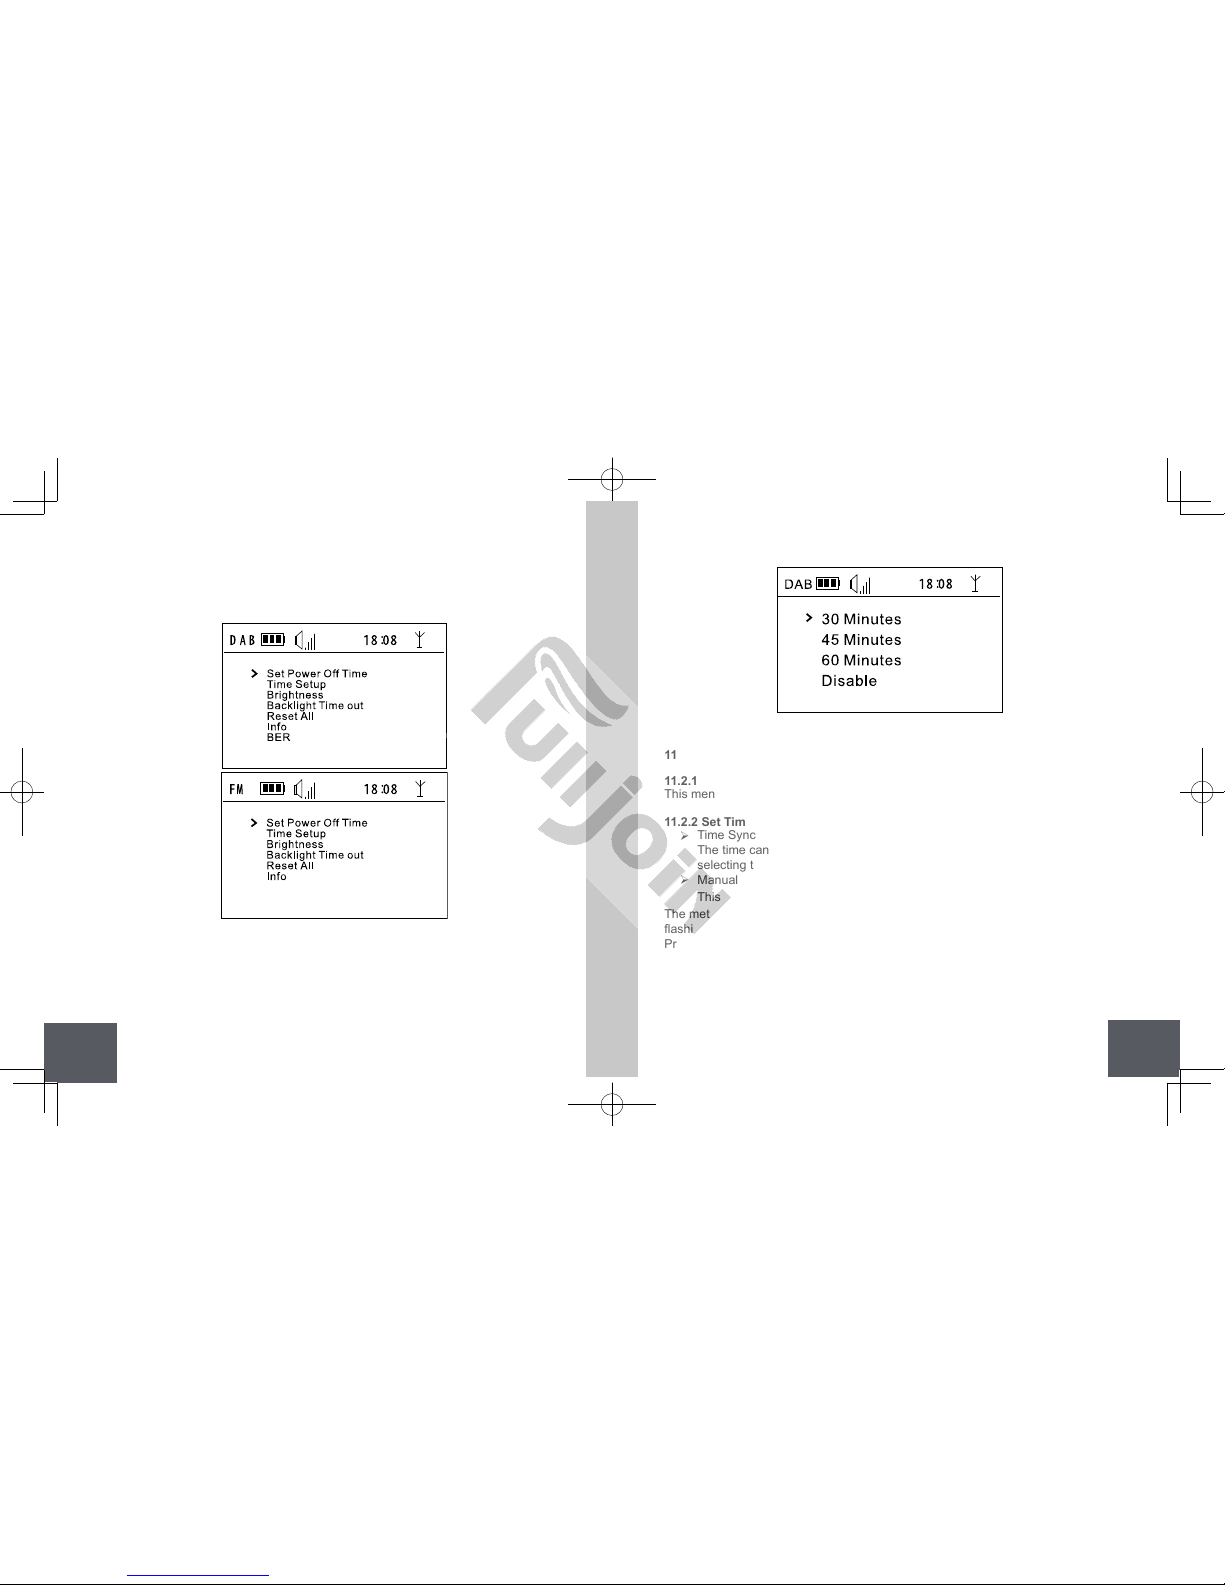
11.1 Set Power Off Time
You can set the <Power Off Time> automatically to either 60 minutes, 45 minutes
or 30 minutes as shown below:
The device will power off automatically after the selected time interval has passed.
11.2 Time Setup
11.2.1 Display Time & Date
This menu can display current date, time.
11.2.2 Set Time & Date
¾
Time Sync
The time can be synchronized by DAB or FM, in DAB or FM mode,
selecting this menu will automatically update the current display time.
¾
Manual Set
This menu can manually adjust the current time
.
The method is to turn the Control Wheel to adjust the number of the currently
ashing item to set the time.
Press the Enter Button to skip to the next one, the next one will start ashing,
adjust them in sequence.
When you reach the display of “week”, press the Enter Button and the settings
will be saved and change the currently displayed time.
Press the Back Button and go back to the previous menu.
Page 17
DAB&FM
30
DAB&FM
31
11.3 Alarm
You can set either a DAB or FM broadcast radio as alarm.
Use the Control Wheel to adjust the alarm information, and select one station in
the Preset List as alarm, then press the Back Button to save it.
When the alarm sounds, the radio will play preset radio station automatically.
11.4 Brightness
Selecting the <Brightness> menu allows you to set the current backlight
brightness. There are 8 levels 1-8, select the desired brightness value with a short
press of the Enter Button to save the setting.
11.5 Backlight TimeOut
Selecting the <Backlight TimeOut> menu allows you to select how long the
backlight remains on after a key press. There are 4 settings: 5s, 10s, 30s and
always on. Select the desired value with a short press of the Enter Button to save
the currently setting.
11.6 Reset All
Selecting the < Reset All> menu, the display will show “Proceed?” press the Enter
Button the device will be reset and will reboot automatically.
After resetting the system, the pre-stored DAB, FM stations and DAB radio
information will be lost.
After resetting, if choosing DAB mode, the radio will search DAB radio
automatically; if choosing FM mode, the default frequency is 87.5MHz.
11.7 Info
Selecting the <Info> menu, it will show the software information. Press the Back
Button will exit the screen.
12.Charging the radio
The radio can be charged by using the supplied USB 2.0 cable. For best results,
charge when it is off in order to ensure the battery is fully charged.
When the radio is off, plugging the USB2.0 cable in causes the indicator to light
Red during charging and extinguishes automatically after charging.
13.Using the Antenna
If headphones are not being used, be sure to use the supplied external antenna.
14.Safety Warning
Please read before use.
1. If this DAB radio has been moved from a cold place to a warm place, do not turn
on the radio for 2-3 hours. (E.g. from a cold car boot to a warm room)
There is a possibility that excessive moisture may damage the DAB radio, in order
to avoid damage, please place at room temperature for 2-3 hours before use.
2. Do not remove any xed covers as this may expose dangerous voltages.
3. Never use your DAB radio if it is damaged in any way, always place the DAB
radio on a at level surface avoiding anywhere which may be subject to strong
vibration.
4. Avoid extremes of temperature, either hot or cold, place your DAB radio well
away from heat sources such as radiators or gas/ electronic which is origin heat.
5. Don’t allow your DAB radio to be exposed to rain, moisture or dust. If any liquid
is spilled into your DAB radio, it can cause serious damage.
If you spill any liquid into your DAB radio, please power off the unit immediately.
6. Caution: Don’t open any covers and don’t repair yourself.
Qualied personnel must carry out repair work.
7. Use of headset or earphones with maximum volume for a long period of time
may cause hearing loss due to excessive sound pressures.
If at any time in the future you should need to dispose of this product please
note that: Waste electrical products should not be disposed of with household
Page 18
DAB&FM
32
waste. Please recycle where facilities exist. Check with your local authority or
retailer for recycling advice (Waste Electrical and Electronic Equipment Directive).
 Loading...