

Fukuda Denshi Co DS7100 User Manual
− To Measure the NIBP−
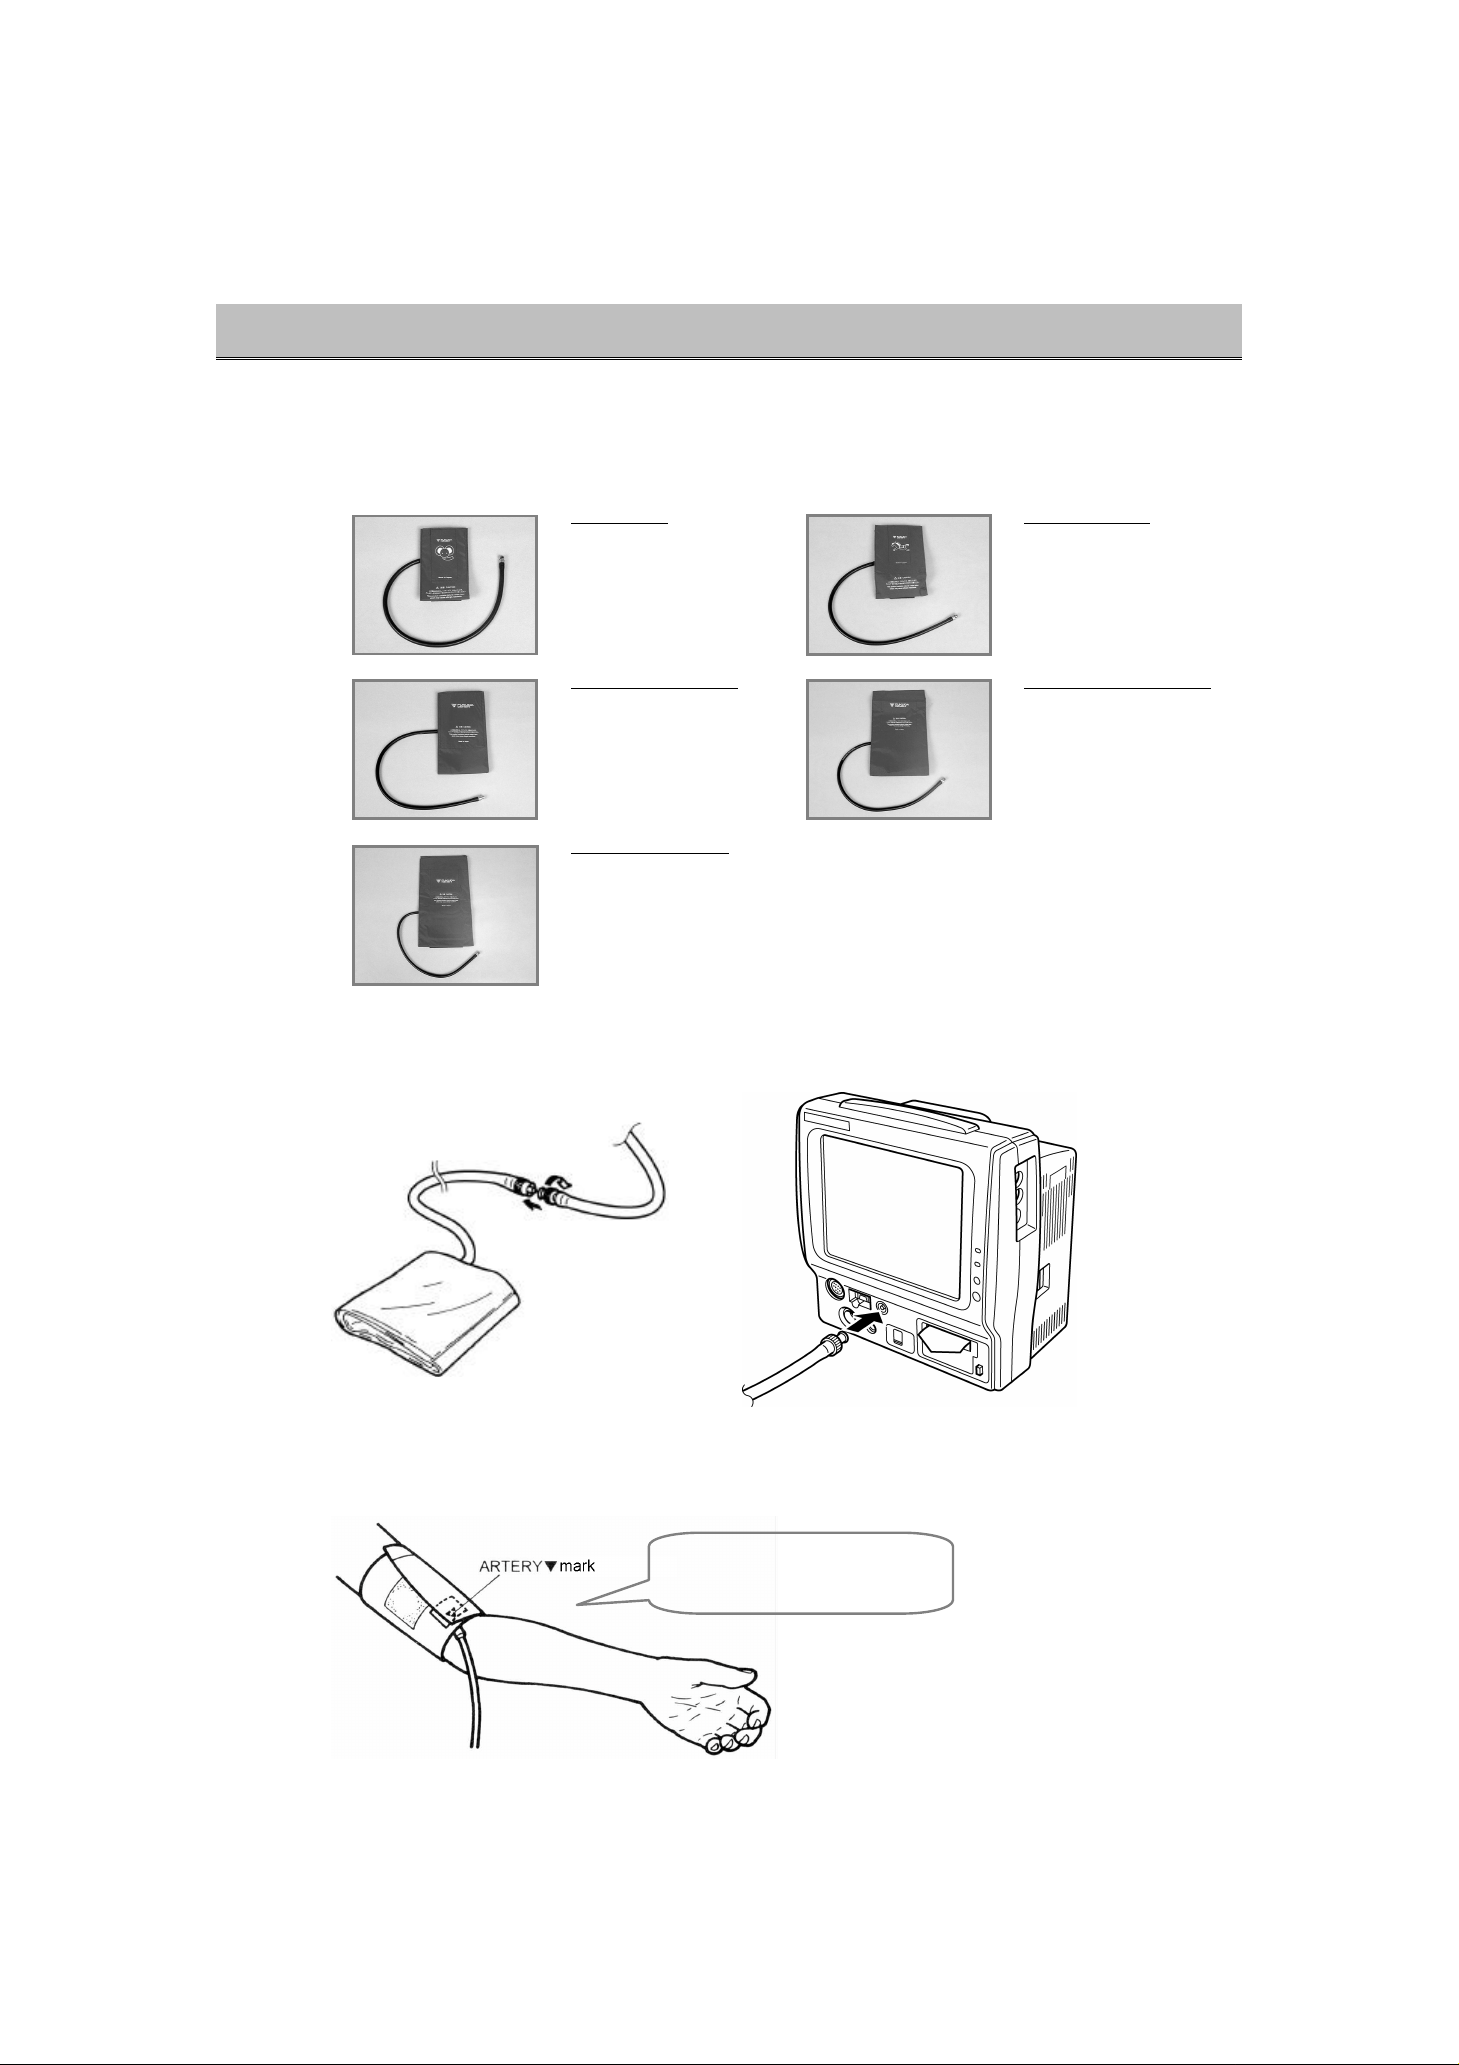
1. Select the appropriate cuff type for the patient.
According to the AHA (American Heart Association) guideline, the appropriate cuff width is 40% of
the arm circumference.
Select the appropriate cuff from the following selections.
Infant Cuff
CUF-7105
Width 8.5cm
Adult Cuff (small)
CUF-7103
Width 11cm
Adult Cuff (large)
CUF-7101
Width 17cm
2. Connect the cuff to the air hose, and then connect the air hose to the cuff connection
connector on the monitor.
Pediatric Cuff
CUF-7104
Width 10.5cm
Adult Cuff (medium)
CUF-7102A
Width 14.5cm
3−14
3. Apply cuff to the patient.
Position the ARTERY▼mark over the artery on the patient’s arm and wrap the cuff around.
A finger should just fit in
between the cuff and arm.

Check Point
4. Start the measurement.
Align the cuff height and heart position to eliminate
an error caused by the blood weight.
It is most appropriate to measure with the patient
lying down and arms naturally extended.
Pressing the NIBP START/STOP key will
start inflating the cuff pressure and starts the
measurement.
Upon completion, the measured value will be
displayed inside the NIBP parameter key.
3
To Measure the NIBP
WARNING
CAUTION
Before the measurement, make sure the patient type ( Adult /
Child / Neonate ) is properly selected. Otherwise, correct
measurement can not be performed, and congestion or other injury may
result.
?
Pay attention when measuring the NIBP of patient with bleeding
disorders or hypercoagulation. The cuff inflation may cause petechia
or circulatory failure by the blood clot.
?
If the air hose is twisted, or weighed down, the cuff air can not be
exhausted. Properly arrange the cuff and air hose.
3−15

Procedure for Periodic Measurement
1. Press the NIBP parameter key on the home display.
2. Press the Auto Mode key on the NIBP setup menu.
The NIBP setup menu will be displayed.
The interval time setup menu will be displayed.
3. Select an interval time.
Press the key for the desired interval. Check that
the key LED is lighted for the selected interval.
The measurement will automatically start at the
selected interval.
The measurement time will be integral multiple of the selected interval time starting from 0 minute.
Ex.) If the present time is 13:14, the measurement time will be as follows for each interval time.
2 min. : 13:16, 13:18, 13:20, …
2.5 min. : 13:15, 13:17:30, 13:20, …
3 min. : 13:15, 13:18, 13:21, …
5 min. : 13:15, 13:20, 13:25, …
.
3−16
− To Measure the BP −
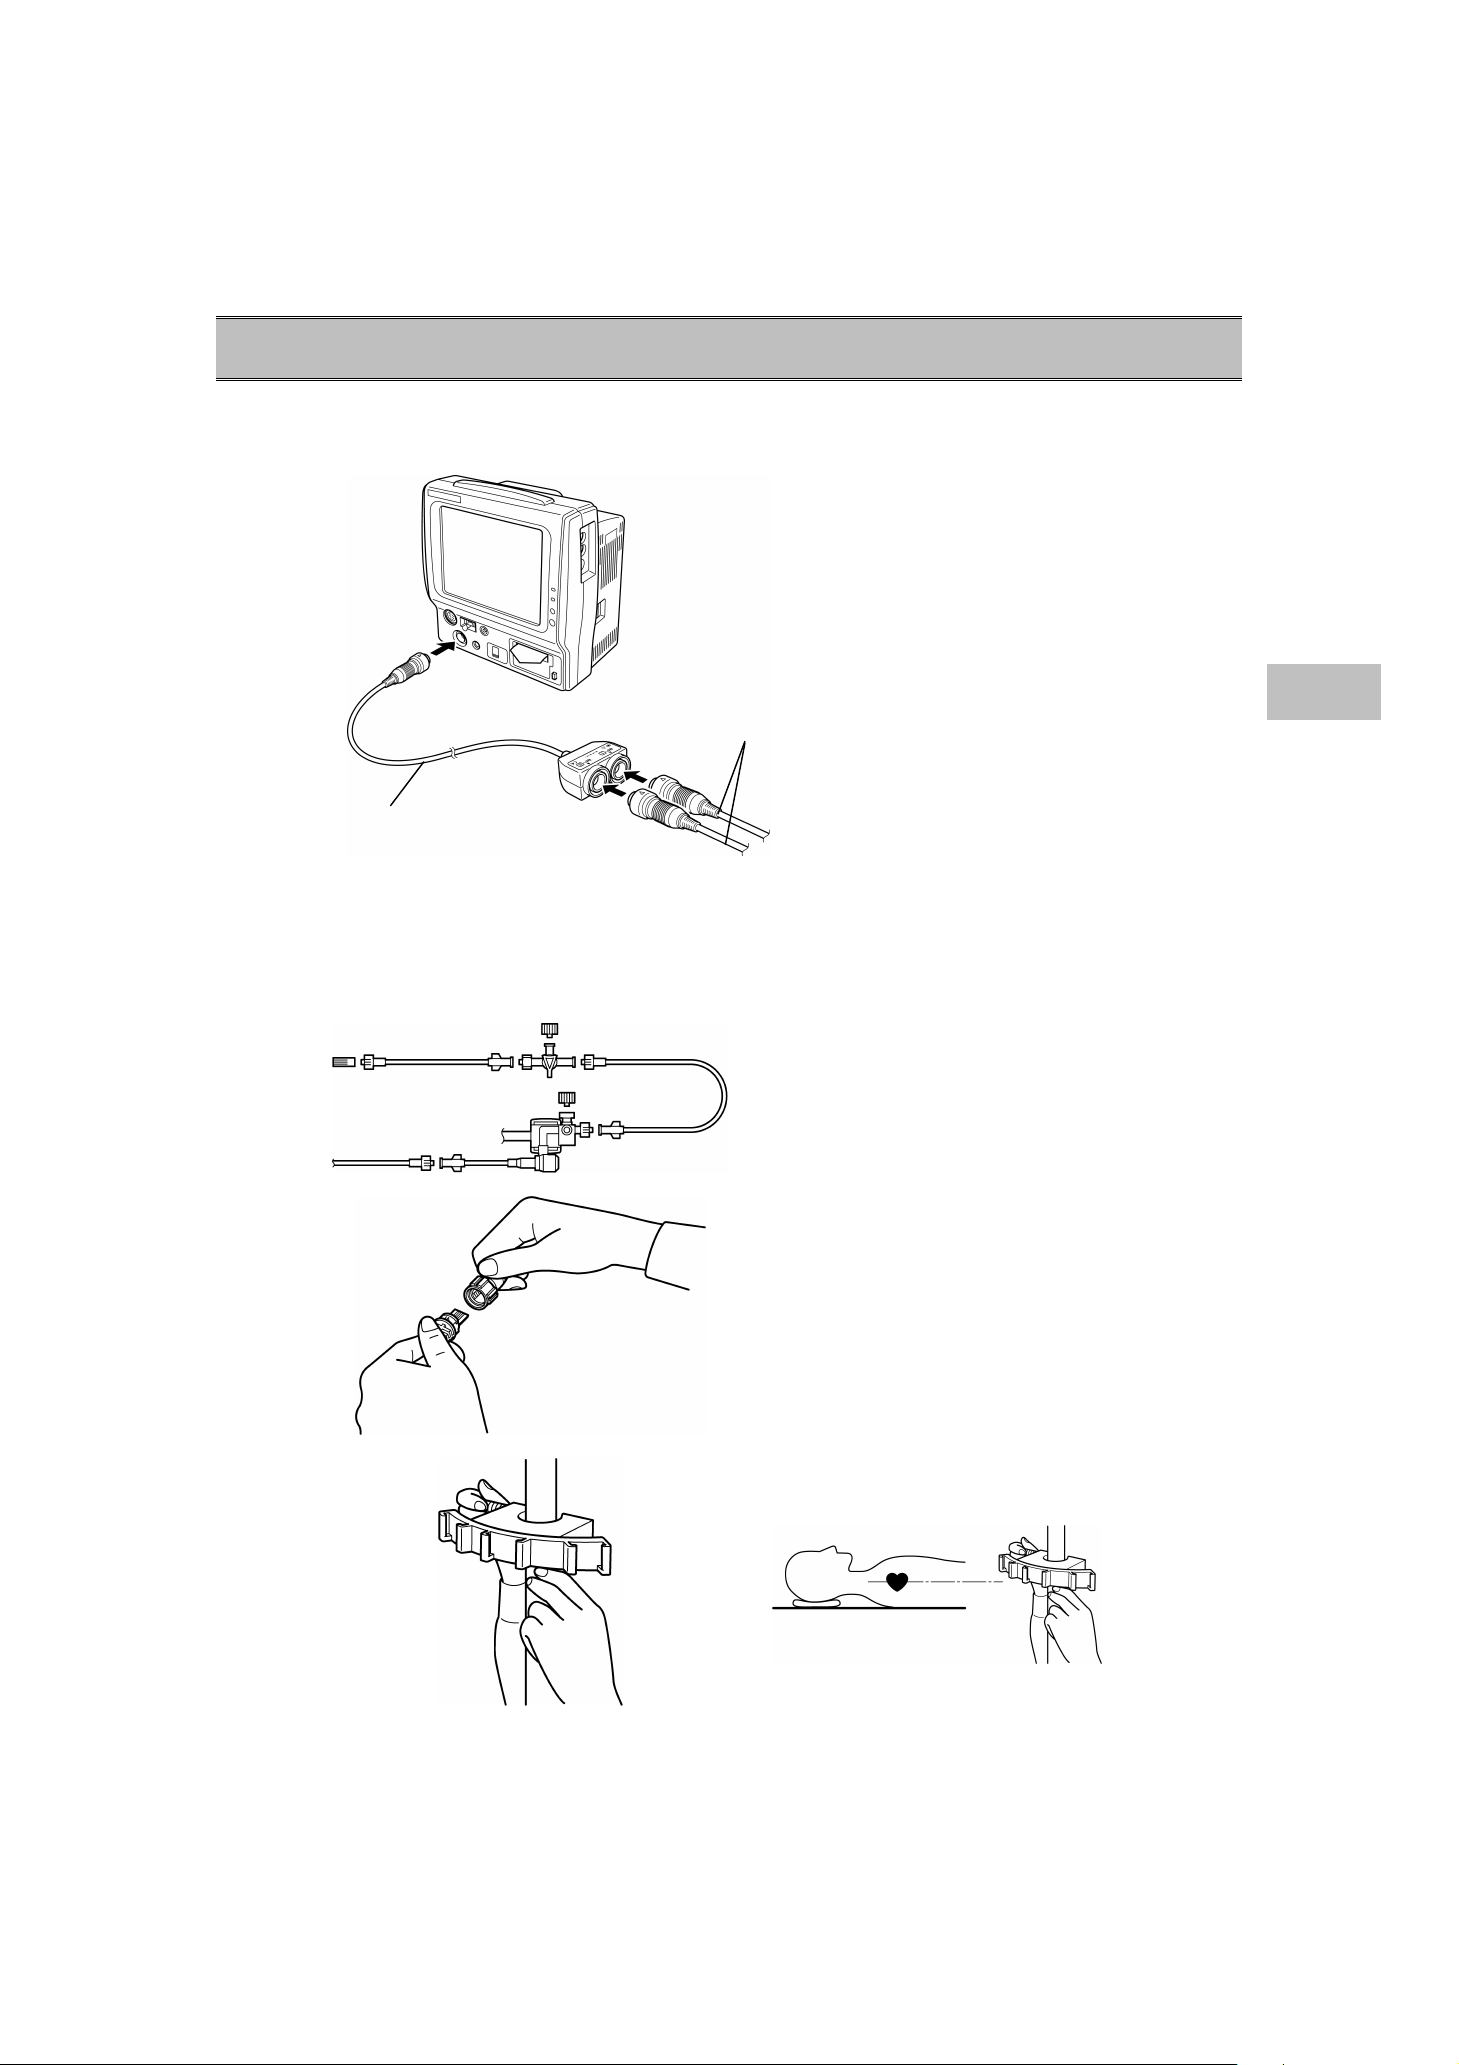
1. Connect the 2ch BP conversion cable to the monitor and interface cable.
2 channels of BP can be measured on this monitor.
2ch BP Conversion Cable
2. Assemble the BP measurement device.
The following procedure explains the case when BP transducer (COBE CDX series, No.041-575-
504) is used.
If using other transducers, refer to the operation manual for the corresponded transducer.
Interface Cable
Connect the monitor and the interface cable via
2ch BP conversion cable.
3
To Measure the BP
(1) Check if the package of the transducer is not
damaged before opening.
Verify that each connector is securely connected.
(2) Align the bracket to patient’s heart position (about
1/2 of the chest depth).
3−17
 Loading...