

This User Guide is printed on FUJI XEROX Office
This User Guide is printed on FUJI XEROX OfficeCCoolloorr
Capable Products.
Capable Products.
Quick User Guide
Quick User Guide
Quick User Guide
A
A
peos
peos
P
P
ort
ort--
IV C7780/6680/5580
IV C7780/6680/5580
D
D
ocu
ocu
C
C
entre
entre--
IV C7780/6680/5580
IV C7780/6680/5580
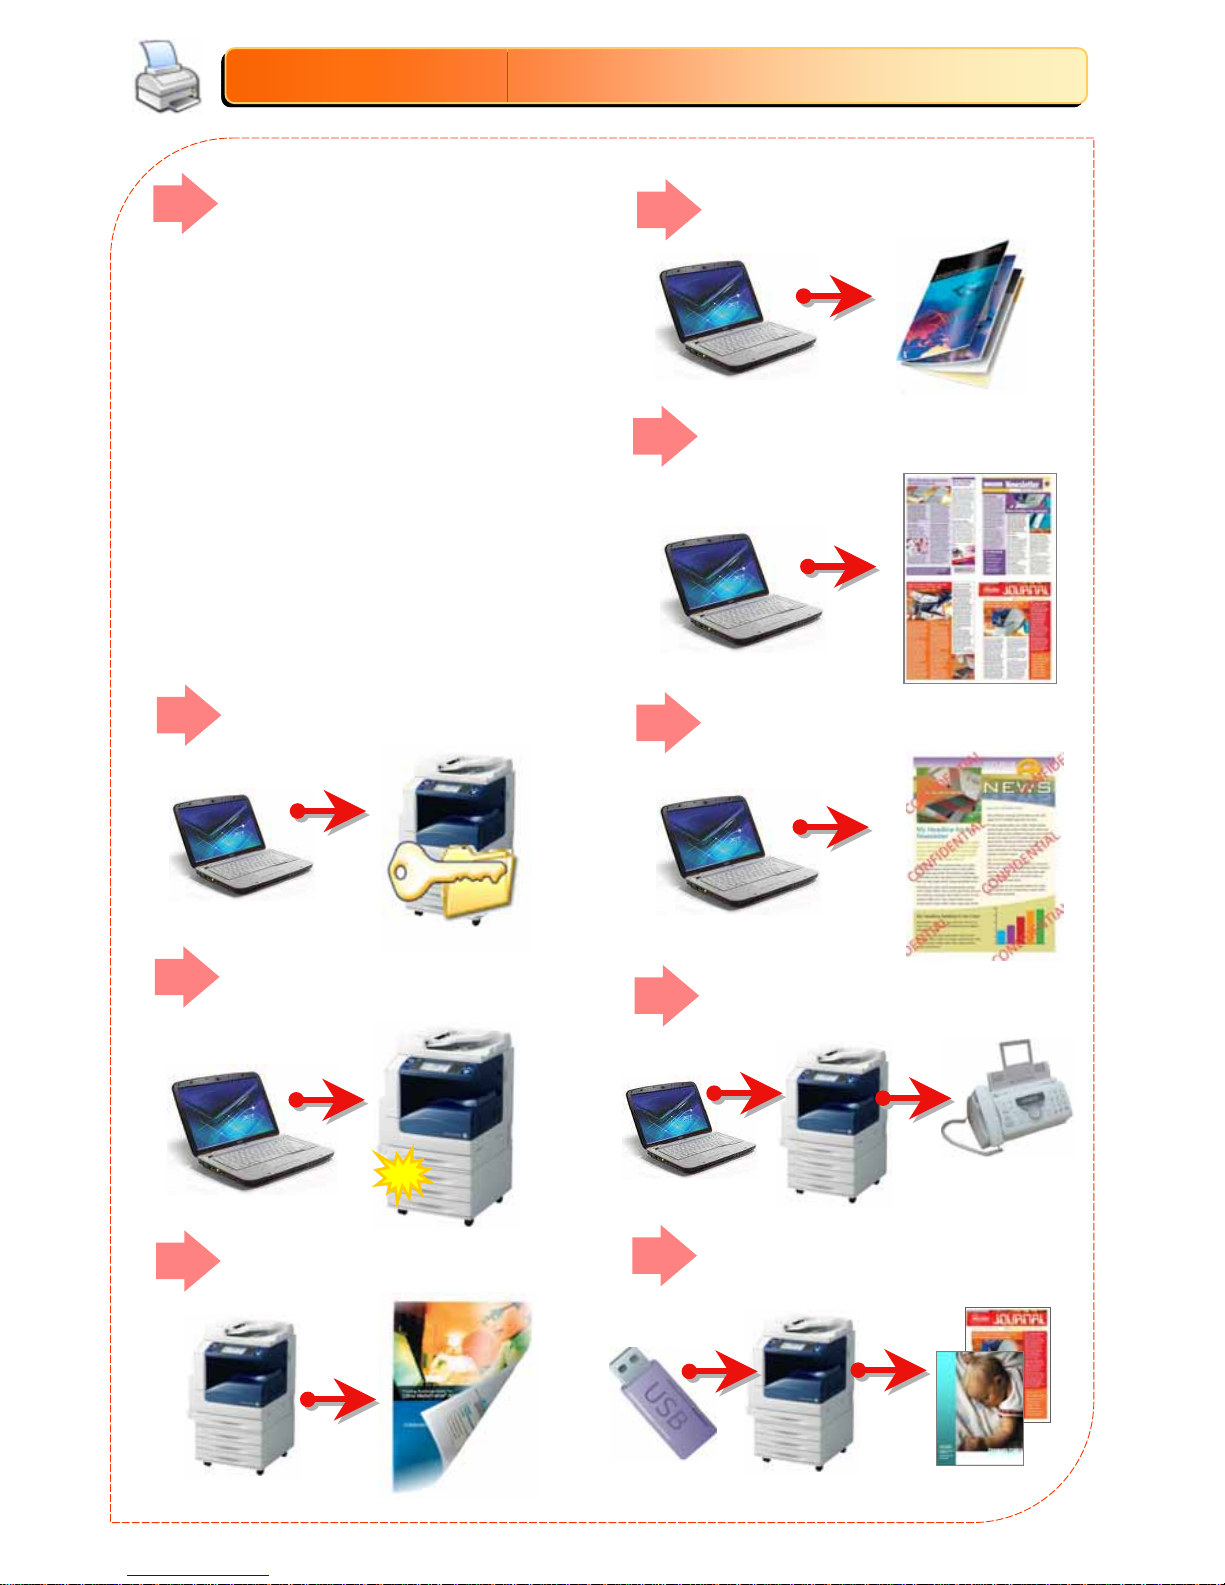
Overview
Overview
Overview
Copy
Copy
Copy
Fax
Fax
Fax
Scan
Scan
Scan
Print
Print
Print
Job Status
Job Status
Job Status
Setup
Setup
Setup
Troubleshooting
Troubleshooting
Troubleshooting

Thank you for selecting the Fuji Xerox ApeosPort / DocuCentre-IV series C7780 / 6680 / 5580.
This quick user guide provides the fundamental Copy / Print / Scan / Fax operating procedures
for ease use of the machine.
Quick User Guide Organization
Quick User Guide Organization
Overview & Features Content …………………………………… Page 01 – 07
…
Copy ………………………………………………………………………… Page 08 – 18
…
Fax …………………………………………………………………………… Page 19 – 22
…
Scan …………………………………………………………………………. Page 23 - 27
…
Print …………………………………………………………………………. Page 29 - 35
…
Store to USB ……………………………………………………………………… Page 28
Media Print Text/Photo …………………………………………………... Page 36
Paper Jams ……………………………………………………………….. Page 37 - 39
…
Billing Information/Supplies Status ……………………………. Page 40 – 42
Job Status ……………………………………………………………..…… Page 45
…
Setup/Register Address (Fax/Email) ……………………………. Page 46
…
Troubleshooting ………………………………………………………… Page 47
IMPORTANT!
The screen images in this guide solely used for illustration and are based on the standard
machine configurations. Some features mentioned may not be used depending on the
machine configurations. Unsupported features will not be displayed on the screen.
Abnormal features will be grayed out on the screen.
This Quick User Guide may not be copied or modified without the written consent of the
author or publisher.
Parts of this user guide are subject to change without prior notice.
We welcome any comments on ambiguities, errors, omissions or missing pages.
Contact Fuji Xerox Customer Training Department Malaysia for more information.
2
2
Features content
Features content
Features content
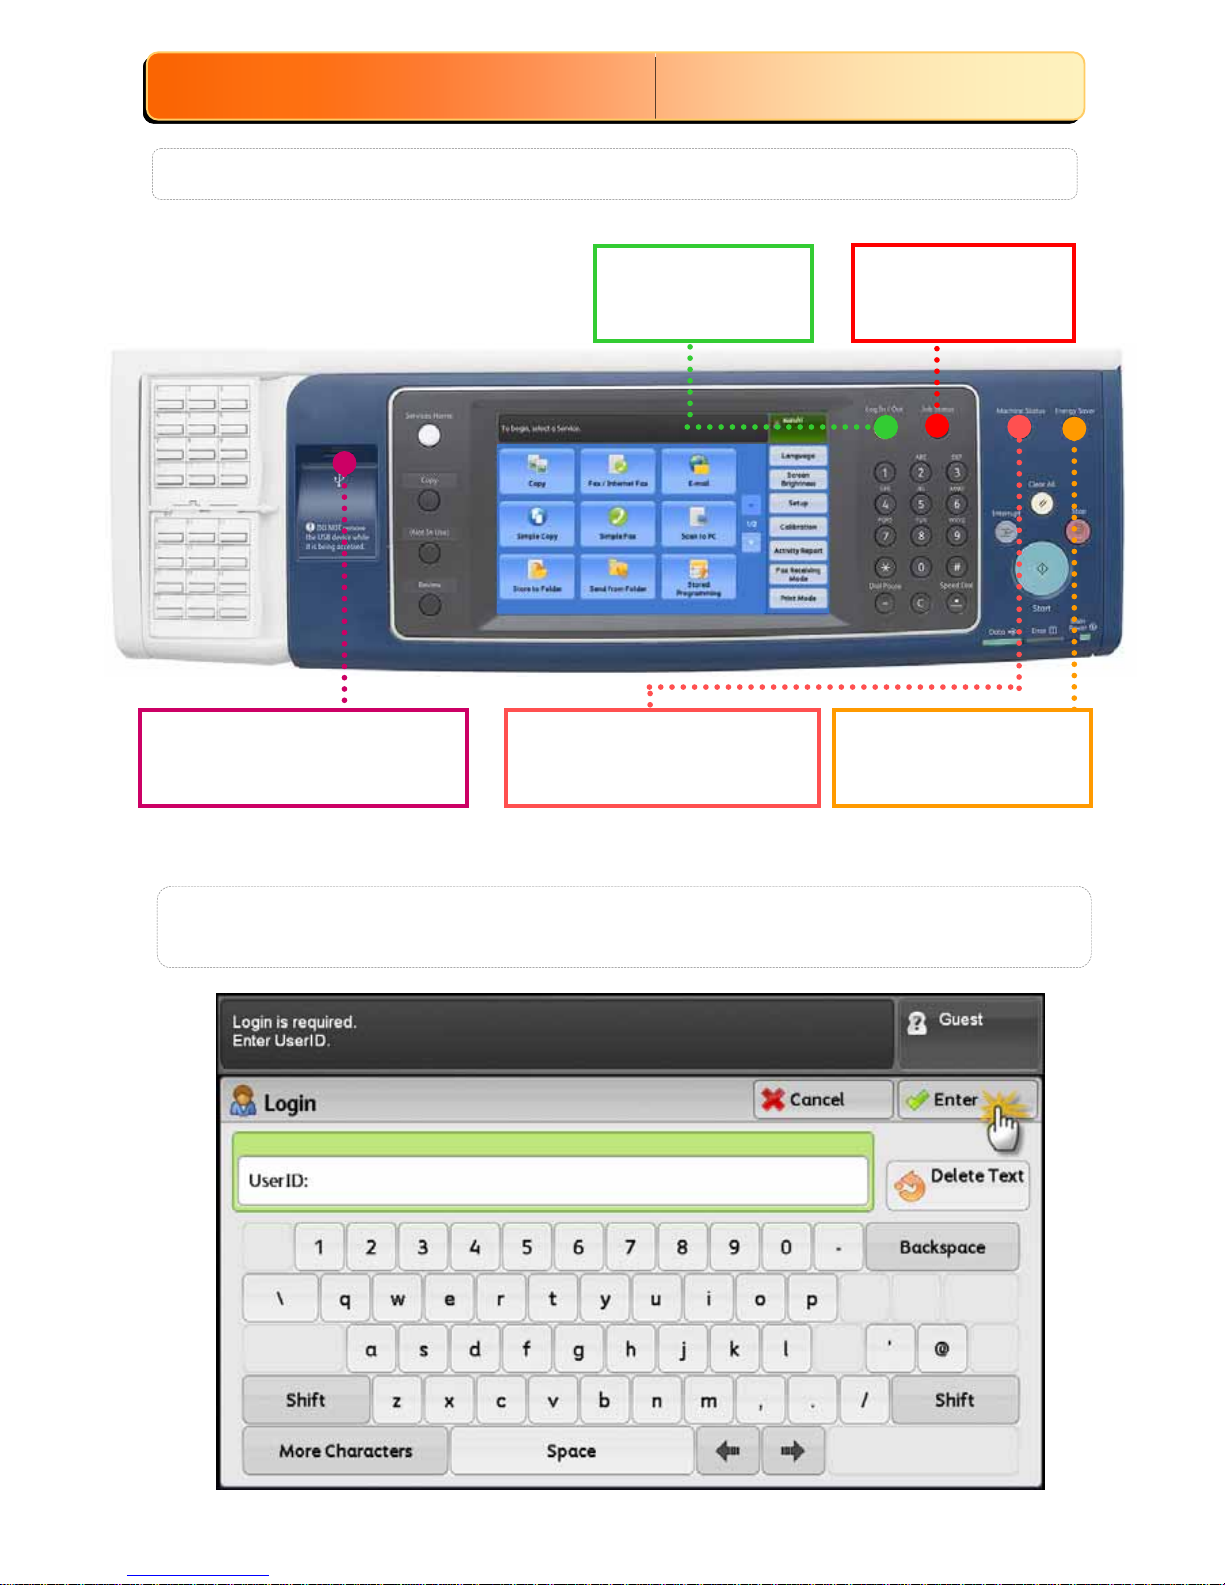
To Login to User Account, press Log In/Out button & enter user details on the
text box as follow. ( Note: Press Log In/Out button again to Logout. )
Control Panel Overview
Control Panel Overview
3
3
Energy Saver: Press
to enter / exit power
saver mode.
Job Status : Press
To check active, &
completed jobs
Machine Status : Press to
check machine information
meter readings & supplies
Log In/Out : Press
To enter UserID &
Passcode
Overview
Overview
Overview
USB Memory slot: (Optional)
Store/print files when USB
memory device is connected
4
4
A
3
A
4
6
5
4
3
2
1
[Uncollated]
1,1,1...2,2,2...3,3,3...
[Collated]
1,2,3…1,2.3…1,2,3…
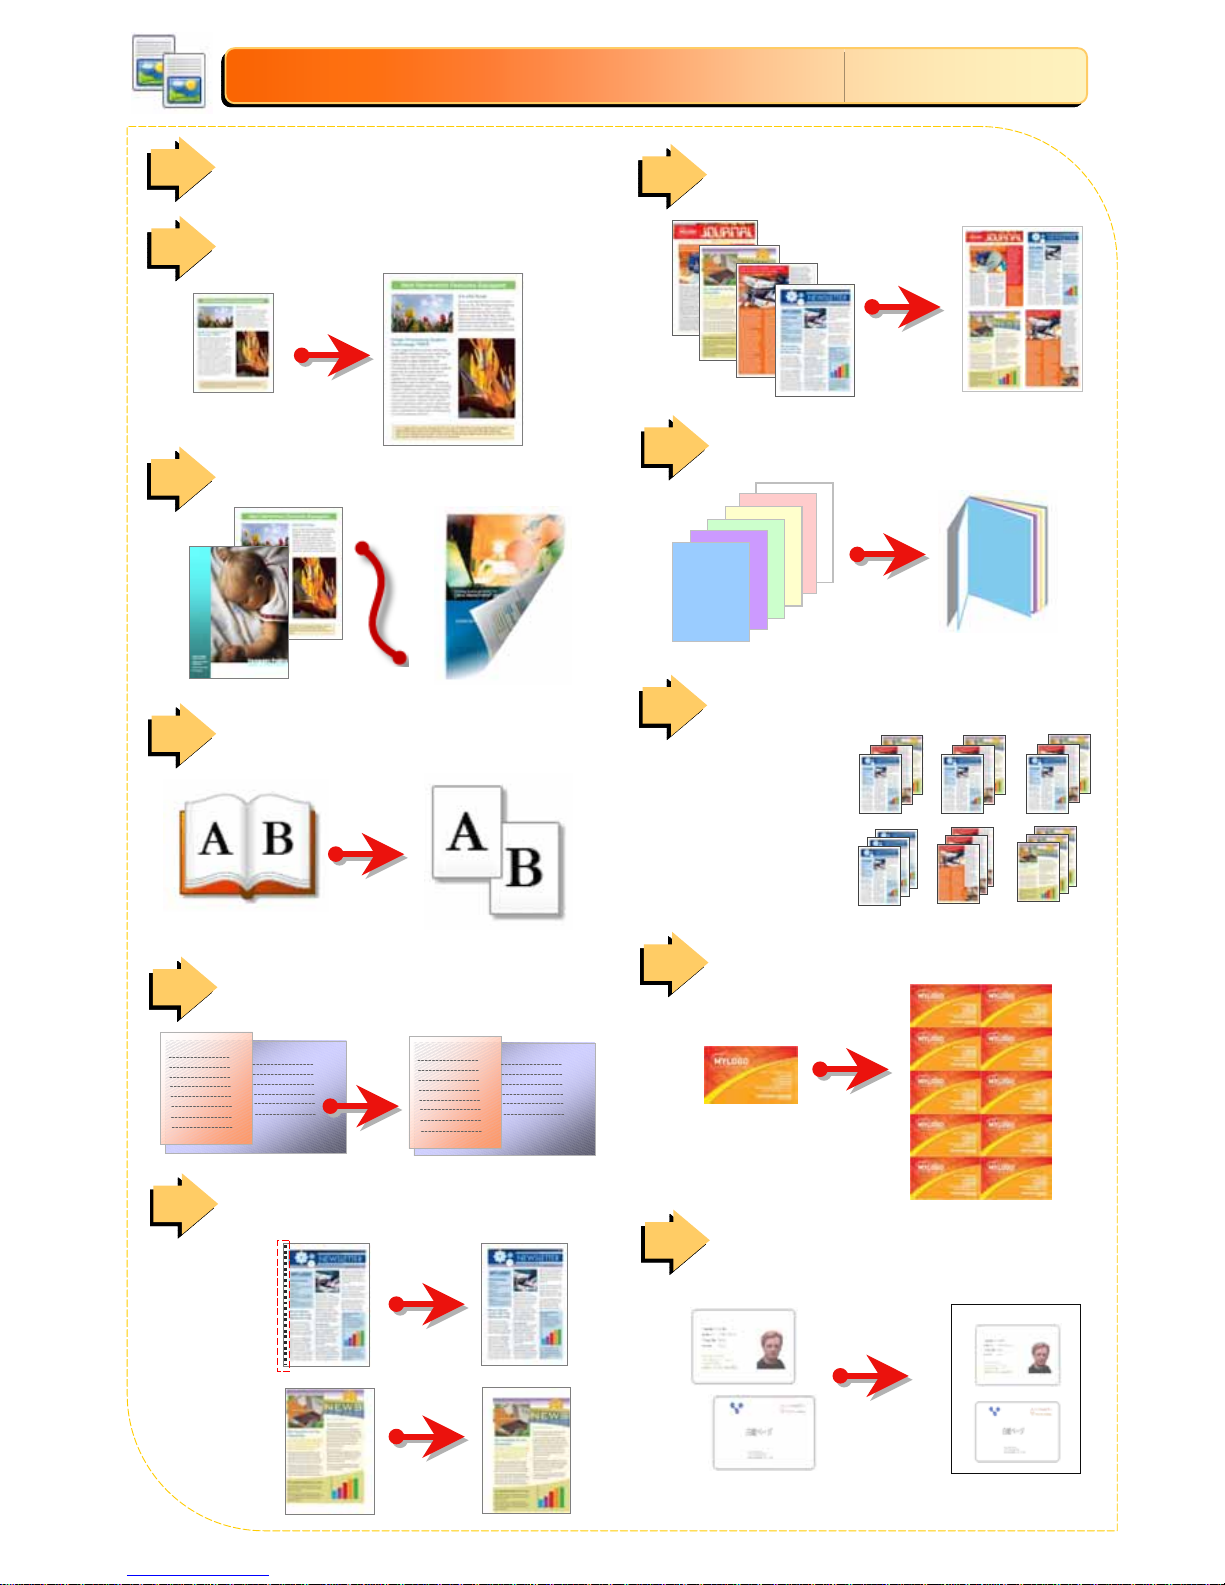
C6: Edge Erase/Image Shift
C6: Edge Erase/Image Shift ……
Page 13
Page 13
C5: Mixed Sized Originals
C5: Mixed Sized Originals ……
Page 12
Page 12
C4: Book Copying
C4: Book Copying ……
Page 11
Page 11
C3: 2
C3: 2--
Sided Copying
Sided Copying ……
Page 10
Page 10
C7: Pages per Side
C7: Pages per Side……
Page 14
Page 14
C8: Booklet Creation
C8: Booklet Creation ……
Page 15
Page 15
C9: Copy Output / Sorting
C9: Copy Output / Sorting ……
Page 16
Page 16
C10: Repeat Image
C10: Repeat Image ……
Page 17
Page 17
C11: ID Card Copy
C11: ID Card Copy ……
Page 18
Page 18
Copy Features
Copy Features
Copy Features
C2: Reduce / Enlarge
C2: Reduce / Enlarge ……
Page 09
Page 09
A
3
A
4
front
back
C1: Simple Copy
C1: Simple Copy
…
…
Page 08
Page 08

5
5
Fax Features
Fax Features
Fax Features
F1: Simple Fax ... Page 19
F3: 2-Sided Originals … Page 21
F2: Single/
Multiple Locations .. Page 20
F2: Speed Dial/One Touch … Page 20
F2: Address Book/Index … Page 20
F4: Confirmation Report … Page 22
Program Fax Number … Page 46
Allows you to program frequent
Allows you to program frequent
used fax numbers into the
used fax numbers into the
address book.
address book.
Read / Cancel Fax… Page 45
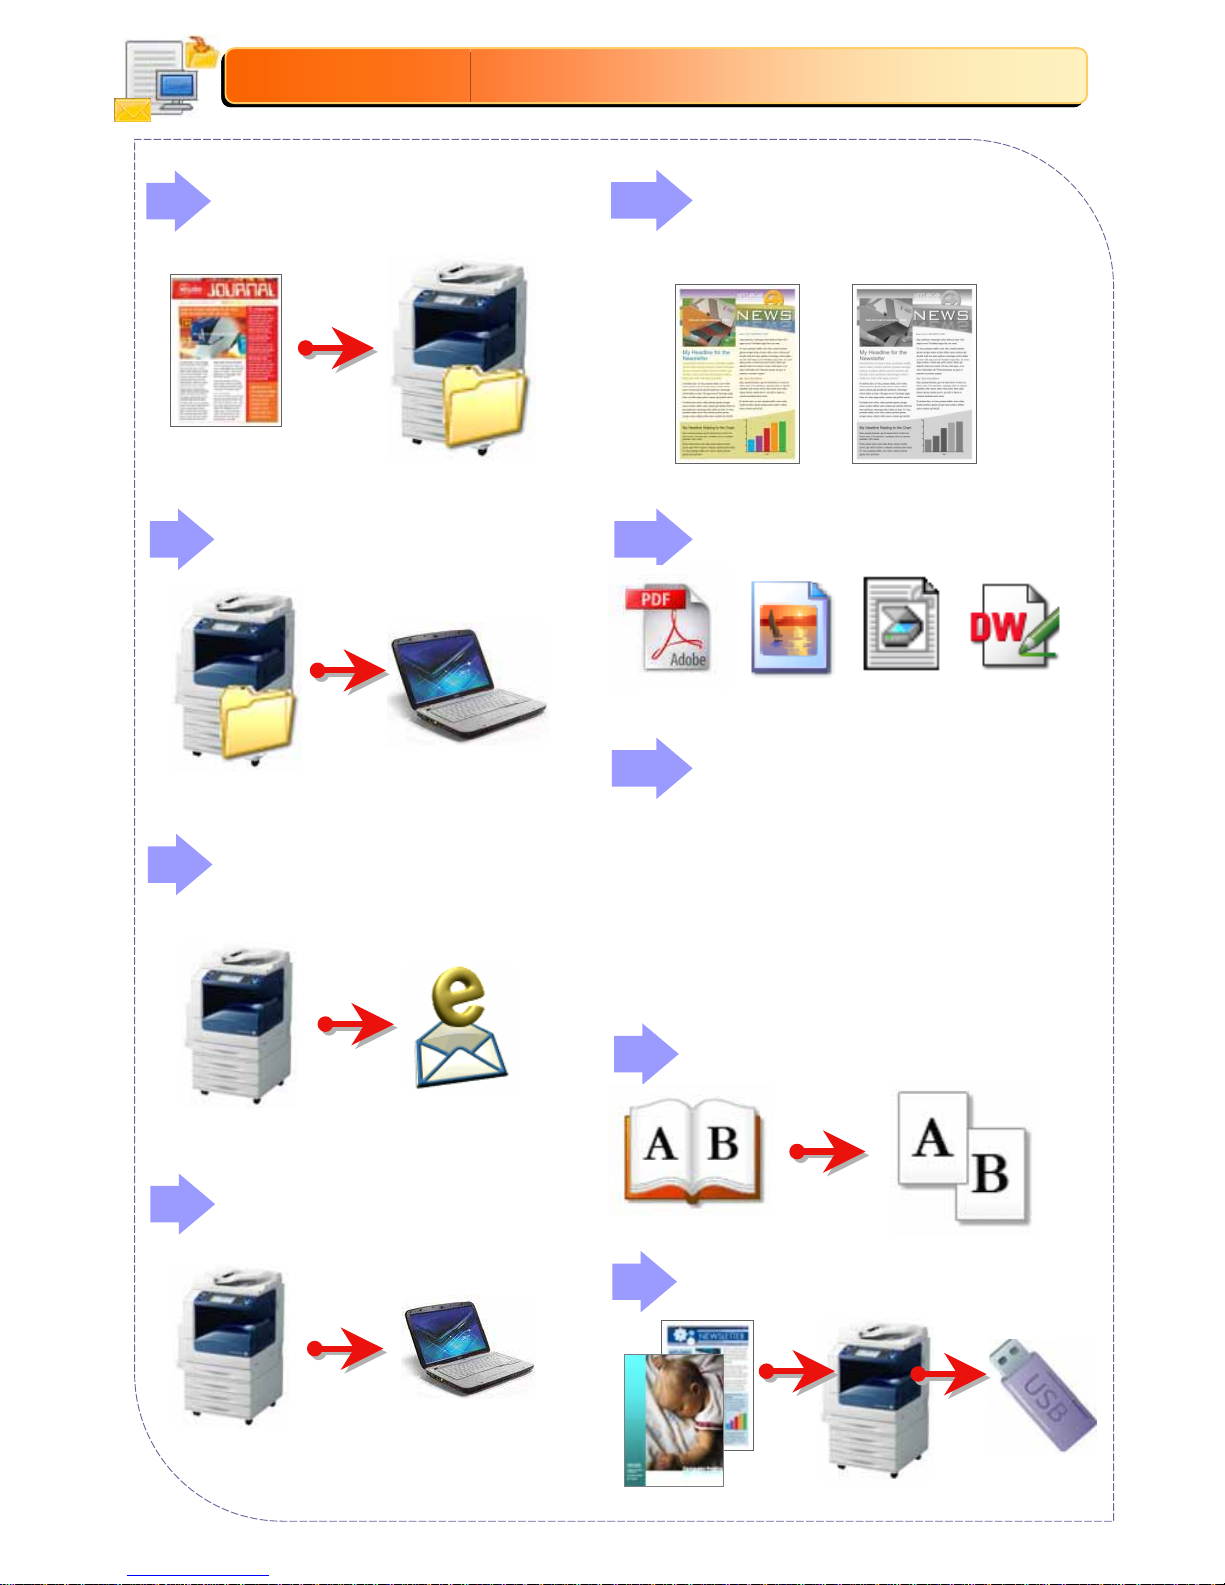
S2: Import Scanned Data
S2: Import Scanned Data……
Page 24
Page 24
S3: Scan to Email
S3: Scan to Email ……
Page 25
Page 25
S4: Scan to PC
S4: Scan to PC ……
Page 26
Page 26
S1S1--6: Output Color
6: Output Color
/Resolution
/Resolution ……
Page 23, 25, 26
Page 23, 25, 26
S3S3--6: File Formats
6: File Formats ……
Page 25, 26
Page 25, 26
S3S3--4: File Name
4: File Name ……
Page 25, 26
Page 25, 26
S5: Book Scanning
S5: Book Scanning ……
Page 27
Page 27
S1: Store to Folder
S1: Store to Folder ……
Page 23
Page 23
JPEG
PDF
DocuWorks
TIFF
Allows you to specify a name for the
Allows you to specify a name for the
scanned document.
scanned document.
By default the file name is
By default the file name is
"img-xxx-yyy.zzz" (where xxx is the
date and time, yyy i s the page
number, and zzz is the extension
6
6
Scan Features
Scan Features
Scan Features
S6: Store to USB
S6: Store to USB ……
Page 28
Page 28
P4: Booklet Print
P4: Booklet Print ……
Page 32
Page 32
P3: 2
P3: 2--
Sided Print
Sided Print ……
Page 31
Page 31
P1: Paper Tray/Paper Type
P1: Paper Tray/Paper Type ……
Page 29
Page 29
P1: Job Types
P1: Job Types ……
Page 29
Page 29
P2: Secure Print
P2: Secure Print ……
Page 30
Page 30
P5: Pages per Sheet
P5: Pages per Sheet ……
Page 33
Page 33
P6: Watermarks
P6: Watermarks……
Page 34
Page 34
P7: PC Faxing
P7: PC Faxing……
Page 35
Page 35
Normal Print – prints as normal print
Secure Print – temporary stores print
jobs on the machine and prints when
UserID & password is entered
Sample Set – print first set of job for
checking & remaining sets stored
temporarily at memory
Delayed Print – print job at a specified
time
Store in Remote Folder – stores job in
a registered folder and print upon
required.
Fax – send as a direct fax job from
computer
7
7
Print Features
Print Features
Print Features
P8: Media Print Text/Photo
P8: Media Print Text/Photo……
Page 36
Page 36
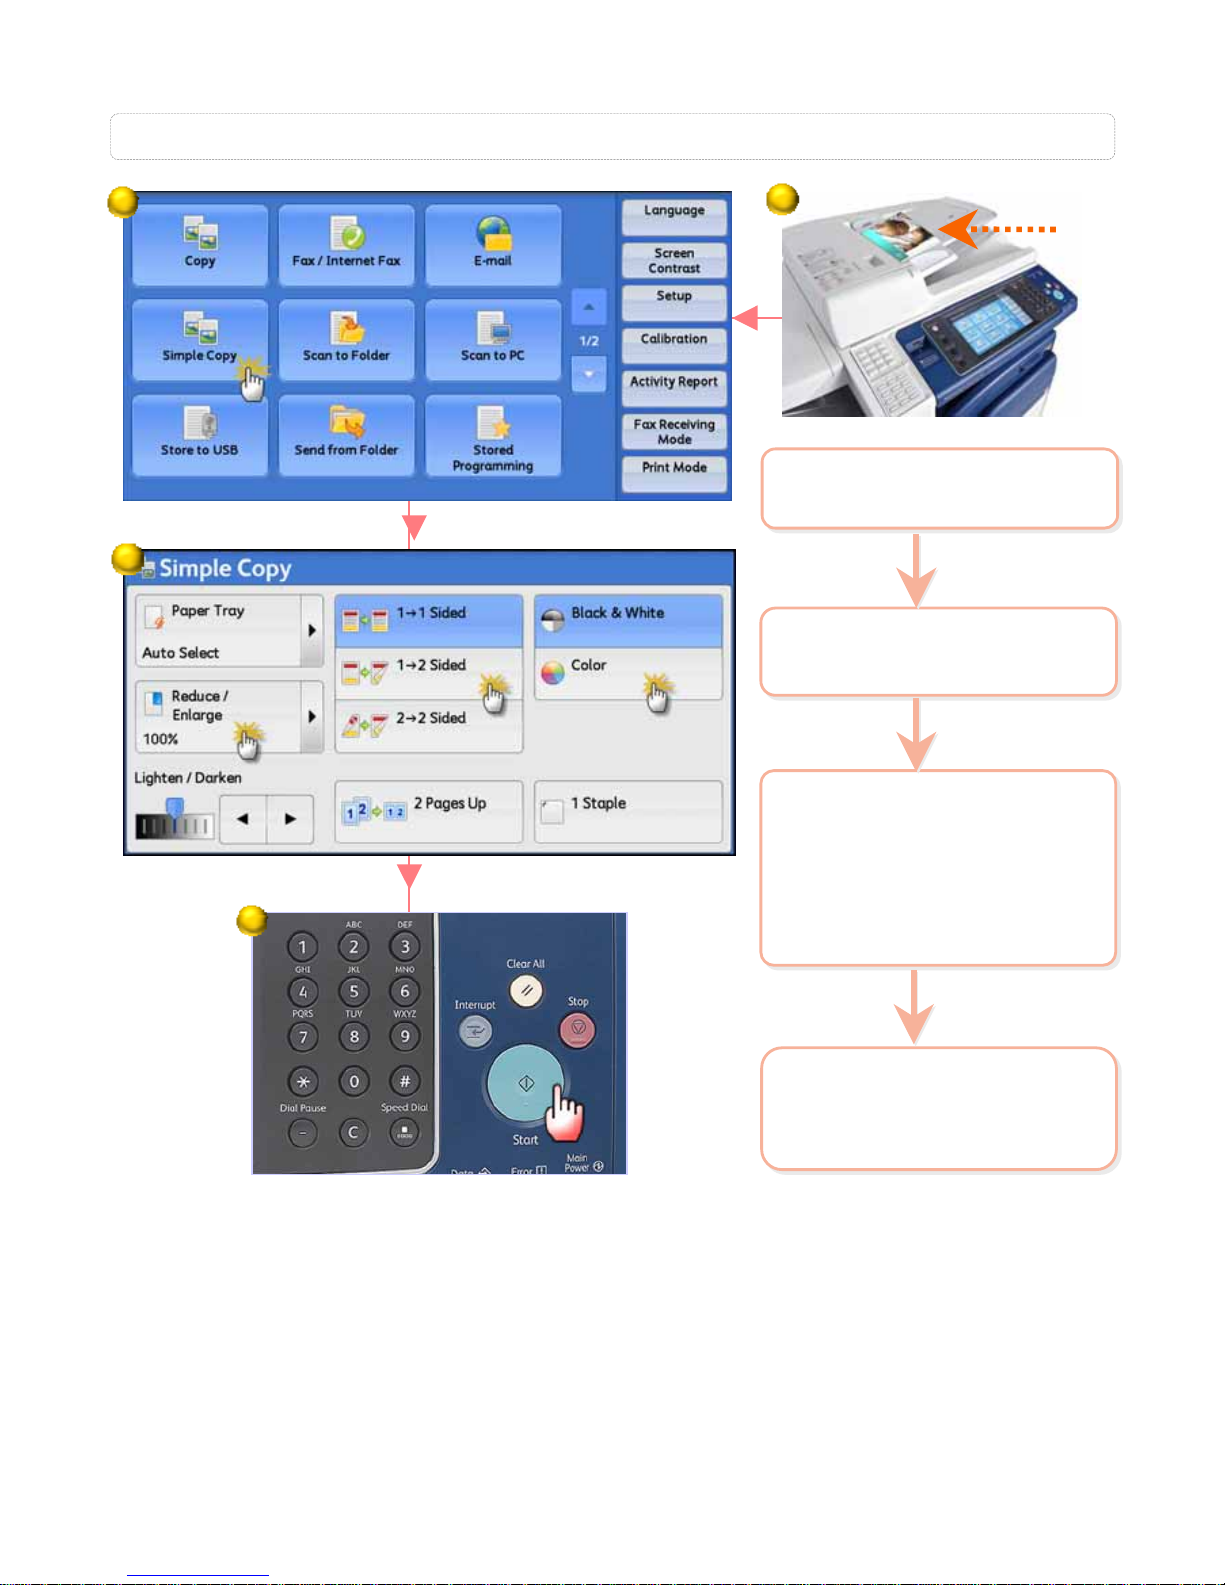
C1: Simple Copy…
Make simple copy jobs
Make simple copy jobs
3 Select an option:
a: [Paper Tray]
If required,
b: [Reduce/Enlarge]
c: [2-Sided]
d: [Output Color]
3 Select an option:
a: [Paper Tray]
If required,
b: [Reduce/Enlarge]
c: [2-Sided]
d: [Output Color]
2 On the [Services Home]
select [Simple Copy]
2 On the [Services Home]
select [Simple Copy]
4 Enter number of copies
using numeric keypad.
Press <Start> button
4 Enter number of copies
using numeric keypad.
Press <Start> button
8
8
1
2
3
4
1 Load documents onto
the Document Feeder
1 Load documents onto
the Document Feeder

Allows you to select copy ratio to enlarge or reduce the size of
Allows you to select copy ratio to enlarge or reduce the size of
copies
copies
3 Select required feature:
a: [Reduce/Enlarge]…
for A3 to A4 : 70%
for A4 to A3 : 141%
b: [Paper Supply]…
Tray 1 – Tray 4
or Tray 5 (bypass)
c: [Output Color]
Black & White or Color
3 Select required feature:
a: [Reduce/Enlarge]…
for A3 to A4 : 70%
for A4 to A3 : 141%
b: [Paper Supply]…
Tray 1 – Tray 4
or Tray 5 (bypass)
c: [Output Color]
Black & White or Color
2 On the [Services Home]
select [Copy]
2 On the [Services Home]
select [Copy]
1 Load documents onto
the Document Feeder
1 Load documents onto
the Document Feeder
4 Enter number of copies
using numeric keypad or
Press <Start> button
4 Enter number of copies
using numeric keypad or
Press <Start> button
C2: Reduce/Enlarge Copies …
Refer User Guide
Reduce/Enlarge P.85
Paper Supply P.89
Color P.92
Note
b
b
a
a
c
c
1
2
3
3a
4
9
9
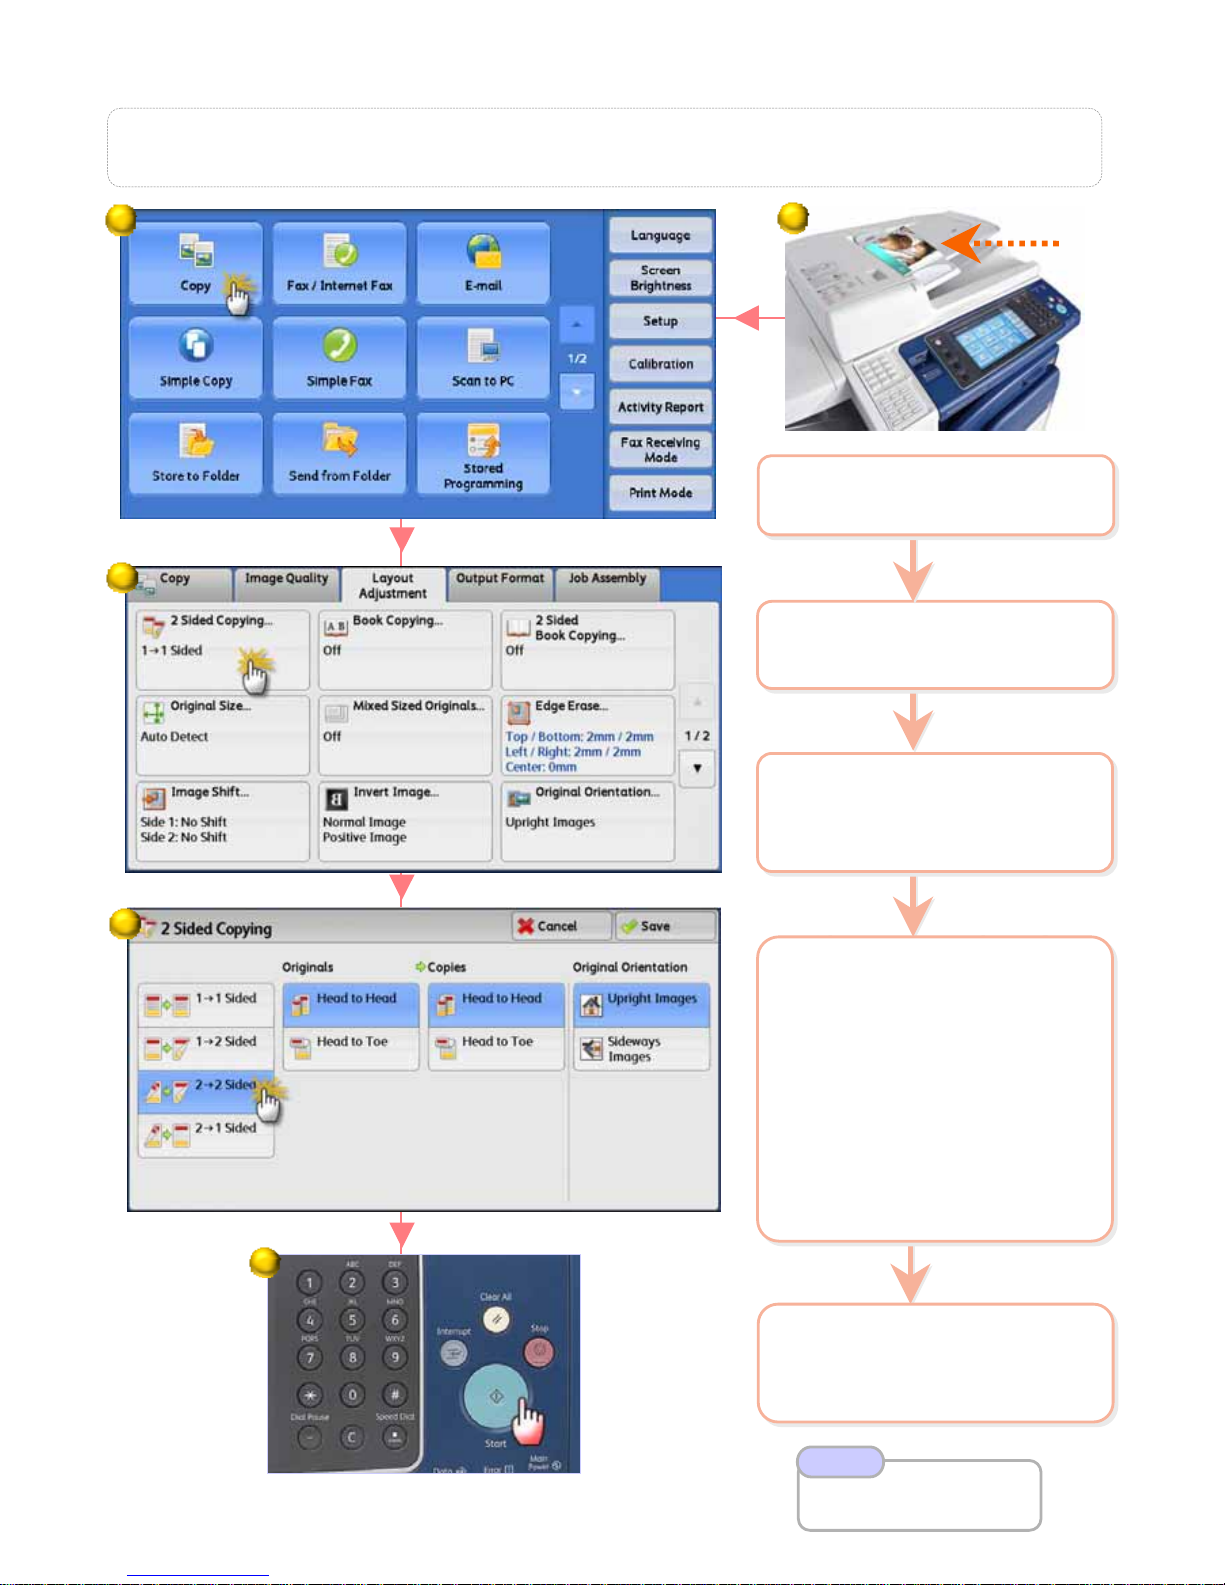
C3: 2 Sided Copying …
Allows you to make copies of 1
Allows you to make copies of 1--
sided and 2
sided and 2--
sided documents on one side or both
sided documents on one side or both
sides of paper
sides of paper
2 On the [Services Home]
select [Copy]
2 On the [Services Home]
select [Copy]
5 Enter number of copies
using numeric keypad &
Press <Start> button
5 Enter number of copies
using numeric keypad &
Press <Start> button
3 Select [Layout
Adjustment] >
Select [2-Sided Copying]
3 Select [Layout
Adjustment] >
Select [2-Sided Copying]
4 Choose an option of:
1Æ1 Sided : copy a 1-sided
document on 1 side of paper
1Æ2 Sided : copy a 1-sided
document on 2 sides of
paper
2Æ2 Sided : copy a 2-sided
document on 2 sides of
paper
2Æ1 Sided : copy a 2-sided
document on 1 side of paper
Press [Save]
4 Choose an option of:
1Æ1 Sided : copy a 1-sided
document on 1 side of paper
1Æ2 Sided : copy a 1-sided
document on 2 sides of
paper
2Æ2 Sided : copy a 2-sided
document on 2 sides of
paper
2Æ1 Sided : copy a 2-sided
document on 1 side of paper
Press [Save]
Refer User Guide
2-Sided Copying P.95
Note
1
2
3
4
5
1 Load documents onto
the Document Feeder
1 Load documents onto
the Document Feeder
10
10
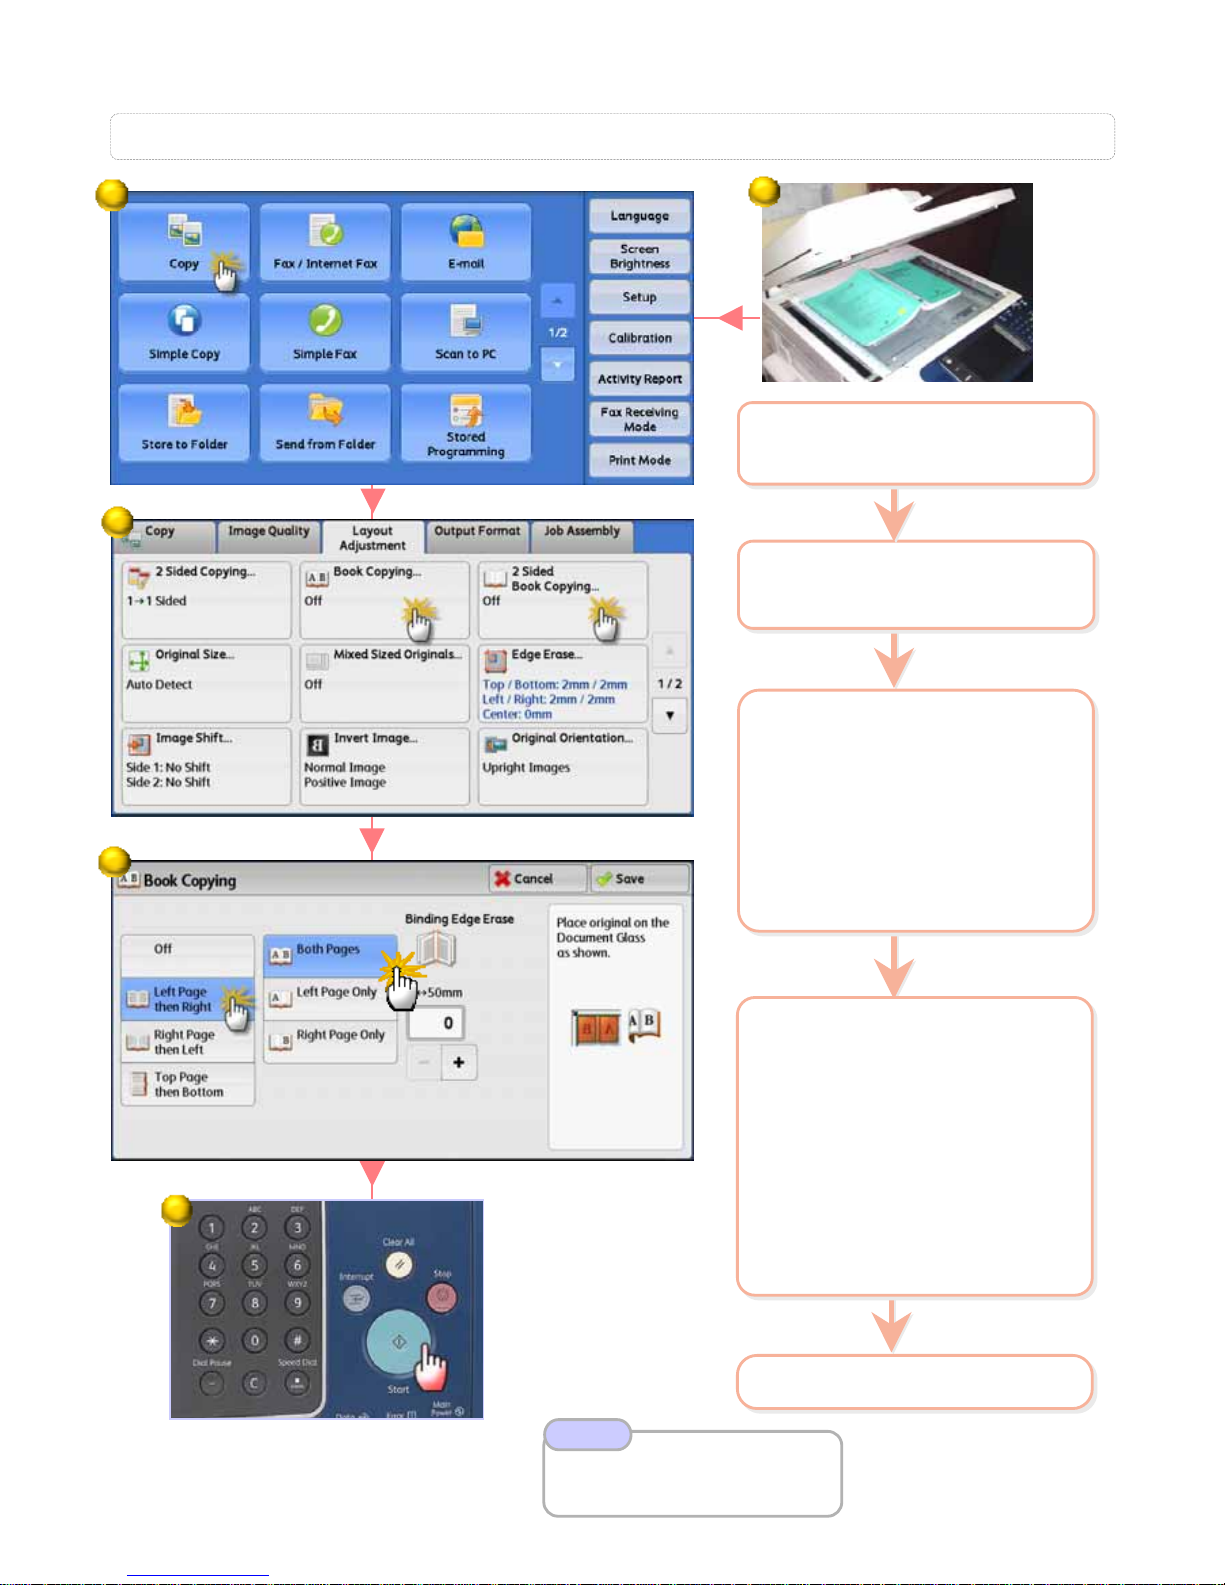
Allows you to copy bound document into separate sheets of paper
Allows you to copy bound document into separate sheets of paper
C4: Book Copying / 2 Sided Book Copying…
2 On the [Services Home]
select [Copy]
2 On the [Services Home]
select [Copy]
3 Select [Layout
Adjustment]
a: [Book Copying
] copies 2
single-sided output
b: [2-Sided Book Copying]
copies 2-sided output in
same order of the book
3 Select [Layout
Adjustment]
a: [Book Copying
] copies 2
single-sided output
b: [2-Sided Book Copying]
copies 2-sided output in
same order of the book
4 Select an option:
(refers to book reading sequence)
Left Page then Right
Right Page then Left
Top Page then Bottom
Select an option:
Both Pages
Left Page Only
Right Page Only
Press [Save]
4 Select an option:
(refers to book reading sequence)
Left Page then Right
Right Page then Left
Top Page then Bottom
Select an option:
Both Pages
Left Page Only
Right Page Only
Press [Save]
1 Place book on the Platen
Glass face down
1 Place book on the Platen
Glass face down
5 Press <Start> button
5 Press <Start> button
b
b
a
a
Refer User Guide
Book Copying P.108
2-Sided Book Copying P.109
Note
1
2
3
4
5
11
11

Allows different size documents copied onto matching paper size.
Allows different size documents copied onto matching paper size.
C5: Mixed Sized Originals …
2 On the [Services Home]
select [Copy]
2 On the [Services Home]
select [Copy]
3 Select [Layout
Adjustment] > Press
[Mixed Sized Originals]
3 Select [Layout
Adjustment] > Press
[Mixed Sized Originals]
Refer User Guide
Mixed Size Original P.112
Note
5 Press <Start> button
5 Press <Start> button
4 Select option: ON
Press [Save]
4 Select option: ON
Press [Save]
1
2
3
4
5
1 Load documents onto
the Document Feeder
1 Load documents onto
the Document Feeder
12
12

Allows you to erase unwanted marks along the edge erased, and sh
Allows you to erase unwanted marks along the edge erased, and sh
ift the position of
ift the position of
document images.
document images.
C6: Edge Erase / Image Shift …
2 On the [Services Home]
select [Copy]
2 On the [Services Home]
select [Copy]
3 Select [Layout
Adjustment]
a: [Edge Erase]
select an option & set area
to be erased
b: [Image Shift]
select an option & set
margin to be shifted
Press [Save]
3 Select [Layout
Adjustment]
a: [Edge Erase]
select an option & set area
to be erased
b: [Image Shift]
select an option & set
margin to be shifted
Press [Save]
4 Enter number of copies
using numeric keypad &
Press <Start> button
4 Enter number of copies
using numeric keypad &
Press <Start> button
a
a
b
b
Refer User Guide
Edge Erase P.113
Image Shift P.114
Note
1
2
3
3a
3b
4
1 Load documents onto
the Document Feeder
1 Load documents onto
the Document Feeder
13
13
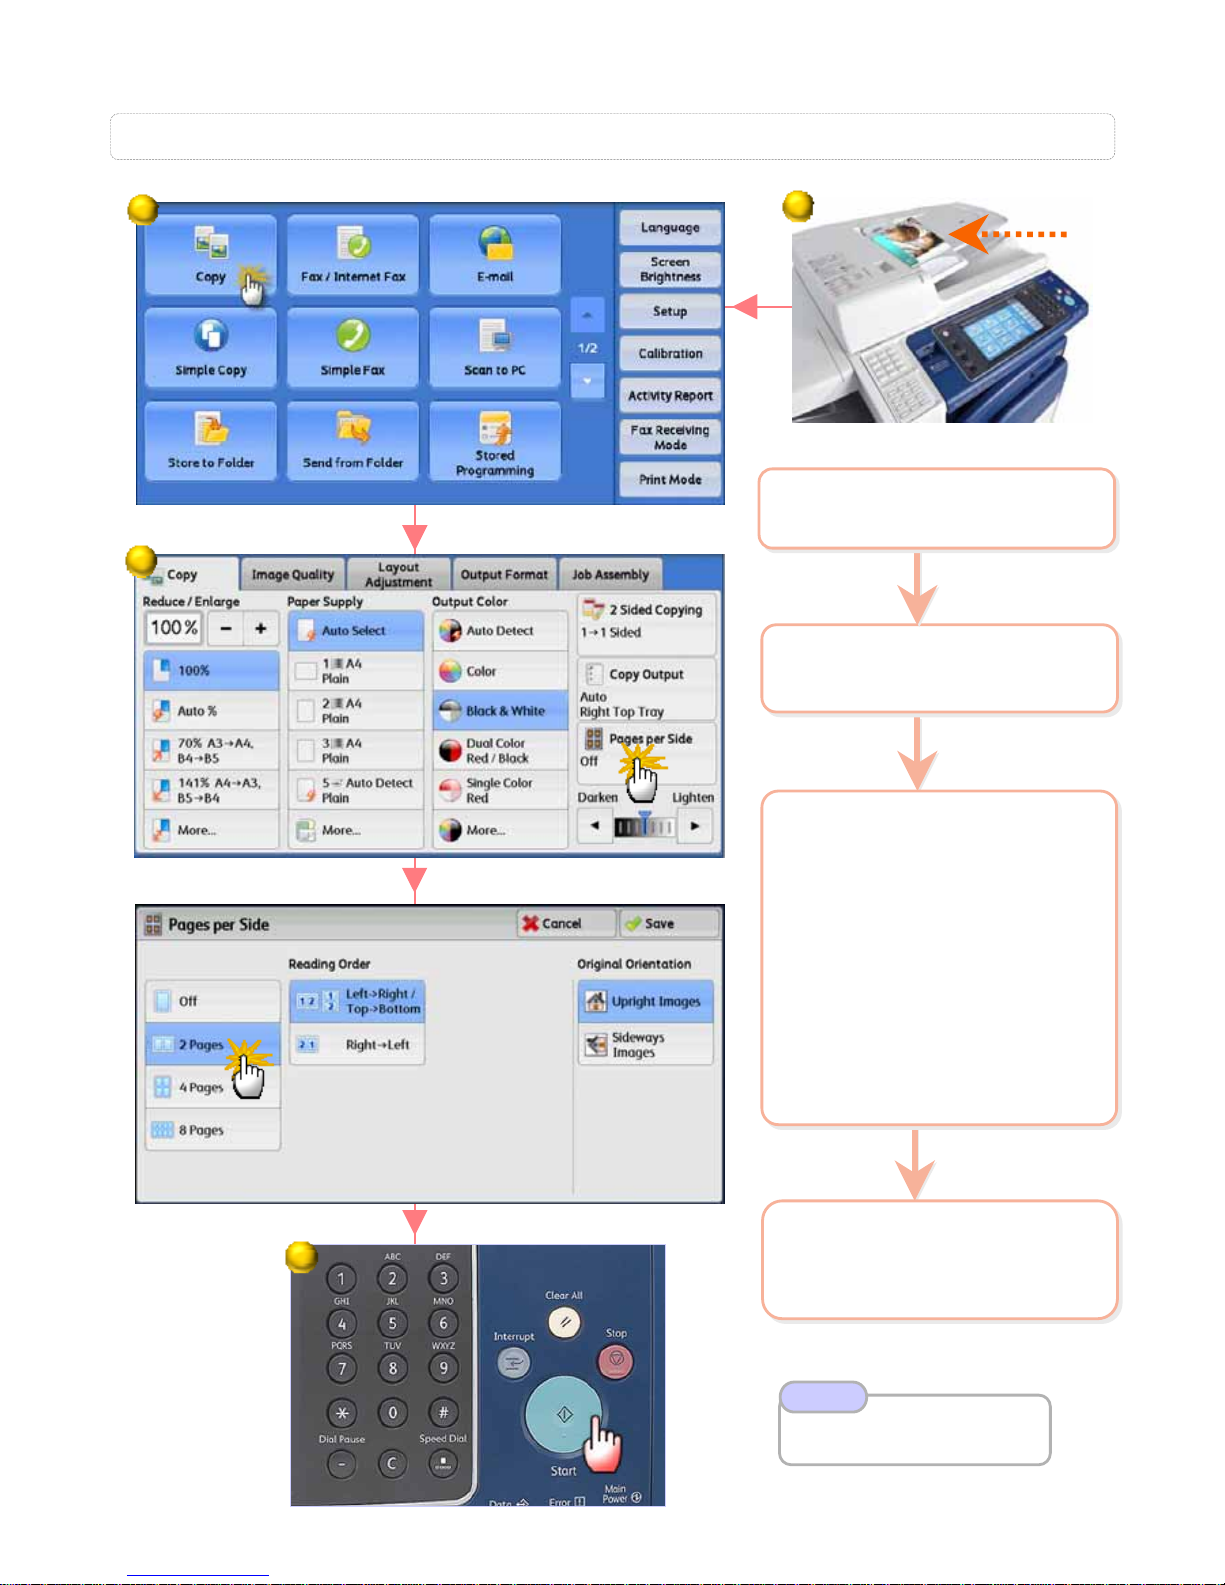
Allows you to copy 2, 4 or 8 pages of documents onto a single sh
Allows you to copy 2, 4 or 8 pages of documents onto a single sh
eet of paper
eet of paper
C7: Pages per Side …
2 On the [Services Home]
select [Copy]
2 On the [Services Home]
select [Copy]
4 Enter number of copies
using numeric keypad &
Press <Start> button
4 Enter number of copies
using numeric keypad &
Press <Start> button
3 Select [Pages per Side] :
Off – feature not applied
2 Pages Up – 2 documents
copied into 1 sheet of paper
4 Pages Up – 4 documents
copied into 1 sheet of paper
8 Pages Up – 8 documents
copied into 1 sheet of paper
Set preferred Reading
Order & Press [Save]
3 Select [Pages per Side] :
Off – feature not applied
2 Pages Up – 2 documents
copied into 1 sheet of paper
4 Pages Up – 4 documents
copied into 1 sheet of paper
8 Pages Up – 8 documents
copied into 1 sheet of paper
Set preferred Reading
Order & Press [Save]
Refer User Guide
Pages per Side P.125
Note
1
2
3
4
1 Load documents onto
the Document Feeder
1 Load documents onto
the Document Feeder
14
14

Allows you to copy multiple pages into a booklet layout. (Option
Allows you to copy multiple pages into a booklet layout. (Option
al: stapled & folded)
al: stapled & folded)
C8: Booklet Creation…
2 On the [Services Home]
select [Copy]
2 On the [Services Home]
select [Copy]
3 Select [Output Format] >
Press [Booklet Creation]
3 Select [Output Format] >
Press [Booklet Creation]
4 Select an option:
Off – feature not applied
Create Left/Top Bound
Create Right Bound
Copy Booklet
Optional feature:
Fold & Staple…
Press [Save]
4 Select an option:
Off – feature not applied
Create Left/Top Bound
Create Right Bound
Copy Booklet
Optional feature:
Fold & Staple…
Press [Save]
5 Select [Copy] > [Paper
Supply] – Select Tray
Landscape orientation
and Press <Start>
button.
5 Select [Copy] > [Paper
Supply] – Select Tray
Landscape orientation
and Press <Start>
button.
Refer User Guide
Booklet Creation P.121
Note
2
3
4
5
1 Load documents onto
the Document Feeder
1 Load documents onto
the Document Feeder
15
15
1
 Loading...