

Page 1

ETERNUS DX80 S2, DX90 S2, DX410 S2 and DX440 S2
Initial Setup
Initial Setup ETERNUS DX80 S2, DX90 S2, DX410 S2 and DX440 S2
0
Copyright Fujitsu Technology Solutions, Release August 2011
Page 2

Content
Connect FST to DX80 S2 / DX90 S2
Connect FST to DX400 S2
Initial Configuration of the FST
Initial Configuration Web GUI
Initial Wizard System Setup
Initial Manual Setup
Initial Setup ETERNUS DX80 S2, DX90 S2, DX410 S2 and DX440 S2
1
Copyright Fujitsu Technology Solutions, Release August 2011
Page 3
Connect FST to DX80 S2 / DX90 S2
DX80 S2 and DX90 S2 systems have one MNT LAN port per
CM
The MNT port is shared for both the Field Engineer and customer
administration tasks
Connect the LA N cable of the Fiel d Service Terminal (FST) to the port
labeled "MNT" at the Controller Module
• The "Master LED" of the respec tive CM lights in gr een
Master LED
Initial Setup ETERNUS DX80 S2, DX90 S2, DX410 S2 and DX440 S2
MNT Port
2
Copyright Fujitsu Technology Solutions, Release August 2011
Page 4

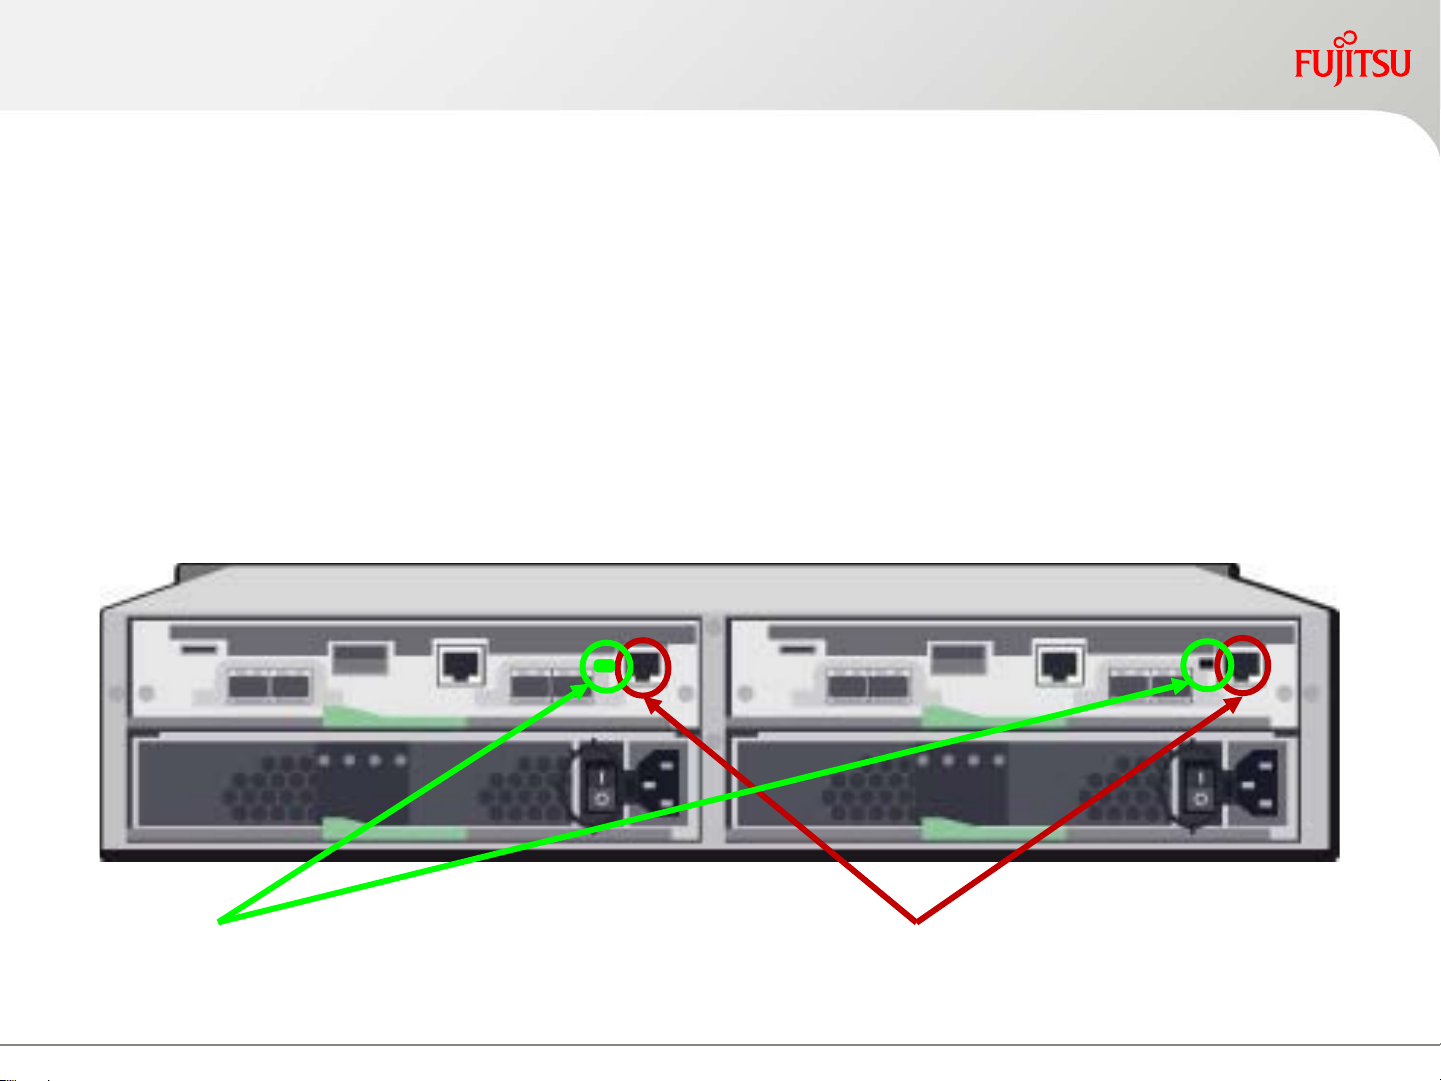
Connect FST to DX400 S2
DX400 S2 systems support a specific FST LAN port per CM
Connect the LA N cable of the Fiel d Service Terminal (FST) to the port
labeled "FST" at the Controller Module
• The "Master LED" of the respec tive CM lights in gr een
Separate LAN port labeled "MNT" at each CM can be
connected to the customer LAN
Both ports can be used for Field Engineer as well as for customer
administration tasks
Master LED
Initial Setup ETERNUS DX80 S2, DX90 S2, DX410 S2 and DX440 S2
FST Port
3
MNT Port
Copyright Fujitsu Technology Solutions, Release August 2011
Page 5

Initial Configuration of the FST
Connect the FST to the Master CM of the ETERNUS DX S2
system
Web browser
LAN cable Straight cable or cross-linked cable (direct connection)
IP Address/Subnet mask
ETERNUS DX S2 Entry: MNT
ETERNUS DX S2 Midrange: FST
IP address of the FST
Caution
Internet Explorer 7.0/8.0 or later
Mozilla Firefo x 3.6.x or later
Factory default IP Ad dress: 192.168.1.1
Factory Subnet mask: 255.255.255.0
Select it within the same subnet of IP Address that is used for
the ETERNUS LAN Port (For example 192.168.1.20)
Do not use a proxy server or cache (T emp orary Internet Files)
JavaScript and Sty le Sheet must be enabled for the browser
The default IP address of the ETERNUS Manager GUI
• http://192.168.1.1/
Initial Setup ETERNUS DX80 S2, DX90 S2, DX410 S2 and DX440 S2
4
Copyright Fujitsu Technology Solutions, Release August 2011
Page 6

Initial Configuration Web GUI (1)
To start the installation procedure, logon to the ETERNUS
DX S2 Web GUI using the standard User Account
User name: root
Password: root
Initial Setup ETERNUS DX80 S2, DX90 S2, DX410 S2 and DX440 S2
5
Copyright Fujitsu Technology Solutions, Release August 2011
Page 7

Initial Configuration Web GUI (2)
The opening screen giving a quick overview about the system
directly appears after log-in to the ETERNUS DX S2 Web GUI
Status overview
of the system
Global System
Global overview about
configured disk capacity
information
Initial Setup ETERNUS DX80 S2, DX90 S2, DX410 S2 and DX440 S2
6
Copyright Fujitsu Technology Solutions, Release August 2011
Page 8

Initial Configuration Web GUI (3)
General status information of the ETERNUS DX S2 sys tem
Indicator Colour Description
Green Each component is in normal status
Orange Component is under maint enance (self test )
Preventive maintenance is required for some components.
Yellow
Pinned data is detected.
This status sign is displayed under the follo wing conditions
Red
Component failure is detected
Loop Down is detected
This status sign is displayed under the follo wing conditions
Abnormal status is detected at power on
Abnormal status is detected at power off, the system has not
Red
Initial Setup ETERNUS DX80 S2, DX90 S2, DX410 S2 and DX440 S2
started up normally
Error during restoration of the operating environment at poweron
The system is abnormal
7
Copyright Fujitsu Technology Solutions, Release August 2011
Page 9
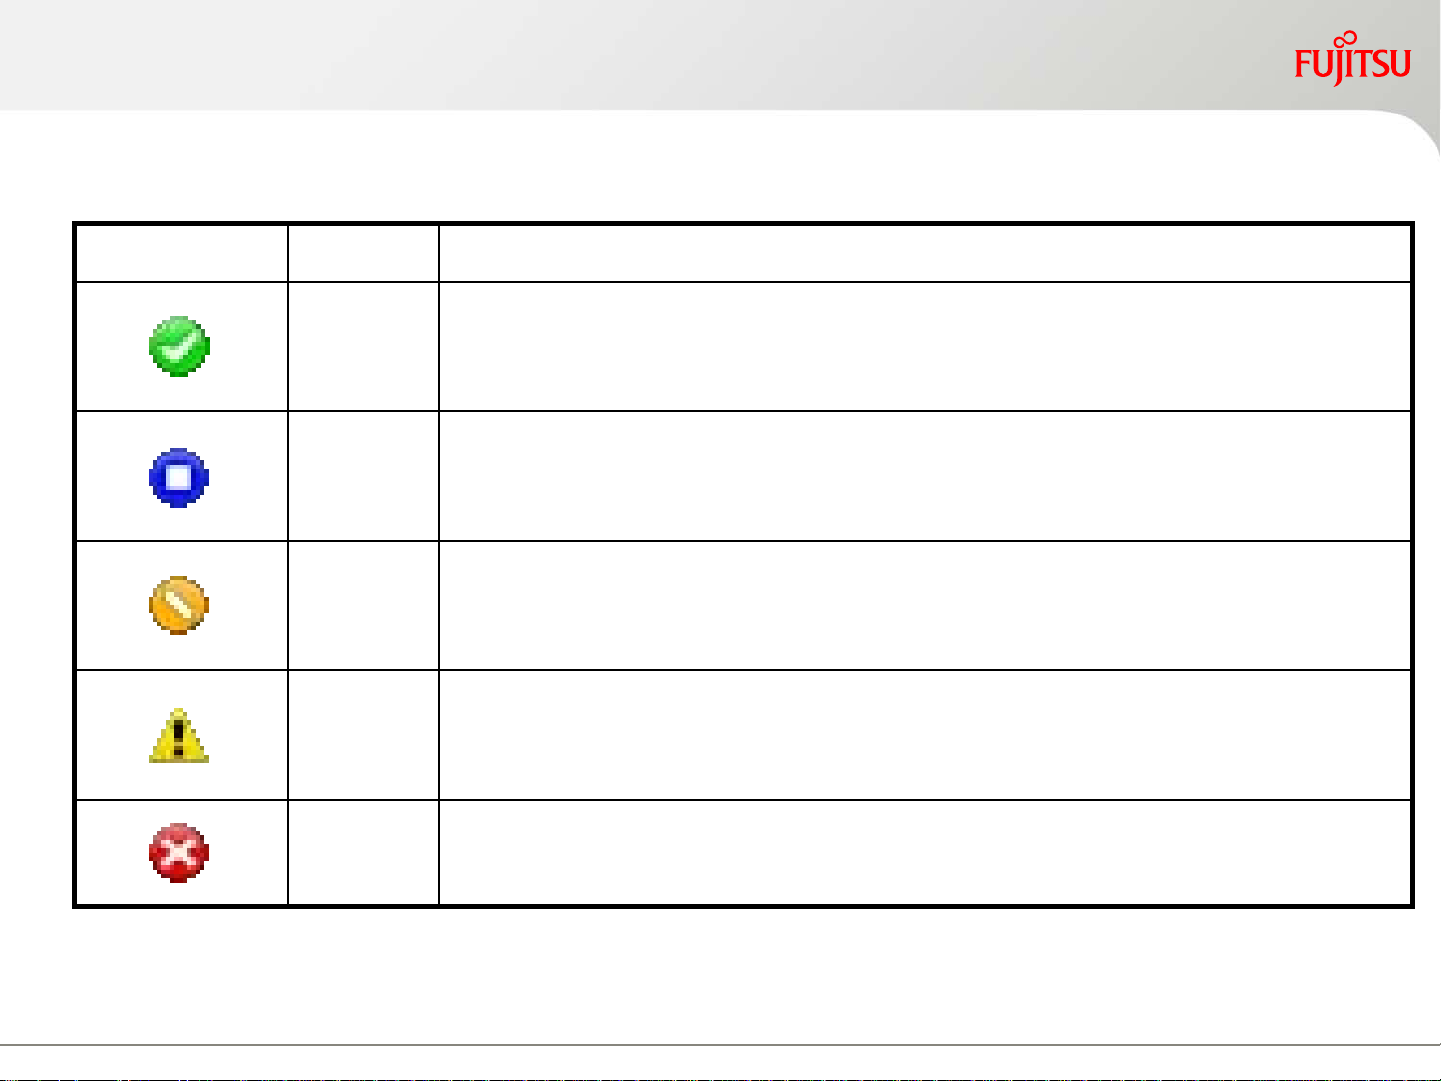
Initial Configuration Web GUI (4)
Status information of each ETERNUS DX S2 com po ne nt
Indicator Colour Description
Green Each component is in normal status
Blue A component is installed but unused
Orange Component is under maintenance (self t est)
Yellow Preventive maintenance is required
Red Component failure is detected
Initial Setup ETERNUS DX80 S2, DX90 S2, DX410 S2 and DX440 S2
8
Copyright Fujitsu Technology Solutions, Release August 2011
Page 10
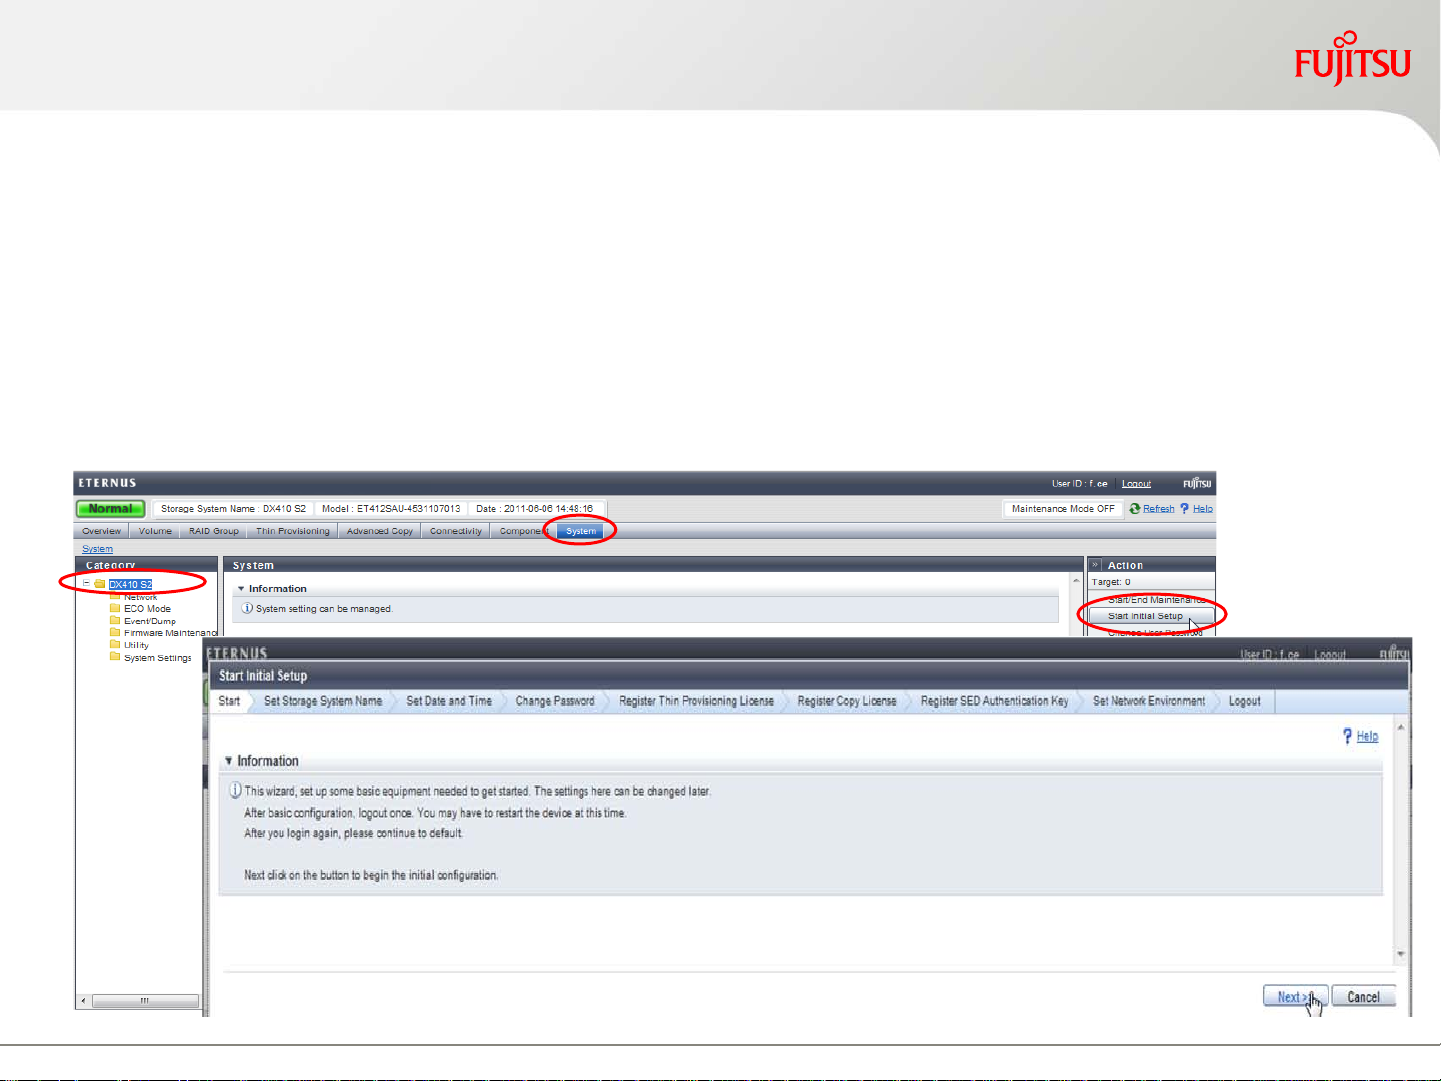
Initial Wizard System Setup (1)
The first Initial Setup Wizard
Setup the Storage System Name, Set Date & Time, Change Root
password
Feature registration
• Thin Provisioning, Advanced Copy and SED Authentication key
Set Network Environment and log out to activate the set tings
Initial Setup ETERNUS DX80 S2, DX90 S2, DX410 S2 and DX440 S2
9
Copyright Fujitsu Technology Solutions, Release August 2011
Page 11

Initial Wizard System Setup (2)
The second Initial Setup Wizard s ess ion can be started after
the first setup is done and it supports the setup of the
notification network components
SNMP
• Agent Basics, Manager, Agent User, Agent Community, Agent Trap
Notification
• e-Mail and syslog
Initial Setup ETERNUS DX80 S2, DX90 S2, DX410 S2 and DX440 S2
10
Copyright Fujitsu Technology Solutions, Release August 2011
Page 12

Initial Manual Setup - Date and Time
"System" "System Settings"
Time, Date and time zone
Daylight Saving T ime
NTP server
Initial Setup ETERNUS DX80 S2, DX90 S2, DX410 S2 and DX440 S2
11
Copyright Fujitsu Technology Solutions, Release August 2011
Page 13
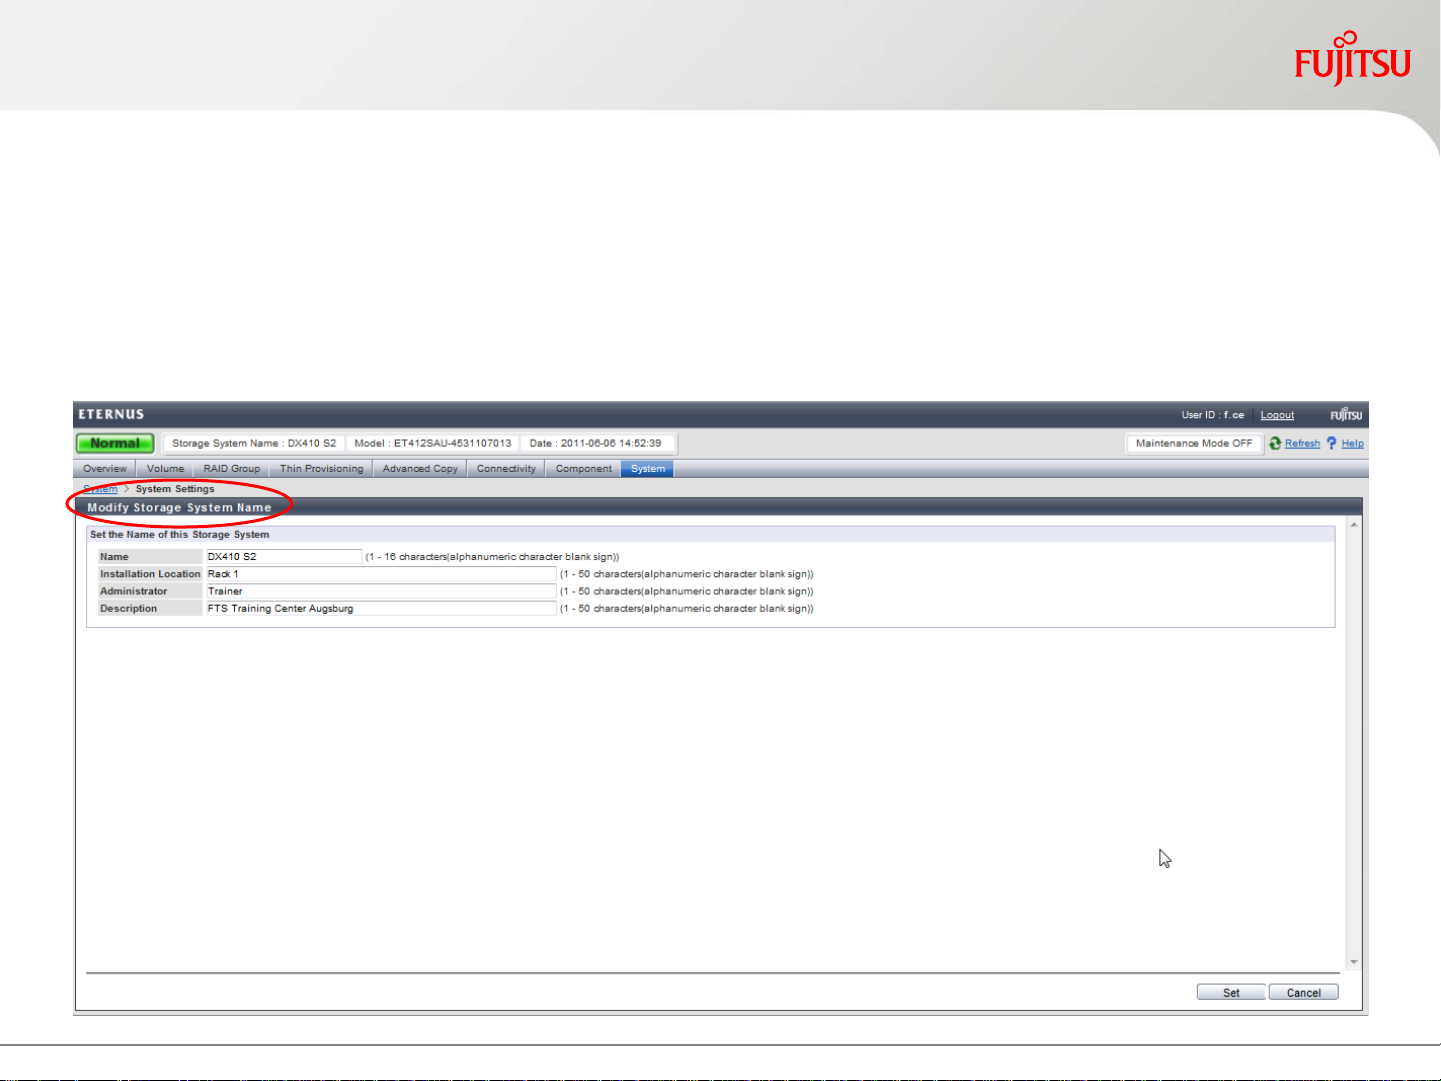
Initial Manual Setup - Machine Name
Optional settings to define system information
A self-explanatory name f or the E TERNUS DX system
A description of the locati on of the ETERNUS DX installation
Contact information of the administ rator
Initial Setup ETERNUS DX80 S2, DX90 S2, DX410 S2 and DX440 S2
12
Copyright Fujitsu Technology Solutions, Release August 2011
Page 14
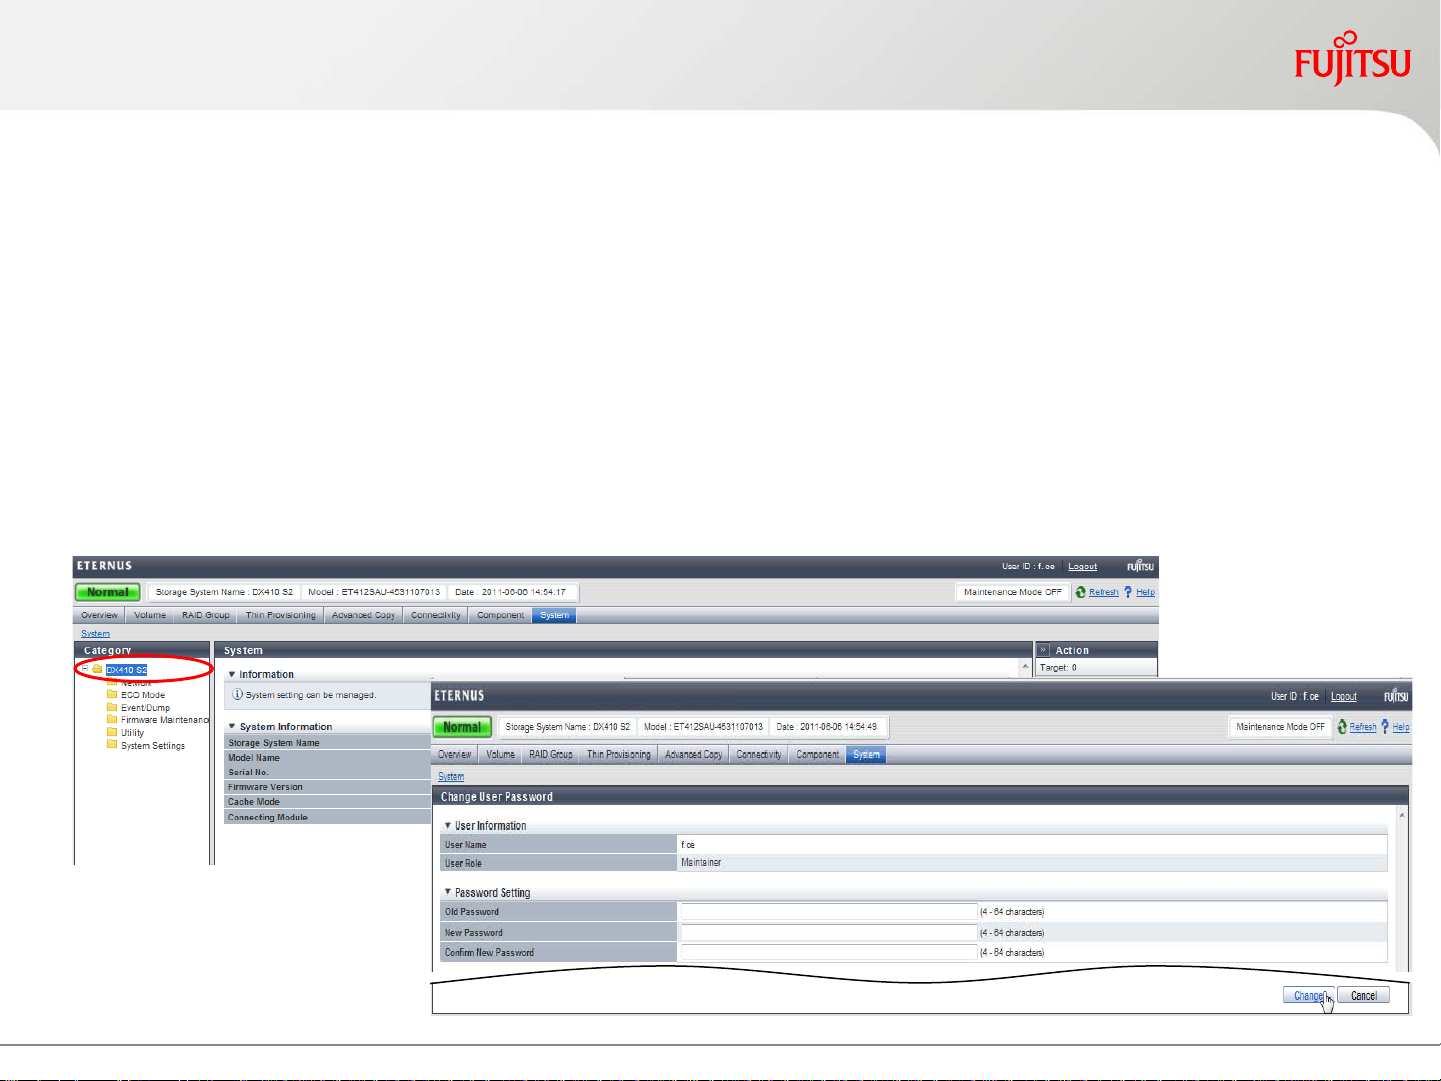
Initial Manual Setup - Password
It is always recommended to change the default passwords
(after customer's approval)
It is recommended to setup an additional user ac count with
appropriate permissions to administrate other user accounts
• The user account "f.ce" has per default only the per m i s sion to change its own
password
• Helps in situations with forgotten passwords
Initial Setup ETERNUS DX80 S2, DX90 S2, DX410 S2 and DX440 S2
13
Copyright Fujitsu Technology Solutions, Release August 2011
Page 15

Initial Manual Setup - Network Environment
IP Address of the Master CM
In the event of an Ethernet link error of the Master CM MNT port, the IP
address is taken over automatically by the Slave CM MNT port
In a DX400 S2 system it is also possible to setup the network
environment f or the FS T port
Initial Setup ETERNUS DX80 S2, DX90 S2, DX410 S2 and DX440 S2
Allowed IP List
• Default Gateway must be set
• Defines all ser vers that are allowed to access the LAN por t of the
ETERNUS DX S2 system
• Either Host IP Address and Netmask
• Or Network Segment Address and Netmask
14
Copyright Fujitsu Technology Solutions, Release August 2011
Page 16

Initial Manual Setup - Firewall Setting
This window allows or denies different TCP/IP management
services that can be used via the LAN ports
"MNT is available in DX S2 systems
"FST" is available in DX400 S2 systems only
"RMT" is used at Fujitsu site only
Initial Setup ETERNUS DX80 S2, DX90 S2, DX410 S2 and DX440 S2
15
Copyright Fujitsu Technology Solutions, Release August 2011
Page 17

Initial Manual Setup - E-Mail Notification
Setup E-Mail Notification window can be used to define
Email notification services
Email server settings
Email retries
Initial Setup ETERNUS DX80 S2, DX90 S2, DX410 S2 and DX440 S2
16
Copyright Fujitsu Technology Solutions, Release August 2011
Page 18

Initial Manual Setup - Syslog Setting
This window can be used to define up to two syslog serv er s
Any Unix or Linux server with a running "syslog" daemon in which the
remote collection service is enabled
Also any other error collection program that supports t he standard syslog
protocol can be used
• For example Microsoft Operations Manager (MO M)
Initial Setup ETERNUS DX80 S2, DX90 S2, DX410 S2 and DX440 S2
17
Copyright Fujitsu Technology Solutions, Release August 2011
Page 19
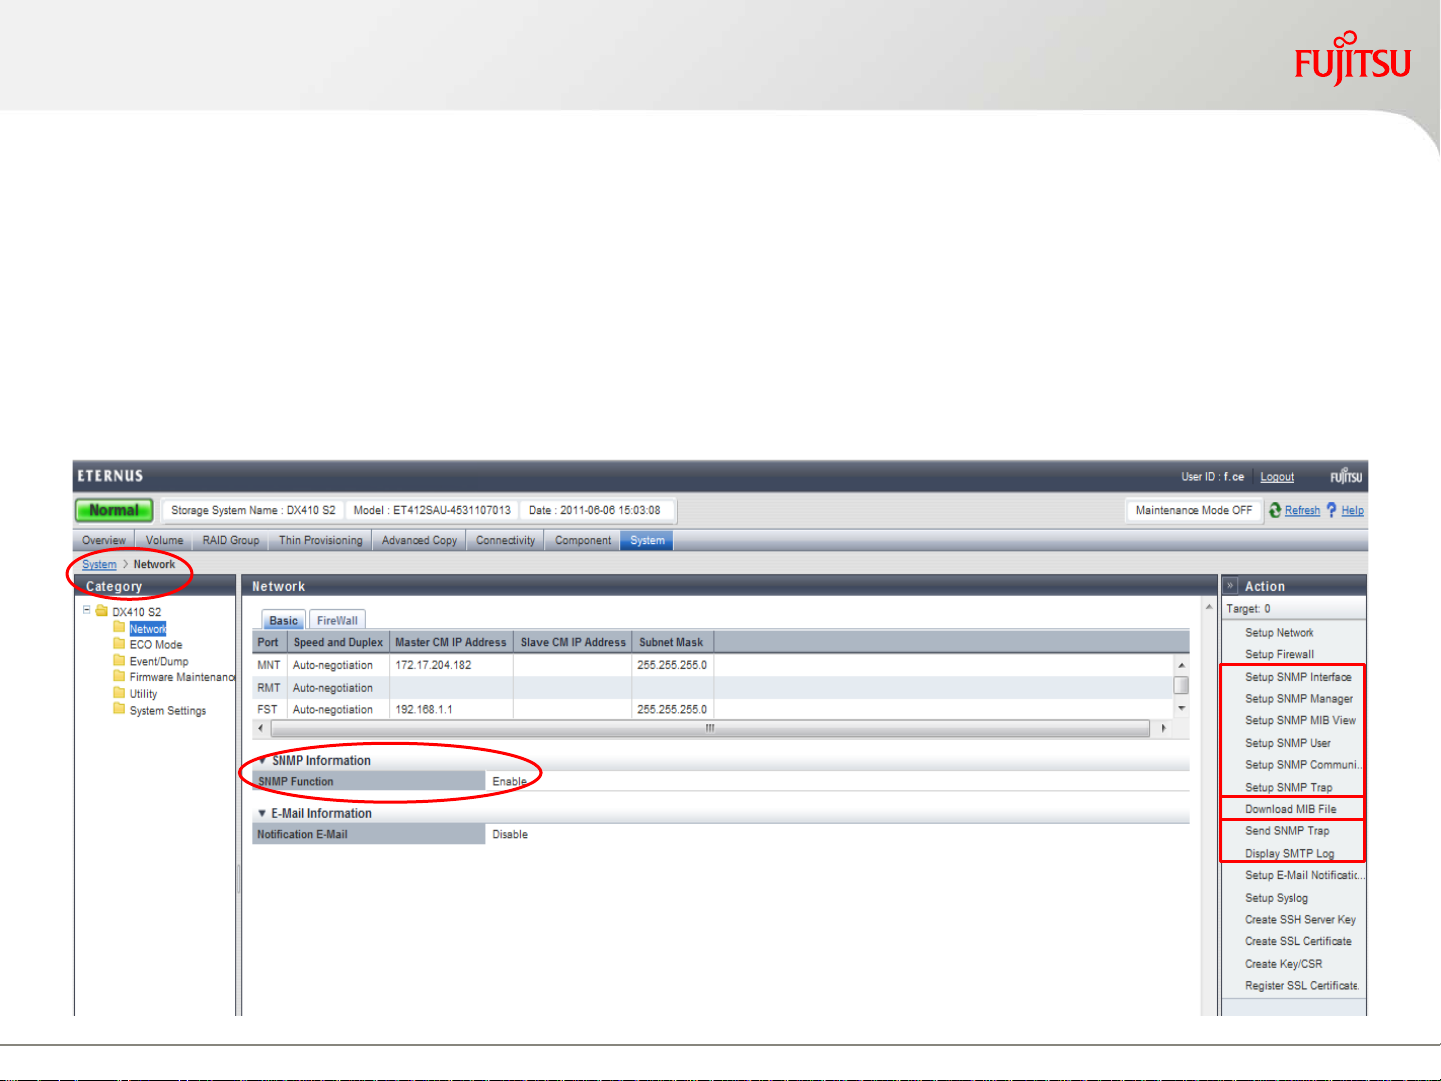
Initial Manual Setup - SNMP Environment
Setup SNMP Interface
SNMP is disabled by default
SNMP must be enabled for the other SNMP settings to appear in bold
under the "Action" column
Initial Setup ETERNUS DX80 S2, DX90 S2, DX410 S2 and DX440 S2
18
Copyright Fujitsu Technology Solutions, Release August 2011
Page 20

 Loading...