

Fujitsu DG-station 100A, DG-station 100B, DG-station 100C, DG-station 100PA, DG-station 100PB User Manual
...Page 1
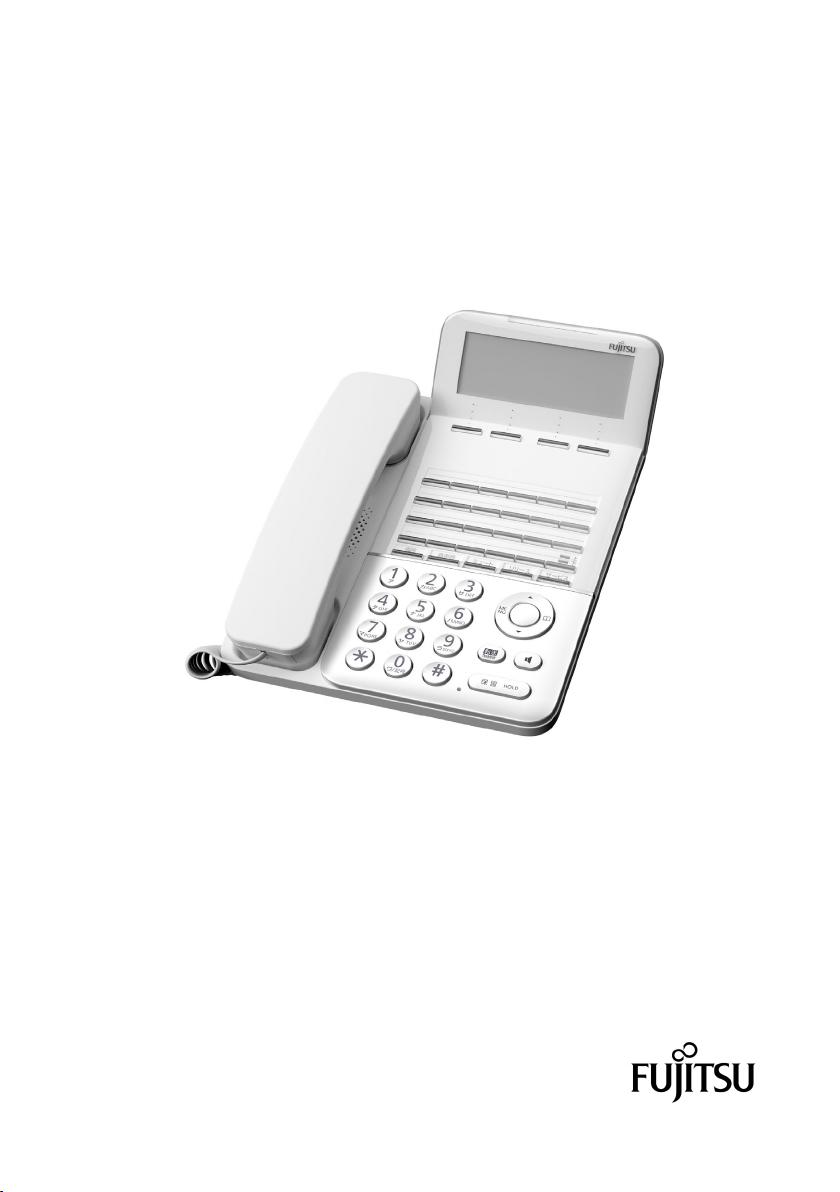
FUJITSU Network IP Pathfinder S
English Guidance Service
User Guide
Thank you for your purchase of the Fujitsu communication system.
This user guide is intended for users of its telephones and system administrators, and the
user guide explains the functions and operation of the Fujitsu communication system.
The user guide also provides important information on using this product safely.
Before using this product, read this user guide thoroughly.
Keep this user guide handy in a safe and convenient location for quick reference during use
of the product.
Fujitsu makes every effort to prevent users and bystanders from being injured and to prevent
property damage. To ensure no harm to you and bystanders, and no damage to the equipment
itself, be sure to use the product in accordance with the instructions in this user guide.
Page 2

This Product is designed, developed and manufactured as contemplated for general use,
including without limitation, general ofce use, personal use, household use, and ordinary
industrial use, but is not designed, developed and manufactured as contemplated for use
accompanying fatal risks or dangers that, unless extremely high safety is secured, could
lead directly to death, personal injury, severe physical damage or other loss (hereinafter
"High Safety Required Use"), including without limitation, nuclear reaction control in
nuclear facility, aircraft flight control, air traffic control, mass transport control,
medical life support system, missile launch control in weapon system. You shall not use
this Product without securing the sufcient safety required for the High Safety Required
Use. If you wish to use this Product for High Safety Required Use, please consult with our
sales representatives in charge before such use.
CAUTION
This is a Class A product.
In a domestic environment this product may cause radio interference, in which case the
user may be required to take corrective actions. VCCI-A
● This telephone system is designed for use in Japan only and cannot be used in any
other country.
● The specications and information provided herein are for informational purposes
only and are not a warranty of actual performance, whether expressed or implied.
the specifications and information are subject to change without notice. Actual
performance may vary based on individual congurations, use of collateral equipment,
or other factors.
● This telephone complies with certication of technical standard conformance.
This user guide prohibits copying, and transcribing the content of the description of
this user guide without the permission of the publisher.
All Rights Reserved,Copyright© Fujitsu 2017
2
Page 3
IMPORTANT NOTE TO USERS
● About this user guide
The user guide also provides important information on using this product safely.
Before using this product, read this manual thoroughly.
Especially, please use this product after you read "IMPORTANT NOTE TO USERS" described in
user guide, and you understood. Moreover, please keep this book importantly.
We will explain some of telephone function on this user guide. Please see the IP Pathnder S
family's user guide ( ※ ) in detail.
※ IP Pathnder S family's user guide : IP Pathnder RM10S GSM series, IP Pathnder S
● Conventions for Alert Signals
This user guide uses the following conventions to alert users to potential injury to
themselves or bystanders and to potential property damage.
「 DANGER」 indicates a hazardous situation likely to result
DANGER
WARNING
CAUTION
in serious personal injury if the user does not perform the
procedure correctly.
WARNING」 indicates a hazardous situation could result in
「
serious personal injury if the user does not perform the
procedure correctly.
CAUTION」 indicates a hazardous situation could result in
「
minor or moderate personal injury if the user does not perform
the procedure correctly. This alert signal also indicates that
damages to the product or other property, may occur if the
user does not perform the procedure correctly.
● Safety Precautions
Follow the safety precautions given below when using the telephone, and the AC adapter (these
components are hereafter collectively referred to as the equipment). Improper handling of the
equipment or failure to observe the precautions may expose users and bystanders to harm, lead
to property damage, and may harm the environment and lead to injury and/or economic loss to
third parties.
DANGER
( 1 ) U s e s
Notes on the AC
adapter
・ Use the dedicated AC plug of the equipment. Otherwise, a fire,
electric shock, or product failure may occur.
The dedicated AC plug
:FC164H12(The dedicated AC plug of FC780BM)
3
Page 4
IMPORTANT NOTE TO USERS
( 1 ) U s e s
Notes on reasonably
foreseeable incorrect
uses
・ Do not spill liquid on the equipment, and do not immerse the
equipment in any liquid. Otherwise, a fire, electric shock, or
product failure may occur.
・ Do not place the equipment near vases, owerpots, glass, toiletries,
containers of chemicals or liquids, and small metal objects. If
liquid from a container were to spill onto the equipment, or if a
foreign object were to get inside the equipment, a re, electric
shock, or product failure may occur.
・ Be careful to not expose the equipment to insecticide or hair
spray or cleaning spray (one including inammable) etc. Otherwise,
a re, electric shock, or product failure may occur.
・ Ensure that no foreign object such as clips and staples gets
through openings and inside the equipment. Otherwise, a fire,
electric shock, or product failure may occur.
・ Do not place the equipment in a location that is not stable, such
as on a wobbly stand, or in a location that is at an incline.
Otherwise, the equipment may be drop off or fall over because of a
problem with balance, which may cause an injury or product failure.
・ Placing the AC adapter or the equipment in a microwave oven or
high-pressure container could cause it to generate excessive heat,
explode, or ignite, or a product failure.
WARNING
Prohibitio n a gains t
d i s a s s e m b l y a n d
modic atio n
Notes on the
connection device
Notes on the cables
・ Do not disassemble or modify the equipment. Do not overhaul or
rebuild a used product for the purpose of reusing it. Otherwise, a
re, electric shock, or product failure may occur.
・ Do not use a modied device in the equipment. Otherwise, a re,
electric shock, or product failure may occur.
・Do not damage, break, or modify the cable. Otherwise, a fire,
electric shock, or product failure may occur.
・ Ensure that no heavy or flammable object rests on the cable.
Otherwise, they may become damaged, which may result in a fire,
electric shock, or product failure.
・ Do not place the cable near a heater. Otherwise, the coating of
the cord may melt, which may result in a re, electric shock, or
prod uct failure .
・ Do not bend the cable. Otherwise, they may become damaged, which
may result in a re, electric shock, or product failure.
4
Page 5
IMPORTANT NOTE TO USERS
(2) Maintenance and inspection
Restriction and
p r o h i b i t i o n
c o n c e r n i n g
inspection s
(maintenance
pe rso n nel)
( 1 ) Uses
Notes on the
o p e r a t i n g
environment
・ If inspection of the inside of the equipment or repair work is
required, ask the shop where you purchased the equipment to carry
out the work. Such work may result in an electric shock, injury, or
prod uct failure .
・ If the equipment is emitting smoke or an abnormal odor, contact the
shop where you purchased the equipment after taking the following
action. For the telephone, remove the AC adapter and cable to turn
off the telephone. For the connection device, use the power switch
to turn off the system.
・ Do not place the equipment in a location where it is hot or exposed
to direct sunlight. Otherwise, the inside of the equipment becomes
hotter, which may cause a re or product failure.
・ Do not place the equipment in a location that is extremely hot or
cold or in a location that has large uctuations in temperature.
Otherwise, a re, electric shock, or product failure may occur.(Use
the equipment at a temperature ranging from 0℃ to 40℃ .)
・ Do not set up or use the equipment in wet locations, such as in a
bathroom and near a humidier. (Use the equipment in an environment
where the humidity ranges from 20% to 80%.)
・Do not place the equipment in a location where oil may splash on
it, such as near a cookstove, or in a wet or dusty location.
Otherwise, a product failure may occur.
・ Do not place the equipment on an object that tends to accumulate
static electricity, such as rugs and carpets. Otherwise, a fire,
electric shock, or product failure may occur.
・ Do not place the equipment in a location where the equipment is
exposed to harmful gases, such as sulfur gas and the exhaust gas
from automobiles. Otherwise, a fire, electric shock, or product
failure may occur.
・ Do not place the equipment in a location where the equipment is
exposed to air from a nearby sea. Otherwise, a re, electric shock,
or product failure may occur.
CAUTION
5
Page 6

IMPORTANT NOTE TO USERS
Notes on reasonably
foreseeable incorrect
uses
・ Ensure that no object rests on the equipment. The object may drop
off the equipment or fall over, which may cause a re, electric
shock, injury, or product failure.
・ Do not place the equipment near an unstable object that is likely
to fall over easily. Such an object may drop off or fall over,
which may cause a re, electric shock, injury, or product failure.
・ When mounting the equipment on a wall, be careful to make sure that
the equipment cannot fall off. Otherwise, a re, electric shock,
injury, or product failure may occur.
・ Do not place the equipment in a location that is exposed to
frequent vibrations or impacts. Otherwise, the equipment may drop
off or fall down, which may cause a re, electric shock, injury, or
prod uct failure .
・ Do not set up the equipment in a passageway. Otherwise, people may
trip over the equipment, which may result in an injury or product
failur e.
(2) Maintenance and inspection
Inspection and
clea ning
・ If drops of water are found on the equipment, wipe them up with a
dry cloth. Drops of water left on the equipment may cause a re,
electric shock, or product failure.
・ If the equipment is dirty, clean the equipment by wiping it with a
soft dry cloth. Avoid using organic solvents, such as benzine and
thinner. Otherwise, the equipment may corrode or melt, which may
result in a re, electric shock, or product failure.
( 3 ) Disp osal
Notes on disposal of
the product
6
・ Please use " 事業系 ICT 製品リサイクルサービス " when this product
is abandoned and recycled from the customer of the corporation and
the enterprise. Please see the following Web site in detail.
http://jp.fujitsu.com/about/csr/eco/products/recycle/recycleindex.html
・ This equipment is products that registers or can maintain peculiar
data to the customer. When this equipment is abandoned to evade
unexpected damage etc. of the outow of data in equipment etc. (Or,
it transfers and return it), it is necessary to delete the data
that registers or is maintained in equipment. Please contact the
purchased shop in detail.
Page 7

CONTENTS
IMPORTANT NOTE TO USERS............................... 3
1 BEFORE USES
BASIC PACKAGE.......................................... 8
DIGITAL TELEPHONE CONTROLS AND INDICATORS.............. 9
CONTROL OF TONE,VOLUME,DISPLAY CONTRAST,ETC........... 11
CLEAR FACEPLATE....................................... 16
CONNECTING CABLES..................................... 16
HEARING AID........................................... 16
2 OPERATIONS
MAKING A CALL......................................... 17
ANSWERING A CALL...................................... 18
HOLDING CALLS / TRANSFER CALLS........................ 19
ABBREVIATED DIALING................................... 20
NOT PROGRAMMED ONE-TOUCH DIALING...................... 21
USEFUL OPERATIONS..................................... 22
3 LOCAL TELEPHONE DIRECTORY
TO REGISTER A DIRECTORY DATA.......................... 23
TO SEARCH LOCAL TELEPHONE DIRECTORY................... 27
TO MAKE A CALL USING THE LOCAL TELEPHONE DIRECTORY.... 29
TO CORRECT A DIRECTORY DATA
TO DELETE A DIRECTORY DATA............................ 31
TO INPUT A CHARACTER.................................. 32
............................. 30
4 CALL LOG
OUTGOING CALL LOG AND INCOMING CALL LOG............... 33
ABOUT OUTGOING CALL LOG............................... 34
ABOUT INCOMING CALL LOG............................... 35
7
Page 8
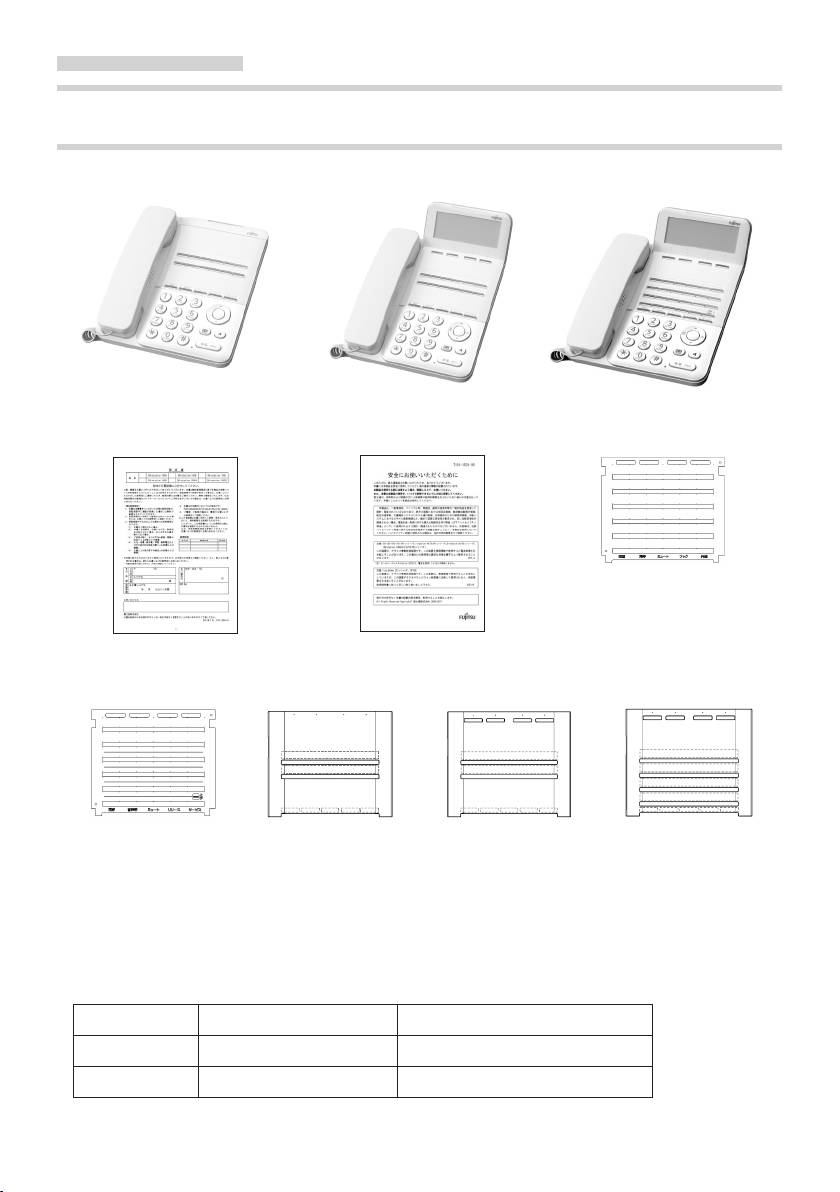
1 BEFORE USES
BASIC PACKAGE
■ Digital telephone
DG-station 100A DG-station 100B DG-station 100C/D/PA/PB
■ Attachment
Insert sheet for IP Pathnser S
Warranty Safety precautions
Insert sheet for other PBX
(In case of DG-station 100A) (In case of DG-station 100B) (
● Please contact the purchased shop if there is an insufcient one in the set or if there are an erratum
and an omission of a word in this book.
Clear faceplate Clear faceplate Clear faceplate
family
In case of DG-station 100C/D/PA/PB)
■ Environmental condition
Temperature(℃) Humidity(% RH)
Operating 0 ~+ 40 20 ~ 80(not dewfall)
Storage - 20 ~+ 60 5 ~ 90(not dewfall)
8
Page 9
1 BEFORE USES
DIGITAL TELEPHONE CONTROLS AND INDICATORS
<FC651D >
■ Face
Ringer LED
Use these Keys to select the item
displayed in the fourth line.
Programmable Line / Feature Buttons
All buttons can be used to automatically dial
either an extension or others.
Dial Buttons
Press this Key to display the
MENU
setting menu.(See page11)
Local telephone directory can be
operated.
Use these keys to change the ringing
tone volume, speaker volume, handset
volume, display contrast, retrieval
of telephone book,and others.
(See page 11.)
Press this key to determine the
selected item.
■ Bottom
■ Back
Recording jack
Function Buttons
Handset
※ The insert sheet is option (the available accessory).
【The insert sheet of the available accessory】
・FC650TCC : Ten pieces
Microphone(only FC651D)
Line cord
Handset cord
ABBD DIAL
REDIAL
MUTE
FLASH
ICM
TRANSFER
HOLD
USB connector
Press this key for abbreviated
dialing.
Press this key to redial number.
Press this key to turn off the
microphone.
Press this key to terminate a call
without replacing the handset.
Press this key for extension call
and answering.
Press this key to transfer a call to
another telephone.
Press this key to dial without
lifting handset. Only FC651D can
use the handsfree by pressing this
button.
Press this key to hold an outside or
extension call. Press the ICM or the
LINE button to resume call.
9
Page 10
1 BEFORE USES
DIGITAL TELEPHONE CONTROLS AND INDICATORS
<FC651PA and FC651PB >
■ Face
Please see <FC651D > .
FC651PA
DP/PB
switch
Please set up the fol lowing switch
pursuant to analog network's contract
for the power outage.
(default:PB )
◆ DP:Analog sending signal 20pps
◆ PB:Analog sending signal PB
■ Bottom
FC651PA : DP/PB switch
FC651PB : P/MP switch
FC651PB
P/MP
Line cord
Handset cord
FC782PA/PB's behave in power outage
■ FC651PA and FC651PB
・During the power outage, functions (display, extension to extension calls, etc.) other than making calls
and answering calls cannot be used.
・About FC651PA/PB's behave in the power outage during the call.
【When the power is lost】
If the power is lost during the call, the call will be broken. After a few seconds, you can hear the
dial tone of the analog / INS network.
【When the power is restored from the power outage】
If the power is restored during the call, the call will be disconnected.
After several tens of seconds, you can hear the internal dial tone.
・The call waiting service etc. of the analog/INS network cannot be used during power outage.
■ Only FC651PB
・Please set up following switch pursuant to INS network's contract for the power outage.
◆ MP : Point to Multi Point always-on / call-by-call (default)
◆ P : Point to Point
P/MP swicth's conguration becomes effective if you reactivate the telephone after you change it during
power recovery.
P/MP switch's conguration doesn't become effective if you change it during power outage, or after you
reactivate the telephone.
・The line length from DSU to FC651PB (via PBX) is 300 metre ( φ 0.5 cable). One INS network line can
connect only one FC651PB.
Please set up the fol lowing switc h
switch
pursuant to INS network's contract
for the power outage.
(default:MP )
◆ MP: Point to Multi Point
always-on / call-by-call
◆ P: Point to Point
10
Page 11
1 BEFORE USES
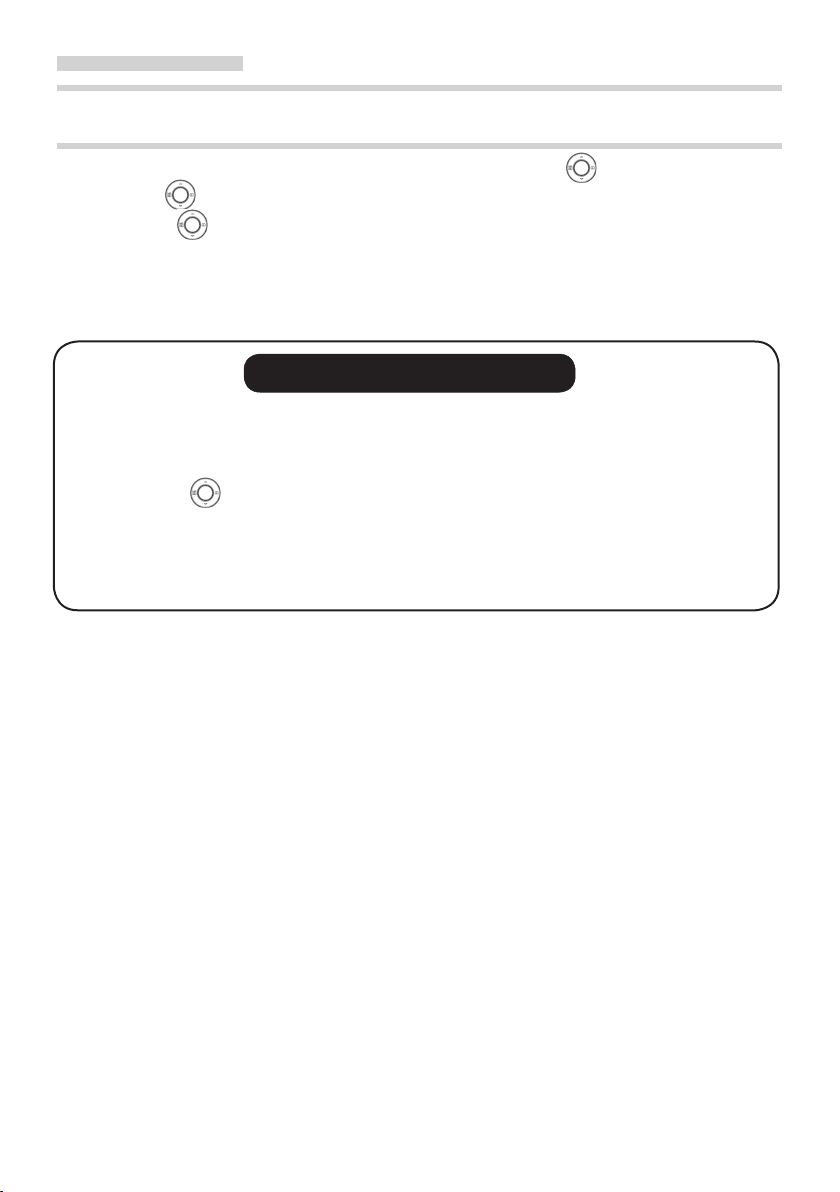
CONTROL OF TONE,VOLUME,DISPLAY CONTRAST,ETC.
Various setting is available by using the setting menu or ▲ / ▼ of button.
Press MENU of button to display the setting menu.
Press ▲/▼of button to select the displayed item.
Press「戻る」button to escape from the setting menu.
The setting menu is not available for DG-station 100A since it does not have a display.
RINGING TONE
You can select one of 6 tones.
You can select the tone for internal call,outside call and other call individually.
Press center of
button during ringing to select ringing tone.
る
11
Page 12
1 BEFORE USES
RINGING TONE VOLUME
You can selet one of 3 levels.
1.Press ▲ / ▼ of
ringing tone volume during ringing.
Press ▲ of button to
Press ▼ of button to decrease the volume.
button to change
increase
the volume.
HANDSET VOLUME
You can select one of 7 levels.
1.Press ▲ / ▼ of
handset volume during a call using the
handset.
Press ▲ of button to increase the volume.
Press ▼ of
button to change
button to decrease the volume.
SPEAKER VOLUME
You can select one of 8 levels.
1. Press ▲ / ▼ of
speaker volume while the spealcer is on.
Press ▲ of button to increase the volume.
Press ▼ of
button to change
button to decrease the volume
DISPLAY CONTRAST
You can select one of 8 levels.
1.Press ▲ / ▼ of
the display contrast during on-hook.
Press ▲ of button to increase the contrast.
Press ▼ of button to decrease the contrast.
button to change
.
12
Page 13

1 BEFORE USES
る
TO REVERSE BLACK AND WHITE
You can reverse black and white of display by the setting menu.
1.Press MENU of
2.Select「ユーザデータ設定」by ▲ / ▼ of
button.「ユーザデータ設定」screen is displayed.
3.Select「LCD 設定」by ▲ / ▼ of
「LCD 設定」screen is displayed.
4.Select「白黒反転設定」by ▲ / ▼ of
「白黒反転設定」screen is displayed.
5.Select「ON」to reverse black and white.
Select「OFF」not to reverse black and white.
Default data is 「OFF」.
6.Press center of
button and the setting munu is displayed.
button and press center of
button and press center of button.
button to register the setting.
button and press center of
button.
13
Page 14

1 BEFORE USES
RINGER LED COLOR
You can select one of seven colors or all
colors (rainbow) by the setting menu.
1. Press MENU of
setting munu is displayed.
2. Select「ユーザデータ設定」by ▲ / ▼ of
button and press center of
button.「ユーザデータ設定」screen is
displayed.
3.Select「着信ランプ設定」by ▲ / ▼ of
button and press center of
button.「着信ランプ設定」screen is
displayed.
4.Select desired color by ▲ / ▼ of
button.Default color is 赤 (red).
5.Press center of
register the setting.
button and the
button to
NAME DISPLAY
You can select to display name in the
telephone directory or not by setting menu.
When a call is made using telephone
directory.Name is not displayed when a call
is made using dial keys.
1. Press MENU of
setting munu is displayed.
2. Select「電話帳設定」by ▲ / ▼ of
button and press center of
button.「電話帳設定」screen is
displayed.
3.Select「発着信時ネーム設定」by
▲ / ▼ of
of
screen is displayed.
4.Select 「ON」to display and selet「OFF」
not to display by ▲ / ▼ of
button.Default data is 「ON」.
5.Press center of
register the setting.
button.「発着信時ネーム設定」
button and the
button and press center
button to
14
Page 15

1 BEFORE USES
る
TELEPHONE DIRECTORY SECURITY
You can select to rock the telephone directory by a password or not by the setting menu.
You can use numeric character,alphabet and mark.
( # $ % & * .:? @ _ )as a password.The password should be 8 gures and should include
numeric character,alphabet and mark.
1.Press MENU of
2.Select「電話帳設定」by ▲ / ▼ of
button.「電話帳設定」screen is displayed.
3.Select「セキュリティ設定」by ▲ / ▼ of
「セキュリティ設定」screen is displayed.
4.Select「有効」to use the rock,select「無効」not to use the rock by ▲ / ▼ of
Default data is 「無効」.
5.Press center of
6.Input a password and press center of
7.Input the same password and press center of
setting menu is displayed.
button and the setting munu is displayed.
button and press center of
button and press center of
button.If 「有効」is selected,「パスワード登録」screen is displayed.
button.「パスワード確認」screen is displayed.
button.Password is registered and the
button.
button.
15
Page 16

1 BEFORE USES
CLEAR FACEPLATE
MOUNTING AND REMOVING THE CLEAR FACEPLATE
Your Digital Telephone comes equipped with a faceplate. A insert sheet for IP Pathnder S
family is attached. You can alter a sheet to record information. And you can set up a sheet in
its place.
■ Removing the clear faceplate ■ Mounting the clear faceplate
The front side of the telephone (refer
the circle in figure) can be easily
removed by raising the clear faceplate
in the direction of the arrow.
CAUTION Note that you don't injure the nger or the ngernail.
First, two ngernail (refer the circle in
figure) is set up the ditch of the
telephone, and the clear faceplate is
installed in the telephone.
CONNECTING CABLES
When you connecta telephone line cord orarecording cord,please conrm a sound click is heard.
When you connect a USB cable to a PC,you can use only a laptop PC.
HEARING AID
Since this telephone supports a hearing aid,you can hear a sound clearly if the hearing aid
includes the telecoil.please refer to the hearing aid manual for the details.
16
Page 17

2 OPERATIONS
MAKING A CALL
OUTGOING CALL EXTENSION CALL
1 Press the LINE button.
Listen to the dial tone of the outside
line.
2 Dial a desired number.
Listen to the ring back tone.
3 Lift the handset.
The conversation begins when the calling
party answers.
4 Replace the handset when the
conversation ends.
LAST NUMBER REDIAL
1 Press the REDIAL button.
The last number you dialed is
automatically redialed.
Listen to the ring back tone.
1 Press the ICM button.
Listen to the dial tone of the extension.
2 Dial a desired number.
Listen to the ring back tone.
3 Lift the handset.
The conversation begins when the calling
party answers.
4 Replace the handset when the
conversation ends.
2 Lift the handset.
The conversation begins when the calling
party answers.
3 Replace the handset when the
conversation ends.
17
Page 18

182 OPERATIONS
ANSWERING A CALL
INCOMING CALL EXTENSION CALL
The ringing tone of the incoming call
sounds.
The ringing tone of the extension
sounds.
1 Lift the handset.
You are now connected to the calling
party.
2 Replace the handset when the
conversation ends.
1 Lift the handset.
You are now connected to the calling
party.
2 Replace the handset when the
conversation ends.
Page 19

2 OPERATIONS
HOLDING CALLS / TRANSFER CALLS
COMMON HOLD TRANSFER
To place a call on COMMON HOLD:
In conversation,
1 Press the HOLD button.
The held party will hear the music.
The LINE button on your telephone blinks
slowly in green.
The LINE button of other extension
telephone blinks slowly in red.
2 Replace the handset.
To pick up a call on COMMON HOLD:
In conversation,
1 Press the TRANSFER button.
The button lights up steadily.
The held party will hear the music.
The calling party is held automatically,
and hears music.
2
Dial the desired extension number
Listen to the ring back tone.
3 When the calling party answers,
announce the call privately.
The held party cannot hear you.
.
1 Lift the handset.
2 Press the blinking ICM button.
4 Replace the handset.
The lamp goes out.
19
Page 20

2 OPERATIONS
ABBREVIATED DIALING
ABBREVIATED DIALING
This function enables you to make a
personal directory of 10 external
numbers consisting of up to 20 digits.
To program or change number,
1 Press the SPEAKER button.
Listen to the dial tone.
2 Dial 17.
3 Dial the entry code (0 to 9).
4 Dial the desired outside number.
Press the TRANSFER button to enter
pause.
5 Press the ABBD button.
Listen to the conrmation tone after a
few seconds.
6 Hang up.
The lamp goes out.
SYSTEM ABBREVIATED DIALING
Up to 100 frequently numbers (00 to 99)
may be stored in your SYSTEM
ABBREVIATED DIALING DIRECTORY; these
numbers may be shared by all extension
in the system.
To make a call,
1 Press the ABBD button.
2 Dial 6.
3 Dial the entry code (00 to 99).
Your call is now being processed.
To make a call,
1 Press the ABBD button.
2 Dial 5.
3 Dial the entry code (0 to 9).
Your call is now being processed.
20
Page 21

2 OPERATIONS
NOT PROGRAMMED ONE-TOUCH DIALING
NOT PROGRAMMED ONE-TOUCH DIALING
To program or change sending digits,
1 Press the SPEAKER button.
Listen to the dial tone.
2 Dial 1807.
3 Press the NOT PROGRAMMED ONETOUCH DIALING button.
The button lights up steadily.
4 Dial the desired number.
5 Press the lighted NOT PROGRAMMED
ONE-TOUCH DIALING button.
Listen to the conrmation tone after a
few seconds.
6 Hang up.
The lamp goes out.
To make a call,
1 Press the NOT PROGRAMMED ONETOUCH DIALING button.
The button lights up steadily.
The registered numbers is automatically
dialed for you.
21
Page 22

222 OPERATIONS
USEFUL OPERATIONS
EXTENSION CAMP-ON
Your telephone automatically calls by
using this function as soon as the
other party's call ends if you hear a
distinctive busy tone.
1 Lift the handset.
2 Press the other party's
extension number.
While a distinctive busy tone is heard.
3 Press the CAMP-ON button.
The button lights up steadily.
Listen to the conrmation tone.
4 Replace the handset.
When both telephones are available, your
telephone will ring and the CAMP-ON
but ton will blink.
5 Lift the handset.
You will receive the ring back tone and
the other party's telephone will ring.
To cancel EXTENSION CAMP-ON
THREE-WAY CONFERENCE
While engaged in a two-party
conversation, you may add another
extension to your conversation.
To make a THREE-WAY CONFERENCE:
In conversation,
1 Press the CONF button.
The button lights up steadily.
Listen to the conrmation tone.
The held party will hear music.
2 Dial the extension number.
- or -
Press the LINE button.
Dial the outside number.
When the calling party answers, announce
conference privately.
3 Press the lighted CONF button.
The button lights up steadily.
A THREE-WAY CONFERENCE is now
established.
If one party disconnects the line, a
two party conversation may continue.
1 Press the SPEAKER button.
Listen to the dial tone.
2
Press the lighted CAMP-ON
The lamp goes out.
button.
GROUP PICK-UP
GROUP PICK-UP enables you to answer a
call within your assigned pick-up group.
1 Lift the handset.
Listen to the dial tone.
2 Press the PICK-UP button.
Page 23

3 LOCAL TELEPHONE DIRECTORY
TO REGISTER A DIRECTORY DATA
This function allows a user to register the person's name and the person's telephone
number into the local telephone directory database and also make a call to the person
by a simple operation using the local telephone directory.
Max,1000 nemes (2000 telephone numbers)can be registered.
1.To register a directory data
(1)Press
Select「メモリ登録」by using ▲ / ▼ of
center of
(2)Input a name
● Kanji,Kana,Alphabet and Numeric character can be used.
You can input 10 full-size characters or 20 half-size
characters.
button and select「メモリ登録」.
button.
button,and press
フリガナ検索
グループ検索
メモリ登録
戻る
Input「富士通太郎」.
① Input「富士通」.
「ふ」⇒ Press
「し」⇒ Press
「゛」⇒ Press
「つ」⇒ Press
「う」⇒ Press
Press ▲ / ▼ of
If desired Kanji is displayed ,press center of
② Input「太郎」.
「た」⇒ Press
「ろ」⇒ Press
「う」⇒ Press
Press ▲ / ▼ of
If desired Kanji is displayed ,press center of
Press center of
● To delete one character,press「消去」button.
button 3 times
button 2 times
button 4 times
button 3 times
button 3 times
button to convert Kana to Kanji.
button once
button 5 times
button 3 times
button to convert Kana to Kanji.
button and next screen is displayed.
button.
button.
名 前 : 漢
ふじつう
戻る 消去 文字
名 前 : 漢
富士通 _
戻る 消去 文字
名 前 : 漢
富士通 _
戻る 消去 文字
名 前 : 漢
富士通
たろう
戻る 消去 文字
名 前 : 漢
富士通
太郎 _
戻る 消去 文字
名 前 : 漢
富士通太郎 _
戻る 消去 文字
23
Page 24

3 LOCAL TELEPHONE DIRECTORY
(3)Input Kana for the Kanji.
● Kana for the Kanji is displayed automatically.
To correct the Kana,press the dial button to correct it.
● Press center of
And next scveen is displayed.
(4)Input telephone number 1.
● You can input 30 digits.
● If the telephone number is external number,external line
access number should be entered before the telephone number.
Example:00312345678
button if no correction is reguired.
フリガナ: カナ
フジツウタロウ _
戻る 消去
T E L 1 : 数
00312345678_
戻る 消去
● If telephone number 1 is not reguired,press
and next screen is displayed.
● After telephone number input,press
screen is displayed.
(5) Input telephone number2.
● You can input 30 digits.
Input method is same as the above.
※ If you don't input both telephone number1 and telephone
number2,next screen is not displayed after pressing center
of
(6)Select a group.
● You can select one of 10 group.
Default group name is グループなし、グループ 1 ~グループ 9.
● Select a group by using ▲ / ▼ of
center of button and next screen is displayed.
(7) Select ringing tone
You can select one of 9 ringing tones(including silenu)and 10
●
melodies.
● Select ringing tone by ▲ / ▼ of
button and next screen is displayed.
button.
button and next
button and press
button.
button
TEL2: 数
00312340000_
戻る 消去
グループ:
グループなし
グループ1
戻る
着信音色:
着信音色(標準)
メヌエ ット ト長調
戻る
24
Page 25

3 LOCAL TELEPHONE DIRECTORY
(8)Select color of ringing LED
● You can select one of 7 colors and all colors(rainbow).
● Select color of ringing LED by using ▲ / ▼ of
and press center of button.
And one telephone directory data is registered.
button
着信ランプ:
着信ランプ(標準)
赤
戻る
しばらく
お待ち下さい ...
After「 登録しました 残り件数は xxx 件です 」is displayed,setting
menu screen is displayed.
登録しました
残り件数は xxx 件
です
● Note
・If「電話帳のロック画面を解除してください」is displayed when button is
pressed,press and hold center of
to input the password.If you input correct password,the rock is released and you can
press
button.
・Don't pull out the telephone cord or powe off the PBX.When「しばらくお待ち下さい・・・」
is displayed.
button for a few seconds.You are reguested
25
Page 26

3 LOCAL TELEPHONE DIRECTORY
2.To change
(1)Press
Select「グループ登録」by ▲ / ▼ of
button.
and press center of
button.
グループ検索
メモリ登録
グループ登録
戻る
● You can select one of 9 groups 「グループ 1」~「グループ 9」.
Default name is for example,「グループ 1」is changed to 「会社」.
● You can input 10 full-size characters or 20 half-size
characters.
(2)Input a group name
① Select「グループ 1」and press center of
next screen is displayed.
② Input「会社」.
「か」⇒ Press
「い」⇒ Press
「し」⇒ Press
「ゃ」⇒ Press
※ To delete one character,press「消去」button.
③ Press ▲ / ▼ of
desired Kanji is displayed,press center of
④ Press center of
After「グループ:会社を登録しました」is displayed,setting
menu screen is displayed.
button once
button 2 times
button 2 times
button 4 times
button to convert Kana to Kanji.If
button
if the conversion is ok.
button and
button.
グループ:
グループ1
グループ2
戻る
グ ル ー プ : 漢
グループ1_
戻る 消去 文字
グ ル ー プ : 漢
かいしゃ
戻る 消去 文字
グ ル ー プ : 漢
会社 _
戻る 消去 文字
グ ル ー プ : 漢
会社 _
戻る 消去 文字
しばらく
お待ち下さい ...
グループ
会社
を登録しました
26
Page 27

3 LOCAL TELEPHONE DIRECTORY
TO SEARCH LOCAL TELEPHONE DIRECTORY
There are the following 3 types of search.
1. Kana search.
2. Group search.
3. Syllabary order【50 音】search.
1.Kana search
(1)Press
Select「 フ リ ガ ナ 検 索 」by ▲ / ▼ of
center of
(2)Search screen is displayed.
For example,search 「富士通太郎」.
Press
Press
Press
Press
Press
Press「 検 索 」button after inputting「 フ シ ゙ ツ ウ 」.And searching
result is displayed.
If correct name is not found,close name is displayed.
Press ▲ / ▼ of
button.
button.
button 3 times
button 2 times
button 4 times
button 3 times
button 3 times
button and press
button if no name is displayed.
フリガナ検索
グループ検索
メモリ登録
戻る
フリガナ: カナ
フジツウ _
戻る 消去 検索
富士通太郎
富士通花子
富士通花実
戻る 消去 内容 発信
(3) Press 「内容」button to courm the data.
By pressing ▲ / ▼ of
▼:name ⇒ Kana ⇒TEL 1 ⇒TEL 2 ⇒⇒ Group ⇒ Ringing tone ⇒ Ringing LED ⇒ name ⇒…
▲:name ⇒ Ringing LED ⇒ Ringing tone ⇒ Group グループ⇒TEL 2 ⇒TEL 1 ⇒ Kana ⇒ name ⇒…
button to display the data.
27
Page 28

3 LOCAL TELEPHONE DIRECTORY
2.Group search
(1)Press
Select「 グ ル ー プ 選 択 」by ▲ / ▼ of
center of
button.
button.
button and press
フリガナ検索
グループ検索
メモリ登録
戻る
(2) Select desired group by ▲ / ▼ of
button.
For example search「会社」.
member of 「会社」 group is displayed.
Press ▲ / ▼ of
3.Syllabary order【50 音】search
(1)Press
and press center of
(2)Input Kana to search the data.
For example,search 「斉藤一郎」.
Press once.Registered names starting from 「サ」are displayed.
Press ▲ / ▼ of button if no name is displayed.
You can input
button.Select 「50 音検索」by ▲ / ▼ of button
button if no display.
button.
to (ア to ワ) to search the data.
button and press 「検索」
グループなし
会社
友達
戻る 検索
斉藤一郎
富士通太郎
富士通花子
戻る 消去 内容 発信
メモリ登録
グループ登録
50音検索
戻る 検索
阿部一郎
阿部二郎
伊藤三郎
戻る 消去 内容 発信
斉藤一郎
清水一郎
鈴木一郎
戻る 消去 内容 発信
28
Page 29

3 LOCAL TELEPHONE DIRECTORY
TO MAKE A CALL USING THE LOCAL TELEPHONE DIRECTORY
(1)Search desired telephone number.
For example,To make a call to「斉藤一郎」.
When「斉藤一郎」is selected,press button or off-hook to
make a call.
※ Telephone number of TEL1 is used to make a call.
If telephone number of TEL2 is desired,select TEL2 and make a
call.See below.
■ To make a call after conrming the telephone number
① Conrm telephone number of 「斉藤一郎」.
Select「斉藤一郎」and press 「内容」button.
② Conrm the telephone number
button.
Conrm telephone number by ▲ / ▼ of
③ Select TEL1 or TEL2 and press 「発信」button or off-hook to
make a call to 「斉藤一郎」.
斉藤一郎
清水一郎
鈴木一郎
戻る 消去 内容 発信
00312345678
呼出中
斉藤一郎
名前:斉藤一郎
フリガナ:サイトウイチロウ
TEL1:00312345678
戻る 編集 発信
フリガナ:サイトウイチロウ
TEL1:00312345678
TEL2:00312340000
戻る 編集 発信
00312340000
呼出中
斉藤一郎
29
Page 30

3 LOCAL TELEPHONE DIRECTORY
TO CORRECT A DIRECTORY DATA
(1)Search desired telephone number.
For example,to correct telephone number of 「斉藤一郎」.
(2)Select「斉藤一郎」and press 「内容」button and telephone number
of 「斉藤一郎」is conrmed.
For example,to correct telephone number of TEL1.
(3)Select TEL1 by ▲ / ▼ of
Telephone number of TEL1 is displayed.
Delete the telephone number by 「消去」button and input new
telephone number.
Press center of
(4) Conrm the telephone number by ▲ / ▼ of
press 「登録」button.
After「登録内容を変更しました」is displayed,setting menu screen
is displayed.
button after telephone number input.
button and press 「編集」button.
button and
斉藤一郎
清水一郎
鈴木一郎
戻る 消去 内容 発信
名前:斉藤一郎
フリガナ:サイトウイチロウ
TEL1:0312345678
戻る 編集 発信
T E L 1 : 数
0312340000
戻る 消去
名前:斉藤一郎
フリガナ:サイトウイチロウ
TEL1:0312340000
戻る 編集 登録
しばらく
お待ち下さい ...
登録内容を
変更しまし た
30
Page 31

3 LOCAL TELEPHONE DIRECTORY
TO DELETE A DIRECTORY DATA
(1)Search desired telephone number.
For example,to delete 「斉藤一郎」.
(2)Select「斉藤一郎」and press「消去」button.
To delete 「斉藤一郎」,press 「1 件」and press 「はい」.
To delete all telephone directory data,press 「全件」 and press
「はい」.
「斉藤一郎」を削除する場合 全件削除する場合
斉藤一郎
消去しますか?
はい いいえ
しばらく
「 消 去 し ま し た 」is displayed and setting munu
screen is displayed.
斉藤一郎
清水一郎
鈴木一郎
戻る 消去 内容 発信
消去しますか?
戻る 1件 全件
全件
消去しますか?
はい いいえ
お待ち下さい ...
消去しました
31
Page 32

3 LOCAL TELEPHONE DIRECTORY
TO INPUT A CHARACTER
You can input Kanji,Kana,alphabet and numeric character by the dial button.
Input character is changed as shown below by pressing the dial button.
For example,to input「う」,chang the mode to 「漢」(Kanji)mode and press 3 times.
To input 「B」,change the mode to 「英」(Alphabet)mode and press 2 times.
mode
button
漢 (Kanji) カナ (Kana) 英 (Alphabet)
数 (Numeric
character)
1
2
3
4
5
6
7
8
9
0
*
# → #
※ Press
※ The cursor is moved to right automatically if another button is pressed.
※□:Space
button to move the cursor to right if same button should be pressed.
1
2
3
4
5
6
7
8
9
0
*
32
Page 33

4 CALL LOG
OUTGOING CALL LOG AND INCOMING CALL LOG
■ Specication
● Following PBX can use this function. And there is PBX that can't use this function by the version of
PBX's software. Please contact the purchased shop in detail.
※ PBX that can use this function.
IP Pathder S family :IP Pathnder RM10S GSM/GSM L, IP Pathder S
● This telephone has the function of 8* outgoing call log and 8* incoming call log (using PBX's service
function). If the call log becomes more than the registered number, it deletes oldest call log.
*:20 for IP Pathnder S Version 5 or later.
● The call log can operate only on-hook.
● If you are making a call or answering a call at the same telephone number as the call log that has
already been registered, the call log is overwrited.
● This telephone can't display the information registered in the local telephone directory when you are
making a call and answering a call.
● You can't see the call log while talking over the telephone.
■ Caution
When your telephone rings, the call log is displayed by pushing "outgoing call log button" or "caller's
number save dial button". But if you push the UP/DOWN button to conrm the call log, the volume of the
ringing tone changes at the same time as the content of the call log changes. Please note it.
33
Page 34

4 CALL LOG
ABOUT OUTGOING CALL LOG
This is using 「OUTGOING CALL LOG」 of PBX's service function.
● The outgoing call log can register extension (forwarding is included), and
the outside line, and one-touch dial. The outgoing call log is automatically
registered.
● The outgoing call log can register to 8* telephone numbers per a telephone,
*:20 for IP Pathnder S Version 5 or later.
■ Method of operating the outgoing call log
1 Press the OUTGOING CALL LOG button.
The telephone changes the screen of the outgoing call log, and
displays the telephone number of the outgoing call log.
The lamp of outgoing call log button lights in red.
and can register up to 15 digits per a telephone number.
● If the call log becomes more than the registered number, it deletes oldest
call log.
● If you register the same telephone number in outgoing call log, the
registered same older log is deleted.
● If you press 0 dial when the outgoing call log was displayed, the displayed
outgoing call log is deleted and the next outgoing call log is displayed.
● If you lift a handset when you receive an incoming call while outgoing call
log is displayed, you can't answer a call. Please lift a handset after
pressing the 「OUTGOING CALL LOG」 button whenever answering.
2 Press ▲ or ▼ of button.
Please press the button until a desired telephone number is
displayed.
3 You lift the handset or press the speaker button
if a desired telephone number is displayed.
The conversation begins when the calling party answers.
The lamp of OUTGOING CALL LOG button is turned off.
If you discontinue calling from OUTGOING CALL LOG, you replace the
handset or press the speaker button.
34
0312345678
Page 35

4 CALL LOG
ABOUT INCOMING CALL LOG
This is using 「CALLER ID SAVE DIAL」 of PBX's service function.
You can save manually the caller ID in two-party conversation at the outside line.
●
● The caller ID can register up to 8* telephone numbers per a telephone, and can
*:20 for IP Pathnder S Version 5 or later.
■ Method of operating the incoming call log
1 Press the CALLER ID SAVE / DISPLAY button.
The telephone changes the screen of the incoming call log, and
display the telephone number of the incoming call log.
memorize up to 15 digits a telephone number.
● If the INCOMING CALL LOG has already been registered 8 telephone numbers at
'the automatic save function' and 'the manual save function', the oldest
telephone number is deleted.
● The automatic save function can work in the incoming call from the various
outside line. (direct in-line, direct line, oating line, dial-in, ISDN dial-in,
addition number dial-in, caller ID dial-in). However, the direct line and the
oating line is saved automatically when you answer a call.
● The automatic save function and the manual save function is set with the
special number
Please contact the purchased shop about the setting of the caller ID save dial.
●
● If you press 0 dial when the incoming call log was displayed, the displayed
incoming call log is deleted and the next incoming call log is displayed.
● If you lift a handset when you receive an incoming call while incoming call
log is displayed, you can't answer a call. Please lift a handset after pushing
the 「caller ID save / display」 button whenever answering.
(The example:130, 1(automatic operation), and 0(manual operation))
.
2 Press ▲ or ▼ of button.
Please press the button until a desired telephone number is
displayed.
3 You lift the handset or press the speaker button
if a desired telephone number is displayed.
The conversation begins when the calling party answers.
If you discontinue calling from INCOMING CALL LOG, you replace the
handset or press the speaker button.
0441234567
35
Page 36

36
Page 37

September, 2017 T101-2663-01
 Loading...