

Page 1

THE FUJITSU 9924
QUICK REFERENCE
USERGUIDE
Page 2

2
USERGUIDE CONTENTS:
I. THE PERMANENT FUNCTION BUTTONS pg.3
pg.3
DROP pg.3
CONF pg.3
TRAN pg.3
REDIAL pg.3
HOLD pg.3
SPKR pg.4
II. THE MAIN MENU DISPLAY AND FUNCTION BUTTONS pg.5
THE MENU BUTTONS
MSG pg.5
UNA pg.5
L-DIR pg.5
CLEAR pg.5
OPTIONS pg.5
MENU pg.5
THE LINE BUTTONS
CFV pg.6
ICM pg.7
IPC pg.7
MX pg.7
III. THE UNA: UNANSWERED CALL LOG pg.8
IV. THE L-DIR: LISTED DIRECTORY DISPLAY pg.9
V. THE OPTIONS DISPLAY pg.11
ONE-TOUCH pg.11
CALANDER pg.13
INITIAL pg.15
UNA pg.16
SPEAKER pg.18
HAND/HEAD pg.20
RINGER pg.22
SPID pg.27
U-CODE pg.28
I-COM pg.29
MIC-OFF pg.33
Page 3

3
I. THE PERMANENT FUNCTION BUTTONS
(Located on the bottom left of your set)
or : Pressing these buttons will;
1. Decrease/Increase the volume of the receiver when it is being used.
2. Decrease/Increase the volume of the speaker when the SPEAKERPHONE
function is being used.
DROP: Pressing this button while on an active call will disconnect the call and
open the line for another outgoing call (you will receive dialtone again). If you are on
a 3-way conference call, it will drop the last call added.
CONF(Conference): To make a 3-way conference call:
DIAL: The first number and wait for the call to connect;
PRESS: The CONF button (this will place the first call on HOLD), you will then
receive and open line with dialtone (if you don’t, manually select an available line – if
no line is available you will not be able to complete the conference call);
DIAL: The second number and wait for the call to connect;
PRESS: The CONF button again and all 3 lines will be connected.
TRAN(Transfer): To transfer a call to another extension:
PRESS: The TRAN button (this will place the call on HOLD) you will then receive
and open line with dialtone (if you don’t, manually select an available line – if no line is
available you will not be able to complete the call transfer);
DIAL: The extension you want to transfer the call to and wait to connect, announce
the call;
PRESS: The TRAN button again and the call will be connected through and you
will be dropped.
REDIAL: The set will automatically dial the last number called when this button is pushed.
HOLD: Pressing this button will place the call on HOLD.
Page 4

4
(PERMANENT FUNCTION BUTTONS continued)
SPKR(Speaker): Pressing this button will;
1. Put an already active call on SPEAKERPHONE. You can then hang-up the receiver
without disconnecting the call.
2. Open an available line for dialing out on SPEAKERPHONE if you are not already
on a call.
3. Open an available line on SPEAKERPHONE and dial an
L-DIR (Listed Directory number) when one has been selected prior to
pressing the SPKR button (Note: You cannot enable the L-DIR feature
after pressing the SPKR button).
Page 5
5
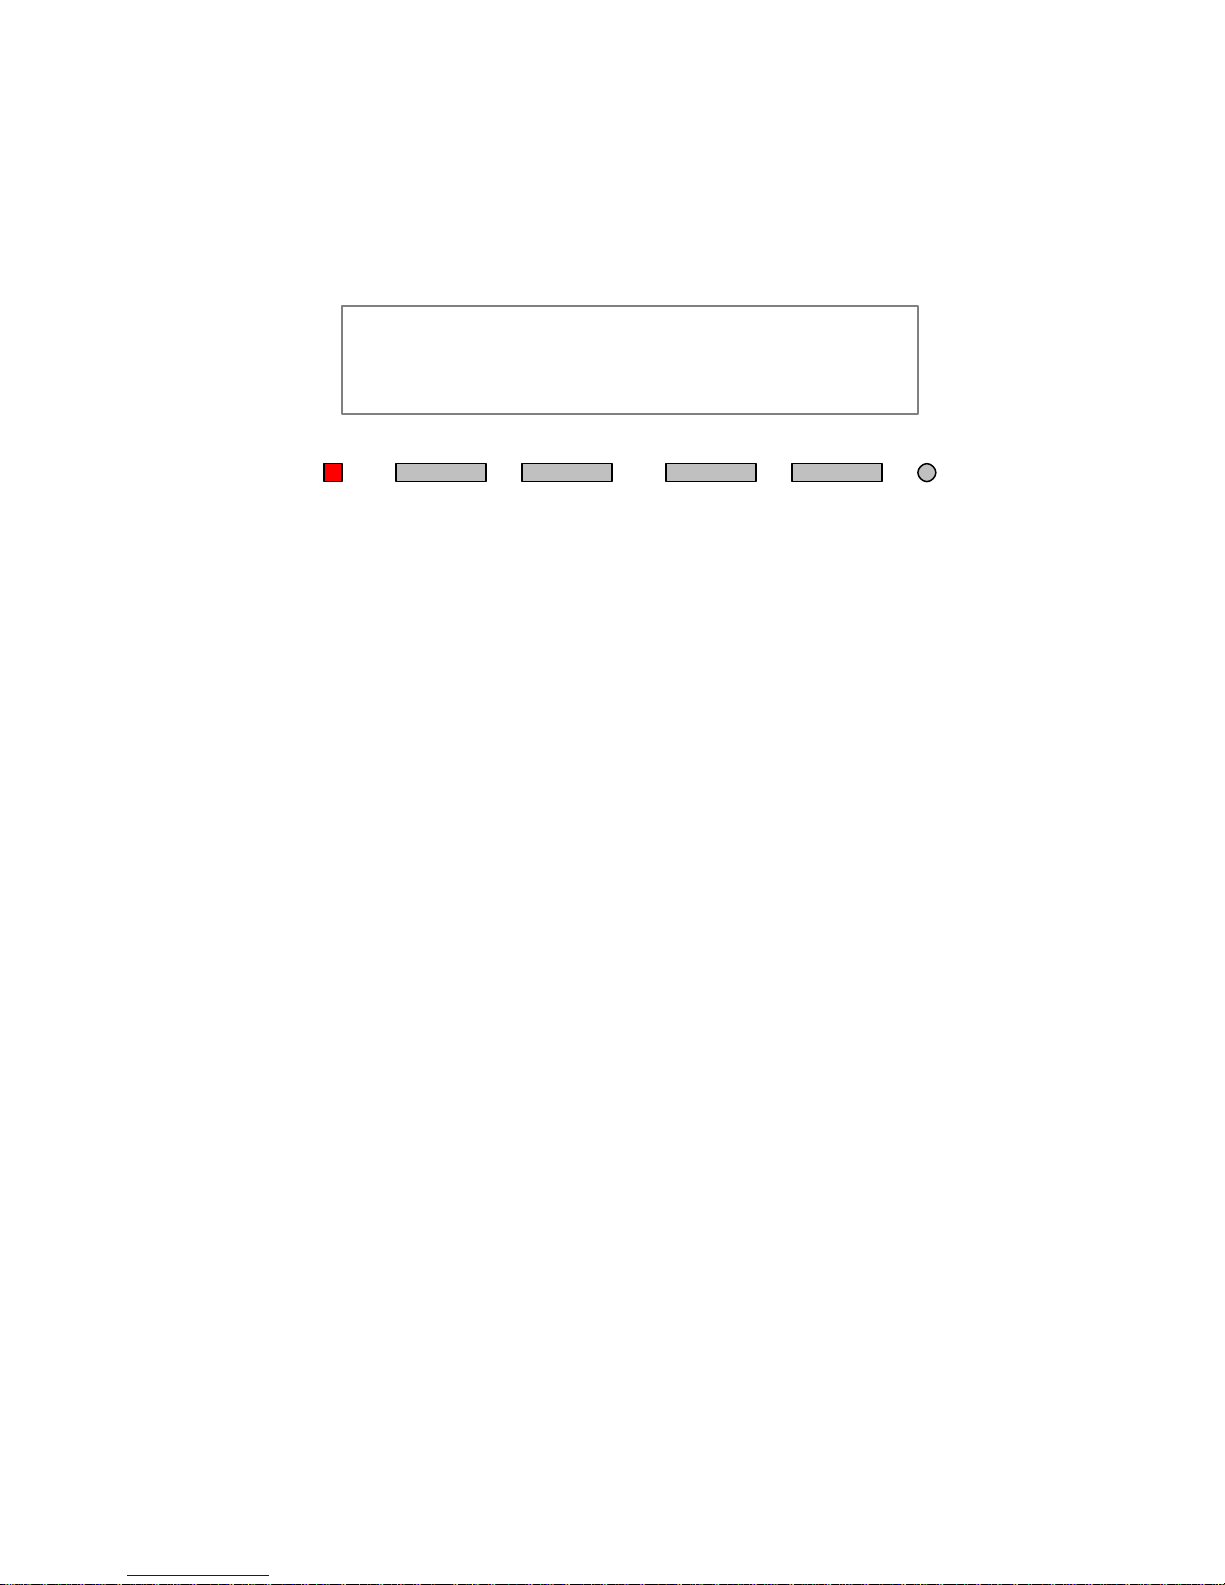
II. THE MAIN MENU DISPLAY AND FUNCTION BUTTONS
(Located at the top of your set)
(This is how the screen will appear with the MAIN MENU Display)
11:56AM SAT AUG 4
• UNA L-DIR CLEAR OPTIONS
(MSG: Message Waiting Light) (MENU: MENU Button)
The MENU BUTTONS:
When at the Main Menu display, the buttons un der the screen have the following functions
(from left to right):
MSG: This MESSAGE indicator will light if you have a new VoiceMail message. For this feature to
work you must have a VoiceMail box and the feature must be enabled within the VoiceMail
box.
UNA: This button will access the list of UNANSWERED calls. When there are unanswered calls, a
dot will appear next to UNA on the display. If the dot is blinking, that means there are 8
calls (the maximum amount) recorded in the log.
(See page: 8 for detai ls)
L-DIR: This button accesses you personal LISTED DIRECTORY numbers.
(See page: 9 for details)
CLEAR: Pressing this button will clear any entry you are making with the keypad without exiting
the FUNCTION or PROGRAMMING mode you are in.
OPTIONS: This button will access the list of PROGRAMMING modes that are available.
(See page: 11 for the list of FUNCTION modes and their uses)
MENU: This has no function when the set is in this mode.
Page 6

6
(MAIN MENU DISPLAY AND FUNCTION BUTTONS continued)
The MENU BUTTONS’ Secondary functions:
Once a FUNCTION or PROGRAMMING mode has been selected from the Main Menu or
Options display, the buttons under the screen will have secondary functions. The buttons will
act differently depending on which mode you are in. PRESS the MENU button, and their
relative functions will appear at the bottom of the screen. From left to right those functions
are:
ENTER/EDIT
NEXT/NUM/MORE
CLEAR
EXIT
MENU
The LINE BUTTONS’ functions:
These buttons are in the center of the set, where the telephone lines appear. Normally, the
number that appears above the button is the line associated with it. Some of them may have
one of the following permanently programmed functions:
CFV(Call Forward Variable) : This button will forward all your calls to another number. You must
have an available line to program it.
To use the CFV button:
PRESS: The button to activate/deactivate the feature. When the button is lit GREEN,
it is active (forwarding your calls). If the button blinks and goes out when pressed, it has not
been programmed.
To program/reprogram the CFV button:
PRESS: The Line button that is your PRIMARY number (usually the button on the
bottom left). This will activate the SPEAKERPHONE, and you will hear Dial Tone (then you can
pick up the Handset if you want to use it).
ENTER: 87 (the code for CFV) on the keypad. You will hear Dial Tone again.
Page 7

7
ENTER: The number you want all your calls to forward to. You will hear a stuttered Dial
Tone as a confirmation of the programming.
(MAIN MENU DISPLAY AND FUNCTION BUTTONS continued)
ICM(Intercom): Use this button to intercom others in your ICM group. You must have an available
line to use this feature.
To use the ICM button:
PRESS: The ICM button. This will activate the SPEAKERPHONE, and you will hear Dial
Tone (then you can pick up the Handset if you want to use it).
ENTER: The ICM number of the person you are trying to reach. It will ring them directly
on their ICM button (they must also have an available line).
IPC: This button allows you to break through to someone who has their line forwarded.
To use the ICM button:
PRESS: The Line button you are going to call out on. This will activate the
SPEAKERPHONE, and you will hear Dial Tone (then you can pick up the Handset if you want to
use it).
PRESS: The IPC button. You will hear a stuttered Dial Tone.
DIAL: The number that is being forwarded, and it will ring that number directly.
MX(Manual Exclusion): This button guarantees privacy when you are on a line shared with others.
To use the MX button:
PRESS: The Line button you are going to call out on. This will activate the
SPEAKERPHONE, and you will hear Dial Tone (then you can pick up the Handset if you want to
use it).
PRESS: The MX button. You will hear a stuttered Dial Tone, and others are now unable to
pick up this line until you hang up.
Page 8

8
III. THE UNA: UNASWERED CALL LOG
(This is how the screen will appear with the UNA Display)
617-495-0001 08 -03
11:00am
To access the UNA display screen:
PRESS: UNA (button 1) on the Main Menu display.
The display will show the oldest logged call first. The number that called will appear in the
upper left, the date in the upper right and the time in the lower right corner of the display.
At most, the log will contain the last 8 unanswered calls. Continue to,
PRESS: UNA to advance to the next call in the log. Once you have reached the 8
recent) call, it will return to the 1st(oldest) call.
To delete a logged call:
PRESS: # on the keypad.
PRESS: CLEAR (button 3). The number that was on the screen is now deleted. The
screen will then return to the Main Menu display.
NOTE: You must have CALLER ID for this feature to work properly. And, once a call has been
deleted from the log it cannot be retrieved.
th
(most
Page 9

9
IV. THE L-DIR: LISTED DIRECTORY DISPLAY
(This is how the screen will appear when in the L-DIR Display)
>01=RECEPTIONIST
02=VOICE MAIL
To access the L-DIR display screen:
SELECT: L-DIR (button 2) from the Main Menu display.
The display will show the first two numbers in the directory. The > will appear next to the
selected number (always at the top left of the screen).
To select a name/number from the directory:
PRESS: The # key to move forward in the directory.
Or,
PRESS: The * key to move backward in the directory.
To call the selected number:
LIFT: The handset.
Or,
PRESS: The SPKR button.
To enter or edit an entry into the directory:
Page 10

10
PRESS: The # or * to select the space where you want to make the entry (if the
selected space has been previously programmed, PRESS: CLEAR (button 3) to clear the
existing number).
PRESS: The MENU button to access the secondary functions (once you have become
familiar with the secondary functions, you can omit this step from the programming
instructions).
(To enter or edit an entry continued)
PRESS: EDIT (button 1).
ENTER: The number you wish to store using the keypad. Use the HOLD button to
create a pause in the dialing sequence (it will appear as a comma on the display screen). If you
need the * or the # in the sequence, a pause must be placed before and after it.
PRESS: The MENU button to access the secondary functions.
PRESS: ENTER (button 1).
ENTER: The name you wish to store it under by using the letters associated with the
keypad (if the selected space has been previously programmed, PRESS: CLEAR (button 3)
to clear the existing name). PRESS: # to save the chosen letter, and move to the next letter
in the name. The name can be up to 16 letters long.
PRESS: The MENU button to access the secondary functions.
PRESS: ENTER (button 1).
“COMPLETED ” will appear at the top of the screen.
Then, to exit the directory:
PRESS: The MENU button to access the secondary functions.
PRESS: EXIT (button 4) and the screen will return to the Main Menu display.
Or, to enter or edit another entry:
PRESS: The MENU button to access the secondary functions.
PRESS: EDIT (button 1) to select the next space you wish to progra m, and follow the
procedure again.
Page 11

11
V. THE OPTIONS DISPLAY
(This is how the screen will appear when in the OPTIONS DISPLAY)
1:ONE -TOUCH 2:CALANDER
3:INITIAL (SELECT 1-11)
To access the OPTIONS display screen:
SELECT: OPTIONS (button 4) from the Main Menu display.
PRESS: The MENU button to access the secondary functions (once you have become
familiar with the secondary functions, you can omit the MENU button step from all the
programming instructions listed in this section).
PRESS: NEXT (button 2) to move forward through the OPTIONS Menu. The
following is the list of the options available and how to enable/use them:
ONE-TOUCH (Speed dialing): This option allows you to program the Line buttons for
one-touch dialing. To program a number to a selected Line button, follow the steps listed
below.
SELECT: OPTIONS from the Main Menu display.
PRESS: 1 on the keypad (for ONE-TOUCH).
PRESS: The MENU button to access the secondary functions.
PRESS: ENTER (button 1).
Page 12

12
“ONE-TOUCH SELECT ASSIGN KEY” will appear on the screen. And, all
Line buttons that are already programmed for ONE-TOUCH dialing will light GREEN.
Then, to program the number to a selected Line button:
SELECT: The line button you want to program (if it has been previously programmed,
PRESS: CLEAR (button 3) after selecting the Line button, to clear the stored number).
(ONE-TOUCH continued)
“ENTER DIRECTORY NUMBER” and the number of that Line button will
appear on the screen.
ENTER: The number you want program on the selected button using the keypad. Use the
HOLD button when a pause is required in the dialing sequence. It will appear as a comma on
the screen, and represents a 2 second pause.
PRESS: The MENU button to access the secondary functions.
PRESS: ENTER (button 1).
“DN=(the number you entered) COMPLETED” will appear on the screen and the line
button you programmed will light GREEN for several seconds to confirm that the
programming was successful. The screen will then return to the main OPTIONS display.
Then to exit:
PRESS: The MENU button to access the secondary functions.
PRESS: EXIT (button 4) to return to the Main Menu display.
Or, to begin programming another line button:
PRESS: 1 on the keypad (for ONE-TOUCH),
PRESS: ENTER (button 1) and follow the procedure again.
Then, to use the ONE-TOUCH feature:
Either,
LIFT: The Handset and,
Page 13

13
PRESS: The programmed button, and the set will dial the number.
Or,
PRESS: The programmed button, the SPEAKERPHONE will activate and the set will dial the
number.
CALANDER: This option allows you to set/change the date and time as it
appears at the top of the Main Menu display.
SELECT: OPTIONS from the Main Menu display.
PRESS: 2 on the keypad (for CALANDER).
PRESS: The MENU bu tton to access the secondary functions.
PRESS: ENTER (button 1).
PRESS: The MENU button to access the secondary functions.
PRESS: ENTER (button 1).
“INPUT HOUR” will appear on the screen.
ENTER: The hour using the keypad.
PRESS: The MENU button to access the secondary functions.
PRESS: ENTER (button 1).
“INPUT MINUTE” will appear on the screen.
ENTER: The minutes using the keypad.
PRESS: The MENU button to access the secondary functions.
PRESS: ENTER (button 1).
“INPUT 0:AM 1:PM” will appear on the screen.
SELECT: AM ( 0 on the keypad) or PM ( 1 on the keypad).
Page 14

14
PRESS: The MENU button to access the secondary functions.
PRESS: ENTER (button 1).
“INPUT YEAR” will appear on the screen.
ENTER: The last two numbers of the current year using the keypad.
PRESS: The MENU button to access the secondary functions.
PRESS: ENTER (button 1).
(CALANDER continued)
“INPUT MONTH” will appear on the screen.
ENTER: The two digits of the current month using the keypad.
PRESS: The MENU button to access the secondary functions.
PRESS: ENTER (button 1).
“INPUT DAY ” will appear on the screen.
ENTER: The two digits of the current day.
PRESS: The MENU button to access the secondary functions.
PRESS: ENTER (button 1).
“COMPLETED ” with the date information you just entered will appear on the screen.
After a few seconds it will then return to the OPTIONS display.
PRESS: The MENU button to access the secondary functions.
PRESS: EXIT (button 4) to return to the Main Menu display.
Page 15

15
INITIAL: This option is to be used when you want to reinitialize your set. It will completely
erase all the programming that has been done to your set, and restore it’s default settings.
NOTE: Once this has been done, you will not be able to restore/retrieve any of the purged
information.
SELECT: OPTIONS from the Main Menu display.
ENTER: 3 on the keypad (for INITIAL).
PRESS: The MENU button to access the secondary functions.
PRESS: ENTER (button 1).
“PRIVATE DATA CLEAR (1:YES 2:NO)” will appear on the screen.
Then, to clear all the stored information:
PRESS: 1 on the keypad (for YES).
“PRIVATE DATA CLEAR COMPLETED” will appear at the bottom of the
screen, and the set will return to the default settings.
PRESS: The MENU button to access the secondary functions.
PRESS: EXIT (button 4) to return to the Main Menu display.
Or, to save all the stored information:
PRESS: 2 on the keypad (for NO).
Page 16

16
“PRIVATE DATA CLEAR COMPLETED” will appear at the bottom of the
screen, an d the stored information will be saved.
PRESS: The MENU button to access the secondary functions.
PRESS: EXIT (button 4) to return to the Main Menu display.
UNA: This option allows you to select which unanswered calls will appear in the UNA log.
You have a choice of ALL lines, SELECTED lines or NO lines (deactivated).
SELECT: OPTIONS from the Main Menu display.
ENTER: 4 on the keypad (for UNA).
PRESS: The MENU button to access the secondary functions.
PRESS: ENTER (button 1).
PRESS: The MENU button to access the secondary functions.
PRESS: ENTER (button 1) again.
“1:ALL 2:SELECT 3:NO SUPPORT(SELECT 1-3)” will
appear on the screen. All the Lines buttons that are supported by the UNA feature will light
GREEN.
Then, to enable the UNA feature on all your lines:
PRESS: 1 on the keypad (for ALL) so all unanswered calls from all lines will appear in the
log. All the Line buttons will light GREEN.
PRESS: The MENU button to access the secondary functions.
PRESS: ENTER (button 1).
Page 17

17
“SUPPORTED(ALL) COMPLETED” Will appear on the screen. After a few
seconds the screen will return to the OPTIONS display.
PRESS: The MENU button to access the secondary functions.
PRESS: EXIT (button 4) to return to the Main Menu display.
Or, to enable the UNA feature only on selected lines:
PRESS: 2 on the keypad (for SELECT) so you can personally select which lines will
appear in the log.
PRESS: The MENU button to access the secondary functions.
PRESS: ENTER (button 1).
(UNA continued)
PRESS: The Line buttons you want so that the GREEN light comes on. If the GREEN light
is on for a line that you do not want to appear in the log, PRESS: that Line button, and the
light will go out.
PRESS: The MENU button to access the secondary functions.
PRESS: ENTER (button 1).
“SUPPORTED(SELECT) COMPLETED” Will appear on the screen. After
a few seconds the screen will return to the OPTIONS display.
PRESS: The MENU button to access the secondary functions.
PRESS: EXIT (button 4) to return to the Main Menu display.
Or, to disable the UNA feature completely:
PRESS: 3 on the keypad (for NO SUPPORT) to deactivate the UNA feature.
PRESS: ENTER (button 1).
“NON SUPPORTED COMPLETED” will appear on the screen. After a few
seconds the screen will return to the OPTIONS display.
Page 18

18
PRESS: The MENU button to access the secondary functions.
PRESS: EXIT (button 4) to return to the Main Menu display.
SPEAKER: This option allows you to activate/deactivate the function of the SPKR
button. This option must be activated if you are using a Headset or for the I-COM feature
to work.
SELECT: OPTIONS from the Main Menu display.
ENTER: 5 on the keypad (for SPEAKER).
PRESS: The MENU button to access the secondary functions.
PRESS: ENTER (button 1).
PRESS: The MENU button to access the secondary functions.
PRESS: ENTER (button 1) again.
“1:SUPPORT 2:NO SUPPORT (SELECT 1-2)” will appear on
the screen.
Then, to enable the SPEAKERPHONE feature:
SELECT: 1 on the keypad (for SUPPORT ) to enable the SPKR function.
Page 19

19
PRESS: The MENU button to access the secondary functions.
PRESS: ENTER (button 1).
“SUPPORTED COMPLETED” will appear on the screen. After a few seconds
the screen will return to the OPTIONS display.
PRESS: The MENU button to access the secondary functions.
PRESS: EXIT (button 4) to return to the Main Menu display.
Or, to disable the SPEAKERPHONE feature:
SELECT: 2 on the keypad (for NO SUPPORT ) to disable the SPKR function.
PRESS: The MENU button to access the secondary functions.
PRESS: ENTER (button 1).
“NON SUPPORTED COMPLETED” will appear on the screen. After a few
seconds the screen will return to the OPTIONS display.
(SPEAKER continued)
PRESS: The MENU button to access the secondary functions.
PRESS: EXIT (button 4) to return to the Main Menu display.
Page 20

20
HAND/HEAD: This option allows you the choice to either:
1. Enable the use of a HANDSET, with the SPKR button enabled or disabled for regular
SPEAKERPHONE use,
2. Enable the use of a HEADSET, using the SPKR button to pick up and disconnect calls.
In this mode you cannot use the SPEAKERPHONE function. But, the SPEAKER option
must be enabled for this feature to work.
SELECT: OPTIONS from the Main Menu display.
ENTER: 6 on the keypad (for HAND/HEAD).
PRESS: The MENU button to access the secondary functions.
PRESS: ENTER (button 1).
PRESS: The MENU button to access the secondary functions.
Page 21

21
PRESS: ENTER (button 1) again.
“1:HAND-SET 2:HEAD-SET (SELECT 1-2)” will appear on the
screen.
Then, to enable the HAND-SET feature:
PRESS: 1 on the keypad (for HAND-SET) to enable the handset function.
PRESS: The MENU button to access the secondary functions.
PRESS: ENTER (button 1).
“HAND-SET COMPLETED” will appear on the screen. After a few seconds it
will return to the OPTIONS display.
PRESS: The MENU button to access the secondary functions.
PRESS: EXIT (button 4) to return to the Main Menu display.
Or, to enable the HEAD-SET feature:
PRESS: 2 on the keypad (for HEAD-SET) to enable the handset function.
PRESS: The MENU button to access the secondary functions.
PRESS: ENTER (button 1).
(HAND/HEAD continued)
“HEAD-SET COMPLETED” will appear on the screen. You will now need to
PRESS: SPKR to pick up and disconnect calls, and the sounds of the keypad will only be
audible through the Headset. When this feature is enabled, the MIC/OFF button will not
be functional. After a few seconds screen will return to the OPTIONS display.
PRESS: The MENU button to access the secondary functions.
PRESS: EXIT (button 4) to return to the Main Menu display.
Page 22

22
RINGER: This option allows you to change both the volume and the tone of the RINGER.
It will also allow you to change the mode of the RINGER when the set is idle or when in
use, to either on or off.
SELECT: OPTIONS from the Main Menu display.
ENTER: 7 on the keypad (for RINGER).
PRESS: The MENU button to access the secondary functions.
PRESS: ENTER (button 1).
Page 23

23
PRESS: The MENU button to access the secondary functions.
PRESS: ENTER (button 1) again.
“1:VOLUME 2:TONE 3:RINGING(SELECT 1-4)” will appear on
the screen. And, if you:
PRESS: The MENU button to access the secondary functions.
PRESS: ENTER (button 1) again.
“4:ONE RING (SELECT 1-4)” will appear on the screen. But, you do not
need to see it on the screen to select it.
Then, to change the RINGER VOLUME:
PRESS: 1 on the keypad (for VOLUME).
PRESS: The MENU button to access the secondary functions.
PRESS: ENTER (button 1).
PRESS: The MENU button to access the secondary functions.
PRESS: ENTER (button 1) again.
“1:SOFT 2:MEDIUM 3:HIGH(SELECT 1-3)” will appear on the
screen.
(RINGER continued)
And, for SOFT:
PRESS: 1 on the keypad (for SOFT). You will hear one soft ring.
PRESS: The MENU button to access the secondary functions.
PRESS: ENTER (button 1).
Page 24

24
“SOFT COMPLETED” will appear on the screen. After a few second, the screen
will return to the OPTIONS display.
And for MEDIUM:
PRESS: 2 on the keypad (for MEDIUM). You will hear one medium ring.
PRESS: The MENU button to access the secondary functions.
PRESS: ENTER (button 1).
“MEDIUM COMPLETED” will appear on the screen. After a few second, the
screen will return to the OPTIONS display.
And for HIGH:
PRESS: 3 on the keypad (for HIGH). You will hear one loud ring.
PRESS: The MENU button to access the secondary functions.
PRESS: ENTER (button 1).
“HIGH COMPLETED” will appear on the screen. After a few second, the screen
will return to the OPTIONS display.
Or, to change the RINGER TONE:
PRESS: 2 on the keypad (for TONE).
PRESS: The MENU button to access the secondary functions.
PRESS: ENTER (button 1).
(RINGER; TONE continued)
PRESS: The MENU button to access the secondary functions.
PRESS: ENTER (button 1) again.
“1:LOW 2:MEDIUM 3:HIGH(SELECT 1-3)” will appear on the
Page 25

25
screen
And, for LOW:
PRESS: 1 on the keypad (for LOW). You will hear a low tone.
PRESS: The MENU button to access the secondary functions.
PRESS: ENTER (button 1).
“SOFT COMPLETED” will appear on the screen. After a few second, the screen
will return to the OPTIONS display.
And for MEDIUM:
PRESS: 2 on the keypad (for MEDIUM). You will hear a medium tone.
PRESS: The MENU button to access the secondary functions.
PRESS: ENTER (button 1).
“MEDIUM COMPLETED” will appear on the screen. After a few second, the
screen will return to the OPTIONS display.
And for HIGH:
PRESS: 3 on the keypad (for HIGH). You will hear a high tone.
PRESS: The MENU button to access the secondary functions.
PRESS: ENTER (button 1).
“HIGH COMPLETED” will appear on the screen. After a few second, the screen
will return to the OPTIONS display.
(RINGER; MODE continued)
Or, to change the RINGER MODE when idle:
PRESS: 3 on the keypad (for RINGING).
Page 26

26
PRESS: The MENU button to access the secondary functions.
PRESS: ENTER (button 1).
PRESS: The MENU button to access the secondary functions.
PRESS: ENTER (button 1) again.
“1:BELL 2:SILENT (SELECT 1 -2)” will appear on the
screen.
And to turn the RINGER on when the set is idle:
PRESS: 1 on the keypad (for BELL).
PRESS: The MENU button to access the secondary functions.
PRESS: ENTER (button 1).
“BELL COMPLETED” will appear on the screen. After a few second, the screen
will return to the OPTIONS display. Now when there is an incoming call, the set will ring
and the line button will light GREEN.
And to turn the RINGER off when the set is idle:
PRESS: 2 on the keypad (for SILENT).
PRESS: The MENU button to access the secondary functions.
PRESS: ENTER (button 1).
“SILENT COMPLETED” will appear on the screen. After a few second, the
screen will return to the OPTIONS display. Now when there is an incoming call, the set
will not ring but the line button will still light GREEN.
(RINGER; MODE continued)
Or, to change the RINGER MODE when the set is in use:
Page 27

27
PRESS: 4 on the keypad (for ONE-RING).
PRESS: The MENU button to acces s the secondary functions.
PRESS: ENTER (button 1).
PRESS: The MENU button to access the secondary functions.
PRESS: ENTER (button 1) again.
“1:SUPPORT 2:NO SUPPORT (SELECT 1-2)” will appear on the
screen.
And to turn the RINGER on when the set is in use:
PRESS: 1 on the keypad (for SUPPORT ).
PRESS: The MENU button to access the secondary functions.
PRESS: ENTER (button 1).
“SUPPORTED COMPLETED” will appear on the screen. After a few second,
the screen will return to the OPTIONS display. Now when there is an incoming call, the
set will ring once and the line button will light GREEN.
And to turn the RINGER off when the set is in use:
PRESS: 2 on the keypad (for NO SUPPORT ).
PRESS: The MENU button to access the secondary functions.
PRESS: ENTER (button 1).
“NON SUPPORTED COMPLETED” will appear on the screen. After a few
second, the screen will return to the OPTIONS display. Now when there is an incoming
call, the set will not ring but the line button will still light GREEN.
Page 28

28
SPID: This option cannot be programmed by the customer. If this feature is required for your
set to work properly, the Telephone Technician will program it for you.
Page 29

29
U-CODE: This option cannot be programmed by the customer. If this feature is required for
your set to work properly, the Telephone Technician will program it for you.
Page 30

30
I-COM (Announce Intercom): This option allows people you select, to call you and
activate the INTERCOM mode automatically (the MICROPHONE and/or SPEAKERPHONE will come on
after the line rings once). You must have Caller ID, an available incoming line, and the SPKR button
must be enabled for this feature to work. You can enable this feature on all or sel ected incoming lines,
or the option can be completely deactivated.
SELECT: OPTIONS form the Main Menu display.
ENTER: 10 on the keypad (for I-COM).
PRESS: The MENU button to access the secondary functions.
PRESS: ENTER (button 1).
PRESS: The MENU button to access the secondary functions.
PRESS: ENTER (button 1) again.
“1:ALL 2:SELECT 3:NO SUPPORT(SELECT 1-3)” will
appear on the screen.
Choosing the lines for the I-COM feature:
To choose all lines for the I-COM feature:
PRESS: 1 on the keypad (for ALL). All the Line buttons will light GREEN.
PRESS: The MENU button to access the secondary functions.
PRESS: ENTER (button 1).
Page 31

31
“SUPPORTED(ALL) COMPLETED” will appear on the screen.
PRESS: The MENU button to access the secondary fu nctions.
PRESS: ENTER (button 1).
PRESS: The MENU button to access the secondary functions.
PRESS: ENTER (button 1) again.
“1:ONE WAY 2:TWO WAY 3:TURN OFF(SELECT 1-3)” will
appear on the screen. Now go to ‘Choosing the type of intercomming’
(I-COM; Choosing the lines continued)
To choose SELECT lines for the I-COM feature:
PRESS: 2 on the keypad (for SELECT). Any Line buttons that already have this feature
will light GREEN.
PRESS: The MENU button to access the secondary functions.
PRESS: ENTER (button 1).
“SUPPORTED(SELECT) COMPLETED” will appear on the screen.
PRESS: The MENU button to access the secondary functions.
PRESS: ENTER (button 1).
PRESS: The MENU button to access the secondary functions.
PRESS: ENTER (button 1) again.
“1:ONE WAY 2:TWO WAY 3:TURN OFF(SELECT 1-3)” will
appear on the screen. Now go to ‘Choosing the type of intercomming’
To choose NO SUPPORT for the I-COM feature:
PRESS: 3 on the keypad (for NO SUPPORT ).
PRESS: The MENU button to access the secondary functions.
Page 32

32
PRESS: ENTER (button 1).
“NON SUPPORTED COMPLETED” will appear on the screen.
PRESS: The MENU button to access the secondary functions.
PRESS: EXIT (button 4) to return to the Main Menu display.
Choosing the type of interco mming:
Once you have chosen which lines will be enabled for the I-COM feature, the display will
prompt you to choose a type of intercom. ONE WAY allows someone to intercom you without
being able to hear you. TWO WAY allows the person to intercom you as well as being able to
hear you.
(I-COM; Choosing the type continued)
To choose a ONE WAY I-COM feature:
When“1:ONE WAY 2:TWO WAY 3:TURN OFF(SELECT 1 -3)”
appears on the screen.
PRESS: 1 on your keypad (for ONE WAY ).
PRESS: The MENU button to access the secondary functions.
PRESS: ENTER (button 1).
“ONE WAY SELECTED ENTER TELEPHONE NUMBER” will
appear on the screen. Also a number (1-4) will appear in the upper right corner. This
represents how many numbers have been entered for this feature (the ma ximum being 4).
ENTER: The number exactly as it appears on your display as an incoming call. Use the *
key for characters other than numbers.
PRESS: The MENU button to access the secondary functions.
PRESS: ENTER (button 1).
“ONE WAY TURNED ON” with the number you entered below it, will appear on
the screen. The screen will return to the OPTIONS display after a few seconds.
To choose a TWO WAY I-COM feature:
Page 33

33
When“1:ONE WAY 2:TWO WAY 3:TURN OFF(SELECT 1 -3)”
appears on the screen.
PRESS: 2 on your keypad (for TWO WAY).
PRESS: The MENU button to access the secondary functions.
PRESS: ENTER (button 1).
“TWO WAY SELECTED ENTER TELEPHONE NUMBER” will
appear on the screen. Also a number (1-4) will appear in the upper right corner. This
represents how many numbers have been entered for this feature (the maximum being 4).
ENTER: The number exactly as it appears on your display as an incoming call. Use the *
key for characters other than numbers.
(I-COM; Choosing the type continued)
PRESS: The MENU button to access the secondary functions.
PRESS: ENTER (button 1).
“TWO WAY TURNED ON” with the number you entered below it, will appear on
the screen. The screen will return to the OPTIONS display after a few seconds.
To TURN OFF the I-COM feature:
When“1:ONE WAY 2:TWO WAY 3:TURN OFF(SELECT 1 -3)”
appears on the screen.
PRESS: 3 on your keypad (for TURN OFF).
PRESS: The MENU button to access the secondary functions.
PRESS: ENTER (button 1).
“INTERCOM TURNED OFF” will appear on the screen. The screen will return to
the OPTIONS display after a few seconds.
Page 34

34
MIC-ON/OFF: This option allows you to activate/deactivate the MICROPHONE feature
for SPEAKERPHONE and I-COM type calls. This button may also be programmed with a number for
the ONE-TOUCH feature, but it must be deactivated as a MICROPHONE first.
SELECT: OPTIONS form the Main Menu display.
ENTER: 11 on the keypad (for MIC-ON/OFF).
PRESS: The MENU button to access the secondary functions.
PRESS: ENTER (button 1).
PRESS: The MENU button to access the secondary functions.
PRESS: ENTER (button 1) again.
“1:SUPPORT 2:NO SUPPORT (SELECT 1-2)” will appear on the
screen.
Then, to activate the MIC-ON/OFF button:
ENTER: 1 on the keypad (for SUPPORT).
PRESS: The MENU button to access the secondary functions.
Page 35

35
PRESS: ENTER (button 1).
“SUPPORTED COMPLETED” will appear on the screen. After a few seconds
the screen will return to the OPTIONS display.
Or, to deactivate the MIC-ON/OFF button:
ENTER: 2 on the keypad (for NO SUPPORT).
PRESS: The MENU button to access the secondary functions.
PRESS: ENTER (button 1).
“NON SUPPORTED COMPLETED” will appear on the screen. After a few
seconds the screen will return to the OPTIONS display.
 Loading...