

Fujifilm FINEPIX S2100HD User Manual
BL00820-201
Before You Begin
First Steps
Basic Photography and Playback
E
Owner’s Manual
Thank you for your purchase of this
product. This manual describes
how to use your FUJIFILM FinePix
S2000HD/S2100HD digital camera
and the supplied software. Be sure
that you have read and understood
its contents before using the camera.
For information on related products, visit our website at
http://www.fujifilm.com/products/index.html
More on Photography
More on Playback
Movies
Connections
Menus
Technical Notes
Tro ubl esh oot ing
Appendix
For Your Safety
Instal lation
Antenn as
• Read Instructions: All the safet y and operating instructions should be read
before the appliance is oper ated.
• Retain Instructions: The safet y and
operating instructions should be
retained for future reference.
• Heed Warnings: All warnings on the
appliance and in the operating instructions should be adhered to.
• Follow Instructions: All operating and
use instructions should be followed.
Installation
Power Sources: T his video product
should be operated only from the
type of power source indicated on
the markin g label. If you are not sure
of the type of power supply to your
home, consult your appliance dealer
or local power company. For video
products intended to operate from
batter y power, or other sources, ref er
to the operating instructions.
Grounding or Polarization: This video
product is e quipped with a polarized alternating-current line plug (a
plug having one blade wider than
the other). This p lug will t into the
power outlet only one way. This is a
safety feature. If you are unable to
insert the plug fully into the outlet,
try reversing the plug. If the plug
should still fail to t, contact your
electrician to replace your obsolete
outlet. Do not defeat the safety purpose of the polarized plug.
ii
IMPORTANT SAFETY INSTRUCTIONS
Alternate Warnings: This video prod-
uct is equipped with a three-wire
grounding-type plug, a plug hav ing
a third (grounding) pin. This plug
will only t into a grounding-type
power outle t. This is a safety feature.
If you are unable to insert the plug
into the outlet, contact your elec trician to replace your obsolete outlet.
Do not defeat the safety purpose of
the grounding type p lug.
Overloading: Do not overloa d wall outlets and ex tension cords as this can
resu lt in a ris k of re o r elec tric sho ck.
Venti lation: Slots and openings in
the cabinet are provided for ventilation, to ensure reliable operation of
the video p roduct and to protect it
from overheating, and these openings must not be blocked or covered. The openings should never
be blocke d by placing the video
product on a bed, sof a, rug, or other
similar surface.
This video product should not be
placed in a built-in installation such
as a bookcase or rack unless proper
ventilation is provided or the manufacturer’s instructions have been adhered to. This video product should
never be placed near or over a radiator or heat register.
Attachme nts: Do not use att achments
not recommended by the video
product manufacturer as they may
cause hazards.
Water and M oistu re: Do not use this
video product near water—for example, near a bath tub, wash bowl,
kitchen sink , or laundr y tub, in a wet
basement, or near a swimming pool,
and the like.
Power-Cord Protection: Power-supply cords should be routed so that
they are not likely to be walked on
or pinched by items placed upon
or against them, paying particular
attention to cords at plugs, convenience receptacles, and the point
where they exit from the ap pliance.
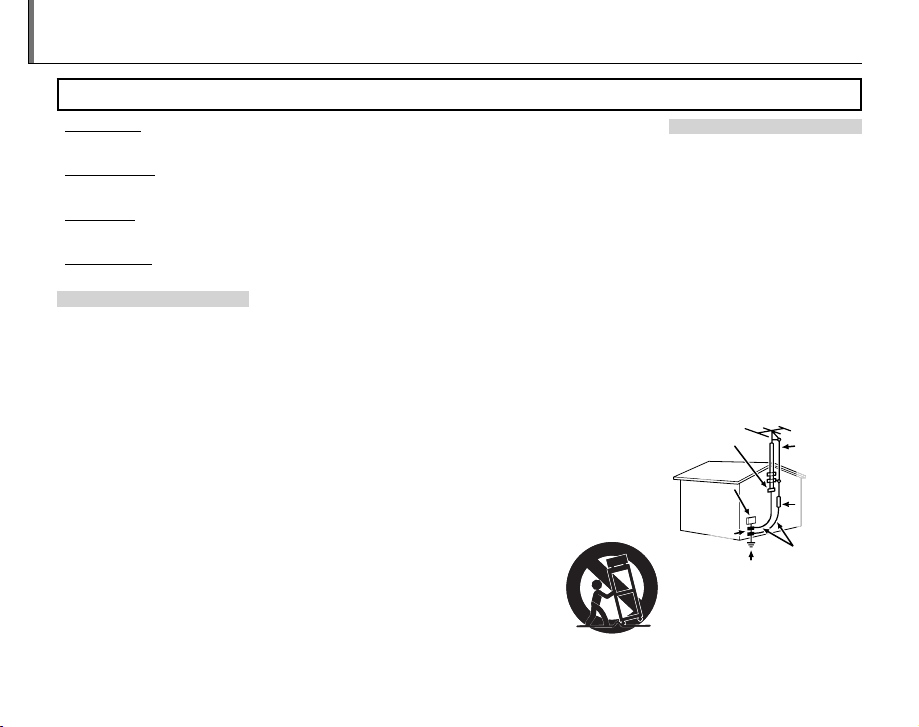
Accessories : Do not place this video
product on an unstable cart, s tand,
tripod, bracket, or table. The video
product may fall, causing serious in jury to a child or adult, and serious
damage to the appliance. Use only
with a car t, stand, tripod, bracket, or
table recom mended by the manuf acturer, or sold with t he video product .
Any mounting of the appliance should
follow the manufacturer’s instruc tions,
and should us e a mounting accessor y
recommend ed by the manufactur er.
An appliance and
cart combination
should be moved
with care. Quick
stops, excessive
force, and uneven
surfaces may
cause the appliance and cart combi nation to over turn.
Antennas
Outdoor Anten na Grou nding : If an
outside antenna or cable s ystem is
connected to the vide o produc t, be
sure the antenna or cable system is
grounded so as to provide some protection against voltage surges and
built-up static charges. Section 810
of the Nation al Electrical Co de, ANSI/
NFPA No. 70, provides information
with respect to proper grounding
of the mast and supporting structure, grounding of the lead- in wire
to an antenna discharge unit, size of
grounding conductors, location of
antenna discharge unit, conne ction
to grounding el ectrodes, a nd requirements for the g rounding electro de.
EXAMPLE O F ANTENNA GROUNDING AS
PER NATIONAL ELECTRICAL CODE
Ground
Clamp
Electric
Service
Equipment
Ground
Clamps
Power Serv ice Grounding
Electrode System (NEC
ART 250. PART H)
Power Lin es: An outside antenna s ystem should not b e located in the
vicinity of overhead power lines or
other elec tric light or power circuits,
Antenna Lead
in Wire
Antenna
Discharge
Unit (NEC
SECTION
810-2 0)
Grounding
Conduc tors
(NEC SECTIO N
810-21)
For Your Safety
Use
Servic e
WARNING
or where it can f all into such power
lines or circuits. When installing an
outside antenna system, extreme
care should be taken to keep from
touching such p ower lines or circuit s
as contact with them might be fatal.
Use
Cleaning: Unplug this video produc t
from the wall outlet before cleaning. Do not use liquid cleaners or
aerosol cleaners. Use a damp cloth
for cleaning.
Object and Liquid Entry: Never push
objects of any kind into this video
product through openings as they
may touch dang erous voltage point s
or short o ut parts that coul d result in a
re or ele ct ric sho ck . Ne ver s pil l li qui d
of any kind on the video product.
Lightning: For added protection for
this video product receiver during
a lightning storm, or when it is left
unattende d and unused for long p eriods of time, unplug it f rom the wall
outlet and disconnect the antenna
or cable system. This will prevent
damage to the v ideo product due to
lightning and power-line surges .
Service
Servicing: Do not attempt to service
this video product yourself as opening or removing covers may expose
you to dangerous voltage or other
hazards. Refer all ser vicing to quali ed service personnel.
Damage R equiring S ervice: Unplug this
video product from the wall outlet
and refer ser vicing to quali ed service personnel under the following
conditions:
• When the power-supply cord or
plug is damaged.
• If liquid ha s been spilled, or ob jects
have fallen into the video product.
• If the video product has been exposed to rain or water.
• If the video product has been
dropped or the cabinet has been
damaged.
If the video product does not operate normally follow the operating
instructions. Adjust only those
controls that are covere d by the operating instructions as an improper
adjustment o f other controls may result in damage and will often require
extensi ve work by a quali ed technician to restore the video product to
its normal operation.
When the video produc t exhibits a
distinct change in performance—
this indicates a need for ser vice.
Replacement Parts: When replacement
parts a re required, be sure the se rvice
technician has used replacement
parts speci ed by the manufacturer
or have the same characteristics as
the original part. Unauthorized substitutions may result in re, electric
shock or other hazards.
Safety Check: Upon completion of any
service or repairs to this video product, ask the service technician to
perform safety checks to determine
that the video product is in proper
operating condition.
Be sure to read these notes before use
Safety Notes
• Make sure that y ou use your camera cor rectly. Read these s afety notes and
your Owner’s Manual carefully before use.
• After reading these safet y notes, store them in a safe place.
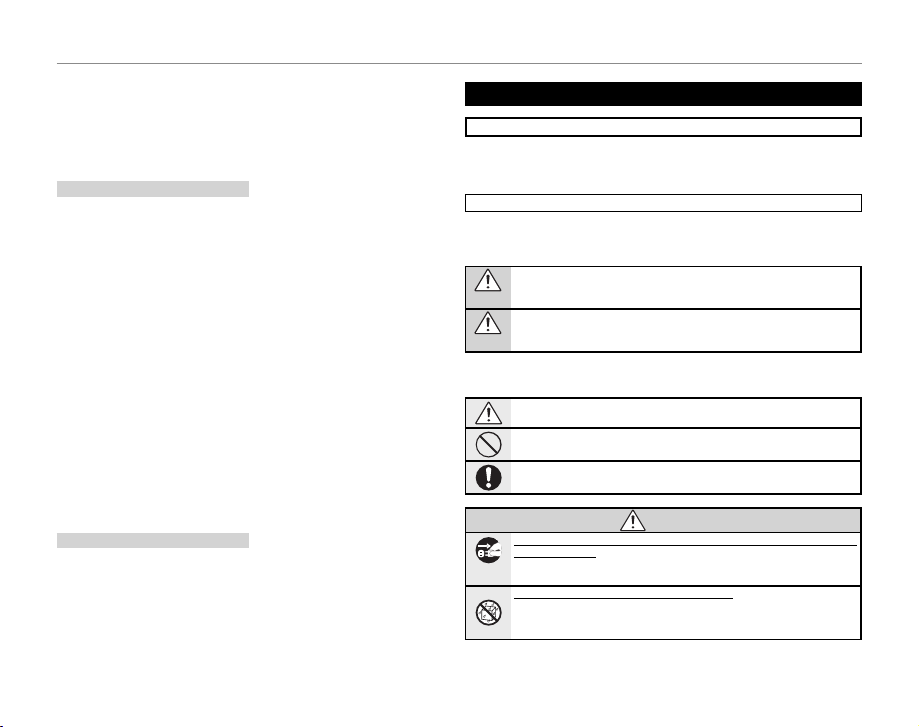
The icons sho wn below are used in this d ocument to indicate th e severity of
the injury or damage that can re sult if the information indi cated by the icon
is ignored and the product is used incorrectly as a result.
This icon indicates that death or serious injury can result if the information
is ignored.
WARNING
This icon indicates that personal injury or material damage can result if the
information is ignored.
CAUTION
The icons shown below are us ed to indicate the nature of the instruc tions
which are to be observed.
Triangular icons tell you that this information requires attention (“Important”).
Circular icons w ith a diagonal bar tell you th at the action indicate d is prohibited (“Prohibited”).
Filled circles with an exclamation mark indicate an action that must be performed (“Required”).
If a proble m arises, tu rn the camera o , remov e the batter ies, and disc onnect an d unplug
the AC power a dapter. Continu ed use of the ca mera when it is e mitting sm oke,
is emitting any unusual odor, or is in any other abnormal state can cause a re
Unplug from
or elect ric shock. Contac t your FUJIFILM dealer.
power socket
Do not all ow water or fo reign obje cts to ente r the camera. I f water or foreig n object s
get inside th e camera, turn the c amera o , remove t he batteries, an d disconnect and u nplug the AC pow er adapter. Continue d use of the cam era can
cause a re o r electric shoc k. Contact your FUJIFIL M dealer.
About t he Icons
WARNING
iii
For Your Safety
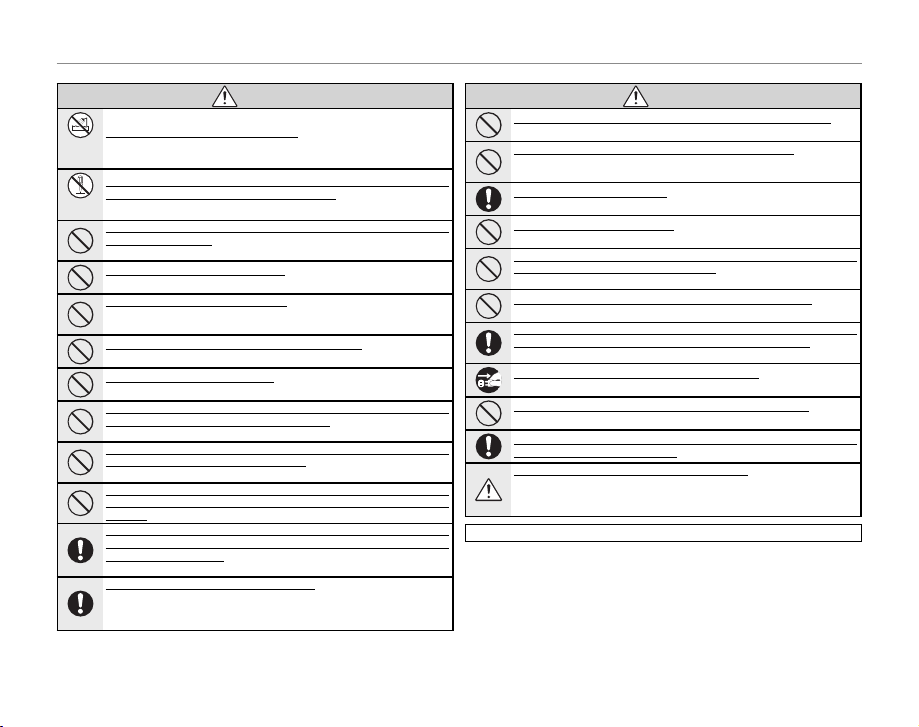
WARNING
CAUTION
WARNING
Do not use th e camera in the ba throom or showe r. This can cause a re or elec tric
Do not use in
shock.
the bathroom
or shower
Never at tempt to c hange or ta ke apar t the camer a. (Never op en the cas ing.) Do not u se the
camera when it has been dropped or the casing is damaged. This can cause a re or
Do not
electr ic shock. Contact y our FUJIFILM dealer.
disassemble
Do not cha nge, heat o r unduly twi st or pull th e connect ion cord and d o not place he avy objects o n the connec tion cord. The se actio ns could damage t he cord and caus e a
re or ele ctric shock. I f the cord is damaged, conta ct your FUJIFILM dealer.
Do not place t he camera on a n unstable su rface. Thi s can cause the camera to f all or
tip over and ca use injury.
Never at tempt to take pi ctures whil e in motion. Do not u se the camer a while you
are walkin g or driving a v ehicle. This c an result in you falling do wn or being
involved in a tra c accident.
Do not touc h any metal pa rts of the cam era during a t hundersto rm. This can caus e an
electr ic shock due to induced c urrent from the lightni ng discharge.
Do not use th e batteries e xcept as speci ed. Load the batter ies as shown by t he
indicator.
Do not hea t, change or take a part the batte ries. Do not drop o r subject the ba tteries to
impac ts. Do not stor e the batteri es with meta llic produ cts. Any of thes e actions c an
cause the ba tteries to burst or l eak and cause re or in jury as a result.
Use only th e batterie s or AC power ada pters spec i e d for use with th is camera. Do n ot use
voltage s other th an the po wer supp ly voltag e shown. T he use of other powe r sources
can cause a re.
If the bat teries leak and uid get s in contac t with your eyes, ski n or clothing, u sh the
a ecte d area with clea n water and seek m edical atte ntion or call an e mergency num ber
right away.
When carrying the batteries, install them in a digital camera or keep them in the hard case.
When stor ing the ba tterie s, keep th em in the ha rd case. Wh en disca rding, co ver the bat tery
terminals with insulation tape. Contact with ot her metalli c object s or batteri es
could cause t he batteries to ignite o r burst.
Keep mem ory cards out of th e reach of small ch ildren. Becaus e memor y cards are
small, they c an be swallowed by chi ldren. Be sure to store me mory cards out
of the reach of s mall children. If a ch ild swallows a me mory card, se ek medical
attention o r call an emergency num ber.
Do not use this camera in locations a ected by oil fumes, steam, humidity or dust. This
can cause a re or elec tric shock.
Do not lea ve this cam era in plac es subje ct to ext remely h igh tempe rature s. Do not leave
the camera i n location s such as a sealed v ehicle or in dire ct sunlight . This
can cause a re.
Keep out of the reach of small children. This produc t could caus e injury in th e
hands of a chil d.
Do not plac e heavy obje cts on the came ra. This can cause t he heavy obj ect to tip
over or fall an d cause injury.
Do not move t he camera whil e the AC power ada pter is still c onnected. D o not pull on the
connection cord to disconne ct the AC power adapter. This can damage the p ower
cord or cable s and cause a re or ele ctric shock.
Do not cove r or wrap the cam era or the AC powe r adapter in a c loth or blank et. This can
cause heat to bu ild up and distort th e casing or cause a r e.
When you ar e cleaning the c amera or you do not p lan to use the came ra for an exte nded
period, r emove the b atteri es and disc onnect a nd unplu g the AC power a dapter. Failure to
do so can cause a re or electric shock.
When cha rging ends, u nplug the cha rger from the p ower socket. Leav ing the charg er
plugged i nto the power socket can c ause a re.
Using a ash too clo se to a person’s e yes may tempo rarily a ect the eyes ight. Take particular car e when photographi ng infants and young c hildren.
When a memo ry card is rem oved, the card c ould come out o f the slot too qu ickly. Use your
nger to ho ld it and gen tly relea se the card.
Reques t regula r intern al test ing and cl eanin g for your c amera. Bui ld- up of dus t in y our
camera can cause a re or electric shock. Contact your FUJIFILM dealer to
request inter nal cleaning every tw o years. Please note that this ser vice is not
free of charg e.
The following describes the proper use of batteries and how to prolong
their life. Incorrect use can shor ten battery life or cause leakag e, overheating, re, or explosion.
Compatible Batteries
The camera takes AA alkaline, rechargeable Ni-MH (nickel-metal hydride),
or UL-certi ed lithium batteries. Do not use manganese, nickel-cadmium
(Ni-Cd), or non-UL certi ed lithium batteries, as the heat generated by these
batteries could damage the camera or cause malf unction.
CAUTION
Using B atteries
iv

For Your Safety
Battery capacity varies with make
and storage conditions. Some commercially-available batteries may
have less capacity than the batteries
provided with the camera.
Cautions: Handling Batteries
• D o not use batterie s that are leaking,
deformed, or discolored. Warning: If
the batter ies leak, clean the b attery
compartment thoroughly before inserting new batteries. If uid from
the batte ry comes into contac t with
skin or clothing, ush the a ected
area with water. If uid enters your eyes,
immed iately ush the a ected area with
water an d seek med ical at tention . Do not
rub your ey es. Failu re to obser ve this pr ecautio n could resu lt in loss of eye sight.
• Do not transport or store with
metal objects such as necklaces or
hairpins.
• Do not disass emble or modify the
batteries or batter y casing.
• Do not expose to strong physical
shocks.
• Do not expose to water, ame, or
heat, or store in warm or humid
conditions.
• Keep out of reach of infants and
small children.
• Insert in the cor rect orientation.
• Do not mix old and new bat teries,
batteries with di erent charge levels, or batteries of di erent types.
• If the camera will not be used for
an extended period, remove the
batteries. Note that the camera
clock will be reset (pg. 14).
• The batteries may be warm to the
touch immediately after use. Turn
the camera o and allow the batteries to cool b efore handling.
• Batter y capacity tends to decrease
at low temperatures. Keep spare
batteri es in a pocket or other war m
place and exchange as necessary.
Cold batteries may recover some
of their charge when warmed.
• Fingerprints and other foreign
matter on the battery terminals
can reduce bat tery performance.
Thoroughly clean the terminals
with a sof t, dry cloth before ins erting the bat teries in the camera.
Ni-MH Ba tteries
The capacity of Ni-MH batteries may
be temporarily reduced when new,
after long periods of disuse, or if they
are repeatedly recharged before being fully discharged. This is normal
and does not indicate a malf unction. Capacity can b e increased by
repeatedly discharging the bat teries
using the P DISCHARGE option
in the camera setup menu (pg. 107)
and rechargin g them using a battery
charger (sol d separately). Do not us e
this option with alkaline batteries.
The camer a draws a small amount of
current even when o . Ni -MH batteries that have been left in the camera
for an extended period may be drawn
down to the point that they no longer
hold a charge. B attery performance
may also drop if th e batteries are run
down in a devi ce such as a ashli ght.
Use the P DISCHARGE option in the
camera setup menu to discharge NiMH batteries. Batteries that no lon-
ger hold a charge even after repeatedly being d ischarged and recharge d
have reached th e end of their serv ice
life and must be replaced.
Ni-MH bat teries can be recharged in
a batter y charger (sold separately).
Batteries may become warm to the
touch af ter charging. Refer to the i nstructions provided with the charger
for more information. Use the charger with compatible bat teries only.
Ni-MH batteries gr adually lose their
charge when not in use.
Disposal
Dispose of used batteries in accord
with local regulations.
AC Adapters (Available Separately)
Use only FUJIFI LM AC adapters desig nated for use wi th this camera. Oth er
adapters could damage the camera.
• Th e AC adapter is for indoor us e only.
• Be sure the DC plug is securely
connected to the camera.
• Tur n the camera o before disconnectin g the adapter. Disconn ect the
adapter by the p lug, not the cable.
• Do not use with other devices.
• Do not disassemble.
• Do not expose to high heat and
humidity.
• Do not subject to strong physical
shocks.
• The AC adapter may hum or become hot to the touch during use.
This is normal.
• If the AC adapter causes radio interference, reorient or relocate the
receiving antenna.
Using the Camera
To ensure that images are recorded
correctly, do not subject the camera
to impact or physical shocks while
images are being recorded.
Electrical Interference
This camer a may interfere wit h hospital
or aviation equipment. Consult with
hospital or airline sta before using the
camera in a hospital or on an aircraft.
Liquid Crystal
In the event that the monitor or electronic view nder is damaged, care
should be taken to avoid contact
with liquid crystal. Take the urgent
action indicated should any of the
following situations arise:
• If liquid c rystal comes in cont act wi th
your skin, clean the a rea with a cloth
and then wash thoroughly with
soap and running water.
• If liquid c rystal ent ers your eyes, ush
the a ected eye with clean water
for at least 15 minutes and then
seek medical assistance.
• If liquid c rystal is swallowe d, rinse
your mouth thoroughly with water.
Drink large quantities of water and
induce vomiting, then seek medical assistance.
Take Test Shot s
Before taking photographs on important occasions (such as at weddings
or before taking the camera on a trip),
take a test shot an d view the result to
ensure that the camera is functioning normally. FUJIFILM Corporation
can not accept liability for damages
or lost pro ts incurred as a result of
product malfunction.
v

For Your Safety
For Custom ers in the U.S .A.
For Custom ers in Canad a
EC Decla ration of Con formity
To prevent re o r shock hazard, do no t expose the unit to rai n or moisture.
Please read the “Safet y Notes” (pages iii– v) and make sure you understand
them befo re using the camera.
Perchlorate Material—special handling may a pply. See http://www.dtsc.
ca.gov/hazardouswaste/perchlorate.
For Custom ers in the U.S .A.
Tested To Com ply Wit h FCC Standar ds
FOR HOME OR OFFI CE USE
FCC Statement
This device complies with Par t 15 of the FCC Rules. Operation is subject to
the follow ing two conditions : (1) This device may not ca use harmful interf erence, and (2) this device must accept any interference received, including
interference that may cause undesired oper ation.
CAUTION
This equipment has been tested and found to comply with the limits for a
Class B digital device, pursuant to Part 15 of the FCC Rules . These limits are
designed to provide reasonable protection against harmful interference in
a residential ins tallation . This equipment generates, uses, and can radiate
radio frequency energy and, if not installe d and used in accordance with
the instructions, may cause harmful interference to radio communications.
However, there is no guarantee that interference will not occur in a p articular install ation. If this equipme nt does cause harmfu l interference to radio o r
television re ception, which can be determined by turning the equipment
o and on, the user is encouraged to try to correct the inter ference by one
or more of the following measures:
• Reorient or relo cate the receiving antenna.
• Increase the separation bet ween the equipment and receiver.
• Connect the equipment into an outlet on a circuit di erent from that to
which the receiver is connec ted.
• Consult the dealer or an experienced radio/T V technician for help.
You are cautioned that any changes or modi cations not expressly approved
in this manual coul d void the user’s authority to operate the equipment.
Notes on t he Grant
To comply with Part 15 of the FCC Rules, this product must be used with a
FUJIFILM-sp eci ed ferrite- core A/V cable, USB cable, and DC supply cord.
vi
NOTICES
For Custom ers in Canad a
CAUTION: This Class B digital apparatus complies with Canadian ICES- 003.
EC Decla ration of Con formity
We
Name: FUJIFILM Electronic Imaging Europe GmbH
Address:Benzstrasse 2
declare that the product
Product Name: FUJIFILM DIGI TAL CAMERA
Manufacturer’s Name: FUJIFILM Corporation
Manufacturer’s Address: 7-3, AKASAKA 9 -CHOME, MINATO-KU, TOK YO,
conforms to the following St andards:
Safety: EN60065: 20 02 + A1: 2006
EMC: EN55022: 1998 + A1: 20 00 + A2: 2003 Class B
following the provision of the EMC Direc tive (2004/108/EC) and Low Voltage Directive (2006/95/EC).
Kleve, Germ any July 15, 2009
Place Date Signature, Managing Director
47533 Klev e, Germany
FinePix S2000HD/S2100HD
107-0 052 JAPA N
EN55024: 1998 + A1: 2001 + A2: 2003
EN61000-3-2: 2006
EN61000-3-3: 1995 + A1: 20 01 + A2: 2005

For Your Safety
Dispos al of Elect rical and El ectroni c Equipmen t in Private Hou seholds
Notes on Co pyright
Tradema rk Informat ion
Dispos al of Elect rical and El ectroni c Equipmen t in Private Hou seholds
Dispo sal of Used Elec tric al and Electronic Equ ipment (Applicabl e in the Europea n
Union, N orway, Icel and and Lie chtenste in)
This symbol on the product, or in the manual and in the
warrant y, and/or on its packaging indicates that this product shall not be treated as hous ehold waste.
Inst ead it sho uld be t aken to an a pplica ble coll ectio n point
for the recycling of electrical and electronic equipment.
By ensuring this product is disposed of correctly, you will
help prevent potential negative consequences to the en vironment and human health, which could otherwise be
caused by inappropriate waste handling of this product.
This symb ol on the batterie s or accumulators indic ates that
those bat teries shall not be treated as Household waste.
If your equipment contains easy removable batteries or accumulators please dispose these separately according to
your local requirements.
The recycling of materials will help to conserve natural resources. For more
detailed information about recycling this product, please contact your local
city o ce, your household waste disposal service or the shop where you
purchased the produc t.
In Count ries Outs ide the Eur opean Uni on, Norway, Ic eland and L iechtens tein:
If you wish to discard this product including the batteries or accumulators, please contact your local authorities and ask for the correct way of
disposal.
Notes on Co pyright
Unless intended solely for personal use, images recorded using your digital
camera system cannot be used in ways that infringe copyright laws without the consent of the owner. Note that some restrictions apply to the
photographing of stage performances, entertainments, and e xhibits, even
when intended purely for personal use. Users are also asked to note that
the transfer of memory cards containing images or data protected under
copyright laws is only permissible within the restric tions imposed by those
copyright laws.
Trademark Information
xD-Picture Card is a trademark of FUJIFILM Corp oration. Macintosh, Power
Macintosh, Power Mac, PowerBook, QuickTime, and Mac OS are trademarks
of Apple In c. in the U.S.A . and other countrie s. Microsoft , Windows, the Wi ndows logo, W indows Vista and the W indows Vista logo are trademarks or
registered trademarks of Microsoft Corporation in the United States and/or
other countries. “Windows” is an abbreviation used in reference to the Microsoft Windows op erating system. Adob e and Adobe R eader are either
trademark s or registered trademark s of Adobe Systems Incorporate d in the
U.S.A . and/or other countries. T he SDHC logo is a trademar k.
Note: The “De signed for Microso ft® Windows ® XP” and “
Vista™” logos apply only to the camera and camera hardware dri ver.
CERTIFIED FOR Windows
vii

About This Manual
✔✔ Troubleshooting
............................................
pg. 111
✔✔ Glossary
........................................................
pg. 122
✔✔ Table of Contents
.............................................
pg. xii
✔✔ Warning Messages a nd Displays
.....................
pg. 118
✔✔ Camera Q & A
....................................................
pg. ix
Before using the camera, read this manual and the warnings on pages ii–vii. For information on speci c
topics, consult the sources below.
Camera Q & A
Know what you want to do but don’t know the
name for it? Find the answer in “Camera Q & A.”
Troubleshooting
Having a speci c problem with the camera?
Find the answer here.
Glossary
The meanings of some technical terms may be
found here.
Memory Cards
Pictures can be stored in the camera’s internal memory or on optional SD and SDHC memory cards. In this
manual, SD memory cards are referred to as “memory cards.” For more information, see page 10.
viii
....................................................
............................................
........................................................
pg. ix
pg. 111
pg. 122
Table of Contents
The “Table of Contents” gives an overview of the
entire manual. The principal camera operations
are listed here.
Warning Messages and Displays
Find out what’s behind that ashing icon or error message in the monitor or electronic view n d e r .
.............................................
.....................
pg. xii
pg. 118

Camera Q & A
Camera Setup
Question
Key phrase
See page
Sharing Pictures
Question
Key phrase
See page
Find items by task.
Camera Setup
Question
How do I set the camera clock? Date and time 14
Can I set the clock to local time when I travel? Time di erence 106
How do I keep the display from turning o automatically? Auto power o 105
How do I make the display brighter or darker? LCD brightness 104
How do I stop the camera beeping and clicking?
Can I change the sound the shutter makes? Shutter sound 101
What are the parts of the camera called? Parts of the camera 2
What do the icons in the display mean? Displays 4
How do I use the menus? Menus 72
What’s behind that ashing icon or error message? Messages and displays 118
How much charge is left in the battery? Battery level 16
Can I increase the capacity of rechargeable Ni-MH batteries? Discharge 107
Sharing Pictures
Question
Can I print pictures on my home printer? Printing pictures 61
Can I copy my pictures to my computer? Viewing pictures on a computer 66
Operation and shutter volume 101
Key phrase
Silent mode 20
Key phrase
See page
See page
ix

Camera Q & A
Taking Pictures
Question
Key phrase
See page
Tak ing Pictures
Question
How many pictures can I take? Memory capacity 124
Is there a quick and easy way to take snapshots? A mode 16
How can I avoid blurred pictures? Dual IS mode 86
How can I make good portraits? Intelligent Face Detection 22
Is there a simple way to adjust settings for di erent scenes? Scene position 38
How do I shoot close-ups? Close-ups (macro mode) 27
How do I keep the ash from ring?
How do I “ ll-in” shadows on back-lit subjects?
How do I take a series of pictures in a single burst? Burst mode 30
How do I take a group portrait that includes the photographer? Self-timer mode 79
Can I take pictures by remote control? Remote control (sold separately) 108
How do I turn o the lamp on the front of the camera? AF-assist illuminator 26
How do I frame pictures with the subject o to one side? Focus lock 24
Can I choose shutter speed and aperture? P, S, and M modes 42
Can I save and recall camera settings? C mode 46
How do I adjust exposure? Exposure compensation 34
How do I shoot movies? Recording movies 55
How do I frame pictures in the view nder? EVF/LCD button 5
Key phrase
Flash mode 28How do I stop my subjects’ eyes glowing red when I use the ash?
See page
x

Camera Q & A
Viewing Pictures
Question
Key phrase
See page
Viewing Pictures
Question
How do I view my pictures? Single-frame playback 47
How do I view pictures of only one type? Choose type 99
How do I get rid of unwanted pictures? Deleting pictures 53
How do I delete a lot of pictures at once? Erase 54
Can I zoom in on pictures during playback? Playback zoom 48
How do I view a lot of pictures at once? Multi-frame playback 50
How do I view all pictures taken on the same day? Sort by date 52
Can I protect my pictures from accidental deletion? Protect 93
Can I hide the icons in the display when viewing my pictures? Choosing a display format 47
Can I view my pictures in a slide show? Slide show 88
Can I add a short voice memo to my pictures? Voice memo 96
Can I crop unwanted elements out of my pictures? Crop 98
Can I copy pictures from internal memory to a memory card? Copy 94
How do I view pictures on a High De nition device? HDTV kit (sold separately) 108
How do I view my pictures on TV? Viewing pictures on TV 59
Key phrase
See page
xi

Before You Begi
First Step
Basic Photography and Playbac
More on Photograph
Table of Contents
For Your Safety ................................................................................. ii
IMPORTANT SAFETY INSTRUCTIONS ......................................ii
Safety Notes .................................................................................... iii
NOTICES ............................................................................................ v i
About This Manual ....................................................................... v iii
Camera Q & A .................................................................................... ix
Before You Beginn
Introduction ....................................................................................... 1
Symbols and Conventions .......................................................... 1
Supplied Accessories .................................................................... 1
Parts of the Camera ....................................................................... 2
Camera Displays ..........................................................................4
The Mode Dial ..............................................................................6
First Stepss
The Strap and Lens Cap ................................................................ 7
Inserting the Batteries .................................................................. 8
Inserting a Memory Card ........................................................... 10
Turning the Camera on and O ...............................................13
Shooting Mode .............................................................................13
Playback Mode .............................................................................. 13
Basic Setup ....................................................................................... 14
Basic Photography and Playbackk
Taking Pictures in A (Auto) Mode ................................. 16
Viewing Pictures ............................................................................21
More on Photographyy
Intelligent Face Detection and Red-Eye Removal .......... 22
Focus Lock ........................................................................................ 24
e Close-ups (Macro and Super Macro Modes) ...............27
l Using the Flash (Intelligent Flash) .....................................28
p Burst Mode (Continuous Shooting) ................................30
c Instant Zoom (Zoom Framing) .........................................32
d Exposure Compensation .....................................................34
Shooting Mode ...............................................................................36
A AUTO ...................................................................................36
E ANTI-BLUR (Picture Stabilization) ..................................36
D NATURAL LIGHT ....................................................................36
C NATURAL & l .......................................................................36
B ZOOM BRACKETING ...........................................................37
SP SCENE POSITION ....................................................................38
P, S, and M Modes ........................................................................42
C: CUSTOM ......................................................................................46
xii

Table of Contents
More on Playbac
Movie
Connection
Menu
More on Playbackk
Playback Options ........................................................................... 47
Playback Zoom ..............................................................................48
Viewing Photo Information......................................................49
Multi-Frame Playback .................................................................50
Pictures Taken in a Single Burst ..............................................51
Sort by Date ....................................................................................52
A Deleting Pictures ....................................................................53
Moviess
F Recording Movies ...................................................................55
a Viewing Movies .......................................................................58
Connectionss
Viewing Pictures on TV ...............................................................59
Printing Pictures via USB ........................................................... 61
Connecting the Camera ............................................................61
Printing Selected Pictures ........................................................61
Printing the DPOF Print Order ................................................62
Creating a DPOF Print Order ....................................................64
Viewing Pictures on a Computer ............................................6 6
Installing FinePixViewer ............................................................66
Connecting the Camera ............................................................70
Menuss
Using the Menus: Shooting Mode .........................................72
Using the f-Mode Menu..........................................................72
f-Mode Menu Options .............................................................73
N ISO ............................................................................................ 74
O QUALITY ................................................................................. 75
P g COLOR ............................................................... 76
Using the Shooting Menu .........................................................77
Shooting Menu Options ............................................................78
B SELF-TIMER............................................................................79
C PHOTOMETRY ......................................................................80
D WHITE BALANCE .................................................................81
E HIGH-SPEED SHOOTING ..................................................83
F FOCUSING .............................................................................83
G AF MODE ................................................................................84
H SHARPENING ........................................................................85
I FLASH ......................................................................................85
J BRACKETING .........................................................................86
L DUAL IS MODE .....................................................................86
xiii

Table of Contents
Technical Note
Troubleshootin
Appendi
Using the Menus: Playback Mode .......................................... 87
Using the f-Mode Menu.......................................................... 87
f-Mode Menu Options ............................................................. 87
I SLIDE SHOW .........................................................................88
J DISPLAY MODE ....................................................................88
Using the Playback Menu .........................................................89
Playback Menu Options .............................................................90
B RED EYE REMOVAL .............................................................90
L MOVIE TRIMMING ............................................................... 91
C IMAGE ROTATE .....................................................................92
D PROTECT ................................................................................93
E COPY ........................................................................................94
F VOICE MEMO ........................................................................96
G TRIMMING .............................................................................98
H CHOOSE TYPE ......................................................................99
The Setup Menu .......................................................................... 100
Using the Setup Menu ............................................................ 100
Setup Menu Options .................................................................101
A IMAGE DISP. ....................................................................... 102
B FRAME NO. .........................................................................103
D DIGITAL ZOOM ................................................................. 104
I PLAYBACK VOLUME ........................................................ 104
J LCD BRIGHTNESS ............................................................. 104
K FORMAT............................................................................... 105
M AUTO POWER OFF ........................................................... 105
N TIME DIFFERENCE ............................................................106
P DISCHARGE (Ni-MH Batteries Only) ......................... 107
Tec hni cal N otess
Optional Accessories ................................................................ 108
Accessories from FUJIFILM ....................................................109
Caring for the Camera ............................................................... 110
Tro ub les hoo ti ngg
Tro ub les ho oti ng .......................................................................... 111
Warning Messages and Displays .......................................... 118
Appendixx
Glossary ...........................................................................................122
Flash Mode and Shooting Mode ..........................................123
Internal Memory/Memory Card Capacity ........................124
Speci cations ................................................................................12 5
FUJIFILM Digital Camera Worldwide Network ..............130
xiv
Introduction
Symbols and Conventions
Supplied Accessories
Symbols and Conventions
The following symbols are used in this manual:
3 Caution: This information should be read before use to ensure correct operation.
1 Note: Points to note when using the camera.
2 Tip: Additional information that may be helpful when using the camera.
Menus and other text in the camera monitor are shown in bold. In the illustrations in this manual, the
monitor display may be simpli ed for explanatory purposes.
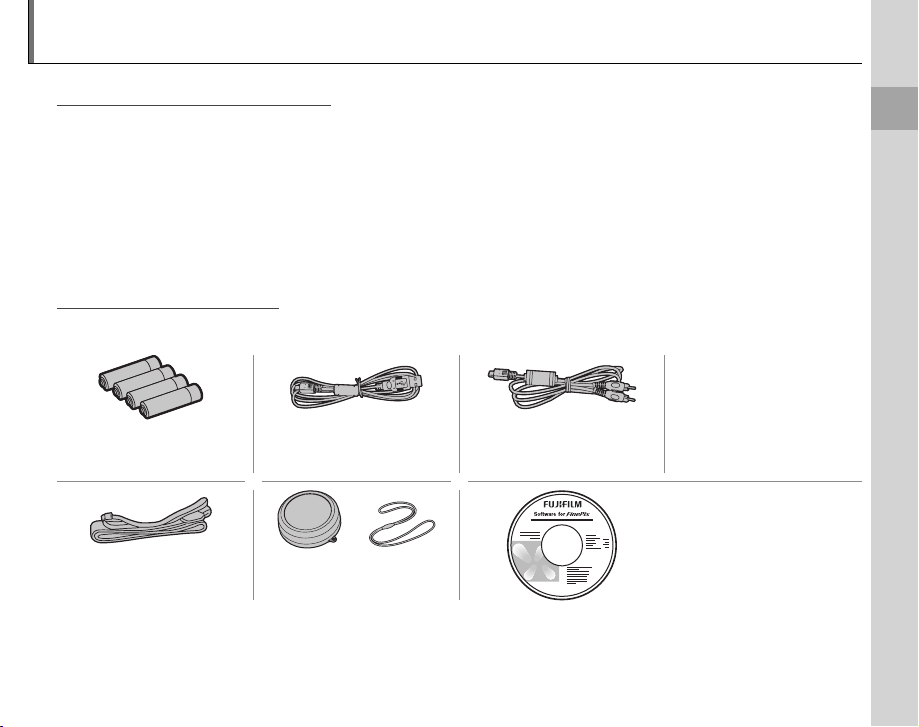
Supplied Accessories
The following items are included with the camera:
• Owner’s Manual CD
(contains this manual)
AA alkaline (LR6) batteries
(×4)
Strap Lens cap
USB cable A/V cable
• Basic Manual
FinePix software CD (IMPOR-
TAN T: read license agreement on the last page of this
manual before opening)
Before You Begin
1
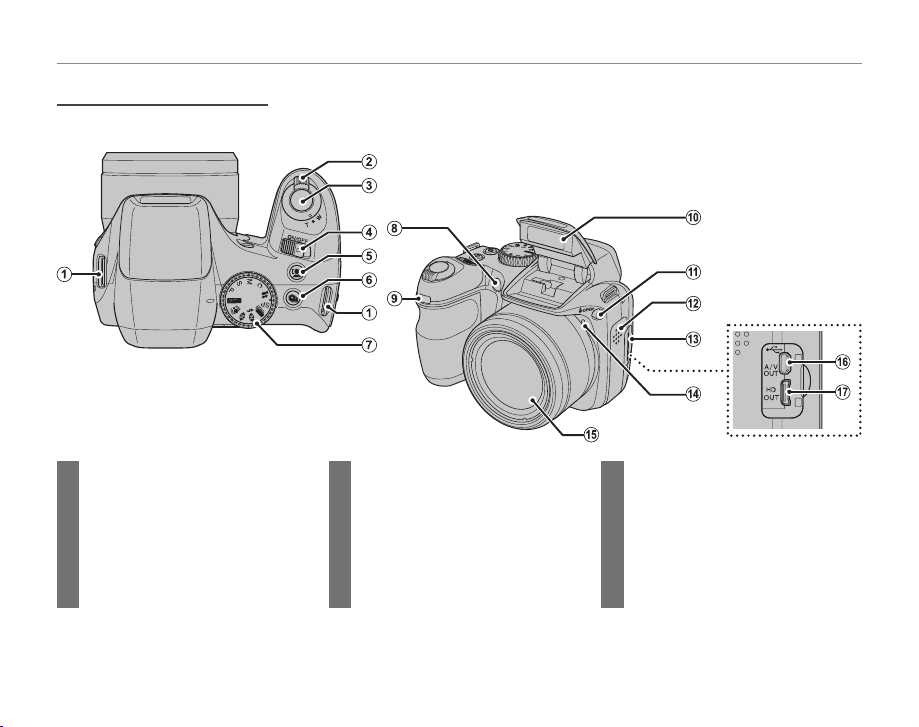
Parts of the Camera
Parts of the Camera
For more information, refer to the page listed to the right of each item.
Introduction
1 Strap eyelet ....................................................7
2 Zoom control .......................................17, 48
3 Shutter button ...........................................19
4 G switch ..........................................13
5 g (Intelligent Face Detection/
red-eye removal) button ....................22
6 p (burst mode) button ......................30
2
7 Mode dial ........................................................ 6
8 AF-assist illuminator ...............................26
Self-timer lamp ..........................................79
9 Receiver for remote control ...........108
10 Flash ..................................................................28
11 l ( ash pop-up) button ......................28
12 Speaker ...........................................................97
13 Terminal cover ............................................59
14 Microphone .................................................96
15 Lens ................................................................... 13
16 Connector for A/V cable ..................... 59
Connector for USB cable .....................70
17 Connector for High De nition
(HD) devices ................................................59
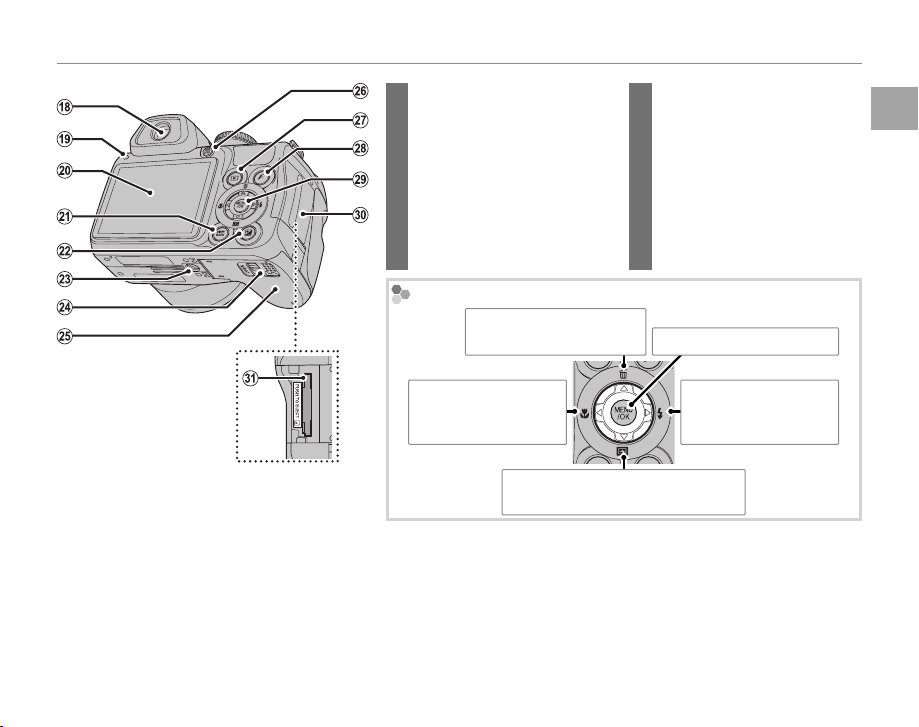
Introduction
18 Electronic view nder ....................5
19 Indicator lamp ................................. 20
20 Monitor ................................................... 4
21 DISP (display)/
BACK button................................18, 47
22 d (Exposure compensation)
button .................................................. 34
23 Tripod mount
24 Battery-chamber latch .................. 8
The Selector Button
Move cursor up
b (delete) button (pg. 21)
Move cursor left
e (macro) button
(pg. 27)
Move cursor down
c (instant zoom) button (pg. 32)
25 Battery-chamber cover ................8
26 EVF/LCD (display selection)
button ..................................................... 5
27 a (playback) button ..................47
28 f (photo mode) button .......... 72
29 Selector button (see below)
30 Memory card slot cover .............11
31 Memory card slot ........................... 11
MENU/OK button (pg. 14)
Move curs or right
l ( ash) button
(pg. 28)
Before You Begin
3
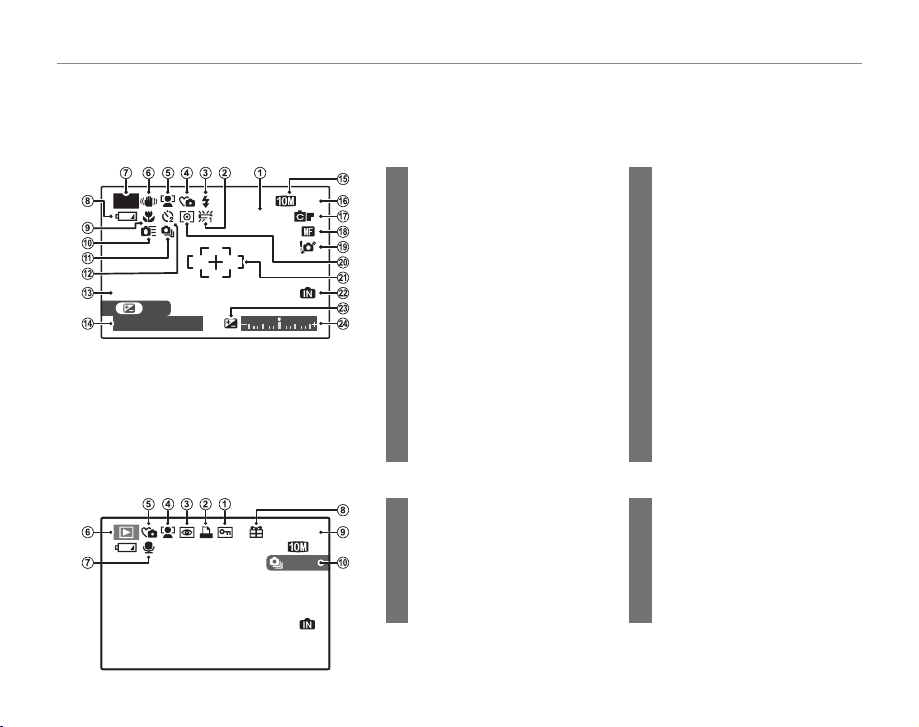
Camera Displays
Camera Displays
■■ Shooting
ISO AUTO (800
)
9
N
12/ 31/ 2050
■■ Playback
10 : 00
AM
100-0001
N
12/ 31/ 2050
The following indicators may appear during shooting and playback:
Shooting
1 Sensitivity ............................................74
P
12/ 31/ 2050
SET
250
F
3.5
10 : 00
ISO AUTO (800
AM
N
9
)
* a: indicates that no memory card is inserted
and that pictures will be stored in the camera’s
internal memory (pg. 10).
Playback
100-0001
N
21/ 30
2 White balance ..................................81
3 Flash mode.........................................28
4 Silent mode ...................................... 20
5 Intelligent Face Detection
*
indicator .............................................. 22
6 Dual IS mode ...................................86
7 Shooting mode .............................. 36
8 Battery level .......................................16
9 Macro (close-up) mode..............27
10 High-speed mode ........................ 83
11 Burst mode ....................................... 30
12 Self-timer indicator .......................79
1 Protected image .............................93
2 DPOF print indicator ...................64
3 Red-eye removal indicator .....90
4 Intelligent Face Detection
indicator .............................................. 22
5 Silent mode indicator ................. 20
Introduction
13 Date and time...................................14
14 Shutter speed and aperture ...43
15 Quality ...........................................55, 75
16 Number of exposures
remaining ......................................... 124
17 FinePix color ......................................76
18 Focus mode ...................................... 83
19 Blur warning ..................................... 86
20 Metering ............................................. 80
21 Focus frame .......................................19
22 Internal memory indicator * .....10
23 Exposure compensation
indicator ...............................................45
24 Exposure indicator ........................45
6 Playback mode indicator ..........47
7 Voice memo indicator................ 96
8 Gift image ...........................................47
9 Frame number ..............................103
10 Current frame/
number of frames in burst .......51
4
12/ 31/ 2050
10 : 00
AM
Introduction
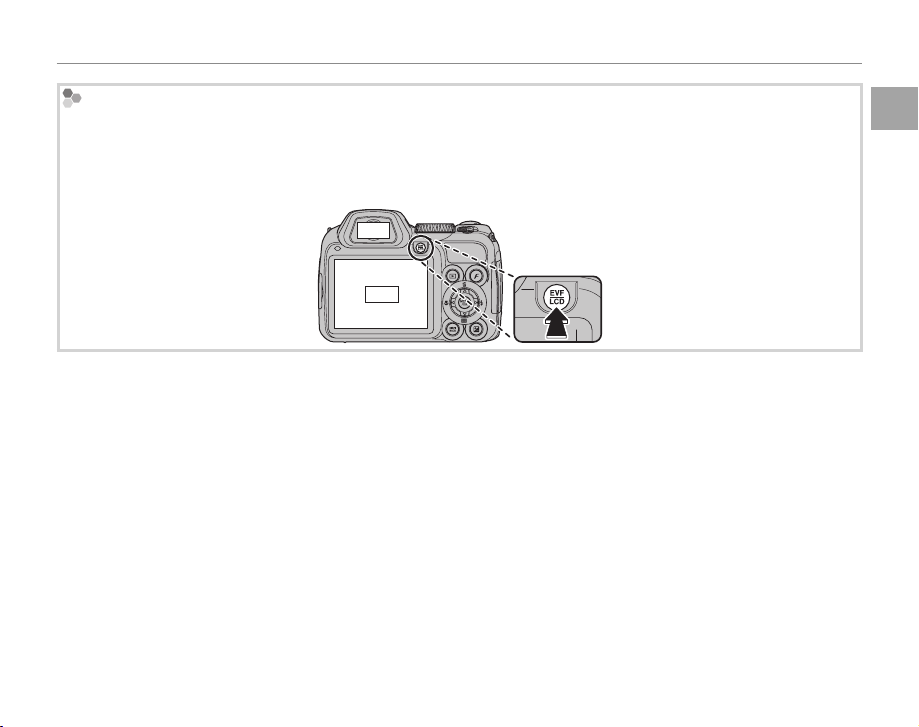
The Electr onic View nder (EVF)
The electronic view nder provides the same information as the monitor, and can be used when bright lighting conditions make the display in the monitor di cult to see. To switch between the monitor and electronic
view nder, press the EVF/LCD button (your selection remains in e ect when the camera is turned o or the mode
dial is rotated to another setting).
EVF
LCD
Before You Begin
5
The Mode Dial
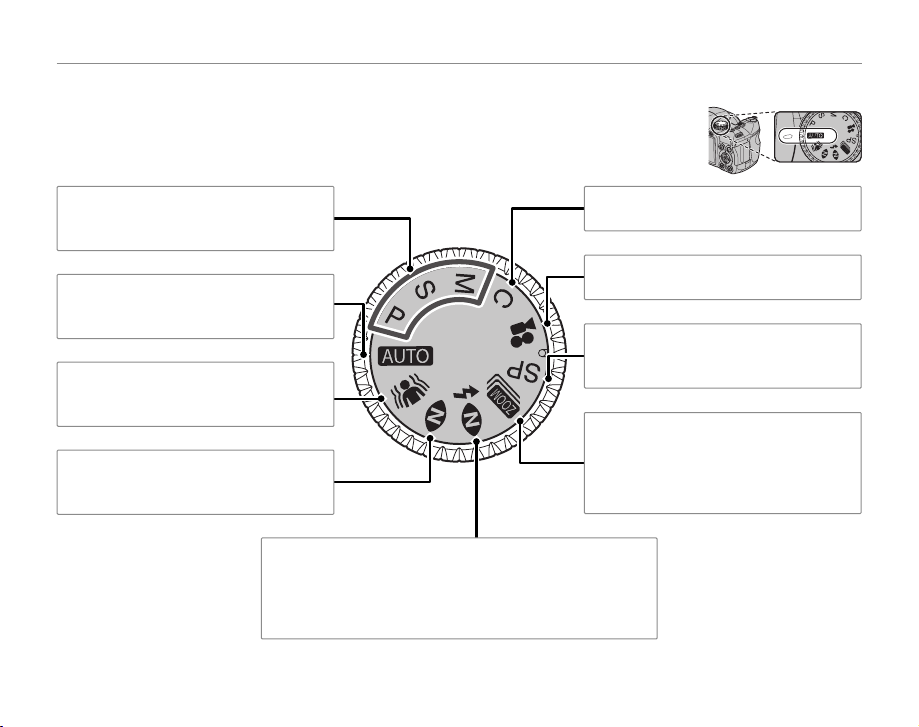
The Mode Dial
To select a shooting mode, align the mode icon with the mark next to the mode
dial.
Introduction
P, S, M: Select for full control over camera
settings, including aperture (M) and/or
shutter speed (M and S; pg. 42).
A (AUTO): A simple “point-and-shoot”
mode recommended for rst-time users
of digital cameras (pg. 16).
E (ANTI-BLUR): High shutter speeds re-
duce blur caused by subject movement
or camera shake (pg. 36).
D (NATURAL LIGHT): Capture natural light
indoors, under low light, or where the
ash can not be used.
6
C (CUSTOM ): Recall stored settings for
modes P, S, and M.
F (MOVIE): Record short MPEG-4 movies
with sound (pg. 55).
SP (SCENE POSITION): Choose a scene suit-
ed to the subject or shooting conditions
and let the camera do the rest (pg. 38).
B (ZOOM BRACK ETING): Take three pictures
each time the shutter button is pressed.
The rst picture will be taken at the current zoom ratio, the second at 1.4 × digital
zoom, the third at 2 × digital zoom.
C (NATURAL & l): Helps ensure good results in situations
with di cult lighting. Each time the shutter button is
pressed, the camera takes two shots: one shot without the
ash to preser ve natural lighting, followed immediately by a
second shot with the ash.
The Strap and Lens Cap
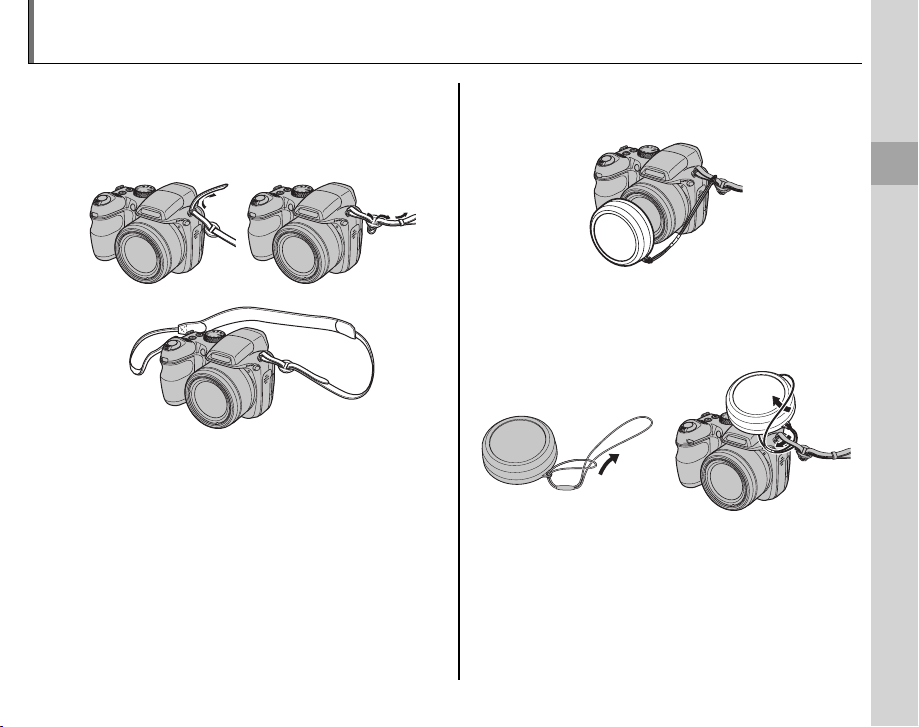
Attaching the Strap
The Lens Cap
Attaching the Strap
Attach the strap to the two strap eyelets as shown
below.
qw
e
3 Caution
To avoid dropping the camera, be sure the strap is correctly secured.
The Lens Cap
Attach the lens cap as shown.
To avoid losing the lens cap, pass the supplied
string through the eyelet (q) and secure the lens
cap to the strap (w).
qw
First Steps
7
Inserting the Batteries
Battery casing
Battery casing
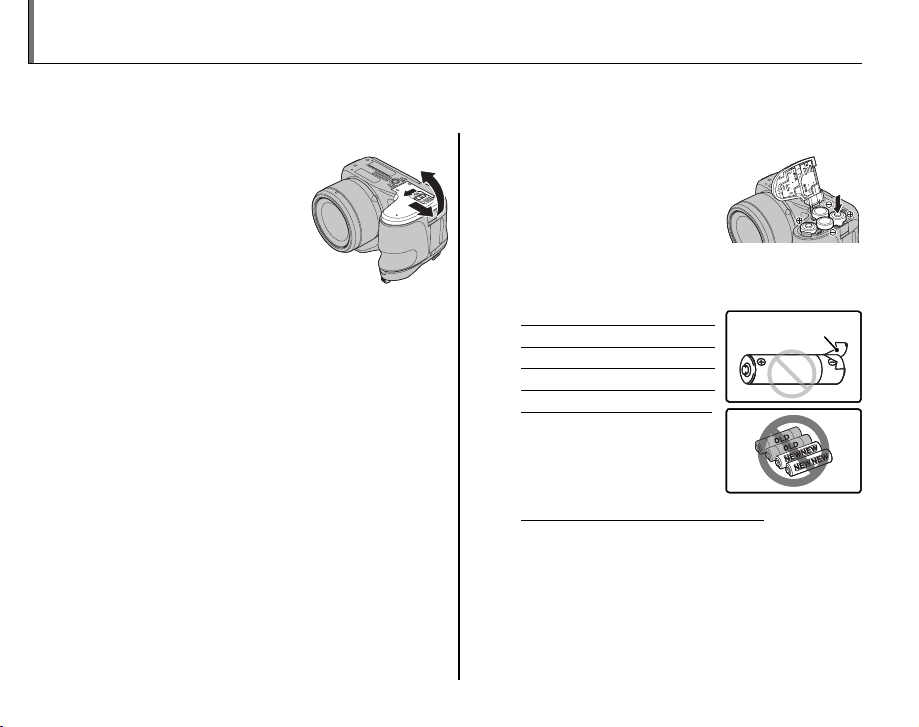
The camera takes four AA alkaline, lithium, or rechargeable Ni-MH batteries. A set of four alkaline batteries is supplied with the camera. Insert the batteries in the camera as described below.
Open the battery-chamber cover.
1
Slide the battery-chamber latch in the direction
shown and open the battery-chamber cover.
1 Note
Be sure the camera is o before opening the battery-chamber cover.
3 Cautions
• Do not open the battery-chamber cover when
the camera is on. Failure to observe this precaution could result in damage to image les or
memory cards.
• Do not use excessive force when handling the
battery-chamber cover.
Insert the batteries.
2
Insert the batteries in the
orientation shown by the
“+“ and “–“ marks inside
the battery chamber.
3 Cautions
• Insert the batteries in the correct orientation.
• Never use batteries with peel-
ing or damaged casing or mix
old and new batteries, batteries with di erent charge levels,
or batteries of di erent types.
Failure to observe these
precautions could result
in the batteries leaking or
overheating.
• Neve r use manganese or Ni- Cd batteri es.
• The capacity of alkaline batteries varies with the
manufacturer and drops at temperatures below
10 °C/32 °F; Ni-MH batteries are recommended.
• Fingerprints and other soil on the battery terminals can shorten battery life.
Battery casing
Battery casing
8
Inserting the Batteries
Close the battery-chamber cover.
3
Close the battery-chamber cover and slide it in
until the latch clicks into
place.
3 Caution
Do not use force. If the battery-chamber cover
does not close, check that the batteries are in the
correct orientation and try again.
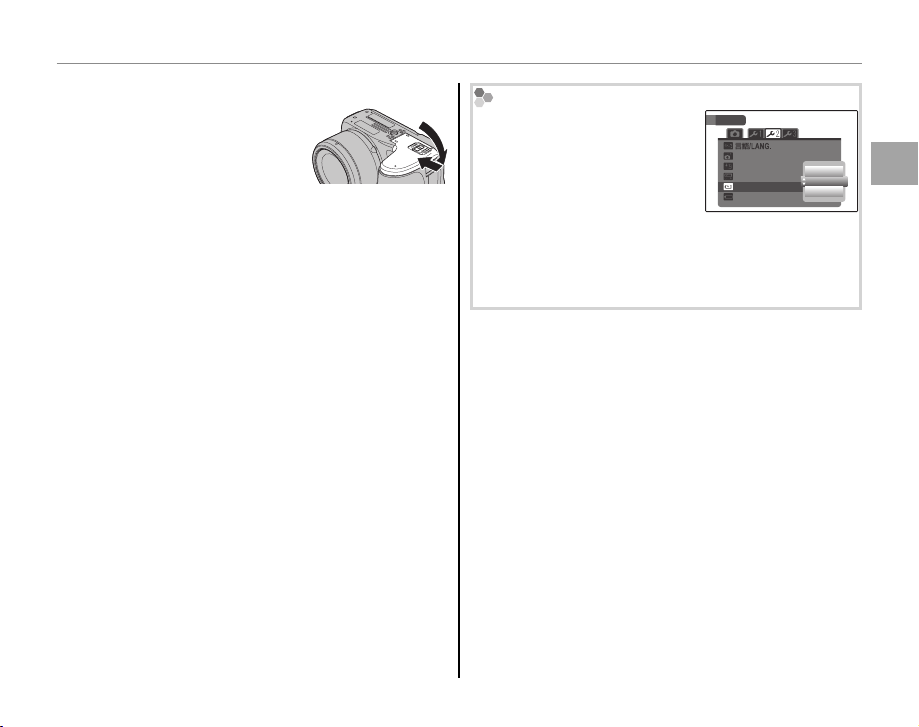
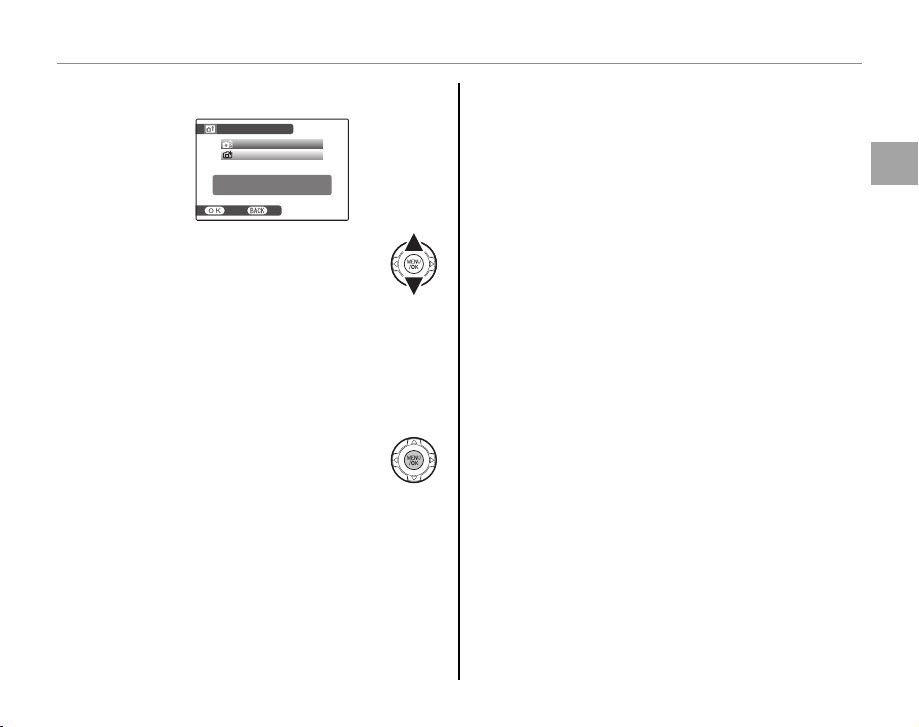
Choosing the Battery Type
After replacing the batteries
with batteries of a di erent
type, select the battery type
using the T BATTERY TYPE
option in the setup menu (pg.
SET-UP
AUTO POWER OFF
TIME DIFFERENCE
BACKGROUND COLOR
BATTERY TYPE
DISCHARGE
ENGLISH
2
MIN
ALKALINE
NI-MH
LITHIUM
101) to ensure that the battery level is displayed correctly and the camera does not turn o unexpectedly.
The current battery type is displayed the rst time the
camera is turned on after batteries are replaced.
First Steps
9

Inserting a Memory Card
■■ Compatible Memory Cards
Write-protect
switch
Although the camera can store pictures in internal memory, SD memory cards (sold separately) can be
used to store additional pictures.
When no memory card is inserted, a appears in the monitor and internal memory is used for recording
and playback. Note that because camera malfunction could cause internal memory to become corrupted, the pictures in internal memory should periodically be transferred to a computer and saved on
the computer hard disk or on removable media such as CDs or DVDs. The pictures in internal memory
can also be copied to a memory card (see page 94). To prevent internal memory from becoming full,
be sure to delete pictures when they are no longer needed.
When a memory card is inserted as described below, the card will be used for recording and playback.
Compatible Memor y Cards
SanDisk SD and SDHC memory cards have been tested and approved for use in the camera. A complete list of approved memory cards is available at http://www.fujifilm.com/products/digital_cameras/
index.html. Operation is not guaranteed with other cards. The camera can not be used with multimedia or xD-Picture cards.
3 Caution
Memory cards can be locked, making it impossible to format the card or to record or delete
images. Before inserting a memory card, slide the write-protect switch to the unlocked position.
Write -prote ct
switch
10
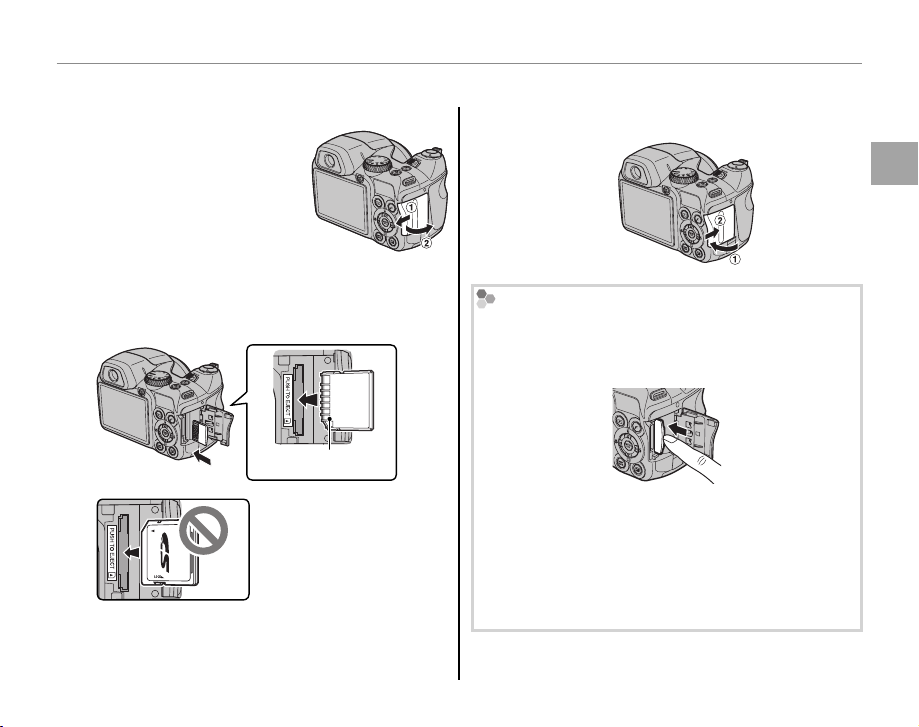
■■ Inserting a Memory Card
Inserting a Memory Card
Open the memory card slot cover.
1
1 Note
Be sure the camera is o before opening the memory
card slot cover.
Insert the memory card.
2
Holding the memory card in the orientation
shown below, slide it all the way in.
Gold contacts
Inserting a Memory Card
Close the memory card slot cover.
3
Removing Memory Cards
After con rming that the camera is o , press the card
in and then release it slowly. The card can now be
removed by hand.
First Steps
Be sure card is in correct
orientation; do not insert
at an angle or use force.
3 Cautions
• The memory card may spring out if you remove
your nger immediately after pushing the card in.
• Memory cards may be warm to the touch after being removed from the camera. This is normal and
does not indicate a malfunction.
11

Inserting a Memory Card
3 Cautions
• Do not turn the camera o or remove the memory card while the memory card is being formatted or data are being recorded to or
deleted fro m the card. Failure to observe this precaution could damage the card.
• Format memory cards before rst use, and be sure to reformat all memory cards after using them in a computer
or other device. For more information on formatting memory cards, see page 105.
• Memory cards are small and can be swallowed; keep out of reach of children. If a child swallows a memory card,
seek medical assistance immediately.
• Do not use miniSD or microSD adapters that expose the back of the card. Failure to observe
this precaution may cause damage or malfunction. Adapters that are larger or smaller than
the standard dimensions of an SD card may not eject normally; if the card does not eject, take
the camera to an authorized service representative. Do not forcibly remove the card.
• Do not a x labels to memory cards. Peeling labels can cause camera malfunction.
• Movie recording may be interrupted with some types of memory card.
• The data in internal memory may be erased or corrupted when the camera is repaired. Please note that the
repairer will be able to view pictures in internal memory.
• Formatting a memory card or internal memory in the camera creates a folder in which pictures are stored. Do
not rename or delete this folder or use a computer or other device to edit, delete, or rename image les. Always
use the camera to delete pictures from memory cards and internal memory; before editing or renaming les,
copy them to a computer and edit or rename the copies, not the originals.
12
Turning the Camera on and O
Shooting Mode
Playback Mode
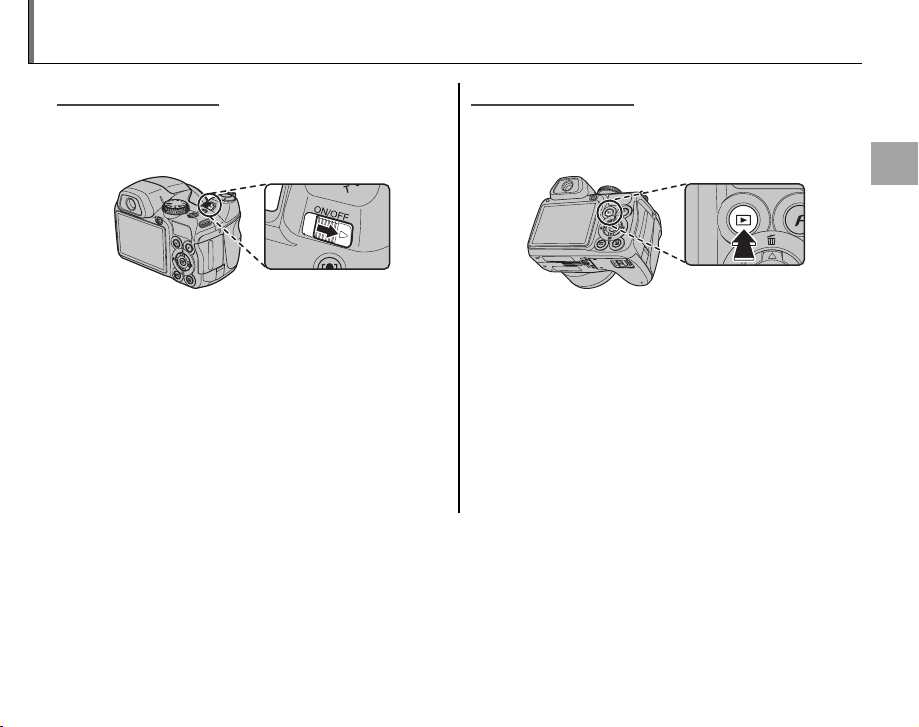
Shooting Mode
Slide the G switch in the direction shown
below. The lens will extend automatically.
Slide the G switch to turn the camera o .
2 Tip: Switching to Playback Mode
Press the a button to start playback. Press the shutter
button halfway to return to shooting mode.
3 Cautions
• Forcibly preventing the lens from extending could
cause damage or product malfunction.
• Pictures can be a ected by ngerprints and other
marks on the lens. Keep the lens clean.
Tip: Auto Power O
2
The camera will turn o automatically if no operations are performed for the length of time selected in the AUTO
POWER OFF menu (see page 105). To turn the camera on, use the G switch or press the a button for
about a second.
Playback Mode
To turn the camera on and begin playback, press
the a button for about a second.
Press the a button again to turn the camera o .
2 Tip: Switching to Shooting Mode
To exit to shooting mode, press the shutter button
halfway. Press the a button to return to playback.
First Steps
13
Basic Setup
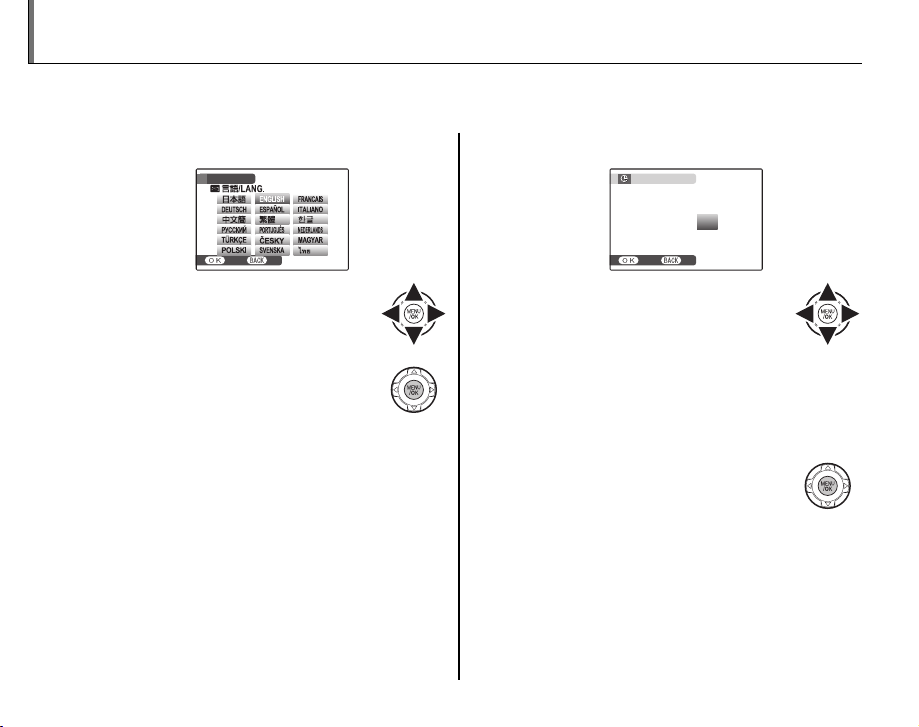
A language-selection dialog is displayed the rst time the camera is turned on. Set up the camera as
described below (for information on resetting the clock or changing languages, see page 100).
Choose a language.
1
START MENU
SET NO
1.1 Press the selector up, down,
left, or right to highlight a language.
1.2 Press MENU/OK.
Set the date and time.
2
DATE / TIME NOT SET
1/ 1 12 : 00
MM/DD/YY
SET NO
2.1 Press the selector left or right
to highlight the year, month,
day, hour, or minute and press
up or down to change. To change the order in which the year, month, and day are
2010
2009
2008
2007
2006
AM
displayed, highlight the date format and
press the selector up or down.
2.2 Press MENU/OK.
14
Basic Setup
Choose power management options.
3
POWER MANAGEMENT
POWER SAVE
CLEAR LCD DISPLAY
Power saving for longer
battery life
SET NO
3.1 Press the selector up or down
to highlight one of the following options:
• POWER SAVE: Save battery power.
• CLEAR LCD DISPLAY: Intelligent Face De-
tection (pg. 22) turns on and EVF/LCD
MODE (pg. 101) is set to 60 fps for im-
proved display quality.
3.2 Press MENU/OK.
Tip: The Camera Clock
2
If the batteries are removed for an extended period, the
camera clock will be reset and the language-selection
dialog will be displayed when the camera is turned on.
If the batteries are left in the camera or an optional AC
adapter connected for about 10 hours, the battery can
be removed for about 24 hours without resetting the
clock, language selection, or power management options.
First Steps
15
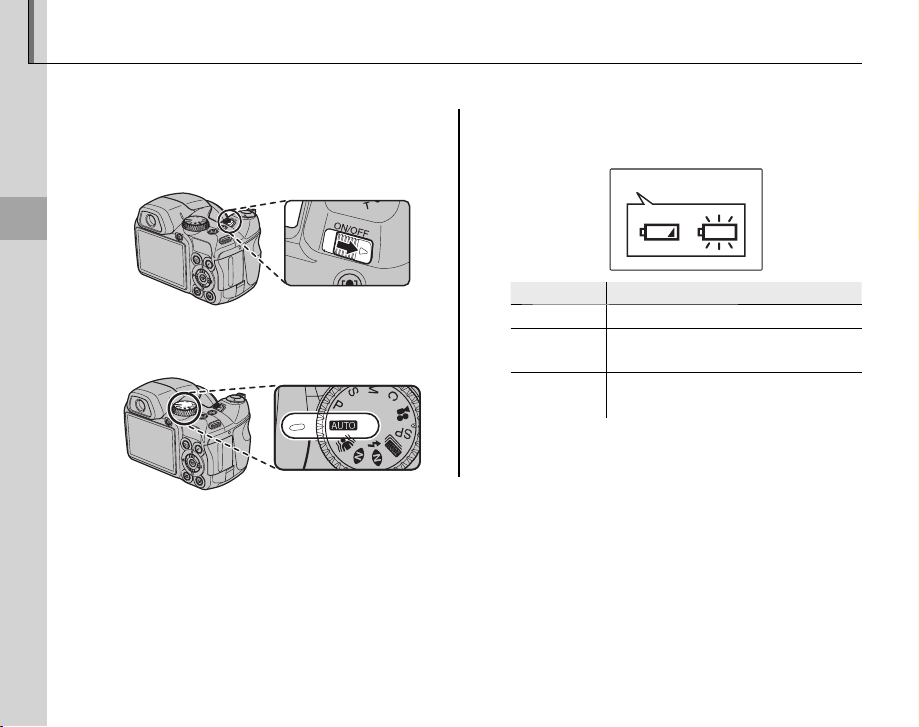
Taking Pictures in A (Auto) Mode
Indicator
Description
This section describes how to take pictures in A (auto) mode.
Turn the camera on.
1
Slide the G switch to turn the camera
on.
Basic Photography and Playback
Select A mode.
2
Rotate the mode dial to A.
1 Note
A battery warning may not be displayed before the camera turns o , particularly if batteries are reused after
having once been exhausted. Power consumption varies greatly from mode to mode; the low battery warning
(o) may not be displayed or may be displayed only brie y before the camera turns o in some modes or when
switching from shooting to playback mode.
16
Check the battery level.
3
Check the battery level in the display.
qw
Indicator
NO ICON Batteries are partially discharged.
o (red ) Batteries are low. Replace as soon
q
n
w
(blinks red)
as possible.
Batteries are exhausted. Turn camera o and replace batteries.
Description
 Loading...