

Page 1
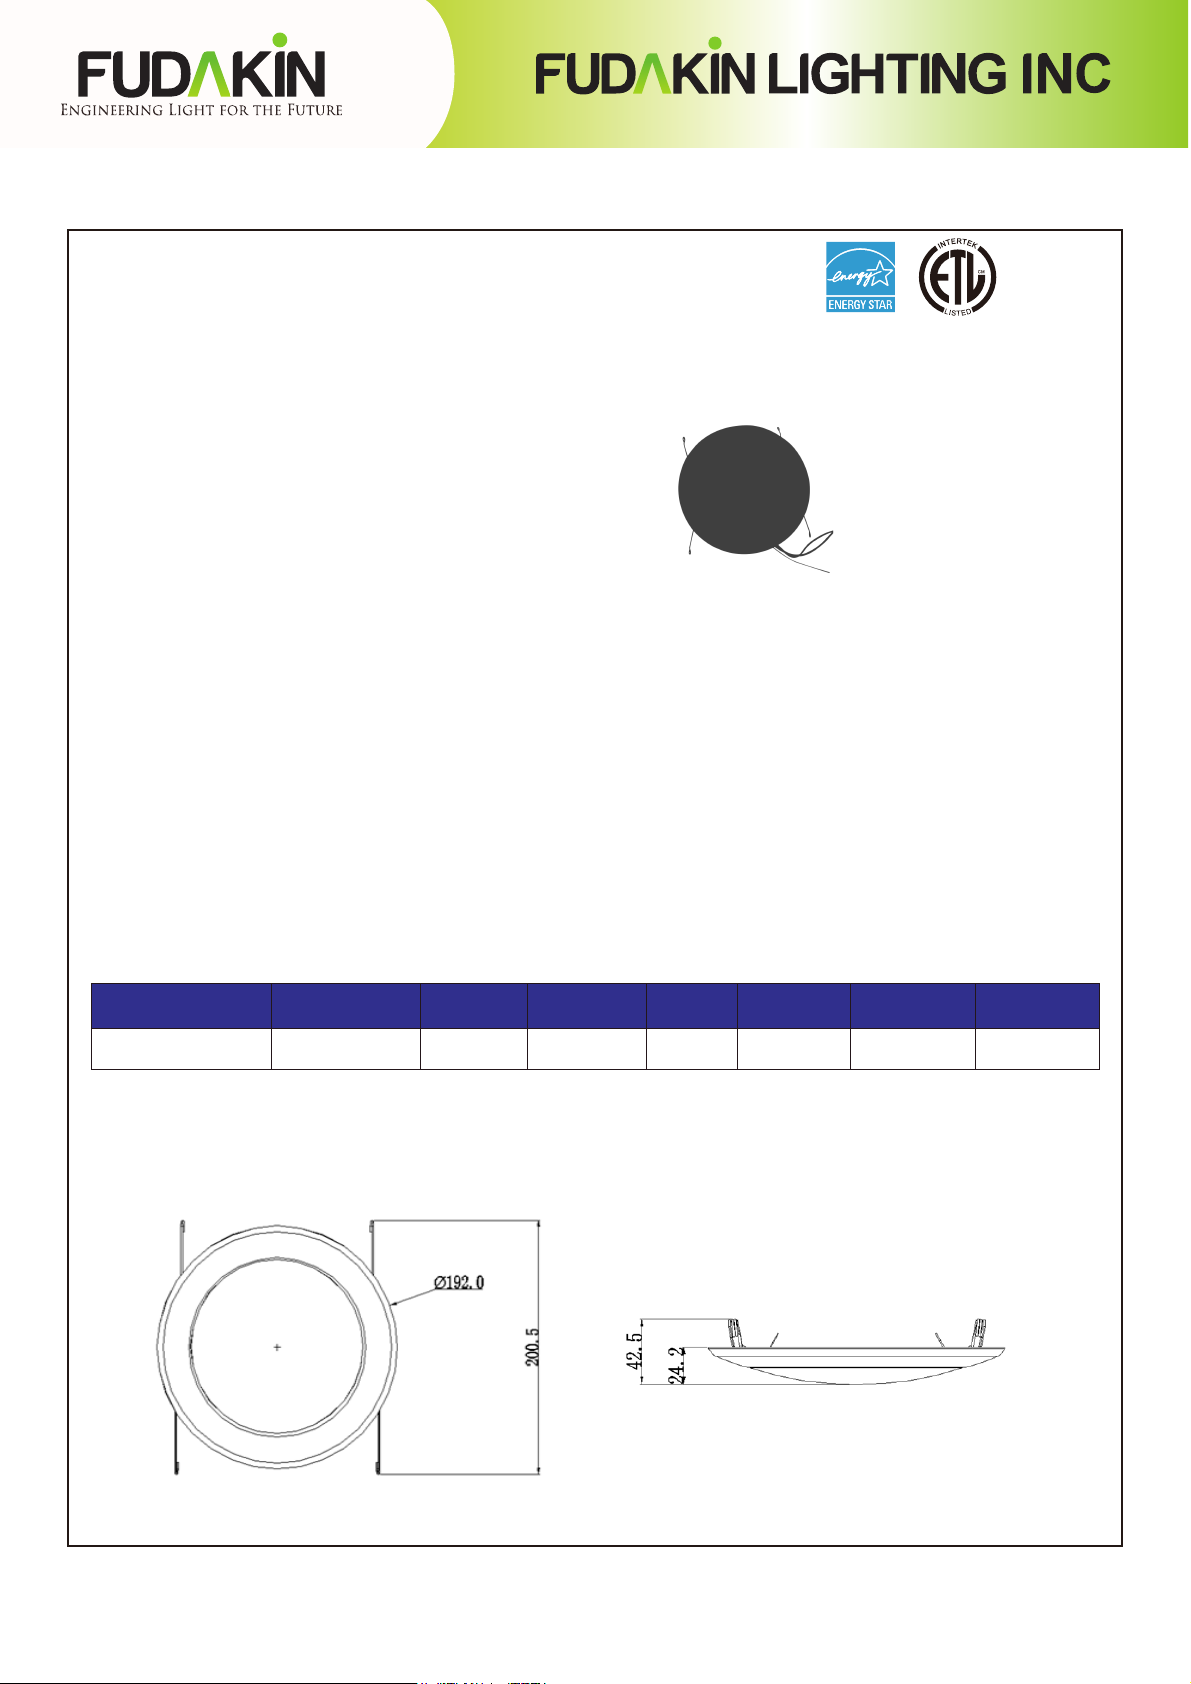
Specifications
.
7.5” LED Disk Light
Model#
Rated input voltage
Enter the maximum current
Rated power
Dimmable
CCT
Rated flux
Ra
The beam Angle
Rated life
Material
Size
Weight
Using the environment temperature -20℃-45℃
Using the environment dry
Storage temperature -30℃-80℃
Store humidity 10-90%
Certification ETL/cETL、FCC、Energy Star-V2.0
FDK-DLYY-F1-12-7.5-15-XXK-D
AC120V 60Hz
0.15A
15W
TRIAC
3000K,4000K,5000K 1100lm
80/90
110°
≥30000h
aluminum alloy, plastic PC
Φ191*24.5mm
~240G
Order Information
Sand Nickel White
ORB
Item Number Description Power Voltage Input Dimmable CCT Lumen Output
FDK-DLYY-F1-12-7.5-15-XXK-D
LED Disk Light 15W 120Vac TRIAC
3000K,4000K
5000K
1100lm
Product Size
Certicates
ETL/cETL ,
Energy Star
340 Marshall Avenue #103, Aurora Il. 60506 | Telephone 630.486.1070 | Fax 630.486.1034
Email: [email protected] | www.fudakinlighting.com
Page 2
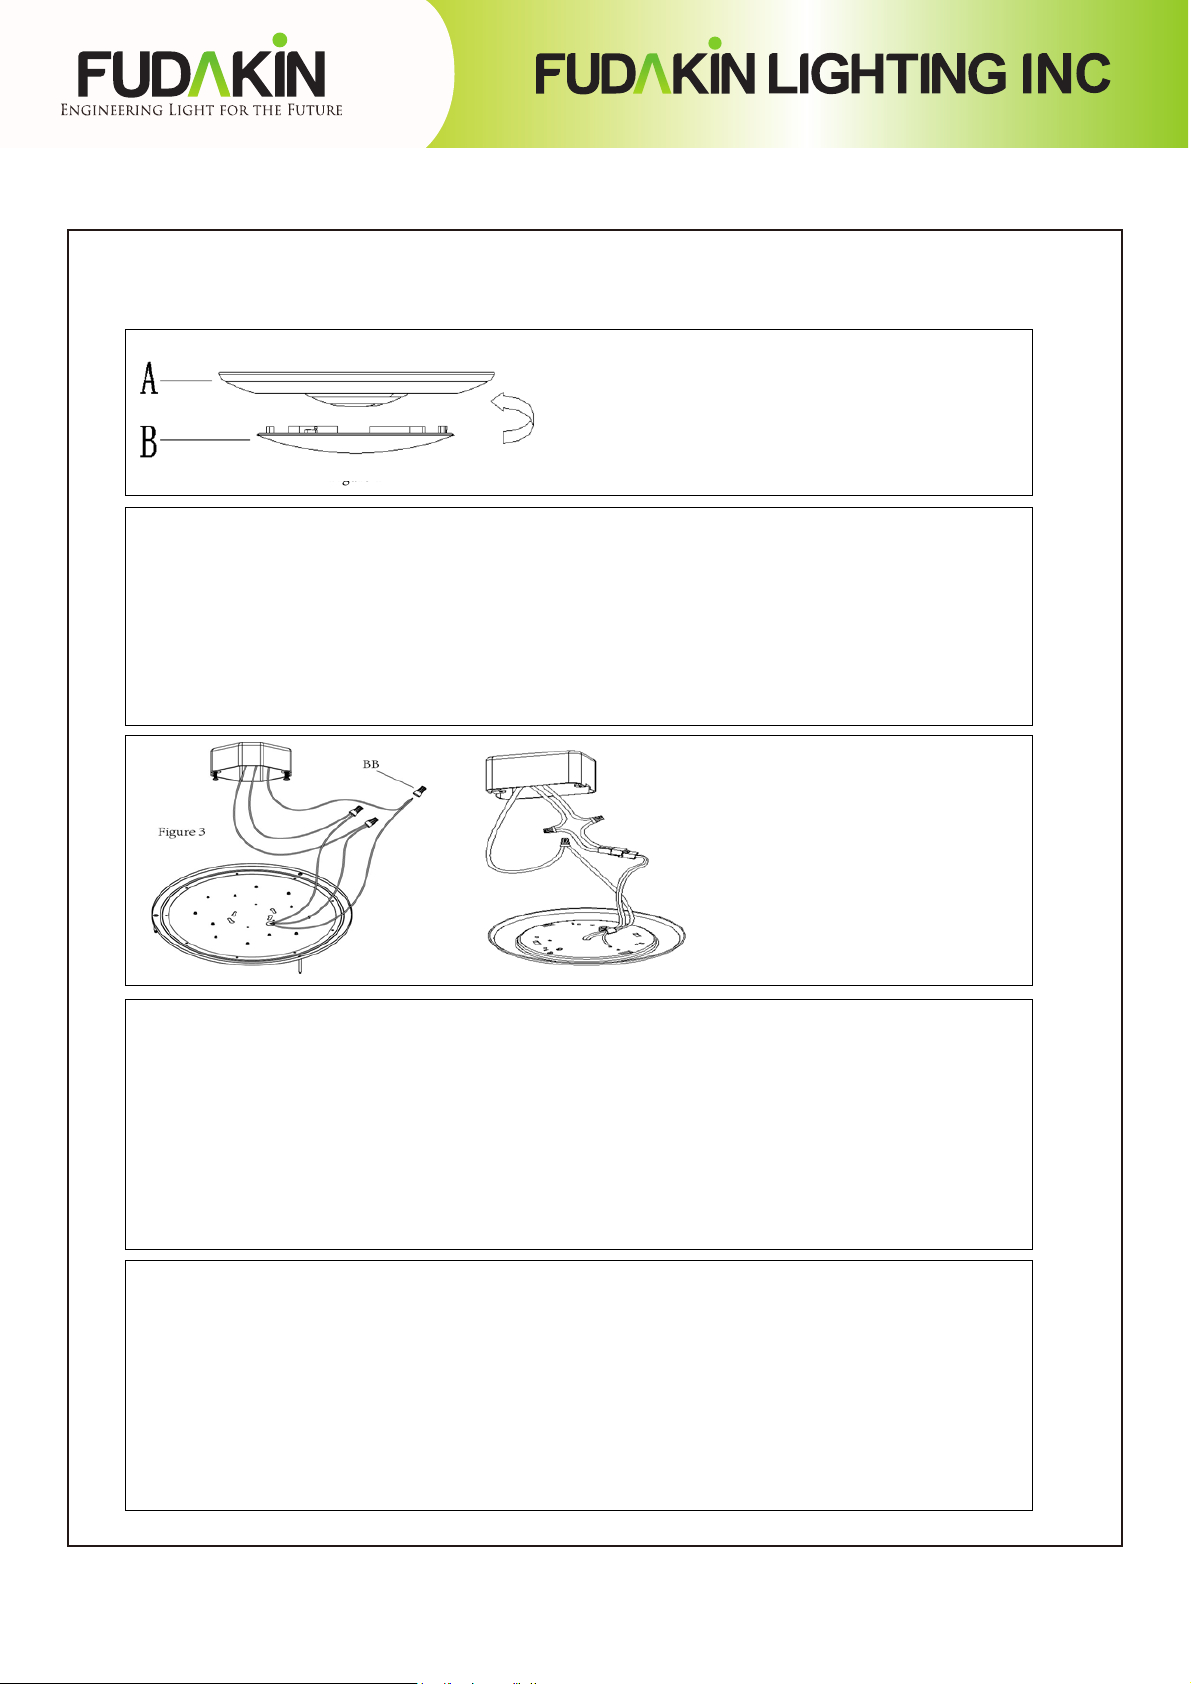
Installation A: J-Box Mounting
1.Twist to detach the lamp shade(Part B) from the mounting plate(Part A)
Figure 1
2. CONNECTING THE WIRES
•Install the two screws (AA) into the junction box.(Figure2)
NOTE: Leave 1/4’’ of screw exposed to accommodate mounting plate.
•Connect the house ground wire to the yellow/green ground wire on the mounting plate (Part A) using the
wire nut(BB).
•Connect the house black wire to the mounting plate (Part A) black wire using the wire nut (BB).
and set aside.(Figure 1)
.
7.5” LED Disk Light
Figure 4
•Connect the house white wire to the mounting plate (Part A)
white wire using the wire nut (BB).
NOTE: For proper connection, place the wire nuts (BB) over
wires and twist clockwise until tight.(Figure 3)
OPTIONAL: Wrap connected wire nuts with electrical tape.
3. ATTACHING THE MOUNTING PLATE
•Attach the mounting plate to the junction box by aligning the holes on the mounting plate (Part A) with
the screws on the junction box.
•Turn mounting plate clockwise to lock in place and tighten screws to ensure the fixture is secure and
will not move.(Figure 4)
Figure 5
4. ATTACHING THE LAMP SHADE
Reattach lamp shade to mounting plate and twist to lock in place.(Figure 5)
340 Marshall Avenue #103, Aurora Il. 60506 | Telephone 630.486.1070 | Fax 630.486.1034
Email: [email protected] | www.fudakinlighting.com
Page 3
7.5” LED Disk Light
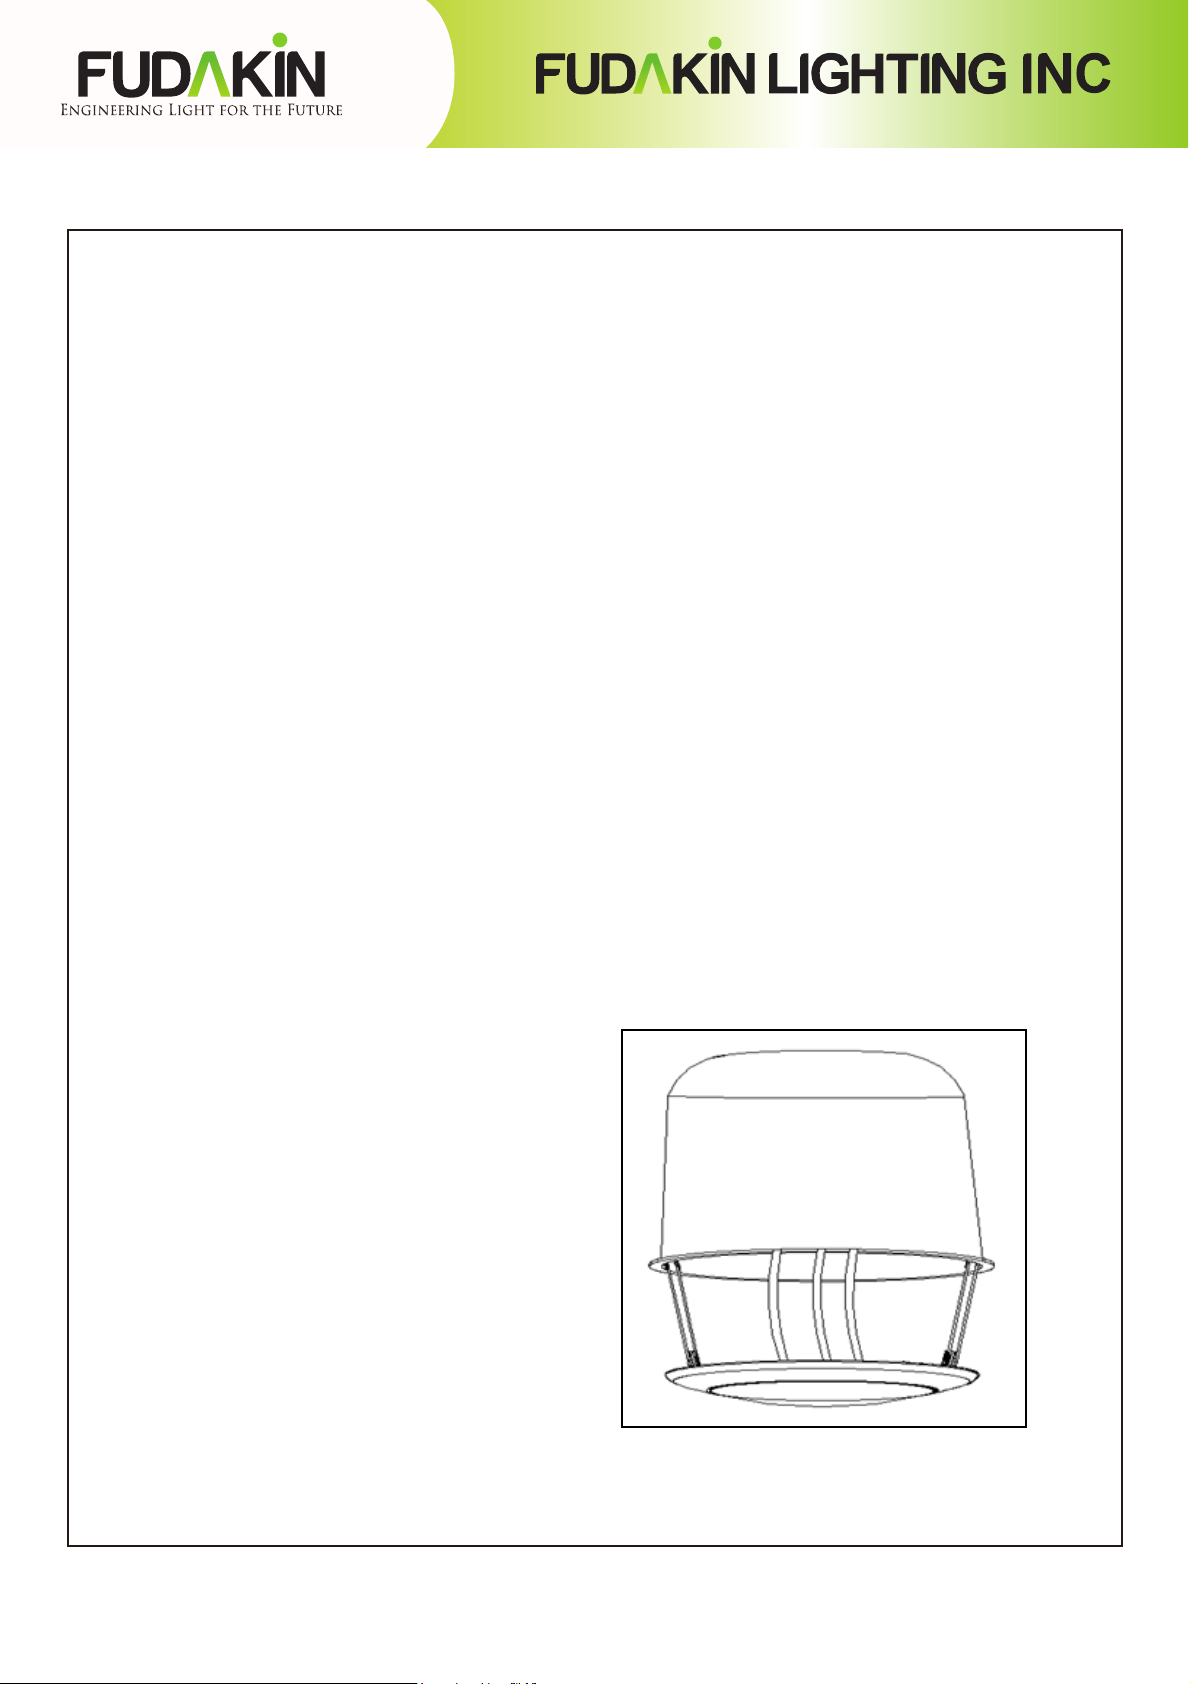
Installation B: Recessed Mounting
CAUTION: Before beginning installation turn off the circuit breaker and light switch.
•Suitable for installation in the Recessed Installation of 5 inches, 6 inches.
.
1. Remove mounting bracket and plate from inside existing
recessed housing (if installed).
3. Insert male connector into female one. 4.Squeeze friction blades together and install into recessed housing.
2. Twist adaptor into socket.
Carefully route wires into fixture and push module up flush to ceiling surface.
340 Marshall Avenue #103, Aurora Il. 60506 | Telephone 630.486.1070 | Fax 630.486.1034
Email: [email protected] | www.fudakinlighting.com
Page 4
7.5” LED Disk Light
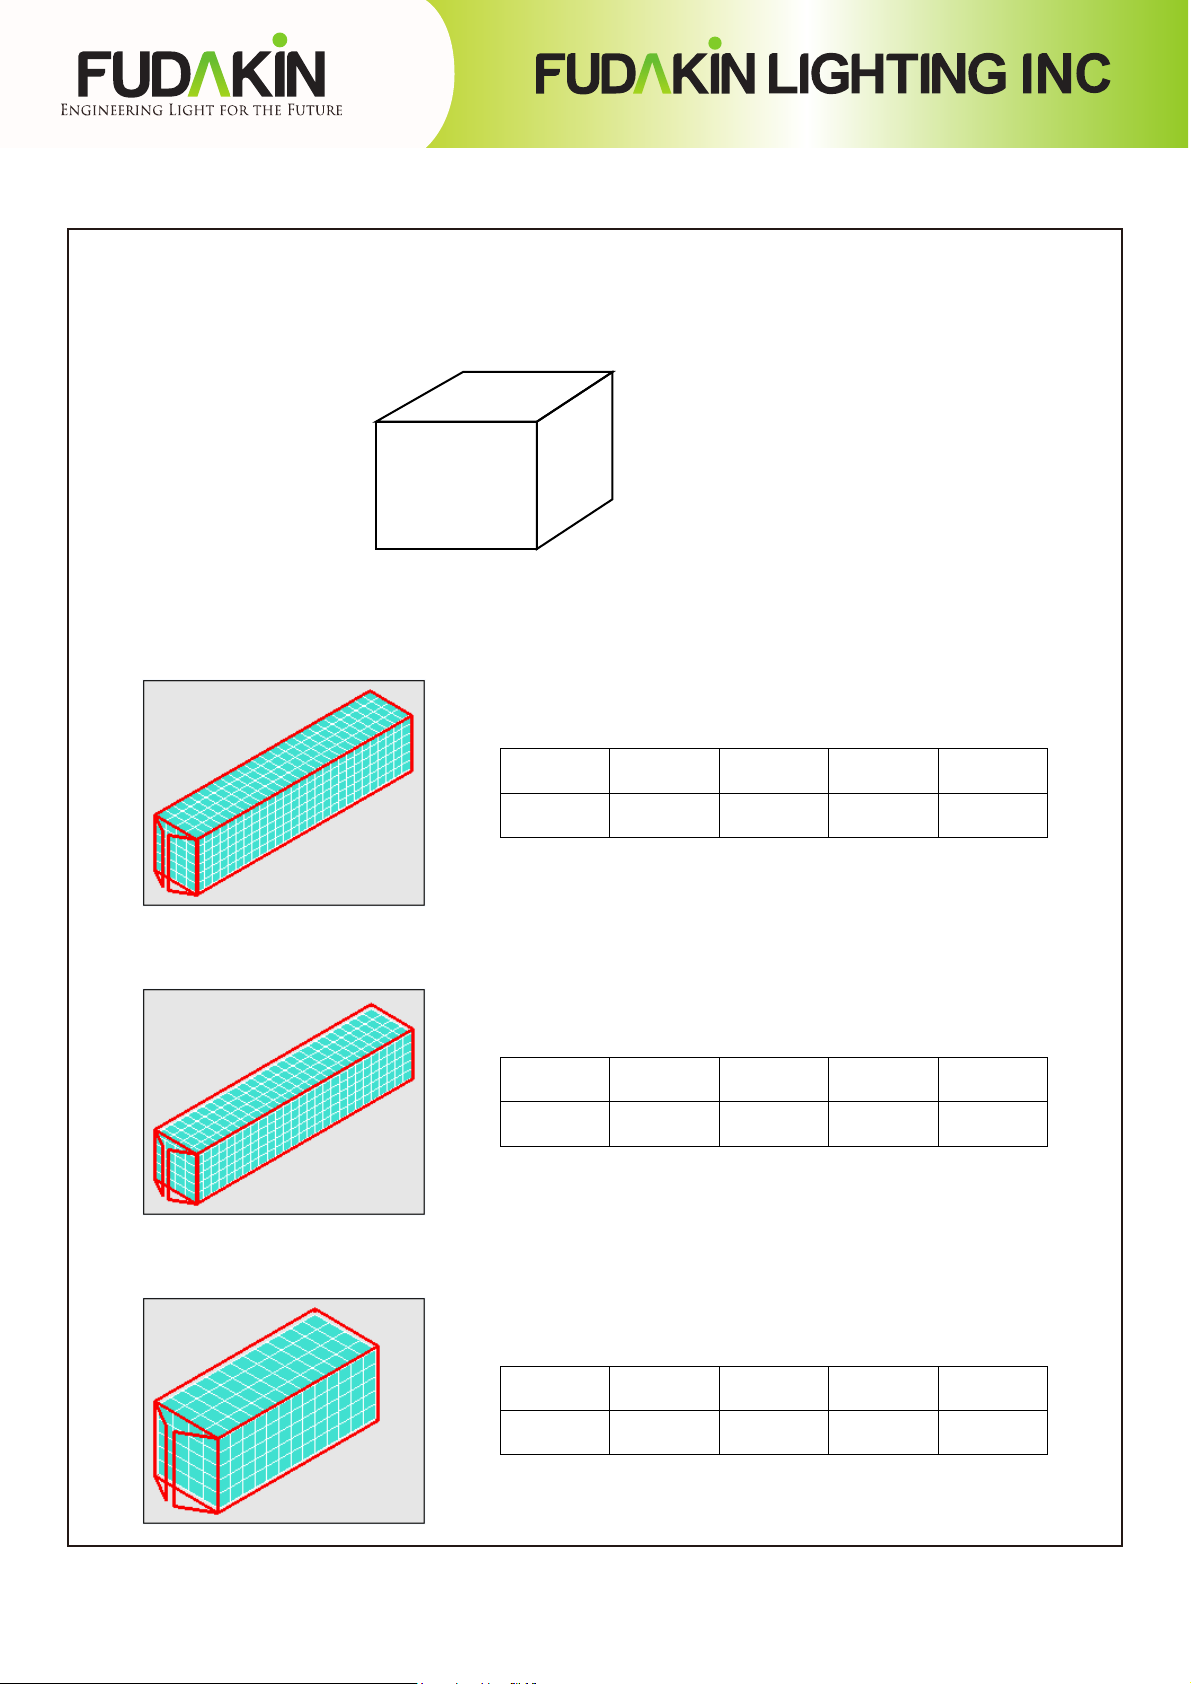
Packaging
32pcs/CTN G.W.:14 kg Dimension: 21.7”L x 16.9”W x 17”H (550mm x 428mm x 435mm)
16.9”428mm
17”435mm
21.7”550mm
Container Loading QTY
.
Size Corton QTY Product QTY Volumn G.W.
40’hq 648 ctn 20736 pcs 70.73 m³ 9072 kg
Size Corton QTY Product QTY Volumn G.W.
40’gp 540 ctn 17280 pcs 58.94 m³ 7560 kg
Size Corton QTY Product QTY Volumn G.W.
20’gp 260 ctn 8320pcs 28.38m³ 3640 kg
340 Marshall Avenue #103, Aurora Il. 60506 | Telephone 630.486.1070 | Fax 630.486.1034
Email: [email protected] | www.fudakinlighting.com
 Loading...