

p
TP100 USER’S MANUAL
QUICK START GUIDE
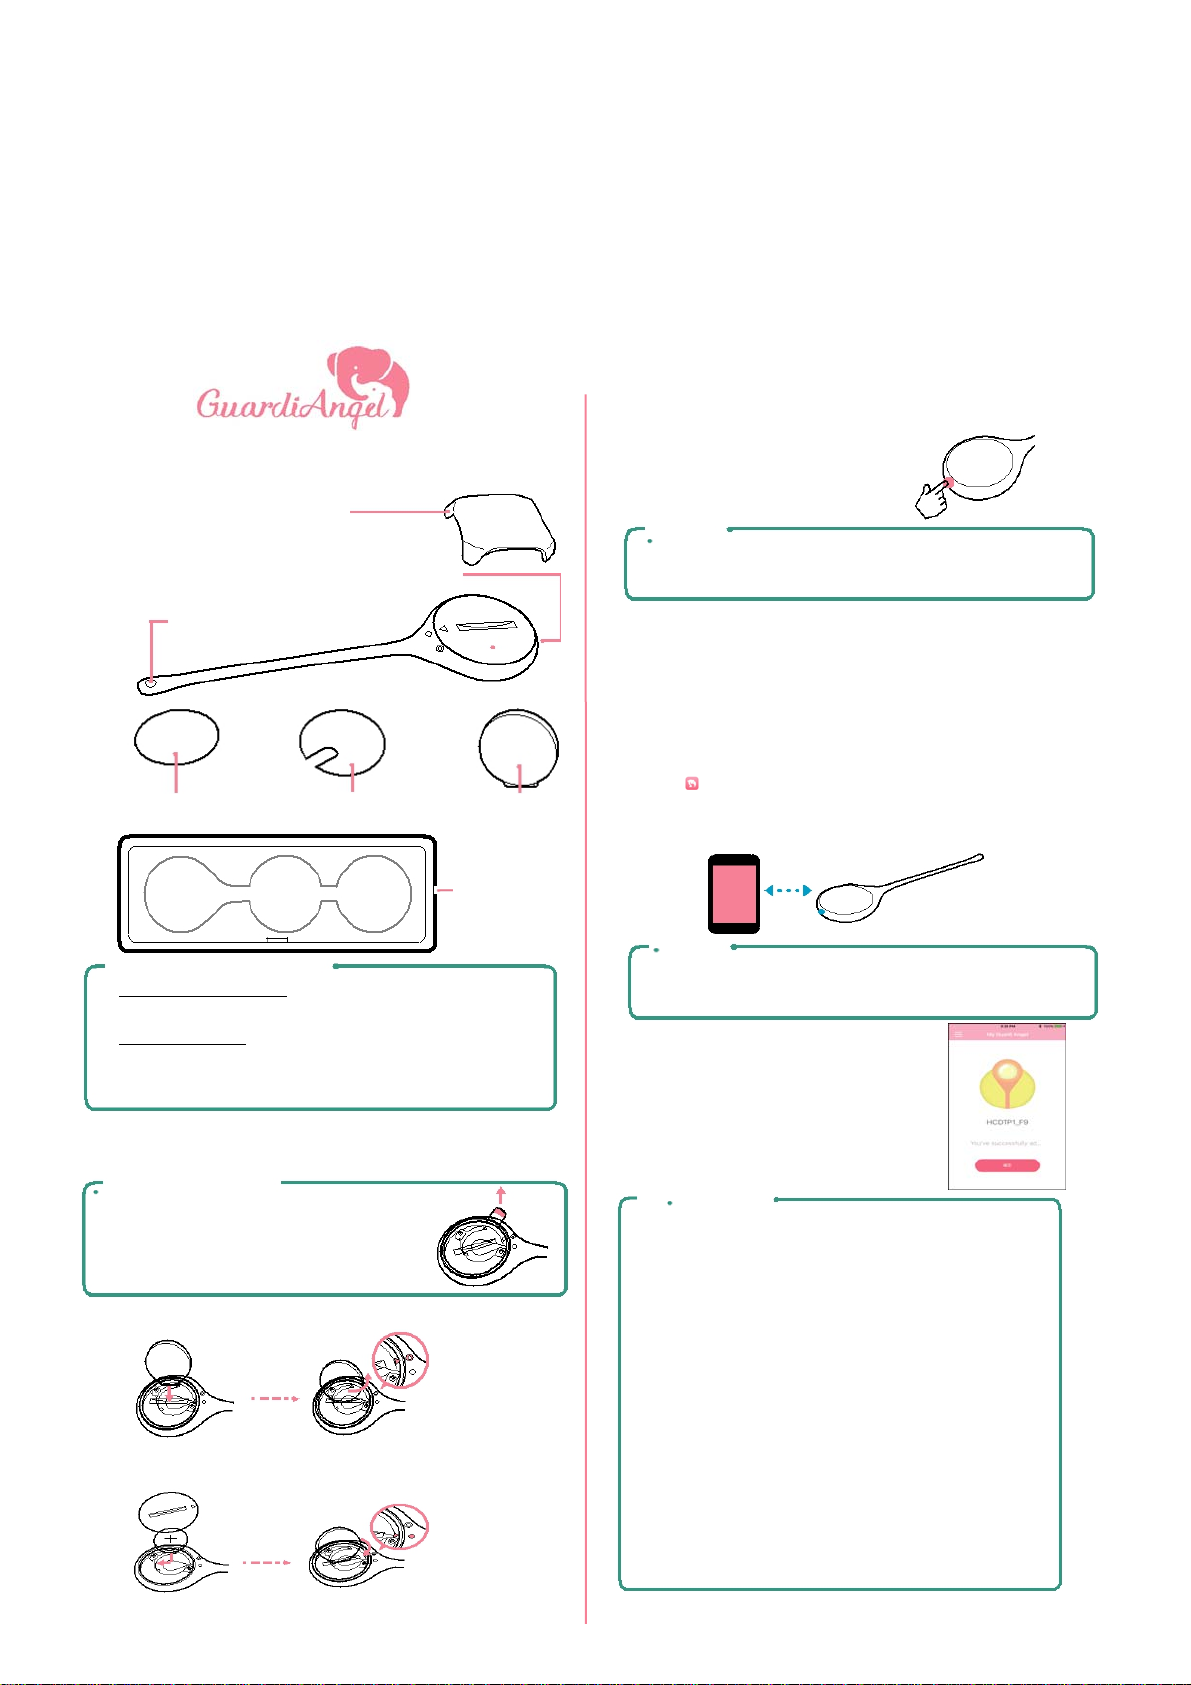
Overview
Holder (2)
Sensing Probe
ON/OFF Button
Battery Compartment
Adhesive Silicone Battery Cap
Patches (5) Patches (7) Opener
Storage Case
Definition of Terms
0 Thermometer/Device: GuardiAngel thermometer
for single or continuous temperature measurement.
0 Portable Device
supports Bluetooth function for monitoring your child’s
body temperature remotely.
Getting Started
Step 1: Insert the Battery
First Time Use
: Any iOS or Android device that
• Pull the plastic tab to open the
battery compartment. Then discard
the plastic tab.
a) Use the battery cap opener to remove the battery cap.
b) Install the battery into the compartment and replace the
battery cap. Then lock the cap back using the battery cap
ener.
o
Step 2: Power On the Thermometer
Long press the ON/OFF button until the
power indicator starts blinking red.
Note
0 To power off the thermometer, long press the ON/OFF button
until the power indicator turns off.
Step 3: Download the GuardiAngel App
a) In your portable device, open App Store (for iOS device) or
Play Store (for Android device).
b) Search for GuardiAngel app and then install it on your
portable device.
Step 4: Complete the Bluetooth Pairing
a) Make sure the Bluetooth is enabled on your portable device.
b) Tap
c) Login using your Facebook or Google account.
to open the GuardiAngel app.
The app automatically detects the thermometer and pairs your
portable device with the thermometer.
Note
0 If the pairing process is successful, the power indicator on
the thermometer starts blinking blue.
d) Ta p Confirm to
complete the
Bluetooth pairing.
The thermometer is now ready for
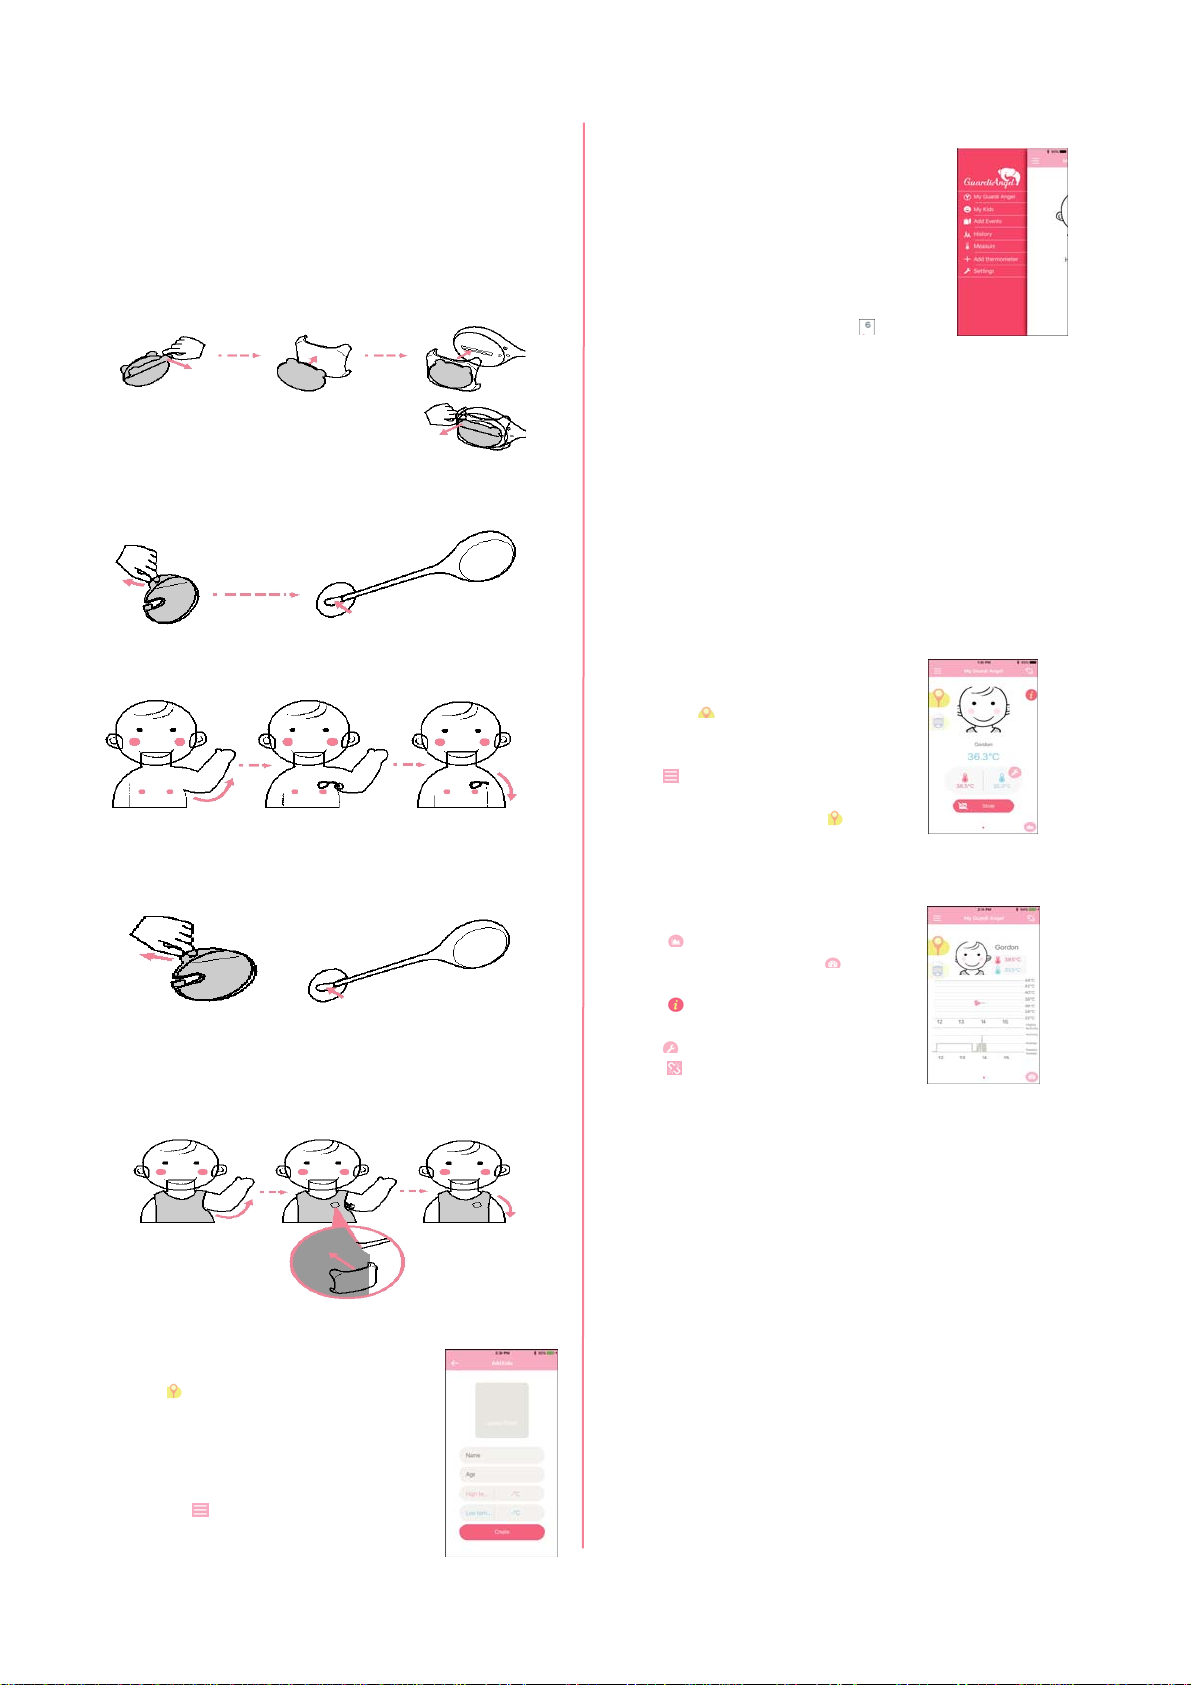
Wearing the Thermometer
Important!
0 The thermometer is safe to use on children of all
ages, beginning with the newborns.
0 Do not wear the thermometer intact with the skin
for more than 24 consecutive hours.
0 The supplied adhesive patches are for single use
only.
0 We recommend using only these types of adhesive
and silicone patches that came with the package.
0 Although the material of the adhesive patches is
considered nonallergic and nontoxic, in case your
child still develops an allergic reaction, please consult
with your physician for finding alternative patches.
0 In order to avoid inaccurate measurement data,
check the thermometer regularly to make sure the
sensing probe is firmly intact with the armpit.
0 Clean the surface of the thermometer with the
concentrated medical alcohol before and after use.
A
The thermometer can be worn as:
0 Patched On: The sensing probe and the main unit are
both attached to the skin directly or
0 Clipped On: The sensing probe is attached to the skin
directly but the main unit is attached to the shirt.
Patched On Method
a) Remove the film from one side of the adhesive patch and
the patch on top of the holder. Then place the holder
place
on the battery cap.
b) Rem
ove the film from the other side of
adhesive p
c) Remove the film from the silico
silicone
illustrated below.
d) Gentl
shirt, closer to the armpit. Then attach the sensing probe to
the armpit. Carefully place your child’s hand down.
Clipped On Method
atch.
patch to the opposite side of the sensing probe as
y lift your child’s arm. Attach the main unit under the
a) Remove the film from the silicone patch. Then
ach the silicone patch to the opposite side of the
att
sensing probe as illustrated below.
y lift your child’s
b) Gentl
under the shirt
holder on top of the shirt so that the cloth is between
the main unit and the holder. Attach the sensing
probe to the armpit. Carefully place your child’s hand
down.
near the armpit and secure it with the
arm. Place the main unit
the
ne patch. Then attach the
c) Tap any of the menu items:
0 My Guardi Angel: View the
paired thermometers.
0 My Kids: Modify your child’s
profile or add a new child.
0 Add Events: Modify an existing
event or create a new event
and assign a category.
0 History: Tap on the day in the
calendar marked with pink dot (
the measurement history on that day.
0 Measure: Measure the currently selected child’s
temperature. See more in Measuring the Temperature.
0 Add thermometer: Add more Bluetooth thermometers.
0 Settings: Read the regulatory information, log out the
current user and clear the data, and/or switch the temperature
measurement unit between Celsius (
Measu
ring the Temperature
The GuardiAngel app allows you to measure the body
temperature of multiple children. You can take a single
measurement and/or continuously monitor the temperature of
each child.
a) Make sure the thermometer is firmly attached to your
child's body.
b) Open the GuardiAngel app.
c) Tap the thermo
for example
d) Select the child’s profile you w
measure his/her
e)Ta p
f) Select the mea
g) Tap to view the measurements
h) T
i)
j) T
k) Ta
changes or modifications not expressly approved by the party
res
operate the equipment.
and select Measure.
0 Single Measurement: Tap and
follow the on-screen instructions.
- Continuous Measurement:
Continuous measurement is turned on
by default. To stop continuous
measurement, tap Stop.
and activity in a graph. Tap
to return to the Measure page.
ap
on measuring the body temperature.
ap
for alarm temperature configuration.
p
ponsible for compliance could void the user’s authority to
meter icon,
.
body temperature.
surement method:
for additional information
to disconnect the thermometer.
) to view
º
C) and Fahrenheit (ºF).
Measure Page
ant to
Measure/
Graphic
ctivity
This equipment has been tested and found to comply with the
limits for a Class B digital device, pursuant to Part 15 of the
FCC Rules. These limits are designed to provide reasonable
protection against harmful interference in a residential
installation. This equipment generates, uses and can radiate
radio frequency energy and, if not installed and used in
Using the GuardiAngel App
a) After the Bluetooth pairing is
complete, tap the thermometer logo
(
). You are then prompted to enter
your child’s personal information as
well as set the high and low body
temperature for the alarm
configuration. After entering the
required information, tap Create.
ap
b) T
or swipe the screen to the
right to access the GuardiAngel m
ain
accordance with the instructions, may cause harmful
interference to radio communications. However, there is no
guarantee that interference will not occur in a particular
installation.
If this equipment does cause harmful interference to radio or
television reception, which can be determined by turning the
equipment off and on, the user is encouraged to try to correct
the interference by one or more of the following measures: -Reorient or relocate the receiving antenna.
-- Increase the separation between the equipment and
receiver.
-- Connect the equipment into an outlet on a circuit different
from that to which the receiver is connected.
-- Consult the dealer or an experienced radio/TV technician for
help.
 Loading...