


Fuave | Weena 664 | 3012 CN Rotterdam | Nederland

FUAVE ACS12K01
ACS14K01
ACS16K01
Bedieningshandleiding
Instruction Manual
Manuel d’instructions
Mobiele Airconditioner/Luchtontvochtiger
Portable air conditioner
Climatiseur/Deshumidicateur Mobile

INHOUD
Technische gegevens 01.
Opmerkingen 02.
Eigenschappen en onderdelen
Installatie en afstelling 06.
Controle-instelling 09.
Afvoerinstructies 12.
Onderhoud
Problemen oplossen
Appendix
symbooluitleg
13.
15.
17.
18.
04.

TECHNISCHE GEGEVENS
Type
Koelcapaciteit in btu 12000btu/uur 14000btu/uur 16000btu/uur
Luchtontvochtiging 28 l/dag
Stroomverbruik 1340 Watt 1580 Watt 1800 Watt
Luchtverplaatsing 400m3/uur 480m3/uur 480m3/uur
Aansluitspanning 220-240V/50Hz 220-240V/50Hz 220-240V/50Hz
Koelvloeistof R290/290 gr
Isolatieklasse IPX4 IPX4 IPX4
Tijdinstelling 1-24 uur 1-24 uur 1-24 uur
Afvoerslang 150 x 15 cm 150 x 15 cm 150 x 15 cm
Geluidsniveau 54dB 53dB 54dB
Kabellengte 1.8 m 1.8 m 1.8 m
Nettogewicht 29 kg 31 kg 31 kg
Productafmetingen 480x390x780 mm
ACS12K01
ACS14K01
31 l/dag
R290/260 gr
480x390x780 mm
ACS1
6K01
33 l/dag
R290/260 gr
480x390x780 mm
1

I. Opmerkingen
• De airconditioning is alleen geschikt voor gebruik binnenshuis en is niet
geschikt voor andere toepassingen.
• Volg de lokale regels voor de netaansluiting bij het installeren van de
airconditioning en zorg ervoor dat deze goed geaard is. Als u vragen
heeft over de elektrische installatie, volg dan de instructies van de
fabrikant op en vraag indien nodig de installatie aan een
professionele elektricien.
• Plaats het apparaat op een vlakke en droge plaats en houd een afstand
van meer dan 50 cm tussen het apparaat en de omliggende voorwerpen of muren.
• Nadat de airconditioning is geïnstalleerd, moet u ervoor zorgen dat de
stekker intact is en stevig in het stopcontact is gestoken en moet u het
netsnoer ordelijk plaatsen om te voorkomen dat iemand struikelt of de
stekker eruit trekt.
• Plaats geen voorwerpen in de luchtinlaat en -uitlaat van de airconditioning. Houd de luchtinlaat en -uitlaat vrij van obstructies.
• Zorg er bij het installeren van afvoerbuizen voor, dat de afvoerbuizen
goed zijn aangesloten en niet zijn vervormd of gebogen.
• Zorg er bij het verplaatsen van de machine voor, dat deze rechtop staat.
• De machine moet uit de buurt blijven van benzine, ontvlambare
benzine, kachels en andere warmtebronnen.
• Demonteer, reviseer en wijzig de machine niet, anders kan de machine
defect raken of zelfs schade toebrengen aan personen en eigendommen. Om gevaar te voorkomen, dient u de fabrikant of professionals
te vragen de machine te repareren als er zich een
machinestoring voordoet.
• Installeer en gebruik de airconditioning niet in de badkamer of andere
vochtige omgevingen.
• Trek niet aan de stekker om het apparaat uit te schakelen.
• Plaats geen kopjes of andere voorwerpen op het lichaam om te voorkomen dat er water of andere vloeistoffen in de airconditioning
terechtkomen.
• Gebruik geen insecticidensprays of andere brandbare stoffen in de
buurt van de airconditioning.
• Veeg of was de airconditioning niet af met chemische oplosmiddelen
zoals benzine en alcohol. Wanneer u de airconditioning moet reinigen, moet u de stroomtoevoer loskoppelen en deze reinigen met een
halfnatte, zachte doek. Als de machine echt vuil is, schrob dan met een
mild reinigingsmiddel.
2

• Het apparaat kan worden gebruikt door kinderen vanaf 8 jaar en personen met verminderde fysieke, zintuiglijke of mentale vermogens als zij
onder toezicht staan of instructies hebben gekregen over het gebruik
van het apparaat op een veilige manier en de gevaren ervan begrijpen.
Kinderen mogen niet met het apparaat spelen. Reiniging en onderhoud
mogen niet door kinderen zonder toezicht worden uitgevoerd.
Verwderen:
Wanneer de mobiele airconditioner uiteindelijk wordt afgedankt en moet
worden
verwijderd, hoort hij niet tussen het normale huishoudelijke afval. Breng
hem
dan naar een door uw gemeente ingesteld inzamelpunt.
Gebruik voor het ontdooiproces geen andere middelen dan aanbevolen
door de fabrikant.
Het apparaat moet worden opgeslagen in een ruimte zonder continu werkende ontstekingsbronnen (bijvoorbeeld: open vuur, een werkend gasapparaat of een werkende elektrische kachel).
Het apparaat nooit doorboren of verbrandenBlokkeer de roosters voor de
inkomende en uitgaande luchtstromen niet: ook niet
Steek geen voorwerpen als pennen enz. door de roosters het apparaat in en
zorg ervoor de ventilator niet te blokkeren. Nooit in apparaat boren of verbranden!
Houd er rekening mee dat koelmiddelen mogelijk geen geur bevatten.
R290 is geurloos, u zult lekkage dus niet ruiken!
Apparaat moet worden geïnstalleerd, bediend en opgeslagen in een ruimte
met een vloeroppervlakte groter dan X m2.
Als het apparaat in een niet geventileerde ruimte wordt gebruikt, moet
deze zo zijn geïnstalleerd, dat als het brandbare koelmiddel lekt, het niet
stagneert in een brand of explosie.
Het apparaat moet worden opgeslagen op een manier zodat er geen mechanische schade kan ontstaan. Mechanische schade tijdens opslag/transport dient altijd te worden voorkomen.
3

Waarschuwing: ventilatieopeningen altijd vrijhouden van obstakels en nooit
afdekken.
Batterij waarschuwing:
De batterij nooit, pletten of doorboren of kortsluiting veroorzaken. Stel de
batterij niet bloot aan een hoge temperatuuromgeving, als de batterij lekt
of uitpuilt, stop dan met het gebruik. Er kan ontplofngsgevaar ontstaan als
de batterij wordt vervangen door een onjuist type. Houd de batterij buiten bereik van kinderen. Batterijen kunnen ontploffen bij blootstelling aan
open vuur. Gooi batterijen nooit in het vuur. Gooi gebruikte batterijen weg
volgens de plaatselijke wettelijke voorschriften.
II. Eigenschappen en onderdelen
1. Eigenschappen:
Met koeling, ontvochtiging en ventilatiefunctie,
continue waterafvoerfuncties.
Automatisch zwenkblad: De uitgang heeft een automatische luchtdraaifunctie en de uitgang kan worden afgedekt wanneer de machine wordt uitgeschakeld om te voorkomen dat er stof in het toestel terechtkomt.
Handvatten aan beide zijden: Zodat het gemakkelijker is om het te dragen
en het behuizingsontwerp menselijker is.
Netsnoer: Het netsnoer kan aan de achterkant worden gewikkeld, waardoor
het gemakkelijker kan worden opgeborgen en schade aan de stroomkabel
bij het liggen op de vloer wordt voorkomen.
Het buiten interieur is hoog ingesteld om de assemblage te faciliteren en
voor een vlotte dorostroming te zorgen van de warmtepijp.
Timer
Beschermingsfunctie van het automatisch herstarten van de compressor na
drie minuten, een verscheidenheid aan andere beveiligingsfuncties.
4

2. Onderdelen:
Voorkant
behuizing
Filter behuizing
Achterkant
behuizing
Luchtuitlaat
Paneel
Wiel
Bovenklep
Instelbare lamellen
Achterkant
behuizing
Handgreep
Doorlopende waterafvoer
Waterafvoer
Handgreep
Snoer
Stekker
5

III. Installatie en Afstelling
1. Installatie:
Waarschuwing: houd de mobiele airco voor het eerste gebruik minstens
twee uur rechtop.
De airconditioning kan eenvoudig in de kamer worden verplaatst. Zorg
er bij het verplaatsen voor dat de airconditioning rechtop staat en dat de
airconditioning op een vlakke ondergrond wordt geplaatst. Installeer en
gebruik de airconditioning niet in de badkamer of andere vochtige omgevingen.
1.1 Installeer de warmtepijpassemblage (zoals getoond in Figuur 1):
schroef de warmtepijpassemblage (uiteinde uitlaattting) in de uit
laatpoort op het achterpaneel (tegen de klok in).
Figuur 1
6

2 Gebruik raamafdichting:
Let op: zet de airco pas aan als u de raamafdichting heeft bevestigd. Hiermee voorkomt u dat de warme uitblaaslucht van de airco in huis rond
gaat waaien.
Deze raamafdichting is niet geschikt voor kiepramen.
2.1 Klittenband raamkozijn
Reinig het raam en het raamkozijn met schoonmaak- of afwasmiddel, zodat
deze stof- en vetvrij zijn. Knip vervolgens het klittenband op maat met een
schaar en plak het op het raamkozijn rondom het raam.
2.2 Klittenband raam
Plak het klittenband vervolgens volledig rondom het raam. Let op: plak het
klittenband niet op het glas.
2.3 Raamafdichting raamkozijn
Plak de smalle zijde van de raamafdichting op het klittenband aan het
raamkozijn. Werk hierbij vanuit het midden en plak de smalle zijde rondom
volledig vast.
2.4 Raamafdichting raam
Zet het raam op een kier en plak de brede zijde van de raamafdichting op
het klittenband aan het raam. Laat genoeg ruimte over in de hoeken, hierdoor gaat de raamafdichting niet knellen.
2.5 Raamafdichting openen
Open de rits van de raamafdichting ongeveer 50 centimeter.
2.6 Luchtafvoerslang bevestigen
Steek de luchtafvoerslang van de airco door het gat in de raamafdichting.
Sluit hierna de rits tot de luchtafvoerslang vastzit. De raamafdichting is nu
klaar voor gebruik. U kunt de airco aanzetten.
7

3. Installeer de behuizing
1) Verplaats de machine met geïnstalleerde warmtepijp en ttingen voor de
ruit en de afstand tussen het lichaam en de muren of andere voorwerpen
moet minstens 50 cm bedragen (zoals getoond in guur 4).
Opmerkingen: 1. het vlakke uiteinde van de warmtepijpverbindingen moet
op zijn plaats worden geklikt.
2) De buis mag niet vervormd zijn en mag geen grote verdraaiing hebben
(meer dan 45°). Houd de ventilatie van de warmtepijp vrij.
8

Belangrk bericht
De lengte van de uitlaatslang moet 280~1.500mm zijn en deze lengte is
gebaseerd op de specicaties van de airconditioning. Gebruik geen verlengslangen en vervang deze niet door andere slangen, omdat dit een
storing kan veroorzaken. Uitlaat moet vrij zijn, anders kan dit
oververhitting veroorzaken.
IV. Controle-insteling
I. Gebruiksaanwzing:
2. Swing toets
3. Timer toets
4. Ventilator snelheidstoets
5. Temperatuurregeling omhoog
6. Display/weergave venster
7. Temperatuurregeling omlaag
8. Functie keuzetoets
9. Slaapstand
10. Aan/Uit toets
9

2. SWING toets: De SWING functie kan alleen werken na het inschakelen
van het apparaat, maar u kunt het apparaat in- of uitschakelen.
3. TIMER toets: In het geval van inschakeling, druk op de toets om de ti-
ming te openen. Druk op de toets, wanneer het tijdsymbool knippert, drukt
u op de toets omhoog en omlaag om de gewenste tijdswaarde te selecteren. Tijdswaarden kunnen worden ingesteld in 1-24 uur en de tijdswaarde
kan met een uur omhoog of omlaag worden aangepast.
4. VENTILATOR snelheidtoets: In de koel-, verwarmings- en ventilatormo-
dus drukt u op deze toets om hoge, middelste en lage snelheid te selecteren. Deze functie is niet beschikbaar in de modus SLEEP (Slaapstand) en
ONTVOCHTIGINGS modus.
5. UP toets: Druk op deze toets om de temperatuurinstelling te verhogen
of de timer in te stellen op de gewenste timerinstelling. Deze functie is niet
beschikbaar in de VENTILATOR- en ONTVOCHTIGINGS-modus.
6. WEERGAVEVENSTER
7. OMLAAG toets: In de timermodus, druk op deze toets kan de tijd naar
beneden worden aangepast. In de koelmodus kan door het indrukken van
deze toets de temperatuur naar beneden worden aangepast. Druk op deze
toets om de temperatuurinstelling te verlagen of de timer in te stellen op
de gewenste timerinstelling. Deze functie is niet beschikbaar in de VENTILATOR- en ONTVOCHTIGINGS-modus.
8. MODUS toets: In het geval van inschakeling drukt u op deze toets om
tussen koelen --> ontvochtigen --> ventilator te schakelen
9. SLAAPSTAND: Wanneer de stroom is ingeschakeld en in de koelmodus
(of verwarmingsmodus), drukt u op de ‘SLAAP’-knop om de slaapmodus te
starten. In de slaapstand is de VENTILATOR snelheid ingesteld op LAGE
snelheid en niet instelbaar. De SLAAP-modus kan worden geannuleerd door
op de knop te drukken.
10. AAN/UIT-toets: Druk op deze toets om het apparaat in en uit
te schakelen.
10
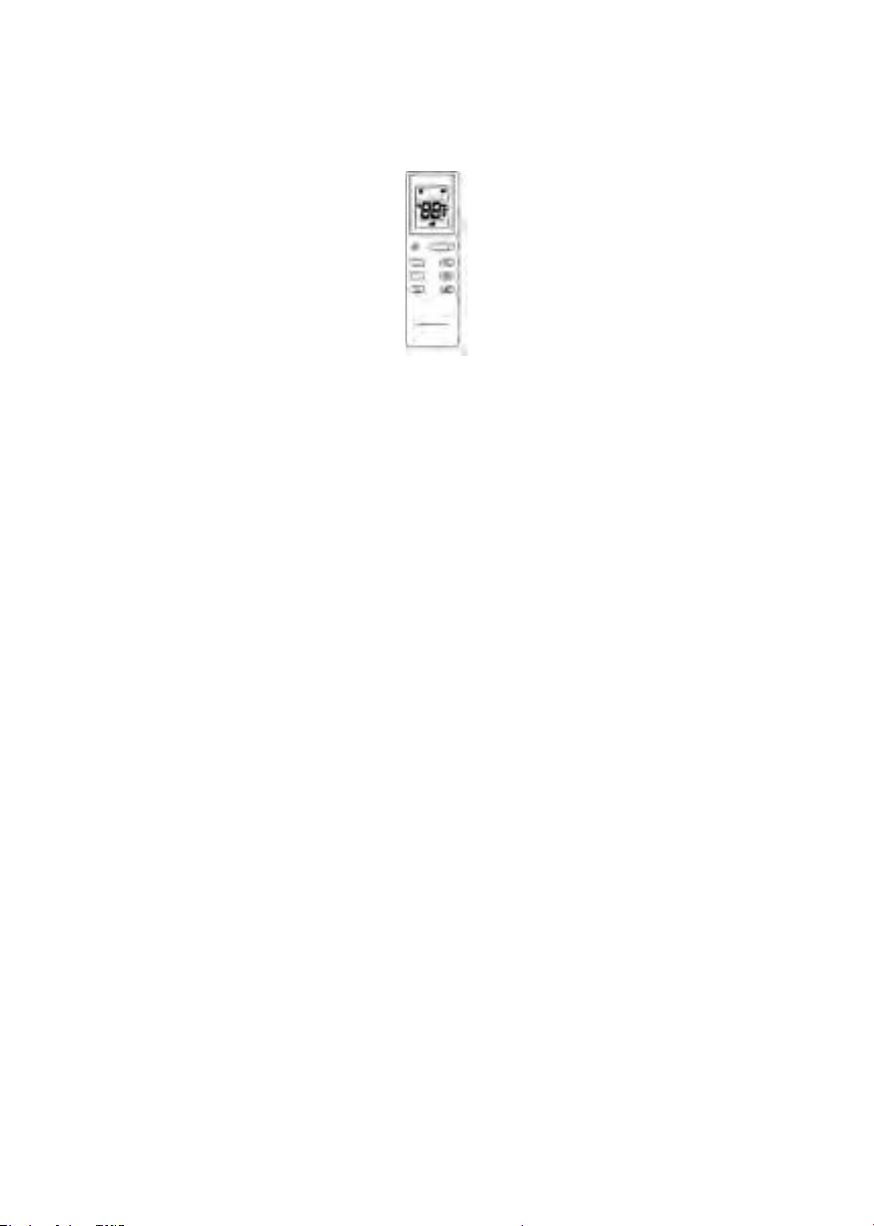
II. Bedieningsinstructies van de afstandsbediening
1) Het bedieningspaneel van de afstandsbediening is als volgt:
III. Een verscheidenheid aan beveiligingsfuncties
3.1 Vorstbeveiligingsfunctie:
Bij het koelen, ontvochtiging of economische energie - de bespa ringswijze, als de temperatuur van de uitlaatpijp te laag is, zal de
machine automatisch in beveiligingsstatus gaan; als de tempe-
ratuur van de uitlaatpijp tot een bepaalde temperatuur toeneemt,
kan het automatisch naar normale verrichting terugkeren.
3.2 De functie van de overstromingsbescherming:
Bij het koelen, ontvochtiging of economische energie - de bespa ringswijze, als de temperatuur van de uitlaatpijp te laag is, zal de
machine automatisch in beveiligingsstatus gaan; als de temperatuur
van de uitlaatpijp tot een bepaalde temperatuur toeneemt, kan het
automatisch naar normale verrichting terugkeren.
3.3 Beveiligingsfunctie van de compressor:
Om de levensduur van de compressor te verlengen, heeft deze na
het uitschakelen van de compressor een opstart beveiliging func tie met 3 minuten vertraging.
11

V. Afvoerinstructies
1. Handmatige drainage:
1) Wanneer de machine stopt nadat het water vol is, schakelt u de machine
uit en trekt u de stekker uit het stopcontact.
Opmerkingen: Verplaats de machine voorzichtig, zodat er geen water in de
waterbak op de bodem van het lichaam gemorst kan worden.
2) Plaats het waterreservoir onder de zijwateruitloop achter het lichaam.
3) Trek de stekker uit het stopcontact, het water zal automatisch in het
waterreservoir stromen.
Opmerkingen:
1. Bewaar het afvoerklepje en de waterstop op de juiste wijze.
2. Tijdens het aftappen kan de behuizing iets naar achteren
worden gekanteld.
3. Als het waterreservoir niet al het water kan vasthouden voordat het water
reservoir vol is, vul dan zo snel mogelijk de waterafvoer met de waterstop
om te voorkomen dat het water naar de vloer of het tapijt stroomt.
4) Als het water is geloosd, vul dan de waterstop en draai de
afvoerklep vast.
Opmerkingen: 1. Start de machine opnieuw op nadat de waterplug en het
afvoerdeksel zijn geïnstalleerd, anders zal het condenswater van de machine
naar de vloer of het tapijt stromen.
12

2. Continue afwatering (alleen van toepassing op de koel- en ontvochti
gingsmodus), zoals aangegeven in bijgaand guur:
1) Haal de stekker uit het stopcontact.
2) Plaats de afvoerpijp in de waterafvoer
3) Sluit de afvoerpijp aan op de emmer.
VI. Onderhoud
Reiniging: voor reiniging en onderhoud, schakel de machine uit en
trek de stekker uit het stopcontact, voordat u het apparaat reinigt en
onderhoudt.
1. Reinig het oppervlak
Reinig het oppervlak van de machine met een natte zachte doek.
Gebruik geen chemicaliën, zoals benzeen, alcohol, benzine, enz.;
anders wordt het oppervlak van de airconditioning beschadigd of
zelfs de hele machine beschadigd.
2. Reinig het lterscherm
Als het lterscherm verstopt is met stof en de effectiviteit van de
airconditioning is verminderd, moet u het lterscherm om de
twee weken reinigen.
13

2.1: Reinig het bovenste frame van het lterscherm
1) Klap het klemblok van het EVA-lterframe met de handen vast.
Forceer van buitenaf om het EVA-lterrame te verwijderen.
Verwijder het EVA-lterscherm (zoals in de bovenstaande afbeelding).
2) Plaats het EVA-lterscherm in warm water met een neutraal reini
gingsmiddel (ongeveer 40 ºC/ 104 ºC) en droog het in de schaduw na
het schoonspoelen.
2.2: Reinig het onderste lterscherm
1) Houd het handvat van het onderste lterscherm vast en trek het voor
zichtig naar buiten om het te verwijderen.
2) Zet het lterscherm in warm water met neutraal reinigingsmiddel (onge-
veer 40 ºC/ 104 ºC) en droog het in de schaduw na het schoonspoelen.
14

Opslag na het seizoen:
• Haal de stekker uit het stopcontact en loos het water in de waterbak
in andere watercontainers of kantel het lichaam direct om het water in
andere containers te lozen.
• Zet de machine aan, pas het aan, aan de wijze van de low-wind
ventilatie, en handhaaf deze staat tot de drainagepijp droog wordt, om
de binnenkant van het lichaam in een droge staat te houden en het te
verhinderen om te schimmelen.
• Zet de machine uit, trek de stekker uit het stopcontact en wikkel het
netsnoer om de wikkelpaal; installeer de waterstop en
de afvoerafdekking.
• Verwijder de uitlaatpijp en bewaar deze goed.
• Bedek de airconditioning met een plastic zak. Zet de airconditioning op
een droge plaats, houd deze buiten het bereik van kinderen en neem
stofbeheersingsmaatregelen.
• Verwijder de batterijen van de afstandsbediening en bewaar ze goed.
Let op: zorg ervoor dat het lichaam op een droge plaats wordt
geplaatst en bewaar alle onderdelen van de machine op de juiste
manier.
VII. Problemen oplossen
De airconditioning mag niet zelf worden gerepareerd of gedemonteerd.
Ongekwaliceerde reparatie zal leiden tot het falen van de garantiekaart en
kan schade toebrengen aan de gebruikers of hun eigendommen.
Als er zich problemen voordoen die niet in de tabel staan vermeld of als de
aanbevolen oplossingen niet werken, neem dan contact op met de
professionele serviceorganisatie.
15

Problemen Reden voor
problemen
De airconditioning werkt
niet.
Er is geen elektriciteit.
Oplossingen
Zet hem aan na aansluiting op een stopcontact
met elektriciteit.
De overloopindicator
geeft “FL”weer.
De omgevingstemperatuur is te laag of te hoog.
Het koel- of verwarmingseffect is niet goed.
Grote ruis. De airconditioning wordt
De compressor werkt niet Oververhittingsbeveili-
De afstandsbediening werkt niet.
Er is direct zonlicht.
Deuren of ramen staan
open; er zijn veel mensen;
of in de koelmodus zijn er
andere warmtebronnen.
Het lterscherm is vuil.
niet op een vlakke ondergrond geplaatst.
ging start.
De afstand tussen de
machine en de afstandsbediening is te groot.
De afstandsbediening
staat niet in de richting
van de ontvanger van de
afstandsbediening.
Lozing van het water in
de overloopindicator.
Gebruik het apparaat bij
een temperatuur van 7-35
ºC (44-95 ºC).
Trek aan het gordijn.
Sluit deuren en ramen en
voeg nieuwe airconditioning toe.
Reinig of vervang het
lterscherm.
Plaats de airconditioning
op een vlakke en harde
plaats (om het geluid te
verminderen).
Wacht 3 minuten tot de
temperatuur is gedaald
en start de machine
vervolgens opnieuw op.
Laat de afstandsbediening in de buurt van de
airconditioning komen
en zorg ervoor dat de
afstandsbediening direct
in de richting van het
apparaat wijst.
16
De batterijen zijn leeg.
Vervang de batterijen.

Het display geeft ‘E1’
weer.
Het display geeft ‘E2’
weer.
VIII.Bijlage
Zekeringsparameters
Type: FSD or 50F
Spanning: 250V
Stroom: 3.15A
Schematisch diagram
De pijptemperatuursensor
is abnormaal.
De pijptemperatuursensor
is abnormaal.
Controleer de kamertemperatuursensor en de bijbehorende schakelingen.
Controleer de pijptemperatuursensor en het bijbehorende schakelschema.
Capillair
verdamper
Alle technische en specieke parameters vindt u op het typeplaatje van het
product. Vanwege de voortdurende verbetering behouden wij ons het recht
voor om een ontwerp zonder voorafgaande kennisgeving te wijzigen.
Behandeling: Zet de verlaten machine niet samen met
ander ongesorteerd afval. Dergelk afval moet apart
worden geplaatst voor ander speciaal gebruik.
17

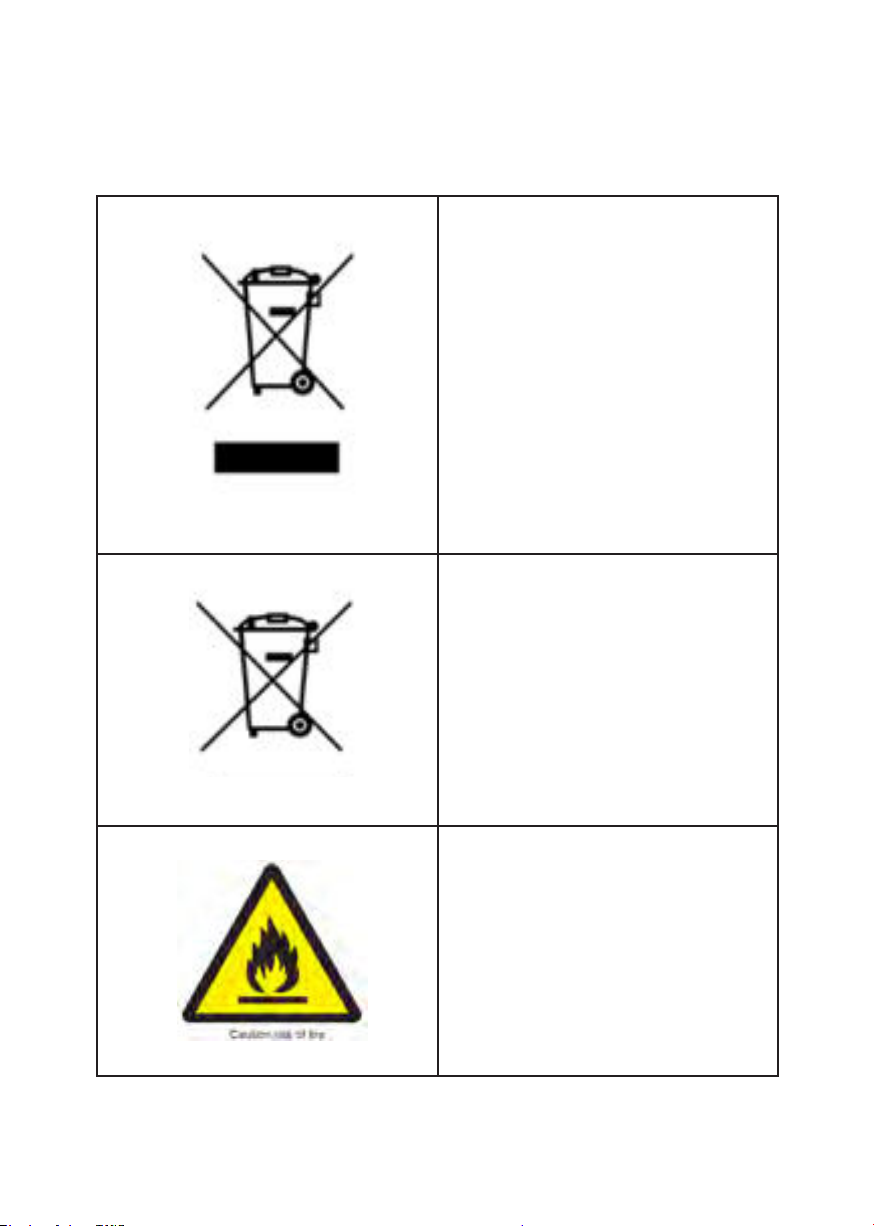
IX. Symbooluitleg
Dit symbool geeft aan dat dit product in
de EU niet bij het gewone huisvuil mag
worden weggegooid. Oude apparatuur bevat waardevolle materialen die
kunnen en moeten worden gerecycled
om schadelijke gevolgen voor de
gezondheid en het milieu, als gevolg
van niet-gereguleerde afvalinzameling
te voorkomen. Breng oude apparatuur
naar een daartoe aangewezen inzamelpunt of neem contact op met het bedrijf
waar u de machine hebt gekocht. Zij
kunnen ervoor zorgen dat zoveel mogelijk van de onderdelen kunnen worden
gerecycled.
Aangezien het product een batterij
bevat, betekent dit symbool dat het
product niet bij het andere huisvuil mag
worden weggegooid. Het is uw verantwoordelijkheid om uw afgedankte apparatuur gescheiden van het huishoudelijk
afval af te voeren.
18
Dit symbool betekent dat het product
licht ontvlambaar is. Dit komt door
het R290 gas dat in het product wordt
gebruikt.

Dit symbool geeft aan dat het product
voldoet aan de Europese Conformiteitsverklaring.
Dit symbool is om de gebruiker te informeren dat hij de gebruikershandleiding
moet lezen.
Dit symbool geeft aan dat de gebruiker
de installatiehandleiding moet lezen.
Dit symbool geeft aan dat reparaties
van dit product moeten worden uitgevoerd door een erkend servicecentrum
en strikt volgens de instructies van de
fabrikant.
19

INDEX
Technical specication 21.
Notes
22.
Features and Components 24.
Installation and Adjustment 26.
Control Setting 29.
A Variety of Protection Functions 31.
Drainage Instructions 32.
Maintenance
Troubleshooting
Appendix
Symbol explanation
33.
35.
37.
38.

TECHNICAL SPECIFICATION
Type
Cooling Capacity 12000btu/hour 14000btu/hour 16000btu/hour
Dehumidication 28 l/day
Power consumption 1340 Watt 1580 Watt 1800 Watt
Air Displacement max. 400m3/uur 480m3/uur 480m3/uur
Connected Power 220-240V/50Hz 220-240V/50Hz 220-240V/50Hz
Refrigerant R290/290 gr
Insulation Category IPX4 IPX4 IPX4
Timer Setting 1-24 hours 1-24 hours 1-24 hours
Exhaust Pipe 150 x 15 cm 150 x 15 cm 150 x 15 cm
Sound Level 54dB 53dB 54dB
Length of Electr. Cable 1.8 m 1.8 m 1.8 m
Net Weight 29 kg 31 kg 31 kg
Product Dimensions 480x390x780 mm
ACS12K01
ACS14K01
31 l/day
R290/260 gr
480x390x780 mm
ACS14K01
33 l/day
R290/260 gr
480x390x780 mm
21

I. Notes
• The air conditioning is only suitable for indoor use and is not suitable
for other applications.
• Follow local grid interconnection rules while installing the air conditio-
ning and ensure that it is properly grounded. If you have any question
on electrical installation, follow the instructions of the manufacturer, and
if necessary, ask a professional electrician to install it.
• Place the machine in a at and dry place and keep a distance of above
50cm between the machine and the surrounding objects or walls.
• After the air conditioning is installed, ensure that the power plug is in-
tact and rmly plugged into the power outlet, and place the power cord
orderly to prevent someone from being tripped or pulling out the plug.
• Do not put any object into the air inlet and outlet of the air conditio-
ning. Keep the air inlet and outlet free from obstructions.
• When drainage pipes are installed, ensure that the drainage pipes are
properly connected, and are not distorted or bent.
• When moving the machine, make sure that it is in an upright position.
• The machine should stay away from gasoline, ammable gas, stoves
and other heat sources.
• Don’t disassemble, overhaul and modify the machine, otherwise it
will cause a machine malfunction or even bring harm to persons and
properties. To avoid danger, if a machine failure occurs, ask the manufacturer or professionals to repair it.
• Do not install and use the air conditioning in the bathroom or other
humid environments.
• Do not pull the plug to turn off the machine.
• Do not place cups or other objects on the body to prevent water or
other liquids from spilling into the air conditioning.
• Do not use insecticide sprays or other ammable substances near the
air conditioning.
• Do not wipe or wash the air conditioning with chemical solvents such
as gasoline and alcohol. When you need to clean the air conditioning,
you must disconnect the power supply, and clean it with a half-wet soft
cloth. If the machine is really dirty, scrub with a mild detergent.
• The appliance can be used by children aged from 8 years and above
and persons with reduced physical, sensory or mental capabilities if
they have been given supervision or instruction concerning use of the
appliance in a safe way and understand the hazards involved. Children
shall not play with the appliance. Cleaning and maintenance shall not
be made by children without supervision.
22

Remove:
When the mobile air conditioner is nally and needs to be scrapped, it does
not belong in the normal household waste. Bring it to a collection point set
up by your municipality.
Do not use any other means than those recommended by the manufacturer
for the defrosting process.
The appliance must be stored in a room with no continuously operating
ignition sources (e.g. an open ame, a working gas appliance or a working
electric heater).
Do not insert objects such as pens etc. into the unit and through the grilles.
Make sure not to block the fan. Never drill or burn in the unit!
Please note that refrigerants may not have any odour. R290 is odourless, so
you won’t smell leakage!
The appliance must be installed, operated and stored in a room with a oorarea greater than X m2.
If the unit is used in a non-ventilated area, it must be installed in such a way
that if the ammable refrigerant leaks, it will not stagnate in a re or explosion.
The device must be stored in such a way that no mechanical damage can
occur. Mechanical damage during storage/transport must always be avoided.
Warning: Always keep vents clear of obstacles and never cover them.
Battery warning:
Never crush or puncture the battery or cause a short circuit. Do not expose
the battery to a high temperature environment; if the battery is leaking or
bulging, discontinue use. There may be a risk of explosion if the battery is
replaced by an incorrect type. Keep the battery out of reach of children.
Batteries may explode if exposed to open re. Never dispose of batteries in
a re. Dispose of used batteries in accordance with local regulations.
23

II. Features and Components
1. Features
v
With cooling, dehumidication and fan function, Continuous Water Drainage Functions ·
Automatic swing leaf : The outlet has automatic air swing function, and the
outlet can be covered when the machine is turned off to prevent dust from
entering the body.
Handles on both sides : So that it is easier to carry it and the body design is
more humane.
Cord Wrap : The power cord can be wrapped at the back making it easier
for storage as well as preventing damage to the power chod when lying on
the oor.
Outdoor interface is set high to facility assembly and keep the smooth ow
of the heat pipe.
Timer
Protection function of automatically restarting the compressor after three
minutes, a variety of other protection functions.
24

2. Components:
Mask
Front Housing
Omni-directional wheel
EVA lter housing
Rear Housing
Air vent
Top cover
Swing leaf
Rear Housing
Handle
Continuous drainage hole
Drainage hole
Handle
Power cord
Power cord plug
25

III. Installation and Adjustment
1. Installation:
The air conditioning can be easily moved in the room. In the moving process, ensure that the air conditioning is in the upright position and the air
conditioning should be placed on a at surface. Do not install and use the
air conditioning in the bathroom or other humid environments.
1.1 Install the heat pipe assembly (as shown in Figure 1): screw the heat
pipe assembly (exhaust tting end) into the exhaust port on the rear
panel (counterclockwise).
Figure 1
1.2 Install the window sealing plate assembly
1). Half open the window, and mount the window sealing plate assembly to
the window (as shown in Figure 2 and Figure 3); the assembly can be placed
in horizontal and vertical direction.
2).Pull various components of the window sealing plate assembly open, adjust their opening distance to bring both ends of the assembly into contact
with the window frame, and x various components of the assembly.
26

2 Use window seal:
Don’t turn on the air conditioner until after you’ve attached the window
seal. This will prevent the air conditioner’s warm exhaust air from circulating
around the house.
This window seal isn’t suitable for tilt windows.
1. Velcro on window frame
Clean the window and window frame with soap or detergent to clear it of
any dust and grease. Cut the velcro 1 to size with scissors and attach it to
the window frame around the window.
2. Velcro on window
Next, attach the velcro around the entire window. Note: don’t stick the
velcro onto the glass
3. Seal on window frame
Attach the window seal’s narrow side 2 to the velcro on the window frame.
Work outwards from the middle and fully attach the narrow side all around.
4. Seal on window
Slightly open the window and attach the window seal’s broad side 3 to the
velcro on the window. Make sure to leave enough room in the corners so
the window seal won’t get stuck in the window.
5. Open window seal
Open the window seal’s zipper by about 50 centimeters.
6. Attach exhaust hose
Stick the air conditioner’s exhaust hose through the hole in the window seal.
Close the zipper until the exhaust hose is secured. The window seal is now
ready for use. You can turn on the air conditioner.
27

1.3 Install the body
1). Move the machine with installed heat pipe and ttings before the window, and the distance between the body and walls or other objects shall be
least 50 cm (as shown in Figure 4).
2). Elongate the heat pipe and snap the at end of the heat pipe joints into
the elliptical hole of the window sealing plate assembly (as shown in Figure
5 and Figure 6) .
Notes: 1. the at end of the heat pipe joints must be snapped into place.
2. The pipe cannot be distorted nor has substantial turning
(greater than 45 °). Keep the ventilation of the heat pipe unobstructed.
28

Important Notice
The length of the exhaust hose shall be 280~1,500mm, and this length is
based on the specications of the air conditioning. Do not use extension
tubes or replace it with other different hoses, or this may cause a malfunction. Exhaust must be unobstructed; otherwise it may cause overheating.
IV. Control Setting
I. Operating instructions:
2. Swing button
3. Timer button
4. Fan speed control button
5. Temperature control up
6. Display window
7. Temperature control down
8. Selection button function
9. Sleep Mode
10. On/Off key
29

2. SWING Key: The SWING function only can work after switching on the
unit, but you can turn it on or off.
3. TIMER Key: In the case of power on, press the key to choose timing; in
the case of power off, press the key to open timing.
Press the key, when the timing symbol ashes, press up and down key to
select the required timing value.
Timing values can be set in 1-24 hours and the timing value is adjusted up
or down by one hour.
4. FAN SPEED Key: In cooling, heating and fan mode, press this key to
select high, middle, low speed. This function is not available in SLEEP mode
and DEHUMIDIFYING mode.
5. UP Key: Press this button to increase the temperature setting or set up
the timer to the required timer setting. This function is not available under
FAN mode and DEHUMIDIFYING mode.
6. Display Window
7. DOWN Key: Under timer mode, press this key can be adjusted downward the time.
Under cooling mode, press this key can be adjusted downward the temperature.
Press this button to decrease the temperature setting or set down the timer
to the required timer setting. This function is not available under FAN mode
and DEHUMIDIFYING mode.
8. Mode Key: In the case of power on, press this key to switch between
cooling --> dehumidifying --> fan.
9. Sleep Mode: When the power is on and In the cooling mode (or heating
mode), press ‘SLEEP’ button to start the sleep mode. Under sleep mode,
the FAN speed is set to LOW speed and not adjustable. The SLEEP mode
can be cancelled by pressing the button.
10. Power Key: Press this key to turn on and turn off the unit.
2. Operation instructions of remote control
1) The remote control panel is as follows:
30

III. A Variety of Protection Functions
3.1 Frost Protection Function:
In cooling, dehumidication or economic power saving mode, if the
tempe rature of the exhaust pipe is too low, the machine will
automatically enter protection status; if the temperature of
the exhaust pipe rises to a certain temperature, it can automatically
revert to normal operation.
3.2 Overow Protection Function:
When water in the water pan exceeds the warning level, the
machine will automatically sound an alarm. At this point, you need
to move the drainage pipe connecting the machine or the water
outlet to sewer or other drainage area to empty the water (details
see Drainage Instructions at the end of this chapter).
After the water is emptied, the machine will automatically return to
the original state.
3. Protection Function of the Compressor
To increase the service life of the compressor, it has a 3-minute de
lay booting protection function after the compressor is turned off.
31

V. Drainage Instructions
1. Manual drainage:
1) When the machine stops after the water is full, turn off the machine
power and unplug the power plug.
Notes: Please move the machine carefully, so as not to spill the water in the
water pan at the bottom of the body.
2) Place the water container below the side water outlet behind the body.
3) Unplug the water plug, the water will automatically ow into the water
container.
Notes: 1. Keep the drainage cover and the water plug properly.
2. During drainage, the body can be tilted slightly backwards.
3. If the water container cannot hold all the water, before the water
container is full, stuff the water outlet with the water plug as soon
as possible to prevent water from owing to the oor or the
carpet.
4) When the water is discharged, stuff the water plug, and tighten the
drainage cover.
Notes: 1. Restart the machine after the water plug and drainage cover are
installed, otherwise condensate water of the machine will ow to
the oor or the carpet.
32

2. Continuous drainage (only applicable to cooling and dehumidication
mode), as shown in gure:
1) Unplug the water plug.
2) Set the drainage pipe into the water outlet.
3) Connect the drainage pipe to the bucket.
VI. Maintenance
Cleaning: before cleaning and maintenance, turn off the machine and
unplug the plug.
1. Clean the surface
Clean with surface of machine with a wet soft cloth. Don’t use
chemicals, such as benzene, alcohol, gasoline, etc.; otherwise, the
surface of the air conditioning will be damaged or even the whole
machine will be damaged.
2. Clean the lter screen
If the lter screen is clogged with dust, and the effectiveness of the
air conditioning is reduced, be sure to clean the lter screen once
every two weeks.
33

2.1: Clean the upper lter screen frame
1) Clasp the wedging block of the EVA lter screen frame with hands. Force
down from the outside to remove the EVA lter screen frame. Remove the
EVA lter screen (as shown in the above gure) .
2) Put the EVA lter screen into warm water with neutral detergent (about
40ºC / 104 ºC) and dry it in the shade after rinsing clean.
2.2: Clean the lower lter screen frame
1) Hold the handle of the lower lter screen frame and pull it outward
gently to remove it.
2) Put the lter screen into warm water with neutral detergent (about
40ºC/ 104 ºC) and dry it in the shade after rinsing clean.
34

Postseason Storage:
• Unplug the water plug and discharge the water in the water pan into
other water containers or directly tilt the body to discharge the water
into other containers.
• Turn on the machine, adjust it to low-wind ventilation mode, and
maintain this state until the drainage pipe becomes dry, so as to keep
the inside of the body in a dry state and prevent it from mildewing.
• Turn off the machine, unplug the power plug, and wrap the power cord
around the wrapping post; install the water plug and the
drainage cover.
• Remove the exhaust pipe and keep it properly.
• Cover the air conditioning with a plastic bag. Put the air conditioning in
a dry place, keep it out of the reach of children, and take dust control
measures.
• Remove batteries of the remote control and keep them properly.
Note: ensure that the body is placed in a dry place and keep all
machine components properly.
VII. Troubleshooting
Do not repair or disassemble the air conditioning by yourself. Unqualied
repair will lead to failure of the warranty card and may cause damage to
users or their properties.
If problems not listed in the table occur or recommended solutions do not
work, please contact the professional service organization.
35

Problems Reasons Solutions
The air conditioning does
not work.
There is no electricity.
Turn it on after connecting it to a socket with
electricity.
The overow indicator
displays “FL”.
The ambient temperature
is too low or too high.
The cooling or
heating effect is not good
Big Noise The air conditioning is not
compressor does
not work.
The remote control does
not work.
There is direct sunlight.
Doors or windows are
open; there are a lot of
people; or in cooling
mode, there are other
sources of heat.
The air inlet or outlet is
blocked.
placed on a at surface.
Overheat protection
starts.
The distance between the
machine and the remote
control is too far.
The remote control is not
aligned with the direction
of the remote control
receiver.
Discharge the water
inside.
Recommend to use the
machine in at the temperature of 7-35ºC (4495ºC).
Pull the Curtain.
Close doors and windows, and add new air
conditioning.
Clean or replace the lter
screen.
Put the air conditioning
on a at and hard place
(to reduce noise).
Wait for 3 minutes until
the temperature is lowered, and then restart the
machine.
Let the remote control
get close to the air conditioning, and make sure
that the remote control
directly faces to the direction of the remote control
receiver.
Displays ‘E1’. The room temperature
sensor is abnormal.
Displays ‘E2’ The pipe temperature
sensor is abnormal.
36
Check the room temperature sensor and related
circuitry.
Check the pipe temperature sensor and related
circuitry.

VIII.Appendix
Fuse Parameters
Type: FSD or 50F
Voltage: 250V
Current: 3.15A
Schematic Diagram
All the technical and specic parameters, please refer to product nameplate.
Due to continuous improvement, we reserve the right to change some design without any notice.
Treatment: Don’t put the abandoned machine with
other unsorted waste together. Such waste shall be
placed separately for other special use.
37

IX. Symbol explanation
Disposal In the EU, this symbol indicates
that this product may not be disposed
of as ordinary household waste. Old
equipment contains valuable materials
that can and should be recycled to prevent any adverse effects to health and
the environment caused by unregulated
waste collection. Make sure to bring old
equipment to a designated collection
point or contact the company where
you bought the machine. They can
make sure that as many of the components as possible can be recycled.
Since the product contains battery, this
symbol means that the product should
not be disposed of with your other
household waste. It is your responsibility
to dispose of your waste equipment
separately from the municipal
waste stream.
38
This symbol means the product is highly
inammable.This is due to the R290 gas
used inside the product.

Dit symbool geeft aan dat het product
voldoet aan de Europese Conformiteitsverklaring.
Dit symbool is om de gebruiker te informeren dat hij de gebruikershandleiding
moet lezen.
Dit symbool geeft aan dat de gebruiker
de installatiehandleiding moet lezen.
Dit symbool geeft aan dat reparaties
van dit product moeten worden uitgevoerd door een erkend servicecentrum
en strikt volgens de instructies van de
fabrikant.
39

TABLE DES MATIÈRES
Caractéristiques techniques
Remarques
Propriétés et composantes 44.
Installation et Conguration 46.
Panneau de contrôle 49.
Instructions pour la vidange 52.
Entretien
Résoudre des problèmes
Annexe
Explication du symbole
42.
53.
57.
41.
55.
58.
CARACTÉRISTIQUES
TECHNIQUES
Type
Capac. de refroidissemt 12000btu/heure 14000btu/heure 16000btu/heure
Déshumidication 28 l/jour
Puissance absorbée 1340 Watt 1580 Watt 1800 Watt
Déplacement d’air 400m3/heure 480m3/heure 480m3/heure
Tension de raccordemt 220-240V/50Hz 220-240V/50Hz 220-240V/50Hz
Liquide de refroidissemt R290/290 gr
Classe d’isolation IPX4 IPX4 IPX4
Réglage de l’heure 1-24 heures 1-24 heures 1-24 heures
Tuyau de vidange 150 x 15 cm 150 x 15 cm 150 x 15 cm
Niveau sonore 54dB 53dB 54dB
Longueur de câble 1.8 m 1.8 m 1.8 m
Poids net 29 kg 31 kg 31 kg
Dimensions du produit 480x390x780 mm
ACS12K01
ACS14K01
31 l/jour
R290/260 gr
480x390x780 mm
ACS14K01
33 l/jour
R290/260 gr
480x390x780 mm
41

I. Remarques
• Le climatiseur convient seulement à un usage intérieur et ne convient
pas à d’autres applications.
• Lors de l’installation du climatiseur, suivez les règlements locaux sur le
raccordement au réseau électrique et veillez à mettre le climatiseur à
la terre. Si vous avez des questions sur l’installation électrique, suivez
les instructions du fabricant. Demandez à un électricien professionnel
d’effectuer l’installation si nécessaire.
• Placez l’appareil à un endroit sec et sur une surface plane. Maintenez
une distance minimale de 50 cm entre l’appareil et les objets ou les
murs avoisinants.
• Après avoir installé le climatiseur, vous devez vous assurer que la che
est intacte et qu’elle a bien été insérée dans la prise. Veillez également
à disposer le câble d’alimentation de manière à prévenir que quelqu’un
ne trébuche dedans ou ne retire la prise.
• Ne placez pas d’objets dans l’entrée et la sortie d’air du climatiseur.
Assurez-vous que l’entrée et la sortie d’air ne sont pas obstruées.
• Au moment d’installer les tuyaux de vidange, assurez-vous que ceux-ci
sont bien raccordés et qu’ils ne sont pas tordus ni pliés.
• Assurez-vous que le climatiseur est debout quand vous le déplacez.
• La machine doit être maintenue à distance de l’essence, de l’essence
inammable, des chauffages et autres sources de chaleur.
• Ne démontez, révisez ou modiez pas la machine. Sinon, elle pourrait
s’endommager ou même poser un danger pour des personnes ou des
biens matériels. Pour éviter tout danger, vous devez faire effectuer les
réparations par le fabricant ou des professionnels.
• N’installez et n’utilisez pas le climatiseur dans la salle de bains ou dans
un autre environnement humide.
• Ne débranchez pas la che pour éteindre l’appareil.
• Ne placez pas de tasses ou tout autre objet sur la machine an d’éviter
que de l’eau ou tout autre uide ne s’inltrent dans le climatiseur.
• N’utilisez pas de sprays insecticides ou de substances inammables à
proximité du climatiseur.
• N’essuyez ou ne nettoyez pas le climatiseur avec des solvants chimiques
comme de l’essence ou de l’alcool. Après avoir débranché l’alimentation, nettoyez la machine avec un chiffon humide et doux. Si le climatiseur est vraiment sale, nettoyez-le avec un produit non agressif.
42

• L’appareil peut être utilisé par des enfants de 8 ans et plus. Il peut
également être utilisé par des personnes ayant des capacités sensorielles, physiques ou mentales limitées, à condition que celles-ci soient
surveillées ou ont été informées quant à l’utilisation sûre de l’appareil et
des risques existants. Surveillez les enfants an qu’ils ne jouent pas avec
l’appareil. Le nettoyage et l’entretien ne doivent pas être effectués par
des enfants laissés sans surveillance.
ENLEVER:
Lorsque le climatiseur mobile est nalement mis au rebut et qu’il doit être
mis au rebut.
Il n’a pas sa place dans les ordures ménagères normales. Apportez-le
qu’à un point de collecte mis en place par votre municipalité.
Ne pas utiliser d’autres moyens que ceux recommandés par le fabricant
pour le processus de décongélation.
L’appareil doit être entreposé dans un local où il n’y a pas de source d’in-
ammation permanente
(p. ex. une amme nue, un appareil à gaz en fonctionnement ou un appareil
de chauffage électrique en fonctionnement).
N’insérez pas d’objets tels que des broches, etc. dans l’appareil à travers et
les grilles.
Veillez à ne pas bloquer le ventilateur. Ne jamais percer ou brûler l’appareil!
Veuillez noter que les uides frigorigènes peuvent ne pas avoir d’odeur. Le
R290 est inodore, vous ne sentirez donc pas les fuites!
L’appareil doit être installé, utilisé et entreposé dans une pièce d’une super-
cie supérieure à X m2.
Si l’appareil est utilisé dans un endroit non ventilé, il doit être installé de
manière à ce qu’en cas de fuite de réfrigérant inammable, il ne stagne pas
dans un incendie ou une explosion.
L’appareil doit être stocké de manière à ce qu’aucun dommage mécanique
ne puisse survenir. Les dommages mécaniques pendant le stockage/transport doivent toujours être évités.
43

Avertissement: gardez toujours les bouches d’aération à l’écart des obstacles et ne les couvrez jamais.
Avertissement de batterie:
Ne jamais écraser ou perforer la batterie ou provoquer un court-circuit.
N’exposez pas la batterie à un environnement à haute température; si la
batterie fuit ou gone, cessez de l’utiliser. Il peut y avoir un risque d’explosion si la batterie est remplacée par un type incorrect. Gardez la batterie hors
de portée des enfants. Les piles peuvent exploser si elles sont exposées
à des ammes nues. Ne jetez jamais les piles dans un feu. Jetez les piles
usagées conformément à la réglementation locale.
II. Propriétés et composantes
1. Propriétés:
Avec fonction refroidissement, déshumidication et ventilation, fonctions
d’évacuation en continu de l’eau.
Lame oscillante automatique : la sortie est équipée d’une fonction d’oscillation d’air automatique. Il est également possible de recouvrir la sortie
quand la machine est désactivée an de prévenir que de la poussière s’immisce dans l’appareil.
Poignées de part et d’autre de l’appareil : facilitent le transport et l’utilisation de l’appareil.
Câble d’alimentation : le câble d’alimentation peut être accroché à l’arrière
de l’appareil an de faciliter le rangement et d’empêcher le câble de s’endommager lorsqu’il traîne sur le sol.
L’unité est fabriquée en hauteur an de faciliter le montage et préserver un
ux homogène dans le tuyau.
Minuteur
Fonction de protection qui redémarre automatiquement le compresseur
après trois minutes. D’autres fonctions de protection sont également
disponibles.
44

2. Composantes:
Front du logement
Roulette
Boîtier de ltre
Dos du boîtier
Sortie d’aire
Panneau
Couvercle supérieur
Grilles réglables
dos du boîtier
Manivelle
Drainage continu
Gestion des eaux usées
Manivelle
Cordelette
Embout
45

III. Installation et Conguration
1. Installation:
Avertissement : redressez le climatiseur mobile au moins deux heures
avant utilisation.
Le climatiseur peut facilement être déplacé. Au moment de déplacer l’appareil, assurez-vous qu’il reste parfaitement droit. Le climatiseur doit être
installé sur une surface plane. N’installez et n’utilisez pas le climatiseur dans
la salle de bains ou dans d’autres environnements humides.
1.1 Installez le tuyau de chauffage (comme illustré dans la gure 1) : vis
sez l’ensemble du tuyau de chauffage (extrémité d’évacuation) dans
l’orice d’évacuation sur la paroi arrière (à contresens).
46
Figure 1

2. Utilisation du kit de calfeutrage
Installez le kit de calfeutrage avant d’allumer le climatiseur mobile. Vous
éviterez ainsi que l’air chaud qui sort du climatiseur se répande dans la
maison.
Ce kit de calfeutrage ne convient pas aux fenêtres battantes.
1. L’auto-agrippant sur le cadre
Nettoyez la fenêtre et le cadre de fenêtre avec un produit de nettoyage,
an d’enlever toutes traces de gras et de poussière. Coupez la bande auto-
agrippante 1 sur mesure avec les ciseaux et collez-la sur le cadre de fenêtre.
2. L’auto-agrippant sur la fenêtre
Collez intégralement la bande auto-agrippante 1 autour de la fenêtre. Note
: veuillez ne pas coller la bande autoagrippante sur le verre.
3. Kit de calfeutrage sur le cadre
Collez le côté étroit du kit de calfeutrage 2 à la bande auto-agrippante sur
le cadre de fenêtre.
Commencez au milieu et collez intégralement le côté étroit du kit de
calfeutrage autour du cadre
4. Kit de calfeutrage sur la fenêtre
Entrouvrez la fenêtre et collez le côté large du kit de calfeutrage 3 sur la
bande auto-agrippante de la fenêtre. Laissez sufsamment d’espace dans
les coins, an que le kit de calfeutrage ne soit pas trop serré.
5. Ouvrir le kit de calfeutrage OUVRIR LE KIT DE CALFEUTRAGE
Ouvrez la tirette du kit de calfeutrage d’environ 50 centimètres.
6. Fixer le tuyau d’évacuation d’air
Faites passer le tuyau d’évacuation d’air à travers l’ouverture du kit de
calfeutrage. Fermez la tirette an que le tuyau d’évacuation d’air reste en
place. Le kit de calfeutrage est prêt à l’emploi, vous pouvez vous servir du
climatiseur mobile
47

3. Installez l’appareil
1) Déplacez la machine muni de son tuyau de chauffe et des raccords devant la fenêtre. La distance entre l’appareil et les murs ou autres objets doit
au moins comporter 50 cm (comme illustré sur la gure 2).
Figure 2
Remarques : 1. l’extrémité plate des raccords du tuyau de chaleur doit être
emboîtée en place.
2) Le tuyau ne peut pas être tordu et ne peut pas présenter de degré de
courbure excessif (plus de 45 °). Le tuyau d’évacuation doit rester libre.
48

Remarque importante
La longueur du tuyau de sortie doit avoir entre 280 et 1500 mm. Cette
longueur est basée sur les caractéristiques du climatiseur. N’utilisez pas de
rallonges et ne remplacez pas le tuyau d’origine par d’autres tuyaux an
d’éviter tout dysfonctionnement. Le tuyau d’évacuation doit rester libre ;
sinon, l’appareil pourrait surchauffer.
IV. Panneau de contrôle
I. Mode d’emploi :
2. Bouton d’oscillation
3. Bouton de minuterie
4. Régulation de la vitesse du ventilateur
5. Régulation de la température vers le haut
6. Afchage / fenêtre d’afchage
7. Régulation de la température vers le bas
8. Fonction de la bouton de sélection
9. Mode veille
10. Bouton Marche/Arrêt
49

2. Touche SWING : la fonction SWING fonctionne seulement lorsque l’ap-
pareil est allumé, mais vous pouvez activer et désactiver l’appareil.
3. Touche TIMER : lorsque l’appareil est allumé, appuyez sur ce bouton
pour ouvrir le minuteur.
Appuyez sur le bouton. Quand le symbole du minuteur se met à clignoter,
appuyez sur la touche avec la èche vers le haut ou sur la touche avec la
èche vers le bas pour sélectionner la durée souhaitée.
La durée peut varier de 1 à 24 heures et peut être ajustée par incréments
d’une heure.
4. Touche rapide VENTILATEUR : en mode refroidissement, réchauffement
ou ventilateur, appuyez sur cette touche pour sélectionner une vitesse élevée, moyenne ou faible. Cette fonction n’est pas disponible en mode SLEEP
(mode veille) et en mode DÉSHUMIDIFICATION.
5. Touche UP : appuyez sur cette touche pour augmenter la température ou
pour congurer le minuteur. Cette fonction n’est pas disponible en mode
VENTILATEUR et en mode DÉSHUMIDIFICATION.
6. ÉCRAN D’AFFICHAGE
7. Touche DOWN : en mode minuteur, appuyez sur cette touche pour
diminuer la durée. Lorsque le mode refroidissement est activé, cette touche
permet de réduire la température. Appuyez sur cette touche pour diminuer
le réglage de la température ou pour congurer la durée souhaitée. Cette
fonction n’est pas disponible en mode VENTILATEUR et en mode DÉSHUMIDIFICATION.
8. Touche MODE : lorsque l’appareil est allumé, appuyez sur cette touche
pour passer au mode refroidissement, déshumidication ou ventilateur.
9. Mode SLEEP : lorsque l’appareil est sous tension et que le mode refroidissement (ou réchauffement) est activé, appuyez sur le bouton SLEEP
pour lancer le mode veille. Lorsque ce mode est activé, la vitesse du mode
VENTILATEUR est FAIBLE et non réglable. Le mode SLEEP peut être annulé
en appuyant sur le bouton.
10. Bouton POWER : appuyez sur cette touche pour allumer et éteindre
l’appareil.
50

II. Instructions pour la télécommande
1) Le panneau de contrôle de la télécommande se présente comme
suit :
III. Plusieurs fonctions de protection
3.1 Fonction de protection contre le gel :
En mode refroidissement, déshumidication ou éco, si la tempéra
ture du tuyau d’évacuation est trop basse, la machine se met auto
matiquement en mode protection ; si la température du tuyau
d’évacuation atteint de nouveau une certaine température,
l’appareil revient à la normale.
3.2 Fonction de protection antidébordement :
En mode refroidissement, déshumidication ou éco, si la tempéra
ture du tuyau d’évacuation est trop basse, la machine se met auto
matiquement en mode protection ; si la température du tuyau
d’évacuation atteint de nouveau une certaine température,
l’appareil revient à la normale.
3.3 Fonction de protection du compresseur :
Pour augmenter la durée de vie du compresseur, ce dernier
possède une fonction de protection au redémarrage avec un délai
de 3 minutes après l’arrêt du compresseur.
51

V. Instructions pour la vidange
1. Vidange manuelle :
1) Si la machine s’arrête car le réservoir d’eau est rempli, désactivez-la
et débranchez la che.
Remarques : déplacez la machine avec prudence an d’éviter que l’eau du
réservoir ne se déverse au fond de l’appareil.
2) Placez un récipient sous l’évacuation d’eau latérale située à l’arrière
de l’appareil.
3) Dévissez le cache de vidange et retirez le bouchon d’eau ; l’eau
commence automatiquement à couler dans le réservoir d’eau.
Remarques :
1. Conservez en lieu sûr le cache de l’orice de vidange et le bouchon
d’eau.
2. Pendant la vidange, le boîtier peut être légèrement incliné vers l’arrière.
3. Si le récipient d’eau ne peut pas accueillir toute l’eau, bouchez la sortie
d’eau à l’aide du bouchon d’eau dès que possible pour éviter que l’eau ne
déborde du récipient et ne se déverse sur le sol ou sur la moquette.
4) Une fois que l’eau a été évacuée, remettez le bouchon d’eau et
serrez le cache sur l’orice de vidange.
Remarques : 1. Redémarrez la machine une fois que le bouchon d’eau et
le cache de vidange ont été installés ; sinon, l’eau de condensation de la
machine se déversera sur le sol ou la moquette.
52

2. Vidange en continu (s’applique seulement aux modes refroidisse
ment et déshumidication), comme illustré sur la gure suivante :
1) Retirez la che de la prise.
2) Placez le tuyau de vidange dans la sortie d’eau.
3) Mettez le tuyau de vidange dans le seau
VI. Entretien
Entretien : éteignez la machine et retirez la che de la prise avant de
faire l’entretien ou le nettoyage.
1. Nettoyez la surface
Nettoyez la surface de la machine avec un chiffon doux et humide.
N’utilisez pas de substances chimiques comme du benzène, de
l’alcool, de l’essence, etc. ; sinon, vous risquez d’endommager la
surface extérieure ou l’ensemble du climatiseur.
2. Nettoyez la grille du ltre
Si la grille du ltre est bouchée par de la poussière, réduisant l’ef
cacité du climatiseur, vous devez la nettoyer toutes les deux
semaines.
53

2.1: Nettoyez le châssis supérieur de la grille du ltre
1) Saisissez le bloc de calage du châssis du ltre EVA à deux mains. De
l’extérieur, appuyez vers le bas et retirez le châssis du ltre EVA. Dévissez les
quatre vis maintenant le ltre EVA et le capot arrière pour retirer le ltre EVA
(comme illustré dans la gure ci-dessus).
2) Immergez la grille du ltre EVA dans de l’eau chaude avec un détergent
neutre (environ 40 °C / 104 °F). Ensuite, rincez-le et laissez-le sécher à
l’ombre.
2.2: Nettoyez le châssis inférieur de la grille du ltre
1) Saisissez la poignée du châssis inférieur et tirez-la vers l’extérieur pour
retirer le châssis.
2) Immergez la grille du ltre EVA dans de l’eau chaude avec un détergent
neutre (environ 40 °C / 104 °F). Ensuite, rincez-le et laissez-le sécher à
l’ombre.
54

Rangement de l’appareil hors saison :
• Retirez la che de la prise et vidangez l’eau du réservoir d’eau dans
d’autres récipients ou inclinez directement l’appareil pour évacuer l’eau
dans une autre évacuation.
• Allumez l’appareil, réglez-le sur le mode ventilation à vitesse faible, et
laissez l’appareil fonctionner dans cet état jusqu’à ce que le tuyau de
vidange soit sec, de manière à garder sec l’intérieur de l’appareil et
d’éviter la formation de moisissures.
• Éteignez l’appareil, retirez le bouchon d’eau et enroulez le cordon
d’alimentation autour de la patte prévue à cet effet ; mettez en place le
bouchon d’eau et le cache de vidange.
• Retirez le tuyau d’évacuation et rangez-le dans un endroit adapté.
• Recouvrez le climatiseur d’un sac en plastique. Placez le climatiseur
dans un endroit sec, hors de portée des enfants et prenez des mesures
pour le protéger contre la poussière.
• Retirez les piles de la télécommande et gardez-les en lieu sûr.
Remarque : assurez-vous que l’appareil est placé dans un endroit sec et
rangez tous ses composants en lieu sûr.
VII. Résoudre des problèmes
Vous ne pouvez pas réparer ou démonter le climatiseur vous-même. Toute
réparation effectuée par une personne non qualiée entraîne la perte de la
garantie et peut blesser des utilisateurs ou endommager des biens matériels.
Si vous rencontrez un problème qui ne gure pas dans le tableau, ou si les
solutions conseillées ne fonctionnent pas, veuillez contacter un réparateur
professionnel.
55

Problèmes Cause du problème Solutions
Le climatiseur ne fonctionne pas.
L’effet de refroidissement
ou de réchauffement est
insufsan
L’appareil est très bruyant. Le climatiseur n’est pas
Il n’y a pas d’électricité.
L’indicateur de déborde-
ment afche le message
« FL ».
La température ambiante
est trop élevée ou trop
basse.
La machine est exposée
à la lumière directe du
soleil.
Des portes ou des fenêtres sont ouvertes ; il y a
beaucoup de personnes
dans la pièce ; en mode
refroidissement, d’autres
sources de chaleur sont
présentes.
La grille du ltre est sale.
placé sur une surface
plane.
Branchez le climatiseur
sur une prise de courant
et allumez-le.
Drainez l’eau qui se trouve à l’intérieur.
Utilisez la machine à une
température comprise entre 7 et 35 °C (44-95 °F).
Fermez les rideaux.
Fermez toutes les portes
et les fenêtres et ajoutez
un nouveau climatiseur.
Nettoyez ou remplacez la
grille du ltre.
Placez le climatiseur sur
une surface plane et dure
(pour réduire le bruit).
Le compresseur ne fonctionne pas.
La télécommande ne
fonctionne pas.
56
La sécurité antisurchauffe
s’est mise en marche.
La télécommande est trop
éloignée de l’appareil.
La télécommande n’est
pas orientée vers le
récepteur de la télécommande.
Les piles sont vides.
Attendez 3 minutes jusqu’à ce que la température ait diminué et redémarrez la machine.
Rapprochez la télécommande du climatiseur
et assurez-vous que la
télécommande pointe directement vers l’appareil.
Remplacez les piles.

L’écran afche le message
« E1 ».
L’écran afche le message
« E2 ».
Le capteur de température du tuyau ne fonctionne
pas correctement.
Le capteur de température du tuyau ne fonctionne
pas correctement.
VIII.Annexe
Informations sur les fusibles
Type : FSD ou 50F
Tension : 250V
Intensité : 3.15A
Schéma
Contrôlez le capteur de
température ambiante et
les circuits associés.
Contrôlez le capteur de
température du tuyau et
les circuits associés.
Vous retrouverez tous les paramètres techniques et spéciques sur la plaque
signalétique du produit. Dans le cadre du développement continu de nos
produits, nous nous réservons le droit de modier une conception sans
avertissement préalable.
Gestion des déchets : ne jetez pas la machine avec d’autres déchets non triés. Les déchets de ce type doivent
être placés séparément an de subir un traitement
spécique.
57
IX. Explication du symbole
Elimination dans l’UE, ce symbole
indique que ce produit ne peut pas
être éliminé avec les déchets ménagers ordinaires. Les vieux équipements
contiennent des matériaux précieux qui
peuvent et doivent être recyclés an de
prévenir tout effet néfaste sur la santé
et l’environnement causé par la collecte
non réglementée des déchets. Assurez-vous d’apporter l’équipement usagé
à un point de collecte désigné ou communiquez avec l’entreprise où vous avez
acheté la machine. Ils peuvent s’assurer
que le plus grand nombre possible de
composants peuvent être recyclés.
Comme le produit contient une pile, ce
symbole signie que le produit ne doit
pas être jeté avec vos autres déchets
ménagers. Il est de votre responsabilité
de vous débarrasser de vos équipe-
ments usagés séparément du ux de
déchets municipaux.
58
Ce symbole signie que le produit est
hautement inammable. Ceci est dû au
gaz R290 utilisé à l’intérieur du produit.

Ce symbole est destiné à indiquer que
le produit est conforme à la conformité
européenne.
Ce symbole est destiné à informer
l’utilisateur qu’il doit lire le
manuel d’utilisation.
Ce symbole est destiné à informer
l’utilisateur qu’il doit lire le
manuel d’installation.
Ce symbole indique que les réparations
de ce produit doivent être effectuées
par un centre de service agréé et strictement selon les instructions du fabricant.
59
 Loading...