

Page 1

F-Secure Policy
Manager 8.0
Administrator’s Guide
Page 2

"F-Secure" and the triangle symbol are registered trademarks of F-Secure Corporation and FSecure product names and symbols/logos are either trademarks or registered trademarks of FSecure Corporation. All product names referenced herein are trademarks or registered
trademarks of their respective companies. F-Secure Corporation disclaims proprietary interest in
the marks and names of others. Although F-Secure Corporation makes every effort to ensure that
this information is accurate, F-Secure Corporation will not be liable for any errors or omission of
facts contained herein. F-Secure Corporation reserves the right to modify specifications cited in
this document without prior notice.
Companies, names and data used in examples herein are fictitious unless otherwise noted. No
part of this document may be reproduced or transmitted in any form or by any means, electronic or
mechanical, for any purpose, without the express written permission of F-Secure Corporation.
This product may be covered by one or more F-Secure patents, including the following:
GB2353372 GB2366691 GB2366692 GB2366693 GB2367933 GB2368233
GB2374260
Copyright © 2008 F-Secure Corporation. All rights reserved.12000013-7A12
Page 3

Contents
About This Guide 9
Overview ............................................................................................................................ 10
How This Guide is Organized ............................................................................................ 11
Conventions Used in F-Secure Guides .............................................................................. 13
Symbols .................................................................................................................... 13
Chapter 1 Introduction 15
1.1 Overview .................................................................................................................... 16
1.2 Installation Order........................................................................................................17
1.3 Features .....................................................................................................................18
1.4 Policy-Based Management ........................................................................................19
1.4.1 Management Information Base ............................................................ 21
Chapter 2 System Requirements 23
2.1 F-Secure Policy Manager Server ...............................................................................24
2.2 F-Secure Policy Manager Console ............................................................................ 25
Chapter 3 Installing F-Secure Policy Manager Server 26
3.1 Overview .................................................................................................................... 27
3.2 Security Issues........................................................................................................... 28
3.2.1 Installing F-Secure Policy Manager in High Security Environments ...... 28
3.3 Installation Steps........................................................................................................34
3.4 Configuring F-Secure Policy Manager Server............................................................ 47
iii
Page 4

3.4.1 Changing the Communication Directory Path ....................................... 47
3.4.2 Changing the Ports Where the Server Listens for Requests ................. 48
3.4.3 F-Secure Policy Manager Server Configuration Settings ...................... 49
3.5 Uninstalling F-Secure Policy Manager Server ........................................................... 54
Chapter 4 Installing F-Secure Policy Manager Console 56
4.1 Overview .................................................................................................................... 57
4.2 Installation Steps........................................................................................................57
4.3 Uninstalling F-Secure Policy Manager Console.........................................................73
Chapter 5 Using F-Secure Policy Manager Console 74
5.1 Overview .................................................................................................................... 75
5.2 F-Secure Policy Manager Console Basics ................................................................. 76
5.2.1 Logging In ........................................................................................... 77
5.2.2 F-Secure Client Security Management ................................................. 80
5.2.3 The Advanced Mode User Interface ..................................................... 81
5.2.4 Policy Domain Pane ............................................................................ 82
5.2.5 Properties Pane................................................................................... 82
5.2.6 Product View Pane .............................................................................. 83
5.2.7 Messages Pane................................................................................... 90
5.2.8 The Toolbar......................................................................................... 90
5.2.9 Menu Commands ................................................................................ 92
5.3 Managing Domains and Hosts ................................................................................... 94
5.3.1 Adding Policy Domains ........................................................................ 96
5.3.2 Adding Hosts ....................................................................................... 97
5.3.3 Host Properties ................................................................................. 102
5.4 Software Distribution ................................................................................................ 104
5.4.1 F-Secure Push Installations ............................................................... 106
5.4.2 Policy-Based Installation ................................................................... 112
5.4.3 Local Installation and Updates with Pre-Configured Packages ........... 116
5.4.4 Information Delivery .......................................................................... 120
5.5 Managing Policies .................................................................................................... 120
5.5.1 Settings............................................................................................. 121
5.5.2 Restrictions ....................................................................................... 121
5.5.3 Saving the Current Policy Data .......................................................... 123
5.5.4 Distributing Policy Files ..................................................................... 123
iv
Page 5

5.5.5 Policy Inheritance .............................................................................. 123
5.6 Managing Operations and Tasks ............................................................................. 126
5.7 Alerting .....................................................................................................................126
5.7.1 Viewing Alerts and Reports................................................................ 126
5.7.2 Configuring Alert Forwarding ............................................................. 128
5.8 Reporting Tool.......................................................................................................... 129
5.8.1 Policy Domain / Host Selector Pane................................................... 130
5.8.2 Report Type Selector Pane................................................................ 131
5.8.3 Report Pane ...................................................................................... 132
5.8.4 Bottom Pane ..................................................................................... 133
5.9 Preferences..............................................................................................................133
5.9.1 Connection-Specific Preferences ....................................................... 134
5.9.2 Shared Preferences........................................................................... 137
Chapter 6 Maintaining F-Secure Policy Manager Server 139
6.1 Overview .................................................................................................................. 140
6.2 Backing Up & Restoring F-Secure Policy Manager Console Data........................... 140
6.3 Replicating Software Using Image Files .................................................................. 143
Chapter 7 Updating F-Secure Virus Definition Databases 145
7.1 Automatic Updates with F-Secure Automatic Update Agent.................................... 146
7.2 Using the Automatic Update Agent ..........................................................................148
7.2.1 Configuration..................................................................................... 148
7.2.2 How to Read the Log File .................................................................. 149
7.3 Forcing the Update Agent to Check for New Updates Immediately.........................153
7.4 Updating the Databases Manually ...........................................................................153
7.5 Troubleshooting ....................................................................................................... 154
Chapter 8 F-Secure Policy Manager on Linux 155
8.1 Overview .................................................................................................................. 156
8.1.1 Differences Between Windows and Linux........................................... 156
8.1.2 Supported Distributions ..................................................................... 156
8.2 Installation ................................................................................................................ 157
8.2.1 Installing F-Secure Automatic Update Agent ...................................... 157
v
Page 6

8.2.2 Installing F-Secure Policy Manager Server ........................................ 158
8.2.3 Installing F-Secure Policy Manager Console ...................................... 159
8.2.4 Installing F-Secure Policy Manager Web Reporting............................ 160
8.3 Configuration............................................................................................................ 161
8.4 Uninstallation............................................................................................................ 161
8.4.1 Uninstalling F-Secure Policy Manager Web Reporting........................ 161
8.4.2 Uninstalling F-Secure Policy Manager Console .................................. 162
8.4.3 Uninstalling F-Secure Policy Manager Server .................................... 162
8.4.4 Uninstalling F-Secure Automatic Update Agent .................................. 163
8.5 Frequently Asked Questions .................................................................................... 163
Chapter 9 Web Reporting 168
9.1 Overview .................................................................................................................. 169
9.2 Introduction .............................................................................................................. 169
9.3 Web Reporting Client System Requirements........................................................... 170
9.4 Generating and Viewing Reports .............................................................................170
9.4.1 Required Browser Settings for Viewing Web Reports ......................... 170
9.4.2 Generating a Report .......................................................................... 171
9.4.3 Creating a Printable Report ............................................................... 173
9.4.4 Generating a Specific URL for Automated Report Generation ............ 173
9.5 Maintaining Web Reporting...................................................................................... 174
9.5.1 Disabling Web Reporting ................................................................... 174
9.5.2 Enabling Web Reporting .................................................................... 174
9.5.3 Restricting or Allowing Wider Access to Web Reports ........................ 175
9.5.4 Changing the Web Reporting Port...................................................... 176
9.5.5 Creating a Backup Copy of the Web Reporting Database................... 177
9.5.6 Restoring the Web Reporting Database from a Backup Copy ............. 177
9.5.7 Changing the Maximum Data Storage Time in the Web Reporting
Database .......................................................................................... 178
9.6 Web Reporting Error Messages and Troubleshooting ............................................. 179
9.6.1 Error Messages ................................................................................. 179
9.6.2 Troubleshooting................................................................................. 180
Chapter 10 F-Secure Policy Manager Proxy 182
10.1 Overview .................................................................................................................. 183
vi
Page 7

Chapter 11 Troubleshooting 184
11.1 Overview .................................................................................................................. 185
11.2 F-Secure Policy Manager Server and Console........................................................185
11.3 F-Secure Policy Manager Web Reporting................................................................ 190
11.4 Policy Distribution.....................................................................................................191
Appendix A SNMP Support 193
A.1 Overview ................................................................................................................. 194
A.1.1 SNMP Support for F-Secure Management Agent ........................................194
A.2 Installing F-Secure Management Agent with SNMP Support ..................................195
A.2.1 F-Secure SNMP Management Extension Installation ..................................195
A.3 Configuring The SNMP Master Agent...................................................................... 196
A.4 Management Information Base ................................................................................ 197
Appendix B Ilaunchr Error Codes 198
B.1 Overview ................................................................................................................. 199
B.2 Error Codes.............................................................................................................. 200
Appendix C FSII Remote Installation Error Codes 203
C.1 Overview ................................................................................................................. 204
C.2 Windows Error Codes .............................................................................................. 204
C.3 Error Messages........................................................................................................205
Appendix D NSC Notation for Netmasks 207
D.1 Overview ................................................................................................................. 208
Technical Support 210
Overview .......................................................................................................................... 211
Web Club ......................................................................................................................... 211
Virus Descriptions on the Web................................................................................ 211
Advanced Technical Support ........................................................................................... 211
F-Secure Technical Product Training ............................................................................... 212
Training Program .................................................................................................... 212
vii
Page 8

Contact Information................................................................................................. 213
Glossary 214
About F-Secure Corporation
viii
Page 9

ABOUT THIS GUIDE
Overview.................................................................................... 10
How This Guide is Organized..................................................... 11
9
Page 10

10
Overview
F-Secure Policy Manager provides tools for administering the following
F-Secure software products:
F-Secure Client Security
F-Secure Internet Gatekeeper for Windows
F-Secure Anti-Virus for
Windows Workstations
Windows Servers
Citrix Servers
Microsoft Exchange
MIMEsweeper
F-Secure Linux Security
F-Secure Linux Client Security
F-Secure Linux Server Security
F-Secure Policy Manager Proxy.
Page 11

How This Guide is Organized
The F-Secure Policy Manager Administrator’s Guide is divided into the
following chapters.
Chapter 1. Introduction. Describes the architecture and components of
the policy-based management.
Chapter 2. System Requirements. Defines the software and hardware
requirement for F-Secure Policy Manager Console and F-Secure Policy
Manager Server.
Chapter 3. Installing F-Secure Policy Manager Server. Covers the
installation of F-Secure Policy Manager Server on the server machine.
Chapter 4. Installing F-Secure Policy Manager Console. Covers the
installation of F-Secure Policy Manager Console applications on the
administrator’s workstation.
Chapter 5. Using F-Secure Policy Manager Console. Includes an
overview, setup procedures, the logon procedure, menu commands, and
basic tasks.
Chapter 6. Maintaining F-Secure Policy Manager Server. Covers backup
procedures and restoration routines.
About This Guide 11
Chapter 7. Updating F-Secure Virus Definition Databases. Describes the
various ways you can update your virus definition databases.
Chapter 8. F-Secure Policy Manager on Linux. Describes how to install
and manage F-Secure Policy Manager on Linux.
Chapter 9. Web Reporting. Describes how to use F-Secure Policy
Manager Web Reporting, a new enterprise-wide graphical reporting
system included in F-Secure Policy Manager Server.
Chapter 10. F-Secure Policy Manager Proxy. Contains a brief
introduction into F-Secure Policy Manager Proxy.
Chapter 11. Troubleshooting. Contains troubleshooting information and
frequently asked questions.
Appendix A. SNMP Support. Contains information about SNMP support.
Appendix B. Ilaunchr Error Codes. Contains a list of Ilaunchr error codes.
Page 12

12
Appendix C. FSII Remote Installation Error Codes. Describes the most
common error codes and messages that can occur during the
Autodiscover Windows Hosts operation.
Appendix D. NSC Notation for Netmasks. Defines and offers information
on NSC notation for Netmasks.
Glossary — Explanation of terms
Technical Support — Web Club and contact information for assistance.
About F-Secure Corporation — Company background and products.
Page 13
Conventions Used in F-Secure Guides
This section describes the symbols, fonts, and terminology used in this
manual.
Symbols
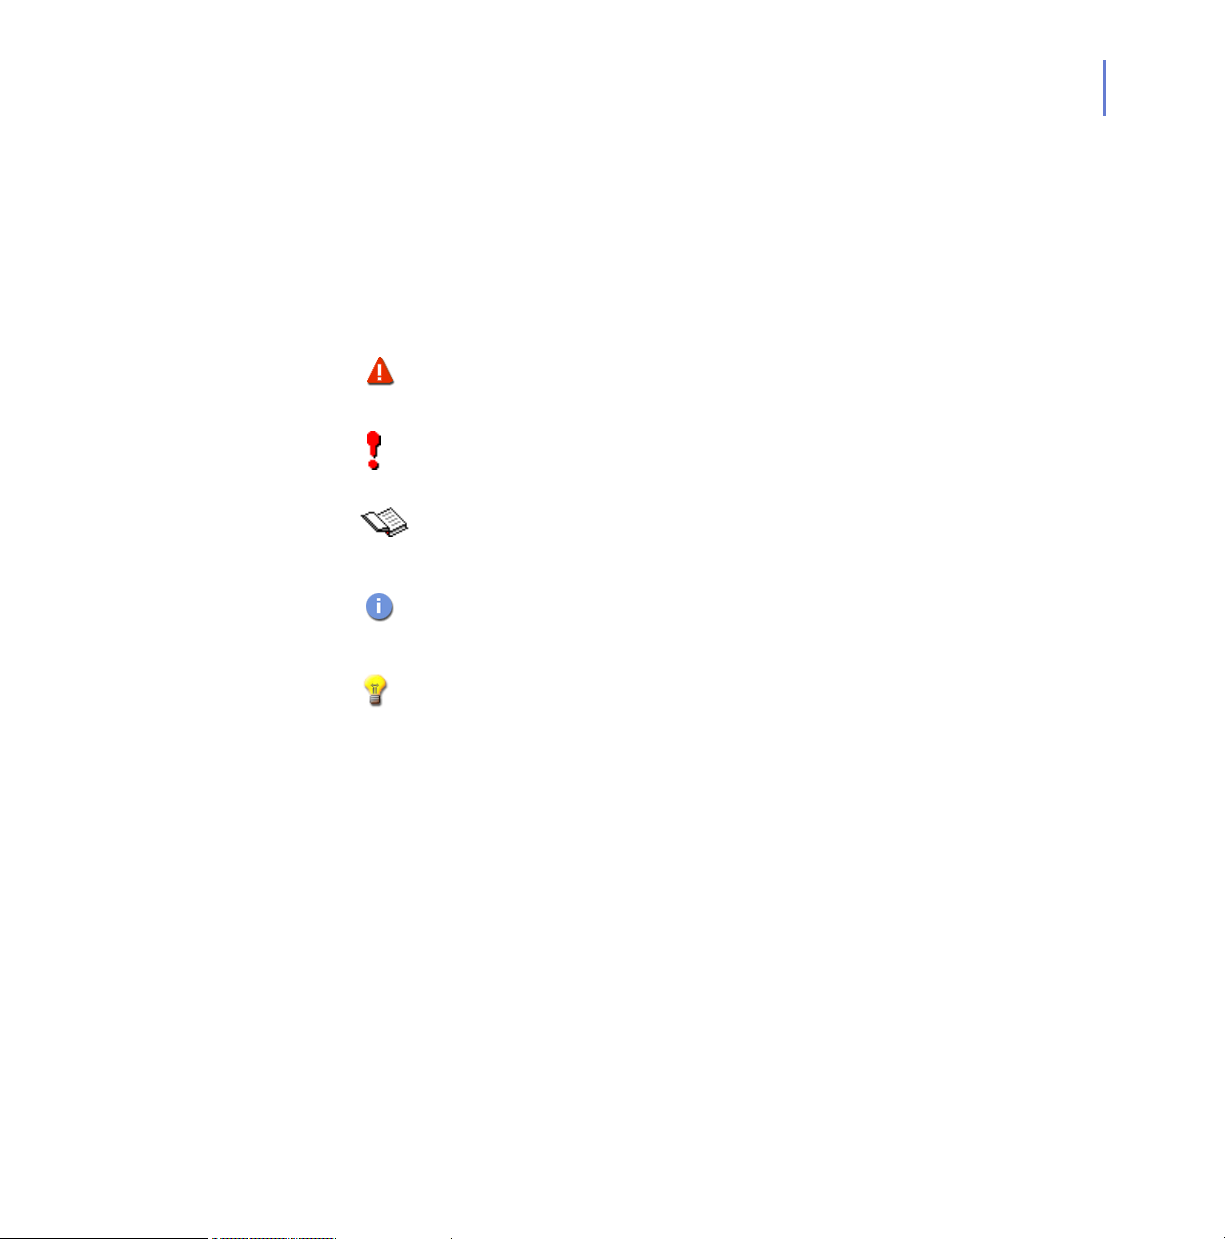
WARNING: The warning symbol indicates a situation with a
risk of irreversible destruction to data.
IMPORTANT: An exclamation mark provides important information
that you need to consider.
REFERENCE - A book refers you to related information on the
topic available in another document.
NOTE - A note provides additional information that you should
consider.
l
13
Fonts
TIP - A tip provides information that can help you perform a task
more quickly or easily.
⇒ An arrow indicates a one-step procedure.
Arial bold (blue) is used to refer to menu names and commands, to
buttons and other items in a dialog box.
Arial Italics (blue) is used to refer to other chapters in the manual, book
titles, and titles of other manuals.
Arial Italics (black) is used for file and folder names, for figure and table
captions, and for directory tree names.
Courier New is used for messages on your computer screen.
Page 14

14
Courier New bold is used for information that you must type.
SMALL CAPS (BLACK) is used for a key or key combination on your
keyboard.
PDF Document
For More Information
Arial underlined (blue)
Arial italics is used for window and dialog box names.
This manual is provided in PDF (Portable Document Format). The PDF
document can be used for online viewing and printing using Adobe®
Acrobat® Reader. When printing the manual, please print the entire
manual, including the copyright and disclaimer statements.
Visit F-Secure at http://www.f-secure.com for documentation, training
courses, downloads, and service and support contacts.
In our constant attempts to improve our documentation, we would
welcome your feedback. If you have any questions, comments, or
suggestions about this or any other F-Secure document, please contact
us at documentation@f-secure.com
is used for user interface links.
.
Page 15

1
INTRODUCTION
Overview..................................................................................... 16
Installation Order ........................................................................ 17
Features ..................................................................................... 18
Policy-Based Management......................................................... 19
15
Page 16

16
1.1 Overview
Main Components of F-Secure Policy Manager
F-Secure Policy Manager provides a scalable way to manage the security
of numerous applications on multiple operating systems, from one central
location. It can be used to keep security software up-to-date, manage
configurations, oversee enterprise compliance, and can be scaled to
handle even the largest, most mobile workforce. F-Secure Policy
Manager provides a tightly integrated infrastructure for defining security
policies, distributing policies and installing application software to local as
well as remote systems, and monitoring the activities of all systems in the
enterprise to ensure compliance with corporate policies and centralized
control.
The power of the F-Secure Policy Manager lays in the F-Secure
management architecture, which provides high scalability for a widely
distributed, mobile workforce. F-Secure Policy Manager is comprised of
F-Secure Policy Manager Console and F-Secure Policy Manager Server.
They are seamlessly integrated with the F-Secure Management Agent
that handles all management functions on local hosts.
F-Secure Policy Manager Console provides a centralized management
console for the security of the managed hosts in the network. It enables
the administrator to organize the network into logical units for sharing
policies. These policies are defined in F-Secure Policy Manager Console
and then distributed to the workstations through the F-Secure Policy
Manager Server. F-Secure Policy Manager Console is a Java-based
application that can be run on several different platforms. It can be used
to remotely install the Management Agent on other workstations without
the need for local login scripts, restarting, or any intervention by the end
user.
F-Secure Policy Manager Server is the repository for policies and
software packages distributed by the administrator, and status information
and alerts sent by the managed hosts. It provides scalability by working
as an extension to the Apache web server. Communication between
Page 17

CHAPTER 1 17
Introduction
F-Secure Policy Manager Server and the managed hosts is accomplished
through the standard HTTP protocol, which ensures trouble-free
performance on the LAN and WAN.
F-Secure Policy Manager Web Reporting is an enterprise-wide web
based graphical reporting system included in F-Secure Policy Manager
Server. With F-Secure Policy Manager Web Reporting you can quickly
create graphical reports based on historical trend data, identify computers
that are unprotected or vulnerable to virus outbreaks.
F-Secure Policy Manager Update Server & Agent are used for
updating virus and spyware definitions on the managed hosts. F-Secure
Automatic Update Agent allows users to receive automatic updates and
informational content without interrupting their work to wait for files to
download from the Web. F-Secure Automatic Update Agent downloads
files automatically in the background using bandwidth not being used by
other Internet applications, so the users can always be sure they will have
the latest updates without having to search the Web. If F-Secure
Automatic Update Agent is always connected to the Internet, it will
automatically receive new virus definition updates within about two hours
after they have been published by F-Secure.
F-Secure Management Agent enforces the security policies set by the
administrator on the managed hosts, and provides the end user with a
user interface and other services. It handles all management functions on
the local workstations and provides a common interface for all F-Secure
applications, and operates within the policy-based management
infrastructure.
1.2 Installation Order
To install F-Secure Policy Manager, please follow this installation order
(unless you are installing F-Secure Policy Manager Server and F-Secure
Policy Manager Console on the same machine, in which case setup
installs all components during the same installation process):
1. F-Secure Policy Manager Server and F-Secure Policy Manager
Update Server & Agent,
2. F-Secure Policy Manager Console,
Page 18

18
1.3 Features
Software Distribution
3. Managed point applications.
First-time installation on Windows domains with F-Secure Push
Installation.
Updating of executable files and data files, including virus
definition databases.
Support for policy-based updates. Policies force the F-Secure
Management Agent to perform updates on a host. Both policies
and software packages are signed, making the entire update
process strongly authenticated and secure.
Updates can be provided in several ways:
From the F-Secure CD.
From the F-Secure Web site to the customer. These can be
automatically ‘pushed’ by F-Secure Automatic Update Agent,
or voluntarily ‘pulled’ from the F-Secure website.
F-Secure Policy Manager Console can be used to export
pre-configured installation packages, which can also be delivered
using third-party software, such as SMS, and similar tools.
Configuration and Policy Management
Centralized configuration of security policies. The policies are
distributed from F-Secure Policy Manager Server by the
administrator to the user’s workstation. Integrity of the policies is
ensured through the use of digital signatures.
Page 19

Event Management
Reporting through the Management API to the Event Viewer
(local and remote logs), SNMP agent, e-mail, report files, etc.
Event redirection through policies.
Event statistics.
Performance Management
Statistics and performance data handling and reporting.
Task Management
Management of virus scanning tasks and other operations.
1.4 Policy-Based Management
A security policy is a set of well-defined rules that regulate how sensitive
information and other resources are managed, protected, and distributed.
The management architecture of F-Secure software uses policies that are
centrally configured by the administrator for optimum control of security in
a corporate environment. Policy-based management implements many
functions:
CHAPTER 1 19
Introduction
Remotely controlling and monitoring the behavior of the products
Monitoring statistics provided by the products and the
Management Agent
Remotely starting predefined operations
Transmission of alerts and notifications from the products to the
system administrator
Page 20

20
The information flow between F-Secure Policy Manager Console and the
hosts is accomplished by transferring policy files. There are three kinds of
policy files:
Default Policy files (.dpf)
Base Policy files (.bpf)
Incremental Policy files (.ipf)
The current settings of a product consist of all three policy file types:
Default Policy Files
The Default Policy file contains the default values (the factory settings) for
a single product that are installed by the setup. Default policies are used
only on the host. If neither the Base Policy file nor the Incremental Policy
file contains an entry for a variable, then the value is taken from the
Default Policy file. New product versions get new versions of the Default
Policy file.
Base Policy Files
Base Policy files contain the administrative settings and restrictions for all
the variables for all F-Secure products on a specific host (With domain
level policies, a group of hosts may share the same file). A Base Policy
file is signed by F-Secure Policy Manager Console, protecting the file
against changes while it is passing through the network and while it is
stored in the host’s file system. These files are sent from F-Secure Policy
Manager Console to the F-Secure Policy Manager Server. The host
periodically polls for new policies created by F-Secure Policy Manager
Console.
Incremental Policy Files
Incremental Policy files are used to store local changes to the Base
Policy. Only changes that fall within the limits specified in the Base Policy
are allowed. The Incremental Policy files are then periodically sent to
F-Secure Policy Manager Console so that current settings and statistics
can be viewed by the administrator.
Page 21

1.4.1 Management Information Base
The Management Information Base (MIB) is a hierarchical management
data structure used in the Simple Network Management Protocol
(SNMP). In F-Secure Policy Manager, the MIB structure is used for
defining the contents of the policy files. Each variable has an Object
Identifier (OID) and a value that can be accessed using the Policy API. In
addition to basic SNMP MIB definitions, the F-Secure MIB concept
includes many extensions that are needed for complete policy-based
management.
The following categories are defined in a product’s MIB:
Settings Used to manage the workstation in the manner
of an SNMP. The managed products must
operate within the limits specified here.
Statistics Delivers product statistics to F-Secure Policy
Manager Console.
Operations Operations are handled with two policy
variables: (1) a variable for transferring the
operation identifier to the host, and (2) a variable
for informing F-Secure Policy Manager Console
about the operations that were performed. The
second variable is transferred using normal
statistics; it acknowledges all previous
operations at one time. A custom editor for
editing operations is associated with the
subtree; the editor hides the two variables.
CHAPTER 1 21
Introduction
Private The management concept MIBs may also
contain variables which the product stores for its
internal use between sessions. This way, the
product does not need to rely on external
services such as Windows registry files.
Page 22

22
Traps Traps are the messages (including alerts and
events) that are sent to the local console, log
file, remote administration process, etc. The
following types of traps are sent by most of the
F-Secure products:
Info. Normal operating information from a host.
Warning. A warning from the host.
Error. A recoverable error on the host.
Fatal error. An unrecoverable error on the host.
Security alert. A security hazard on the host.
Page 23

2
SYSTEM REQUIREMENTS
F-Secure Policy Manager Server ............................................... 24
F-Secure Policy Manager Console............................................. 25
23
Page 24

24
2.1 F-Secure Policy Manager Server
In order to install F-Secure Policy Manager Server, your system must
meet the following minimum requirements:
Operating system: Microsoft Windows:
Microsoft Windows 2000 Server (SP 4 or higher)
Windows 2003 Server (32- and 64-bit)
Windows 2008 Server (32- and 64-bit)
Linux:
Red Hat Enterprise Linux 3, 4 and 5
openSUSE Linux 10.3
SUSE Linux Enterprise Server 9 and 10
SUSE Linux Enterprise Desktop 10
Debian GNU Linux Etch 4.0
Ubuntu 8.04 Hardy
Processor: Intel Pentium III 450 MHz processor or faster.
Managing more than 5000 hosts or using Web
Reporting requires Intel Pentium III 1 GHz level
processor or faster.
Memory: 256 MB RAM
When Web Reporting is enabled, 512 MB RAM.
Disk space: Disk space: 200 MB of free hard disk space; 500
MB or more is recommended. The disk space
requirements depend on the size of the
installation.
In addition to this it is recommended to allocate
about 1 MB per host for alerts and policies. The
actual disk space consumption per host is hard
to anticipate, since it depends on how the
policies are used and how many installation
packages are stored.
Network: 10 Mbit network. Managing more than 5000
hosts requires a 100 Mbit network.
Page 25

2.2 F-Secure Policy Manager Console
In order to install F-Secure Policy Manager Console, your system must
meet the following minimum requirements:
CHAPTER 2 25
System Requirements
Operating system:
Processor:
Memory:
Disk space:
Display:
Network:
Microsoft Windows:
Microsoft Windows 2000 Professional (SP4 or
higher)
Windows XP Professional (SP2 or higher)
Windows Vista (32- and 64-bit)
Windows 2000 Server SP4
Windows 2003 Server (32- and 64-bit).
Windows 2008 Server (32- and 64-bit).
Linux:
Red Hat Enterprise Linux 3, 4 and 5
openSUSE Linux 10.3
SUSE Linux Enterprise Server 9 and 10
SUSE Linux Enterprise Desktop 10
Debian GNU Linux Etch 4.0
Ubuntu 8.04 Hardy
Intel Pentium III 450 MHz processor or faster.
Managing more than 5000 hosts requires
Pentium III 750 MHz processor or faster.
256 MB of RAM. Managing more than 5000
hosts requires 512MB of memory.
100 MB of free hard disk space.
Minimum 256-color display with resolution of
1024x768 (32-bit color with 1280x960 or higher
resolution recommended).
Ethernet network interface or equivalent.
10 Mbit network between console and server is
recommended. Managing more than 5000 hosts
requires 100Mbit connection between console
and server.
Page 26

3
INSTALLING F-SECURE
P
OLICY MANAGER
ERVER
S
Overview..................................................................................... 27
Security Issues ........................................................................... 28
Installation Steps ........................................................................ 34
Uninstalling F-Secure Policy Manager Server............................ 54
26
Page 27

3.1 Overview
CHAPTER 3 27
Installing F-Secure Policy Manager Server
The following are advanced instructions for installing F-Secure
Policy Manager Server on a machine dedicated only to the Server.
F-Secure Policy Manager Server can also be installed on the same
machine as F-Secure Policy Manager Console.
F-Secure Policy Manager Server is the link between F-Secure Policy
Manager Console and the managed hosts and acts as the repository for
policies and software packages distributed by the administrator, as well
as status information and alerts sent by the managed hosts.
Communication between F-Secure Policy Manager Server and other
components can be achieved through the standard HTTP protocol, which
ensures trouble-free performance on LAN and global networks.
The information stored by F-Secure Policy Manager Server includes the
following files:
Policy Domain Structure.
Policy Data, which is the actual policy information attached to
each policy domain or host.
Base Policy files generated from the policy data.
Status Information, including incremental policy files, alerts, and
reports.
Autoregistration requests sent by the hosts.
Host certificates.
Security News received from F-Secure.
Product installation and virus definition database update
packages.
The Web Reporting component stores statistics and historical
trend data about the hosts.
Page 28

28
3.2 Security Issues
F-Secure Policy Manager Server utilizes Apache Web Server technology,
and even though we do the utmost to deliver a secure and up-to-date
technology we advise you to regularly consult the following sites from
information on Apache technology and security.
The most up to date information on security issues related to Operating
Systems and Apache web server can be found at the CERT web site:
http://www.cert.org.
A document containing advice on how to secure an installation of the
Apache web server is available at http://www.apache.org/docs/misc/
security_tips.html. and a list of vulnerabilities at
http://www.apacheweek.com/features/security-13
The release notes contain important information about installation
and security. Read these notes carefully!
3.2.1 Installing F-Secure Policy Manager in High Security
.
Environments
F-Secure Policy Manager is designed to be used in internal corporate
networks mainly for managing F-Secure Anti-Virus products. F-Secure
does not recommend using F-Secure Policy Manager over public
networks such as Internet.
IMPORTANT: When installing F-Secure Policy Manager in high
security environments, you should make sure that the
Administration port (by default port 8080) and the Host port (by
default port 80) are not visible in the Internet.
Page 29

Installing F-Secure Policy Manager Server
F-Secure Policy Manager's Built-In Security Features
F-Secure Policy Manager has built-in security features that ensure
detection of changes in the policy domain structure and policy data. More
importantly, it is impossible to deploy unauthorized changes to managed
hosts. Both these features rely on a management key pair that is
available to administrators only. These features, based on strong digital
signatures, will in most cases provide the right balance between usability
and security in most Anti-Virus installations, but the following features
may require additional configuration in high security environments:
1. By default, all users can access the Policy Manager Server in
read-only mode but are only able to view the management data. This
is a convenient way of sharing information to users who are not
allowed full administrative rights. Multiple users can keep a read-only
session open simultaneously, monitoring the system status without
affecting other administrators or managed hosts in any way.
2. To enable easy migration to new management keys, it is possible to
re-sign the policy domain structure and policy data with a newly
generated or previously existing key pair. If this is done accidentally,
or intentionally by an unauthorized user, the authorized user will
notice the change when he tries to login to F-Secure Policy Manager
the next time. In the worst case, the authorized user needs to recover
backups in order to remove the possible changes made by the
unauthorized user. In any case, the policy domain structure and
policy data changes will be detected, and there is no way to distribute
the changes to managed hosts without the correct original key pair.
Both of these features may be undesirable in a high security environment
where even seeing the management data should be restricted. The
following measures can be taken to increase the level of system security:
CHAPTER 3 29
Page 30

30
Possible different installation scenarios for high security
environments:
1. F-Secure Policy Manager Server and F-Secure Policy Manager
Console will be installed in the same machine and access to the
F-Secure Policy Manager Server will be limited only to the localhost.
After this, only the person who has physical access to the localhost
can use the F-Secure Policy Manager Console.
When access to the F-Secure Policy Manager Server is limited only
to the localhost during the installation (see Step 8. , 40), F-Secure
Setup modifies the #FSMSA listen directive in httpd.conf file as
follows:
#FSMSA listen
Listen 127.0.0.1:8080 <- Allow connections only from
localhost to PMC port 8080
2. Access to F-Secure Policy Manager Server will be limited only to the
separately defined IP addresses by editing the httpd.conf file.
If the access to port 8080 was limited only to the localhost during
the setup, you should now open the port and then define the list of
allowed IP addresses (see the Listen 8080 directive in the example
below).
Page 31

CHAPTER 3 31
Installing F-Secure Policy Manager Server
Below is an example of edited httpd.conf file section:
#FSMSA listen
Listen 8080 <- make sure that connections are not limited to
localhost only
#FSMSA port
<VirtualHost _default_:8080>
<Location /fsmsa/fsmsa.dll>
Order Deny,Allow
Deny from all <- First deny all
Allow from 127.0.0.1 <- Then allow access to the server
from local machine
Allow from 10.128.129.2 <- Allow access from the server
machine
Allow from 10.128.129.209 <- Allow access from
Administrator's workstation
SetHandler fsmsa-handler
</Location>
</VirtualHost>
After this, only the person who has access to the machines with the
defined IP addresses can use F-Secure Policy Manager Console.
3. If there is a very strong need to use F-Secure Policy Manager over a
public network (such as the Internet), it is recommended to encrypt
the connection between F-Secure Policy Manager Server and
F-Secure Policy Manager Console with a VPN or SSH type product.
As an alternative, F-Secure Policy Manager Console and F-Secure Policy
Manager Server can be installed on the same machine, and access
limited to the localhost. Remote administrator access to the F-Secure
Policy Manager Console can be arranged by using a secure remote
desktop product.
Page 32

32
Installing F-Secure Policy Manager Web Reporting in
High-Security Environments
F-Secure Policy Manager Web Reporting is designed to be used in
internal corporate networks for generating graphical reports of, for
example, F-Secure Client Security virus protection status and alerts.
F-Secure does not recommend using F-Secure Policy Manager Web
Reporting over public networks such as Internet.
Possible different installation scenarios for high security
environments:
1. Access to Web Reports is limited to localhost only during the
installation. After this, only the person who has physical access to the
localhost can use F-Secure Policy Manager Web Reporting.
When access to F-Secure Policy Manager Web Reporting is limited
only to the localhost during the installation (see , 41), F-Secure Setup
modifies the #Web Reporting listen directive in httpd.conf file as
follows:
#Web Reporting listen
Listen 127.0.0.1:8081 <- Allow connections only from
localhost to Web Reporting port 8081
2. Access to F-Secure Policy Manager Web Reporting is limited only to
the separately defined IP addresses by editing the httpd.conf file (see
below)
If the access to port 8081 was limited only to the localhost during
the setup, you should now open the port and then define the list of
allowed IP addresses (see the Listen 8081 directive in the example
below).
Page 33

CHAPTER 3 33
Installing F-Secure Policy Manager Server
Below is an example of edited httpd.conf file section, in which access
is allowed from the localhost and from one separately defined IP
address:
#Web Reporting listen
Listen 8081
# Web Reporting port:
<VirtualHost _default_:8081>
JkMount /* ajp13
ErrorDocument 500 "Policy Manager Web Reporting could not
be contacted by
the Policy Manager Server.
<Location / >
Order Deny,Allow
Deny from all <- First deny all
Allow from 127.0.0.1 <- Then allow access to Web Reporting
from the local machine
Allow from 10.128.129.209 <- Allow access from
Administrator’s workstation
</Location>
</VirtualHost>
After this, only the person who has access to the local host or the
machine with the defined IP address can use F-Secure Policy
Manager Web Reporting.
Page 34

34
3.3 Installation Steps
To install F-Secure Policy Manager Server, you need physical access to
the server machine.
Step 1. 1. Insert the F-Secure CD in your CD-ROM drive.
2. Select Corporate Use. Click Next to continue.
3. Go to the Install or Update Managed Software menu and select
F-Secure Policy Manager.
Step 2. Setup begins. View the Welcome screen, and follow the setup
instructions. Select the installation language from the drop-down menu.
Click Next to continue.
Page 35

CHAPTER 3 35
Installing F-Secure Policy Manager Server
Step 3. Read the license agreement information. If you agree, select I accept this
agreement. Click Next to continue.
Page 36

36
Step 4. If you are installing on a clean computer, select F-Secure Policy Manager
Server. Click Next to continue.
Page 37

Installing F-Secure Policy Manager Server
Step 5. Choose the destination folder. Click Next.
It is recommended to use the default installation directory. If you want to
install F-Secure Policy Manager Server in a different directory, you can
use the Browse feature.
WARNING: If you have F-Secure Management Agent installed
in the same machine you must not change the installation
directory of the F-Secure Policy Manager Server
CHAPTER 3 37
Page 38

38
Step 6. Setup requests confirmation if a previous installation of F-Secure Policy
Manager exists.
1. If Yes
2. If No
Click Next to continue.
, select I have existing F-Secure Policy Manager installation.
Enter the communication directory path of the installed F-Secure
Policy Manager. The contents of this directory will be copied under
<server installation directory>\ Communication Directory (commdir\
directory under F-Secure Policy Manager Server installation
directory), and this will be the directory that F-Secure Policy Manager
Server will use as a repository. You can use the previous commdir as
a backup, or you can delete it once you have verified that F-Secure
Policy Manager Server is correctly installed.
, select I do not have existing F-Secure Policy Manager.
This will not require a existing commdir, and will create an empty
commdir in the default location (under <F-Secure Policy Manager 5
installation directory>\commdir).
Page 39

CHAPTER 3 39
Installing F-Secure Policy Manager Server
Step 7. Select whether you want to keep the existing settings or change them.
This dialog is displayed only if a previous installation of F-Secure
Policy Manager Server was detected on the computer.
By default the setup keeps the existing settings. Select this option
if you have manually updated the F-Secure Policy Manager
Server configuration file (HTTPD.conf). This option automatically
keeps the existing administration, host and web reporting ports.
If you want to change the ports from the previous installation,
select the Change settings option. This option overwrites the
HTTPD.conf file, and restores the settings to defaults.
Page 40

40
Step 8. Select the F-Secure Policy Manager Server modules to enable:
Host module is used for communication with the hosts. The
default port is 80.
Administration module is used for communication with F-Secure
Policy Manager Console. The default HTTP port is 8080.
If you want to change the default port for communication,
you will also need to change the HTTP Port Number setting
in F-Secure Policy Manager Console.
By default the access to the Administration module is restricted to
the local machine. This is the most secure way to use the
product.
When using a connection over a network, please consider
securing the communication with F-Secure SSH.
For environments requiring maximum security, see section
Installing F-Secure Policy Manager in High Security
Environments in F-Secure Policy Manager Administrator’s
Guide.
Web Reporting module is used for communication with F-Secure
Policy Manager Web Reporting. Select whether it should be
enabled. Web Reporting uses a local socket connection to the
Admin module to fetch server data. The default port is 8081.
By default access to Web Reports is allowed also from other
computers. If you want to allow access only from this computer,
select Restrict access to the local machine.
Page 41

Click Next to continue.
CHAPTER 3 41
Installing F-Secure Policy Manager Server
Page 42

42
Step 9. Select to add product installation package(s) from the list of available
packages (if you selected F-Secure Installation Packages in Step 4 on
page 17). Click Next.
Page 43

Installing F-Secure Policy Manager Server
Step 10. Setup displays the components that will be installed. Click Next.
CHAPTER 3 43
Page 44

44
Step 11. When the setup is completed, the setup shows whether all components
were installed successfully.
Page 45

CHAPTER 3 45
Installing F-Secure Policy Manager Server
Step 12. F-Secure Policy Manager Server is now installed. Restart the computer if
you are prompted to do so. Click Finish to complete the installation.
Page 46

46
Step 13. To determine if your installation was successful, open a web browser in
the machine where F-Secure Policy Manager Server was installed, enter
http://localhost:80 (if you used the default port number during the
installation) and press
following page will be displayed.
ENTER. If the server installation was successful, the
The F-Secure Policy Manager Server starts serving hosts only after
F-Secure Policy Manager Console has initialized the
Communication directory structure, which happens automatically
when you run F-Secure Policy Manager Console for the first time.
Step 14. The setup wizard creates the user group FSPM users. The user who was
logged in and ran the installer is automatically added to this group. To
allow another user to run F-Secure Policy Manager you must manually
add this user to the user group FSPM users.
Page 47

Installing F-Secure Policy Manager Server
3.4 Configuring F-Secure Policy Manager Server
Under the conf\ directory in the Policy Manager Server installation
directory, you will find a file named httpd.conf, which contains the
configuration information for F-Secure Policy Manager Server.
After any change to the configuration, you need to stop F-Secure
Policy Manager Server, and restart it for the changes to become
active.
The F-Secure Policy Manager Web Reporting settings that can be
configured in httpd.conf are explained in
Reporting”, 174
3.4.1 Changing the Communication Directory Path
If the existing network drive on which the communication directory is
located is getting full, you can change its location by using these
instructions.
1. Choose a new network path on a drive with more space. Create the
path and ensure that the fsms_<machine wins name> user has Full
Control access rights to all the directories on the path.
2. Stop the F-Secure Policy Manager Server service.
3. Copy the whole directory structure from the old commdir path to the
new path.
4. Change the value for the CommDir and CommDir2 directives in
httpd.conf. The default configuration contains the following
configuration:
CommDir "C:\Program Files\F-Secure\Management Server
5\CommDir"
CommDir2 "C:\Program Files\F-Secure\Management Server
5\CommDir"
If you want to change the Communication Directory Location to
E:\CommDir, change the directives to reflect that configuration:
CommDir "E:\CommDir"
CommDir2 "E:\CommDir"
“Maintaining Web
CHAPTER 3 47
Page 48

48
5. Start the F-Secure Policy Manager Server service.
6. Check that everything still works.
7. Delete the old commdir files.
3.4.2 Changing the Ports Where the Server Listens for Requests
There are two directives that define the ports for both of the WebServer
Modules that constitute F-Secure Policy Manager Server: Listen and
<VirtualHost>. By default, F-Secure Policy Manager Server Admin
Module (the component that handles requests coming from Policy
Manager Console) listens in port 8080, and F-Secure Policy Manager
Server Host Module (the component that handles requests from
workstations) listens in port 80. You can, however, define what ports they
should listen in, if the defaults are not suitable.
If you want to change the port in which F-Secure Policy Manager Server
Admin Module listens, add a Listen entry in the configuration file with the
new port (e.g. Listen 8888), and remove the Listen directive that
defines the default port in which F-Secure Policy Manager Server Admin
Module listens: Listen 8080.
When a new Listen entry is added, be sure to remove the obsolete
entry. Otherwise, the server will unnecessarily consume system
resources, such as a network port.
After adding the Listen directive, F-Secure Policy Manager Server
knows that it should listen in the new port (8888 in our example).
However, you must still configure it to associate the F-Secure Policy
Manager Server Admin Module to that new port. This is done by changing
Page 49

CHAPTER 3 49
Installing F-Secure Policy Manager Server
the <VirtualHost> directive, which is associated with F-Secure Policy
Manager Server Admin Module. Here is that directive’s default
configuration:
#FSMSA port
<VirtualHost _default_:8080>
<Location /fsmsa/fsmsa.dll>
SetHandler fsmsa-handler
</Location>
</VirtualHost>
To associate it with the newly selected port, change the statement to:
#New FSMSA port
<VirtualHost _default_:8888>
<Location /fsmsa/fsmsa.dll>
SetHandler fsmsa-handler
</Location>
</VirtualHost>
WARNING: If you have workstations already configured to
access F-Secure Policy Manager Server (through the F-Secure
Policy Manager Server Host module) you should not change
the F-Secure Policy Manager Server Host port where agents
communicate, since you might reach a state where the
workstations will not be able to contact the server
3.4.3 F-Secure Policy Manager Server Configuration Settings
This section introduces and explains all the relevant entries present in the
F-Secure Policy Manager Server configuration file, and how they are
used.
ServerRoot: This directive sets the directory in which the server is
installed. Relative paths for other configuration files are taken as relative
to this directory.
Page 50

50
Timeout: This directive defines the period of time that the server will wait
before closing a connection, when there is no outbound or inbound traffic
in the network connection.
LoadModule: This directive defines the symbolic name of the module to
read and the path to the library that contains the module binaries.
Example: LoadModule fsmsh_module
"C:\serverroot\modules\fsmsh.dll"
Listen: This directive defines what port the server should listen on. The
default configuration for a web server, for example is: Listen 80. You
can restrict where the connections can be received from, for example,
Listen 127.0.0.1:80 will only allow connections to port 80 from the
machine where the server is running (localhost).
You can configure F-Secure Policy Manager Server to listen on different
ports by changing this setting and the associated <VirtualHost> setting
that we also discuss in this section. For more information, see “Changing
the Ports Where the Server Listens for Requests”, 48.
DocumentRoot: This directive should contain an absolute path. It defines
the directory that everyone will be able to access, so don’t use a path to a
directory with sensitive data. By default F-Secure Policy Manager Server
allocates a directory under F-Secure Policy Manager Server installation
directory, htdocs\. This directory is where the “welcome page” for the
server is located. If you change it, this page will no longer be displayed.
<Directory “c:\somepath”>: This directive will define what kind of
security settings will be associated with the directory specified in the path
component of the directive.
ErrorLog: The error log directive sets the name of the file to which the
server logs any errors it encounters. If the file path does not begin with a
slash (/), it is assumed to be relative to the ServerRoot. If the file path
begins with a pipe (|), it is assumed to be a command to spawn handling
of the error log. This feature is used for spawning the rotatelogs (see the
rotatelogs entry in this section) utility so that log file is actually rotated
and not written to an ever growing file.
<VirtualHost _default_:port>: This directive defines a set of directives
that will apply only to a VirtualHost. A VirtualHost is a virtual server, i.e., a
different server that is run in the same process as other servers. F-Secure
Page 51

CHAPTER 3 51
Installing F-Secure Policy Manager Server
Policy Manager Server; for example, has two virtual hosts, one running in
port 80 (F-Secure Policy Manager Server Host Module) and another one
running in port 8080 (FSMSA or Admin Module).
Here is the default configuration for F-Secure Policy Manager Server:
# FSMSH port
<VirtualHost _default_:80>
<Location /fsms/fsmsh.dll>
SetHandler fsmsh-handler
</Location>
<Location /commdir>
SetHandler fsmsh-handler
</Location>
</VirtualHost>
#FSMSA port
<VirtualHost _default_:8080>
<Location /fsmsa/fsmsa.dll>
SetHandler fsmsa-handler
</Location>
</VirtualHost>
Commdir and Commdir2: These directives define the path to the
communication directory or repository. This is the directory where
F-Secure Policy Manager Server stores all the Management Data that it
receives from Policy Manager Console and F-Secure Management
Agent. You can alter the Communication Directory location by changing
these directives, but you must make sure that the account under which
the server is run (fsms_<machine wins name>) has full rights to that
directory.
Commdir "C:\Program Files\F-Secure\Policy Manager
Server\CommDir"
Commdir2 "C:\Program Files\F-Secure\Policy Manager
Server\CommDir"
Page 52

52
CustomLog: This entry is used to log requests to the server. The first
parameter is either a file (file to which the requests should be logged) or a
pipe ('|') followed by the path to a program to receive the log information
on its standard input. This feature is used for spawning the rotatelogs
(see the rotatelogs entry in this section) utility so that the log file is
actually rotated and not written to an ever growing file.
The second parameter specifies what will be written to the log file, and is
defined under a previous LogFormat directive.
Below is an example of an entry in the access.log file:
10.128.131.224 - - [18/Apr/2002:14:06:36 +0300]
/fsmsa/
fsmsa.dll?FSMSCommand=ReadPackage&Type=27&SessionID=248 HTTP/
1.1"
200 5299 0 - 0 - "FSA/5.10.2211 1.3.1_02 Windows2000/5.0 x86"
mod_gzip: DECHUNK:DECLINED:TOO_SMALL CR:0pct.
10.128.131.224 - - [18/Apr/2002:14:06:36 +0300] tells you when the
request to the server was made and by which host (described by its IP
address).
The fxnext component informs you which module the command sent to /
fsmsa/fsmsa.dll. This module (fsmsa.dll) is the Admin Module. fsmsh.dll
would be the Host Module.
Then come the command and parameters
FSMSCommand=ReadPackage&Type=27&SessionID=248. In this case the
host requested an object of Type 27 (there is only one).
The HTTP version used is also noted HTTP/1.1
Immediately after the http version comes six different numbers, as
follows:
1. HTTP response code: In this example 200 is used, meaning OK in
HTTP specification. There are other codes, all of them covered under
the HTTP specification that can be obtained from http://www.w3.org.
2. Bytes transferred from the server: The example entry informs of 5299
bytes transferred.
3. How long the server took to serve the request (in seconds).
4. Connection status when response is completed.
Page 53

CHAPTER 3 53
Installing F-Secure Policy Manager Server
'X' = connection aborted before the response completed.
'+' = connection may be kept alive after the response is sent.
'-' = connection will be closed after the response is sent.
5. F-Secure Policy Manager Server Admin Module error code (0 for
success).
6. Bytes transferred to the server (“-” for none).
The next string identifies the client "FSA/5.10.2211 1.3.1_02
Windows2000/5.0 x86". In this case, note that the server was contacted
by FSA 5.10 build 2211.
The information that follows is about the compression of data:
mod_gzip: DECHUNK:DECLINED:TOO_SMALL.
In this instance the data was not compressed because it was too small.
And finally the compression ratio, 0% in this case: CR:0pct.
Rotatelogs: This is a small program that is used to rotate the logs that
F-Secure Policy Manager Server produces. This allows us to define the
length a log should be kept (8 days by default) and when the files should
be rotated, e.g. when the access.log is named access.log.1 and a new,
empty access.log file is created where the new requests will be logged.
Example usage:
CustomLog '|""C:\Program Files\F-Secure\Policy Manager Server
5\bin\rotatelogs"
"C:\Program Files\F-Secure\Policy Manager Server
5\logs\access.log" 8 86400"' common"
In this example the CustomLog directive defines that the rotatelogs utility
should open the access.log file, and keep 8 files (8 archive files plus the
active file) that are rotated daily (86400 seconds = 24 hours). In practice
this means that the files for the last full week plus one day are kept and
there is still a file for logging accesses during the current day.
<ifModule mod_gzip.c>: There is a new feature in F-Secure Policy
Manager Server that allows you to compress all the data that is
transferred between Console and Server. This directive marks the start of
the compression settings, which end just before the directive </ifModule>.
Page 54

54
For more information on the settings you can read the httpd.sample file
that is located in the same directory as the configuration file of F-Secure
Policy Manager Server (<fspms installation directory>\conf).
mod_gzip_on Yes: This setting is one of the several compression
settings, and the one that enables or disables support for the
compression in F-Secure Policy Manager Server. Compression is
disabled if the setting is changed to mod_gzip_on No.
FastPolicyDistribution On: This is a performance versus maximum
backward compatibility switch. When enabled (On) it will allow the
F-Secure Policy Manager Server to distribute policies in a way that
speeds up the process greatly (30-100 times, depending on the number
of hosts). The disabled switch (Off) should be used when there are other
components accessing the communication directory concurrently (e.g.
F-Secure Management Agent).
RetryFileOperation 10: This setting tells the server how many times it
should retry a failed file operation (with a 1 second retry-interval) before
giving up.
CommdirCacheSize 10: The number-value of this setting informs the
server how much memory, percentage-wise, it should use for storing files
in memory before serving them. This will allow the server to serve the files
much faster, since it will not have to read them from the disk all the time. If
you use the default (10), the server will use 10% of the memory available
for this cache. For example, in a 512MB RAM machine, it will use 51,2
MB for the cache.
3.5 Uninstalling F-Secure Policy Manager Server
To uninstall F-Secure Policy Manager Server (or other F-Secure Policy
Manager components), follow these steps:
1. Open the Windows Start menu and go to Control Panel. Select Add/
Remove Programs.
2. Select F-Secure Policy Manager Server (or the component you want
to uninstall), and click the Add/Remove button.
Page 55

CHAPTER 3 55
Installing F-Secure Policy Manager Server
3. The F-Secure Uninstall dialog box appears. Click Start to begin
uninstallation.
4. When the uninstallation is complete, click Close.
5. Click OK to exit Add/Remove Programs.
Page 56

4
INSTALLING F-SECURE
P
OLICY MANAGER
ONSOLE
C
Overview..................................................................................... 57
Installation Steps ........................................................................ 57
Uninstalling F-Secure Policy Manager Console ......................... 73
56
Page 57

4.1 Overview
F-Secure Policy Manager Console can operate in two modes:
Administrator mode - you can use F-Secure Policy Manager
Console to its full extent.
Read-Only mode - you can view F-Secure Policy Manager
Console information but cannot perform any administrative tasks
(this mode is useful for such users as Helpdesk personnel).
The same console installation can be used for both Administrator and
Read-Only connections. The following sections explain how to run the
F-Secure Policy Manager Console setup from the F-Secure CD, and how
to select the initial operation mode when the console is run for the first
time. The CD setup is identical for both modes, and it is always possible
to add new Administrator and Read-Only connections after the initial
startup.
4.2 Installation Steps
CHAPTER 4 57
Installing F-Secure Policy Manager Console
Step 1. 1. Insert the F-Secure CD in your CD-ROM drive.
2. Select Corporate Use. Click Next to continue.
3. Select F-Secure Policy Manager from the Install or Update
Management Software menu.
Page 58

58
Step 2. View the Welcome screen, and follow the setup instructions. Select the
installation language from the drop-down menu. Click Next to continue.
Page 59

CHAPTER 4 59
Installing F-Secure Policy Manager Console
Step 3. Read the license agreement information. If you agree, select I accept this
agreement. Click Next to continue.
Page 60

60
Step 4. Select F-Secure Policy Manager Console. Click Next to continue.
Page 61

Installing F-Secure Policy Manager Console
Step 5. Choose the destination folder. Click Next.
It is recommended to use the default installation directory. Use the
Browse feature to install F-Secure Policy Manager Console in a different
directory.
CHAPTER 4 61
Page 62

62
Step 6. Specify F-Secure Policy Manager Server address, and Administration
port number. Click Next to continue.
Page 63

CHAPTER 4 63
Installing F-Secure Policy Manager Console
Step 7. Review the changes that setup is about to make. Click Next to continue.
Page 64

64
Step 8. Click Finish to close the installer.
Page 65

CHAPTER 4 65
Installing F-Secure Policy Manager Console
Step 9. Run F-Secure Policy Manager Console by clicking on Start >Programs >
F-Secure Policy Manager Console > F-Secure Policy Manager Console.
When F-Secure Policy Manager Console is run for the first time, the
Console Setup Wizard collects the information needed to create an initial
connection to the server.
The first page of F-Secure Policy Manager Console setup wizard
summarizes the installation process. Click Next to continue.
Page 66

66
Step 10. Select your user mode according to your needs:
Administrator mode - enables all administrator features.
Read-Only mode - allows you to view administrator data, but no
changes can be made. If you select Read-only mode, you will not
be able to administer hosts. To change to Administrator mode,
you will need the admin.pub and admin.prv administration keys.
Click Next to continue.
Page 67

CHAPTER 4 67
Installing F-Secure Policy Manager Console
Step 11. Enter the address of the F-Secure Policy Manager Server that is used for
communicating with the managed hosts.
Page 68

68
Step 12. Enter the path where the administrator’s public key and private key files
will be stored. By default, key files are stored in the F-Secure Policy
Manager Console installation directory:
Program Files\F-Secure\Administrator.
Click Next to continue.
If the key-pair does not pre-exist, it will be created later in the setup
process
Page 69

CHAPTER 4 69
Installing F-Secure Policy Manager Console
Step 13. Move your mouse cursor around in the window to initialize the random
seed used by the management key-pair generator. Using the path of the
mouse movement ensures that the seed number for the key-pair
generation algorithm has enough randomness. When the progress
indicator has reached 100%, the Passphrase dialog box will open
automatically.
Page 70

70
Step 14. Enter a passphrase, which will secure your private management key.
Re-enter your passphrase in the Confirm Passphrase field. Click Next.
Page 71

Installing F-Secure Policy Manager Console
Step 15. Click Finish to complete the setup process.
CHAPTER 4 71
F-Secure Policy Manager Console will generate the management
key-pair.
After the key-pair is generated, F-Secure Policy Manager Console will
start.
Step 16. The setup wizard creates the user group FSPM users. The user who was
logged in and ran the installer is automatically added to this group. To
allow another user to run F-Secure Policy Manager you must manually
add this user to the user group FSPM users.
Page 72

72
F-Secure Policy Manager Console starts in Anti-Virus mode, which is a
optimized user interface for managing F-Secure Client Security and
F-Secure Anti-Virus for Workstations. If you are going to use F-Secure
Policy Manager Console for managing any other F-Secure product, you
should use the Advanced Mode user interface. You can access it by
opening the View menu and selecting Advanced Mode.
When setting up workstations, you must provide them with a copy of the
Admin.pub key file (or access to it). If you install the F-Secure products on
the workstations remotely with F-Secure Policy Manager, a copy of the
Admin.pub key file is installed automatically on them. However, if you run
the setup from a CD, you must transfer a copy of the Admin.pub key file
manually to the workstations. The best and most secure method is to
copy the Admin.pub file to a diskette and use this diskette for workstation
installations. Alternatively, you can put the Admin.pub file in a directory
that can be accessed by all hosts that will be installed with remotely
managed F-Secure products.
Page 73

CHAPTER 4 73
Installing F-Secure Policy Manager Console
Changing the Web Browser Path
The F-Secure Policy Manager Console acquires the file path to the
default Web browser during setup. If you want to change the Web
browser path, open the To ol s menu, and select Preferences.
Select the Locations tab and enter the new file path.
4.3 Uninstalling F-Secure Policy Manager Console
To uninstall F-Secure Policy Manager Console (or other F-Secure Policy
Manager components), follow these steps:
1. Open the Windows Start menu and go to Control Panel. Select Add/
Remove Programs.
2. Select the component you want to uninstall (F-Secure Policy
Manager Console or Certificate Wizard), and click the Add/Remove
button.
3. The F-Secure Uninstall dialog box appears. Click Start to begin
uninstallation.
4. When the uninstallation is complete, click Close.
5. Click OK to exit Add/Remove Programs.
Page 74

5
USING F-SECURE
P
OLICY MANAGER
ONSOLE
C
Overview..................................................................................... 75
F-Secure Policy Manager Console Basics ................................. 76
F-Secure Client Security Management....................................... 80
Managing Domains and Hosts ................................................... 94
Software Distribution ................................................................ 104
Managing Policies .................................................................... 120
Managing Operations and Tasks.............................................. 126
Alerting ..................................................................................... 126
Reporting Tool .......................................................................... 129
Preferences .............................................................................. 133
74
Page 75

5.1 Overview
CHAPTER 5 75
Using F-Secure Policy Manager Console
F-Secure Policy Manager Console is a remote management console for
the most commonly used F-Secure security products, designed to provide
a common platform for all of the security management functions required
in a corporate network.
An administrator can create different security policies for each host, or
create a single policy for many hosts. The policy can be distributed over a
network to the workstations, servers, and security gateways.
With F-Secure Policy Manager Console, you can:
Set the attribute values of managed products,
Determine rights for users to view or modify attribute values that
were remotely set by the administrator.
Group the managed hosts under policy domains sharing common
attribute values.
Manage host and domain hierarchies easily.
Generate signed policy definitions, which include attribute values
and restrictions.
Display status.
Handle alerts.
Handle F-Secure Anti-Virus scanning reports.
Handle remote installations.
View reports in HTML format, or export reports to various exports
formats.
F-Secure Policy Manager Console generates the policy definition, and
displays status and alerts. Each managed host has a module (F-Secure
Management Agent) enforcing the policy on the host.
The conceptual world of F-Secure Policy Manager Console consists of
hosts that can be grouped within policy domains. Policies are
host-oriented. Even in multi-user environments, all users of a specific host
share common settings.
F-Secure Policy Manager Console recognizes two types of users:
administrators and read-only mode users.
Page 76

76
The administrator has access to the administration private key. This
private key is stored as a file, which may be shared among users with
management rights. The administrator uses F-Secure Policy Manager
Console to define policies for different domains and individual hosts.
In Read-only mode, the user can:
View policies, statistics, operation status, version numbers of
installed products, alerts and reports.
Modify F-Secure Policy Manager Console properties, because its
installation is user-based and modifications cannot affect other
users.
The user cannot
Modify the domain structure or the properties of domains and
do any of the following in Read-only mode:
hosts.
Modify product settings.
Perform operations.
Install products.
Save policy data.
Distribute policies.
Delete alerts or reports.
There can be only one Administrator mode connection to F-Secure Policy
Manager Server at a time. There can be several read-only connections to
F-Secure Policy Manager Server simultaneously.
5.2 F-Secure Policy Manager Console Basics
The following sections describes the F-Secure Policy Manager Console
logon procedure, menu commands and basic tasks.
Page 77

5.2.1 Logging In
CHAPTER 5 77
Using F-Secure Policy Manager Console
When you start F-Secure Policy Manager Console, the following dialog
box will open (click Options to expand the dialog box to include more
options)
Figure 5-1 F-Secure Policy Manager Console Login dialog
The dialog box can be used to select defined connections. Each
connection has individual preferences, which makes it easier to manage
many servers with a single F-Secure Policy Manager Console instance.
It is also possible to define multiple connections to a single server. After
selecting the connection, enter your F-Secure Policy Manager Console
passphrase. This is the passphrase that you defined when you installed
the program. This is not your network administrator password.
You can start the program in Read-Only mode, in which case you do not
need to enter a passphrase. In this case, however, you will not be allowed
to make changes.
The setup wizard creates the initial connection, which appears by default
in the Connections: field. To add more connections, click Add or to edit an
existing connection, click Edit (these options are available when the
dialog box is expanded).
Note that it is possible to make copies of existing connections. This
makes it easy to define multiple connections to the same server, with
slightly different connection preferences for different usages. For
example, an existing connection can be taken as a template, and different
connection preferences can be tested with the new copy without affecting
the original settings.
Page 78

78
Connection Properties
The link to the data repository is defined as the HTTP URL of the
F-Secure Policy Manager Server.
Figure 5-2 Connection Properties dialog
The Name field specifies what the connection will be called in the
Connection: field in the login dialog. If the Name field is left empty, the
URL or the directory path is displayed.
Public Key File and Private Key File paths specify what management
key-pair to use for this connection. If the specified key files do not exist,
F-Secure Policy Manager Console will generate a new key-pair.
Communication Preferences
Select the Communication tab to customize communication settings. To
change polling intervals, click Polling Period Options.
Host connection status controls when hosts are considered disconnected
from F-Secure Policy Manager. All hosts that have not contacted
F-Secure Policy Manager Server within the defined interval are
considered disconnected. The disconnected hosts will have a notification
Page 79

CHAPTER 5 79
Using F-Secure Policy Manager Console
icon in the domain tree and they will appear in the Disconnected Hosts list
in the Domain status view. Note that it is possible to define an interval that
is shorter than one day by simply typing in a floating point number in the
setting field. For example, with a value of "0.5" all hosts that have not
contacted the server within 12 hours are considered disconnected. Values
less than one day are normally useful only for trouble shooting purposes,
because in a typical environment some hosts are naturally disconnected
from the server every now and then. For example, laptop computers may
not be able to access the server daily, but in most cases this is perfectly
acceptable behavior.
Figure 5-3 Connection Properties > Communication dialog
The communication protocol selection affects the default polling intervals.
You should modify the communication setting to suit your environment. If
you are not interested in certain management information, you should
switch unnecessary polling off by clearing the polling item you want to
disable. Disable All Polling disables all of the polling items. Whether or not
automatic polling is disabled, manual refresh operations can be used to
refresh the selected view.
Page 80

80
Figure 5-4 Polling Periods dialog
See “Preferences”, 133 for more information about other
connection-specific settings. After F-Secure Policy Manager Console
startup these settings can be edited normally from the Preferences view.
5.2.2 F-Secure Client Security Management
When you first start F-Secure Policy Manager Console, the simplified
Anti-virus mode user interface opens. This mode is optimized for
administering F-Secure Client Security. Using the Anti-Virus mode user
interface you can complete most tasks for managing F-Secure Client
Security or F-Secure Anti-Virus for Workstations.
For more information on the Anti-Virus mode user interface, see the
F-Secure Client Security Administrator’s Guide.
You should be able to complete most tasks with the Anti-Virus mode user
interface, however particularly if you need to administer products other
than F-Secure Client Security, you will need to use the Advanced Mode
user interface.
Page 81

Using F-Secure Policy Manager Console
5.2.3 The Advanced Mode User Interface
To use all the functionality available in F-Secure Policy Manager Console
you need to change to the Advanced mode user interface. To do so,
select View > Advanced Mode.
The Advanced mode user interface opens displaying the following four
panes: Policy Domain pane, Properties pane, Product View pane and
Messages pane (not visible if there are no messages).
CHAPTER 5 81
Figure 5-5 F-Secure Policy Manager Console user interface
Page 82

82
5.2.4 Policy Domain Pane
In the Policy Domain pane, you can do the following:
Add a new policy domain (click the icon, which is located on
the toolbar). A new policy domain can be created only when a
parent domain is selected.
Add a new host (click the icon).
Find a host.
View the properties of a domain or host. All hosts and domains
should be given unambiguous names.
Import autoregistered hosts.
Autodiscover hosts from a Windows domain.
Delete hosts or domains.
Move hosts or domains, using cut and paste operations.
Export a policy file.
After selecting a domain or host, you can access the above options from
the Edit menu.
The domains referred to in the commands are not Windows NT or DNS
domains. Policy domains are groups of hosts or subdomains that have a
similar security policy.
5.2.5 Properties Pane
Defining policies consists of specifying default values for settings,
specifying what values are allowed, and specifying access restrictions to
the settings. Policies for a domain or a host are defined in the Properties
pane.
The Properties pane contains subtrees (“branches”), tables, rows, and
policy variables. Subtrees are only used to expand the structures. Tables
may contain any number of rows.
Page 83

Using F-Secure Policy Manager Console
The Properties pane has the following tabs:
Policy - The Policy tab allows you to use the Product View pane
to define settings, restrictions, and operations for domains or
hosts. These changes become effective after the policy has been
distributed and the Agent has fetched the policy file.
Status - Beneath each product shown in the Status tab are two
status categories: Settings and Statistics. Settings displays the
local settings that have been explicitly modified in the host;
default values or values set in the Base Policy are not displayed.
The Statistics subtree displays statistics for the host for each
product. If a policy domain is selected, the Status view displays
number of hosts in the domain and which hosts are disconnected
from F-Secure Policy Manager.
Alerts - Displays a list of alerts originating from hosts in the
selected domain, displays the selected alert in the Product View
pane, and displays reports related to the alerts.
Reports - Displays all reports from the selected host.
Installation - Displays installation options.
CHAPTER 5 83
5.2.6 Product View Pane
The function of the Product View pane changes according to which tab of
the Properties pane is open:
Policy tab - In the Product View pane, you can set the value of a
policy variable. All modifications affect the selected policy domain
or host. There is a predefined editor for each type of policy
variable. The editor is displayed when you select the variable
type in the Policy tab. Some subtrees, tables, and leaf nodes
might have special custom editors. These editors customize
Page 84

84
F-Secure Policy Manager Console for each installed product.
There are also Restriction Editors, which open within the Product
View pane or open as a separate dialog box.
Status tab - In the Product View pane, you can view (1)
“settings”, which are the local modifications reported by the host,
and (2) statistics.
Alerts tab - When an alert is selected in the Alerts tab, details of
the alert are displayed in the Product View pane.
Reports - When a report is selected in the Reports tab, details of
the report are displayed in the Product View pane.
Installation - In the Product View pane, you can view and edit
installation information.
The traditional F-Secure Policy Manager Console MIB tree contains all
the settings/operations (Policy) and local setting/statistics (Status) in a
product component specific MIB tree.
The F-Secure Management Agent Product View is on the following page
as an example (the same generic operations and functionality are found
in all Product Views).
Using Help
In most cases the Product View fields offer the same help texts as the
MIB tree nodes. In addition, each tab has it's own help text. The help texts
follow mouse clicks (all tabs and policy and status editors) and field focus
(only available when the Policy tab is selected in the Properties pane).
You can click either the field label or the value editor field to activate the
corresponding help text.
Page 85

CHAPTER 5 85
Using F-Secure Policy Manager Console
Editing Policy Settings
Select a product (e.g. F-Secure Management Agent) and the Policy tab
from the Properties Pane. F-Secure Policy Manager Console will render a
Product View in the Product View Pane for your selected product, and
contains the most commonly used settings and the most often needed
restriction editors from the MIB tree, in the following categories:
Communication - edit communication settings.
Alerting - edit alert settings.
Alert Forwarding - see “Configuring Alert Forwarding” on
page 128 for more details.
Certificates - allows definition of trusted certificates
Certificate Directory - defines the directory settings where
certificates are stored.
About - contains a link to F-Secure Web Club (for more details,
see “Web Club”, 211).
You can edit the policy settings normally, and use the restriction setting
(final, hidden) to define end user access rights.
Figure 5-6 Product View pane
Page 86

86
Using the Context Menu for Policy Settings
Most editor fields in the Product View include a context menu (activated
by right-clicking your mouse). The context menu contains the following
options: Go To, Clear Value, Force Value and Show domain values.
Figure 5-7 Context menu
Shortcut to the MIB Tree Node
Sometimes it is convenient to see what setting of the MIB tree is actually
changed when modifying some specific Product View item. Select the Go
To menu item to display the corresponding MIB tree node in the
Properties pane.
Note that in most cases the MIB tree offers more, though less frequently
needed, setting parameters. For example, this is one way to edit the
restrictions of those policy settings that do not display direct restriction
editors in the Product View.
Clear Value
The functionality of the Clear Value menu item is the same as in the MIB
tree. After clearing the current value, the field will either display the
inherited value (grey text), or no value at all. The Clear Value menu item
is available only if there is a value defined for the currently defined
domain or host.
Page 87

CHAPTER 5 87
Using F-Secure Policy Manager Console
Force Value
This Force Value menu item is available only when a Policy Domain is
selected. You can enforce the current domain setting to also be active in
all subdomains and hosts. In practice, this operation clears the
corresponding setting in all subdomains and hosts below the current
domain, enabling the inheritance of the current value to all subdomains
and hosts. Use this menu entry cautiously: all values defined in the
subdomain or hosts under the selected domain are discarded, and cannot
be restored.
Show Domain Values
The Show Domain Values menu item is available only when a Policy
Domain is selected. You can view a list of all policy domains and hosts
below the selected policy domain, together with the value of the selected
field.
Click any domain or host name to quickly select the domain or host in the
Policy Domains pane. It is possible to open more than one Domain Value
dialog simultaneously.
Figure 5-8 Show Domain Values dialog
Page 88

88
Viewing Status
Open the Status tab and select the product from the Properties pane.
F-Secure Policy Manager Console will render a Product View to the
Product View pane, where you can view the more important local settings
and statistics.
Values cannot be edited, but the MIB help texts can be displayed
by clicking a field or its label.
For the policy domains, the Status tab will show the domain level status
overview: number of hosts in the domain, and list of disconnected hosts.
Figure 5-9 Status tab
Click any disconnected host to quickly change the policy domain selection
into that host. This way it is possible to investigate if the disconnected
host managed to send some alerts or useful statistics before the
disconnection. This information may help to investigate why the host was
disconnected. If the reason is clear, for example, if the host's F-Secure
software has been uninstalled, the host can be deleted normally. After
investigating one disconnected host, the most convenient way to get back
to the previously selected domain level is to click the button in the
toolbar.
The Domain Status view also offers two shortcut operations for handling a
greater number of disconnected hosts: selecting all disconnected hosts
and deleting all disconnected hosts. Both operations can be accessed
through the Disconnected Host tree root node context menu.
Page 89

Using F-Secure Policy Manager Console
Figure 5-10 An example of shortcuts available in the Domain Status View
WARNING: Deleting all disconnected hosts is potentially a
dangerous operation, as it is possible that some existing
hosts are for some natural reason temporarily disconnected
longer than the allotted threshold days. Always check the
disconnection threshold value from Preferences before
deleting hosts. If a still existing host is deleted accidently, all
host specific alerts, report, status and policy settings will be
lost. However, the host will send an autoregistration message
once it discovers that it has been removed from the F-Secure
Policy Manager. The host can be re-imported to the domain
tree, but from the Policy Manager point of view it's like any
other newly added host.
CHAPTER 5 89
Page 90

90
5.2.7 Messages Pane
F-Secure Policy Manager Console logs messages in the Message pane
about different events. Unlike the Alerts and Reports panes, Message
pane events are generated only by F-Secure Policy Manager Console.
There are three categories of messages: Information, Warnings, and
Errors. Each Message View tab can contain messages of all three
severities. You can delete a category in the displayed context menu by
right-clicking on a tab. By right-clicking on an individual message, a
context menu is displayed with cut, copy, and delete operations.
By default, messages are logged into both files in the message
subdirectory of the local F-Secure Policy Manager Console installation
directory. Logs of the messages are kept both in English and the
language you have set for F-Secure Policy Manager Console. A separate
log file is created for each message category (tab names in the Message
pane). You can use the Preferences-Locations page to specify the
directory for the log file, and to switch logging on and off. The functionality
of the Messages view is not affected when you switch message saving on
and off.
5.2.8 The Toolbar
The toolbar contains buttons for the most common F-Secure Policy
Manager Console tasks.
Saves the policy data
Distributes the policy
Go to the previous domain or host in the domain tree
selection history.
Page 91

CHAPTER 5 91
Using F-Secure Policy Manager Console
Go to the next domain or host in the domain tree selection
history.
Go to the parent domain.
Cuts a host or domain.
Pastes a host or domain.
Adds a domain to the currently selected domain.
Adds a host to the currently selected domain.
Displays the Properties box of a host or domain.
Launches the Autodiscover Windows Hosts tool. New
hosts will be added to the currently selected policy
domain.
Starts push installation to Windows hosts.
Imports autoregistered hosts to the currently selected
domain. Green signifies that the host has sent an
autoregistration request.
Displays available installation packages.
Displays all alerts. The icon is highlighted if there are new
alerts. When you start F-Secure Policy Manager Console,
the icon is always highlighted.
Page 92

92
5.2.9 Menu Commands
Menu Command Action
File New Policy Creates a new policy data instance with the Management
Information Base (MIB) defaults. This command is rarely
needed because existing policy data will usually be modified
and saved using the Save As command.
Open Policy Opens previously saved policy data.
Save Policy Saves current policy data.
Save Policy As Saves policy data with a specified name.
Distribute Policies Distributes the policy files.
Export Host Policy File Exports the policy files.
Exit Exits F-Secure Policy Manager Console.
Edit Cut Cuts selected items.
Paste Pastes items to selected location.
Delete Deletes selected items.
New Policy Domain Adds a new domain.
New Host Adds a new host.
Import Autoregistered
Hosts
Autodiscover Windows
Hosts
Push Install to Windows
Hosts
Find Search for a string in the host properties. All hosts in the
Domain/Host Properties Displays the Properties page of the selected host or policy
View Toolbar Displays the toolbar.
Imports hosts that have sent an autoregistration request.
Imports hosts from the Windows domain structure.
Installs software remotely, and imports the hosts specified by
IP address or WINS name.
selected domain are searched.
domain.
Page 93

CHAPTER 5 93
Using F-Secure Policy Manager Console
Status Bar Displays the status bar.
Too lTi ps Displays on-screen descriptions of buttons when the mouse
pointer rests on them.
Embedded Restriction
Editors
Messages Pane Shows/hides the Messages pane at bottom of screen.
Open on New Message If selected the Message pane opens automatically when a
Back Takes you to the previous domain or host in the domain tree
Forward Takes you to the next domain or host in the domain tree
Parent Domain Takes you to the parent domain.
All Alerts Opens the Alerts page in the Properties pane with all alerts
Advanced Mode Changes to the advanced mode user interface, which is the
Anti-Virus Mode Changes to the Anti-Virus mode user interface, which is
Refresh <Item> Manually refreshes the status, alert, or report view. The menu
Toggles between the embedded restriction editor and the
restrictions dialog box.
new message is received.
selection history.
selection history.
showing.
user interface described in this manual.
optimized for managing centrally F-Secure Client Security.
item changes according to the selected tab in the Properties
pane.
Refresh All Manually refreshes all data affecting the interface:policy,
status, alerts, reports, installation packages, and
autoregistration requests.
Tools Installation Packages View Installation Packages info in a dialog box.
Change Passphrase Changes login passphrase (the passphrase protecting the
F-Secure Policy Manager Console private key).
Reporting Lets you select the reporting methods and the domains/hosts
and products included in the reports.
Page 94

94
Preferences Sets the local properties for F-Secure Policy Manager
Console. These properties only affect the local installation of
F-Secure Policy Manager Console.
Help Contents Displays the Help index.
Web Club Opens your Web browser and connects to the F-Secure
Policy Manager Web Club.
Contact Information Displays contact information for F-Secure Corporation.
About F-Secure Policy
Manager Console
Displays version information.
5.3 Managing Domains and Hosts
If you want to use different security policies for different types of hosts
(laptops, desktops, servers), for users in different parts of the organization
or users with different levels of computer knowledge, it is a good idea to
plan the domain structure based on these criteria. This makes it easier for
you to manage the hosts later on.
If you have designed the policy domain structure beforehand, you can
import the hosts directly to that structure. If you want to get started
quickly, you can also import all hosts to the root domain first, and create
the domain structure later, when the need for that arises. The hosts can
then be cut and pasted to the new domains.
Page 95

Using F-Secure Policy Manager Console
Figure 5-11 An example of a policy domain structure
All domains and hosts must have a unique name in this structure.
Another possibility is to create the different country offices as
subdomains.
CHAPTER 5 95
Figure 5-12 An example of a policy domain: country offices as sub-domains
Page 96

96
5.3.1 Adding Policy Domains
Figure 5-13 An example of a policy domain with sub-domains
From the Edit menu, select New Policy Domain (a parent domain must be
selected), or click in the toolbar (alternatively press ctrl+ insert).
The new policy domain will be a subdomain of the selected parent
domain.
Figure 5-14 Policy Domain Properties Dialog
You will be prompted to enter a name for the policy domain. An icon for
the domain will be created in the Policy Domain pane.
Page 97

5.3.2 Adding Hosts
The main methods of adding hosts to your policy domain, depending on
your operating system, are as follows:
Windows Domains
In a Windows domain, the most convenient method of adding hosts to
your policy domain is by importing them through F-Secure Intelligent
Installation by choosing ‘Autodiscover Windows hosts’ from the Edit menu
in F-Secure Policy Manager Console. Note that this also installs F-Secure
Management Agent on the imported hosts. In order to import hosts from a
Windows domain, select the target domain, and choose ‘Autodiscover
Windows hosts’ from the Edit menu. After the autodiscover operation is
completed, the new host is automatically added to the Policy Domain
tree. For more information, see “Software Distribution”, 104.
CHAPTER 5 97
Using F-Secure Policy Manager Console
Import hosts directly from your Windows domain.
Import hosts through autoregistration (requires that F-Secure
Management Agent be installed on the imported hosts). You can
also use different criteria to import the autoregistered hosts into
different sub-domains.
Create hosts manually by using the New Host command.
Autoregistered Hosts
Another possibility for importing hosts into F-Secure Policy Manager
Console is by using the autoregistration feature. You can do this only after
F-Secure Management Agent has been installed on the hosts and after
the hosts have sent an autoregistration request. The F-Secure
Management Agent will have to be installed from a CD-ROM, from a login
script, or some other way. To import autoregistered hosts, click , or
choose Import Autoregistered Hosts from the Edit menu, or from the
Installation view. When the operation is completed, the host is added to
the domain tree. The autoregistered hosts can be imported to different
domains based on different criteria, such as the hosts’s IP or DNS
address. For more information, see “Autoregistration Import Rules”, 99.
Page 98

98
Figure 5-15 Import Autoregistered Hosts dialog > Autoregistered Hosts tab
The Autoregistration view offers a tabular view to the data which the host
sends in the autoregistration message. This includes the possible custom
autoregistration properties that were included in the remote installation
package during installation (see step 6 in “Using the Customized Remote
Installation JAR Package”, 116 section). It is possible to sort
autoregistration messages according to the values of any column by
clicking the corresponding table header. Column ordering can be
changed by dragging and dropping the columns to the suitable locations,
and column widths can be freely adjusted. The table context menu (click
the right mouse button on table header bar) can be used to specify which
autoregistration properties are visible in the table.
Page 99

Autoregistration Import Rules
CHAPTER 5 99
Using F-Secure Policy Manager Console
Figure 5-16 Import Autoregistered Hosts dialog > Import Rules tab
You can define the import rules for the autoregistered hosts on the Import
Rules tab in the Import Autoregistered Hosts window. You can use the
following as import criteria in the rules:
WINS name, DNS name, Dynamic DNS name, Custom
Properties
These support * (asterisk) as a wildcard. * can replace any
number of characters. For example: host_test* or
*.example.com.
Matching is case in-sensitive, so upper case and lower case
characters are treated as the same character.
IP address, Dynamic IP address
These support exact IP address matching (for example:
Page 100

100
192.1.2.3) and IP sub-domain matching (for example:
10.15.0.0/16).
You can hide and display columns in the table by using the right-click
menu that opens when you right-click any column heading in the Import
Rules window. Only the values in the currently visible columns are used
as matching criteria when importing hosts to the policy domain. The
values in the currently hidden columns are ignored.
You can also add new custom properties to be used as criteria when
importing hosts. One example of how to use the custom properties is to
create separate installation packages for different organizational units,
which should be grouped under unit-specific policy domains. In this case
you could use the unit name as the custom property, and then create
import rules that use the unit names as the import criteria. Note, that
custom property names that are hidden are remembered only until the
Console is closed.
To add a new custom property, do as follows:
1. Right-click a column heading and select Add New Custom Property.
The New Custom Property dialog opens.
2. Enter a name for the custom property, for example the unit name.
Then click OK.
3. The new custom property now appears in the table, and you can
create new Autoregistration Import rules in which it is used as import
criteria.
To create a new Autoregistration Import rule, do as follows:
1. Click Add on the Import Rules tab. The Select Target Policy Domain
for Rule dialog opens displaying the existing domains and
sub-domains.
2. Select the domain for which you want to create the rule and click OK.
3. Now you can define the import criteria. Select the new row that was
created, click the cell where you want to add a value and click Edit.
Enter the value in the cell.
When autoregistered hosts are imported, the rules are verified in
top-down order, and the first matching rule is applied. You can change the
order of the rules by clicking Move down or Move up.
 Loading...