

Page 1

F-Secure Anti-Virus for Windows Servers
Administrator's Guide
Page 2

Page 3

Contents
Chapter 1: Introduction.......................................................................5
Chapter 2: Getting started.................................................................15
F-Secure Anti-Virus for Windows Servers | TOC | 3
Product license.........................................................................................................................6
Disclaimer......................................................................................................................6
Installation.................................................................................................................................7
System requirements.....................................................................................................7
Installation overview.......................................................................................................7
Installing F-Secure Anti-Virus for Windows Servers......................................................8
Logging in for the first time.....................................................................................................16
Log in and install the security certificate......................................................................16
Create the security certificate......................................................................................16
Setting up Web Console for remote use.................................................................................18
Setting up Web Console for remote use on Windows Server Core editions...............18
Sending alerts.........................................................................................................................19
Specifying the maximum size of log file..................................................................................20
Exporting settings...................................................................................................................21
Exporting statistics..................................................................................................................22
Chapter 3: Protecting the server against malware.........................23
What are viruses and other malware......................................................................................24
Viruses.........................................................................................................................24
Spyware.......................................................................................................................24
Rootkits........................................................................................................................24
Riskware......................................................................................................................24
How to scan the server...........................................................................................................26
Scan for malware.........................................................................................................26
Scan manually.............................................................................................................28
Scan at set times.........................................................................................................30
Select files that are scanned........................................................................................31
Select the action when something is found.................................................................33
How to use the quarantine......................................................................................................36
View quarantined items................................................................................................36
Restore quarantined items...........................................................................................36
Delete quarantined items.............................................................................................36
Chapter 4: How to use automatic updates......................................39
Turning automatic updates on................................................................................................40
Page 4

4 | F-Secure Anti-Virus for Windows Servers | TOC
Check the update status.........................................................................................................41
Change the Internet connection settings................................................................................42
Add a Policy Manager proxy server.............................................................................42
Chapter 5: Technical support............................................................45
F-Secure online support resources.........................................................................................46
F-Secure support tool..................................................................................................46
Web Club................................................................................................................................47
Virus descriptions on the Web................................................................................................48
Page 5

Introduction
Chapter
1
Topics:
•
Product license
•
Installation
With F-Secure Anti-Virus for Windows Servers, you can guard the
valuable data stored on the server against viruses and other malware.
F-Secure Anti-Virus for Windows Servers is always up-to-date and works
automatically in the background.
Page 6

6 | F-Secure Anti-Virus for Windows Servers | Introduction
Product license
License terms and conditions are supplied with your software.
Your license validity period begins from the moment you purchase the product. Automatic updates keep the
protection on your computer updated while your product license is valid.
Your license validity period begins from the moment you purchase the product. Automatic updates keep the
protection on the server updated while your product license is valid.
Disclaimer
The product disclaimer.
"F-Secure" and the triangle symbol are registered trademarks of F-Secure Corporation and F-Secure product
names and symbols/logos are either trademarks or registered trademarks of F-Secure Corporation. All product
names referenced herein are trademarks or registered trademarks of their respective companies. F-Secure
Corporation disclaims proprietary interest in the marks and names of others. Although F-Secure Corporation
makes every effort to ensure that this information is accurate, F-Secure Corporation will not be liable for any
errors or omission of facts contained herein. F-Secure Corporation reserves the right to modify specifications
cited in this document without prior notice.
Companies, names and data used in examples herein are fictitious unless otherwise noted. No part of this
document may be reproduced or transmitted in any form or by any means, electronic or mechanical, for any
purpose, without the express written permission of F-Secure Corporation.
This product may be covered by one or more F-Secure patents, including the following:
GB2353372, GB2366691, GB2366692, GB2366693, GB2367933, GB2368233, GB2374260
Copyright©2010 F-Secure Corporation. All rights reserved.
Page 7

F-Secure Anti-Virus for Windows Servers | Introduction | 7
Installation
This chapter explains how to install the product.
System requirements
Read the following before starting to use the product.
The minimum and recommended requirements for installing and using the product on the server are:
System requirements
Processor:
Operating system:
Memory:
Disk space:
Display:
Internet connection:
Web browser:
Any 32- or 64-bit processor that can run Microsoft Windows Server ( Intel
Pentium 4 2GHz or higher recommended)
• Microsoft Windows Server 2003
• Microsoft Windows Server 2008
• Microsoft Windows Server 2008 R2
• Microsoft Small Business Server 2003
• Microsoft Small Business Server 2008
512MB (1GB or more recommended)
200 MB free hard disk space (300 MB recommended)
at least 8-bit [256 colors] (16-bit or more [65000 colors] recommended)
Required to validate your subscription and receive updates
Internet Explorer 6.0 or newer
Installation overview
F-Secure Anti-Virus for Windows Servers can be installed either in stand-alone or centrally administered
mode.
In stand-alone installation, F-Secure Anti-Virus for Windows Servers is managed with the Web Console. In
centrally administered mode, it is managed centrally with F-Secure Policy Manager components: F-Secure
Policy Manager Server and F-Secure Policy Manager Console. Refer to F-Secure Policy Manager manual
for instructions on Policy Manager deployment and policy-base management.
Note: F-Secure Anti-Virus for Windows Servers can be installed on the same computer that runs F-Secure
Anti-Virus for Microsoft Exchange. You can use the same Web Console (in case of stand-alone installation)
or F-Secure Policy Manager Console (in centrally administered mode) to manage both products installed
on the same server.
Follow these steps to set up F-Secure Anti-Virus for Windows Servers:
Centralized administration mode:
1. Import the product installation package, for example, fsavsrv900-nnn.jar, to F-Secure Policy Manager.
2. Start the installation to the remote server using either the push or policy-based installation method.
Alternatively, you can export the JAR installation package to the MSI format, and then deploy the product
locally or remotely using Microsoft Installer based tools.
3. When the installation is complete, add the server to the policy domain.
Page 8
8 | F-Secure Anti-Virus for Windows Servers | Introduction
4. Configure the product settings.
5. Distribute the policy to the server and make sure that it receives the latest database updates.
Note:
For more information about push and policy-based installations and about exporting MSI packages, see
the F-Secure Policy Manager Administrator's Guide.
Stand-alone mode:
1. Insert the installation CD or copy the installation package, for example, fsavsrv900-nnn.exe, to the
server.
2. Run the setup program and follow the instructions in the setup wizard.
3. After the installation is complete, configure the product settings.
4. Make sure that the product receives latest database updates.
Installing F-Secure Anti-Virus for Windows Servers
Instructions on how to install F-Secure Anti-Virus for Windows Servers.
Follow these instructions to install F-Secure Anti-Virus for Windows Servers locally.
Note: You need to log in with administrator-level privileges to install F-Secure Anti-Virus for Windows
Servers .
1. Download the installation package from the F-Secure web pages.
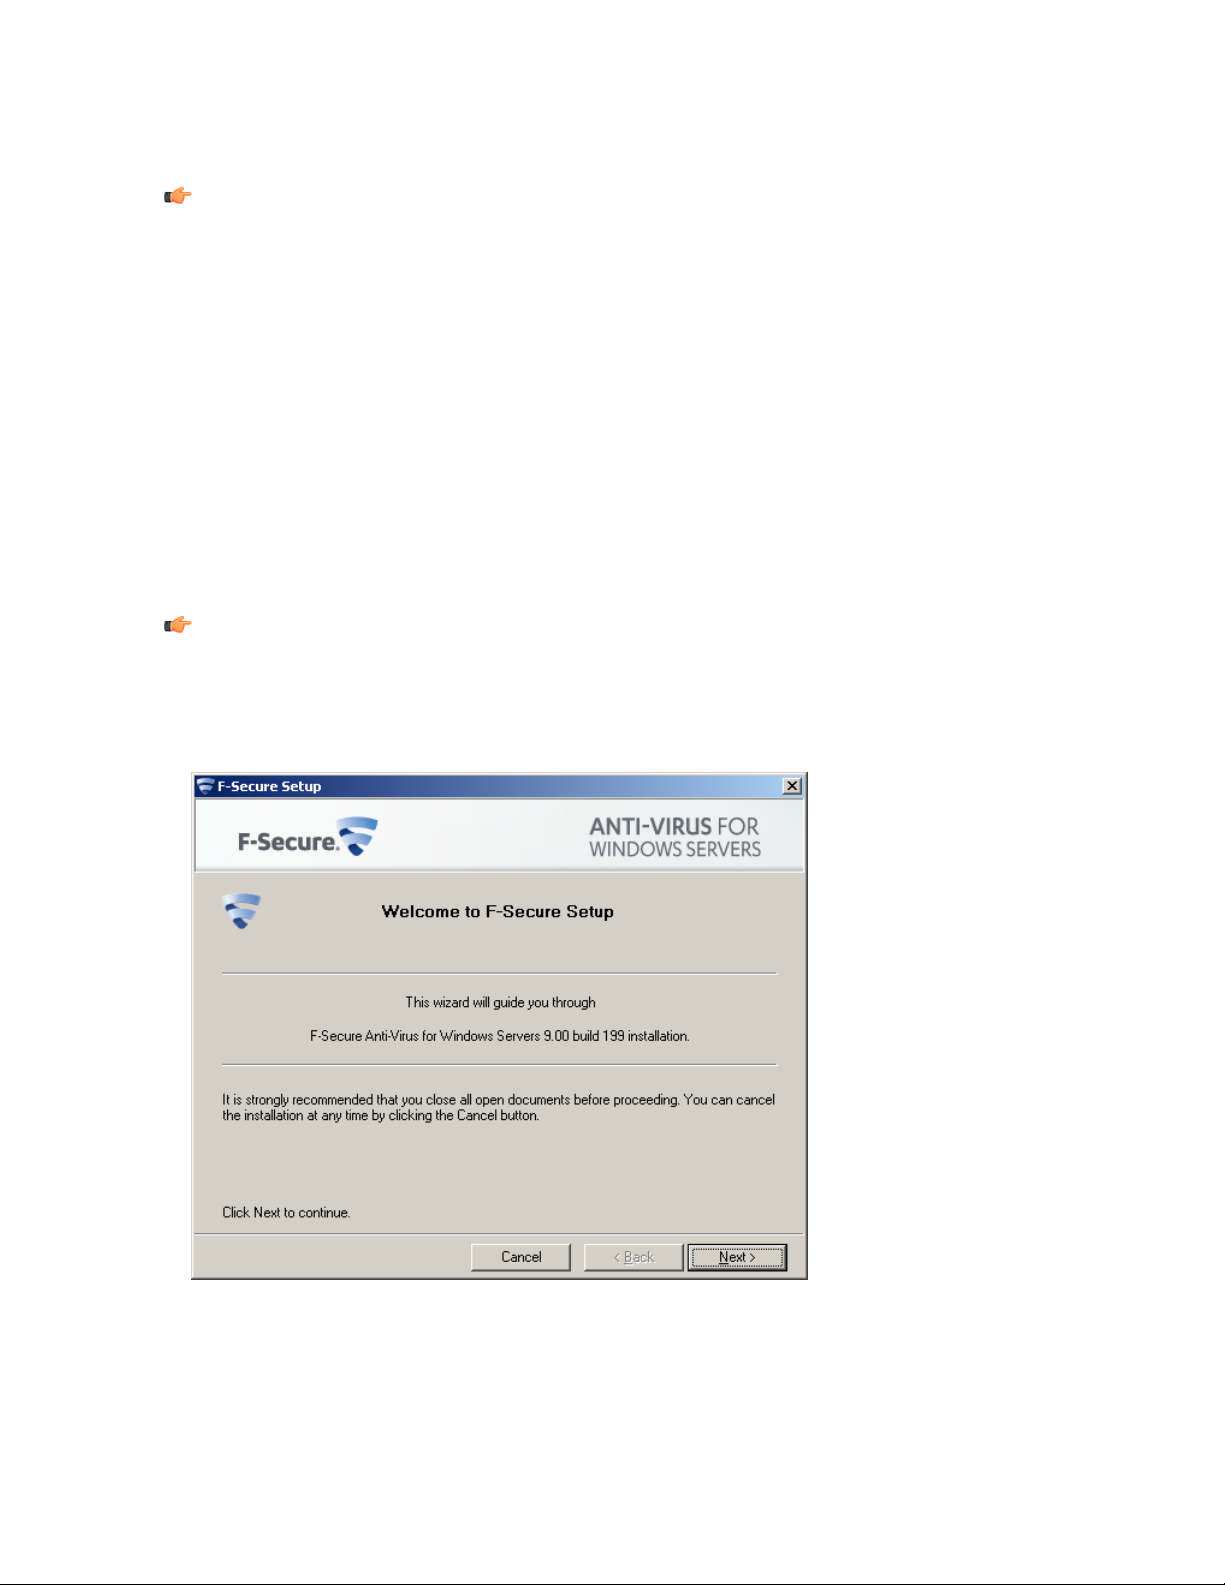
2. Locate the downloaded file and double-click it to start the installation.
3. Read the information in the Welcome screen. Click Next to continue.
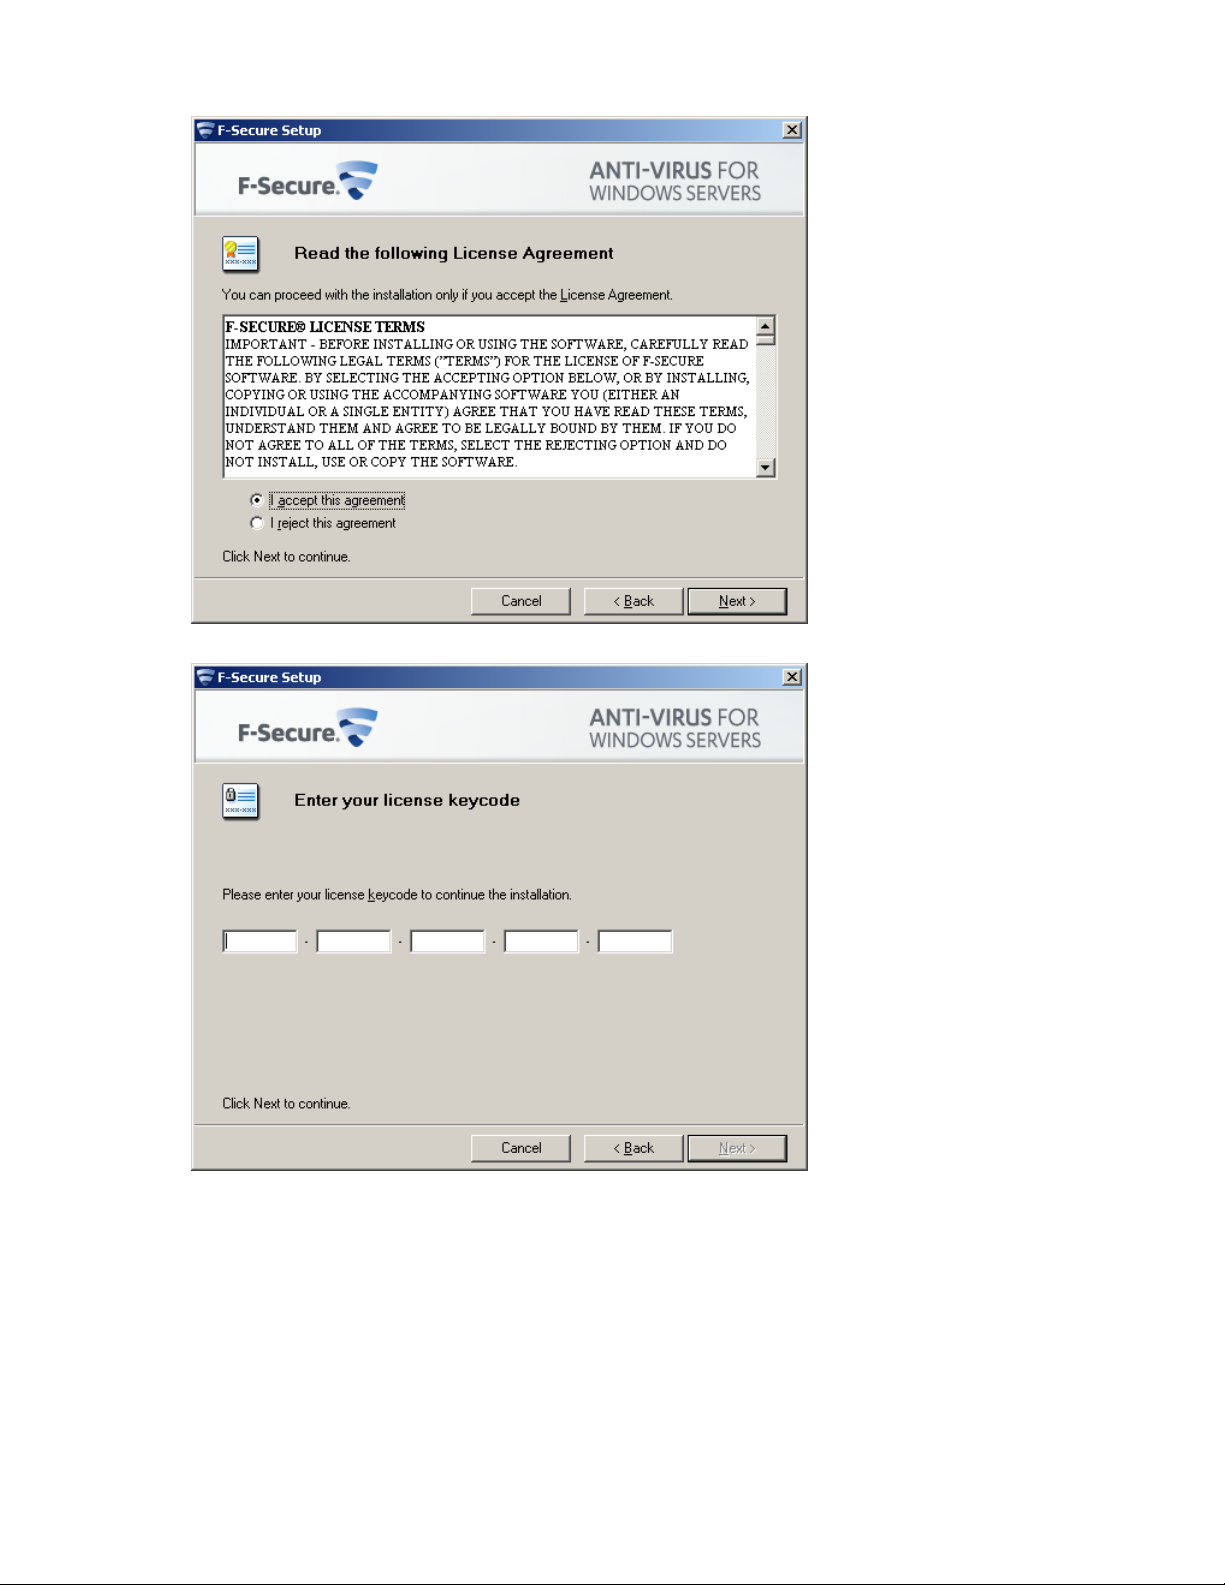
4. Read the license agreement. If you accept the agreement, check the I accept this agreement checkbox
and click Next to continue.
Page 9
F-Secure Anti-Virus for Windows Servers | Introduction | 9
5. Enter the product keycode. Click Next to continue.
6. Choose the components to install. Click Next to continue.
Page 10

10 | F-Secure Anti-Virus for Windows Servers | Introduction
7. Choose the destination folder for the installation. Click Next.
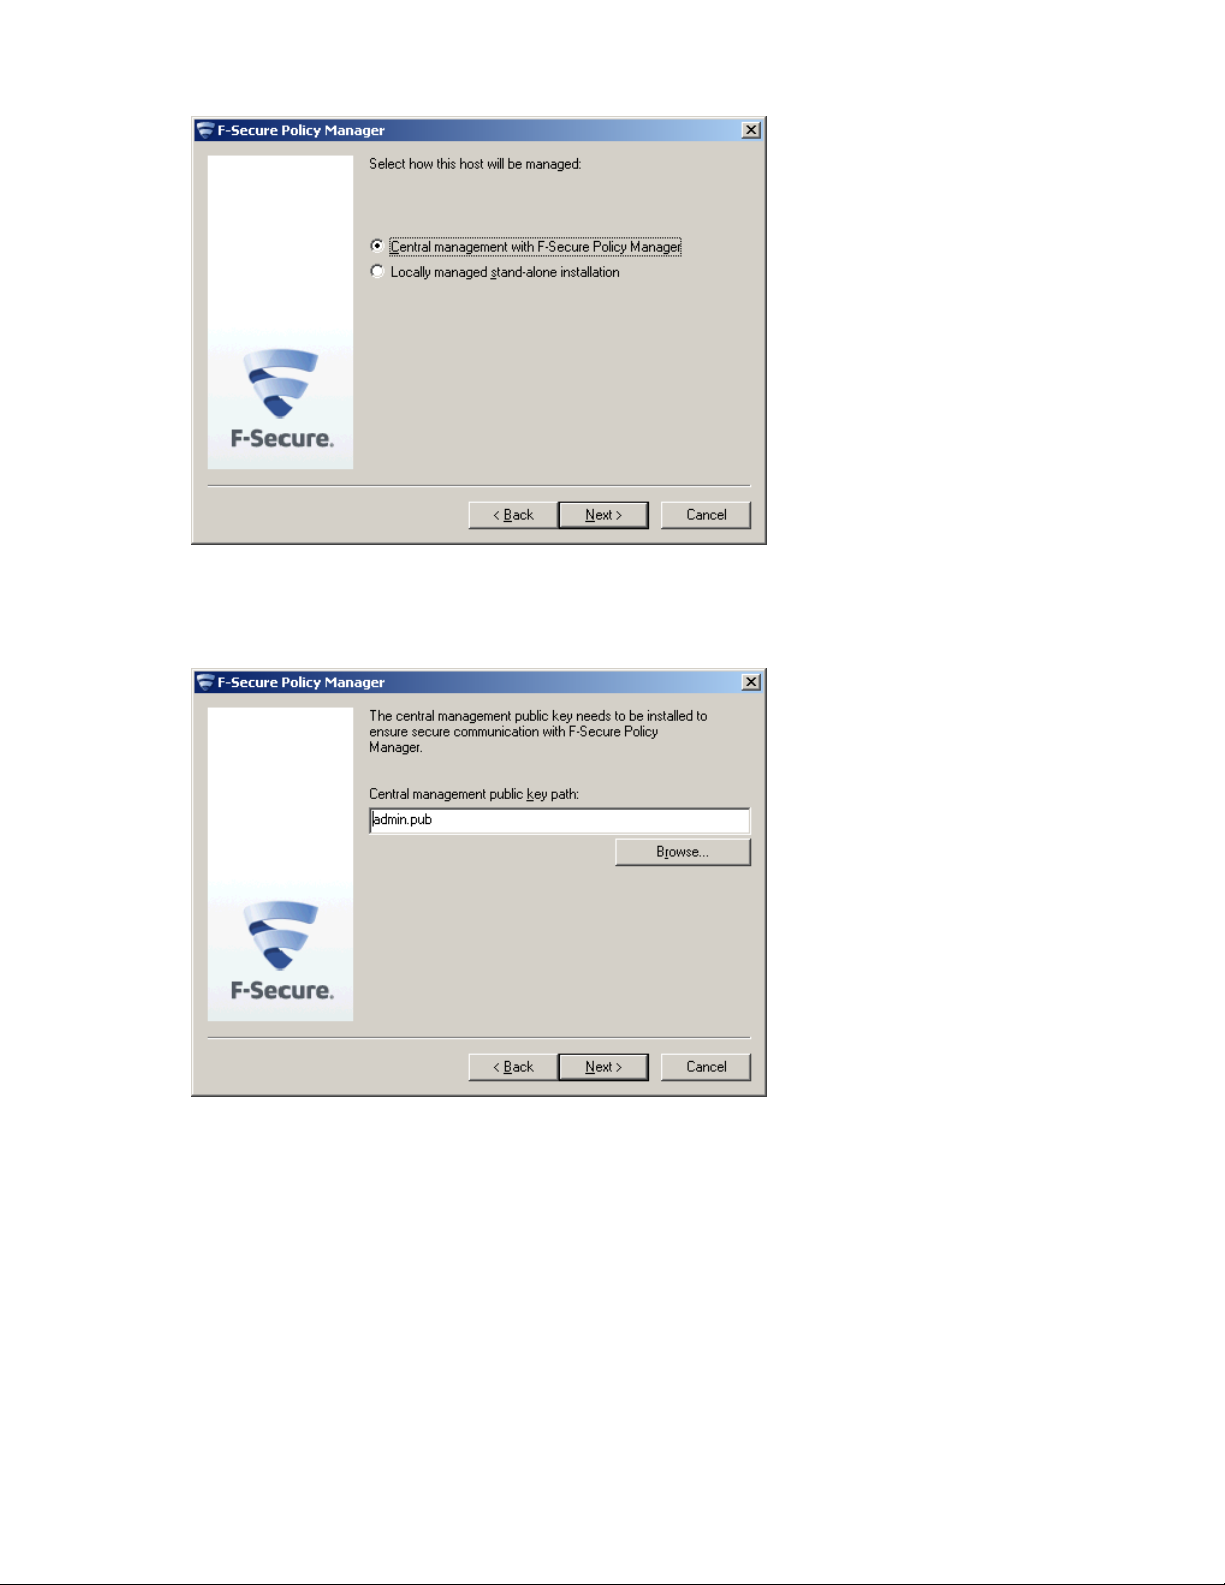
8. Choose the administration method. If you install F-Secure Anti-Virus for Windows Servers in stand-alone
mode, you cannot configure settings and receive alerts and status information in F-Secure Policy Manager
Console. Click Next to continue.
If you selected the stand-alone installation, continue to Step 11 below.
Page 11
F-Secure Anti-Virus for Windows Servers | Introduction | 11
9. The centrally managed administration mode requires the public management key. Enter the path to the
public management key file admin.pub that was created during F-Secure Policy Manager Console setup.
You can transfer the public key in various ways (use a shared folder on the file server, a USB device, or
send the key as an attachment in an e-mail message). Click Next to continue.
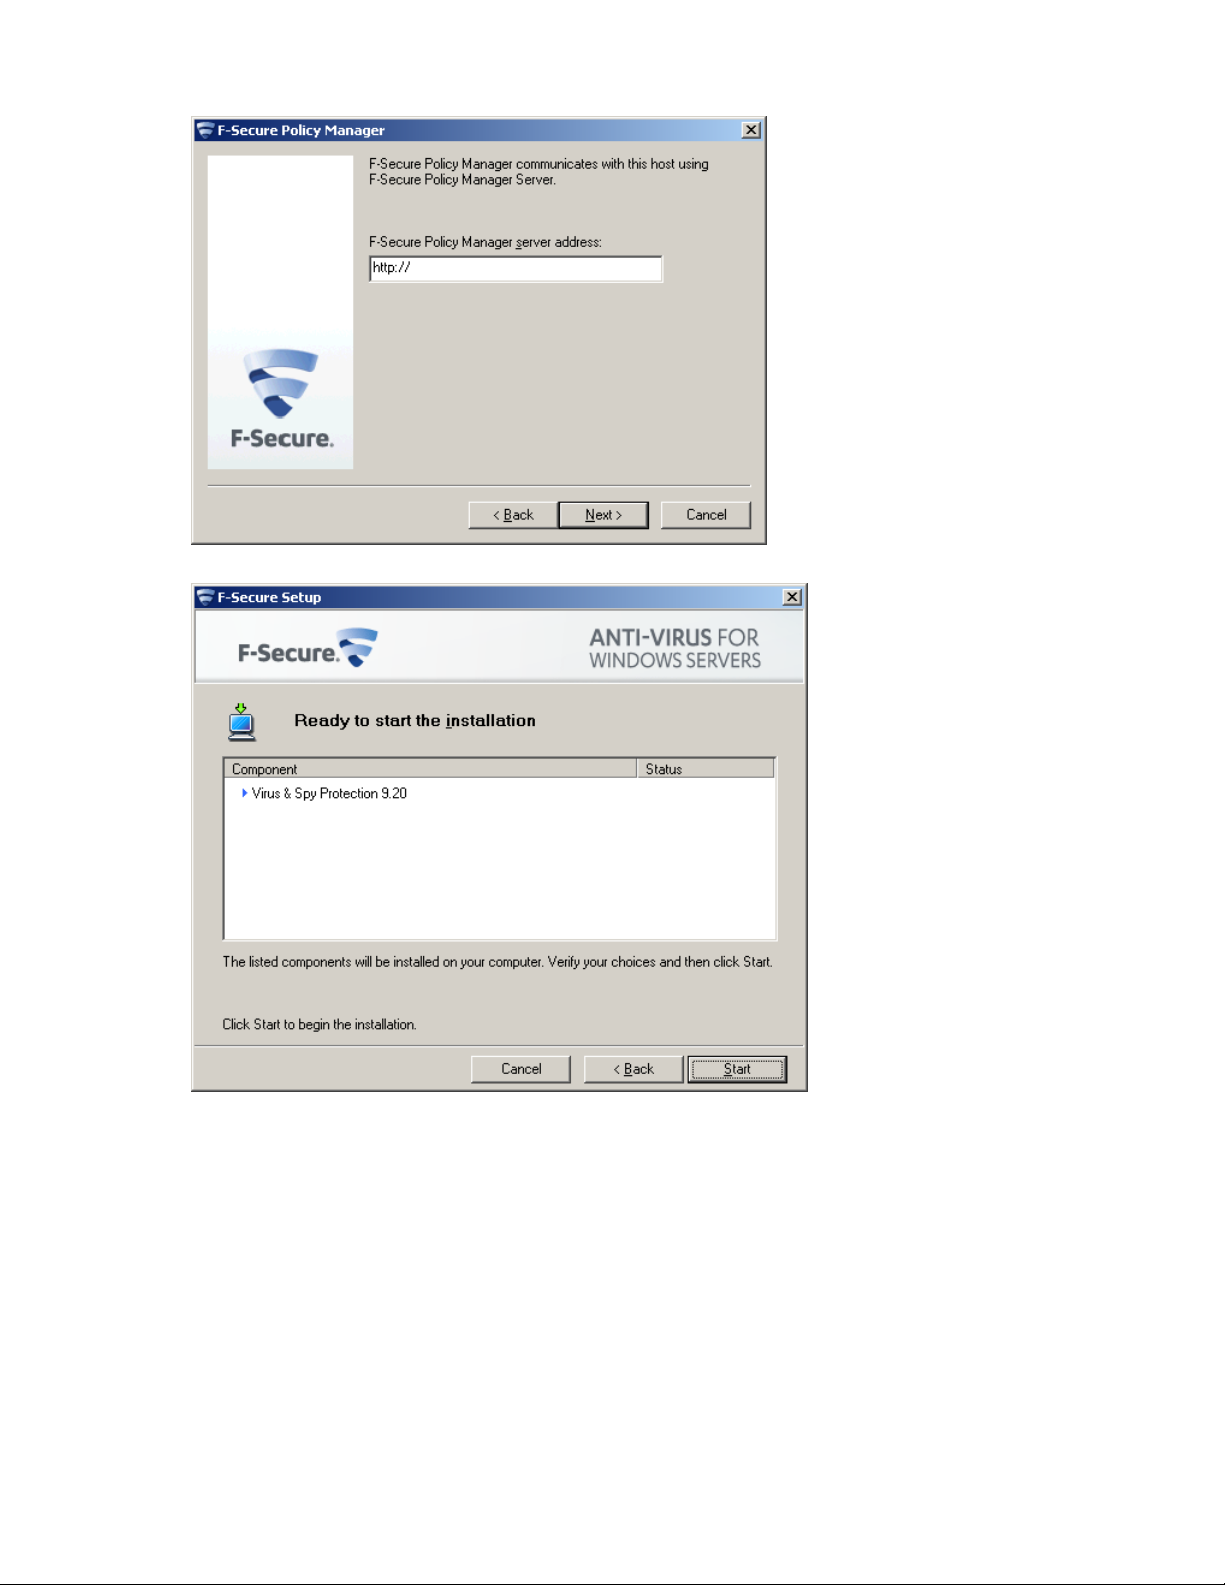
10. In the centrally managed administration mode, enter the IP address or URL of the F-Secure Policy Manager
Server that you installed earlier.
Page 12
12 | F-Secure Anti-Virus for Windows Servers | Introduction
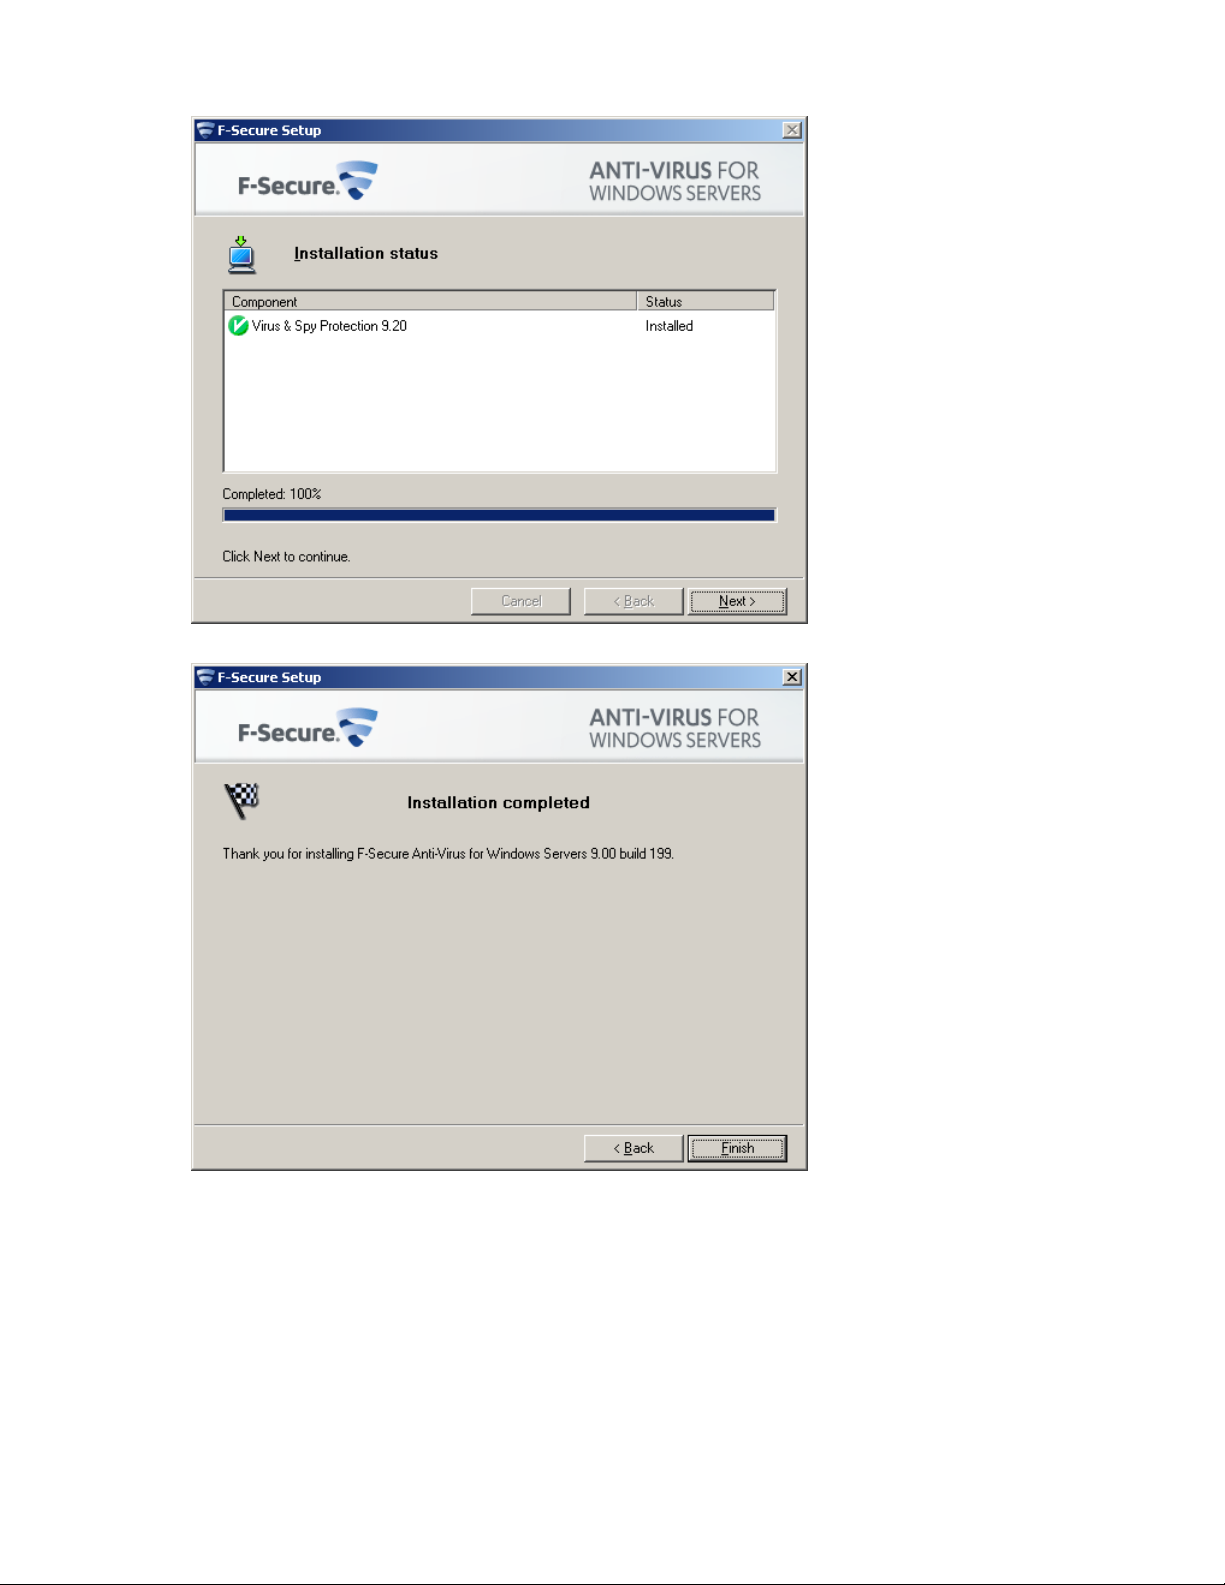
11. The list of components that will be installed is displayed. Click Start to install the listed components.
12. The installation status of the components is displayed. Click Next to continue.
Page 13
F-Secure Anti-Virus for Windows Servers | Introduction | 13
13. The installation is complete. Click Finish to close the Setup wizard.
After the installation is complete, check the status of the automatic updates and make sure that the product
receives the latest updates.
Page 14

Page 15

Getting started
Chapter
2
Topics:
•
Logging in for the first time
•
Setting up Web Console for
remote use
•
Sending alerts
•
Specifying the maximum size of
log file
•
Exporting settings
•
Exporting statistics
This section describes how to get started with using the product.
Page 16

16 | F-Secure Anti-Virus for Windows Servers | Getting started
Logging in for the first time
Before you log in to F-Secure Anti-Virus for Windows Servers Web Console for the first time, check that
JavaScript and cookies are enabled in the browser.
Note: Microsoft Internet Explorer users: You need to add the address of F-Secure Anti-Virus for Windows
Servers Web Console (https://127.0.0.1:25023/) to the Trusted sites in the Internet Explorer security
options to ensure that F-Secure Anti-Virus for Windows Servers Web Console works properly.
Log in and install the security certificate
When you connect to the F-Secure Anti-Virus for Windows Servers Web Console for the first time, your
browser displays a Security Alert dialog window about the security certificate.
You must install the security certificate before proceeding with the login process.
To install the security certificate:
1. Open F-Secure Anti-Virus for Windows Servers Web Console.
The Security Alert about the F-Secure Anti-Virus for Windows Servers Web Console certificate is displayed.
After you install the certificate, you will not see the Security Alert window again.
Note: If you are using Internet Explorer 7 or 8, click Continue and then Certificate Error.
2. Click View Certificate to view the certificate information.
The Certificate window opens.
3. Click Install Certificate to install the certificate with the Certificate Import Wizard.
The Certificate window opens.
Note: If your company has an established process for creating and storing certificates, follow that
process to create and store the security certificate for F-Secure Anti-Virus for Windows Servers Web
Console.
4. Click Install Certificate to proceed to the Certificate Import Wizard.
5. Follow the instructions in the Certificate Import Wizard.
If you are using Internet Explorer 7 or 8, select the Trusted Root Certification Authorities store in the Place
all certificates in the following store selection. If you are using Internet Explorer 6, Click Yes when you are
prompted to add the new certificate in the Certificate Root Store.
6. If the Security Alert window is still displayed, click Yes to proceed or log back in to F-Secure Anti-Virus
for Windows Server Web Console.
7. Log in to the Web Console with your user name and the password when the login page opens.
The Web Console displays the product Home page when you log in. You can check server protection state
on this page.
Create the security certificate
If the host name or IP address of the server is changed, you will need to create a new security certificate for
F-Secure Anti-Virus for Windows Servers Web Console.
Follow the instructions below to create the server certificate after you have installed the product.
1. Browse to the F-Secure Anti-Virus for Windows Servers Web Console installation directory, for example:
C:\Program Files (x86)\F-Secure\Web User Interface\bin\
2. Double-click the makecert.bat file to run the certificate creation utility.
Page 17

F-Secure Anti-Virus for Windows Servers | Getting started | 17
The utility creates a certificate that is issued to all local IP addresses and then restarts the F-Secure
Anti-Virus for Windows Servers Web Console service to take the new certificate into use.
3. Wait for the utility to complete.
After the utility window closes, you can continue to log in to the Web Console, and install or replace the server
certicate in the web browser.
Page 18

18 | F-Secure Anti-Virus for Windows Servers | Getting started
Setting up Web Console for remote use
This section explains how you can access F-Secure Anti-Virus for Windows Servers Web Console remotely.
To access F-Secure Anti-Virus for Windows Servers Web Console remotely:
1.
Log in to the Web Console locally on the server (https://127.0.0.1:25023 )
2. Go to General ➤ Administration and open the Web Console tab.
3. In Allowed hosts section, click Add new hosts... link and enter the IP address of the remote host where
you want to access the server.
4.
On remote host, open https://<IP address of the server>:25023 to open the Web Console.
5. In the Session section, specify the length of time that a client can be connected to a server.
When the session expires, F-Secure Anti-Virus for Windows Servers Web Console terminates the session
and displays a warning. The default value is 60 minutes.
6. Under Connections, you can do the following:
• In the Listen on address field, specify the IP address of the F-Secure Anti-Virus for Windows Servers
Web Console Server.
• In the Port field, specify the port where the server listens for connections. The default port is 25023.
Setting up Web Console for remote use on Windows Server Core editions
This section explains how you can access F-Secure Anti-Virus for Windows Servers Web Console remotely
on the Windows Server Core edition.
To access F-Secure Anti-Virus for Windows Servers Web Console remotely on Windows Server Core:
1. Log in to Windows Server Core with the local admin account.
2. Go to the F-Secure Web Console installation folder, which by default is located in
%ProgramFiles%\F-Secure\Web User Interface\bin.
3. Open the Web Console configuration file (webui.cnf) in Notepad.
4. Add the following entry to the Connections section: Allowed2 = <ip_address>
The "ip_address" is the address of host that is allowed to connect the Web Console. If you want to allow
connections from any host, replace the ip address by an asterisk (*).
5. Restart the F-Secure Web Console daemon service after you have made the changes to the webui.cnf
file by entering the following in the command line:
net stop "F-Secure WebUI daemon"
net start "F-Secure WebUI daemon"
Page 19

F-Secure Anti-Virus for Windows Servers | Getting started | 19
Sending alerts
You can specify where alerts are sent according to their severity level.
The product can send alerts to Windows Event Log or to e-mail addresses. If you have installed the product
in centralized administration mode, the product can send alerts to F-Secure Policy Manager.
Follow these instructions if you choose to forward alerts to e-mail addresses:
1. Go to General ➤ Administration and open the Alerts tab.
2. Under Sending alerts by SMTP, specify the SMTP server address, alert message subject line, and the
return address of the alert e-mail.
3. Click Add new recipient... to add a new entry in the E-mail Address table.
4. Type the e-mail address of the alert recipient.
5. Select the types of alerts that are to be sent to this address.
6. Click Apply.
By default, informational and warning-level alerts are not sent to F-Secure Policy Manager Console. If you
use the centralized administration mode, we recommend that you forward all alerts to F-Secure Policy
Manager Console.
Page 20

20 | F-Secure Anti-Virus for Windows Servers | Getting started
Specifying the maximum size of log file
You can specify the maximum size of the F-Secure log file.
To specify the maximum size:
1. Go to General ➤ Administration and open the Management tab.
2. Under Logging, specify the maximum size (in KB) of the F-Secure log file.
3. Click Apply.
Page 21

F-Secure Anti-Virus for Windows Servers | Getting started | 21
Exporting settings
You can view a list of all F-Secure Anti-Virus for Windows Servers settings.
To see a list of the settings:
1. Go to General and open the Status tab.
2. On the right side, under Tasks, click Export settings....
A list of all F-Secure Anti-Virus for Windows Servers settings opens in a new Internet browser window.
Page 22

22 | F-Secure Anti-Virus for Windows Servers | Getting started
Exporting statistics
You can view a list of all F-Secure Anti-Virus for Windows Servers statistics.
To see a list of the statistics:
1. Go to General and open the Status tab.
2. On the right side, under Tasks, click Export statistics....
A list of all F-Secure Anti-Virus for Windows Servers statistics opens in a new Internet browser window.
Page 23

Protecting the server against malware
Chapter
3
Topics:
•
What are viruses and other
malware
•
How to scan the server
•
How to use the quarantine
By default, all malware types are immediately handled when they are
found, so that they can cause no harm.
Virus and spyware scanning scans your local hard drives, any removable
media (such as portable drives or compact disks) and downloaded content
automatically by default.
Page 24

24 | F-Secure Anti-Virus for Windows Servers | Protecting the server against malware
What are viruses and other malware
Malware are programs specifically designed to damage your computer, use your computer for illegal purposes
without your knowledge, or steal information from your computer.
Malware can:
• take control over your web browser,
• redirect your search attempts,
• show unwanted advertising,
• keep track on the web sites you visit,
• steal personal information such as your banking information,
• use your computer to send spam, and
• use your computer to attack other computers.
Malware can also cause your computer to become slow and unstable. You may suspect that you have some
malware on your computer if it suddenly becomes very slow and crashes often.
Viruses
Viruses are usually programs that can attach themselves to files and replicate themselves repeatedly; they
can alter and replace the contents of other files in a way that may damage your computer.
A virus is a program that is normally installed without your knowledge on your computer. Once there, the
virus tries to replicate itself. The virus:
• uses some of your computer's system resources,
• may alter or damage files on your computer,
• probably tries to use your computer to infect other computers,
• may allow your computer to be used for illegal purposes.
Spyware
Spyware are programs that collect your personal information.
Spyware may collect personal information including:
• Internet sites you have browsed,
• e-mail addresses from your computer,
• passwords, or
• credit card numbers.
Spyware almost always installs itself without your explicit permission. Spyware may get installed together
with a useful program or by tricking you into clicking an option in a misleading pop-up window .
Rootkits
Rootkits are programs that make other malware difficult to find.
Rootkits hide files and processes. In general, they do this to hide malicious activity on your computer. When
a rootkit is hiding malware , you cannot easily discover that your computer has malware.
This product has a rootkit scanner that scans specifically for rootkits, so malware cannot easily hide itself.
Riskware
Riskware is not designed specifically to harm your computer, but it may harm your computer if it is misused.
Page 25

F-Secure Anti-Virus for Windows Servers | Protecting the server against malware | 25
Riskware is not strictly speaking malware. Riskware programs perform some useful but potentially dangerous
functions.
Examples of riskware programs are:
• programs for instant messaging, such as IRC (Internet Relay Chat),
• programs for transferring files over the Internet from one computer to another,
•
Internet phone programs, such as VoIP ( Voice over Internet Protocol),
• Remote Access Software, such as VNC,
• scareware, which may try to scare or scam individuals into buying fake security software, or
• software designed to bypass CD checks or copy protections.
If you have explicitly installed the program and correctly set it up, it is less likely to be harmful.
If the riskware is installed without your knowledge, it is most likely installed with malicious intent and should
be removed.
Page 26

26 | F-Secure Anti-Virus for Windows Servers | Protecting the server against malware
How to scan the server
You can scan the server for malware in real time, manually, or you can schedule a scan at set times.
Deciding which method to use depends on how powerful the server is and how high a level of protection you
want. Turning on all the virus and spyware scanning features can have a noticeable effort on the server's
speed if it is an older server.
Scan for malware
Real-time scanning protects the server by scanning all files when they are accessed locally or remotrly (over
network) and by blocking access to those files that contain malware .
Real-time scanning works as follows:
1. A file is accessed locally or remotely over network
2.
The file is immediately scanned for malware before access to the file is allowed.
3.
If malware is found in the file, real-time scanning removes the malware automatically before it can cause
any harm.
Does real-time scanning affect the performance of my computer
Normally, you do not notice the scanning process because it takes a small amount of time and system
resources. The amount of time and system resources that real-time scanning takes depend on, for example,
the contents, location and type of the file.
Files that take a longer time to scan:
•
Compressed files, such as .zip files.
• Files on removable drives such as CDs, DVDs, and portable USB drives.
Turn real-time scanning on or off
You can turn real-time scanning on to stop malware before it can harm your computer.
To turn real-time scanning on:
1. Go to Server Protection ➤ Real-time Scanning.
2. Select Turn on real-time scanning.
3. Click Apply.
Include Files in Real-Time Virus Scanning
You can add file types to be included in Real-time Scanning.
Note: No file that is excluded from scanning by either type or location is scanned even if the file is
included in the list of scanned file types.
To include files:
1. Go to Server Protection ➤ Real-time Scanning.
2. Under Scan these files, click Configure... and select one of the following:
To scan all files.Scan all files
To scan only the file types that you define.Scan defined files
3. Define file types to scan.
Page 27

F-Secure Anti-Virus for Windows Servers | Protecting the server against malware | 27
To include a file type to be scanned, enter the three-letter file extension in the field next to the Add
•
button and click Add.
• To prevent a file type from being scanned, click a file type in the list. Then click Remove.
Note: File types that are defined by F-Secure in database updates are grayed out and cannot be
removed.
For example, to include executable files in the scan, type exe in the field next to the Add button and click
Add.
4. Click OK.
Edit Scanned File Types dialog closes.
5. Click Apply.
Exclude Files by File Type from Real-Time Virus Scanning
You can define a list of excluded file types that you do not want to be scanned for viruses in real time.
Note: File types on this list override the list of scanned file types. For example, if you add a file type to
the list of files excluded by file type, files of that type are not scanned even if they are on the list of scanned
file types.
To define a list of files excluded by file type:
1. Go to Server Protection ➤ Real-time Scanning.
2. In Exclude from scanning, click Configure....
3. Exclude a file type:
a) Select the File Types tab.
b) Select Exclude files with these extensions.
c) Type a file extension that identifies the type of files that you want to exclude, in the field next to the
Add button.
To specify files that have no extension, type '.'. You can use the wildcard '?' to represent any single
character, or '*' to represent any number of characters.
For example, to exclude executable files, type exe in the field.
d) Click Add.
4. Repeat the previous step for any other extension you want to be excluded from being scanned for viruses.
5. Click OK to close the Exclude from Scanning dialog.
6. Click Apply.
The selected file types are excluded from future real-time scans.
Exclude Files by Location from Real-Time Virus Scanning
You can define a list of excluded folders or drives that you do not want to be scanned for viruses in real time.
Note: Files in folders or drives that are excluded from scanning are not scanned even though they might
be of a type that is included in scanned file types.
To define a list of files, folders, or drives excluded by location:
1. Go to Server Protection ➤ Real-time Scanning.
2. In Exclude from scanning, click Configure....
3. Add a file, drive, or folder to exclude:
a) Select the Objects tab.
b) Select Exclude objects (files, folders, ...).
c) Click Add....
Page 28

28 | F-Secure Anti-Virus for Windows Servers | Protecting the server against malware
d) Select the file, drive, or folder that you want to exclude from virus scanning.
e) Click OK.
4. Repeat the previous step to exclude other files, drives, or folders from being scanned for viruses.
5. Click OK to close the Exclude from Scanning dialog.
6. Click Apply.
Scan manually
You can scan your computer manually, if you suspect that you have malware on your computer.
How to select the type of manual scan
You can scan your whole computer or scan for a specific type of malware or a specific location.
If you are suspicious of a certain type of malware, you can scan only for this type. If you are suspicious of a
certain location on your computer, you can scan only that section. These scans will finish a lot quicker than
a scan of your whole computer.
To start manually scanning your computer:
1. Go to Server Protection ➤ Manual Scanning.
2. Under New scan, select the type of scan.
If you want to change the scanning settings, click the Settings tab.
3. If you selected Choose what to scan, click Select....
A window opens in which you can select which location to scan.
4. To start scanning, click Start.
If no malware is detected, you will see "Finished" on the Status line at the upper part of the page. If malware
is detected, the Scan Wizard opens.
Note: You can also start scanning the server manually by right-clicking the product icon in the system
tray.
Types of scan
You can scan your whole computer or scan for a specific type of malware or a specific location.
The following lists the different types of scan:
When to use this typeWhat is scannedScan type
Full computer
scan
Choose what
to scan
Your entire computer (internal
and external hard drives) for
viruses, spyware and riskware
A specific file, folder or drive
for viruses, spyware and
riskware
When you want to be completely sure that there is no
malware or riskware on your computer. This type of scan
takes the longest time to complete. It combines the quick
malware scan and the hard drive scan. It also checks for
items that are possible hidden by a rootkit.
When you suspect that a specific location on your computer
may have malware, for example, the location contains
downloads from potentially dangerous sources, such as
peer-to-peer file sharing networks. Time the scan will take
depends of the size of the target that you scan. The scan
completes quickly if, for example, you scan a folder that
contains only a few small files.
Scan hard
drives
All the internal hard drives on
your computer for viruses,
spyware and riskware
This type of scan goes through all the hard disks of the
computer. Unlike the quick Virus and spyware scan, this scan
type does not specifically go through the parts of your system
that contain installed program files, but scans also all data
Page 29

F-Secure Anti-Virus for Windows Servers | Protecting the server against malware | 29
When to use this typeWhat is scannedScan type
files, such as documents, music, images, and videos. This
type of scan is slow and recommended only if the Virus and
spyware scan has not found any malware and if you want to
be sure that the other parts of your computer do not contain
malicious files.
Virus and
spyware scan
Rootkit scan
Parts of your computer for
viruses, spyware and riskware
Important system locations
where a suspicious item may
mean a security problem.
Scans for hidden files, folders,
drives or processes
This type of scan is much quicker than a full scan. It searches
only the parts of your system that contain installed program
files.This scan type is recommended if you want to quickly
check whether your computer is clean, because it is able to
efficiently find and remove any active malware on your
computer.
When you suspect that a rootkit may be installed on your
computer. For example, if malware was recently detected in
your computer and you want to make sure that it did not
install a rootkit.
Clean malware automatically
If malware is found during the scan, you can either let the program automatically decide how to clean your
computer or you can decide yourself for each item.
1. Select either of:
What will happenOption
Handle automatically (recommended)
I want to decide item by item
The program decides what to do to each malware item to
automatically clean your computer.
The program asks what you want to do to each malware
item.
2. Click Next.
• If you selected Handle automatically (recommended), a window with the results of automatic malware
handling opens.
Note: Some malware items may have a "Not processed" status, which means that the infected
file is inside an archive (for example, a zip file) and cannot be handled automatically. You can
delete the infected file by opening the archive and deleting the file manually. If the content of the
archive is not important, you can delete the whole archive.
• If you selected I want to decide item by item, you must specify action for each detected malware.
3. Click Finish to close the Scan Wizard.
View the results of manual scan
You can view a report of the scanning results after the scan is complete.
Note: You might want to view this report because the action you selected may not always be the action
that was performed. For example, if you chose to clean an infected file, but the virus could not be
removed from the file, the product may have performed some other action to the file.
To view the report:
1. Go to Server Protection ➤ Manual Scanning and open the Status tab.
Page 30

30 | F-Secure Anti-Virus for Windows Servers | Protecting the server against malware
2. Under Tasks, click View scanning report....
Note: In a centrally-administered mode, the scan report is sent to F-Secure Policy Manager. You
can check it also in the F-Secure Policy Manager Console.
Scan at set times
You can scan your computer for malware at regular intervals, for example daily, weekly or monthly.
Scanning for malware is an intensive process. It requires the full power of your computer and takes some
time to complete. For this reason, you might want to set the program to scan your computer when you are
not using it.
Schedule a scan
Set the program to scan your computer at regular times.
To schedule a scan:
1. Go to Server Protection ➤ Scheduled Scanning.
2. Select Turn on scheduled scanning.
3.
Select which days you would like to regularly scan for viruses and spyware .
DescriptionOption
To scan every day.Daily
Weekly
4. Select when you want to start the scan on the selected days.
Start time
After computer is not used for
5. Click Apply.
To scan on selected days during the week. Select on which days to scan from
the list to the right.
To scan on up to three days a month. To select which days:Monthly
1. Select one of the Day options.
2. Select the day of the month from the list next to the selected day.
3. Repeat if you want to scan on another day.
DescriptionOption
The time when the scan will start. You should select a time when you
expect to not be using the computer.
Select a period of idle time after which the scanning starts if the
computer is not used.
Cancel a scheduled scan
You can cancel a scheduled scan locally if it starts when you do not want to run it. The scheduled scan will
run at the next scheduled time.
Note: You cannot cancel a scheduled scan from the Web Console.
Scheduled scanning may have a noticeable effect of your computers performance. To cancel the scheduled
scan:
Note: In centrally managed mode, you may not be able to cancel a scheduled scan.
Page 31

F-Secure Anti-Virus for Windows Servers | Protecting the server against malware | 31
1. Click Scheduled scan has started link on the Virus and spyware scanning flyer.
The flyer stays for about 15 seconds, after which it disappears. If you do not click the link on the flyer, you
cannot cancel the scheduled scanning any more.
2. Click Cancel on the Virus and spyware scanning window.
3. Click Close.
The scheduled scan is canceled. The next scheduled scan will start as usual.
View the results of scheduled scan
When a scheduled scan finishes you can check if malware were found.
To check the results of a scheduled scan:
1. Click the Scheduled scan has finished on the Virus and spyware scanning flyer.
2. Click Show Report to see what happened during the scan.
Note: If you opened the dialog from the Flyer History dialog, the Show report button is disabled.
You cannot see the results of previous scheduled scans.
3. Click Close to close the dialog.
Tip: You can view the results of the last scan also by clicking Server Protection ➤ Scheduled Scanning.
Click View scanning report....
Note: In a centrally administered mode, the scan report is sent to F-Secure Policy Manager. You can
check it also in the F-Secure Policy Manager Console.
Select files that are scanned
You can select the types of file and parts of your computer to scan in manual and scheduled scans.
Note: Edit manual scanning settings to select files and folders you want to scan during the scheduled
scan.
Two types of lists determine which files are scanned for viruses in manual and scheduled scans:
• Scanned file types list contains either all files or a defined list of file types.
• Lists of files excluded from scanning define exceptions to the list of scanned file types. File types or
locations that are on the lists of excluded files are not scanned even if they are included in the list of
scanned file types.
The lists of scanned file types and excluded files let you define which parts of your computer will be scanned
in different ways:
• You can include all files, and then optionally use the exclude list to exclude drives, directories, or files that
you know are safe and do not want to be scanned.
• You can define a list of file types that you want to scan, so that only these file types are scanned.
Include files
You can select the file types that you want to be scanned for viruses and spyware in manual and scheduled
scans.
1. Go to Server Protection ➤ Manual Scanning and click the Settings tab.
2. Under Scan these files, click Configure... and select one of the following:
To scan all files.Scan all files
To scan only the file types that you define.Scan defined files
Page 32

32 | F-Secure Anti-Virus for Windows Servers | Protecting the server against malware
3. Click Apply.
The options you selected under Scanning options determine which files are included in future manual and
scheduled scans.
Note: All file types or locations on the excluded items list will override the settings that you defined here.
File types on the excluded items list will not be scanned even if you selected them to be scanned here.
Exclude file types
You can exclude files from manual and scheduled scans by their file type.
1. Go to Server Protection ➤ Manual Scanning and click the Settings tab.
2. In Exclude from scanning, click Configure....
3. To exclude a file type:
a) Select the File Types tab.
b) Select Exclude files with these extensions.
c) Type a file extension that identifies the type of files that you want to exclude, in the field next to the
Add button.
To specify files that have no extension, type '.'. You can use the wildcard '?' to represent any single
character, or '*' to represent any number of characters.
For example, to exclude executable files, type exe in the field.
d) Click Add.
4. Repeat the previous step for any other extension you want to be excluded from being scanned for viruses.
5. Click OK to close the Exclude from scanning dialog box.
6. Click Apply.
The selected file types are excluded from future manual and scheduled scans.
Exclude files by location
You can define a list of excluded folders or drives that you do not want to be scanned for viruses in manual
and scheduled scanning.
Note: Files in folders or drives that are excluded from scanning are not scanned even though they might
be of a type that is included in scanned file types.
To define a list of files, folders, or drives excluded by location:
1. Go to Server Protection ➤ Manual Scanning and click the Settings tab.
2. In Exclude from scanning, click Configure.
3. To exclude a file, drive, or folder:
a) Select the Objects tab.
b) Select Exclude objects (files, folders, ...).
c) Click Add.
d) Select the file, drive, or folder that you want to exclude from virus scanning.
e) Click OK.
4. Repeat the previous step to exclude other files, drives, or folders from being scanned for viruses.
5. Click OK to close the Exclude from scanning dialog box.
6. Click Apply.
The selected files, drives or folders are excluded from future manual and scheduled scans.
Page 33

F-Secure Anti-Virus for Windows Servers | Protecting the server against malware | 33
View excluded applications
You can view applications that you have excluded from future manual and scheduled scans, and remove
them from the exclude list so they will be found in future scans.
To view the applications that are excluded from scanning:
1. Go to Server Protection ➤ Manual Scanning and click the Settings tab.
2. In Exclude from scanning, click Configure....
3. Select the Applications tab.
Note: Only spyware and riskware applications can be excluded, not viruses.
4. To restore an application so that it will be found in future manual or scheduled scans:
a) Select the application that you want to include in the scan again.
b) Click Remove.
5. Click OK to close the Exclude from scanning dialog box.
6. Click Apply.
Scan inside compressed files and folders
You can scan for viruses that hide inside compressed files.
1. Go to Server Protection ➤ Manual Scanning and click the Settings tab.
2.
If you want to scan archive files and folders, such as .zip files, select Scan inside compressed files
(.zip, .rar, etc.).
Compressed files take slightly longer to scan.
3. Click OK .
4. Click Apply.
Select the action when something is found
If viruses or spyware are found and you have set the program not to automatically handle viruses and spyware,
you can now select whether to clean, delete, quarantine or only block the files in which a virus or spyware
was found.
Note: This step of the Scan Wizard will be skipped if you have set the program to always handle viruses
and spyware automatically during a manual or scheduled scan or if you have set the program to
automatically process malware found during this scan.
When using Web Console Scan Wizard, you are shown a list of infected files and the viruses and spyware
that were found in these files. To handle these viruses and spyware:
1. Select the infected files that you want to handle.
To view additional details of the infection, click the link in the Infection column.
2. Select the action that you want to take for the selected files.
The files are handled immediately.
3. Repeat step 2 with all the files that you want to handle.
4. Click Finish.
If you are using the local Scan Wizard, you will have three separate iterations for handling detected viruses,
spyware and riskware. To handle viruses from your computer:
1. Select the action to take for infected files. If you want to view the additional details of the infection, click
the link in the Infection column.
Page 34

34 | F-Secure Anti-Virus for Windows Servers | Protecting the server against malware
2. Click Next to apply the actions.
3. Click Next to finish.
If spyware was found during the manual or scheduled scan, the Scan Wizard continues to the spyware
cleaning step.
Actions you can take in real-time scanning
The Action to take column shows you what actions you can take for the infected files in real-time scanning.
Note: In addition to files, the infection can be found also in a registry entry or a process.
The following actions can be taken for viruses:
What happens to the infected filesAction to take
Disinfect automatically
Quarantine automatically
(default)
Report only
The following actions can be taken for spyware:
Quarantine automatically
Report only (default)
The product tries to disinfect the viruses in any infected files that were
found during real-time scanning.
The product moves any infected files found during real-time scanning to
the quarantine where it cannot harm your computer.
The product renames any infected files found during real-time scanning.Rename automatically
The product deletes any infected files found during real-time scanning.Delete automatically
The product records the detected viruses in the logfile.log file, sends alerts
to Policy Manager, adds events to Windows Event log, and sends e-mail
notifications (according to the settings that are specified on the Alerts page
under General>Administration).
What happens to the infected filesAction to take
The product moves any spyware found during real-time scanning to the
quarantine where it cannot harm your computer.
The product removes any spyware found during real-time scanning.Remove automatically
The product leaves any spyware that was found during real-time scanning
as it is and records the detection in the logfile.log file, sends alerts to Policy
Manager, adds events to Windows Event log, and sends e-mail notifications
(according to the settings that are specified on the Alerts page under
General>Administration).
Actions you can take in manual or scheduled scanning
The Action to take column shows you what actions you can take for the infected files in manual or scheduled
scanning.
Note: In addition to files, the infection can be found also in a registry entry or a process.
The following actions can be taken for viruses:
What happens to the infected filesAction to take
Ask what to do (default)
The product asks you what to do if viruses are found during manual scanning.
Page 35

F-Secure Anti-Virus for Windows Servers | Protecting the server against malware | 35
What happens to the infected filesAction to take
Disinfect automatically
Quarantine automatically
Rename automatically
Delete automatically
Report only
The following actions can be taken for spyware:
The product tries to automatically disinfect the viruses in any infected files that
were found during manual or scheduled scanning.
Note: It is not always possible to disinfect a virus in a file. If this is not
possible, the file is quarantined (except when found on network or
removable drives), so the virus cannot harm the server.
The product moves any infected files that were found during manual or
scheduled scanning to the quarantine where they cannot harm the server.
The product renames any infected files that were found during manual or
scheduled scanning.
The product deletes any infected files that were found during manual or
scheduled scanning.
The product leaves any infected files that was found during during manual or
scheduled scanning as they are and records the detection in the scan report.
Note: If real-time scanning is turned off, any malware is still able to harm
the server if you select this option.
What happens to the infected filesAction to take
Ask what to do (default)
Quarantine automatically
Remove automatically
Report only
The product asks you what to do if spyware is found during manual scanning.
The product moves any spyware that was found during manual or scheduled
scanning to the quarantine where it cannot harm the server.
The product removes any spyware that was found during manual or scheduled
scanning.
The product leaves any spyware that was found during during manual or
scheduled scanning as it is and records the detection in the scan report.
Note: If real-time scanning is turned off, any malware is still able to
harm the server if you select this option.
Page 36

36 | F-Secure Anti-Virus for Windows Servers | Protecting the server against malware
How to use the quarantine
Quarantine is a safe repository for files that may be harmful.
Quarantined files cannot spread or cause harm to your computer.
The product can quarantine malware , spyware , and riskware to make them harmless. You can restore
applications or files from the quarantine later if you need them.
If you do not need a quarantined item, you can delete it. Deleting an item in the quarantine removes it
permanently from your computer.
•
In general, you can delete quarantined malware .
•
In most cases, you can delete quarantined spyware . It is possible that the quarantined spyware is part
of a legitimate software program and removing it stops the actual program from working correctly. If you
want to keep the program on your computer, you can restore the quarantined spyware .
•
Quarantined riskware can be a legitimate software program. If you have installed and set up the program
by yourself, you can restore it from the quarantine. If the riskware is installed without your knowledge, it
is most likely installed with malicious intent and should be deleted.
View quarantined items
You can view more information on items in the quarantine.
To view information on items in the quarantine:
1. To view general information on the quarantined items, go to the Quarantine page.
It shows the total number of items stored in quarantine.
2. To view detailed information on items in the quarantine, go to the Quarantine ➤ Query.
You can sort the content either by malware type or malware name.
A list of the first 100 items is shown with the type of the quarantined items, their name, and the path where
the files were installed.
3.
To view more information on a quarantined item, click the icon next to the item on the State column.
Restore quarantined items
You can restore the quarantined items that you need.
You can restore applications or files from the quarantine if you need them. Do not restore any items from the
quarantine unless you are sure that items pose no threat. Restored items move back to the original location
in your computer.
To restore quarantined items:
1. To restore all the items from the quarantine, on the Quarantine page, click Restore all files under Tasks
on the right pane.
2. To restore specific items from the quarantine, do the following:
a) Go to Quarantine ➤ Query.
b) Select the quarantined items that you want to restore.
c) Click Restore.
Delete quarantined items
You can delete one or more items in the quarantine.
Page 37

F-Secure Anti-Virus for Windows Servers | Protecting the server against malware | 37
To delete quarantined items:
1. To delete all the items from the quarantine, on the Quarantine page, click Delete all files under Tasks
on the right pane.
2. To delete one or more quarantined items, do the following:
a) Go to Quarantine ➤ Query.
b) Select the quarantined items that you want to delete.
c) Click Delete.
Note: In the centrally-administered mode, you can view and handle quarantined files through both
the F-Secure Policy Manager Console and the Web Console. See F-Secure Policy Manager
Administrator's Guide for more details.
Page 38

Page 39

How to use automatic updates
Chapter
4
Topics:
•
Turning automatic updates on
•
Check the update status
•
Change the Internet connection
settings
The product retrieves the latest updates to your computer when you are
connected to the Internet. It detects the network traffic and does not
disturb other Internet use even with a slow network connection.
Page 40

40 | F-Secure Anti-Virus for Windows Servers | How to use automatic updates
Turning automatic updates on
When you keep automatic updates turned on, the product stays up-to-date automatically.
1. Go to Automatic Updates ➤ Communications, and click the General tab.
2. Check the Turn on automatic updating check box to keep automatic updates turned on. Clear the check
box to turn off automatic updates.
Page 41

F-Secure Anti-Virus for Windows Servers | How to use automatic updates | 41
Check the update status
View the date and time of the latest update.
When automatic updates are turned on, the product receives the latest updates automatically when you are
connected to the Internet.
To make sure that you have the latest updates:
1. Go to Automatic Updates and click the Status tab.
2. Last installed update displays the name and the date of the latest installed update.
3. Last check time displays the time of the latest update check and Last check result displays whether
the product retrieved any new updates.
4. Click Check for updates now.
The product connects to the Internet and checks for the latest updates. If the protection is not up-to-date,
it retrieves the latest updates.
5. If you want to see information about downloaded and installed update packages, click the Downloads
tab.
Page 42

42 | F-Secure Anti-Virus for Windows Servers | How to use automatic updates
Change the Internet connection settings
Usually there is no need to change the default settings, but you can configure how the server is connected
to the Internet so that you can receive updates automatically.
To change the Internet connection settings:
1. Go to Automatic Updates ➤ Communications.
2. On the Internet connection checking list, select how your computer is connected to the Internet.
• Select Assume always connected if you have a permanent network connection.
Note: If your computer does not actually have the permanent network connection and is set up
for dial-on-demand, selecting Assume always connected can result in multiple dial-ups.
• Select Detect connection to retrieve updates only when the product detects an active network
connection.
• Select Detect traffic to retrieve updates only when the product detects other network traffic.
Tip: If you have an uncommon hardware configuration that causes the Detect connection setting
to detect an active network connection even when there is none, select Detect traffic instead.
3.
On the Use HTTP proxy list, select whether or not your computer uses a proxy server to connect to the
Internet.
• Select No HTTP Proxy if your computer is connected to the Internet directly.
•
Select Manually configure HTTP proxy to configure the HTTP proxy settings.
•
Select Use browser's HTTP proxy to use the same HTTP proxy settings that you have configured
in your web browser.
4. Under Update server, you can select the following options:
• Turn on Allow fetching updates from F-Secure Update Server to allow the server to connect to
F-Secure Policy Manager Server or F-Secure Policy Manager Proxy if it cannot connect to specified
update sources.
• In the Server failover time field, enter the time (in hours) after which you want the server to connect
to F-Secure Policy Manager Server or F-Secure Policy Manager Proxy if it cannot connect to specified
update sources.
• In the Server polling interval field, enter the time (in minutes) how often you want the server to connect
to update sources to receive the latest updates.
Add a Policy Manager proxy server
If you add a Policy Manager proxy server, the product downloads updates through this proxy, which can mean
faster updates.
Note: These instructions apply only when the product is installed in the centrally- administered mode
and the product is managed with F-Secure Policy Manager.
To add a new proxy server:
1. Go to Automatic Updates ➤ Communications ➤ Policy Manager Proxies.
2. Click Add new proxy....
3. Enter the URL of the proxy server.
4. Edit the priority of the proxy servers.
Page 43

F-Secure Anti-Virus for Windows Servers | How to use automatic updates | 43
The product connects first to the proxy at the top of the list. If the connection to that proxy fails, it tries to
connect to the next proxy in the list, and so on until the connection succeeds. You can change the order
of the proxy servers by selecting a proxy from the list and clicking the arrows to the right of the list.
5. Click OK to add the new proxy server to the list.
6. Click Apply.
The product will try to download updates through the Policy Manager proxy server.
Page 44

Page 45

Technical support
Chapter
5
Topics:
•
F-Secure online support
resources
•
Web Club
•
Virus descriptions on the Web
F-Secure Technical Support is available through F-Secure support web
pages, e-mail and by phone.
Page 46

46 | F-Secure Anti-Virus for Windows Servers | Technical support
F-Secure online support resources
Support requests can be submitted through a form on F-Secure support web pages directly to F-Secure
support.
F-Secure support web pages for any F-Secure product can be accessed at
http://www.f-secure.com/en_EMEA/support/. All support issues, frequently asked questions and hotfixes can
be found under the support pages.
If you have questions about F-Secure Anti-Virus for Windows Servers not covered in this manual or on the
F-Secure support web pages, you can contact your local F-Secure distributor or F-Secure Corporation directly.
For technical assistance, please contact your local F-Secure Business Partner. Send your e-mail
to:Anti-Virus-<country>@f-secure.com. For example, Anti-Virus-Norway@f-secure.com
If there is no authorized F-Secure Anti-Virus Business Partner in your country, you can submit a support
request directly to F-Secure. There is an online "Web submit form" accessible through F-Secure support web
pages under the "Contact Support" page. Fill in all the fields and describe the problem as accurately as
possible. Please include the FSDiag report taken from the problematic server with the support request.
F-Secure support tool
Before contacting support, please run the F-Secure Support Tool (also known as FSDiag utility) on problematic
hosts running F-Secure Anti-Virus for Windows Servers.
This utility gathers basic information about hardware, operating system, network configuration and installed
F-Secure and third-party software.
Note: You can also find and run the FSDiag.exe utility under the F-Secure\Common folder, if you prefer
not to do it through the F-Secure Anti-Virus for Windows Servers Web Console. The tool generates a file
called FSDiag.tar.gz.
To run the F-Secure Support Tool from F-Secure Anti-Virus for Windows Servers Web Console:
1. Log in to the Web Console.
2. Go to General and open the Status tab.
3. Under Tasks, click F-Secure support tool....
The F-Secure Support Tool starts and the dialog window displays the progress of the data collection.
Note: In some web browsers, the window may appear behind the main browser window.
4. When the tool has finished collecting the data, click Report to download and save the collected data.
5. Please include the following information with your support request:
• Version number of F-Secure Management Agent, F-Secure Anti-Virus for Windows Servers , F-Secure
Policy Manager Server, and F-Secure Policy Manager Console. Include the build number if available.
• Description how F-Secure components are configured.
• The name and the version number of the operating system on which F-Secure products and protected
systems are running. For Windows, include the build number and Service Pack number.
• A detailed description of the problem, including any error messages displayed by the program, and
any other details that could help us replicate the problem
• Logfile.log from the machines running F-Secure products. This file can be found under Program
Files\F-Secure\Common. If you are sending the FSDiag report you do not need to send the Logfile.log
separately, because it is already included in the FSDiag report.
• If the whole product or a component crashed, include the drwtsn32.log file from the Windows NT
directory and the latest records from the Windows Application Log.
Page 47

F-Secure Anti-Virus for Windows Servers | Technical support | 47
Web Club
F-Secure Web Club provides assistance and updated versions of the F-Secure products.
To connect to the Web Club on our Web site:
1. Open F-Secure Anti-Virus for Windows Servers Web Console, and click the Web Club link.
2. To connect to the Web Club directly from your Web browser, go to:
http://www.f-secure.com/en_EMEA/downloads/product-updates/.
Page 48

48 | F-Secure Anti-Virus for Windows Servers | Technical support
Virus descriptions on the Web
F-Secure Corporation maintains a comprehensive collection of virus-related information on its Web site.
To view the Virus Information Database, connect to: http://www.f-secure.com/security_center/
 Loading...