

Frog Bikes Bike, Tadpole, Frog 43, Frog 48 User Manual

Your New Frog Bike
Congratulations on purchasing a new bike and thank
you for choosing Frog!
We know that you must be raring to go but before you
do there’s a few little things still to do to get you up
and running safely. So just follow these simple steps
and in a few minutes you’ll be ready to hit the road.
The following pages will help you fully understand
your bike and how to look after it.
A few basic tools
It’s easy to get your Frog Bike ready. All you need to make the final pre-ride
adjustments are some standard allen keys and a size 15 spanner for the
pedals.
Ok, let’s get started
If your new Frog Bike has been delivered to your home you just need to fit
the front wheel, twist the handlebars and fit the pedals. Then you need to
make the final size adjustments. Don’t worry, it’s easy to do and only takes a
few minutes. If you have picked your new Frog Bike up from a shop most of
this will already be done for you, but your safety is very important to us - so
please check these anyway.
Frog Bikes
Manual
Issue 3
September 2013
frogbikes.com
frogbikes.com
Frog Bikes
Manual
Issue 3
September 2013
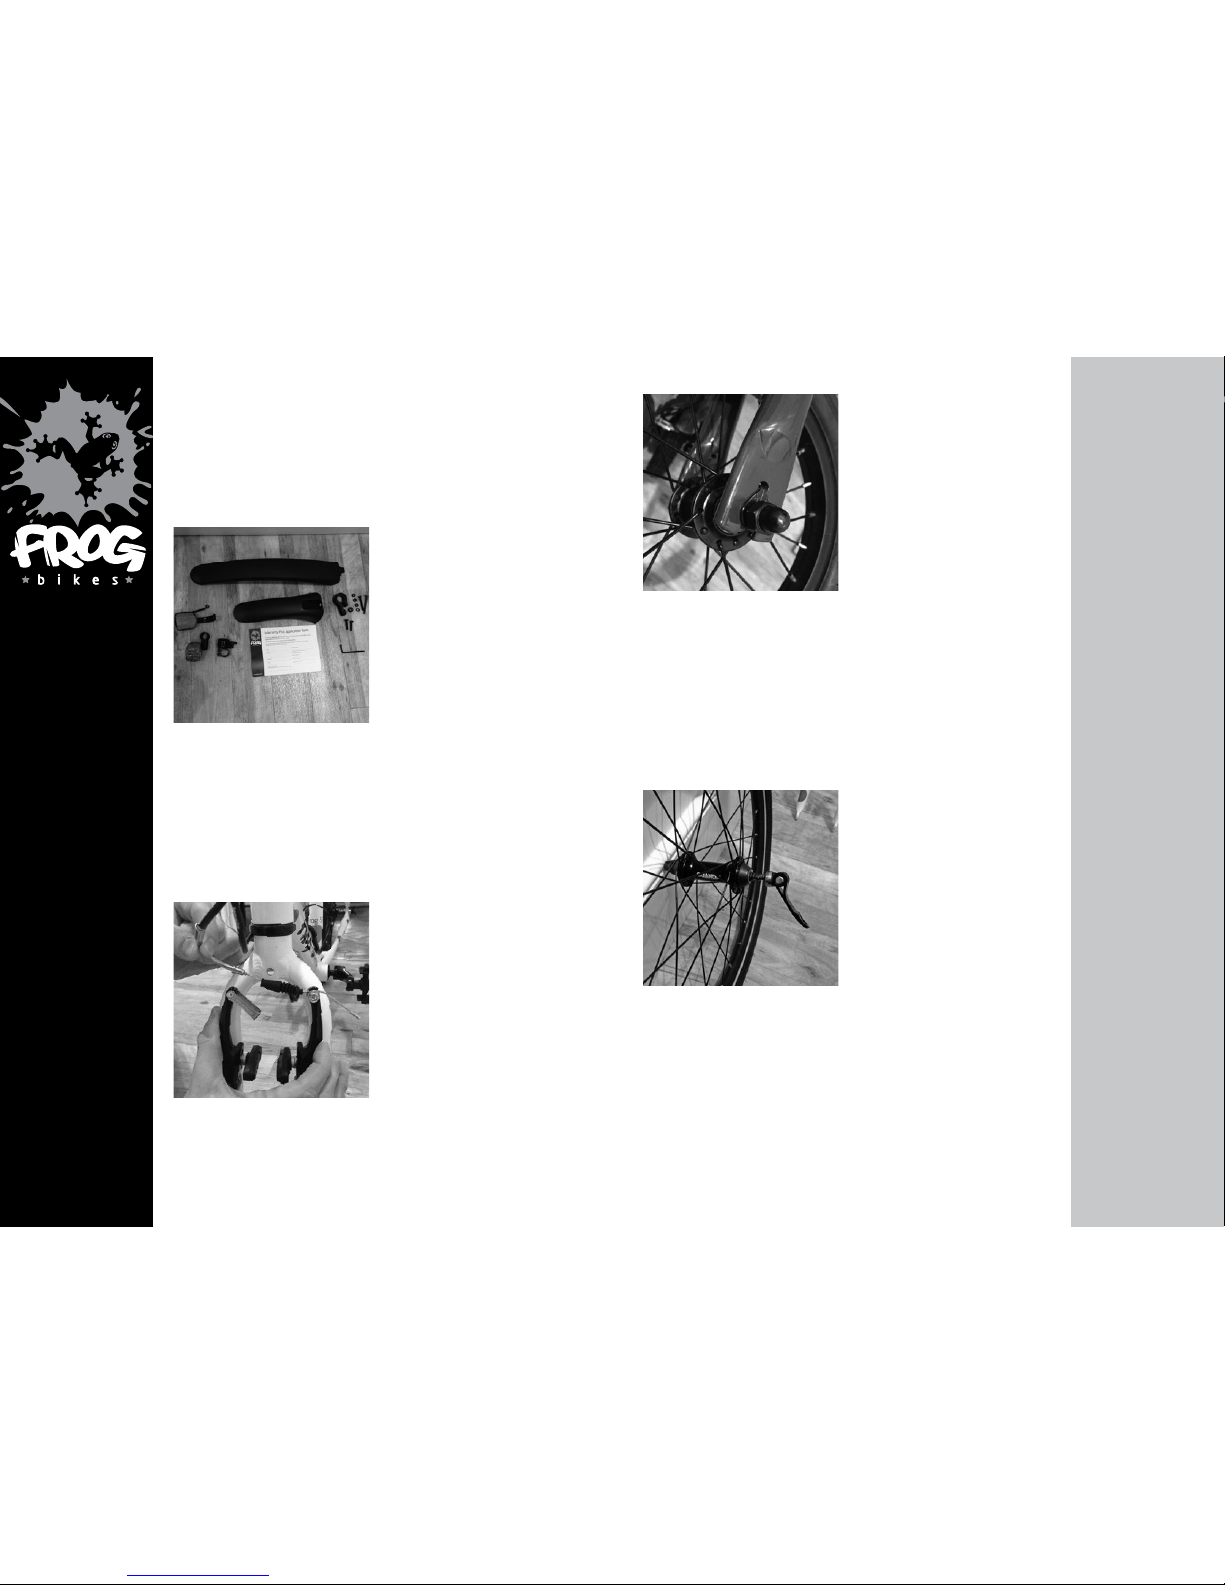
In the box you will find
» 1 bike with front wheel of f
» 1 front wheel
» 1 bag containing 2 mud guards, 2 long bolts, 2 shor t bolts, 3 nuts, 1
curved plas tic washer, 1 metal washer, 1 black mudguard clamp
» 1 box containing reflectors, pedals, front wheel Quando
skewer, allen key, warranty card and manu al
Before you start , carefully remove all plastic wrappin g, cable ties and
cardboard wraps.
a) Fitting the Front Wheel
» Remove the black plastic supporting rod from between the forks
» The front brake ar ms will need to be disconnected to get the f ront
wheel on. To do this, squeeze the left and right brake arms (or
“calipers”) together and then slide the cable out of the cut-out piece
For the Tadpole, Frog 43 and Frog 48, place the front wh eel axle in
between the jaws of the forks. Keep the safety washers on the outside of
each fork, an d plug them into the holes.
» Use a 15mm spanner to tighten the nuts
For all others sizes of bike:
» Find the Quan do skewer which is in the box with the peda ls and
reflectors, uns crew the plastic nut off the end an d place the skewer
through the wheel. Make sure that there is a spring either side of the
wheel; the widest part of each spring should be furthest away from
the wheel. Th e quick release handle goes on th e left side of the bike,
and the “Dri ve —›” marking on the tyre should b e pointing forwards
» Open the quick-release lever on the front wheel
» Insert the wheel into the jaws of the front forks (these look
like open jaws), keeping the q uick-release lever on th e left
» Tighten up the nut on the opposite side to the quick-release
lever and then clo se the lever with a firm pressure. If it is too
tight to close, release t he nut a little then try to clos e it again
frogbikes.com
Frog Bikes
Manual
Issue 3
September 2013
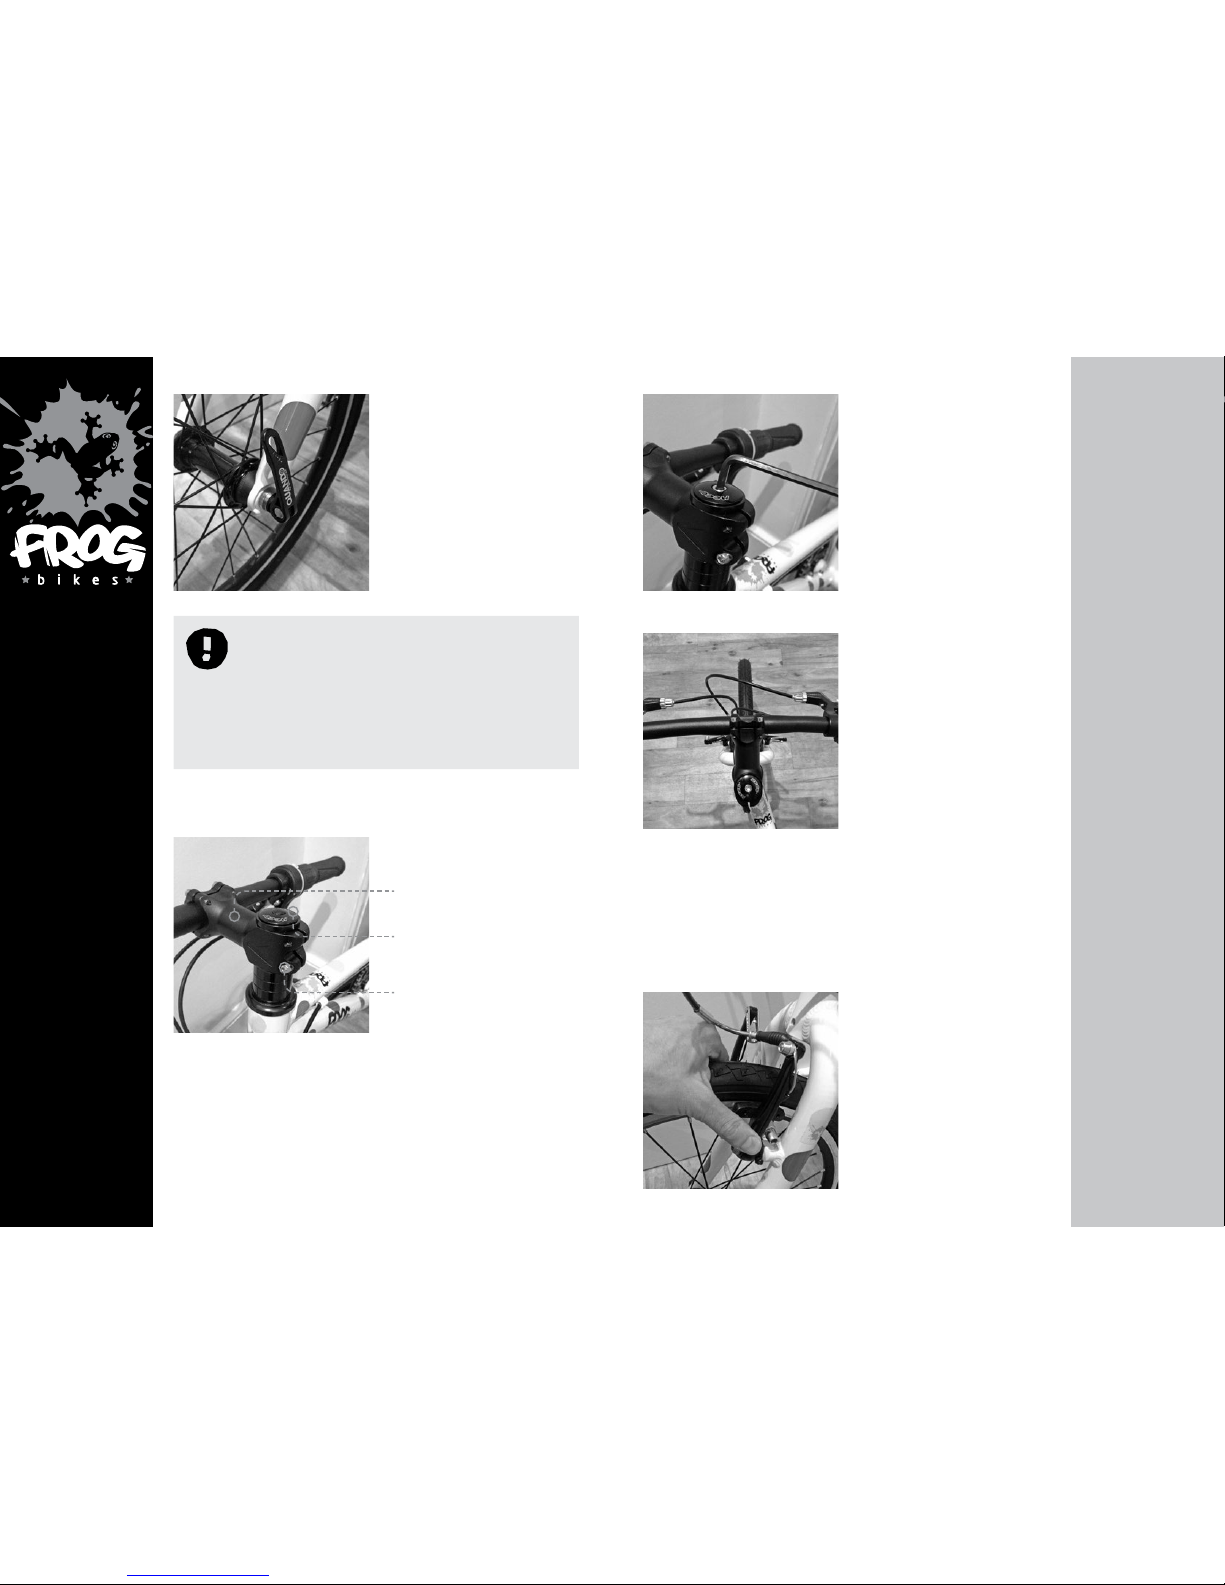
Important safety check!
Check that the quick-release lever is firmly closed and
that the wheel is clamped tightly in the forks. If the quickrelease lever closes too easily or if the wheel is loose in
the forks when the lever is closed then re-open the lever
and tighten the nut on the opposite side of the wheel.
Then try again.
b) Fitting the handlebars correctly
» The handleb ars need to be fitted to the bike
Stem
Headset
Side bolts
» Unscrew the 4 bol ts at the front of the stem and take off the
front plate in order to position the handlebars centrally on the
stem. Note the ridge s on the handlebar indicate the centre
» Next, ens ure the handlebars are straig ht. Loosen
the side bolt s with an allen key
» Flip the rub ber cap out of the headset, then l oosen with allen key
» Position the handlebars to line up the stem with the front wheel
» Tighten the top cap bolt first, then tighten the bolts on
either side of the stem. Replace the rubber cap
c) Connecting the front brakes
Safety fir st – Don’t ride the bike until you have done this.
» With your fingers, squeeze the left and right brake arms (or “calipers”)
together above the wheel until the brake pads are touching the rims
 Loading...