

Page 1
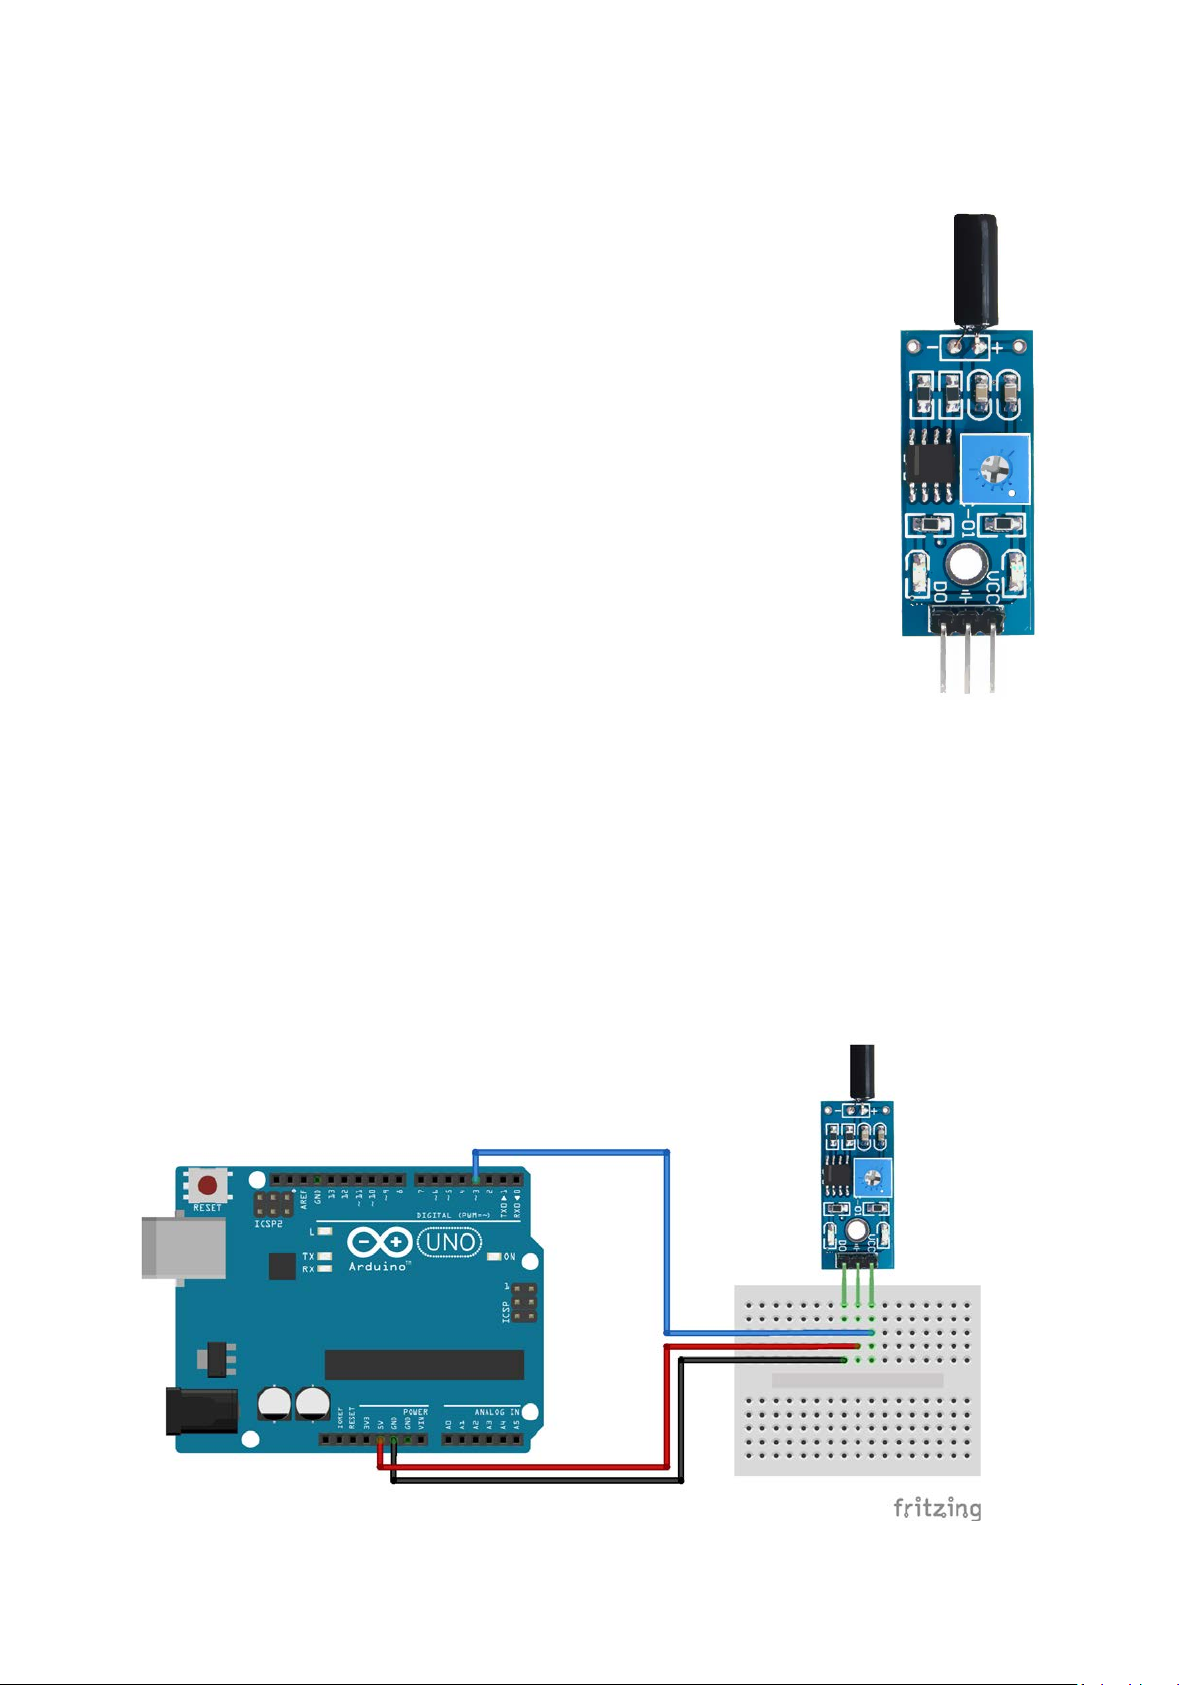
Vibration Shake Sensor
The Vibration Sensor allows you to use an Arduino to detect impacts, shocks or
shaking.
When the switch detects a jolt, the output of the module is sent low.
Functional Description
The switch primarily consists of a terminal that forms a center post and a second
terminal that is a spring that surrounds the center post.
When a sufficient force is transferred to the switch, the terminal consisting of the
spring moves and shorts both terminals together.
The connection between the terminals is momentary and will require a little
thought as you implement it in your Arduino project.
Positioning of the switch is also important. Generally speaking the switch should
be physically located as close as possible to the area being monitored. Otherwise, the vibration
being detected may be dampened by other structural components in your project.
An exception to this rule may be where you find that the switch is too sensitive for your
application. In this case, moving the switch further away from the area of interest may make it less
sensitive.
Pinout and Connection to Arduino
Use the diagram below. You will only need three connections. Connect + to 5V, - to Ground and S to
pin 10 on Arduino.
Page 2

Arduino Example Sketch
In the sketch below:
• We read the input from the shock sensor
• If we detect a shock and we record the time the shock was detected. ( see lastShockTime)
• If we were not already in an alarm state (see bAlarm) when a shock is detected, we set an alarm
state and indicate that we’re in an alarm state by sending an output to the serial monitor
• We exit the alarm state when the following conditions are satisfied
• There is a high value measured at the sensor output
• The difference between the high measurement and the last low measurement is greater than
250 mS (set by shockAlarmTime)
• We are in an alarm state (see bAlarm)
• When we exit the alarm state, we set bAlarm to false and we send an output to the serial monitor
int shockPin = 10; // Use Pin 10 as our Input
int shockVal = HIGH; // This is where we record our shock measurement
boolean bAlarm = false;
unsigned long lastShockTime; // Record the time that we measured a shock
int shockAlarmTime = 250; // Number of milli seconds to keep the shock alarm high
void setup ()
{
Serial.begin(9600);
pinMode (shockPin, INPUT) ; // input from the sensor
}
void loop ()
{
shockVal = digitalRead (shockPin) ; // read the value from our sensor
if (shockVal == LOW) // If we're in an alarm state
{
lastShockTime = millis(); // record the time of the shock
// The following is so you don't scroll on the output screen
if (!bAlarm){
Serial.println("Shock Alarm");
bAlarm = true;
}
}
else
{
if( (millis()-lastShockTime) > shockAlarmTime && bAlarm){
Serial.println("no alarm");
bAlarm = false;
}
}
}
 Loading...