

Page 1
Soil Moisture Sensor Module
This sensor will measure the humidity in the soil. It works by
measuring the resistance across the two legs and convert it to a
voltage that can be read by a microcontroller. As the probe passes
current through the soil, it carries ions that will damage the surface
layer over time. As such the sensor should not be operated
permanently. Instead it should only be powered up when a
measurement is taken and then instantly shut down again.
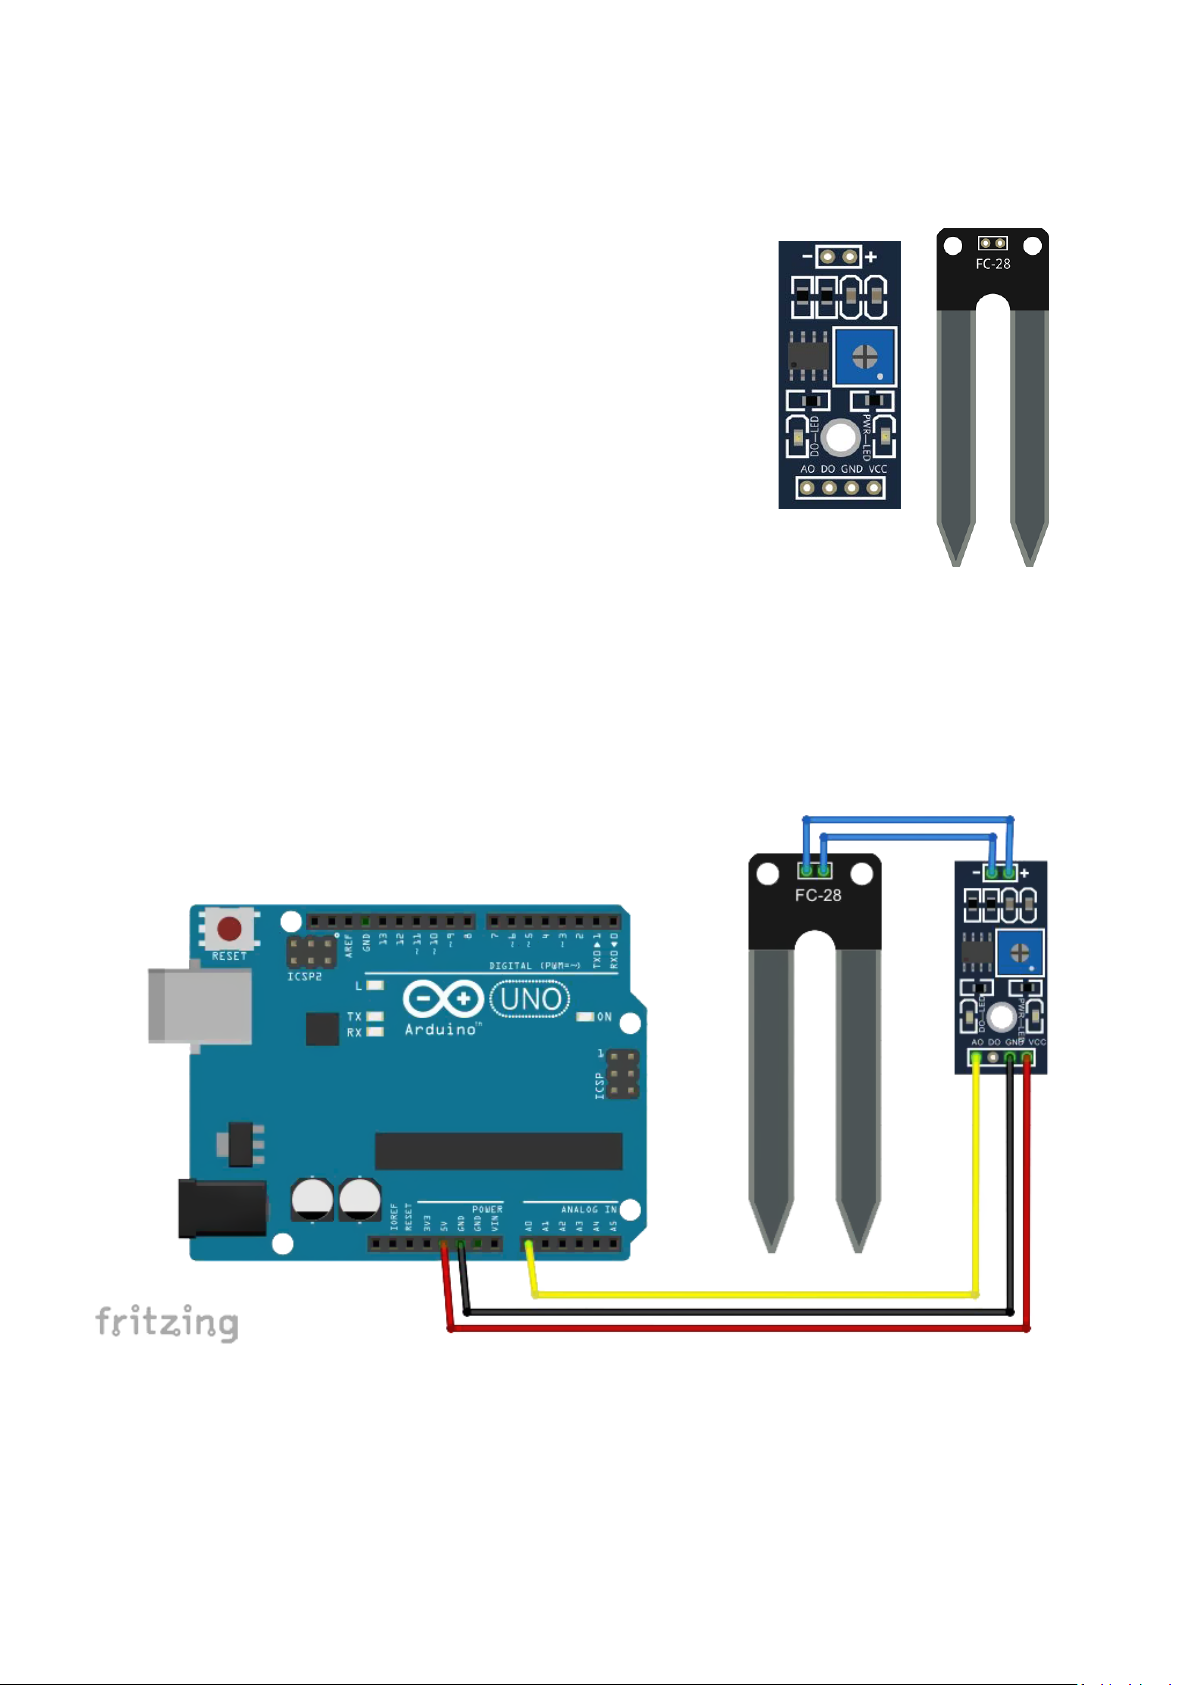
Pinout and Connection to Arduino
Connect the Power line (middle) and ground (-) to +5 and GND respectively. Connect signal to pin A5
on the Arduino. In the example sketch below, the power line is connected to pin 13!
Page 2

Arduino Example Sketch
The example sketch will output the measured value once every minute in the serial monitor.
Please note that the sensor is powered from pin 13 instead of 5V pin to enable on/off control from
the sketch!
int sensorPin = A5; // select the input pin for the potentiometer
int sensorValue = 0; // variable to store the value coming from the sensor
int sensorVCC = 13;
void setup()
{
Serial.begin(9600);
pinMode(sensorVCC, OUTPUT); // declare the ledPin as an OUTPUT:
digitalWrite(sensorVCC, LOW);
}
void loop()
{
digitalWrite(sensorVCC, HIGH); // power the sensor
delay(100); //make sure the sensor is powered
sensorValue = analogRead(sensorPin); // read the value from the sensor:
digitalWrite(sensorVCC, LOW); //stop power
delay(60*1000); //wait
Serial.print("sensor = " );
Serial.println(sensorValue);
}
 Loading...