

Page 1
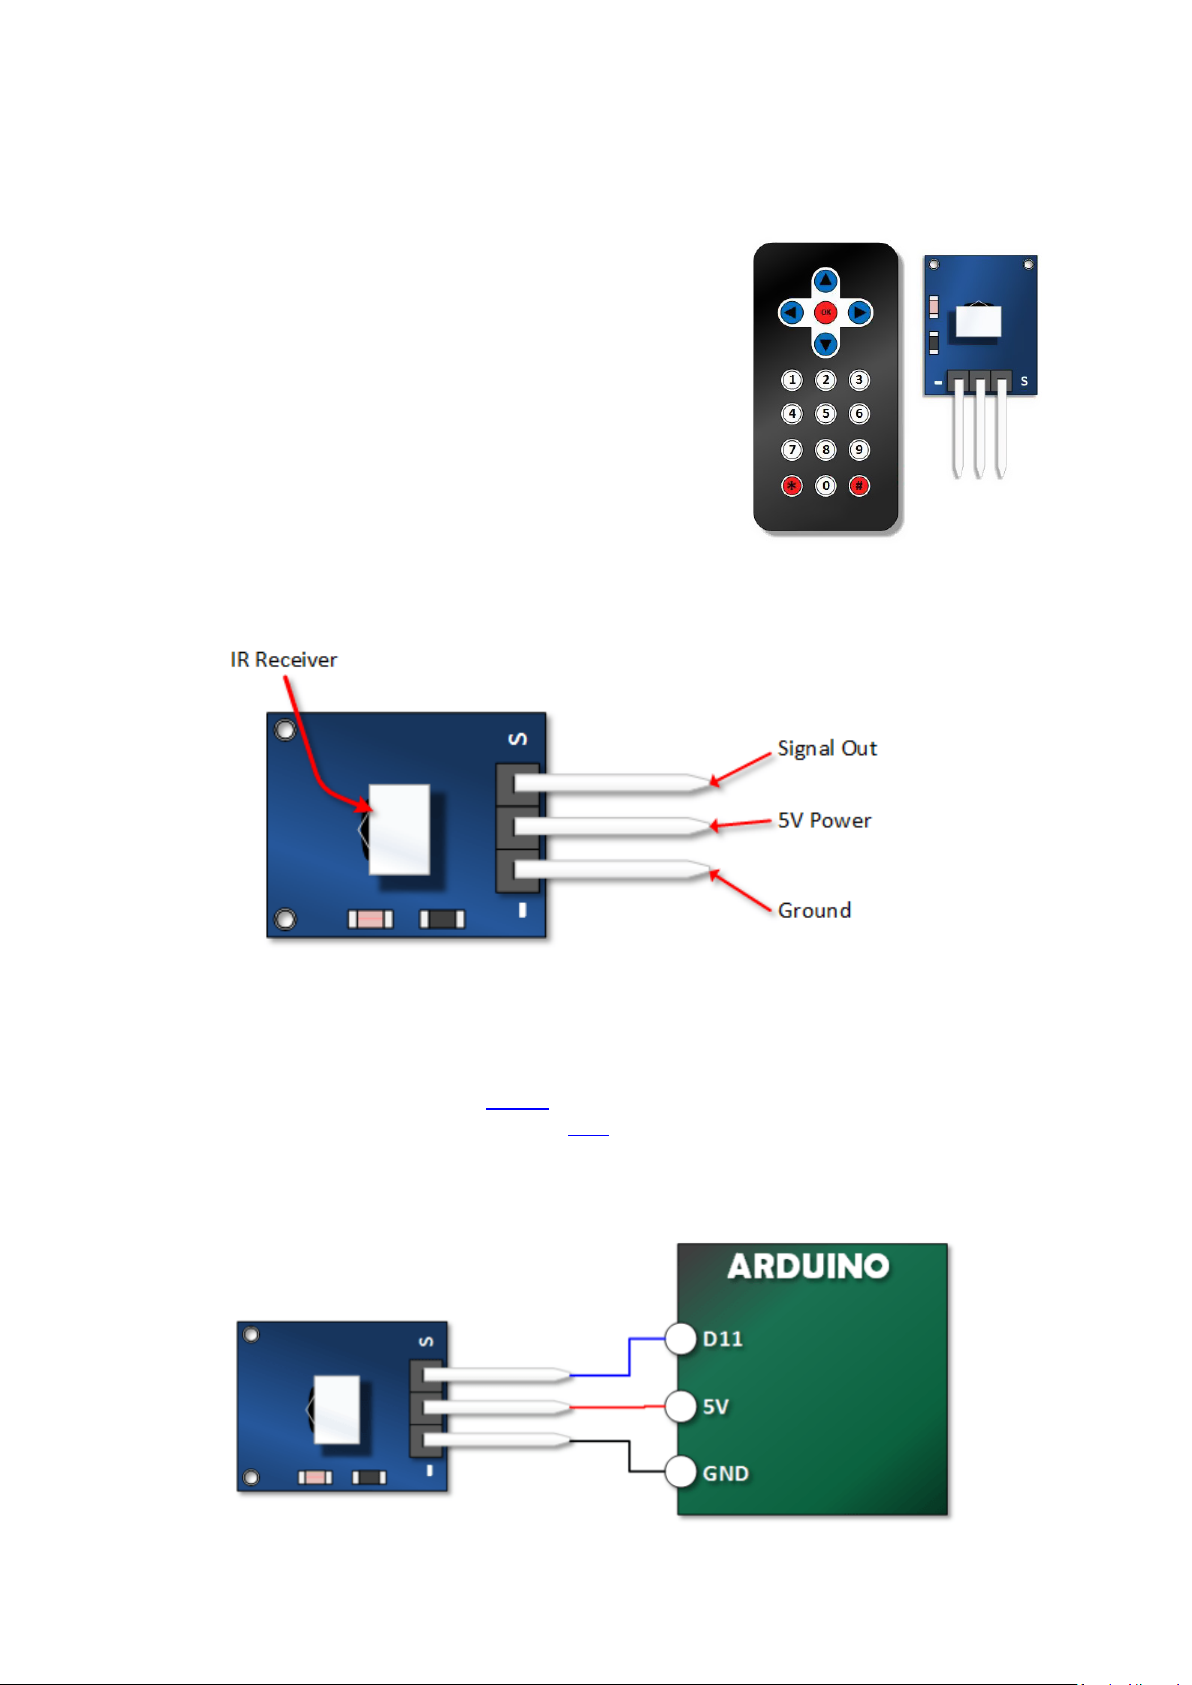
IR Remote Control + Receiver
These remote controls are incredibly inexpensive and are pretty
simple to use.
They consist of a key pad that transmits and IR signal and an IR
receiver that connects to your Arduino.
The receiver requires only three connections and is easily
implemented with a readily available library.
Receiver pinout
The only connections you will require are a power, ground and a signal input to your Arduino
Download and install IRRemote Library
The necessary library can be found on GitHub. If you’re not familiar with working with libraries, you
can learn more about installing and using them here.
Connecting the receiver to Arduino
Page 2
Arduino Example Sketch 1
This sketch simply receives a signal and shows the value of the signal received on your serial monitor.
#include <IRremote.h>
int IR_PIN = 11;
IRrecv irDetect(IR_PIN);
decode_results irIn;
void setup()
{
Serial.begin(9600);
irDetect.enableIRIn(); // Start the Receiver
}
void loop() {
if (irDetect.decode(&irIn)) {
Serial.println(irIn.value, HEX);
irDetect.resume(); // Receive the next value
}
}
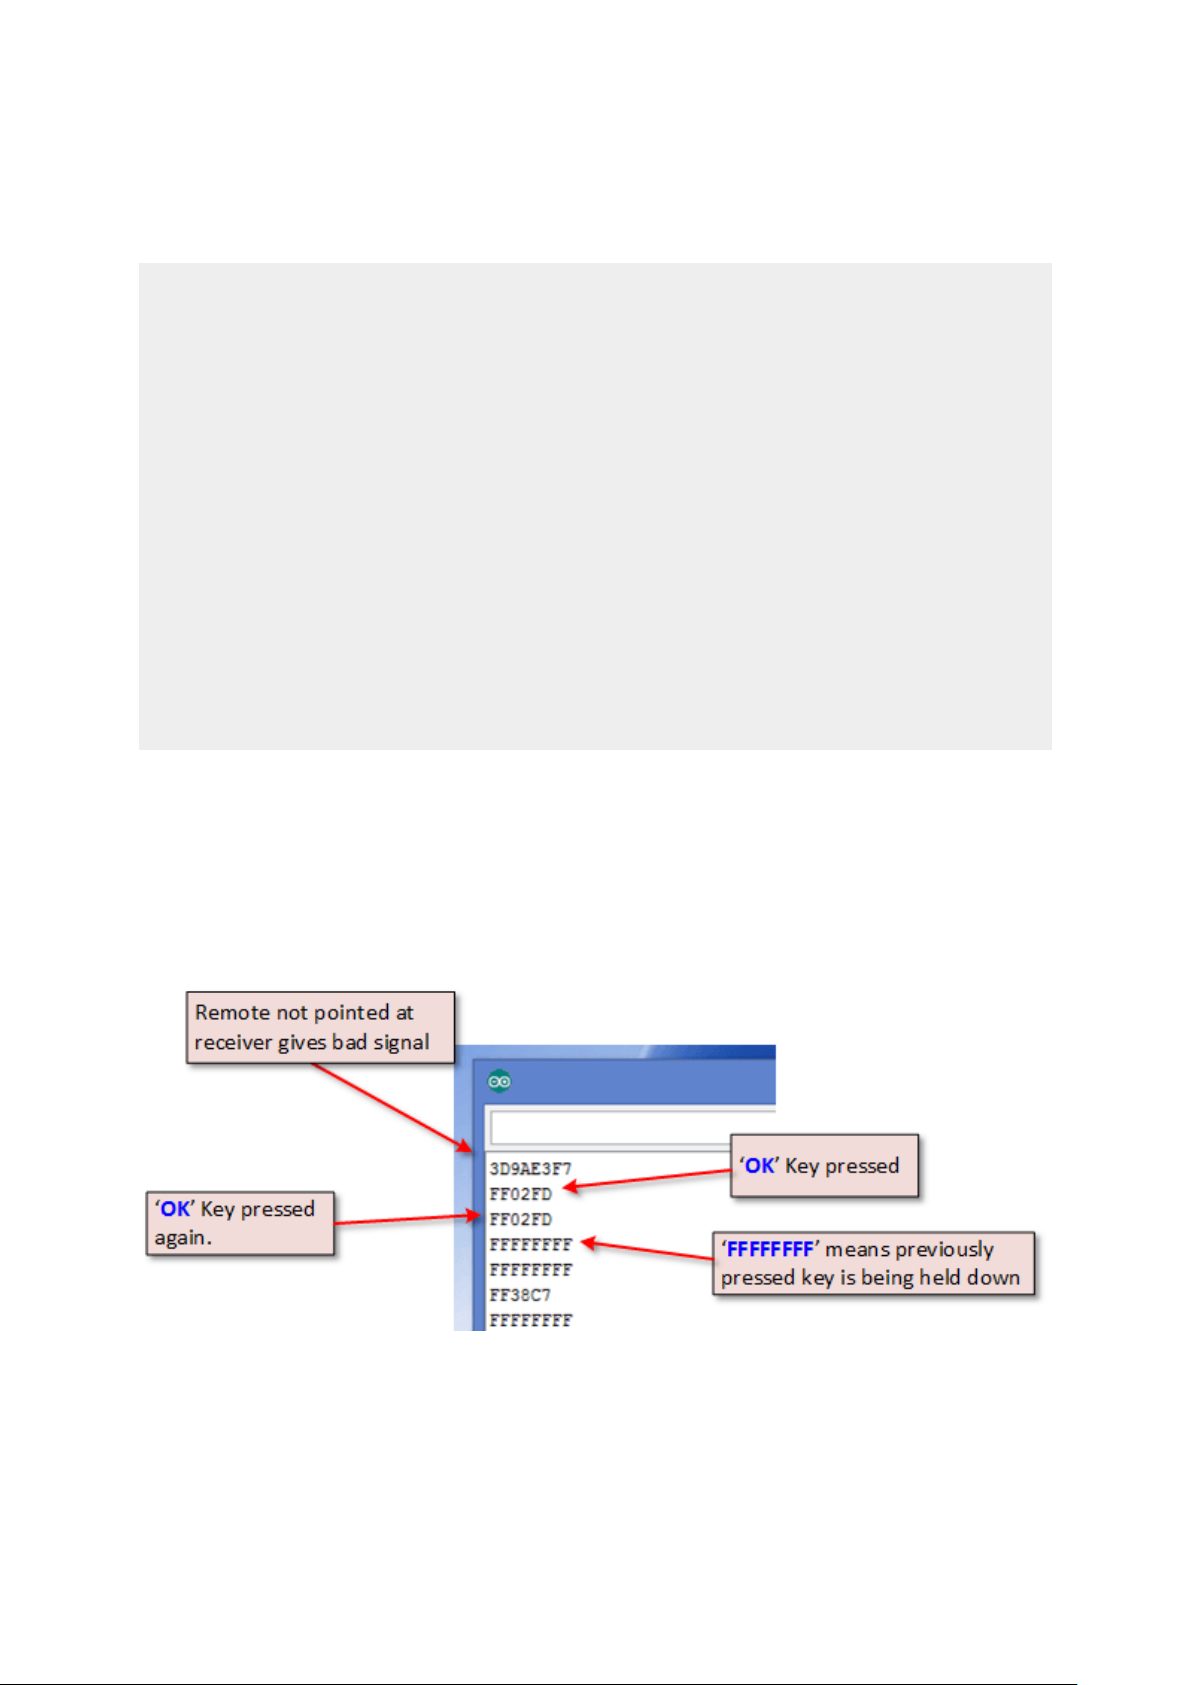
Verify the output from example sketch 1
Depending on the keys pressed, your output should look something like the screen grab below:
Page 3

Arduino Example Sketch 2
In this sketch, I put the knowledge about the key values to use. Once the an input has been received,
I call out to and decipher the value. decodeIR()
#include <IRremote.h>
int IR_PIN = 11;
IRrecv irDetect(IR_PIN);
decode_results irIn;
void setup() {
Serial.begin(9600);
irDetect.enableIRIn(); // Start the Receiver
}
void loop() {
if (irDetect.decode(&irIn)) {
decodeIR();
irDetect.resume();
}
}
void decodeIR() { // Indicate what key is pressed
switch(irIn.value)
{
case 0xFF629D: Serial.println("Up Arrow"); break;
case 0xFF22DD: Serial.println("Left Arrow"); break;
case 0xFF02FD: Serial.println("OK"); break;
case 0xFFC23D: Serial.println("Right Arrow"); break;
case 0xFFA857: Serial.println("Down Arrow"); break;
case 0xFF6897: Serial.println("1"); break;
case 0xFF9867: Serial.println("2"); break;
case 0xFFB04F: Serial.println("3"); break;
case 0xFF30CF: Serial.println("4"); break;
case 0xFF18E7: Serial.println("5"); break;
case 0xFF7A85: Serial.println("6"); break;
case 0xFF10EF: Serial.println("7"); break;
case 0xFF38C7: Serial.println("8"); break;
case 0xFF5AA5: Serial.println("9"); break;
case 0xFF42BD: Serial.println("*"); break;
case 0xFF4AB5: Serial.println("0"); break;
case 0xFF52AD: Serial.println("#"); break;
default: break;
}
}
Verify the output from example sketch 1
Open the serial monitor. Press the keys. You should notice that the serial monitor reports exactly
which key you pressed.
 Loading...