

Fritsch Pulverisette 5 Operating Instructions Manual
Operating Instructions
Planetary Mill
„pulverisette 5“
ZERKLEINERN PARTIKELMESSEN TEILEN MILLING PARTICLE SIZING DIVIDING ZERKLEINERN PARTIKELMESSEN TEILEN MILLING PARTICLE SIZING DIVIDING ZERKLEINERN PARTIKELMESSEN TEILEN
FRITSCH
Fritsch GmbH
Manufacturers of Laboratory Instruments
Industriestrasse 8
D - 55743 Idar-Oberstein
Phone: *6784/ 70-0
Fax: *6784/ 70-11
E-Mail: info@fritsch.de
Internet: http://www.fritsch.de
Fritsch GmbH, Laborgerätebau has been certificated by the TÜVZertifizierungsgemeinschaft e.V. on June 24, 1994.
ZERKLEINERN PARTIKELMESSEN TEILEN MILLING PARTICLE SIZING DIVIDING ZERKLEINERN PARTIKELMESSEN TEILEN MILLING PARTICLE SIZING DIVIDING ZERKLEINERN PARTIKELMESSEN TEILEN
FRITSCH
An audit certificated the accordance of the Fritsch GmbH to the
DIN EN ISO 9001.
The enclosed declaration of conformity calls the directives which
the „pulverisette 5“ corresponds to. This permitts us to mark the
instrument with the CE-Sign.
Instrument number 05.500.00 und 05.600.00
applies as of serial number 322
Edition 05/2002 Index 003

Table of contents page
1
General Information / Introduction.............................................. 2
1.1 Notes about Operating Instructions........................................................... 2
1.2 Explanations of the signs at the instrument and
in the operating instructions....................................................................... 2
1.3 Short Description of the Machine ..............................................................3
1.3.1 Applications ...........................................................................................................3
1.3.2 Method of Operation.............................................................................................. 4
1.3.3 Drive Motor and Speed Control .............................................................................4
1.4 Technical Data........................................................................................... 4
2 Operating Safety ...........................................................................6
2.1 General Safety Instructions ....................................................................... 6
2.2 Operators................................................................................................... 7
2.3 Protective Devices..................................................................................... 7
2.4 Danger Points............................................................................................ 8
2.5 Electrical Safety......................................................................................... 8
2.5.1 General.................................................................................................................. 8
2.5.2 Protection against Restarting................................................................................. 8
2.5.3 Overload Protection (see 8 Troubleshooting Checklist)......................................... 8
2.5.4 Unbalance Detection (see 8 Troubleshooting Checklist) ....................................... 8
3 Installation.....................................................................................9
3.1 Unpacking.................................................................................................. 9
3.2 Transport ................................................................................................... 9
3.3 Erection...................................................................................................... 9
3.4 Ambience conditions ................................................................................. 9
3.5 Electrical Connection............................................................................... 10
3.6 Adaptation to Mains Supply Voltage, Changing Timer and
Unbalance Detection in setup mode ....................................................... 10
3.7 Switching On for the First Time / Test for Correct Functioning ............... 11
4 Working with the mill..................................................................12
4.1 Choice of Grinding Bowls and Grinding Balls.......................................... 12
4.1.1 Size of the Grinding Balls .................................................................................... 12
4.1.2 Number of Balls per Grinding Bowl...................................................................... 13
4.2 Filling the Grinding Bowl.......................................................................... 13
4.3 Influencing Quantities During Grinding.................................................... 14
4.3.1 Dry Grinding ........................................................................................................14
4.3.2 Wet Grinding (Grinding in Suspension) ...............................................................14
4.4 Clamping the grinding bowls ...................................................................15
4.4.1 Clamping with the "Safe Lock" Holder .................................................................15
4.4.2 Clamping the 80 ml grinding bowl........................................................................ 15
4.4.3 Clamping with Additional Clamping System......................................................... 16
4.5 Mass Balance .......................................................................................... 17
4.6 Grinding Time .......................................................................................... 17
4.7 Control Panel........................................................................................... 18
4.7.1 Setting the Speed................................................................................................ 18
4.7.2 Setting the Running Time ....................................................................................18
4.7.3 Reversing Operation............................................................................................ 18
4.7.4 Repetition of the Grinding / Break Cycles............................................................ 18
4.8 Performing a Grinding Operation ............................................................ 19
4.9 Cooling the Grinding Bowls ..................................................................... 19
4.10 Standby.................................................................................................... 19
4.11 Grinding under protective gas with gas lid .............................................. 20
4.12 GTM System ............................................................................................22
5 Cleaning.......................................................................................22
6 Maintenance ................................................................................23
7 Warranty ......................................................................................24
8 Troubleshooting Checklist ........................................................24
9 Examples of Comminution Tasks .............................................25
10 List of Keywords.........................................................................27
11 Spare part list and circuit diagrams..........................................27
ZERKLEINERN PARTIKELMESSEN TEILEN MILLING PARTICLE SIZING DIVIDING ZERKLEINERN PARTIKELMESSEN TEILEN MILLING PARTICLE SIZING DIVIDING ZERKLEINERN PARTIKELMESSEN TEILEN
FRITSCH
pulverisette 5 page 1
ZERKLEINERN PARTIKELMESSEN TEILEN MILLING PARTICLE SIZING DIVIDING ZERKLEINERN PARTIKELMESSEN TEILEN MILLING PARTICLE SIZING DIVIDING ZERKLEINERN PARTIKELMESSEN TEILEN
1 General Information / Introduction
1.1 Notes about Operating Instructions
• The copyright to these technical documents is the property of
Fritsch GmbH, Manufacturers of Laboratory Instruments.
• These operating instructions are not to be reprinted or copied
without the express approval of Fritsch GmbH.
• Please study these instructions carefully before operation.
• All operators must be familiar with the contents of the operat-
ing instructions.
• Please observe all notes concerning your safety.
• The mill was designed with the user's safety in mind, however
inherent risks cannot be excluded. Follow the advices in these
instructions to avoid risks to users.
• The symbols in the right hand margin highlight the risks described in the text. Symbols are also to be found on the instrument warning users of possible risks.
Warning symbols are surrounded by a triangle.
• These operating instructions do not constitute a complete
technical description. They describe only the details required
for safe operation and maintenance for usage under normal
conditions.
FRITSCH
Attention!
observe operating
instructions
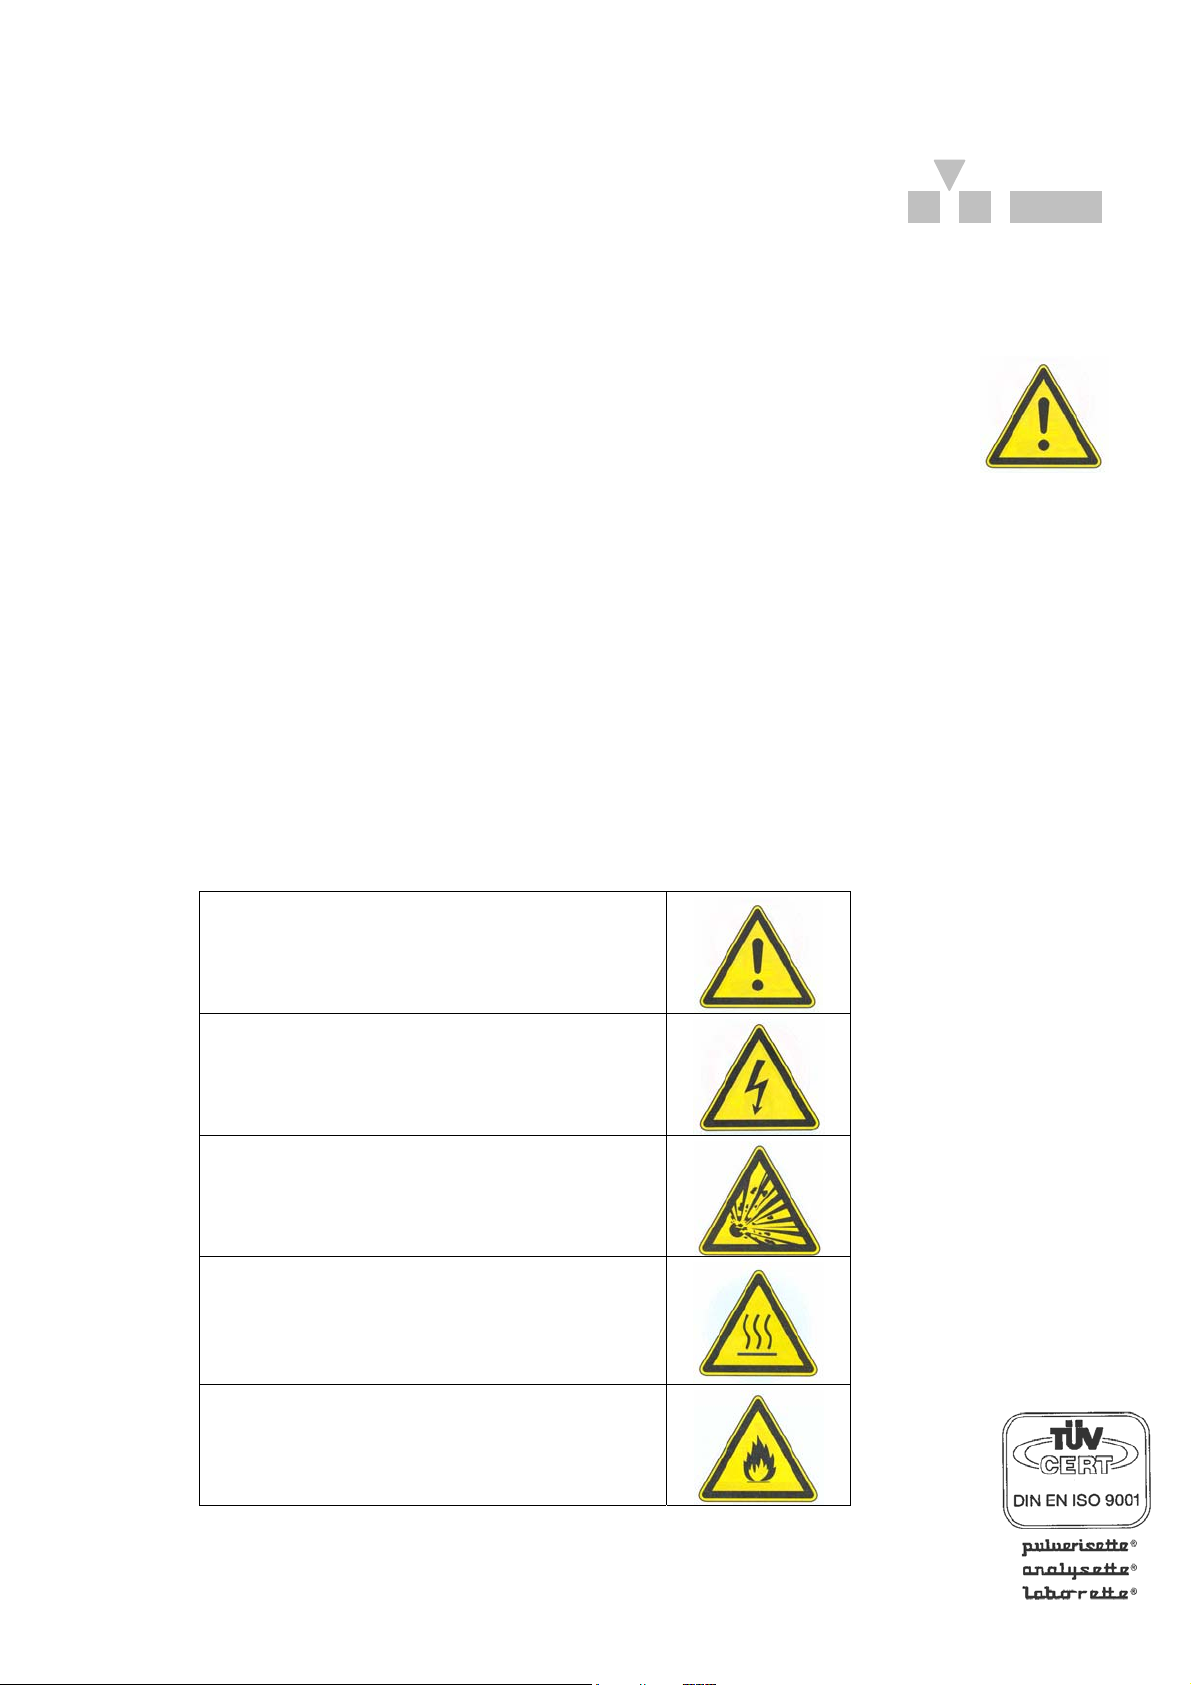
1.2 Explanations of the signs at the instrument and in the operating instructions
Attention!
warning against danger spot
observe operating instructions
Attention! mains voltage
Attention! risk of explosion
Attention! hot surface
Attention! inflammable substances
pulverisette 5 page 2
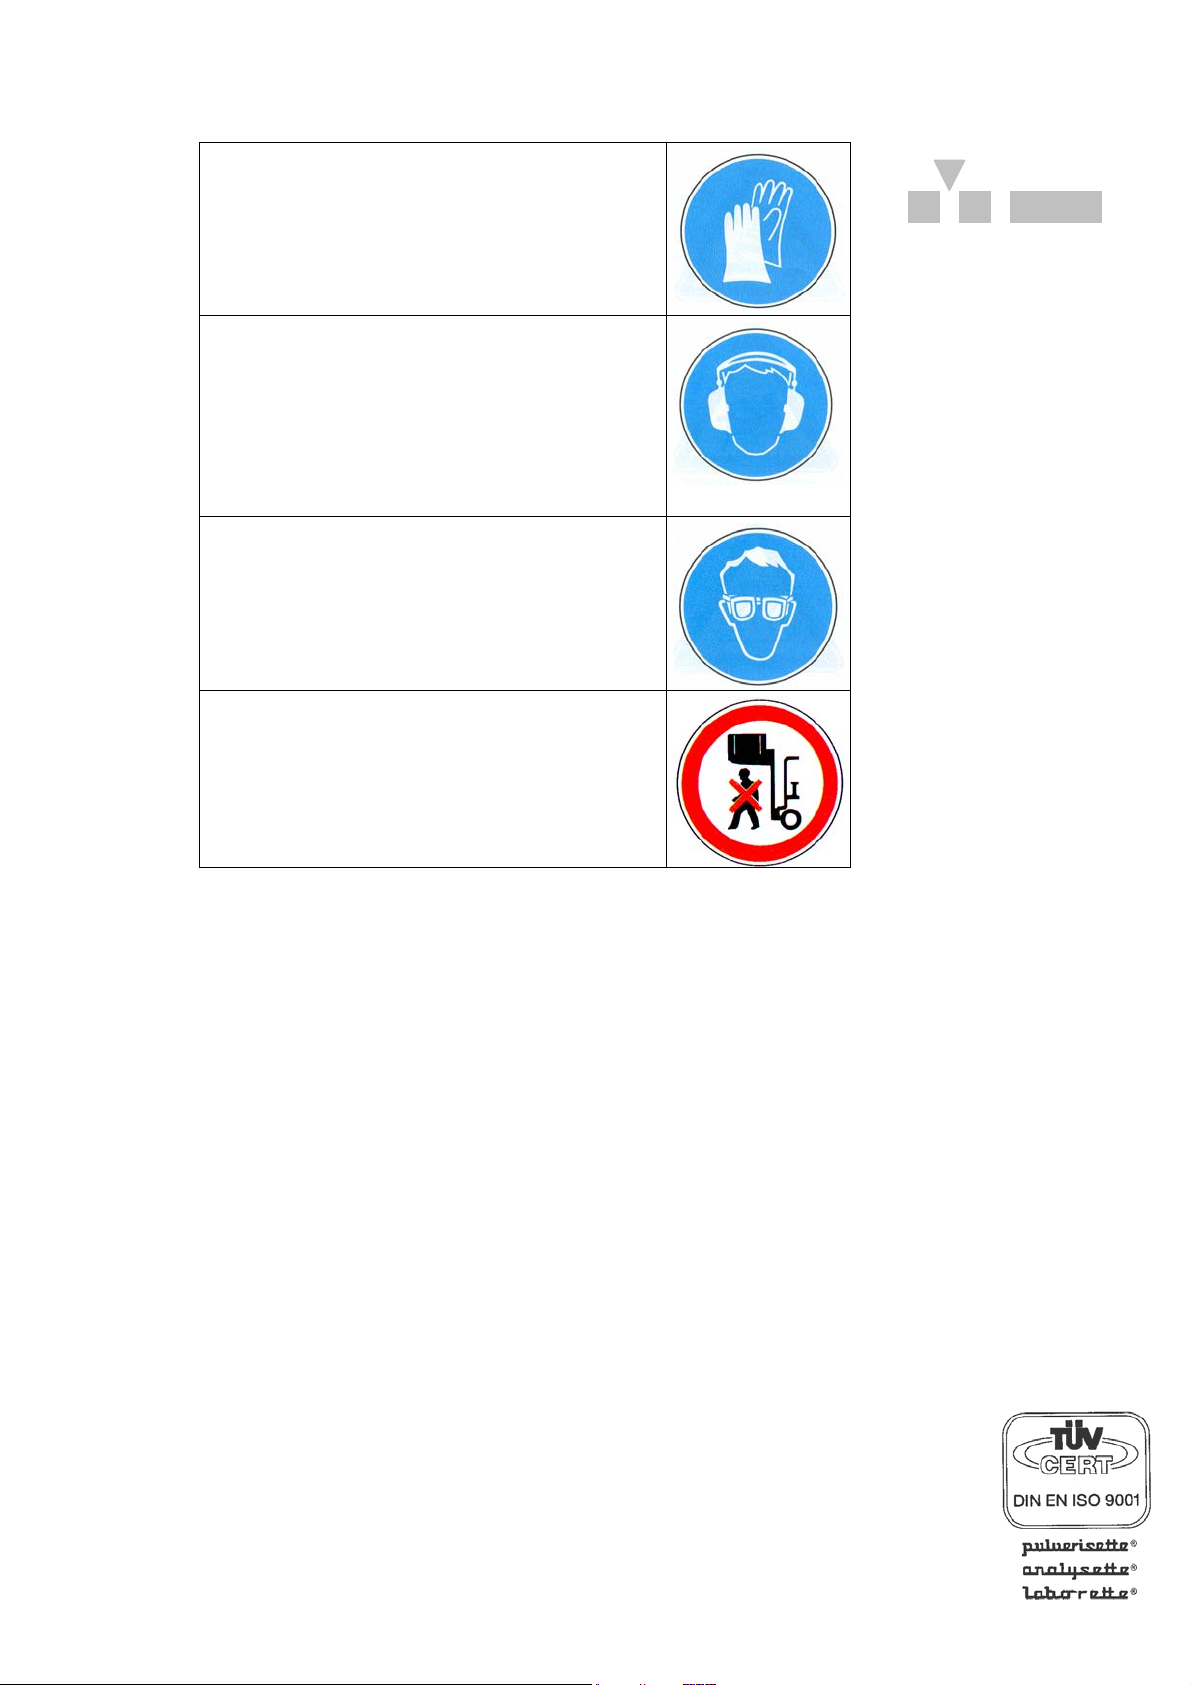
wear protective gloves!
wear ear protectors!
wear safety goggles!
ZERKLEINERN PARTIKELMESSEN TEILEN MILLING PARTICLE SIZING DIVIDING ZERKLEINERN PARTIKELMESSEN TEILEN MILLING PARTICLE SIZING DIVIDING ZERKLEINERN PARTIKELMESSEN TEILEN
FRITSCH
Do not step below lifted load!
1.3 Short Description of the Machine
1.3.1 Applications
The "pulverisette 5" laboratory planetary mill is universally applicable for quick dry or wet grinding of inorganic and organic samples for analysis, quality control, materials testing and mechanical alloying.
In synthesis, the "pulverisette 5" can be used for mixing and homogenisation of dry samples, of emulsions and of pastes.
pulverisette 5 page 3
ZERKLEINERN PARTIKELMESSEN TEILEN MILLING PARTICLE SIZING DIVIDING ZERKLEINERN PARTIKELMESSEN TEILEN MILLING PARTICLE SIZING DIVIDING ZERKLEINERN PARTIKELMESSEN TEILEN
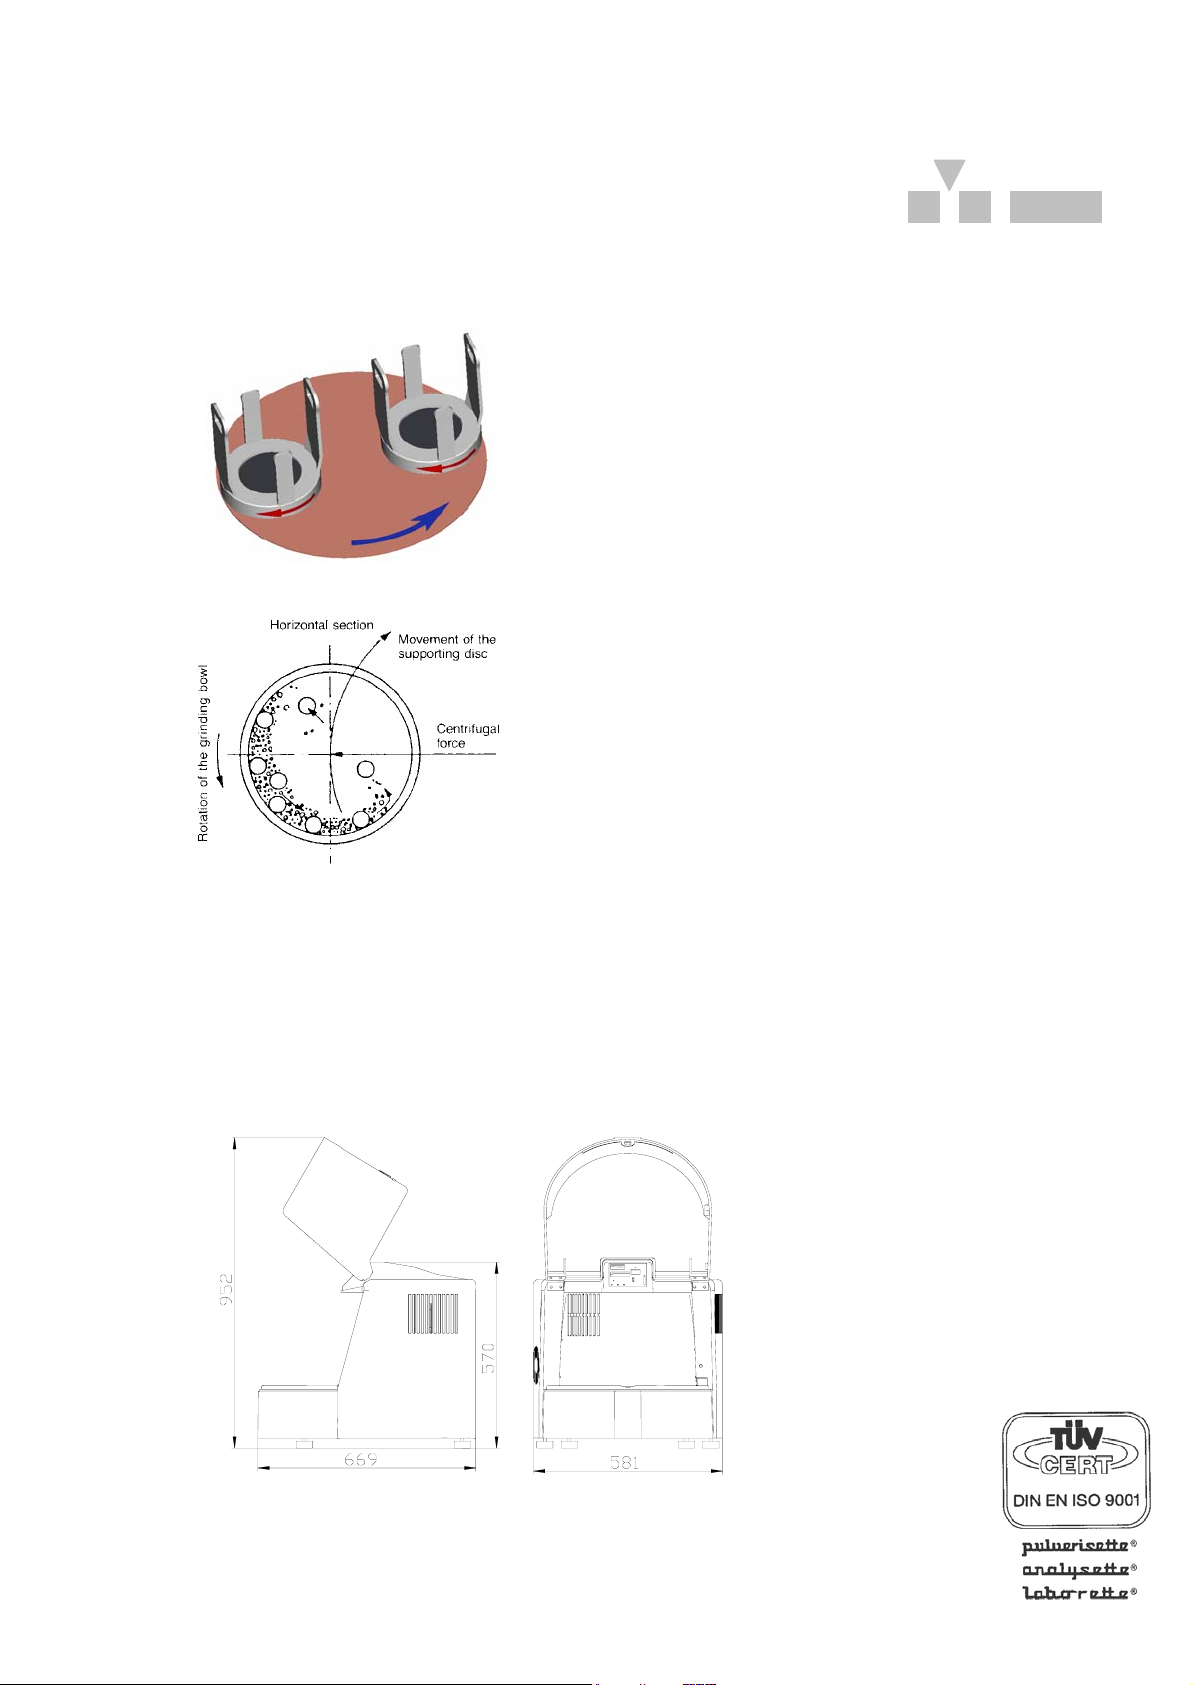
1.3.2 Method of Operation
The material is crushed and torn apart in two or four grinding
bowls by grinding balls. The grinding balls and the material in the
grinding bowl are acted upon by the centrifugal forces due to the
rotation of the grinding bowl about its own axis and due to the rotating supporting disc.
The grinding bowl and the
supporting disc rotate in opposite
directions, so that the centrifugal
forces alternately act in the same
and opposite directions.
This results in, as a frictional
effect, the grinding balls running
along the inner wall of the bowl,
and as an impact effect, the balls
impacting against the opposite
wall of the grinding bowl.
The impact effect is en-
hanced by the grinding
balls impacting against
one another.
Loss-free grinding, even in
the case of grinding of
suspensions, is guaranteed by a hermetic seal
between the grinding bowl
and the cover.
FRITSCH
1.3.3 Drive Motor and Speed Control
The machine is driven by a three-phase a.c. motor, which receives three-phase a.c. 230 V of variable frequency from a frequency converter.
1.4 Technical Data
Dimensions and Weight
Weight: 120 kg
pulverisette 5 page 4

ZERKLEINERN PARTIKELMESSEN TEILEN MILLING PARTICLE SIZING DIVIDING ZERKLEINERN PARTIKELMESSEN TEILEN MILLING PARTICLE SIZING DIVIDING ZERKLEINERN PARTIKELMESSEN TEILEN
Operating Noise
The noise level is about 85dB (A). The value fluctuates greatly
depending on the speed and the material being ground and on
the type of grinding bowl and grinding balls.
Voltage
The machine can be operated in two voltage ranges:
• Single-phase alternating voltage 100-120V ± 10% and
• Single-phase alternating voltage 200-240V ± 10%.
(see also section 3.6 Adaptation to Mains Supply Voltage,
Changing Timer and Unbalance Detection in setup mode)
Transient overvoltages according to overvoltage category II allowed.
Current Input
The maximum current input is approx.:
• 100-120V.............. 14 A
• 200-240V.............. 6 A
Power consumption
The maximum power consumption is approx. :
• 100-120V.............. 1500W
• 200-240V.............. 1300W
FRITSCH
Electrical Fuses
Automatic circuit breaker at the rear of the machine: 16 A
Switch on again by pressing in the black button at the rear of the
machine.
Material
• Maximum feed size in the case of hard material approx. 10
mm
• Maximum feed quantity 900 ml
divided in 4 x 500 ml grinding bowls + grinding balls
• Achievable mean final fineness (depending on material) down
to d
< 1 µm
50
Final Fineness
• Dry grinding
down to d
< 20 µm (depending on material)
50
• Wet grinding
down to d
< 1 µm (depending on material)
50
pulverisette 5 page 5
ZERKLEINERN PARTIKELMESSEN TEILEN MILLING PARTICLE SIZING DIVIDING ZERKLEINERN PARTIKELMESSEN TEILEN MILLING PARTICLE SIZING DIVIDING ZERKLEINERN PARTIKELMESSEN TEILEN
2 Operating Safety
2.1 General Safety Instructions
• Read the operating instructions carefully before use.
• The instrument can only to be used for the purpose described
in Section 1.3 Short Description of the Machine
• Use only original accessories and original spare parts. Failure
to do so may call into question the performance of the instrument.
• Do not use damaged accessories.
• The operators must be familiar with the contents of the operat-
ing instructions.
To this end, for example, the operating instructions must with
the instrument.
• Do not remove labels.
• Protective devices must not be made unserviceable or re-
moved.
• Unauthorized modification of the instrument or any part
thereof will result in the loss of the conformity to European directives which is asserted by Fritsch and the warranty.
• Wear protective gloves!
Grinding bowls may be very hot after grinding.
• Wear safety glasses
Wet grinding may cause high pressure in the grinding bowlDanger of squirting!
• Wear ear protectors - noise level up to 85dB(A).
• Don’t run the instrument several hours without cooling phases
- Danger of overheating.
• Behaviour at all times must be such as to strictly preclude any
accidents.
• Furthermore, the MAC values at place of work specified in the
pertinent safety regulations must be adhered to. Where applicable, ventilation must be provided or the instrument must be
operated under an exhaust hood.
• When oxidizable materials such as metals, organic materials,
wood, coal, plastic, etc. are ground or sieved, the risk of spontaneous ignition (dust explosion) exists whenever the fine particles exceed a specific percentage. While such materials are
being ground, it is therefore necessary to take special safety
precautions (e.g. wet grinding) and the work must be supervised by a specialist.
• The instrument is not explosion-proof and is unsuitable to
grind or sieve materials which are explosive, combustible or
promote combustion.
• Do not allow the instrument to run unsupervised. Due to the
vibrations, under certain operating conditions, the machine
may creep along the surface on which it is located or mounted.
FRITSCH
observe operating
instructions!!
wear protective gloves
wear safety goggles!
wear ear protectors!
Attention! risk of explosion
pulverisette 5 page 6
ZERKLEINERN PARTIKELMESSEN TEILEN MILLING PARTICLE SIZING DIVIDING ZERKLEINERN PARTIKELMESSEN TEILEN MILLING PARTICLE SIZING DIVIDING ZERKLEINERN PARTIKELMESSEN TEILEN
2.2 Operators
• No one other than authorized persons should operate the in-
strument and it must be serviced and repaired by trained
specialists.
• No one suffering from medical problems or under the influ-
ence of medications, drugs, alcohol or overtiredness should
be permitted to operate the instrument.
2.3 Protective Devices
Protective devices should be used for the intended purpose
and must not be made unserviceable or removed.
All protective devices should be regularly checked for completeness and to ensure that they are functioning correctly.
See section 6 Maintenance.
The hood must be closed when the machine is started up.
The hood is locked:
• when the machine is disconnected from the mains supply
• during operation
FRITSCH
The hood can be opened only when the drive of the mill has
come to a standstill.
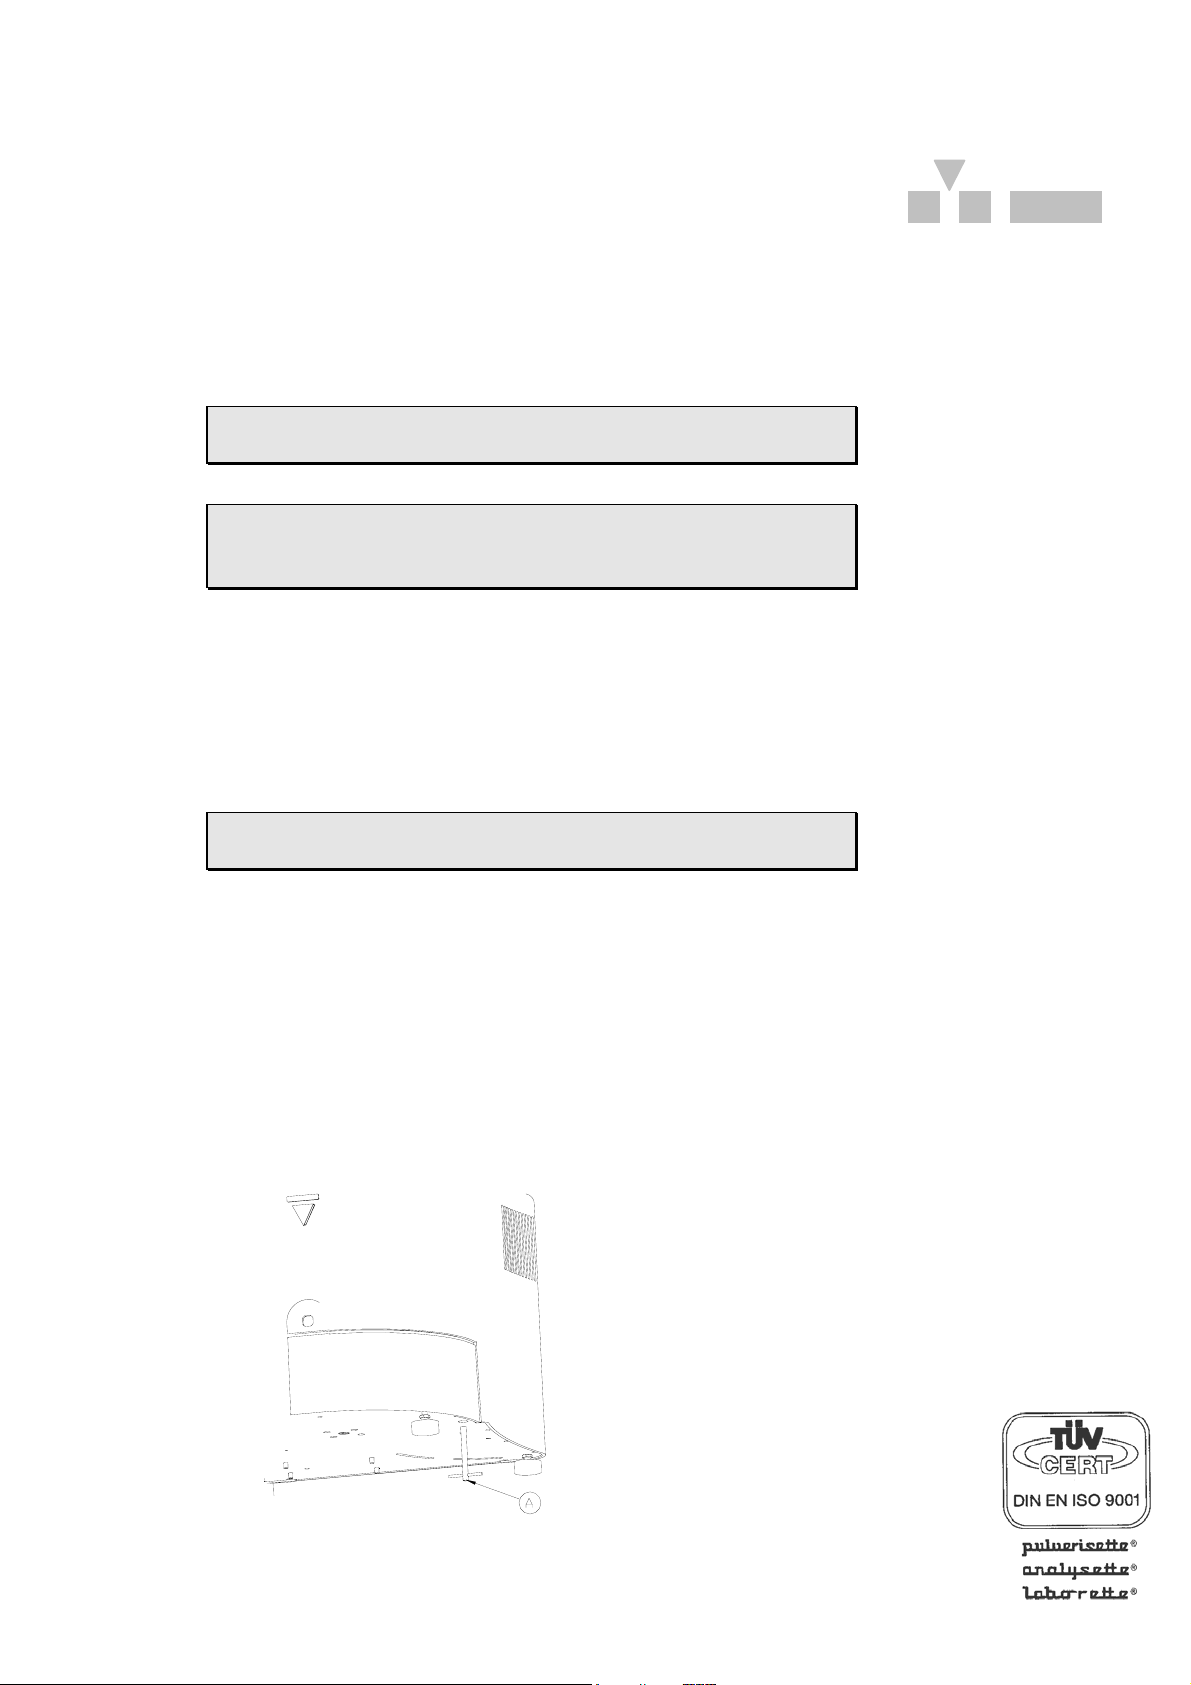
Opening the hood when the machine is disconnected from
the mains supply
• Insert the attached triangular wrench (A) through the bore,
and turn clockwise.
• The closure hatch can now be opened after the spring-loaded
lock at the front of the hood is opened.
• The instrument can now not be switched on. If it is to be swit-
ched on, the safety lock must be activated by turning the
triangular wrench anticlockwise, and the hood must be closed.
pulverisette 5 page 7

2.4 Danger Points
• Danger of crushing when the hood is being closed.
• Danger of crushing at the grinding bowl holder.
2.5 Electrical Safety
ZERKLEINERN PARTIKELMESSEN TEILEN MILLING PARTICLE SIZING DIVIDING ZERKLEINERN PARTIKELMESSEN TEILEN MILLING PARTICLE SIZING DIVIDING ZERKLEINERN PARTIKELMESSEN TEILEN
FRITSCH
2.5.1 General
• The main switch disconnects the machine from the mains
supply at two poles.
• Switch off the main switch if the instrument is to be inopera-
tive for an extended period (e.g. over night).
2.5.2 Protection against Restarting
In the event of a mains failure during operation or after switchingoff with the main switch, the hood will remain locked. When the
mains voltage is restored, the lock of the hood will open. For safety reasons, however, the instrument will not start again.
2.5.3 Overload Protection
(see 8 Troubleshooting Checklist)
In the event of overloading, the speed of the machine will be reduced. This is indicated by the REDUCED SPEED light beeing illuminated.
If the drive motor overheats, the machine will switch off.
If the drive is obstructed, the machine will switch off.
2.5.4 Unbalance Detection
(see 8 Troubleshooting Checklist)
In the event of an excessive unbalance, the machine will switch
off.
Attention!
pulverisette 5 page 8
3 Installation
3.1 Unpacking
• Pull out the nails with which the hood is fastened on the trans-
port pallet. The hood is either a wooden box or a cardboard
box placed over the transport pallet.
• Lift the hood off the transport pallet.
• Check that the items supplied correspond to your order.
ZERKLEINERN PARTIKELMESSEN TEILEN MILLING PARTICLE SIZING DIVIDING ZERKLEINERN PARTIKELMESSEN TEILEN MILLING PARTICLE SIZING DIVIDING ZERKLEINERN PARTIKELMESSEN TEILEN
FRITSCH
3.2 Transport
Transport the mill on the transport pallet with a fork
lift truck or a hand fork lift truck.
To carry the machine, grip it below the edge of the
housing.
Attention: Weight 120kg!
3.3 Erection
• Lift the instrument with the transport pallet.
Do not walk below the transport pallet.
• The instrument is attached to the transport pallet with 7
screws. Undo the screws.
• Lift the instrument off the transport pallet.
Attention: Weight 120kg!
• Place the instrument on a level, stable surface, indoors. It is
not necessary to fasten the instrument on the erection site.
The instrument can also be mounted on a sturdy table.
It is inadvisable to operate the instrument while it is standing on the transport pallet.
Do not step below lifted
loads!
• Ensure that there is good access to the instrument. There
must be enough space to reach the main switch.
• Do not block the exit of air from the ventilator louver at the si-
de. There is a danger of overheating if the louver is blocked.
3.4 Ambience conditions
• Use the instrument only inside.
• The air must not contain any electrical conductive dust.
• The ambient temperature must be between 5 and 40°C.
• Height up to 2000m M.S.L.
• Maximum relative humidity of air 80% temperature up to 31°C,
linear decreasing down to 50% relative humidity of air at 40°C
• Contamination level 2 (IEC 664)
pulverisette 5 page 9
ZERKLEINERN PARTIKELMESSEN TEILEN MILLING PARTICLE SIZING DIVIDING ZERKLEINERN PARTIKELMESSEN TEILEN MILLING PARTICLE SIZING DIVIDING ZERKLEINERN PARTIKELMESSEN TEILEN
3.5 Electrical Connection
Before making the connection, compare the voltage and current
values shown on the nameplate with the values of the mains
supply to which the instrument is to be connected.
Single-phase alternating voltage with protective conductor (see
section 1.4 Technical Data).
The connecting cable may be changed only by a trained expert.
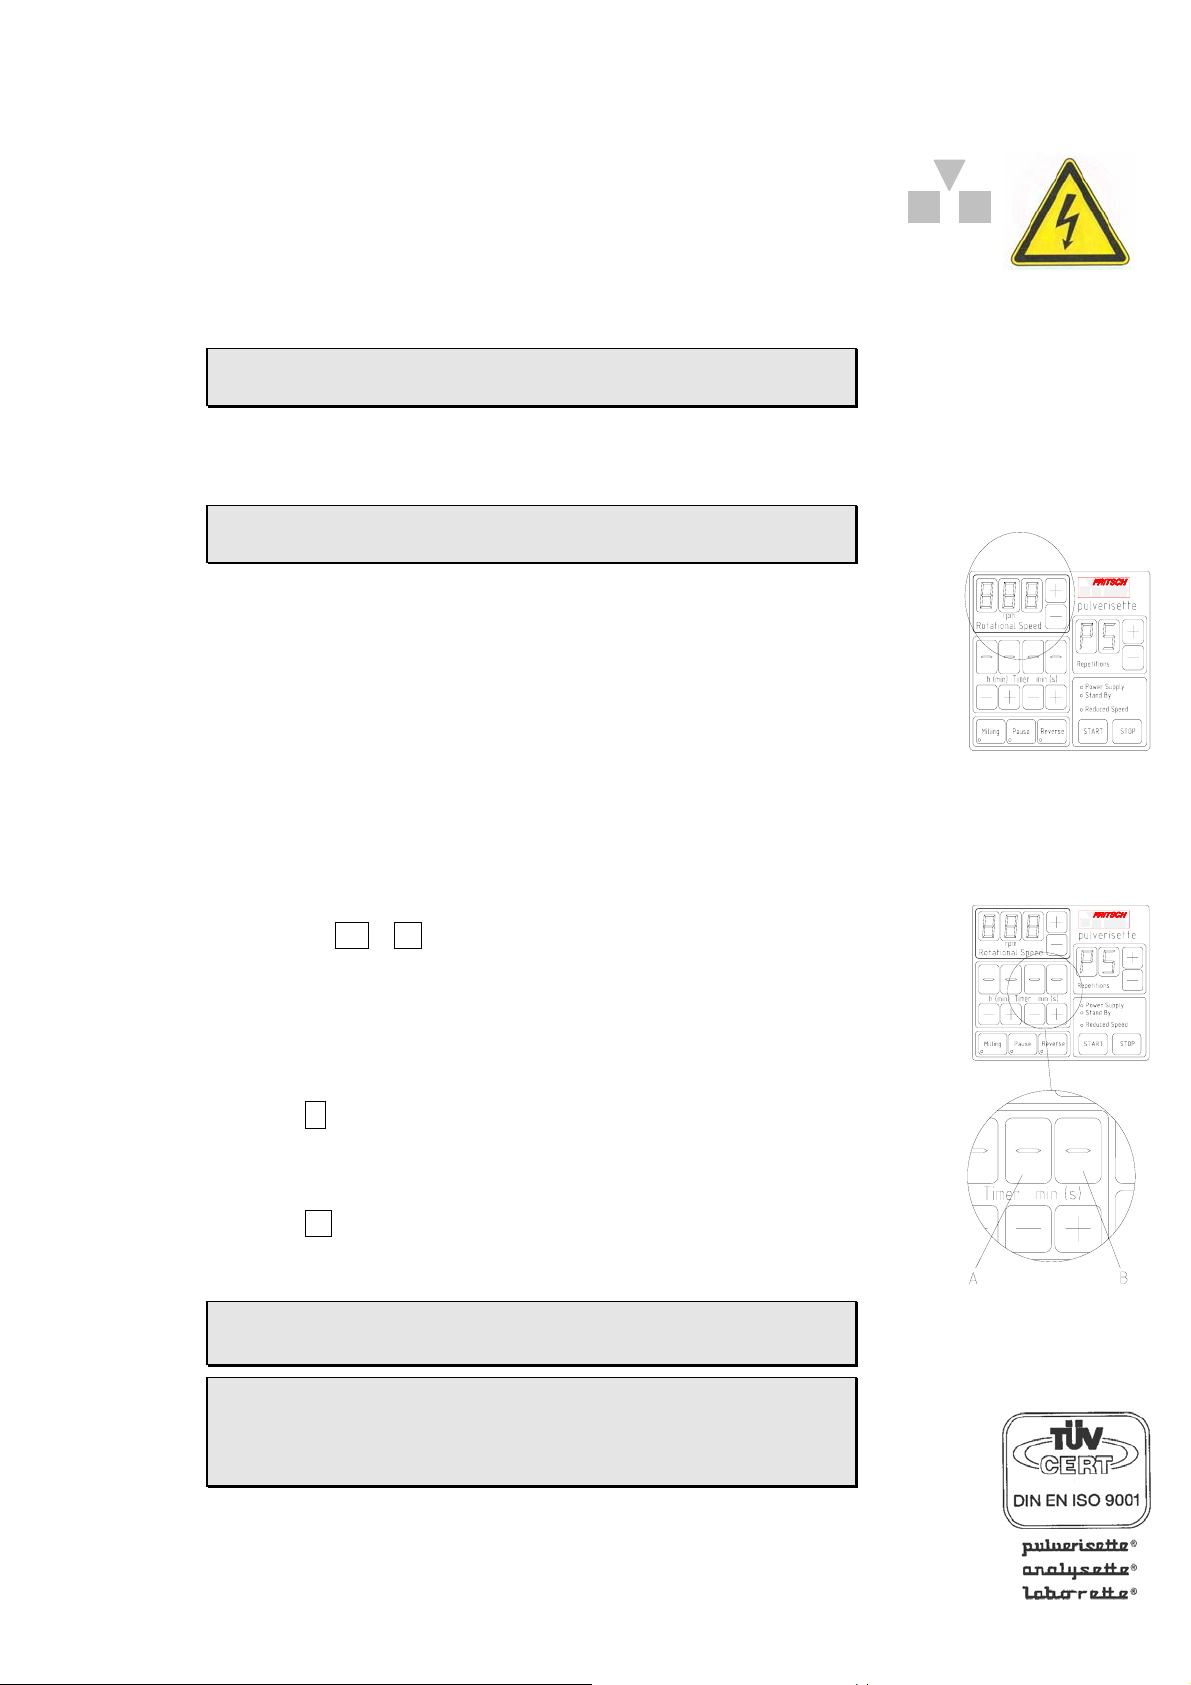
3.6 Adaptation to Mains Supply Voltage, Changing
Timer and Unbalance Detection in setup mode
The voltage range of the machine should be switched over
only by specialist staff.
Adaptation to Mains Supply Voltage in setup mode
1. Disconnect the machine from the mains supply.
2. At the rear of the machine, set the changeover switch to the
voltage range.
3. Connect the machine to the mains supply.
4. Press and hold down the STOP button on the control panel at
the front.
5. Switch on the main switch at the rear of the machine and re-
lease the STOP button immediately afterwards.
6. The POWER SUPPLY light is flashing Æ setup mode
The POWER SUPPLY light is not flashing, repeat the procedure
7. With the + / - ROTATIONAL SPEED buttons, select the
mains supply voltage level (90 - 260 V).
8. To store the settings and end the setup mode, press the
STOP button.
FRITSCH
Attention! mains voltage
Further options in setup mode
A unbalance detection: on / off
(right) - button in the TIMER panel
unbalance detection on display: -
unbalance detection off display: 1
B timer function: hours, minutes / minutes, seconds
(right) + button in the TIMER panel
Hours and minutes display: -
Minutes and seconds display: 1
Switching off the unbalance detection at own risk!
see section 2 Operating Safety and 2.5 Electrical Safety
Pressing the REPETITIONS buttons in setup mode alters the
machine type. Do not change anything here: P5 should be
indicated in the display. Otherwise, damage will occur during operation.
pulverisette 5 page 10

ZERKLEINERN PARTIKELMESSEN TEILEN MILLING PARTICLE SIZING DIVIDING ZERKLEINERN PARTIKELMESSEN TEILEN MILLING PARTICLE SIZING DIVIDING ZERKLEINERN PARTIKELMESSEN TEILEN
3.7 Switching On for the First Time /
FRITSCH
Test for Correct Functioning
Switch on the machine only when all the work described in section 3 Installation has been done.
Switching On
1. Connect the machine to the mains supply.
2. Switch on the machine with the main switch at the rear.
3. POWER SUPPLY shines
4. Open the hood.
5. If the grinding bowl holder or any wood are present, take them
out. There should be nothing in the grinding bowl holder.
6. Close the hood.
7. Press START on the control panel.
8. The hood will be locked and the mill will run at the preselected
speed.
Switching Off
• Press STOP on the control panel.
• After a short period (after the mill has come to a standstill), the
hood is unlocked and can be opened.
pulverisette 5 page 11
ZERKLEINERN PARTIKELMESSEN TEILEN MILLING PARTICLE SIZING DIVIDING ZERKLEINERN PARTIKELMESSEN TEILEN MILLING PARTICLE SIZING DIVIDING ZERKLEINERN PARTIKELMESSEN TEILEN
4 Working with the mill
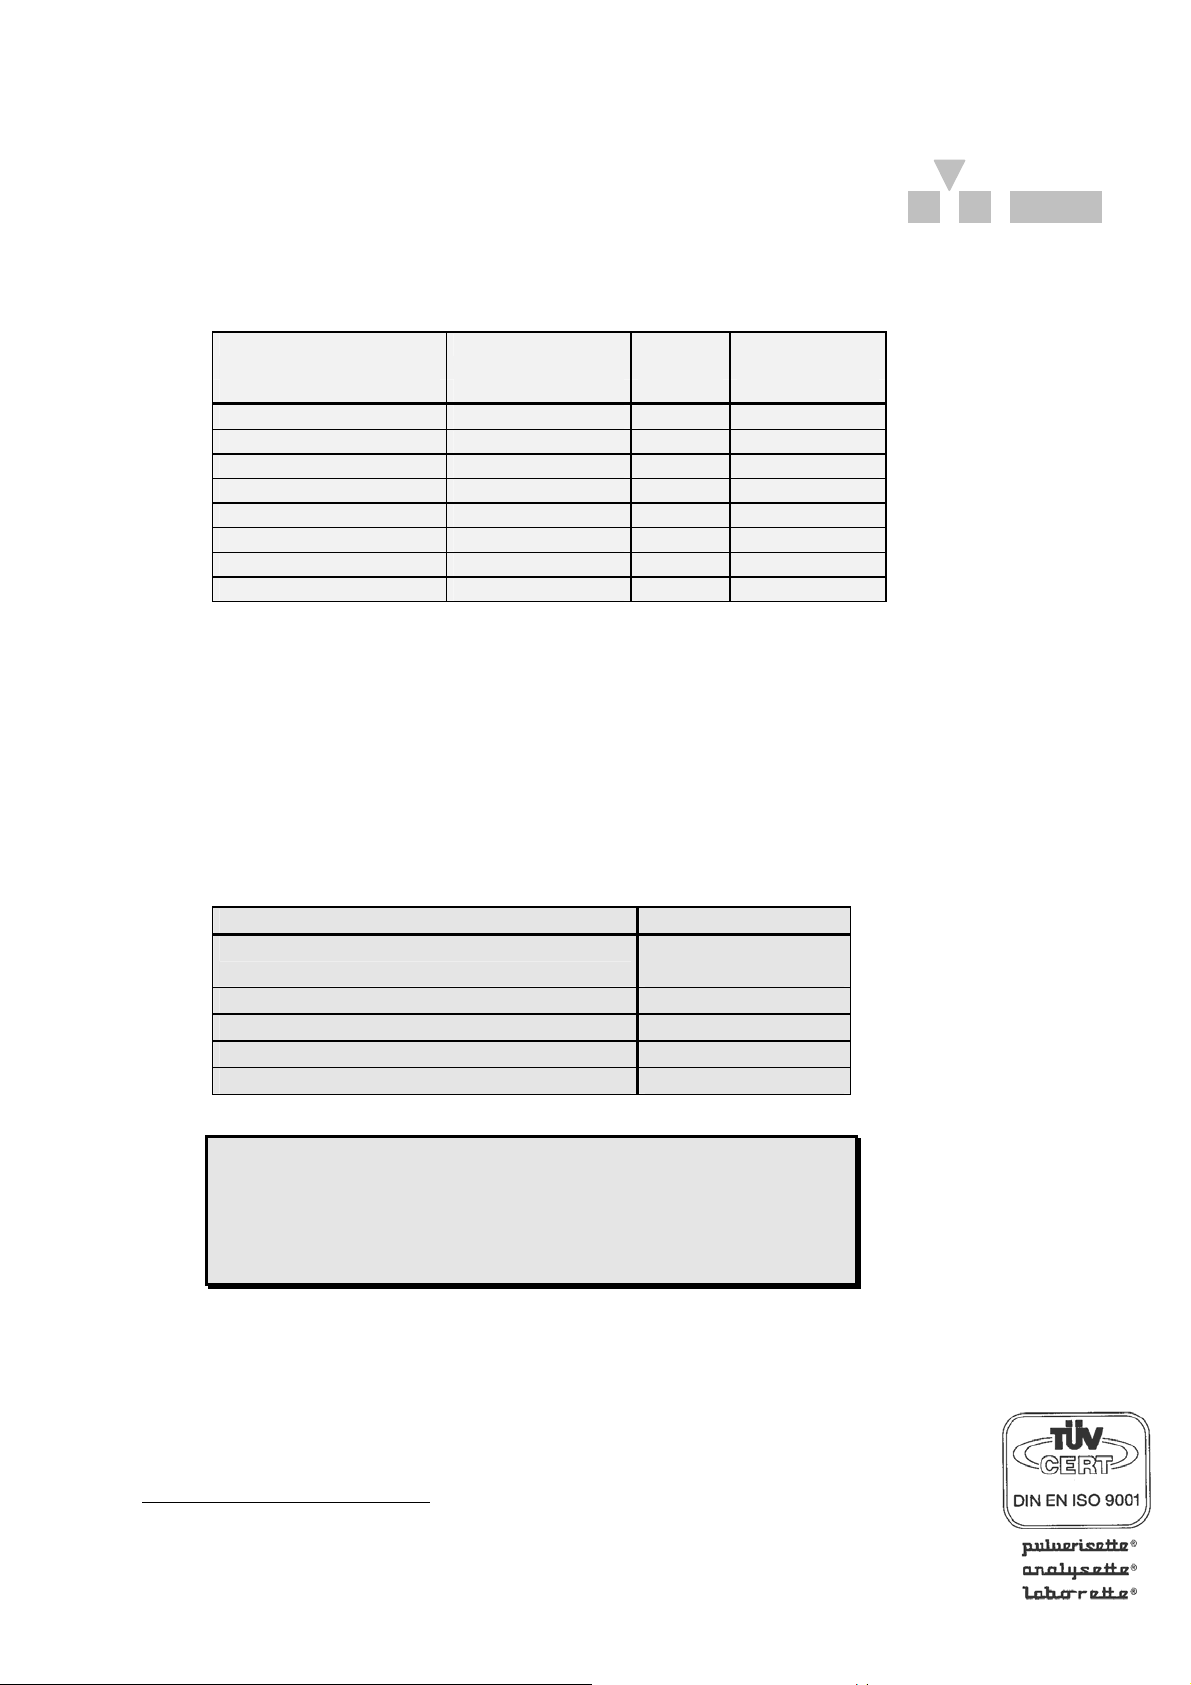
4.1 Choice of Grinding Bowls and Grinding Balls
In order to prevent excessive abrasion, the hardness of the grinding bowl used and of the grinding balls must be higher than that
of the material used.
Material density* restistance to
abrasion
(bowl and balls) in g/cm3
Agate (99.9% SiO2) 2.65 Good
Sintered corundum 1 (99.7% Al2O3) 3.7 Fairly good
Sintered corundum 2 (85% Al2O3) 3.5 Fair
Zirconium dioxide (95% ZrO2) 5.7 Very good
Chrome nickel steel 7.9 Fairly good
Hardened chrome steel 7.85 Good
Tungsten carbide (93%WC+6% Co) 14.75 Very good
Silicon nitride (Syalon) (90% Si3N4) 3.2 Extremely good
The grinding bowls and grinding balls of zirconium dioxide are
resistant to acids with the exception of hydrofluoric acid.
Normally, grinding bowls and grinding balls of the same material
should be chosen.
Exeption: Tungsten carbide balls may be combined with steel
bowls.
FRITSCH
The size of the grinding bowls and grinding balls should be determined experimentally.
4.1.1 Size of the Grinding Balls
Type of feed material Ball diameter
Hard samples feed particle size <10 mm 30 mm or
40 mm
Medium piece size (<5 mm) 20 mm
Fine material (0.5 mm) 10 mm / 5 mm
Homogenisation of dry or liquid samples 10 mm / 5 mm
Homogenisation of viscous samples 20 mm
Attentione:
We do not recommend to mix grinding balls with different
diameters.
(If different ball diameters are used there is the danger of
higher abrasion of the balls!)
*
High density means high impact energy
pulverisette 5 page 12
 Loading...