

Frister Rossmann 404 QUILTER PROFESSIONAL Quick Reference Instructions

QUICK
REFERENCE
INSTRUCTIONS
FOR
404 QUILTER
PROFESSIONAL
- 2 -
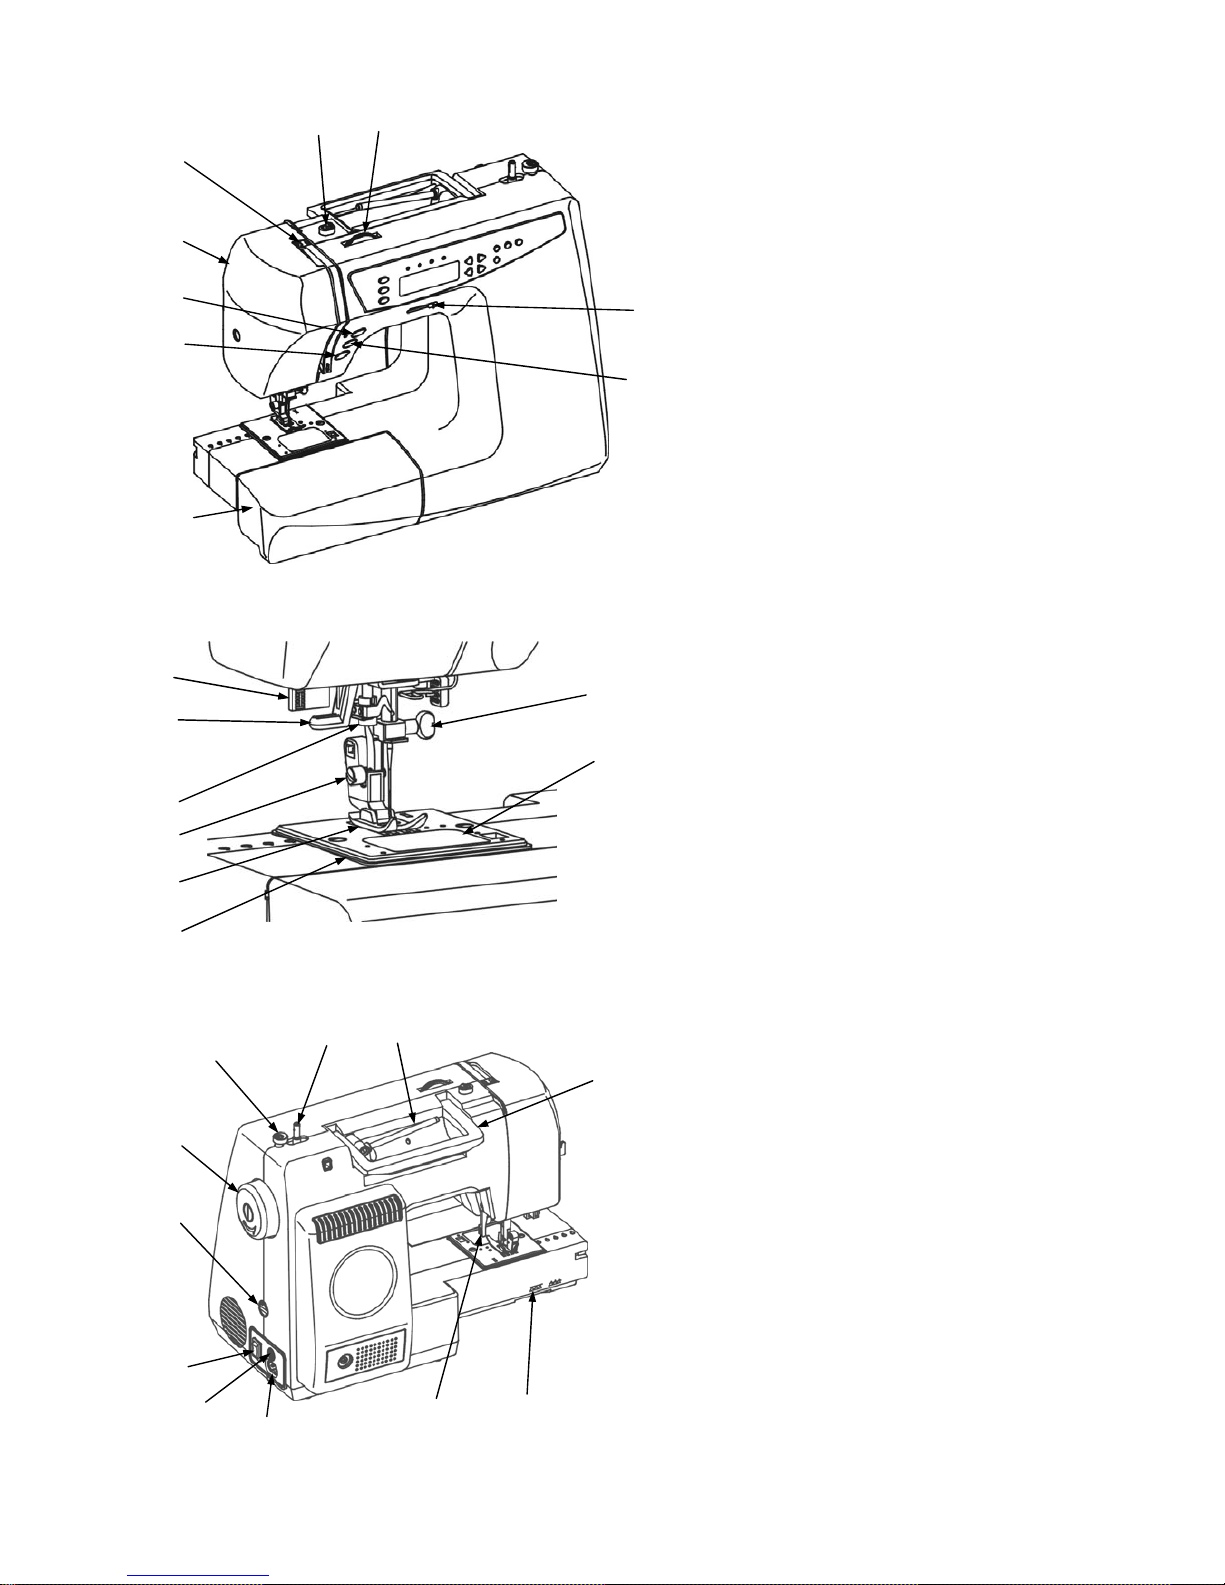
PRINCIPAL PARTS OF THE
MACHINE
1. Upper thread guide
2. Tension dial
3. Speed adjustment lever
4. Reverse button
5. Take up lever
6. Face cover
7. Needle position button
8. Start/Stop button
9. Extension table
10. Needle clamp screw
11. Bobbin & shuttle cover
12. Buttonhole lever
13. Threading lever
14. Needle threader
15. Presser foot holder screw
16. Presser foot
17. Needle plate
18. Bobbin winder stopper
19. Bobbin winder spindle
20. Horizontal spool pin
21. Handle
22. Hand wheel
23. Stitch balance dial
24. Power switch
25. Foot controller connector
26. Plug connector
27. Presser foot lever
28. Feed dog height lever
10
11
12
13
14
15
16
17
1
2
3
4
6
7
9
5
8
18
19
20
21
22
23
24
25
26
27
28
- 3 -
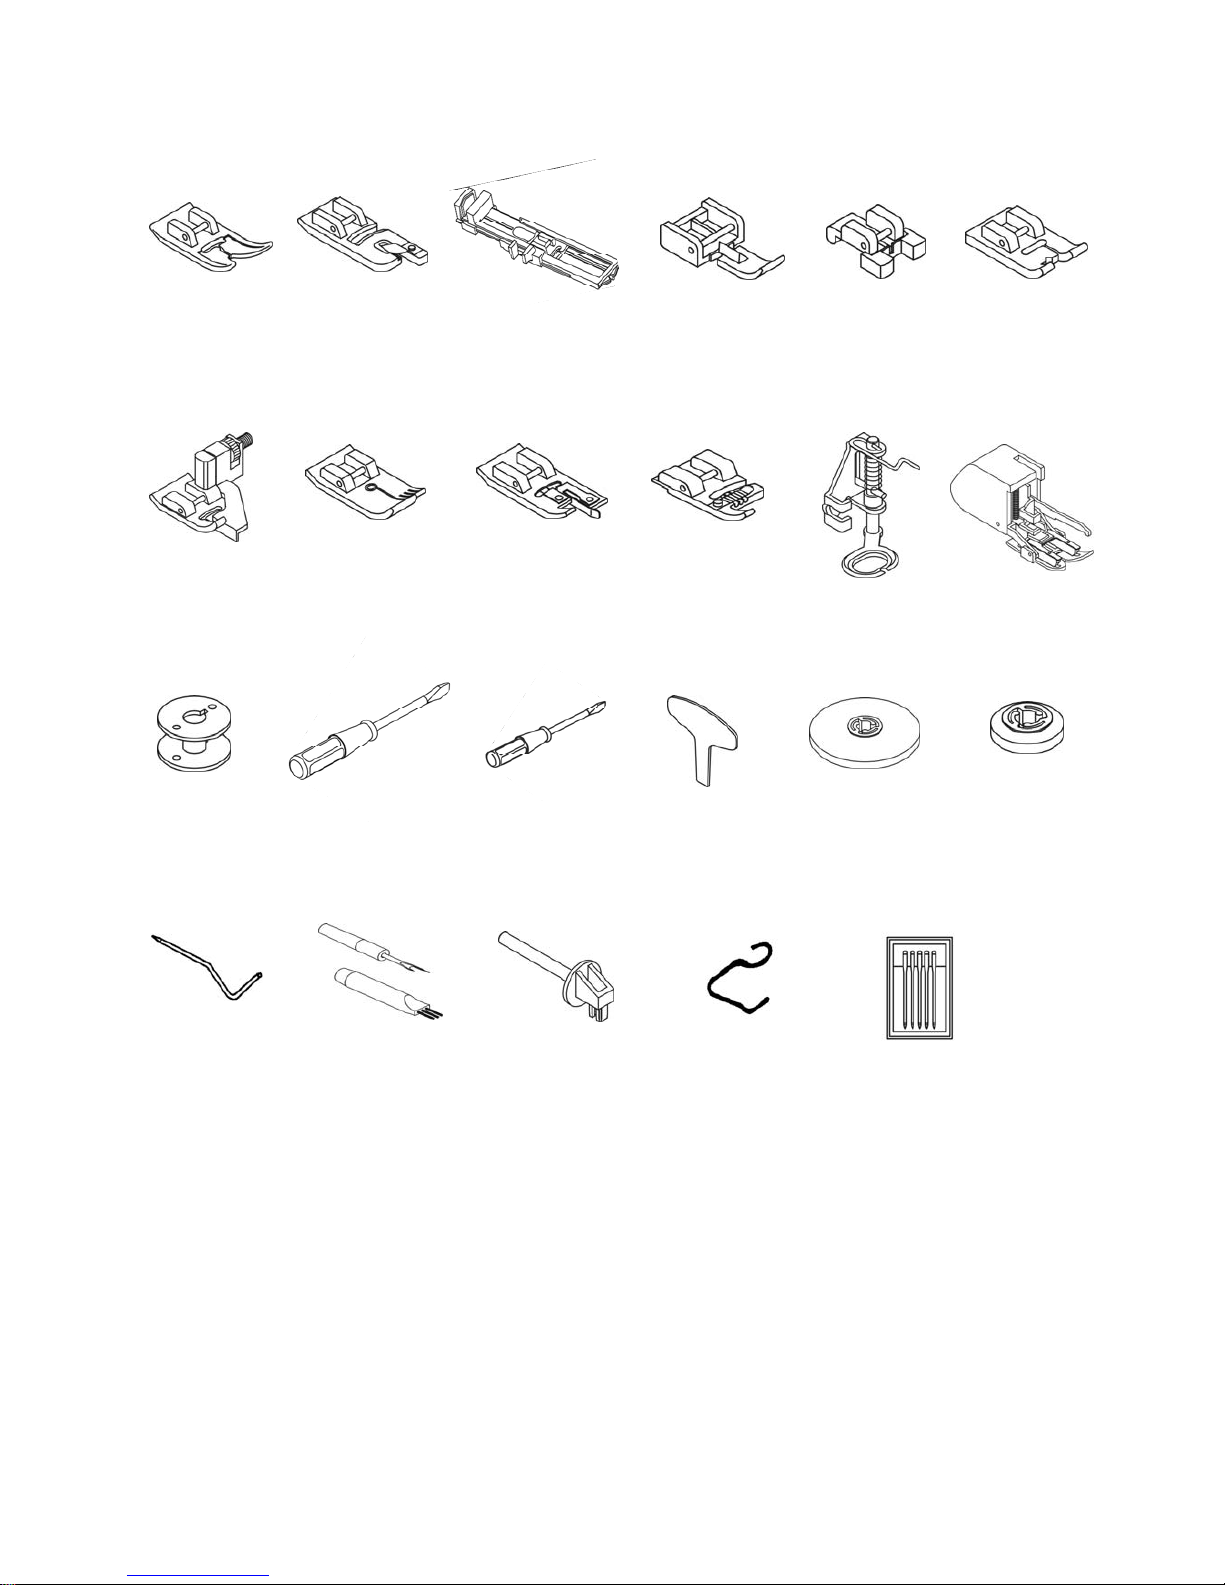
ACCESSORIES
1 2 3 4 5 6
7 8 9 10 11 12
13 14 15 16 17 18
19 20 21 22 23
1. All purpose foot (On machine)
2. Narrow hem foot
3. Buttonhole foot
4. Zipper foot
5. Button foot
6. Satin stitch foot
7. Blind hem foot
8. Quilting / Straight stitch foot
9. Overlock foot
10. Cording foot
11. Embroide ry foot
12. Walking foot
13. Bobbin
14. Screw driver (Large)
15. Screw driver (Small)
16. Needle plate screw driver
17. Spool cap (Large)
18. Spool cap (Small)
19. Quilting guide
20. Buttonhole cutter
21. Extra spool pin
22. Finger protecter (On machine)
23. Needles.
- 4 -
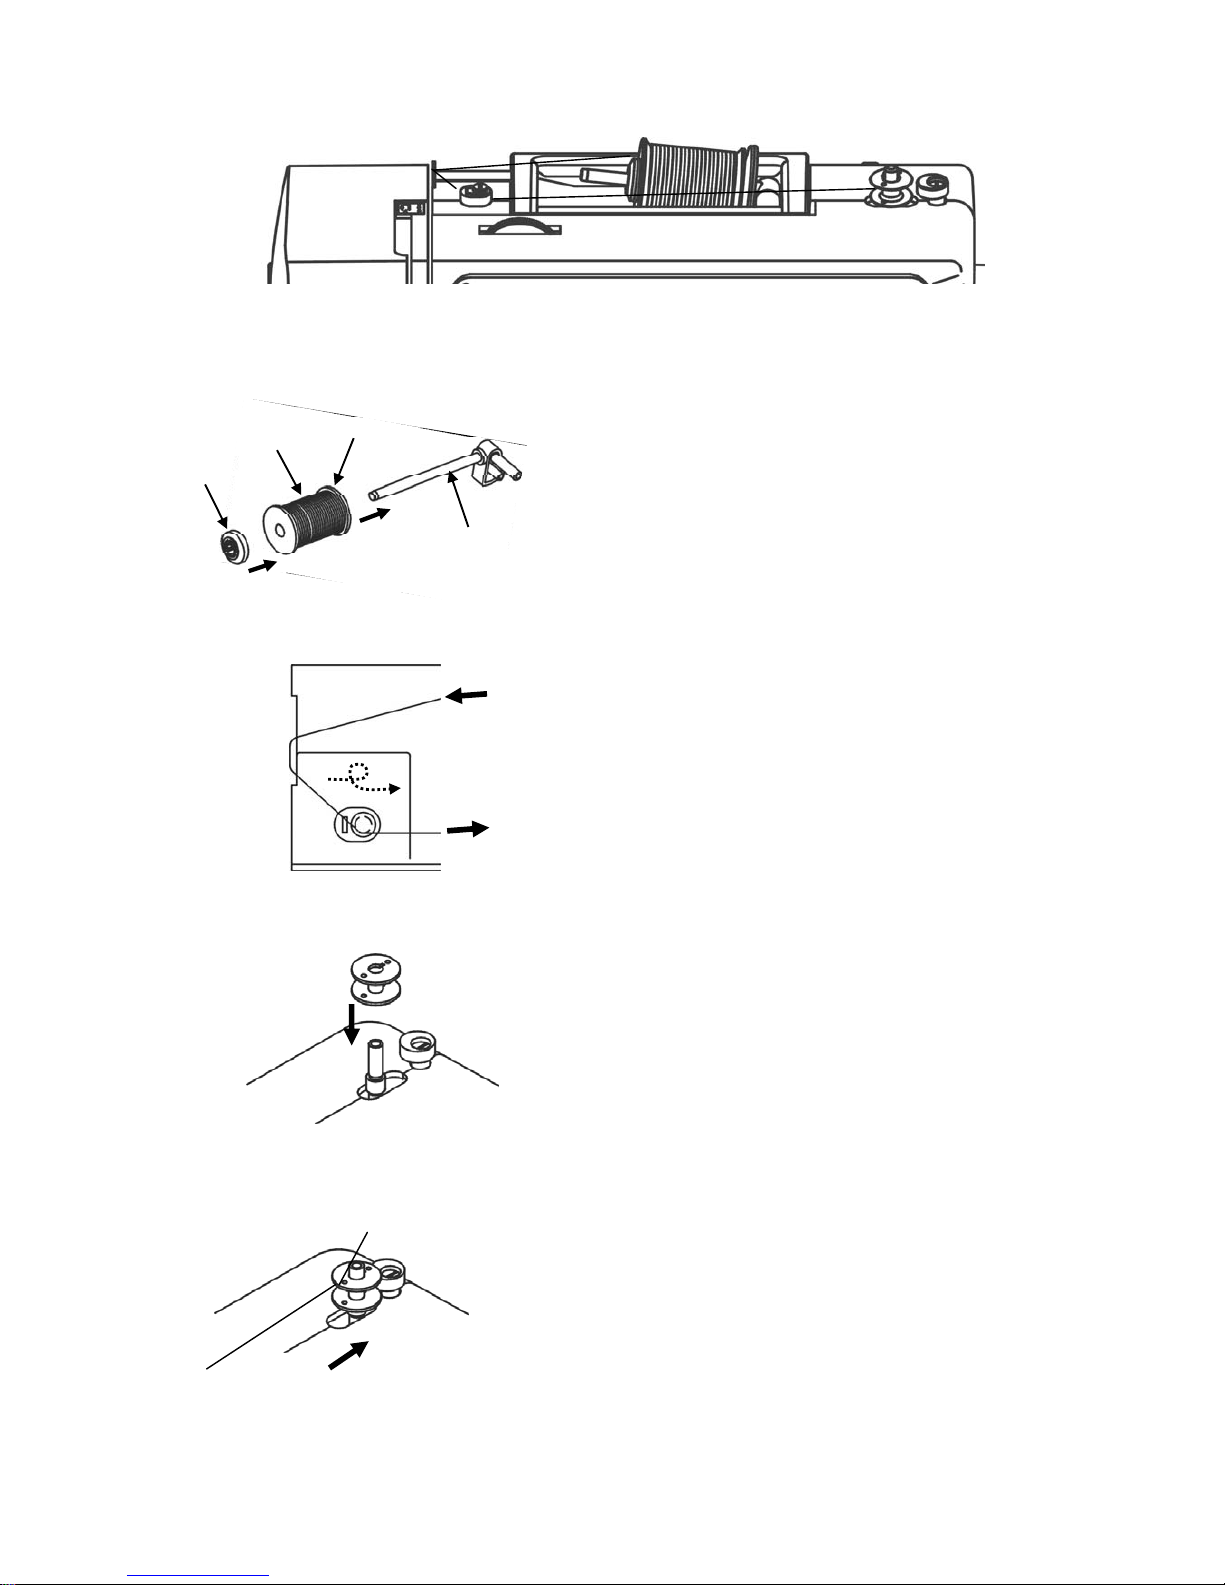
1. Place thread spool and spool cap onto spool
pin. (Make sure the cut on the thread reel is
towards right side before threading)
2﹒Follow the arrow direction, thread as diagram.
3﹒Thread through inside of the opening on the
bobbin edge, then place empty bobbin onto
spindle.
4﹒Push bobbin winder to the right, hold the end of
thread. Slowly press the foot control to start
winding.
WINDING THE BOBBIN
Spool
Gap
Spool pin
Spool cap
- 5 -
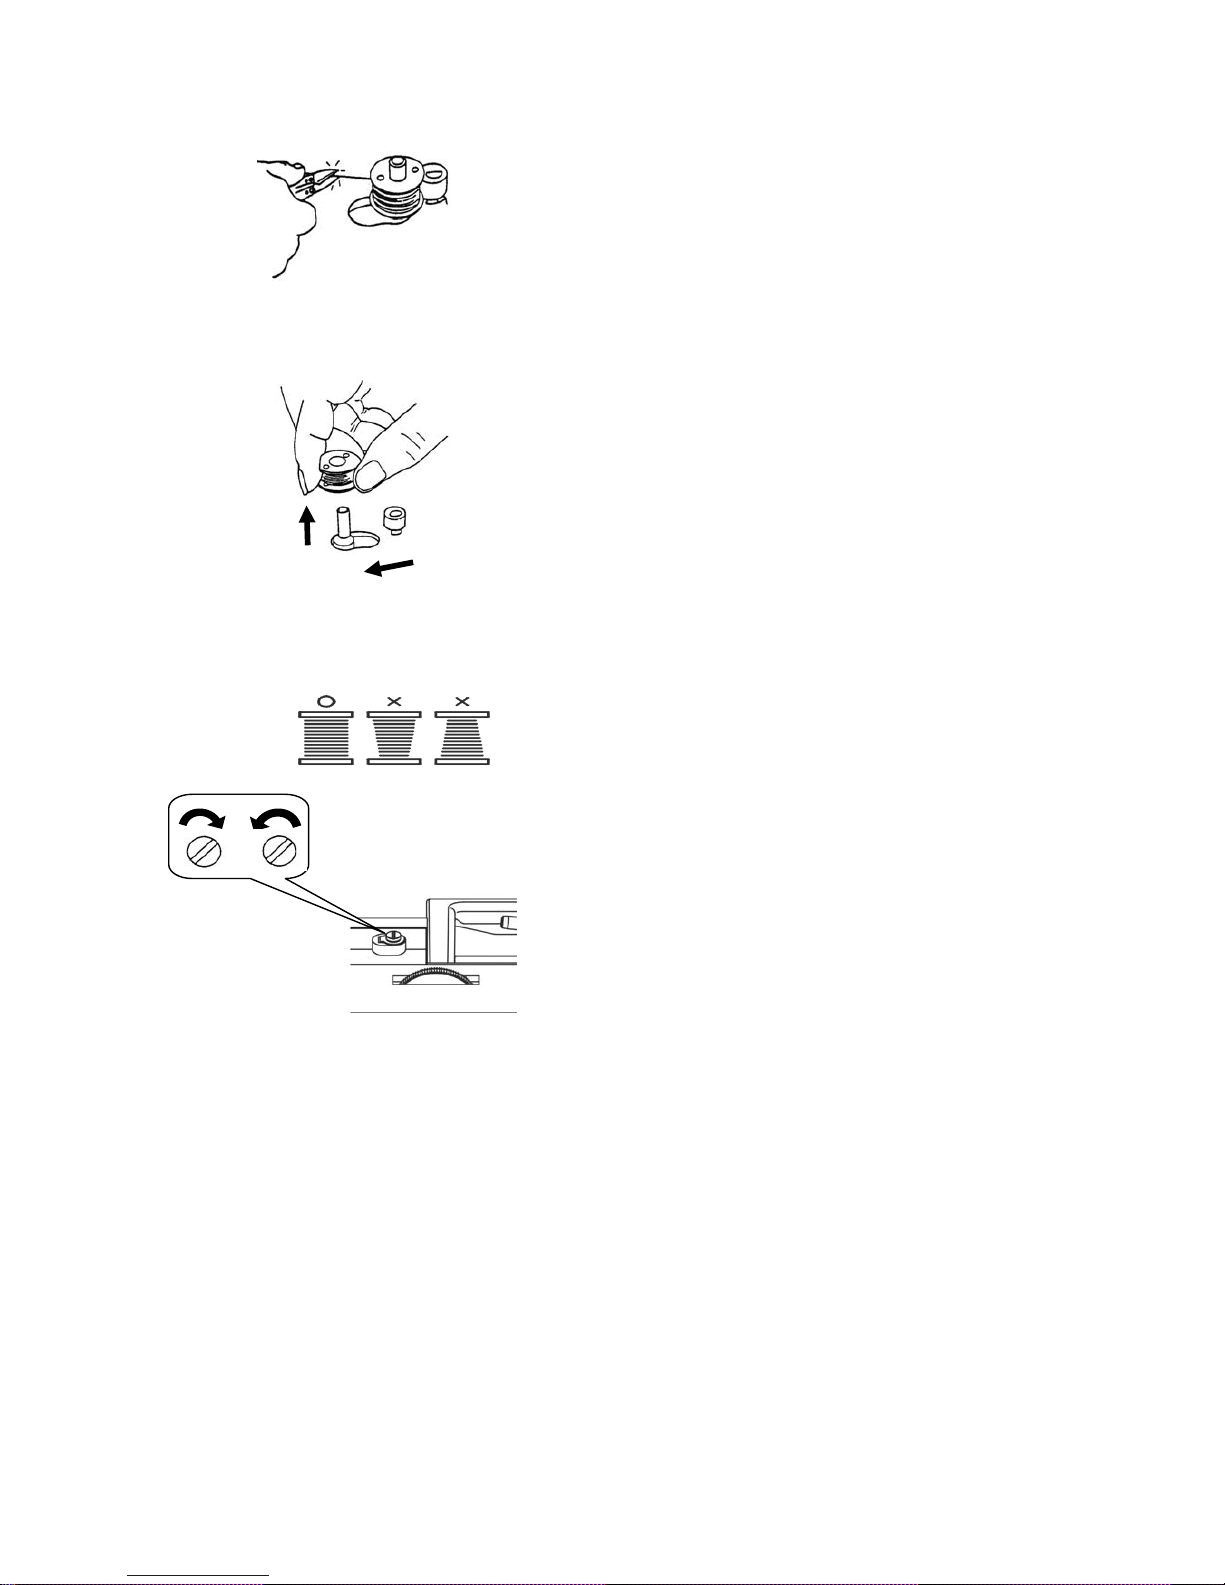
5﹒When bobbin winder is completed, release the
foot control to stop machine then cut the thread.
6﹒Return winder spindle to left and remove wound
bobbin.
If it is not winding evenly, make adjustments:
Turn screw clock wise: position down.
Turn screw counter clockwise: position up.
Until winding is even in bobbin.
 Loading...