

Page 1
1
Installation and User Guide
fring version 2.0.0.4
For iPhone / iPod touch 2.x/3.x.x
Page 2

2
Table of Contents
Table of Contents ...............................................................................................................2
Introduction ..........................................................................................................................3
About fring ....................................................................................................................3
System Requirements ........................................................................................................4
Registering to fring .............................................................................................................5
Login Procedure ................................................................................................ ...........5
Subscribing to your Add-ons – (optional) .........................................................................7
Adding a SIP Service – (optional) ..................................................................................... 9
Using Twitter ..................................................................................................................... 10
Adding Twitter to fring ............................................................................................ 10
Using Twitter with fring........................................................................................... 10
Making your first fring call ................................................................................................ 11
Using fring ......................................................................................................................... 12
Getting Started .......................................................................................................... 12
Statuses ....................................................................................................................... 12
Searching your buddy list ...................................................................................... 13
Making a call from fring .......................................................................................... 13
Receiving a fring call ................................................................................................ 16
Loudspeaker ............................................................................................................... 16
Chatting........................................................................................................................ 17
Chatting with a contact ....................................................................................... 17
Navigating between chats .................................................................................. 17
Viewing offline chat messages .......................................................................... 17
Ending a chat .......................................................................................................... 18
Profile ................................................................ ............................................................ 19
Adding or subscribing to an Add-on ................................................................... 20
History .......................................................................................................................... 21
Adding a new fring contact .................................................................................... 22
Logging out of your fring account ....................................................................... 22
Using fring with Push Notifications ...................................................................... 23
Temporarily disabling Push Notifications ....................................................... 25
Managing Push Notifications .............................................................................. 26
fring's settings .......................................................................................................... 27
Privacy settings...................................................................................................... 27
Hiding or showing offline contacts and phone contacts ........................... 28
Frequently Asked Questions ........................................................................................... 29
Downloading & Installing fring ............................................................................. 29
Registering to fring ................................................................................................... 29
General ......................................................................................................................... 30
Page 3
3
Introduction
About fring
fring™ is a mobile internet service & community that enables you to access & interact
with your social networks on-the-go, including make free calls, live chat and seeing your
contacts online presence with all your fring, Skype®, MSN® Messenger, Google Talk™,
ICQ, SIP, Twitter, Yahoo!™ and AIM®* friends using your handset’s internet connection
rather than costly cellular airtime minutes.
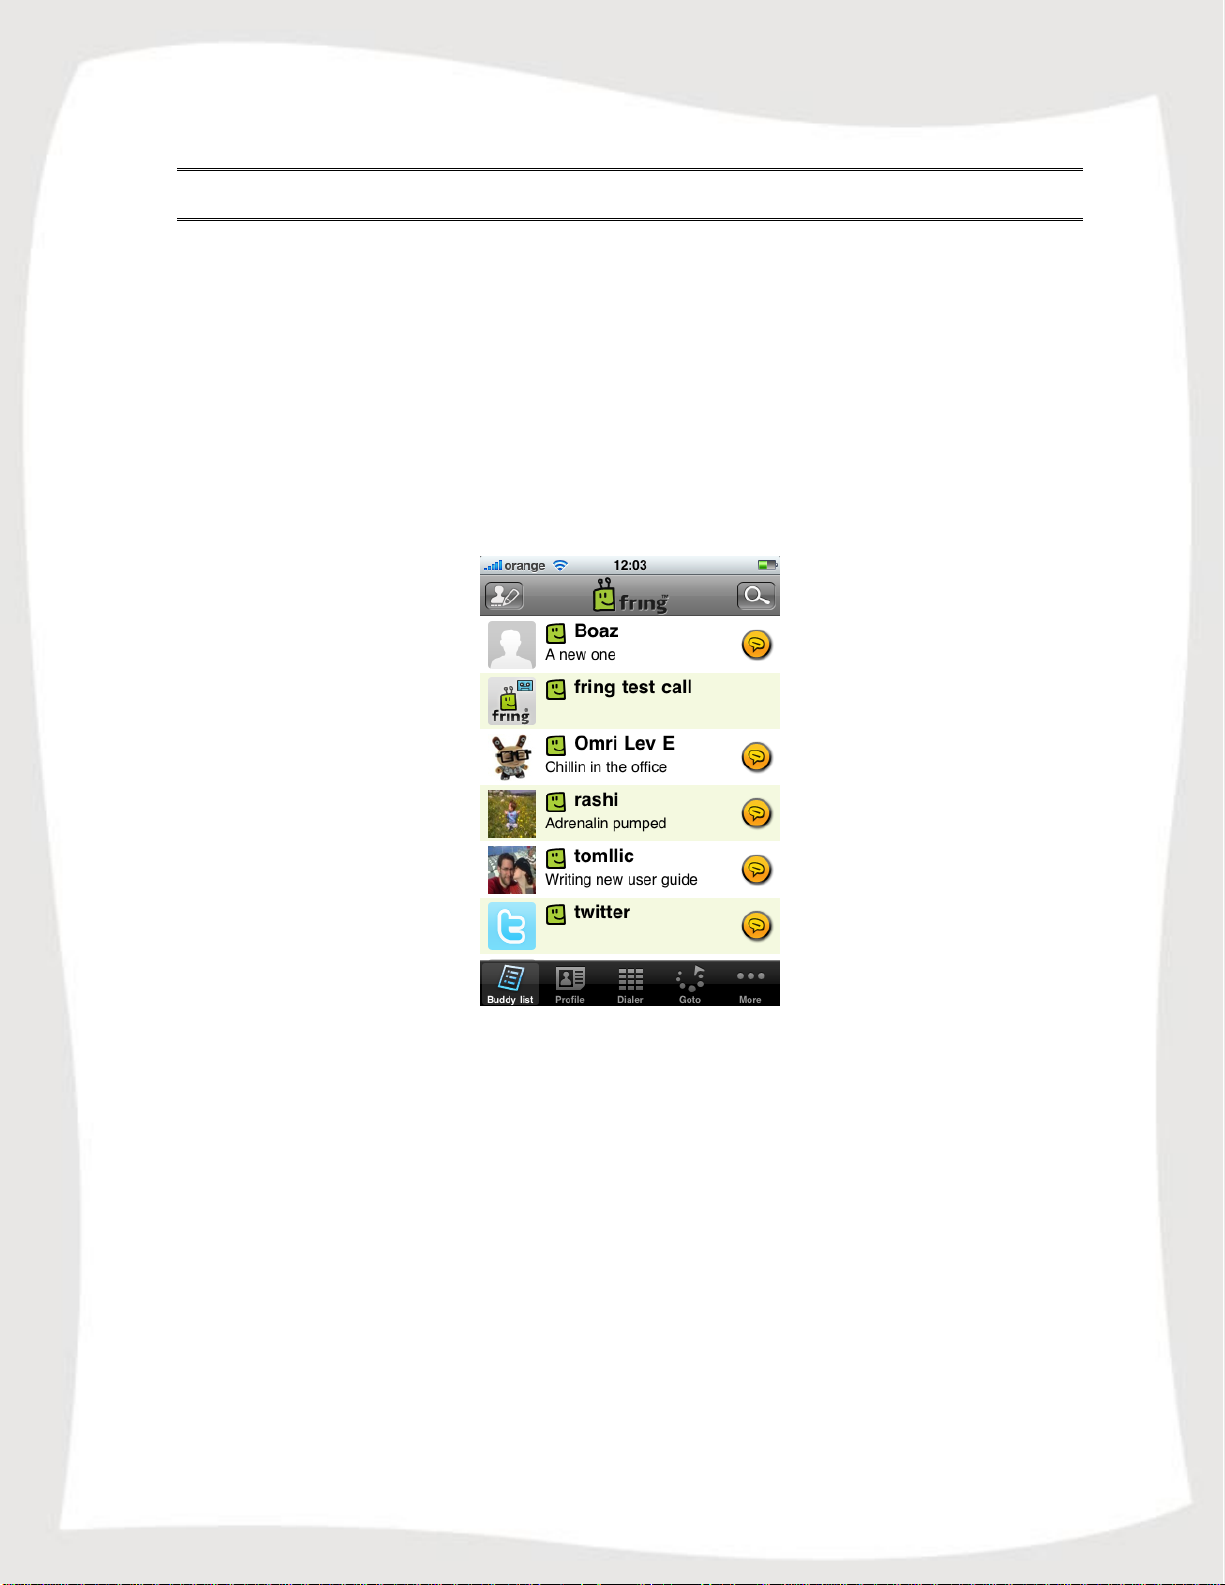
Once you've installed fring, fring's main screen displays your contacts and their presence
status (e.g. online, offline). This list shows the names of your fringster- friends, your
Skype/Google-Talk/MSN/ICQ/Yahoo/AIM contacts.
Figure 1 – buddy list
From the main Buddy list you can navigate between your contacts, find their presence
status and initiate a communication session with them. You may initiate a voice call,
start a chat session and move between all open sessions using the 'Goto' tab. You
can also make SkypeOut/SIP calls directly from
your fring Buddy list.
To sum it up, you'll not only make your iPhone more useful, you can also save
money.
This guide will help you get started.
Page 4

4
System Requirements
In order to use our version, you will need:
iPhone 3GS, iPhone 3G, original iPhone or iPod touch with the 2.0 firmware (or
above)
Internet connection (Not a WAP connection) on your iPhone.
Download fring on the App Store.
Notes:
1. To initiate a call to a landline (or non-fring user) using fring, make sure to purchase
SkypeOut/SIP credits.
2. Currently it is not possible to make VoIP calls over 3G/GPRS networks.
3. In order to make voice calls using the iPod touch you will need the latest iPod touch (the one
with the volume control on the side) and a headset or an Apple certified microphone.
Page 5
5
Registering to fring
A short registration process is required before you can begin to use fring.
The stages of this process are:
Login details Selection
Service Definition
Login Procedure
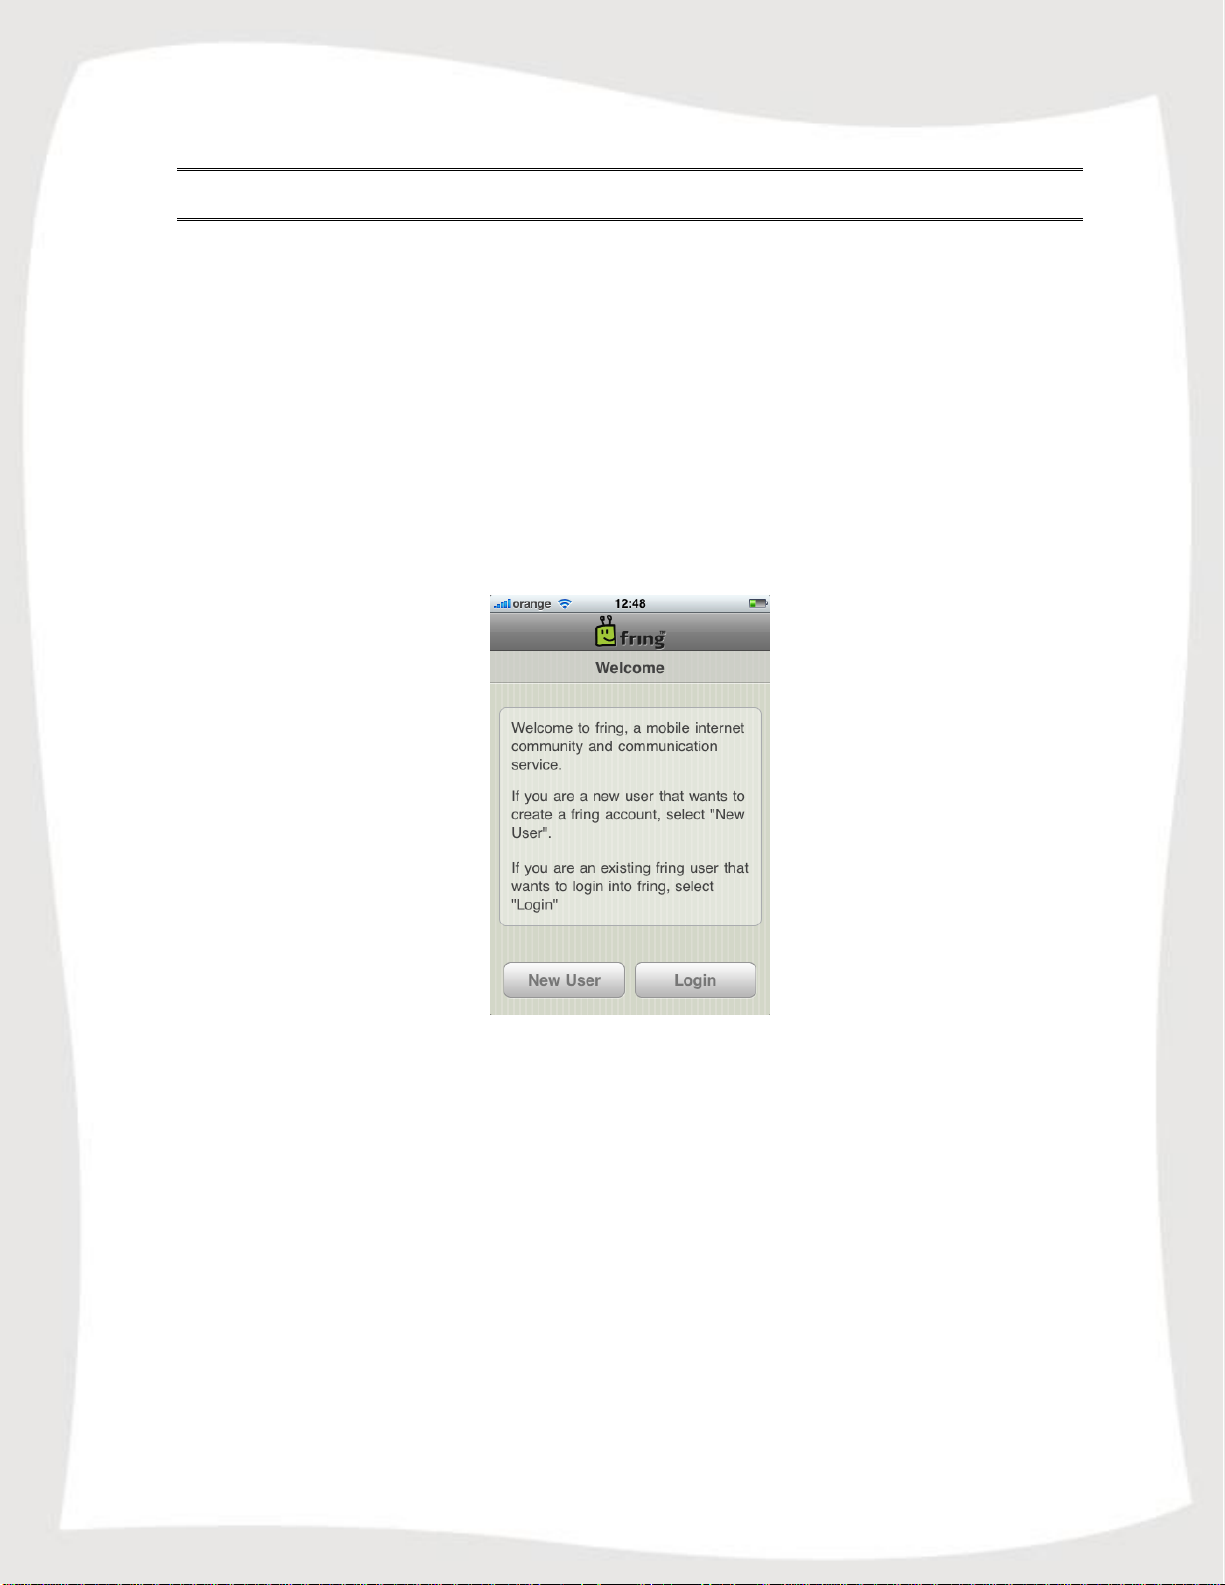
Once the installation is complete, an Installation Complete message appears briefly.
You are now ready to select your fring nickname and password.
Figure 2 - Registration Screen
If you have already registered with fring, choose 'Login' and enter your existing
credentials to log in.
Page 6
6
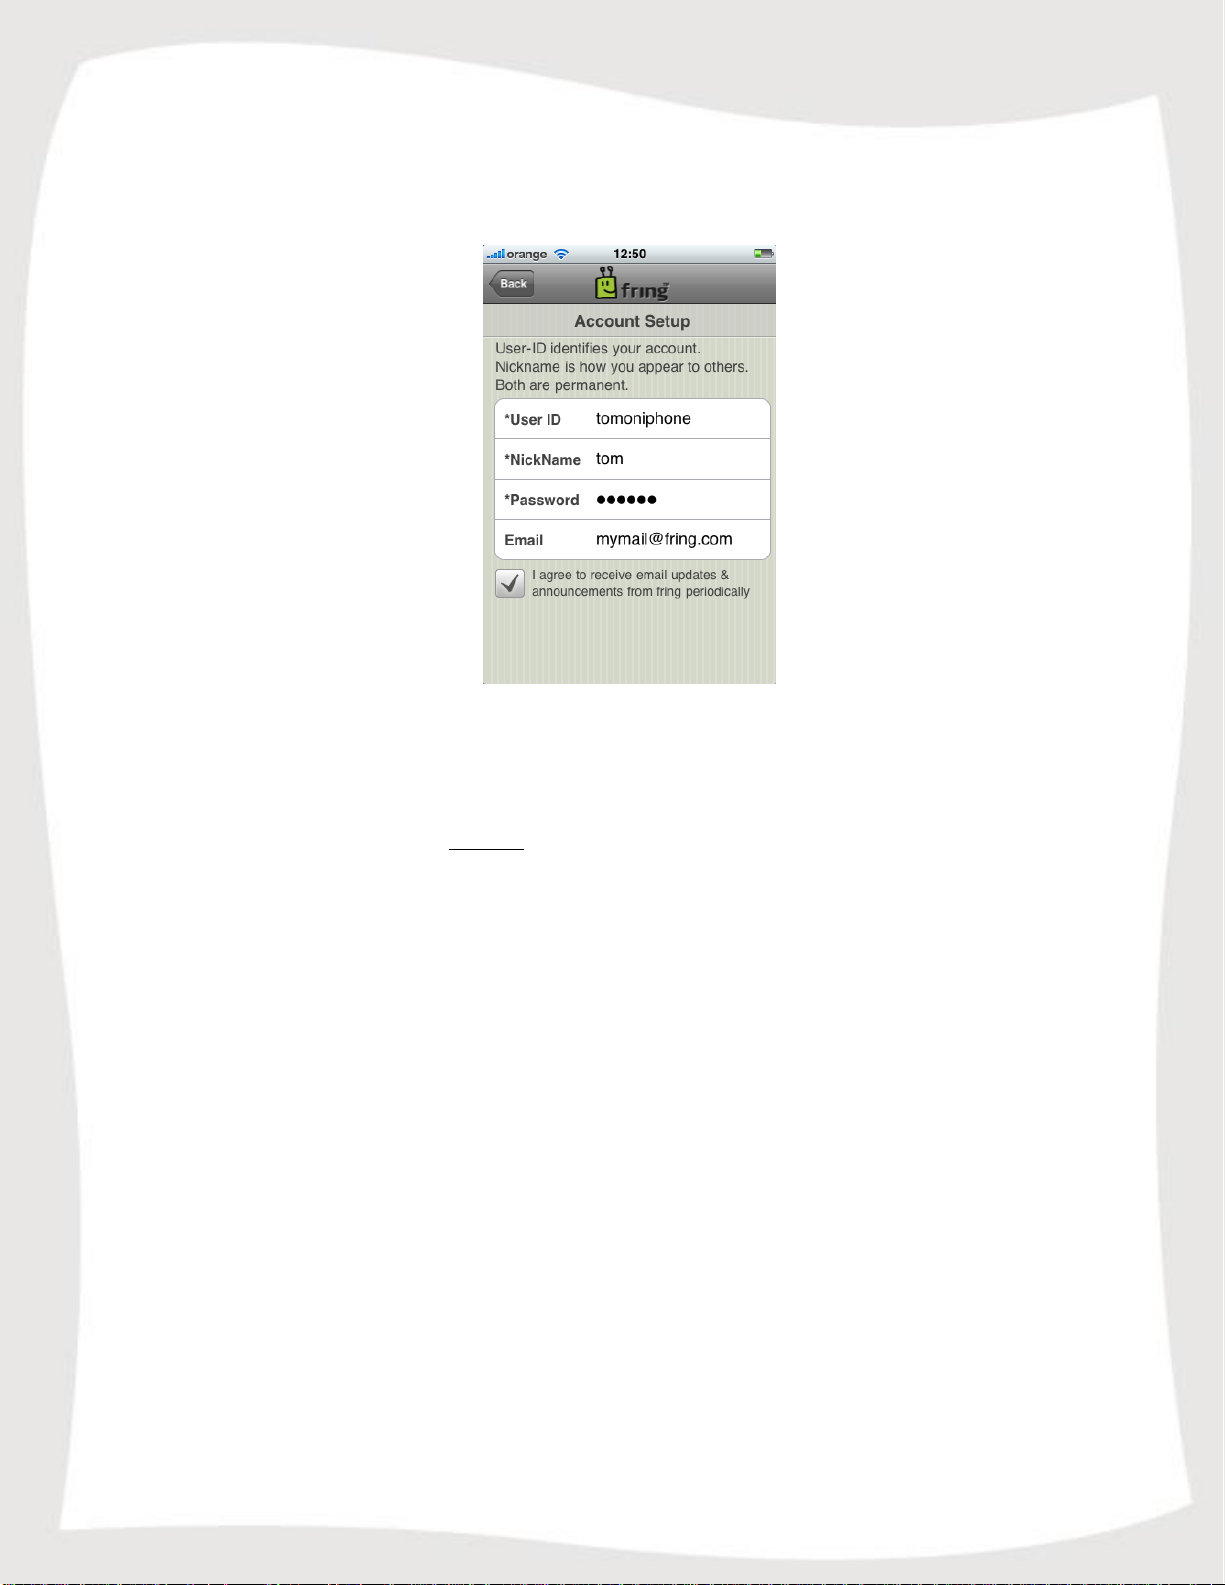
If this is your first use of fring, please choose 'New User' and follow the instructions on
the following screen:
Figure 3 – Account setu p
The registration screen allows you to select your nickname and the password you will
use to access your fring account. Email address is required for password retrieval
purpose.
Note: Passwords must be at least 4 characters long.
Press Go to move to the next screen. The next screen allows you to add your VoIP (e.g.,
Skype/MSN/ICQ etc) accounts details.
Page 7
7
Subscribing to your Add-ons – (optional)
Once you have chosen your fring nickname and password, provide the details of your
Add-ons (e.g., Skype, MSN Messenger, Gtalk, ICQ etc) so that you can begin making
and receiving VoIP calls.
Note: You can subscribe to one or more Add-ons (e.g., Skype) to which you are
registered. Make sure to have your username and password for each.
If you do not already have an Add-on account, register on the Web before you begin to
add networks. You can subscribe to Add-ons at any time. To subscribe to an Add-on
now, follow the instructions below.
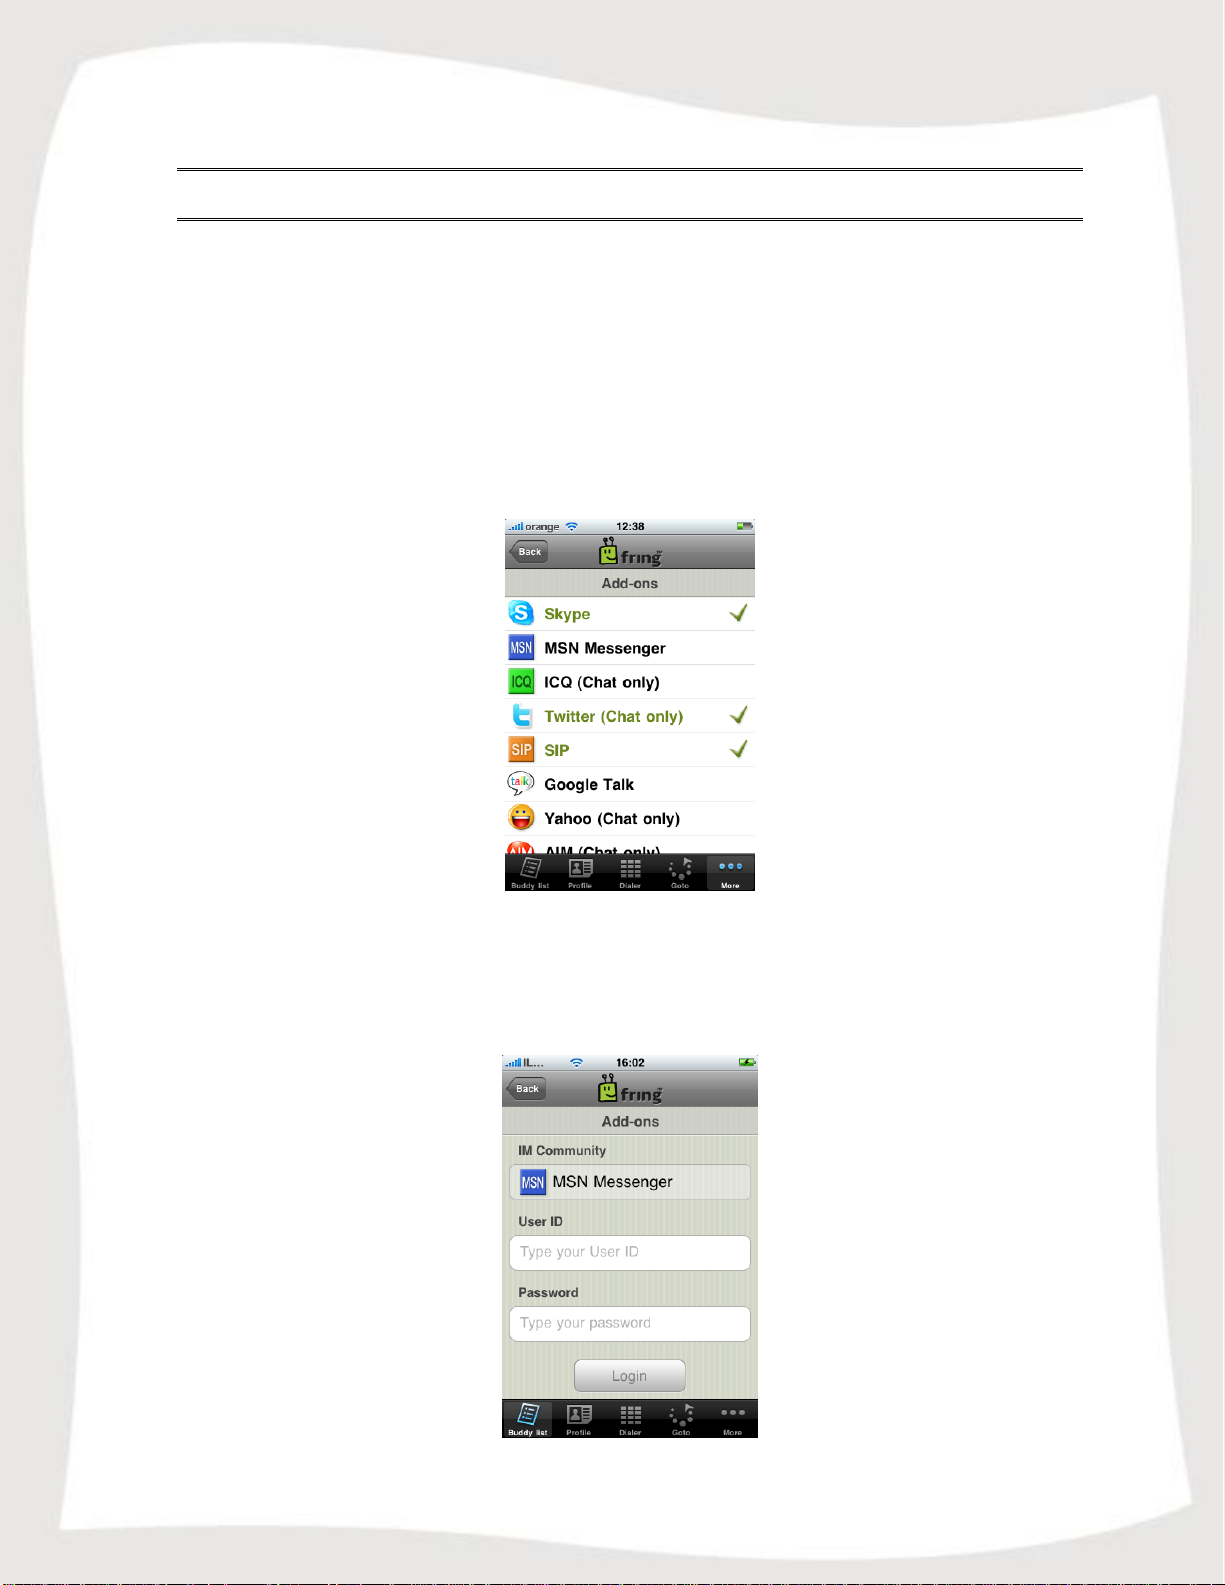
Figure 4 –Add-ons menu
To login to an Add-on:
1. Click on 'More', select 'Add-ons' and choose the service from the list, The
following screen appears:
Figure 5 – Subscribe to an Add-on
Page 8
8
2. In the User ID field, type the username of the Add-on you have selected (e.g.,
your MSN username).
3. In the Password field, type the password of the Add-on you have selected (e.g.,
your MSN password).
4. Press Login.
The Add-on selection screen appears and you can see a green "V" sign which
states the subscription was successful.
If you are interested in subscribing to an additional Add-on, repeat steps 1 to 4 in
this section.
If you have completed selecting your Add-ons, navigate back to the buddy list.
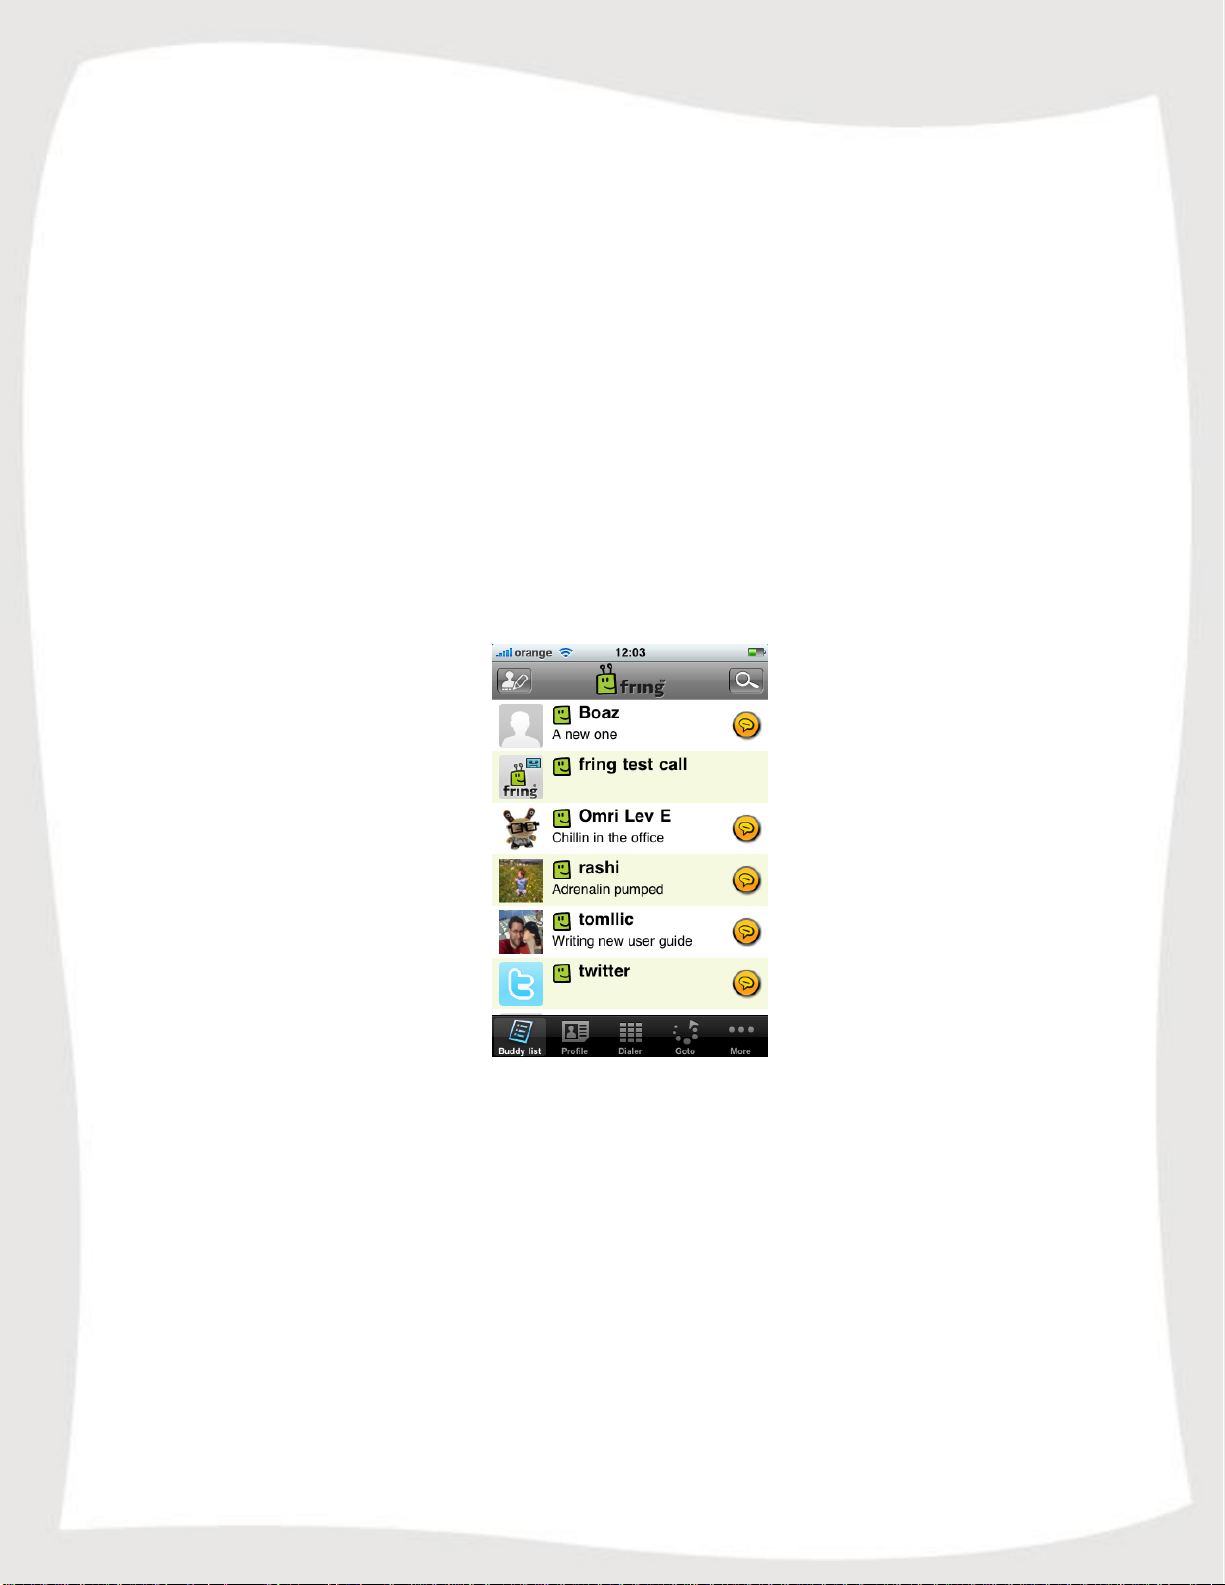
5. Once the sign-in is complete, the Buddy list of your fring contacts, selected Add-
on(s) contacts and the handset’s contact list appears.
Note: If you have added more than one Add-on, the Buddy list will display
contacts from all Add-ons in a single list.
Figure 6 – Buddy list
You have successfully completed the registration. You are now ready to make
your first call.
Page 9
9
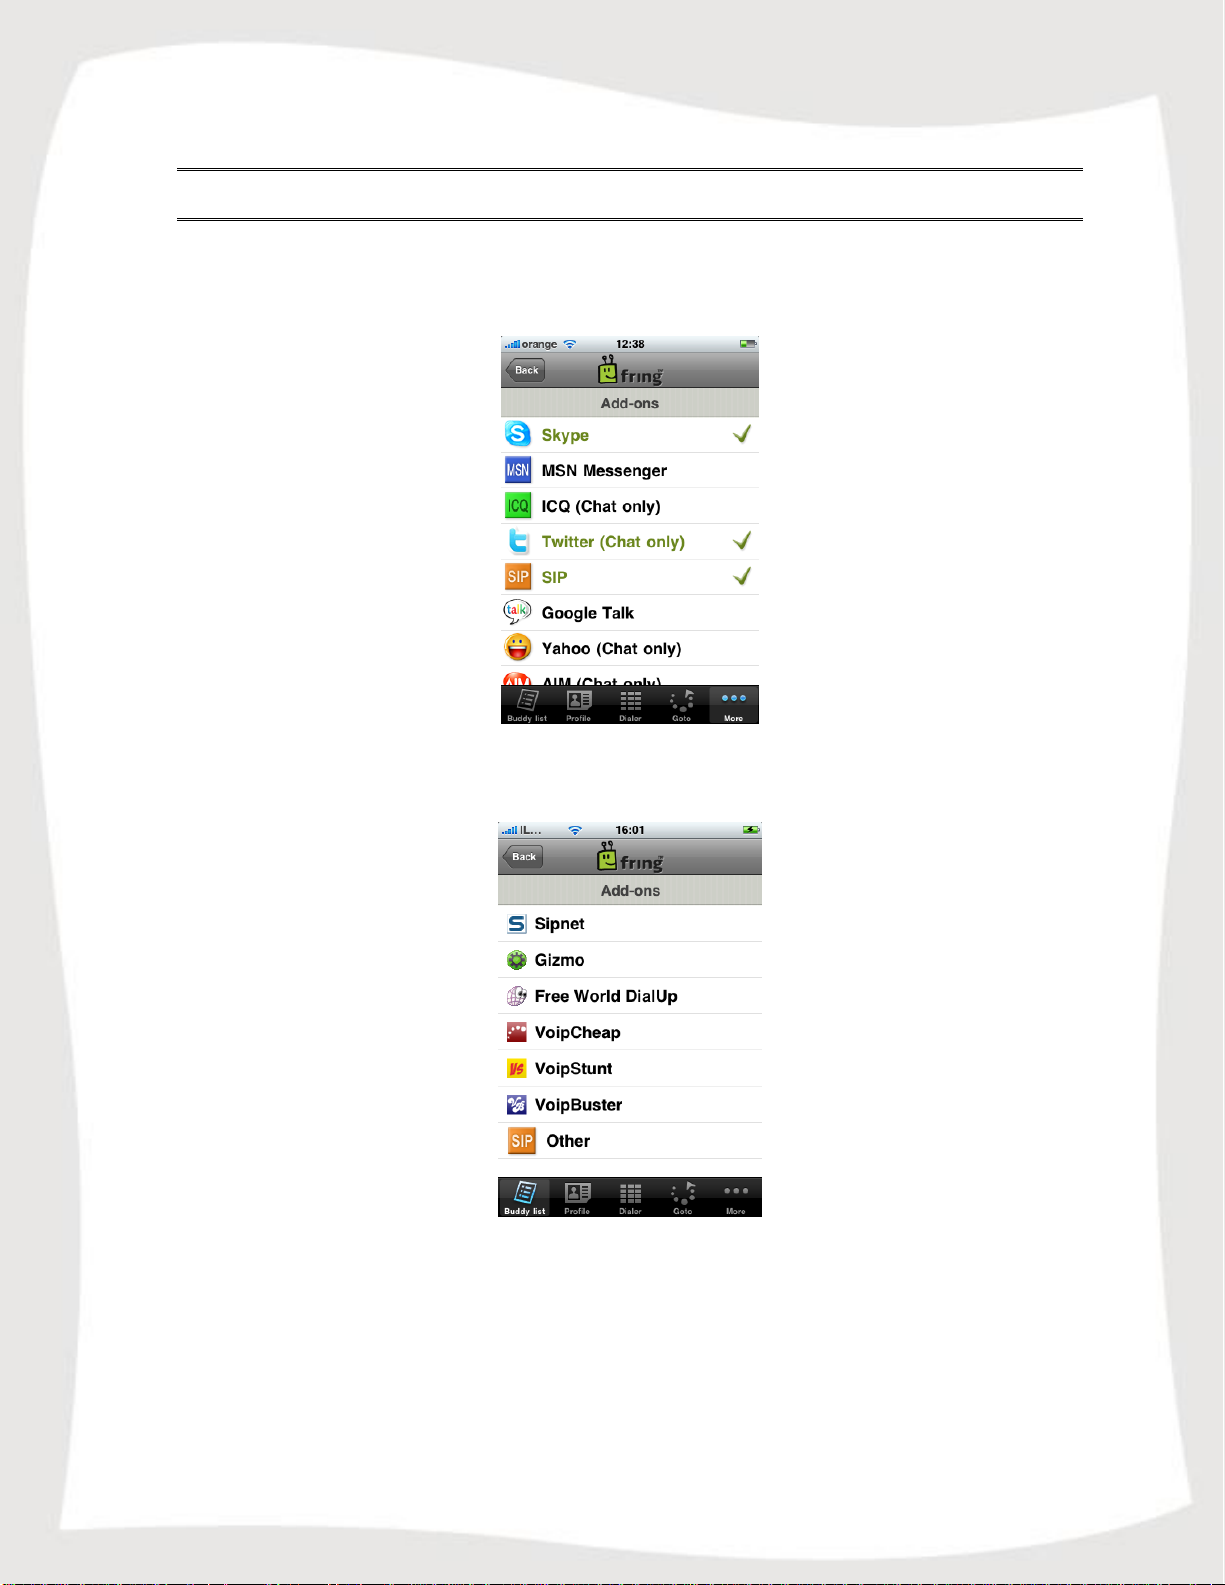
Adding a SIP Service – (optional)
If you have an account with a SIP provider, you can also use it on fring.
To add a SIP service:
Figure 7 - Service Selection
1. Click on 'More' and choose 'SIP' from the list, The following screen appears:
Figure 8 – Select SIP Service
2. Choose your SIP provider from the list. If your SIP provider is not listed, choose
Other.
3. Enter your SIP user id and password and press Login.
You are logged into your SIP Service and should now be able to make outgoing
calls through your SIP provider.
Page 10

10
Using Twitter
If you have already opened a Twitter account (see www.twitter.com), you can use it
with fring.
Adding Twitter to fring
You can add Twitter to fring in the same way that you add other Add-ons.
To add Twitter or to sign-in as a different user:
1. Press More Add-ons and choose Twitter
2. Enter your Username and Password and press Login.
You are signed into Twitter and Twitter appears as a contact in your fring contacts.
Using Twitter with fring
Once you have signed into Twitter, you can send Tweets directly from your fring Buddy
list.
To send a Tweet:
1. Locate the Twitter contact in your fring Buddy list
2. Choose Chat.
3. Type your Twitter message and press the Blue envelope icon.
Your message is sent.
Page 11

11
Making your first fring call
Once you have completed the installation and registration processes described above,
you're ready to make your first call. To know that everything is working correctly, you
may choose to call the fring test call.
The fring test call is a test center that lets you record a message and plays it back to
you. If you successfully record and hear the message that you have recorded, you're
ready to go!
To call the fring test call:
1. From your buddy list choose the fring test call contact and press the Call
button on the second screen.
The call connects to the test center.
2. Listen to the message and follow the instructions.
Your test is complete!
Figure 9 – fring test call
Page 12

12
On a call
Unread chat event
Available / Online
Busy
Offline
Using fring
Getting Started
Figure 10 – Buddy list
Statuses
The following statuses are displayed in the Buddy list:
Page 13

13
Searching your buddy list
You can browse your buddy list to find contacts quickly.
To find a contact:
1. Choose the Magnifying glass icon on the top right corner of the buddy list.
2. Start typing the name of your contact.
The list is filtered according to the characters you have typed.
Making a call from fring
In fring you have three call options:
Calling your Add-on's contacts from the Buddy list.
Calling your phone contacts from the Buddy list.
Calling phone numbers by using the Dialer.
To call an Add-on contact:
1. Open the fring Buddy list, choose an Add-on contact you wish to call and press
Call.
Figure 11 – Initiate call
Page 14

14
2. On your screen you can see the call screen. To end the call press End call.
Figure 12 – Call screen
To call a phone contact:
1. Open the fring Buddy list and choose a phone contact you wish to call.
2. The next screen will give you the call options (Cellular/Skype out/SIP). Choose
the method you would like to use and make the call.
Figure 13 - Call Options Menu
3. On your screen you can see the call screen. To end the call press End call.
Page 15

15
To call by using the dialer:
1. Choose the dialer tab from the Tab Bar.
Figure 14 - Dialer
2. Click the flag icon and select the country you would like to call.
Figure 15 – Choosing country
3. Dial the number and choose the method you would like to use to make the call.
4. On your screen you can see the call screen. To end the call press End call.
Page 16

16
To make a SkypeOut call from fring, you must have sufficient SkypeOut credits.
SkypeOut credits cannot be purchased from fring, only directly from
www.skype.com.
To make a SIP call from fring, you must have a SIP account with enough credits to
complete the call. SIP credits cannot be purchased from fring, only directly from your
SIP provider.
Cellular call is a regular call, exactly as if you would make it directly from the iPhone
without running fring. These calls use your normal provider rate as fring only acts as
a platform to initiate these calls.
Note: Cellular calls are not available on the iPod touch version.
Receiving a fring call
fring allows you to both make and receive calls using voice-over-IP (VoIP) technology.
To receive a fring call
A call screen appears with the nickname of the caller. Press Accept.
Figure 16 – Incoming Call
Loudspeaker
fring allows you to use your iPhone's speaker.
To activate / deactivate the speaker:
While in the call screen, use the Speaker icon on the top right corner.
Page 17

17
Chatting
fring lets you chat with your contacts using instant messaging. You can chat with one or
more of your contacts simultaneously.
Figure 17 – Chat screen
Chatting with a contact
To initiate a chat:
1. From your Buddy list, select the contact you want to chat with and press Chat.
2. In the text entry area, write your message and press the Blue envelope icon.
Navigating between chats
If you choose to have two or more chats simultaneously, each will have a separate tab.
Navigate between the chats by going to the 'GoTo' tab.
Viewing offline chat messages
Chat messages can be received even when you are offline. If you have received a
message, it will appear as a 'GoTo' tab when you open fring.
Page 18

18
Figure 18 – GoTo tab
Ending a chat
To end a chat:
Press the Back button on the chat screen or go to the GoTo tab and press the
Delete icon.
Page 19

19
Profile
In fring you can edit and manage your profile.
Figure 19 – GoTo tab
To access your profile in fring:
Select the 'Profile' tab.
To edit your profile:
1. Choose the 'Camera' icon to edit your profile picture.
2. Choose the 'Nickname' and 'Mood Text' fields to edit them.
Page 20

20
Adding or subscribing to an Add-on
You can subscribe to new Add-ons or sign-in as a different user at any time.
To subscribe to a new Add-on or to sign-in as a different user:
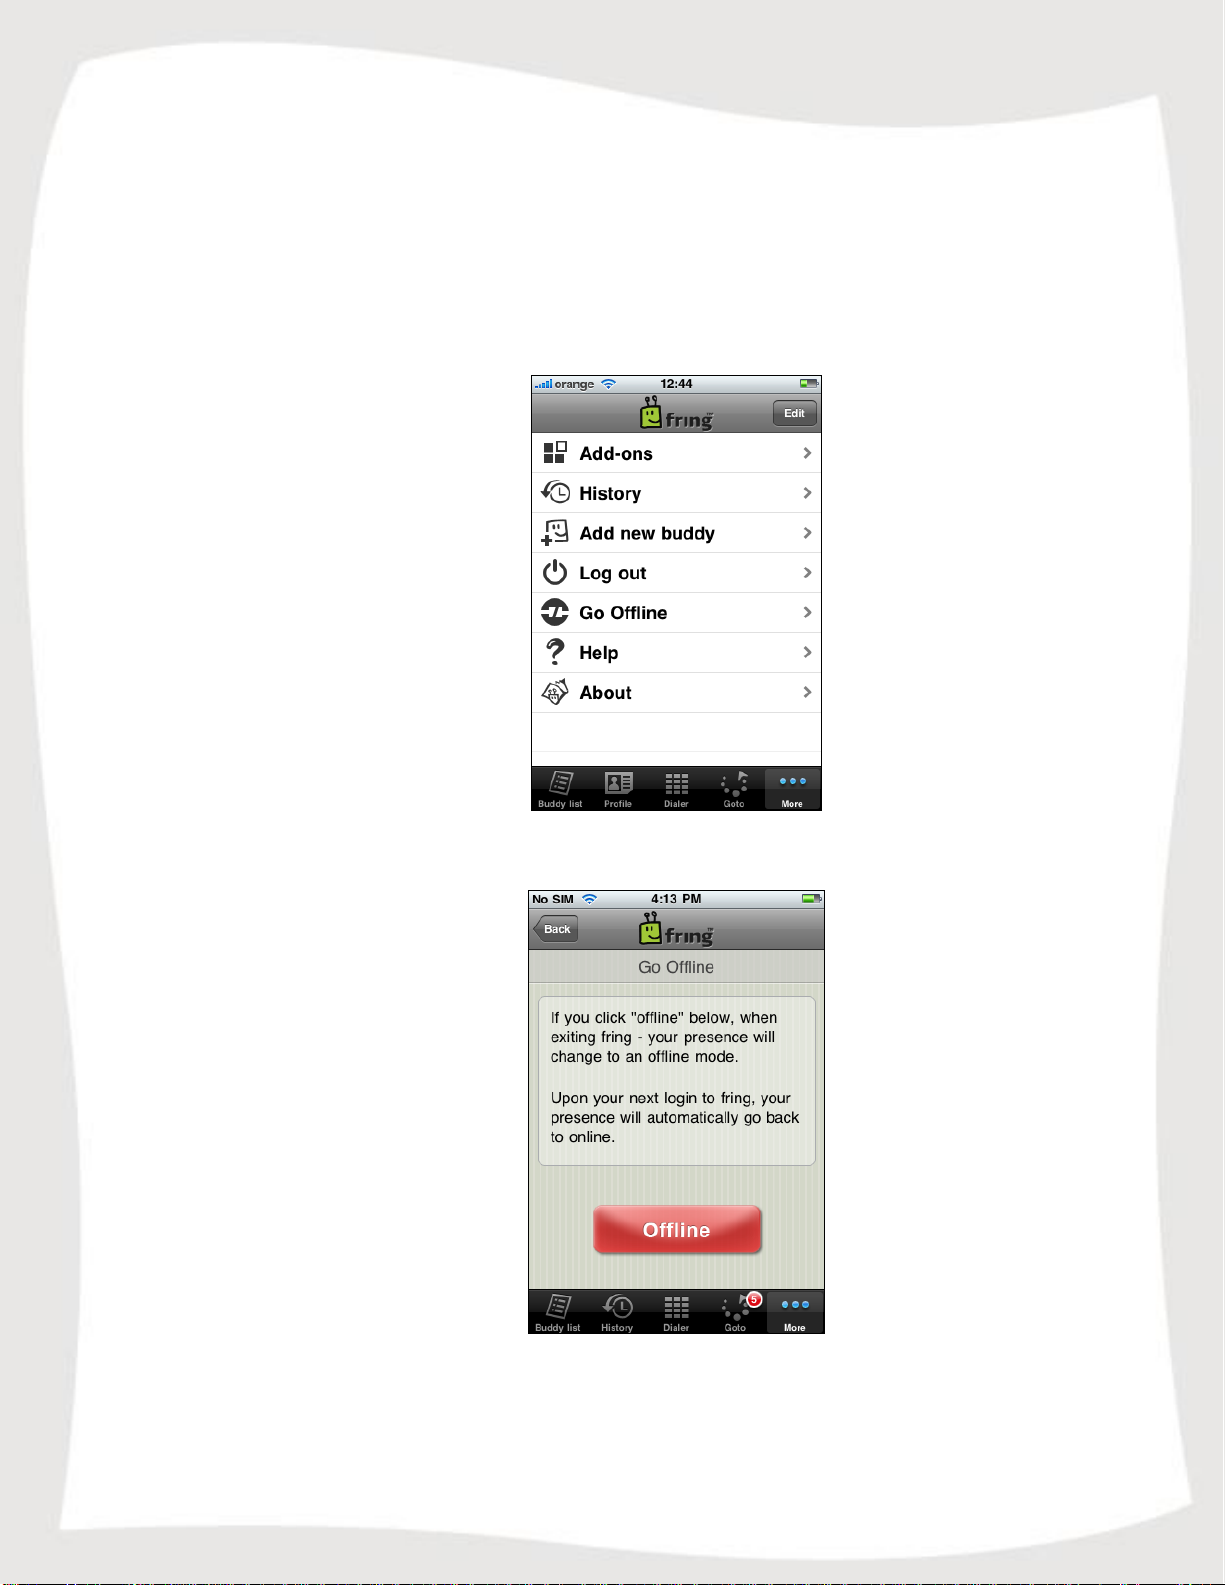
1. From the Tab bar choose More.
The following menu opens:
Figure 20 - More tab
2. Choose Add-ons
A screen opens displaying the available Add-ons.
3. Follow the process defined in the "Subscribing to your Add-ons – (optional)"
section in this guide.
Page 21

21
Outgoing call
(blue up arrow)
Missed call
(red down arrow)
Incoming call
(green down arrow)
History
The history menu keeps a record of every incoming or outgoing voice event in fring.
Figure 21 - History
The icons on the left side represent the following events:
Note: If you have chosen to display your phone contacts in fring, voice events from
your phone also appear in the history menu.
To view the details of each event, press the green icon on the right.
To clear the entire list of history records press Clear and select Clear History.
Figure 22 - Event Details
Page 22

22
Adding a new fring contact
You can search for a fring contact by his fring user ID or by browsing your phone book.
To search for a fring contact in the fring network:
1. From the Tabs bar choose More.
2. Choose the Add new buddy option.
3. You can now choose whether you'd like to search by fring user ID or through
your internal address book.
Figure 23 – Add new buddy
Type in the fring User ID of the buddy you'd like to add and select Add, or select a
contact from your phone book.
Logging out of your fring account
In fring you can log out of your account.
To log out of your fring account:
1. From the Tabs bar choose More.
2. Choose the Log out option.
3. Read the message and select Log out.
You have logged out of your fring account. To login as a new or as an existing fring
user, please follow the instructions described in the "Login procedure" part of this guide.
Page 23

23
Using fring with Push Notifications
Using the new Push Notification capability, you can now be notified when you receive a
call or a chat when fring is not running.
Note: Push Notifications available only on firmware version 3.x.x or newer.
Once you register to fring and run it for the first time, you will see this message on your
screen:
Figure 24 – Push alart
Choose OK and your contacts will see you online when you exit fring and will be able to
send you chat messages and call you.
Choosing Don't Allow will dismiss this window and you will not get notifications.
Note: Once you exit fring, your contacts will see you online and you'll be available for
the next 4 hours.
Page 24

24
When a contact will send you a chat message or try to call you, you'll receive these
notifications:
Figure 25 – Missed chat notification Figure 26 – Missed call notification
If you choose Answer, fring will launch and you'll see these windows accordingly:
Figure 27 – Missed chat Figure 28 – Missed call
Note: if you choose Close, you will not be available any longer and your contacts will
see you offline until the next time you launch fring.
Page 25
25
Temporarily disabling Push Notifications
If, for some reason, you don't want that your contacts will see you online when fring is
not running, you can temporarily disable Push Notifications.
To temporarily disable Push Notifications:
1. Press More Go Offline:
2. Press Offline:
Figure 29 – More tab
Figure 30 – More Menu
When you'll exit fring, you will not appear to your contacts as Online. The next time
you'll run and exit fring, you are once again available and appear Online to your
contacts.
Page 26

26
Sounds
Disable/Enable notification's sound.
Alerts
Disable/Enable notification pop up.
Badges
Disable/Enable red badges on fring's icon in the spring board.
Managing Push Notifications
You can manage fring's Push Notifications at any time by going to the settings menu of
your device:
Figure 31 – Settings Menu Figure 32 – Notifications Options
To manage fring's Push Notification:
1. Choose fring:
Figure 33 – More Menu
Page 27

27
fring's settings
There are several settings which can be altered in fring.
To access fring settings:
1. On your Spring Board, select Settings.
2. From the list of applications choose fring.
Figures 34-36 – fring settings
Privacy settings
1. Twitter notifications – Choose if you would like to get alerts for incoming tweets
using the push feature.
2. fring mood message – Once you're logged in with your Skype/MSN/Google talk on
fring your mood message will be changed so your friends will know that you're on fring.
You can disable this feature here.
3. fring signature – fring adds periodic signature to your Skype/MSN/Google talk
messages to let your friends know that you're using your mobile on fring and therefore
typing slowly. If you disable this here the signature will not appear.
Page 28

28
Hiding or showing offline contacts and phone contacts
You can also choose if you'd like your offline and phone contacts to appear on your fring
Buddy list.
To select whether phone contacts are displayed in your fring Buddy list or
not:
1. If Show GSM buddies is set to Off, your phone contacts are currently hidden.
To show them, choose On.
To select whether offline contacts are displayed in your fring Buddy list or
not:
1. If Show offline buddies is set to Off, your offline buddies are currently
hidden. To show them, choose On.
Page 29

29
Frequently Asked Questions
Downloading & Installing fring
How do I download fring to my iPhone?
The iPhone version of fring can be downloaded on the App Store.
Is fring free?
Yes. fring's service is free. Your cost for using fring is the standard data tariff for air time
it takes to download and use fring.
When using fring over 3G data networks, please be aware that you will be subject to the
data usage costs that your service provider charges. If you are using an unlimited 3G
data plan you can use fring as much as you like for free. Using fring over WiFi benefits
you with superior voice quality - completely free of charge
As a guideline for calculating your data charges when using fring, assume that fring
requires 1MB of data per 15 minutes of talk time.
Currently it is not possible to make VoIP calls over 3G/GPRS networks.
Registering to fring
How do I register?
See the Registering to fring section in this guide.
Can I use more than one user-id on my handset?
No, each handset is limited to a single user-id.
Can I add more than one Skype account to my fring account?
No, each fring account is limited to a single Skype account.
I bought a new handset; can I use the same user-id and password?
Yes. Download the application again and install it on your new handset. Enter the same
fring nickname and password you used with the old handset.
Please note that it is not recommended to use the same fring account on more than one
handset at a time.
Page 30

30
General
Can I add contacts from other messaging services like Jabber?
Not at this time. This option will be available in a future version.
How do I search for other contacts?
You can search through your Buddy list to find contacts quickly.
To search your Buddy list:
Click the magnifying glass at the top right corner of your fring buddy list, start typing
the name of your contact.
The list is filtered according to the characters you have typed.
How do I add new contacts to my fring list?
See the Adding a new fring contact section in this guide.
Does fring have any effect on my handset's battery?
Unfortunately, yes. fring uses wireless data on your mobile phone and therefore tends to
consume extra battery power. The actual usage depends on the length of the call and
special requirements imposed by your specific network.
I forgot my password / User ID
Please go to http://www.fring.com/password
Does fring support the iPod Touch ?
fring currently supports both of the available iPod Touch devices (1st Gen and 2nd Gen).
The 1st Gen iPod is only supported for chat messaging and the 2nd Gen is supported for
both chat messaging and Voice calls (as long as you have a supported microphone)
Thank you for becoming a fringster
We welcome your comments and suggestions and hope you enjoy fring!
 Loading...