

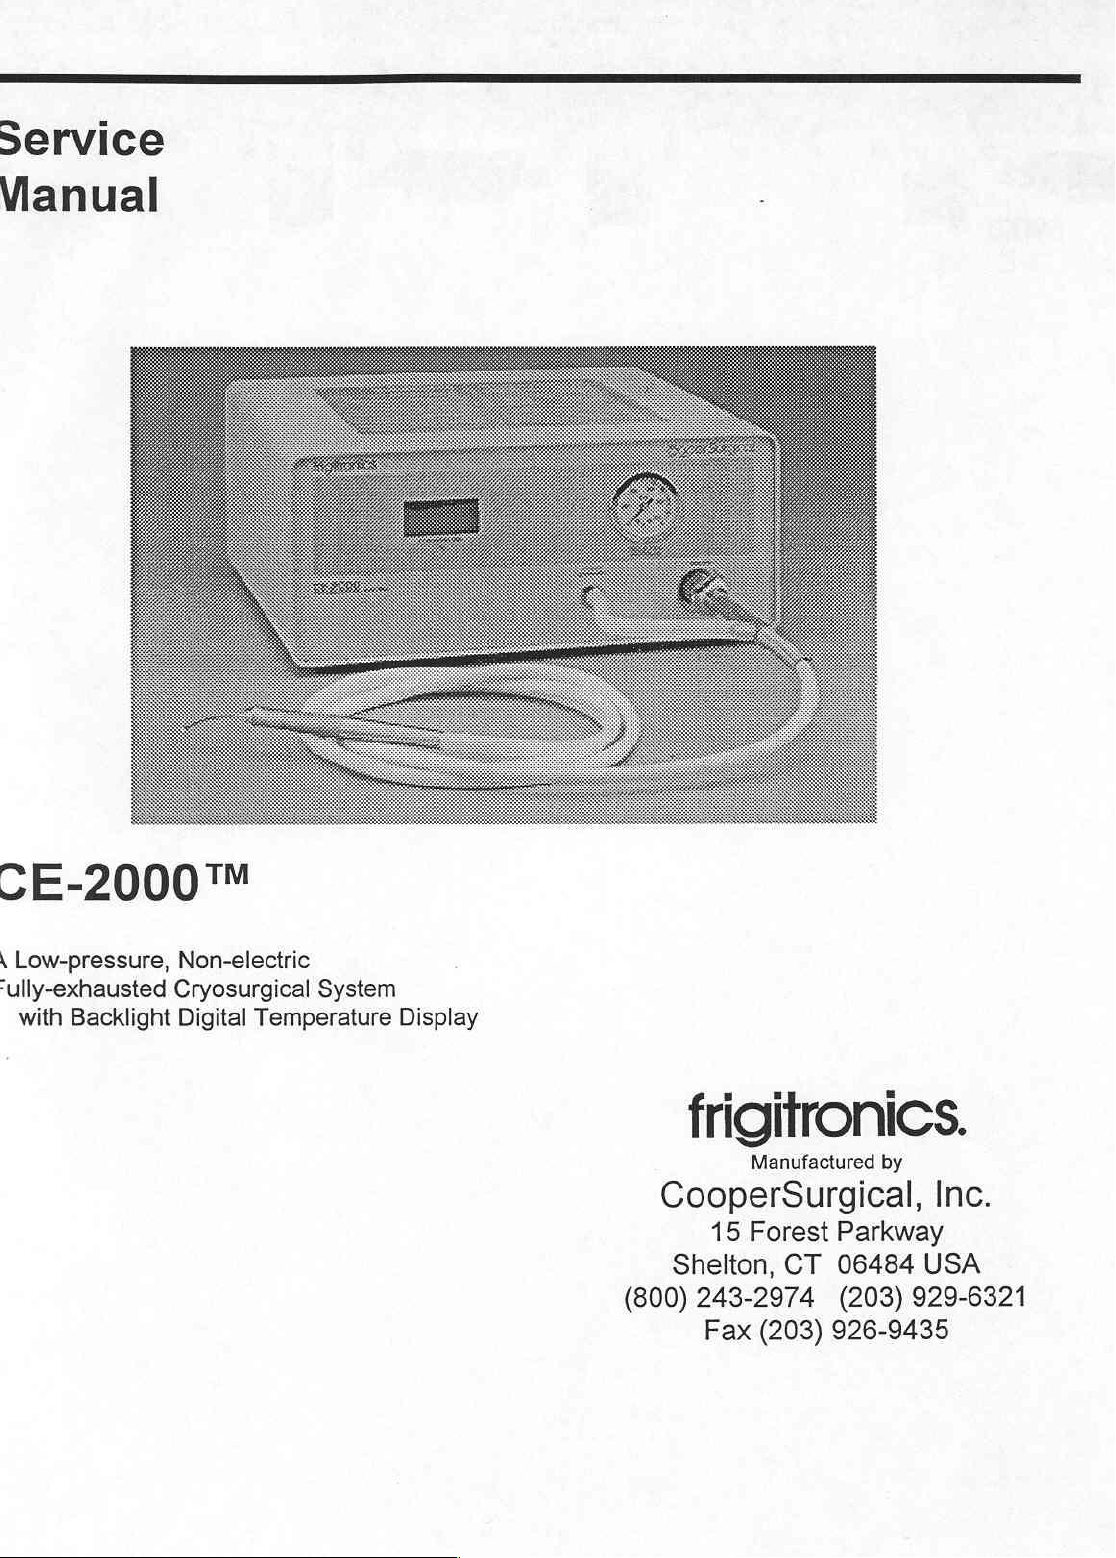
Frigitronics CE-2000 User manual
Service
Vianual
SE-2000"M
|
Low-pressure,
‘ully-exhausted
with
Backlight
Non-electric
Cryosurgical
Digital
System
Temperature
Display
frigitronics.
Manufactured
CooperSurgical,
15
Forest
Shelton,
(800)
243-2974
Fax
CT
(203)
by
Parkway
06484
(203)
USA
929-6321
926-9435
Inc.
6/15/95
Table
of
Subject
Replacement
Preventive
Tools
Parts
List
Maintenance
Required
Troubleshooting
Contents
of
High
Pressure
Regulator
Procedure
Page
2
3
4
5
6
Prints
CE-2000
Probe
Probe
Probe
Foot
Flow
Final
#125
#126
#134
Pedal
Diagram
Assembly
Final
Final
Final
Assembly
Assembly
Assembly
Assembly
Wiring
&
Diagram
Drawing
X52794
51507
51040
51648
51874
52793
No.
6/15/95
Replacement
Remove
Lift
Loosen
Loosen
Loosen
regulator.
Remove
regulator
Install
top
and
eight
off
of unit.
set
screws
nuts
bracket
small
into
tighten
of
(8)
brown
and
remove
from
brass
panel.
High
in
knob
rear
nut
down
Pressure
screws
copper
of
from
large
and
on
regulator
pipe
the
regulator
regulator
brass
two
and
from
shaft
nut.
Regulator
(2)
brown
remove
regulator.
and
and
bezels
large
first
knob.
brass
from
nut
large
the
in
front
brass
unit.
of
nut
and
install
10.
TA.
Connect
High
connect a probe
With
approximately
Install
contacting
bracket
pressure
console
stop
in
nuts
regulator
stop
625
and
copper
nut
into
the
freeze
psi.
regulator
on
neck.
tubing.
must
be
console.
mode,
turn
threaded
set
now.
regulator
shaft
Connect
pressure
lock
and
console
so
up
place
in
to
gas
front
just
supply
gauge
before
and
read
will

6/15/95
Preventative
What
What
What
Outline
Provide a checklist
is
is
is
the
the
the
what
Maintenance
Procedure
—===—=—=—=—=—=———=———_—_——_—__———————
recommended
months
Six
average
1/2
average
Two
is
Verify
probes
time
hour
time
hours
involved
pyrometer
and
of
frequency
to
to
in
the
system.
the
PM
of
conduct
conduct
a
a
if
PM
of
this
calibration;
procedure.
PM
intervals?
PM?
repair?
equipment.
leak
test
system;
freeze & defrost
test
of
Temperature
A.
Install a probe
B.
Turn
console
digital
C.
Put
D.
Verify
Leak
A.
Turn
test.
B.
Take a reading
C.
Turn
D.
Gauge
E.
If
Ereeze
.
Install a probe.
>
B.
Turn
C.
Depress
temperature
probe
that
Test
console
console
should
pressure
and
console
temperature
Release
D.
Note:
a
and
Probes
thermocouple
defrost
Display
into
“On”,
tip
in
ice
temperature
“On”.
from
"Off".
not
drops,
Defrost
Test
“On”.
pedal
foot
and
of
approximately
pedal
with a red
and
with
these
Accuracy
the
socket.
depress
display.
water.
is
0°C + 5°.
Note:
the
pressure
drop
more
open
unit.
verify
and
that
verify
band
will
not
probes.
Verification
pedal
Do
and
not
install a probe
gauge
than
10
psi
Find
and
the
tip
freezes
-80°C
tip
around
read
in
air.
defrost.
the
temperature.
release.
in
front
in
one
repair
leak.
and
spring
Verify
This
activates
in
the
socket
of
unit.
minute.
that
you
are
not
only
the
for
get
a
equipped
tip
freeze
this
with
6/15/95
Tools
Required
3/8”
5/8”
9/16”
1/4”
Phillips
Flat
Wrench
Wrench
Wrench
Wrench
Screwdriver
Screwdriver
TOOLS
REQUIRED
 Loading...