

Page 1

OWNER'S GUIDE
READ AND SAVE THESE INSTRUCTIONS
Printed inU. S. A.
LAUNDRY CENTER
P/N131593000 (9603)
Page 2

Д WARNING
For your safety, theinfontBticointhisttBnualmustbefolloitfedtotrdnimzetheriskof
fixeorexplcsicnortopreventpir^jertydarna^, perscaial injury or loss of life.
- Donot storeorusegasolii^ or otter f IsmiBble Vcp>rs and liquids in tte vicinity of this or ai^otter
appliance.
- NHAT TO DO IF YOU SHELL OAS:
• tenottryto light any appliance.
• Do not touch any electrical switch; do not use any phene in your building.
• dear the reem, building or area of all cccupants.
• Immediately call your gas supplier from a nei^bor' s phone. Follow the gas supplier' s
itterixtxns.
• If you cannot reachyour gas supplier, call the fire cfepartirHnt.
Installaticnandserviceraustbeperforrr^byaqualifialinstaller, servicea^ncyorttegas supplier.
Cemtents
Versión enespafiol
Prrói let" T?egi sj~T7^1~ i m 2
Irp^rt^itiMietYlrBtructicns . . . 2-3
Washing Procedures
Stain Removal
Common Washing Problems .... 9
Ehrying ProcedLires ............................ 10
Fhatures
Common Drying Problems .... 11
Care and Cleaning
TWoidServicsGhazklist
Warranty and Service
............................................
Versión en eí^afSol
si desea obterer una cepia en español
cteeste№nualcfelljfeuario, sírvase
escribirá ladirraciáiqLE se incliye a
axLtiriLacicn. Solicite la P/N131547000.
Spanish Owner' s Guides
Frigidaire СЬпрапу
P. О. Box 9061
Dublin, Ohio 43017-0961
.................................
............................
...................................
...........................
..................
...........................
13-15
2
5-7
7-8
11
12-13
16
Product Registraticn
Thank you for chsosing this Isjndry
oenber. This ожег' sguidewill explain
proper epemtion and care.
Record Your Sisdel and Serial
Ntimbers
Record below the model and serial
numbers found on the laundry center
serial plate locatedontte insideof the
dryer door. Keep these numbers for
future referercs.
Model Number
Serial Number
Date of Purchase
Register Your Product
The self-addressed PRODUCT
RBGff ^niAinCM CARD should be f i 11 ed
incarpletely, signedandreturrEd.
___________________________
Exportant Safety Tript-nifjt*! ГПЯ
Read all instructions before using this laundry center.
Д WARNING
usiigthis laundry center, coiplywiththebasicwamin^listedbelcw.
JTbiEducEtteriskof fire, electrical shock, or injury topersensvinen
Failure to corply with these v®mir^ oculdresult insericusperscnal injuries.
Prevent Fire
Д WARNING
soakedin, or spotted with cpsoliœ, cleaning solvants, kerosene, cœkingoils,
v«xss, etc. Donot store ttese itertB cnor near the dryer. These substances give off
vapors that could ignite or explode.
Д WARNING
center. Ihese substances give off vapors that could ignite theireterials.
Д WARNING
esç)losive substances to the wash water. These substances give off vapors that
could ignite or e>ç3locte.
_______________
Д WARNING
water system that has not been used for 2 weeks or more. HXDiROGEtl GAS IS
EXPTOSIVE. If the hot water system has not been used for such a period, before
using the washer, turn co all hot water faucets and let the water flow from each
for several minutes. This will rel^se any accumulatedhydxcgen gas. I^fliro^n
gas is flammable; donot smoke or use an open flame during this time.
Д WARNING
ri±bercrsimilarlytexturedrul±ier-likematerials, or items attaining feathos or
down. Use Mr Fluff (Nolfeat) only.
Д WARNING
thedryer, lint screenhousingandexhaustductshouldbecleanedapprcKirrately
every 18 rrenths by qualified service perscnnel. in excessive amount of lintbuildipi in these areas couldresult in inefficient dryirgardpossible fire. See Care and
CLeanlug, pages 12-13.
] Do not wash or dry items that have been previous ly c leaned in,
j Do not put oi ly or greasy rags or clothing on tep of the laundry
]Do not add gasoline, cleaning solvents, or other flammable or
jUnder certain conditions, hydrcgai gas may be produced in a hot
JTbpaievmt fire, dorEtuseteattodryitarscoitainirgplastic, foam
jCLeantte dryer lint screenbeforeor after each load. Theintariorof
"1996WhiteConsolidateiIndustries, Inc.
All г1ф1з r^errad.
Page 3
This Owner' s Qiide provides general
cpostirg instructions foryM: laundry
center. It also contains infonrmticri
about features for several otter
models. Your laundry center may not
teve every feature included.
À WARNING
missirg. Firehazaxd, overheatirg and ter^e to fatarics can occur. Ifyourdryerhas
adryingrack, always replace the lint screen\dnen finished using the drying rack.
 WARNING
fraritheaccumulationof lint^ dust and dirt.
] Do not operate the dryer if the lint screen is blocked, daimged or
] Keep area around t±ie exhaust opening and surrounding areas free
Use the laundry center only as
instructed in this Owner' s Guide and
the Cipecating Itastzuctions cards
included with ycur laundry canter.
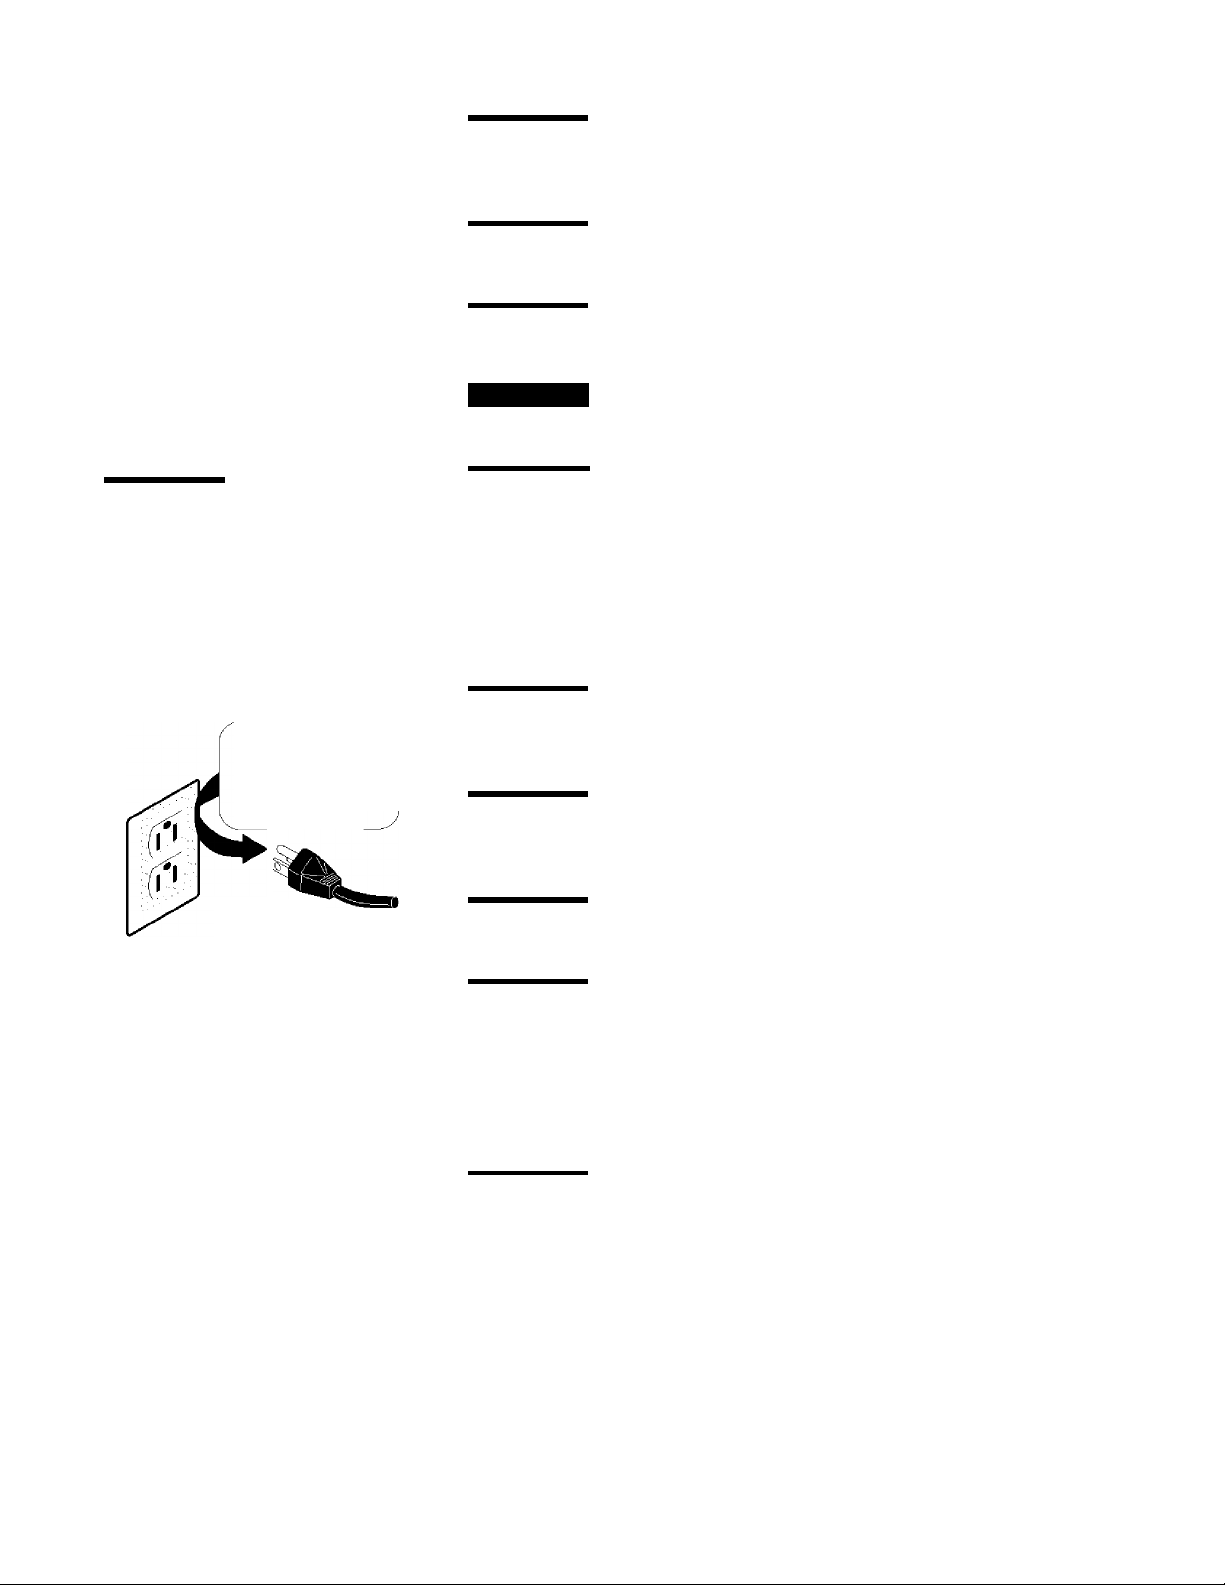
À WARNING
electrical shock. Do not use an adaptor
plug or extension cord or remove
groundingprcrig f ran electrical power
cerd. Failure to follcwthisvarnirg'can
cause serious injury, fixeorteath.
Grounding type
wall receptacle
]Avoid fire hazard or
Do not under
any circumstances
cut, remove,
or bypass
the grounding prong
from this piug.
 WARNING
laurxir/or threw rugs against the front or back of the laundry center.
Ü WARNING
arytirre.
ik WARNING
recomnendedby the manufacturer of the fabric softener or product.
Failure to coiplywite these ymninqs cculdresult infire, explosion, serious
bodily injury and/ or damage to the rubber orplasticjarts of the laundry center.
] Do not obstruct the flow of ventilating air. Do not stacik or place
Do not spray any type of aerosol into, on or œar laundry center at
]Do not use fabric softeners or products to eliminate static unless
Protect Children
 WARNING
supervisicnof children is necessary when the laundry center is usednear children.
As childrengrcw, teach them the proper, safeuseof allajpliances.
À WARNING
laundrycenterisunpacked. CMldrenmi^t use them for play. Cbrtcns covered with
nxjs, bedspreads or plastic sheets canbeccne airti^t chambers.
] Do not al low children to play on or in the laundry center. Close
jEfestroy the carton, plastickagardottErpadkingimtarialsafterthe
Power supply
cord with 3-prong
grounding plug
CORRECT
Use this way OKLY
N3t6: The instructions cgpearing in
this Owner' s Guide are not meant to
cover every possible ccnditicnand
situation that may occur. Common
sense and caution must be practiced
vten installing, eperatingand
iTHintainirg'ary appliance.
À WARNING
injury^ ebserve all vernings onproduct labels.
À WARNING
remove the vasher lid and dryer door to prevent accidental entrapment.
Pngwian^. Tnjliry
 WARNING
laundry center trust be installed and electricallygrounded by aqualified service
person in accordance with local codes. InstallationirBtructicns are packed in the
laundry center for the installer ' s reference. Refer to INSIAIXAriCKf IhEIMjCITQSE
fortetailedgrojiidmgprDcedures. If thelaundrycenterisnovedtoanewlocaticn,
have it chamkedandreinstalledbyaqualifiedservioeperson.
] Ifeep laundry products out of children' s reach. To prevent perscnal
] Before the laundry center is removed from service or discarded,
Failure to ccnply with these varnirgs could result in serious perscnal injuries.
Jlbpreventshockhazardandassurestabilityduringcperatian, the
Page 4
Japortant Safety
XoStrUCtijCllS (ccntiisied}
Ü WARNING
electrical power cordnust be plumed into aprcperly grounded and polarized 3-
prong outlet. The third grounding prong must never be renoved. Never
I To prevent personal injury or damage to the laundry center, the
ground the laundry center to a gas pipe. Do not use an extension cord or
an adaptor plug.
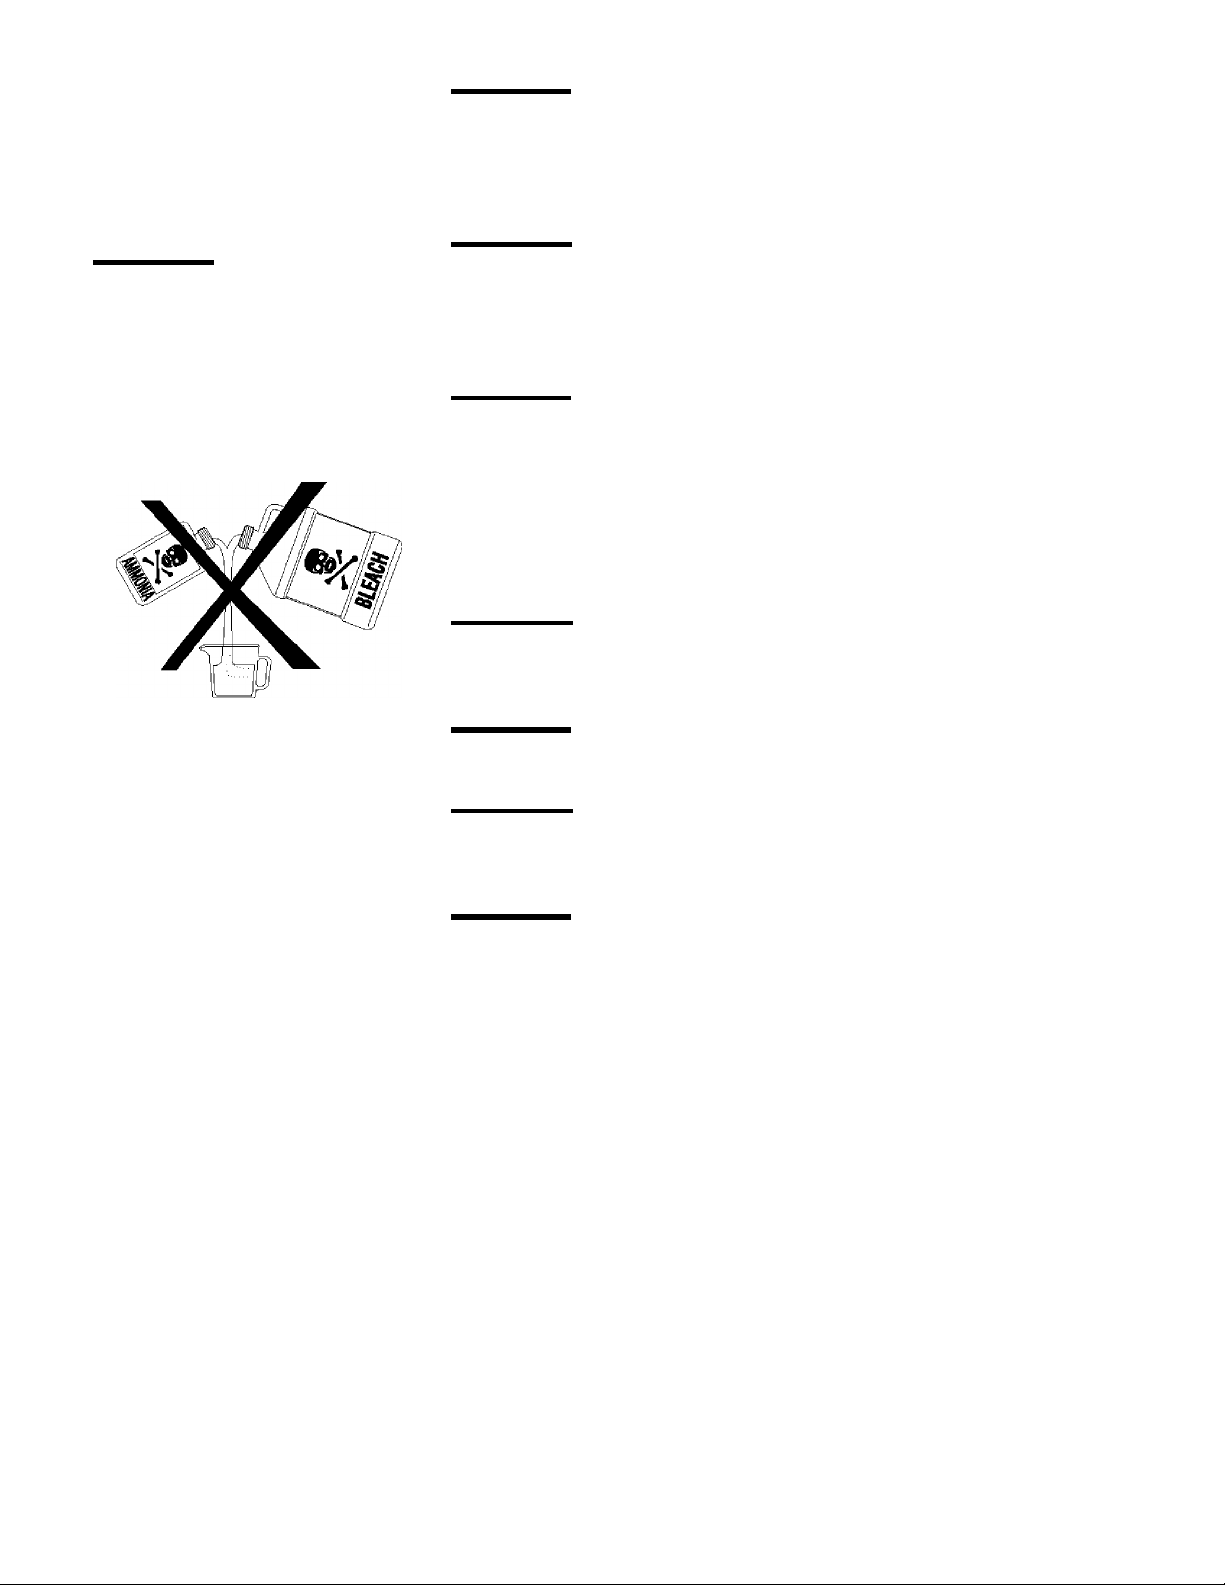
A WARNING
Do not use or mix
li^jid chlorine bleach^th other
household chemicals such as toilet
cleaners, nutroKJvers, acid or
products containing ammonia.
These mixtures can produce
dangerous fumes which can cause
serious injury or death.
A WARNING JFollawpadkagedirecticns when using laundryprcducts. Incorrect
usage canproducepoiscnous gas—resulting in serious injury or death.
• Donot combine laundry products for use in 1 load unless specif ied on the
MeL.
• Donot mix chlorine bleach with ammonia or acids such as vinegar.
^WARNING ] To prevent serious personal inj ury and daniage to the laundry
CB±er:
• All repairs and servicingmustbeperformedbyan authorized servicer
unless specificallyreooiTffiodedinthisOwrKr' s Guide. Use only authorized
factcryparts.
• Donot tanper with controls.
• Donot install or store the laundry centerwhere it will be exposed to the
weather.
Ü WARNINGjAUffiXS discoonect the laundry center from the electrical supply
before attarptirg any seorvice or cleaning. Failure to do so can result in electrical
shodkor injury.
^WARNING
Hazardous frniesorGlGcrtriGal shock could occur.
]Do not use any type spray cleanser vten cleaning dryer interior.
Ü WARNING ] To prevent inj ury, do not reach into the washer vdiile parts are
movirg. Before loading, unloading or adding itors, push in the cycle selector kncfc
and allow the tub to coast to a complete stop before reaching inside.
^WARNING
Wait until the dryer has stepped completely before r^ching into the drum.
event of an overheated situation (electric dryers only) . AservicetechnicianiTust
replace the thermal limiter switchafter correctirgtte fault.
m The washer is equippedwith an electrical overload protector. The motor will
step if it beccnes overheated. Thewasherwill autamtically restart after acool
down period of up to 3 0 minutes, if the washer has not been manual ly turned off
during this tirre.
m Fhiluretocoiplywithttesewernirgsaouldinsult inseriouspersonal injuries.
jTbprevent injury, donot leachintothedryer if thedrumismoving.
limiter switch autamtically turns off thedryermotor intheunlnkely
SAVE THESE INSTRUCTIONS
Page 5
Washing Procedures
• Follow the guidel ines below f or prejaring the wash load.
• Read theWasber C|)exatiiig Instmcticns card for operatingyour specific
model.
• Alw^s read and follow fabric care and laundry product labels.
 WARNING ]Tbie±icet±ieriskof fixe, elect^d.cHlshock, cxirijurytopexscm, read
Inpartant Safety Instxucti<i3S, pages 2-4, before cperatiry this washer.
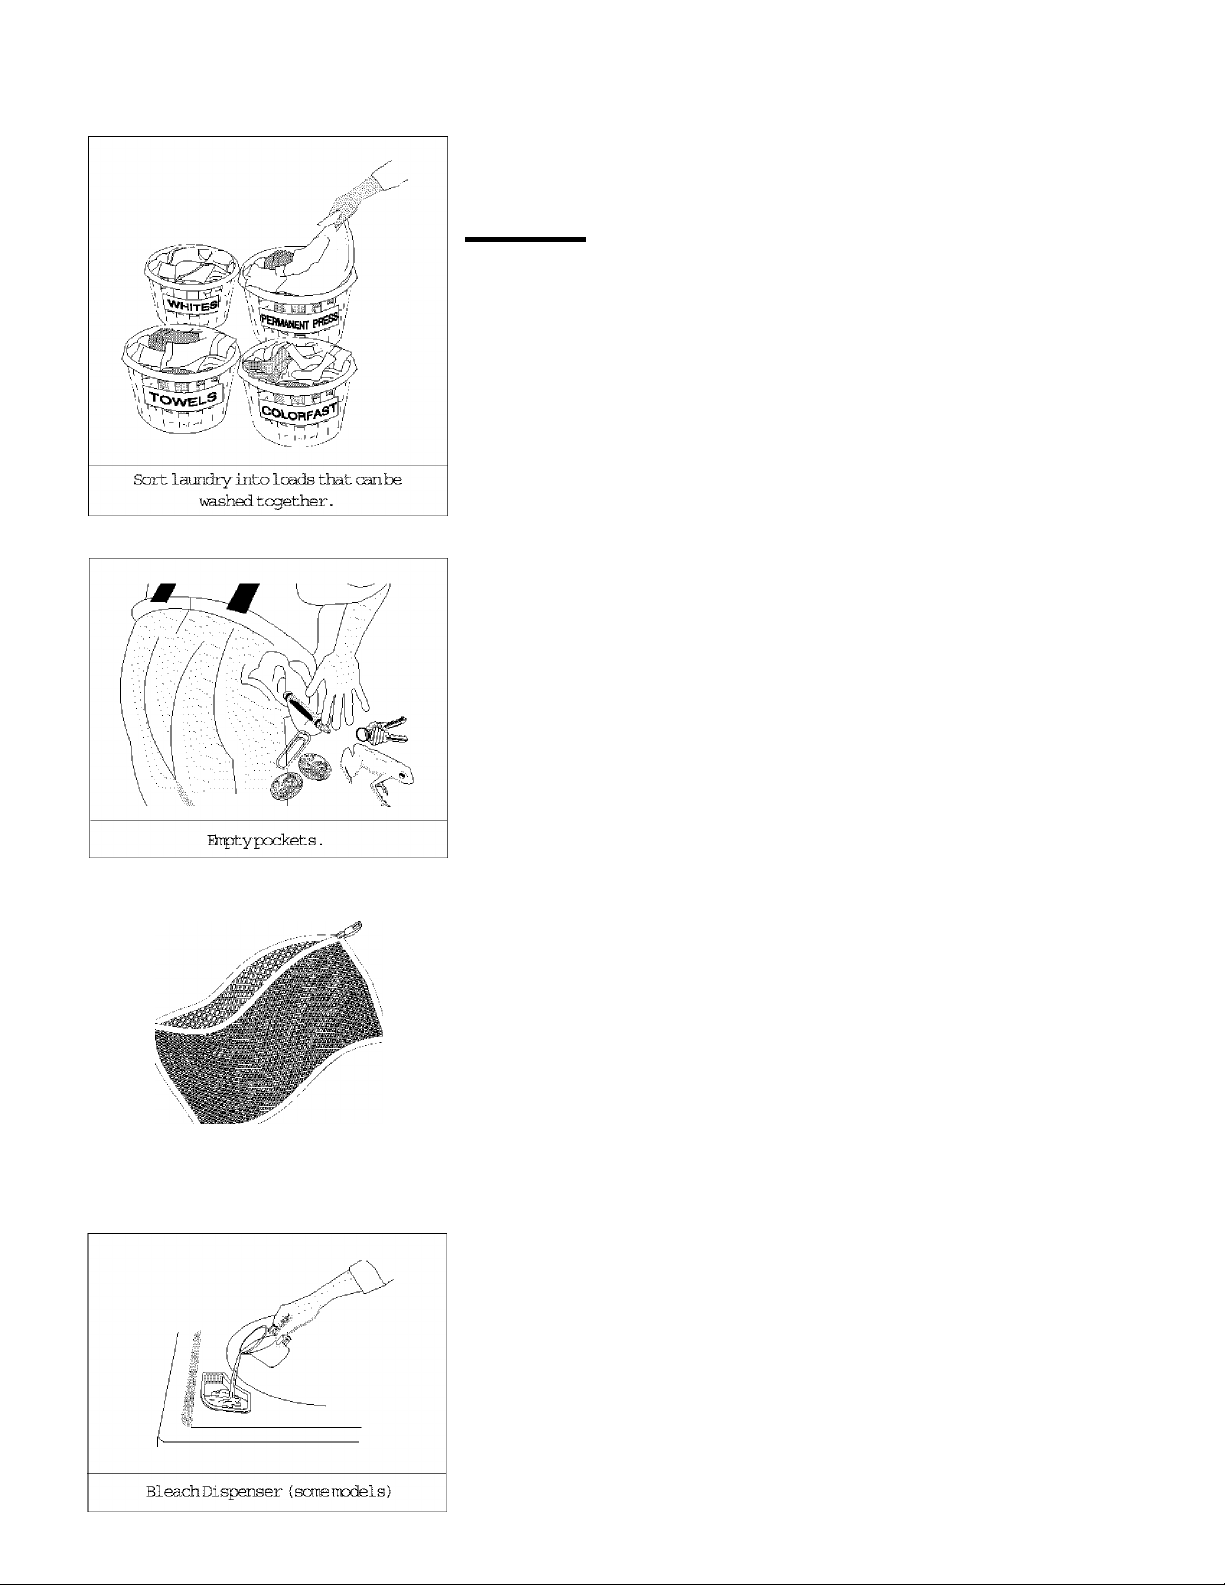
1 Sort lauiidxy Into loads that can be washed together.
Sort items by recartrended water tsnperatures, wash time, andagitate/spin
speeds.
• Separate white, light, and colorfast iterre from dark andncncolorfast
itHTB.
• S^HTste itans which shed lint from itam which attract 1 int. PeriTBroat
poss, synthetic, kirLtandcno±iioyitG!TBwillpiGkiplintfrcmtc)wels, irgs
andchenillebedspiBads.
• S^HrateheavilysoileditaiBfrcmlii^lysoileditemB.
• Separate lacy, sheer and locsely knit iterre fronsturdy itans.
Prepare items forvfashing,
• Empty pockets.
• Brush of f lint and dirt. Shake out rugs and beach towels.
• Close zippers, fastenhccks, tie string and^shes, andrarovencrMshable
trims and omanents.
• Rsnovepins, decorative buttons, beltbuckles, andotherobjectsvfeLch
cculdbedaimged. This also heljps protect other items in the wash load.
• Mend rips and tears to prevent further daimge during washing.
• Placedelicate itans such as bras, shoulder pads, hosiery, andbeltsina
mesh bag to prevent tangí ing during the wash cycle.
• TurnknititarsinsictecuttopEESvaritpilling.
Place delicate items inameshbag.
3L Pretreat stains andheavy soil.
SeeStainRODOval, pages 7-8, for details.
4> Add a measured amount of detergent to the wash ttib
before adding the laundry load.
Follow detergent rrsnuf acturer ' s directions. The amount required d^>ends on
type of detergent, Icadsizeandsoil level, andvaterhardness.
5, If desired, add liquid bleach to Bleach Dispenser (some
iBodels).
• Before adding tte wash load, add liquidbleach to bleach dispenser located
in left front oomeruncfartte lid;
• 3/4 CLÇ) (180ml) forsmall loads
• IcLÇ (240 ml) for large leads
• 1-1/4 CLÇS (300ml) for extra-large leads.
• Then add! cup (240 ml) water to flush the dispenser.
• Do not use powdered bleach in the bleach dispenser.
FormodelS witbout ablaacbdispenser, dilute the recemnended amount
of liquid dhloriœ bleach in 1 quart (. 95 L) water. ikid it to wash water after
a fewminutes of agitation. Do not pour bleach directly on waf(h load.
Page 6

WsLshing Procedures
(ocstiiiuedl}
61 Addlaundxy load to washer.
• Diry load level should not be higher than tcp row of holes inwashtub.
Do not overload washer.
• Do not put items on top of agitator or wrap them around it. Load itans
ssiLy.
• Ctmbine large andsmall itaiB ina load. Load large itetiB first. Large items
should not be mere than half the total wash load.
• When washing a single heavy item, add 1 or 2 towels to balance the load.
7. If desired, add liquid fabric softener to Fabric Softener Dispenser <soae models).
FcariBodelswithabuilt-indiEpenser (seepicturebelowto the left):
L Add liquid softener to the dispenser, following fabric softener label
diiecticns.
2 Adimtertohringliquidleveltofilllinecndispensercap.
3. Remove the dispenser f ran the agitator after each use. Rinse both cap and
cup withvarmva.ter. Replace dispenser in the agitator.
IMPORTANT: Do not step and restart washer during a spin when using the
fabric softerErdi^Denser.
Pc»:iDodelswithax«movable dispenser (seeplctsjxehelowto the left):
1 Attachfahricsoftmerdi^iaisertotcpof agitatarbyprossirgdewngently.
2 Addsoftenertothedispaiser, following fabric softsier label directierB.
3. Add water to bring liquid level to tep of the peg in the center of the erp.
4 Removethedisjpnserfrantheagitatoraftereachuse. Rinsehothlidand
bowl thoroughly with warm water. Reassemble and place dispenser on
agi tator or store itrearty.
IMPORTANT: Do not step and restart washer during a spin when using the
fabric softsierdi^Denser.
Forscdelawithouta fabric softener dispenser, follow fabric softener
label directions. Adi diluted fabric softener to the final rinse. Donotpour
fabric softener directlyon the wash load.
a Set cycle selector knob and washer controls according to
type, size, andsoil levt^of eacbload, and detergent used.
sTtesfaerCperatingDastruCticns card for your specific model controls.
Page 7

Si start the washer.
dose t±Evasher lidandpull cut t±E cycle selectorkncb. Washerwill fill and
agitate with tte lidcpen. Ite tub will not spin unless the lid is clcsed.
• To step the washer, push in the cycle selector knob.
• Tb charge a cycle, pushinthe cycle selector kndo. Ihmitclockwisetothe
desired setting. Pull cut the kneb to restart the vasler.
10. Remcnre Itesoss idien the cycle is coepleted.
ForyMT safety, the lid locks wiwithe tub is ^innirg. It will ramin locked for
about 1 rninute after the ti±) steps spirming.
• Tbcpaittelidduringaspin, pushinttecycleselectorkncbandwaitabout
1 minute for the lid lock to release. Do not force epen the locked lid.
PlacsMsteditenisinautaTatiGdryer, linedry, or dry flat as directedhy fabric
care label. Excess wrinkling, color transferor odors imycfevelcp in itans left in
the washer after the cycle has anded.
Stain R€moval
Safe Stain Removal Procedures
ik WARNING
corplywith the basic warnings listed below;
• Read and comply with all instructictns on stain removal products.
• Keep products in their original labeled containers and out of chi Idren' s
reach.
• Thoroughly wash any utensil used.
• Do not combine stain removal products, especially ammonia and chlorine
bleach. Dangerous fumes may result.
• Never wash items which have been previously cleaned in, washed in,
soaked in or spotted with gasoline, dry cleaning solvents or other f lamrable
or explosive substances because they give off vapors that could ignite or
esplcde.
• Never use highly flamnable solvents, such as gasoline, inside the home.
Vapors can explode on contact with f lanKS or sparks.
For successful stain removal:
• Remove stains prcnptly.
• Determine the kind of stain, then follow recommended treatment in the
stain removal chart on the next page.
• To pretreat stains, use a prewash product, liquid detergent, or a paste
made from granular detergent and water.
• Use cold water on unknown stains because hot water can set stains .
• Check care label instructiens for treatrrents to avoid on specif ic fabrics.
• Checkforcolorfastnessbytestingstainremoveronaninside seam.
• Rinse and wash items after stain removal.
Jib r0dj.ee the risk of fire or serious injury to persons car property,
Page 8

stain Removal
STAIN
Adhesive tape, chewing
rubber cetrent
Bakyfomila, <feiryprcdi jcts,
egg
Bever^ES (coffee, tea, sctfe,
juice, alochclicfcevei:^^)
ELocd
Candle wax, craycn
Chocolate
Cbilarcarcuff soil, ccsietics
Eye transfer cnv^hite fabric
Grass
Gt:^£^, oil, tar (butter, fets,
saiaddressirg, cotkirgoils,
cargrease, mctoroils)
ifc
TREATMENT
i^lyice. Scrape off excess* Place stain face dcwn on paper towels* ^tmatewithprewashstainrenicfveror
ncnf larnabledry cieanir^ fluid.
Use product cmtaioir^ enzynes to pretreat or soak stains. Scak for 30 minâtes or more. Vfesh.
Pretreat stain, ^shusir^coldwaterandbleachsafeforfabric.
Rinsewithcoldwater. Pub with bar soap. Or, pretreat or scak with product ccntainirgenzynes. i/fesh\isingbleach
£^efcrM3ric.
Scrape off surface wax. Place stain face downbetween paper tcwels. Press withwarmirm until wax is absorbed.
Replace paper towels frequently. Treat гншпгпщ stain withprewashstain reraver orncnflaimabledrycleanir^
fluid. Hand wash to геюте solvent. Washusingbleachsafe for fabric.
Pretreat or scak in warmwater using product containing enzynes. Washusingbleachsafe for fabric.
Pretreat with prewash stain remover or rub withbar soap.
Use packaged color remover. Vfeshusirgbleach safe for fabric.
Pretreat or scak in warm water using product containing enzynes. Wash usirgbleach safe for fabric.
Sortie residue frcmfabric. PTetreat. Vteishusirghottest water safe for fabric. Btrheavystainsandtar, ^ply
ncnflamTBbledrycleaningfiuidtohackof stain. R^lace towels under stain frequently. Rinse thoroLghly. Vfesh using
hcttest Viater e for fabric.
Sonfâ inks mybeinpossibie to remove, Washingmay set scn^ inks, Use prewash stain remover, denatured alcohol
or roif lamrable dry cloning fluid.
Milifew, scorch
Mud
r*^tard, tcmto
rfeilpoLMi
Pair±, ■varnMi
PerTYnY73t-im Useprewashstainronoveror rub withbar soap. Rinse. Wash usirgncnchlorine bleach in hottest water safefor fabric.
Rust, brcMioryellow
distdloaticn
Shoepclish
Urine, vcmit, irucus, feces
Wash with chlorine bleach if safe for fabric. Or, soak in oxygenbleachandhot water before washirg. Badlymildewed
fabrics my be permanently damaged.
Brushoff dryrrod. Pretreat or soak withprcductccntainirg enzymes.
Pretreat with prewash stain remover. Washusingbleachsafe for fabric.
iVfey be ijtpossihle to rsncve. Place stain face down on paper towels. nail polish reuover toback of stain.
Repeat, r^lacirgp^ertcsAelsfrequently. Ebmtusecnacetatefabrics.
WATËRBASED: Rinse fabric in ccol water while stain is wet. Wash. Once paint is dry, it cannot be removed. OIL BASED
АЮ VARNISH : Use solvent reccimfânded on can label. Rinse thoroughly before washing.
Fbrspots, use rust recover safe for fabric. Fbrdiscolcraticnof an entire lead, usepho^tetedetergentand
ncnchlorinebleach. HnnnhiMMaf^ilorHTiahlaarfibfyMriiiaa-i^nwy-iTit-.flnn-i^f^’iHnnlfwaHm-
LIQUID; Pretreat with a paste of granular detergent and water. PASTE; Scrape residue from fabric. Pretreat with
prewashstain remover ornonflaiTfiabledry cleaning fluid. Rinse. Rubdetergent into danpened area, Wash using
bl^chsafe for &(ric.
Pretreat or scak in product oentaining enzymes. Washusingbleachsafe for fabric.
Page 9

Common Washing Problems
Many washingpmblsms involvE poor soil and stain removal, msidues of lint and scum, and fabric darrage. For satisfactory
washirgresults, follcwthese sucBsstiansprovidedbyHieSoapandDetergmt Association.
PROBLEM
BUie stains • Eteteigant car fabric softener
EdsodloaBtiai, •Not enough ifetergent.
(fesaep, aUyatalns
tSSTBrOr
snags
POSSIBLE CAUSES
didnet dissolve crdi^srse.
•ifesh water tenperature too low.
• aortirg*
•Not enough detergent.
•Шdilutedliquid fabric scftemr
pojreddirectlycnfahric.
• Incorrect use of dikahne bleach.
•Onfastsiedzippers, hcdcs, buckles.
•Rips, tearsandbrckerthreads,
• Overloading the washer.
•E^radaticnof fabric.
• ihootrectaortirg,
• Tismes left inpodet.
• Overlcading t±ie washer,
•Not enough detergent.
• Ondissolved detergent has left
residje,
• StaticcLirgisatb3cdigli2±,
•Load washed too long.
SOLUTIONS
• If causedbydetergmt, mixlcip (240ml)
whitevinegarwithlquart (,95L) waterina
plasticcmtainer. Seek itanl hour. Rinse.
• If causedbyfabric softener, lubstainswith
bar soap. Wash,
•Rewash with correct amount of detergent
andhottest water safe for fabric. idd
bleachsafe fer fabric.
•Trmt withprewash stain recover or liquid
ifeteiga±.
• Increase detergent and water tarperature.
Rewash.
•Rl±> fabric softener stains wi-thbarsc^.
•№ybeirresersibleif rips, tears and sears
cannot be mended.
•Reduce load size, Rewashusii^ correct
water tetperature, water level, and
amount of detergent.
•idd nc^recipitatingmterccnditioTerto
wash water.
• Aid liquidfabric softener to f IibI rinse.
• ETy lead indiO;^.
•RarnTJ^lrmwithlinthrLiahor roller.
PREVENTIVE MEASURES
♦A±i detergent before wash load. Then start
washer.
♦Dilute fabric sof tensrwdthwater,
♦ Sort itans by soil level andoolor.
♦Use correct soiountof detergent, hottest
water andbl^ch safe for fabric.
♦Use correct amount of detergent and
hottest ViBter e for fabric,
•Do Dotpour fabric softener
dire^lycnf^cic. See package directiens
or IfariiiiigProoeiiires for proper diluting.
♦NeverpoLT diLcrinebleachdirectlycnfabric,
♦ Checkcenditienof iteiEbefore washing.
See tfafaMng Frocedures for preparing
and loadirg the wash lead.
• SeeMaohliigProcedures for sorting and
preparing the wash lead.
♦Do not overload washer,
•Use correct amount of detergent, water
taiperature and water level.
pHUcg
(ElbeLsbreakaff, ball
ip and cling to f ^ric)
Residue or powder
ondarkitQiis;
StL££, ianiifAgdaa.
wrinkling
Yellow Iwildi^ of
bot^soilon
EtpiOieticfabEics
Yellow or brown
rust stains
• Pilling is 1хшш1 wLthsyniiietic and
permanaitpress fabrics, Thisisdue
to abrasion from гюгпн! wear,
•Ondissolveddetergent.
•Sam nonphosphate granular
detergents can combine withhard
water •mineral я to forma residje,
• Overlcading t±ie washer, • Reduce iced si ze,
•igitaticn time tco short,
•Wash water tenperature too low.
•Not enough ifetergent.
• I ГСП or n^nganese in water supply,
water pipes, or water h^ter,
•Usea lintbrushcr shaver to renovepills.
• Reduce iced si ze,
•Adddissolveddetergsnttotub . Rewash
Iced
•Mixlcup (240!TlL) vhite vinegar to 1 gallon
(3.8L) warmwaterinpiasticemtainer.
Seek item. Rinse and rewash.
• Rinse in cnldwater with liquid f ^ric
scfCaisr.
• Soak in detergBct booster or product
centaining enzyrnes.
•Vfeshinhot water (120°F/49°C) usirgfull
permanent press cycle, Increase deter^nt.
Addbleach safe for fabric.
•Or, trmtwithcolorrerover.
•Torestcrediscoloredlcadof whites, use
rust remover safe for fabric,
Do not USB fгг^т1^!^ b1 ftfirb bo reSDOVB
xuststaios.
* Use fabric softener in the washer to lubricate
♦Whmi-rcrang, ■use^raystarchorfabric
f inishcnooLlars andouf fs.
•Tumitams inside out to reduce abrasion.
* Increase water tarperature usirg hottest
water safe for fabric,
*r>o not overload washer,
♦Use liquiddetergent cr usencrprecipi-tating
water conditicnerwithnarphosphate
granular deter^nt.
♦Do not overload washer,
•Remove items from washer as soon as cycle
isoorpleted.
♦ liquidfabric softmer.
♦Wash synthetics f requmtly usingwater at
least 100®F (37®C) andcorrect water level.
* U^ ntrprec ipitat ing water sof tener,
♦Before washing, run hot water for a few
minutes tocl^r lines.
* Eirainwater beater cccasicnally,
♦Rurancngcdigporblom, install an irm filter
inyour water sugplysyBtan.
Page 10

Di^liig Procedures
• Follcwthegiiidelinesbelcwforpr^Hxingt±ieloadfordrying.
• Rmdt±ieD]^earC^egatiiigltaStructicr8 card for cperatingypur specif icrrpdel.
• Always read and follow fabric care labels and laundry product labels.
^WARNING jTbiHdxetheriskof fire, elect^d.cHlsl:r)ck, orinjmytopeo:scns, read
Inportaait pages 2-4, before cperating this dryer.
1, Prepare items for dryijQg.
• Dry itaiis of similar fabric, weight and oonstructian in the same load.
• S^jaratecferkitemsfroTili^it-cnlaraiiteRis. S^msteiternsthatstedlint
frarithase that attract lint. If anitansIrEdslint, tumitinsicteoat.
• Be sure buckles, buttons and trim are heatproof and won' t daimge the
drumfinish. dosezijpers, fastenhcolisandVelcro®-like fasteners. Tie
strings and sashes to prevent snagging and tanglirg.
• If possible, tumpodkets insicte cut for evmdrying.
ibllcw fabric caie label instmcticns.
i
Place stmll items inansshbag.
• Checkforstainswhichrriayriothavebeenraiiavediiiwashing. Dryerheat
may permanently set some stains. Repeat stain removal process before
dryirg.
• Place small itere inarreshbagto prevent tanglirg and for easy raroval.
2 Check tbat lint screen Is clean and in ExLaoe. 3l Load the dryer.
• The average Icadwill fill ttedmnl/3 to 1/2 full. Itars needrocmtotLirible
freely for evan drying and less wrinkling. DoDObOvorloaddcyetr.
• Ptendryinglar^iteTis, dryanly2or3atatirrE. Fill cut the Icadwithsmall
andrrediumsized items.
• FtrcfelicatecirverysiTBll leads, adl2 lint-free tcwels fortetterdryirg,
wrinklirg, and toprevent grease stains causedbyfabrlcsoftener sheets.
• Irirotcverdryitais. Cvetrtyiigcancauseviadjikiirg, shrirfage, harshness,
and a build-up of static electricity, which canprcducemoro lint.
• If ctesired, adda dryer fabric softener sheet.
4, dose the dryer door and set dryer controls (scmemodels).
See DryecCpesating Ibstructicns card for your specific model controls.
5. Ttxcn cycle selector clockwise to the desired setting. 6L Start the dryer.
• Push Start button for 2 seconds.
• To add or ranoveitaTB when the dryer is running, epenthedoor. Thedryer
will always stop wlien the door is oper^d. Al low the drum to core to a
complete step fcefore r^ching insicte.
• Tb restart dryer, clcse the door thenpushStart button. Hcldfor 1-2 seconds
ardreleaffi.
7. When the cycle ends, remove items immediately and hang
or fold. If load is removedbefore the cycle ends, turn cycle selector to Ci?F.
1 0
Page 11

Use the drying rack to dry items which
should not be tumbled.
Cycle Signal Control (someinocleie}
When the Cycle Signal Ocntrol is CN, a signal will sound at the end of each cycle
anddiiringtte Press Saver settirg (soremcdels) . 'IhevDluTeisadjustablecnsare
rrodels.
Drum Light (some models)
A drum lic^t will core cn vtenever the dcor is cpered to illuminate the dryer drum
during leading and unloading. Closing the door turns off the light.
Drying Rack (somemodels)
Use the drying rack to dry items which should not be tumble dried.
1. Cpen the dryer door and remove the lint screen.
Z Insert drying rack into the dryer drum. Place the front barunffer the lip of the
lint screenepenirg. The side tars should sit in the notches of the frane.
3. Place items to be dried cn tep of rack. Wei^t shouldnot exceed 10 lbs. Leave
space between items, but do not let items hang over the sides or through the
grids. Do net tumble other items when using the drying rack.
4 SelectatiiTEddrysettirgbestsuitedfaritaTBbeirgdried. LbecnlytteAirFluff
(no heat) temperature setting for items containing plastic, foam mtber,
rubber-likerraterials, feattersordcMi.
E When iteiTB are dry, remove therackandr^lace the lint screai. If lintscreen
is not inplace, tumbling iteme could enter the exhaust system and cause
damage to the dryer.
Common Drying Probleans
^feпydryiIlgprldDlGn^iIIVDl■vepoorGlGaningmsuItS/ poor soil and stain residues of lint and sciin^ and fabric damage.
For satisfactory dryiro results ^ follow these su^estiem providedb/lhe Soap andDeteiigent Asscciaticn.
PROBLEM POSSIBLE CAUSES SOLUTIONS
0»aq^,QÍly
Tárt.
•Fabric softoier steet.
•O/erlcadirg.
•tt?erdryirgcHLises static
eladhctiy,
• Lint screen not clean Vutoi
cyclebe^n.
• Lirt is attactedto''pills J'
Pinirg •PinirgisroriBlwithsyTthetic •Usealixyzbrushorstm'ertoroTCfvepills.
(Fibeaisht^koff, andpermnent press fabrics.
ball tpandcling This is due to abrasim f rem
toMzieJ nonralwear,
Oiráiddiig
•Overdrying. • Rillcwfahriccare label diiecticns.
•RLib fabric sof tsner stairis withhar sc^.
Rirtse and rswash.
•Reduce lead size and rewash using liquid
fabric aofts'or in tte £ ii^eI rinse.
•Or^ add a fabric softerier sheet and
tuirble without heat.
• Ifee lii± fcru^QT roller to rsiicve lint.
PREVENTIVE MEASURES
•Addafewfcathtcwels to stall leads forpreper
tmbling.
•Sore "silk-like" fabrics sheuidhe air dried.
•Use proper drying teiperature.
•Place fabricsoftener sheet entepof icadbefore
startir^Chediyer.
• De nat overlced dryer.
•Use fabric sof tarier in washer or dryer to reduce
•ReiTDve items when they are slightly danp to
avoideverdryirg.
• Check
that
lint screen is cl^n and in place.
•L^faiuricsoftarHctolduricatefibers.
•Whai ironing, use spray starch or fabric f inishm
cellars andcuf fs.
•Tom itans inside cut to rediice abrasion.
•If shrinking is a cmcern, dwk lead often.
•Raio/e itejTS vMle slightly efenp.
• Blcdc knits into .
• Lay flat to cntplete drying.
WHiTfeUng
•Overlisding.
• leaving itms indryer after
cydeorfe.
•Reduce load size and tumble at medium
or lew heat for 5-10 minutes.
•I^mcfveitemsimnsdiately. Hangorfold.
1 1
• Do not overlcad dryer.
•Rencjve itsns as seen as cycle ends.
Page 12

Cbutb Clesuaing
deanlint screenaf ter every lead.
A WARNING
withthetasicwamingBlistedinEiportailtSafetylilStructicrs, pages2-4, and
those listfidfcelow.
• Beforecleaningthewasherordryer interior, vH^ilugtlieelectricalpower
CBnitoavoidelectricHl shcckhazards.
• Do not use any type spray cleanser when cleaning dryer interior. Hazardous
fuires or electrical shock oould occur.
jTbiedxeriskof fireorseriousinjurytoperscnsorpixperty, ccnply
Inside the Warier
• Remove itains from the washer as soon as the cycle ends. Excess wrinkl ing,
color transfer, and odors rmy develop in itans left in the washer.
• Dry thewasher tep, the area around the lid opening, andthe underside of the
lid. These areas should always he dry hefoie the lid is closed.
• Before cleaning the washer interior, ur^ug the electrical powear cord to
avoidelectrical shodfchezards.
• WheneKtremelysoiled items haveheenwashed, adirtyresidueimyreiminon
the tub. Ranove this bywiping the tub withanenabrasive household cleanser.
Rinse thoroughly with water.
• The agitator or tubimybecOTe stained from fabric dye. Clean these jarts with
ancnabrasivehouseholdcleanser. This prevents dye transfer to future loads.
 CAUTION
products. They can dairage f inish on
the laundry center.
I Use caxe with laundry
Inside the Dryer
• deanthedryerlintscreenaftereveryloai. Lintbuild-upinttescreairestricts
airflOT, vtechrauses longer dryirg'tines. The screen is Icxstedatthebottcm
of thedcorcpsiing. Ranovebypullirgstraic^tip. Ranove the lint and replace
thEscreai.
• Occasional ly a waxy build-ipi may form on the lint screen from using dryeradeted fabric softener sheets. Tb remove thishuild-ip, washthe lint screen in
warm, soapy water. Dry thoroughly and replace. Do not operate the dryer
without the lint screen inplace.
• If the dryer drumbecoies stained f romnoncolorf ast fabrics, clean the drum
with a damp cloth and a mild liquid household cleanser. Remove cleanser
residue bef am drying the next lead.
• Every 18 nmths anauthorized servicer shouldcleantte dryer cabinet interior
and exhaust duct. These areas cancollect lint and dust overtime, itoexcessive
stTcunt c£ lintbuild-ipcculdresult in inefficient drying andpo^ible fire hazard.
Outside
• when laundering is completed, wipe cabinet with a damp cloth. Turn water
faucets off toprevait pressure build-up in the bases.
• As needed, clean the cabinet with mild soap and water. Never use harsh,
grittyatfibcasiveclaatisera. if tepor lidhecemes stained, cleanwithdiluted
chlorine bleach [l/2cip (120ml) inlquart (.95L) water] . Rinse several tines
wLthclear water.
• RarDve glue residue from tape or labels withamixture of warm water and mild
detergsit. Or, touch residue with the sticky side of the tape or label.
• Beforelaovliig bha lenjndxy center, place a strip of cardboard or thin
f iberboard under the front level ing legs to prevmt floor damage.
1 2
Page 13

Winterizing Instructions
If the laundry center is stored in an area where f reez ing can occur or moved in
freezirg tarperatures, follcwttesewinterizirg instructims topmvent darn^p to
Ebllowr winterizing
Instructions £cr ooLcl
weather care.
the laundry ca±;er;
L Turnoff ve.ter supply faucets.
2 Di sconnect hoses from water supply and drain water from hoses.
3. Plug electrical cond into apaxpgrlygrourrJed electrical cutlet.
4 ikMlgallcnncntoxic recreational vehicle (EV) antifreeze to aiptyvash tub.
dose lid.
5. Set cycle selector kncb at a spin setting. Pull out knoband let washer spin for
1 minute to drain out all water. Not all of the RV antifreeze will be e>pelled.
6. Pdsh inkncb, unplug electrical pcwer cord, dry tub interior, and close lid.
7. Store waster inampri^t pcBiticn.
a To rerrDve antifreeze from washer after storage, runerrptywasher thrcaj^a
complete cycle using detergent. Do not addwsh load.
Avoid Service Cbedclist
Before calling for service, reviewthis list. Itrraysavehothtimeandespense. The list includes ccmroi concerns that are not
the result of defective vroriarenship arimterials in this laundry canter.
OCCURRENCE
WASHER - NOISE
"dunking* or gear sounds.
Squealing sound or hot
rubber odor.
Ttnuiiping sound.
Vibrating noise.
POSSIBLE CAI^E
A certain amount of "clunking" or gear
sounds are romBl Inaheavy-dutywasher.
Foreign obj ects such as coins or safety
pins may be in tub or punp.
Eeltbuddes andiretal festa^rsarehlttirg'
wash tub.
Washer is overlc»lfid.
Heavy wash loads may produce a
thmping sound.
Laundry caiter is not restirg cn a solid,
finrifkrr.
Shipping bolt and block have not been
rercweddurirg installaticn.
l/feahloadrriervHrilydistributad in tub.
SOLUTION
ThisisnomBl.
Stop waster and check ti±i. If noise continues after
washer is restarted, objects my be in punp. Callyour
aul±arizte«rvLcHr.
TopreventunnecessarynDiseanddamgetotub, fasten
f astmers and turn itans inside cut.
Do not overload waster. Stop washer and reduce load.
ThisisrtsLBllyrnmal. If soirdaxitinues, wasterispoiAly
out of balance. Step washer and redistribute wash Icsd.
NtTiPil a rdrvrmtersoi trestsfi rmlvmfol idflnnr. ?dd1ticml
floor bracingmy be needed. Adjust leveling legs. See
INSTHLIATICU INSTMJCriONS for details.
See INSTALLATION INSTRUCTIOSTS for removing shipping
boltaniblock.
Step waster and rearrange wash load.
WASHER - OPERATING
Washer does not start.
Electrical power cord tray not be plumed
in or camectionmaybe loose.
HojsefuseblcMi, cirarlthreatertrijped,
or a power outage has occurred.
Water supply faucets are not turned on.
1 3
teke sureplug fits ti^ntly inwall outlet.
Reset clrcuitbreakHTorrplacefu^. Dorot increase fuse
capacity. IfprddLanteacircuito^rarlcad, heveitoorrectad
bya qualified electrician. If prcblam is apoi«r outage,
call local electric corpary.
Turn on water supply faucets.
Page 14

OCCURRENCE POSSIBLE CAUSE
WASHER - OPERATING
(ocntiraied)
SOLUTION
Washar does not start
(cxxitirued).
WiuberwKà't spin.
Rasidus left intiib.
WASHER - WATER
Wash load too wet after
Water does not enter
washer or It ente» slowly.
CVcleselectcr isrot mcncxectpcsiticn. More indicator clockwise sli^tly. Pullautkndc.
№tor is ovErh^ted. WdsOnernictorwillstcpif itteoerresoverheated. Itvn.ll
autamticallyrestart after a cool down period of ip to
30minutes (if washer has not been rranually turned
c±0.
Lid is ret carpletelyclceed. Close lidooTpletely.
Heavily goileditatis.
Washer is overloaded. Do not overload washer. See Waahliig Procedures,
lead is out of balance.
Etainhose is kinked. Strai^taidrainhcse.
Water sufply is not adegjate in area. Check another faucet in the house. Wait unti 1 water
Water supply faucets are not cotpletely qpai. Fully open hot and cold faucets.
Water is being used elseitere in the house. Wdterpressuremjstbeatleast30psi (260kEa) .Avoid
Wipe tubwithancnabrasivehousdiold cleanser, than
rinse. Shake or brush excess dirt and sand from iteris
before washing.
Rearrange loadtoallcwproper ^Innirg'.
supply ardpressure increase.
rurrdrgwaterelsaiierewhilewasiher is filling.
water level does not cover
Iced.
Warm or hot water is not
hot enou^.
Water In washer does not
drainer drains slowly.
water leaks.
Water inlet hoses are kinked.
iTipKpervater level selecticn (for
niD^lsmthViaterlevel/lcadsizecmtrol).
Washer is overloaded.
Hbt water heater is set too low or is a
distance f ran laundry emter.
Hbt water is being used elsevfere in
the house.
Dralnhose is kinked or clogged. Clean and straighten the drain hose.
Fill hose comectiaiat faucet or washer.
House drainpipes are closed. Uiclcg drainpipes. ContactpliiTber if necessary.
Straightanheses.
Select hiфervвtнrlevel/lcad size.
Do not overload washer. Whan control is set at hiфest
fill level, drylстdleveldюuldnotbehiфerthantcp
row of circular holes In wash tub.
lyteasure hot water tereperature at nearby faucet viith
candy or meat thermometer. Water taiperature should
beat least 130°F (70°C) . Adjust water heater as
mces^ry.
Avoid using hot water elsewhere before or during
washer use. There may not be enough hot water
availablefarprpercleanirg. Ifprcblanpersists, your
hot water system tray be unable to support more than
1 use at a tine.
Check and tighten hose connections. Install rubber
seal ingwasihers provided.
Incorrect wash and rinse
tenperatures.
Water Is entering washer
but tub does not fill.
Cwersudsirg. Use less detergent.
Hbt and cold water hoses are connected
to wra::^ supply faucets.
Ecainhffie stan:%)ipe is incorrect hei^it. Standpipe must be a minimum of 33 " (83.82 cm) high,
1 4
Connect hot water hose to hot water faucet and cold
water hose to cold water faucet.
to prevent siphoning. See INSTALLATION
INSTRUCTIONS.
Page 15

OCCURRENCE
DRYER
POSSIBLE CMTSE SOLUTION
Etyer does not start.
Dryer rune but won' t
heat.
Drying cycle takes too
Icng, outsideof thedryer
feels too hot or smells
hot.
ËlectricalpDæroaniisrotæcumlyplLggBi
in or plug tray be loose.
Huse fuseblomor cirmitbreakHr triiped.
Itemal lirtdter topped. C&ll authorized service persen for r^lacatait.
Iheœ are 2 hojse fuses Inthe dryer circuit.
If 1 of the2 fuses isblown, thedruriTnay
tumbut theheaterwill not cp)erate.
Gassipplyvalveisnotcpeu (gasmodels). Check to make sure supply valve is open. See
Dryer does not have enouc^ air supply to
support the burner flaire (gas models) .
LP gas supply tank is errpty or there has
beenautility interruption of natural gas
(gasTTodels).
Lint screai is closedvdthlint. Make sure all lint has been ranoved from the dryer lint
Exhaust duct requirements have not been
met.
r-bke sure the plugf its tightly inwall cutlet.
Reset Cl m li t. breaker orrepl are fi tse.
№ke sure electrical line is not o\rer leaded and the
1 C5ptic^l^t"i=ir^‘i TT^ 1"I t“
••..rUi i! Atp.jn.i.. CJ.l . V — t . »
R^lacefuse.
INSTALLATION INSTRUCTIONS for procedure.
See INSTALLATION INSTRUCTIONS.
Refill orr^laietark.
Dryer should heat ^laiutility service is restored.
scrraibefare startirg each cycle.
Exhaust duct must be at least 4 inches in diarreter and
rradeof rigid or fladblenetal.
When in place, the duct must have no more than two 90°
bends and must not exceed length listed in INSTALIATiaSi
INSIRUCTIONS.
Electric dryer is connected toa 208 volt
dmit.
Eaqdng procedures have not bear followed.
Outside esdiaust hood or eodiaust duct rrey
V-v-s
High humidity. Use a dehumi(±Lfier near the (dryer.
EMcessivevarinkHiig. Dryer is overlcaded. Donotoverlciad. See Drying Procedures, page 10.
Itansleft in dryer too lap. Remove itans as soon as cycle ends.
Irojfficioit sortlrgof itetB.
Drying taiperature too high. Eollcwfahric care latel instruoticris.
1 J.I.. .f. vii.i ■'^ ..E..C ..ifri.J »
Drying time will be 20% longer than drying csia240 volt
ebnit.
See Drying Procedures, page 10.
dean out anyctetructicn.
See Drying Proceduires, page 10.
1 5
Page 16

27" lAnNDRY CENTER WARRANTY
Ycurpicdjct isprotectediYthis visrzsnty
Your appliance is warrantsdbyMiite Consolidated Industries, Inc. WCI has authorizedFrigidaireConsumer Services and their authorized servicers to
perfom services under this warranty. WCI authorizes no cne else to change or add to any of these obligations under this warranty. Any dbl igations
for service and parts under this warranty rrust be performed by Frigidaire Consurer Services or an authorized Frigidaire servicer.
FITIiL OHE-YEAR
WARRANTY
LIMITED 2ND - 5TE
TEAR WARRANTY
FULL 25-YEAR
XHHES HASH BASKET
WARRANTY
(Secludiiag Alaska)
LmiTED H&KKANTY
explicable to the
State of Aleelca}
«NORMAL
RESFCaiSlSlLITIES
OF THE COHSTIHSR
EXCLUSIONS
WARRANTY
PERIOD
One year from original
purchase date.
Second through fifth
years from original
purchase date.
2 5 years from original
purchase date.
Time periods listed above.
WCI, THROUQE ITS
AUTHORIZED SERVICERS WILL;
Pay all costs for repairing or replacing any parts of this
appliance which preve to be defective in materials or
workmanship.
Provide a replacement for a defective or malfunctioning
part found in the washer transmissicn.
Ehrovide a replaceirent and in-herr^ service labor, without
charge, for an inner washbasket that breaks due todefective
materials or workmanship.
All of the provisions of the full and limited warranties above
and the exclusions listed belcwapply.
Costs of service calls that are listed under HCRMRL
RESPCRfSiBILITIES OF THE CONSUMER.*
Costs for labor and replacement parts other than
defective transmissimparts.
Cost of service calls that are listed under NCQ9G&
RESPCR^SIBILITIES OF THE CONSUMER.*
Costs of the technician' s travel to ttie hoie and any
costs for pick up and delivery of the appliance
requiredbecause of service.
THE CONSUMER WILL BE
RESPONSIBLE FORl
filla wBiranty applies only to products In. mrdlnary use % and consumer Is responsii^le for the Items
listed belows
1 Properuseof theapplianceinaccordancewithinstructionsprovidedwiththeproduct.
2 Proper installation by an authorized servicer in accordance with instructions provided with the appliance and in
accordance with all local plui±>irig, electrical and/or gas cedes.
2 Proper connection to a grounded power supply of sufficient voltage, replacement of blown fuses, repair of loose
ccnnecticns or defects in house wiring.
4 Ejq:enses f or mking the appliance accessible for servicing, suchasrancvalof trim, cupboards, shelves, etc., which are not
a part of the appliance when it was shipped from the factory.
2 liamgsstofinishafterinstallaticn.
6.
Replaceirent of light bulbs and/or fluorescent tubes {cnmodels with these features) .
This warranty does not cover the following t
1 CONSEQUENTIAL OR INCIDENTAL DAMAGES SUCH AS PROPERTY DAMAGE AND INCIDENTAL EXPENSES RESULTING
FROM ANY BREACH OF THIS WRITTEN OR ANY IMPLIED WARRANTY.
M3te: Sam states c±) not allcM the axcluBion or limitaticn ofincid&ital oroenseguential daimges, so this 1 imitation or
exclusion may not apply to you.
2 Service calls idiich do not involve malf uncticsn or defects in workn^nship or material, or for appliances not in ordinary
household use. The cesnsun^r shall pay for such service calls.
2 Damages causedby services performed by persons other than authorized Prigidaire servicers; use of parts other than
Frigidaire Genuine Renewal Parts; obtained from persons other than such servicers; or external causes such as abuse,
misuse, inadequate power supply or acts of God.
4 Products with original serial numbers that have been removed or altered and cannot be readily determined.
IF YOU NEED
SERVICE
Keep your hi 11 of sale, delivery slip, or seme other appropriate fsymoit record. The date cnthebill establishes the warranty
period should service be required. If serviceisperformed, itisinycurbestinteresttocbtainandkeepallreceipts. Thiswritten
warranty gives ycu specif ic le^l ri^ts. Ycumy also have other rights that vary from state to state. Service under this warranty
must be obtained by following these steps, in order:
1 Contact Frigidaire Coipany Consumer Services or an authorized Frigidaire servicer.
2 If there is a question as to where to obtain service, contact our Consumer Assistance Center at :
Fflgii^ire
P.O. BOX7181
Dublin, Ohio 43017
^FRIGIDAIRE
COMPANY
Consumer
services
{800} 844-9044
Product features or specifications as described or illustrated are subject to change without notice. All warranties are made I::y
White Consolidated Industries, Inc. This warranty applies cnly in the 50 states of the U. S .A. and Puerto Rico.
 Loading...