

ELECTRONIC OVEN CONTROL
Control Pad Functions
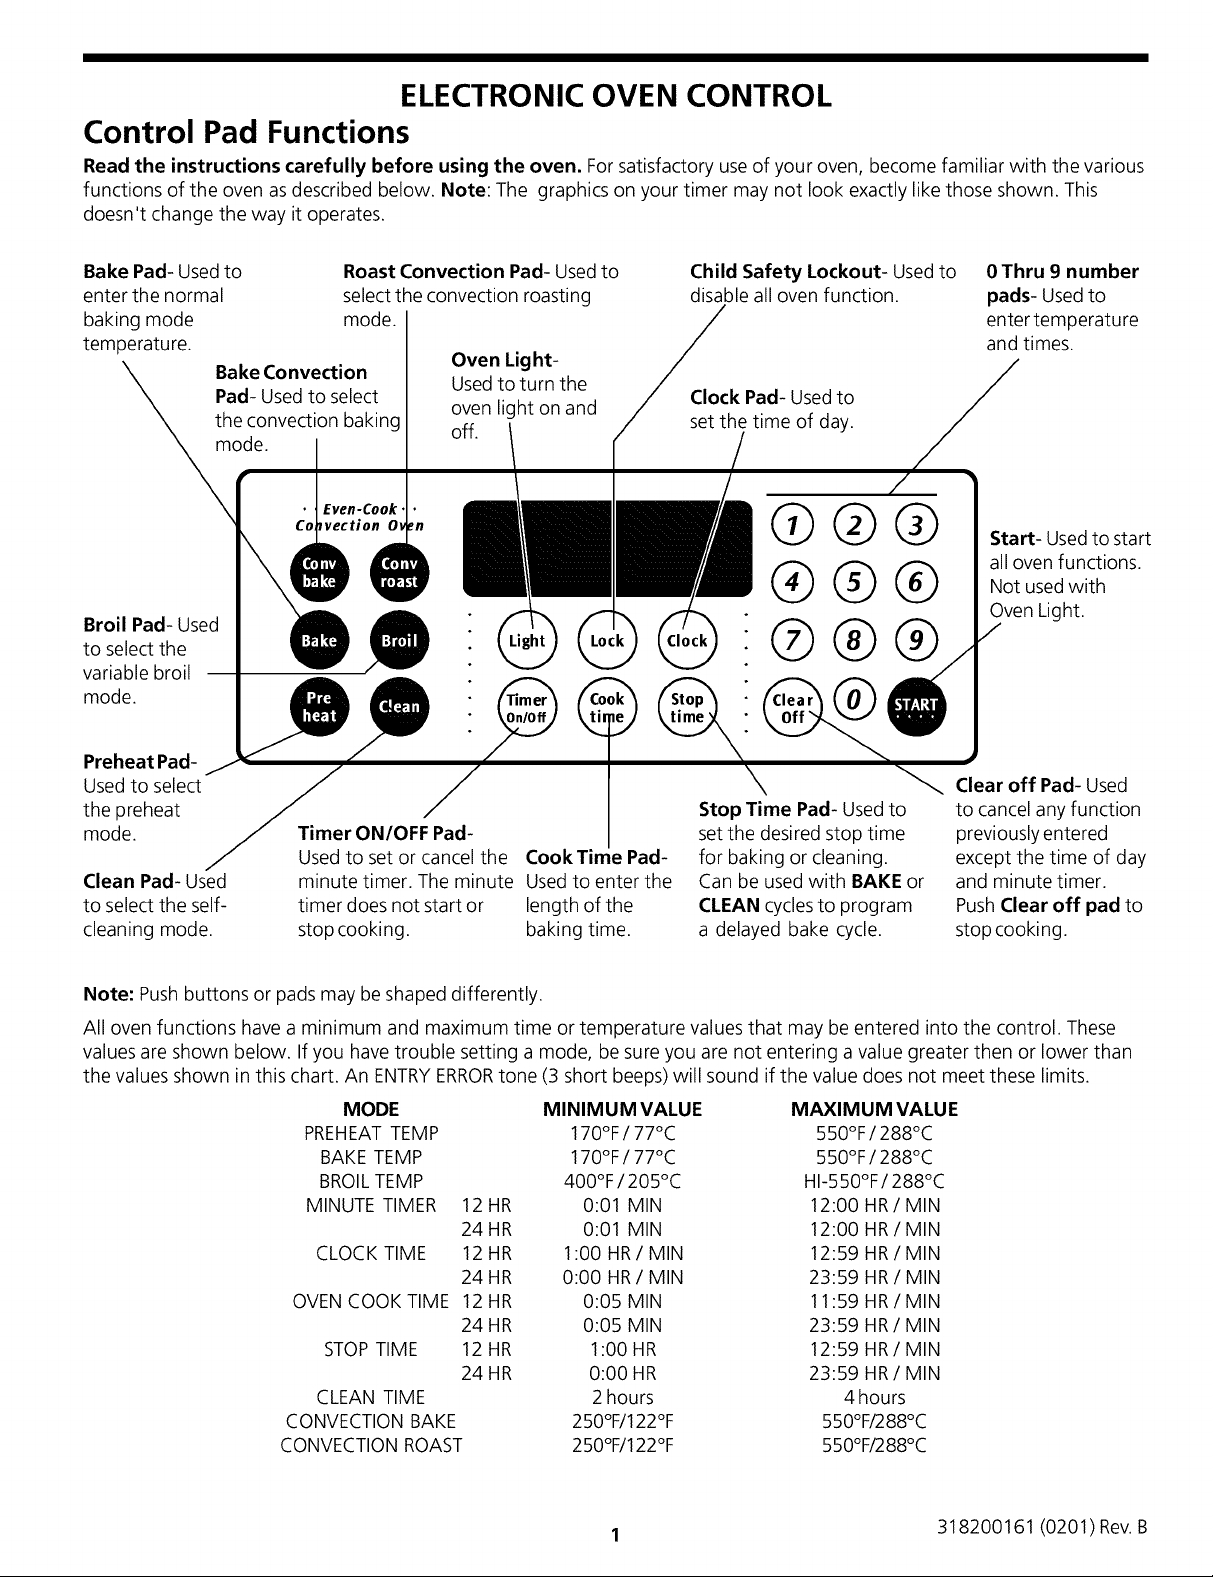
Read the instructions carefully before using the oven. Forsatisfactory use of your oven, become familiar with the various
functions of the oven as described below. Note: The graphics on your timer may not look exactly like those shown. This
doesn't change the way it operates.
Bake Pad- Usedto
enter the normal
baking mode
temperature.
Bake Convection
Pad- Used to select
the convection baking
mode.
Broil Pad- Used
to select the
variable broil
mode.
Preheat Pad-
Used to select
the preheat
mode.
Clean Pad- Used
to select the self-
cleaning mode.
Roast Convection Pad- Used to
select the convection roasting
mode.
Oven Light-
Usedto turn the
oven light on and
off.
Timer ON/OFF Pad-
Used to set or cancel the CookTime Pad-
minute timer. The minute Used to enter the
timer does not start or length of the
stop cooking, baking time.
Child Safety Lockout- Usedto 0 Thru 9 number
disable all oven function, pads- Used to
enter temperature
and times.
Clock Pad- Usedto /
set the time of day.
/
/
@®@
®@@
®@
Stop Time Pad- Used to
set the desired stop time
for baking or cleaning.
Can be used with BAKE or
CLEAN cyclesto program
a delayed bake cycle.
Start- Used to start
all oven functions.
Not usedwith
Oven Light.
Clear off Pad- Used
to cancel any function
previously entered
except the time of day
and minute timer.
PushClear off pad to
stop cooking.
Note: Push buttons or pads may be shaped differently.
All oven functions have a minimum and maximum time or temperature values that may be entered into the control. These
values are shown below. Ifyou have trouble setting a mode, be sure you are not entering a value greater then or lower than
the values shown inthis chart. An ENTRYERRORtone (3 short beeps) will sound if the value does not meet these limits.
MODE
PREHEATTEMP
BAKE TEMP
BROILTEMP
MINUTE TIMER
CLOCK TIME
OVEN COOK TIME 12HR
STOPTIME 12 HR
CLEAN TIME
CONVECTION BAKE
CONVECTION ROAST
12HR
24 HR
12HR
24 HR
24 HR
24 HR
MINIMUM VALUE MAXIMUM VALUE
170°F / 77°C 550°F / 288°C
170°F / 77°C 550°F / 288°C
400°F / 205°C HI-550°F / 288°C
0:01 MIN 12:00 HR/MIN
0:01 MIN 12:00 HR/MIN
1:00 HR/MIN 12:59 HR/MIN
0:00 HR/MIN 23:59 HR/MIN
0:05 MIN 11:59 HR/MIN
0:05 MIN 23:59 HR/MIN
1:00 HR 12:59 HR/MIN
0:00 HR 23:59 HR/MIN
2 hours 4 hours
250°F/122°F 550°F/288°C
250%/122°F 550°F/288°C
1 318200161 (0201) Rev. B
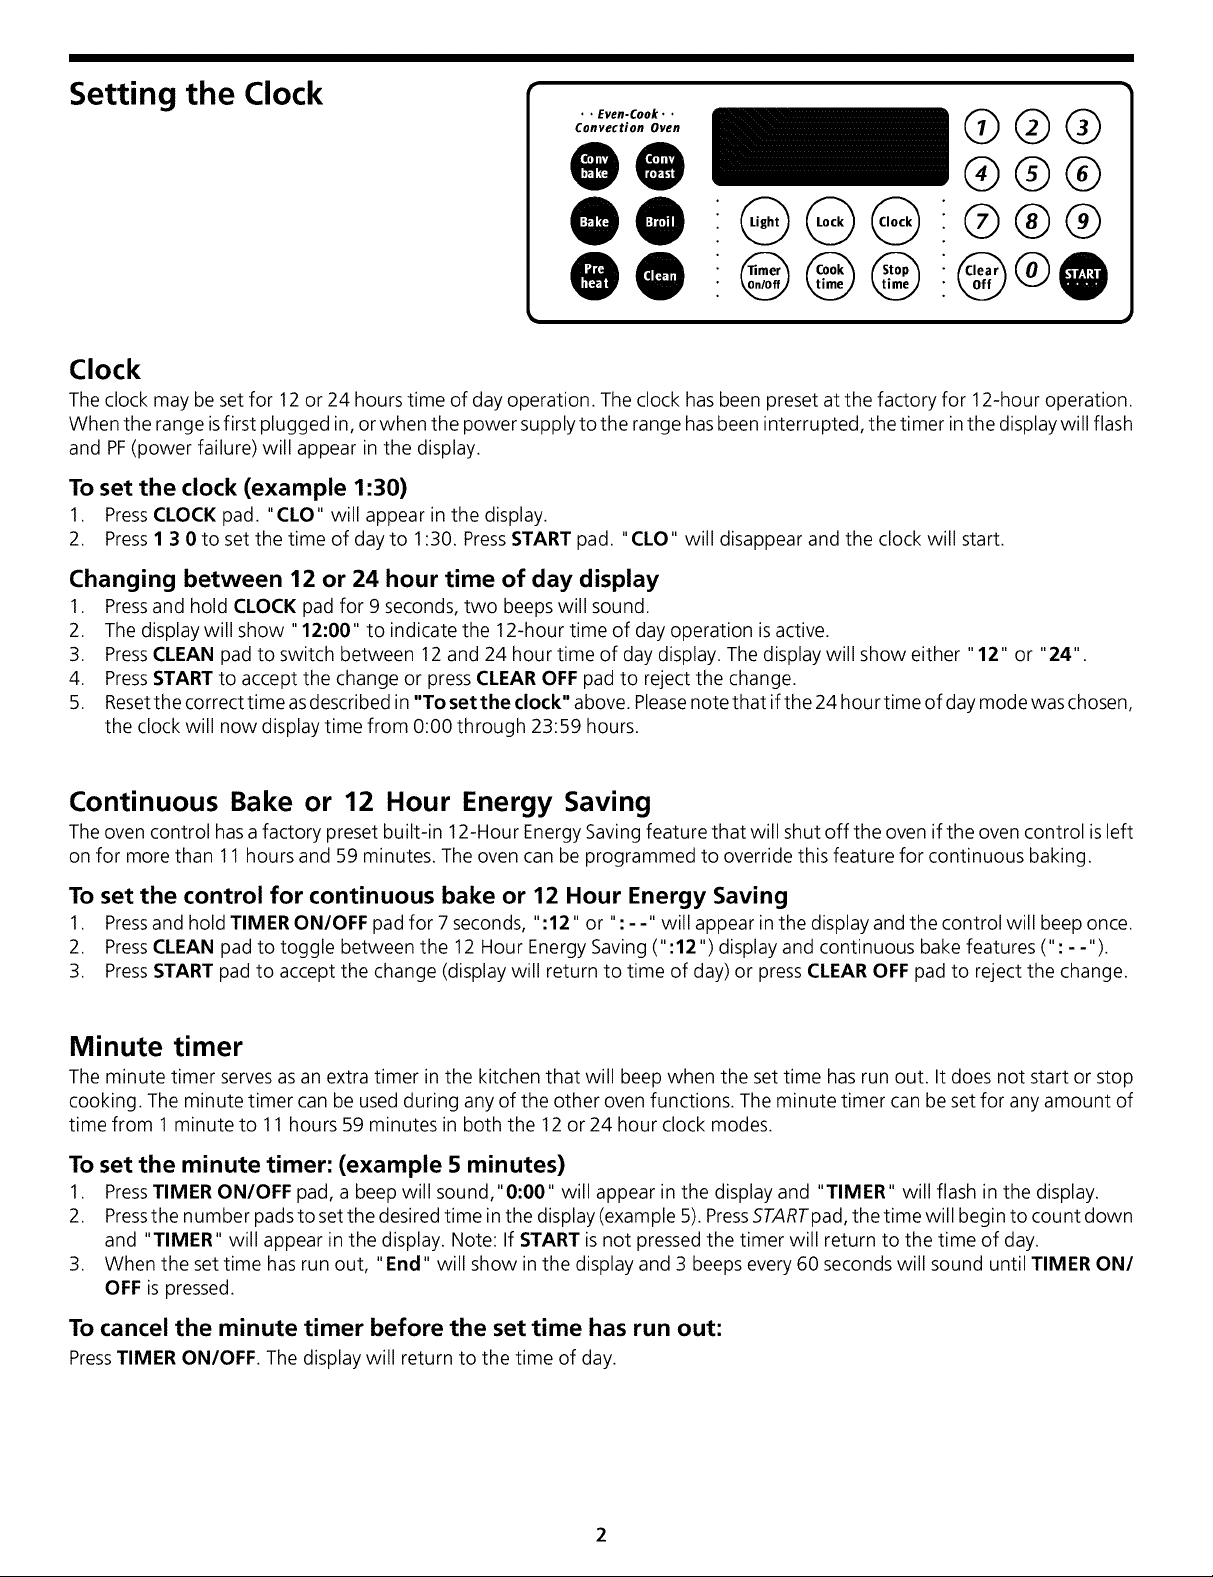
Setting the Clock
r
. . Even.Cook • .
Convection Oven
@@@
00
O0
0@
®@@
®@®
@®@
Clock
The clock may be set for 12 or 24 hours time of day operation. The clock has been preset at the factory for 12-hour operation.
When the range isfirst plugged in, or when the power supply to the range hasbeen interrupted, the timer inthe display will flash
and PF(power failure) will appear in the display.
To set the clock (example 1:30)
1. PressCLOCK pad. "CLO" will appear in the display.
2. Press1 3 0 to set the time of day to 1:30. PressSTART pad. "CLO" will disappear and the clock will start.
Changing between 12 or 24 hour time of day display
1. Pressand hold CLOCK pad for 9 seconds, two beeps will sound.
2. The display will show "12:00" to indicate the 12-hour time of day operation is active.
3. PressCLEAN pad to switch between 12 and 24 hour time of day display. The display will show either "12" or "24".
4. PressSTART to accept the change or press CLEAR OFF pad to reject the change.
5. Resetthecorrecttimeasdescribed in "Tosettheclock" above. Pleasenote that ifthe 24 hourtimeof day mode waschosen,
the clock will now display time from 0:00 through 23:59 hours.
Continuous Bake or 12 Hour Energy Saving
The oven control has a factory preset built-in 12-Hour Energy Saving feature that will shut off the oven if the oven control isleft
on for more than 11 hours and 59 minutes. The oven can be programmed to override this feature for continuous baking.
To set the control for continuous bake or 12 Hour Energy Saving
1. Pressand hold TIMER ON/OFF pad for 7 seconds, ":12 " or " :- -" will appear in the display and the control will beep once.
2. PressCLEAN pad to toggle between the 12 Hour Energy Saving (" :12") display and continuous bake features (": - -").
3. PressSTART pad to accept the change (display will return to time of day) or press CLEAR OFF pad to reject the change.
Minute timer
The minute timer serves as an extra timer in the kitchen that will beep when the set time has run out. It does not start or stop
cooking. The minute timer can be used during any of the other oven functions. The minute timer can be set for any amount of
time from 1 minute to 11hours 59 minutes in both the 12 or 24 hour clock modes.
To set the minute timer: (example 5 minutes)
1. PressTIMER ON/OFF pad, a beep will sound,"0:00" will appear in the display and "TIMER" will flash in the display.
2. Pressthe number padst_ set the desired time in the disp_ay(examp_e5). PressSTARTpad, the time wi__begin t_ c_unt d_wn
and "TIMER" will appear in the display. Note: If START isnot pressed the timer will return to the time of day.
3. When the set time has run out, "End" will show in the display and 3 beeps every 60 seconds will sound until TIMER ON/
OFF is pressed.
To cancel the minute timer before the set time has run out:
PressTIMER ON/OFF. The display will return to the time of day.
Consumer Defined Control Features
Oven Lockout Feature
The Oven Lockout feature prevents the oven from being accidentallyturned on. It doesnot disable the clock, minute timer, surface
elements (or) burners, or the interior oven light.
To activate the Oven Lockout feature:
1. Pressand hold LOCK pad for 3 seconds.
2. After 3 secondsthe lock icon lightwill appear in te display, a beep will sound and " DOOR LOCKED" will flash in the display.
Once the oven door is locked the "door locked" indicator will stop flashing and remain on along with the lock icon light.
To reactivate Normal Oven Operation:
1. Pressand hold LOCK for 3 seconds. A beep will sound. The "DOOR LOCKED" will continue to flash until the oven door has
completely unlocked and the lock icon light will disappear.
2. The oven control can now be programmed for all operations.
Temperature display - Fahrenheit or Celsius
The oven control can be programmed to display temperatures in Fahrenheit or Celsius. The oven has been preset at the factory
to display in Fahrenheit.
To change from Fahrenheit to Celsius or to Celsius to Fahrenheit:
1. Identify which display your control isset for now. To tell if your range is setfor Fahrenheit or Celsius press BROIL pad and
hold for 7 seconds. A beep will then sound. If "F" appears, the display isset to show temperatures in Fahrenheit. If "C"
appears, the display is setto show temperatures in Celsius.
2. PressCLEAN pad to switch between the Fahrenheit to Celsius display modes. The display will show either "F" or "C".
3. PressSTART pad to accept the change or press CLEAR OFF to reject the change.
For a Silent Control Operation:
The Silent Control Operation feature allows the control to be operated without sounds or beepswhenever necessary. If desired
the control can be programmed for silent operation and later returned to operating with all normal sounds and beeps.
To change control from normal sound operation to silent control operation:
1. Identify which sound operation your timer isset for now. To tell if your range is set for normal or silent operation press and
hold STOP TIME pad for 7 seconds. "DELAY" will appear and flash in the display. If ":SP" appears, the control will
operate in the normal operation mode and beeps. If ":-" appears, the control isin the silent operation mode.
2. PressCLEAN pad to switch between the normal sound operation and the silent operation mode. The display will show
either ":SP" or ":-".
3. PressSTART pad to accept the change or press CLEAR OFF pad to reject the change.

Setting Oven Controls
. . Even.Cook • .
Convection Oven
@@@
00
O0
0@
Preheat
The Preheat mode will bring the oven up to temperature and then beep to let you knowwhen to placefood in the oven. Preheating
the oven isrecommended when baking breadsand cakes. Usethis modewhen recipescallfor preheating. During manual preheat,
the notification tone will be generated when the temperature in the center of the oven has reach his maximum perfomance of
cooking. Preheating is not necessary when roasting or cooking casseroles. The oven can be programmed to preheat at any
temperature from 170°Fto 550°F (77°C to 288°C).
To set the Preheat temperature to 350°F:
1. Arrange the interior oven racks.
2. PressPREHEAT pad. "- - -°'' will appear and "BAKE" will flash in the display.
3. Press3 5 0 pads. "350°'' will appear and "BAKE" will flash in the display.
4. PressSTART pad. "PRE" and "BAKE" will appear inthe display as the oven heats and reaches 350°F.
Note: After the oven hasreached the desired temperature (this example, 350°F) the control will beep and the "PRE" light will turn
off and oven temperature will be displayed. If the beep was missed,a quick glance atthe display with oven temperature showing
inthe oven display isagood wayto check that the oven hasalready reachedthe preheat temperature. Oncethe oven haspreheated,
PLACEFOOD IN THE OVEN. The "BAKE" light will stay on.
®@@
®@®
@®@
PressCLEAR OFF when baking is complete or to cancel preheat feature.
To change Preheat temperature while oven is preheating: (example changing from 350 to 425°F)
If it isnecessary to change the preheat temperature while the oven ispreheating to the original temperature:
1. While preheating, press PREHEAT pad. "- - o,, will appear and "BAKE" will flash in the display.
2. Enter the new preheat temperature. Press4 2 5 pads. "425 °'' will appear and "BAKE" will flash the display.
3. PressSTART pad. "PRE" and "BAKE" will appear inthe display as the oven heats and reaches 425°.
4. When baking iscomplete press CLEAR OFF pad.
Bake
Usethis modewhen preheating isnot necessary;such as,when roasting or cooking casseroles.The BakeFeatureincludesapreheat
cycle. The oven can be programmed to bake at anytemperature from 170°F to 550°F (77°C to 288°C) (The sampleshown below
isfor 350°C).
To set the Bake temperature to 350°F:
1. Arrange the interior oven racks and place food in oven.
2. PressBAKE pad, "-- o,, will appear in the display.
3. Press3 5 0 pads. "BAKE" will flash and "350 °'' will appear in the display.
4. PressSTARTpad. "BAKE"and "PRE"willappearinthedisplayuntiltheovenreaches350°F.Abeepwillsoundoncetheoven
temperature reaches 350°F and the display will show "350 °'' and "BAKE ".
PressCLEAR OFF pad to stop baking or cancel bake at any time.
To change the bake temperature (example changing from 350°F to 425°F)
1. After the oven hasalready been set to bake at 350° and the oven temperatu re needs to be changed to 425°, press BAKE pad
and "- - o,, will show in the display.
2. Then press4 2 5 pads. "425 °'' and "BAKE" will appear in the display.
3. PressSTART pad. "BAKE" and the new oven temperature "425 °.. will appear in the display.
4

Setting Oven Controls (continued)
Timed Bake
The automatic timer of the Timed Baked feature will turn the oven off at the time you select in advance.
_Usecaution when using theTIMED BAKEorDELAYEDTIME BAKEfeatures. Usethe automatictimerwhen cooking
cured or frozen meats and most fruits and vegetables. Foodsthat can easilyspoil such as milk, eggs, fish, meat or poultry, should
bechilled inthe refrigerator first. Evenwhen chilled, they should not stand inthe oven for more than 1 hour before cooking begins,
and should be removed promptly when cooking iscompleted. Eating spoiled food can result in sicknessfrom food poisoning.
To program the oven to begin baking immediately and to shut off automatically (example bake
at 350 ° for 50 minutes):
1. Besure the clock is set for the correct time of day.
2. Arrange the interior oven rack(s) and if roasting or cooking a casserole, place the food in the oven.
3. PressBAKE pad, "- - - °'' will appear in the display.
4. Press3 5 0 pads. "BAKE" will flash and "350 °'' will appear in the display.
5. PressSTART pad. "BAKE"and "PRE"willappearinthedisplayuntiltheovenreaches350°F.Abeepwillsoundoncetheoven
temperature reaches 350°F and the display will show "350 °'' and "BAKE ".
6. PressCOOK TIME pad. "TIMED" will flash; "0:00" appears, "BAKE" and "350 °'. remain on the display.
7. Enterthe desired baking time by pressing 5 0 pads. "TIMED" will flash; ":50" appears, "BAKE" and "350 °'' remain on the
display. Note: Baking time can be set for any amount of time from 1 minute to 11 hours and 59 minutes (maximum time for
both 12 or 24 hour display modes).
8. PressSTARTpad. Boththe "TIMED" and "BAKE" iconswill remain on inthedisplay.OnceTimed Bake hasstarted, thecurrent
time of day will appear in the display.
Note: After the Timed Bake feature has activated, pressCOOK TIME to display the cook time remaining in the Timed Bakemode.
PressCLEAR OFF when baking is complete or at any time to cancel the Timed Bake mode.
When the set BAKE TIME runs out:
1. "End" will appear in the display and the oven will shut off automatically.
2. The control will beep 4 times. The control will continue to beep 3 times each minute until CLEAR OFF pad is pressed.
Delayed Time Bake
The automatic timer of the Delayed Time Bake feature will turn the oven on and off at the time you select in advance.
To program oven for a delayed bake start time and to shut-off automatically (Example for baking
at 350°F for 50 minutes finishing at 5:30):
1. Besure that the clock isset with the correct time of day.
2. Arrange the interior oven rack(s) and, if roasting or cooking a casserole, place the food in the oven.
3. PressBAKE pad, "- - - °'' will appear in the display.
4. Press3 5 0 pads. "BAKE" will flash and "350 °'. will appear inthe display.
5. PressSTART pad. "BAKE" and "PRE" will appear in the display until the oven reaches 350°F. A beep will sound once
the oven temperature reaches 350°F and the display will show "350 °'' and "BAKE".
6. PressCOOK TIME pad. "TIMED" will flash; "0:00"appears, "BAKE" and "350 °'. remain on the display.
7. Enter the desired baking time using the number pads by pressing 5 0. "TIMED" will flash, ":50" appears, "BAKE" and
"350 °'. remain on the display. Note: Baking time can be set for any amount of time from 1 minute to 11 hours and 59
minutes (maximum time for both 12 or 24 hour display modes).
8 PressSTART pad. "TIMED BAKE" and "350 °'' appear in the display.
9. PressSTOP TIME pad. Enter the desired stop time using the number pads 5 3 0.
10. PressSTART pad. When Delayed Time Bake starts, the set oven temperature will disappear, "TIMED DELAY" and
"BAKE" and the current time of day will appear in the display.
Note: Once Delayed Time Bake has started, press COOK TIME pad to display the bake time remaining in the Timed Bake
mode. PressCLEAR OFF pad when baking has complete or at any time to cancel the Delayed Time Bake feature.
When the set BAKE TIME runs out:
1. "End" will appear in the display and the oven will shut off automatically.
2. The control will beep 4 times. The control will continue to beep 3 times each minute until CLEAR OFF pad is pressed.

Setting Oven Controls (continued)
Broil
When broiling, heat radiates downward from the oven broiler for even coverage. Besureto center the broiler pan directly under
the oven broiler element for best results. Broil temperatures may be set from 400°F to HI(550°F). Arrange and position the oven
rackswhile oven is still cool.
The broil pan and broil pan insert used together allow dripping greaseto drain and be kept away from the high heat of the oven
broiler. DO NOT usethe broil pan without the insert. DO NOT cover the broil pan insert with foil. Theexposed grease could
catch fi re.
Should an ovenfire occur, leavethe oven door closed and turn off the oven. Ifthe fire continues, throw baking soda
on the fire or usea fire extinguisher. DO NOT put water or flour on the fire. Flour may be explosive and water can cause a grease
fire to spread and cause personal injury.
To set the oven to Broil at 550°F:
1. Placethe broiler pan insert_nthebr_i_erpan_thenp_acethef__d_nthebr_i_erpaninsert.D_N_Tusethebr_i_erpanwith_ut
the insert. DO NOT cover the broiler insert with foil. The exposed grease could catch fire.
2. Arrange interior oven racks and place the broiler pan on the oven rack. Be sure to center the broiler pan directly under the
broiler element. Open the oven door to the broil stop position when broiling.
3. PressBROIL pad. "BROIL" will flash and "- - - o,,will appear in the display.
4. Press5 5 0 pads. "BROIL" will flash and "550 °'' will appear in the display.
5. PressSTART pad. The oven will begin to broil. "BROIL" and "550 °'' will appear in the display.
6. Broil on one side until food isbrowned; turn and cook on the second side. Seasonand serve. Note: Always pull the rack out
to the stop position before turning or removing food.
7. To cancel broiling or when broiling iscomplete pressCLEAR OFFpad.
Convection Bake
Use the Convection Bake feature when cooking speed is desired. The oven can be programmed to Convection Bake at any
temperature between 250°F (122°C) to 550°F (288°C) (The example below isfor 350°F).
General Convecion Bake Instructions:
1. When using Convection Bake, decrease your normal cooking times as shown on
the table a side. Adjust the cook time for desired doneness as needed. Time
reductions will vary depending on the amount and type of food to be cooked.
Cookies and biscuits should baked on panswith no sides or very low sidesto allow
heated air to circulate around the food. Food baked on pans with dark finish will
cook faster.
2. Preheating is not necessarywhen cooking casseroles with Convection Bake.
3. When using Convection Bake with a single rack, place oven rack in position 2 or
3. If cooking on multiple racks, place the oven racks in positions 2 and 3 (for 2
racks).
Benefits of Convection Bake:
Some foods cook up to 30% faster, saving time and energy.
Multiple rack baking.
No special pans or bakeware needed.
To Set the Convection Bake and temperature to 350°F:
1. Arrange interior oven racksand place food in oven.
2.
PressCONV BAKE pad. "CONV BAKE" will flash and "- - - o,,will appear in the display.
3.
Press3 5 0 pads. "CONV BAKE" and "350°'. will appear in the display.
4.
PressSTART pad. "CONV BAKE" and "PRE" will appear in the display until oven reaches 350°F. A beep will sound once the
oven temperature reaches350°F and the display will show "350 °'', "CONV BAKE" and a fan icon.
ForConvection Bake pad
*Decrease normal cook time by:
Frozen foods, pies,
pastries and pizza
Refrigerator cookies
Refrigerator biscuits
Rolls& Breads
Fresh Pies/ Pastries
* Recommended reduction in cook
times based on brands of food
items tested. Cook times may vary
with your specific brand of food
item.
15-25%
15-35%
15-30%
20-25%
10-20%
Note: the convection fan will come on a short time AFTERthe oven has been set for Convection Bake. The oven icon display will
then show a rotating fan. This rotating fan icon indicates when the Convection Fan isoperating.
PressCLEAR OFF pad to stop Convection Baking or cancel Convection Bake at any time.

Setting Oven Controls (continued)
Convection Roast
The oven can be programmed to Convection Roastat any temperature between 250°F (122°C) to 550°F (288°C) (The example
below is for 350°F).
To Set the Convection Roast and temperature to 350°F:
1. Arrange interior oven racks and place food in oven.
2. PressCONV ROAST pad. "CONV" will flash and ,, o,, will appear in the display.
3. Press3 5 0 pads. "CONV" icon will flash and "350 °'' will appear in the display.
4. PressSTARTpad. The "CONV" iconwillremainon.Alsothe "350°"oventemperatureandtheconvectionfan icon will show
in the display.
Note: the convection fan will come at the same time the oven has beenset for convection roast. The oven icon display will begin
rotating indicating that the convection fan isoperating.
PressCLEAR OFF pad to stop Convection Roasting or cancel convection roast at any time.
Oven Cleaning
To Start the Self-Clean Cycle
Ifyou are planning to usethe oven directly after a self-clean cycleremember to allow time for the oven to cool down and the oven
door to unlock. This normally takes about one hour. So to self-clean for 3 hours will actually take about 4 hours to complete.
*We recommend a 2 hour self-clean cycle for light soils, a 3 hour cycle for average soils, and a 4 hour cycle for heavy soils
(to assure satisfactory results).
During the self-cleaning cycle, the outside of the range can become very hot to the touch. DO NOT leavesmall
children unattended near the appliance; they may be burned if they touch the hot oven door surfaces.
DO NOT force the oven door open. This can damage the automatic door locking system. Usecare when opening
the oven door after the self-cleaning cycle.Stand to the sideof the oven when opening the door to allow hot air or steam to escape.
The oven may still be VERY HOT.
To set the controls for the Self-Cleaning Cycle to start immediately and shut off automatically:
1. Besure the clock is set with the correct time of day and the oven door isclosed.
2. PressCLEAN pad. "CLEAN" will flash and "3:00" will show in the display.The control will automatically clean for a 3 hour
period (default self-cleaning cycle time). If a 2 or 4 hour clean time isdesired usethe number pads to enter the time. Set the
cleaning time based on the amount of soil you haveilight, medium or heavy (*See above).
3. PressSTART pad. The "DOOR LOCKED" icon will flash; "CLEAN" icon and the letters "CLn" will remain on in the display.
4. As soon asthe control isset, the motor driven oven door lockwill begin tocloseautomatically. Once the door hasbeen locked
the "DOOR LOCKED" indicator light will stop flashing and remain on. Also the oven icon will show in the display.
Note: allow about 15 seconds for the oven door lock to close.
When the Self-Clean Cycle is Completed
1. The time of day and, the "DOOR LOCKED" and "CLEAN" icon will remain in the display.
2. Oncethe oven hascooled down for approximately 1 HOUR,and the icon "DOOR LOCKED" isno longer displayed, the oven
door can then be opened.
Stopping or Interrupting a Self-Cleaning Cycle
If it becomes necessary to stop or interrupt a self-cleaning cycle due to excessive smoke or fire in the oven:
1. PressCLEAR OFF pad.
2. Oncethe oven hascooled down for approximately 1 HOURand the "DOOR LOCKED" icon is no longer displayed, then the
oven door may be opened.

Oven cleaning (continued)
To Start the Delayed Self-Clean Cycle
Theautomatic timer will turn the oven on and off at the time you select in advance. Besureto review TO STARTTHESELF-CLEAN
CYCLE for recommended clean times.
To set the controls for the Self-Cleaning Cycle to start at a delayed time and shut off automatically:
(example 3 hour self-clean cycle to finish at 9:00)
1. Besure the clock is set with the correct time of day and the oven door is closed.
2. PressCLEAN pad. "CLEAN" will flash and "3:00" (default 3hour clean cycle)will show inthe display. If a 2 or 4 hour clean
time is desired usethe number padsto enter the time. Setthe cleaning time based on the amount of soil you haveilight,
medium or heavy (*see To start the Self-Clean Cycle).
3. PressSTART pad. The "DOOR LOCKED" icon will flash; "CLEAN" icon and the letters "CLn" will remain on in the display.
4. PressSTOP TIME pad. Enter the desired Stop Time using the number pads 9 0 0.
5. PressSTART pad. The "CLn" icon will turn off; "DELAY", "DOOR LOCKED" and "CLEAN" icons will remain on.
6. As soon asthe control isset, the motor driven oven door lock will begin to close automatically and once the door has been
locked the "DOOR LOCKED" indicator light will quit flashing and remain on. The oven icon will appear in the display.
7. The control will calculate backward from the set stop time to determine when the self-cleaning cycleshould begin. The self-
cleaning cycle will come on automatically at the calculated time. At that time, the icon "DELAY" will go out; "CLEAN" and
"CLn" will appear in the display.
When the Self-Clean Cycle is Completed
1. The time of day, the "DOOR LOCKED" and "CLEAN" icon will remain in the display.
2. Once the oven hascooled down for approximately 1 HOUR,and the icon "DOOR LOCKED" is no longer displayed, the oven
door can be opened.
Stopping or Interrupting a Self-Cleaning Cycle
If it becomes necessary to stop or interrupt a self-cleaning cycle due to excessive smoke or fire in the oven:
1. PressCLEAR OFF pad.
2. Once the oven has cooled down for approximately 1 HOURand the "DOOR LOCKED" icon is no longer displayed, then the
oven door may be opened.
Adjusting Oven Temperature
Note: The Oven Temperature adjustments made with this feature will not change the Self-Cleaning Cycle temperature.
The temperature in the oven has been pre-set at the factory. When first using the oven, be sure to follow recipe times and
temperatures. If you think the oven istoo hot or too cool, the temperature inthe oven can be adjusted. Before adjusting, test a
recipe by using a temperature setting that ishigher or lower than the recommended temperature. The baking results should help
you to decide how much of an adjustment is needed.
To adjust oven temperature:
1. PushBAKE pad for 6 seconds. A beep will sound.
2. To increasethe temperature usethe number padsto enter the desire change. (Example 30°F) 3 0. Thetemperature may be
increased up to 35°F (17°C). PressSTARTto accept the temperature change and the display will return to the time of day.
PressCLEAR OFF to reject the change if necessary.
3. To decreasethe temperature usethe number pads to enter the desire change. (Example -30%). 3 0 and then push CLEAN
pad. The temperature may be decreased by 35°F (17°C). PressSTARTto accept the temperature change and the display
will return to the time of day. PressCLEAR OFF to reject the change if necessary.
 Loading...