

Page 1
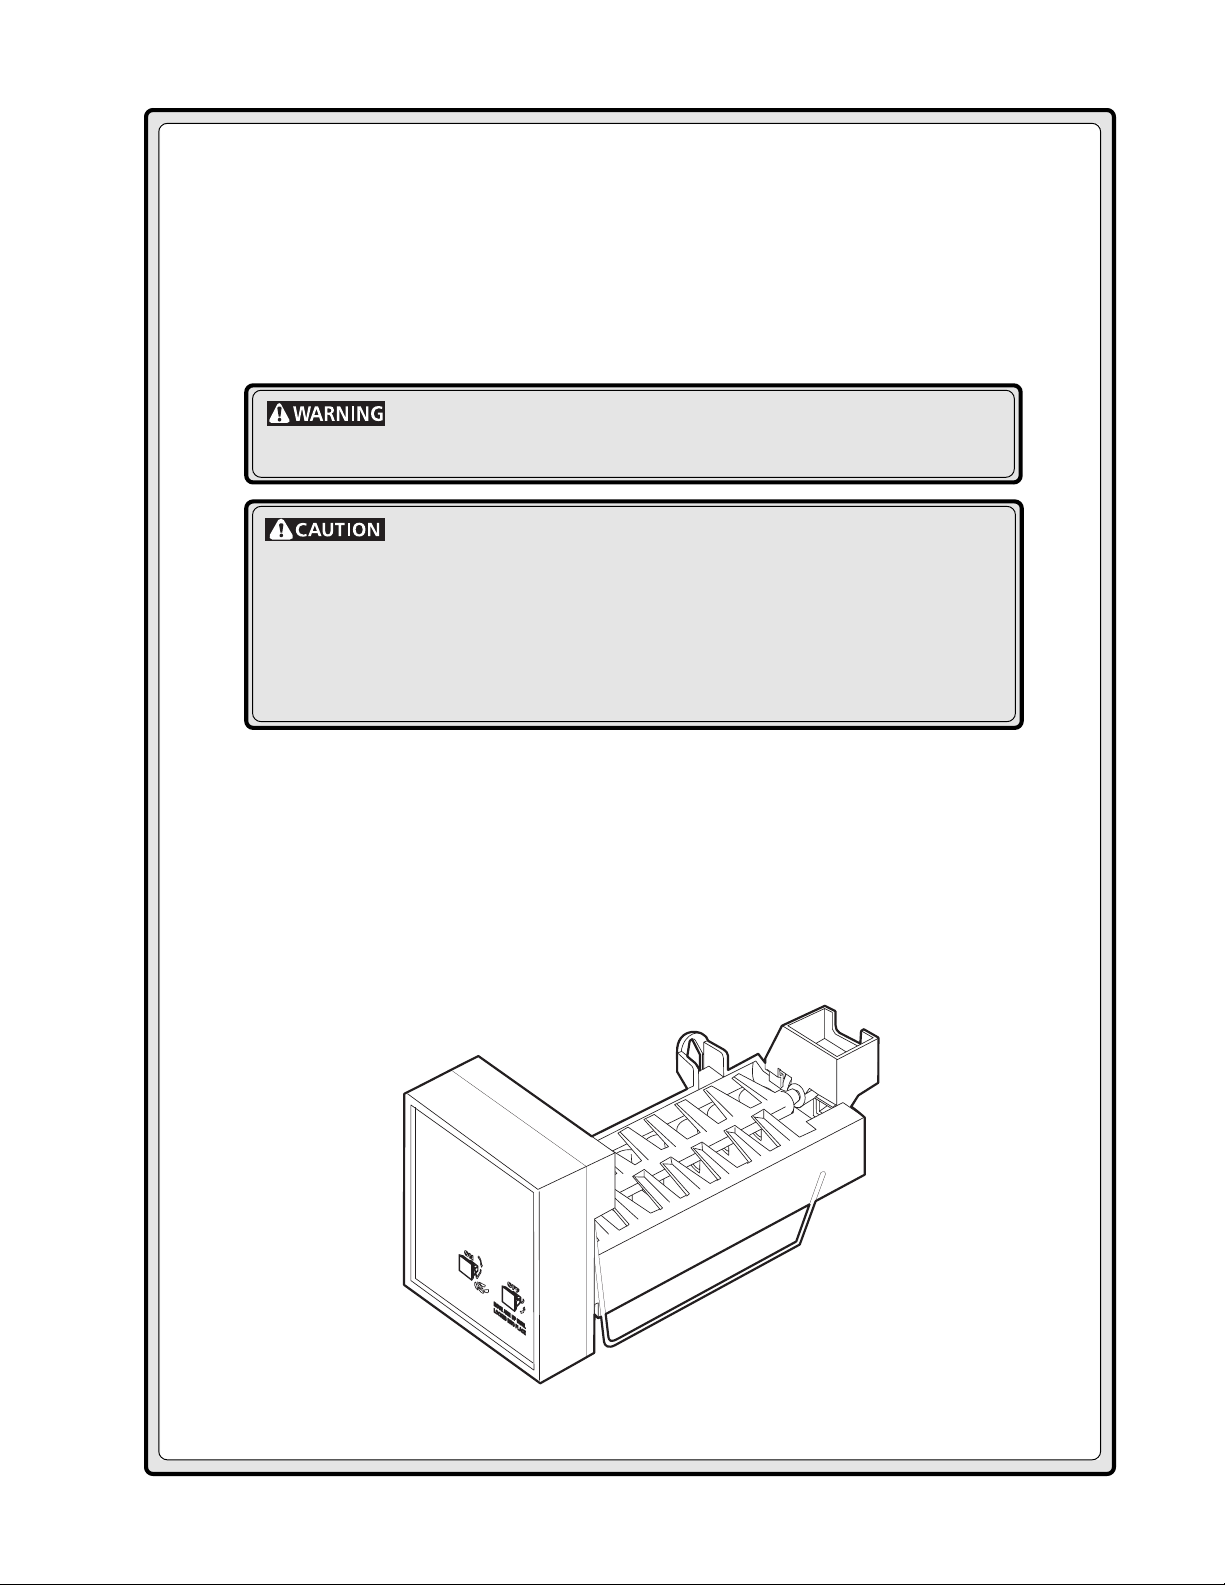
ICE MAKER
INSTALLATION
INSTRUCTIONS
To avoid electric shock, which can cause death or severe personal injury,
disconnect the refrigerator from electrical power before connecting a water supply line to
the refrigerator.
To Avoid Property Damage:
• Copper tubing is recommended for the water supply line. Water supply tubing made of 1/4”
plastic is not recommended since it greatly increases the potential for water leaks.
The manufacturer will not be responsible for any damage if plastic tubing is used for the
supply line.
• DO NOT install water supply tubing in areas where temperatures fall below freezing.
• Connect the ice maker to a drinkable water source that is not tied into a water softening
system. Chemicals from the softener may damage the ice maker, causing it to
malfunction.
The following items will be required to install the ice maker kit.
• 1/4 inch copper supply line with shut off valve
• 1/4 inch brass compression nut and ferrule
• Freezer shelf (Some models not eqipped with shelf). If your
model does not have one, contact your dealer to order one.
The copper tubing and shut off valve are available in a kit from your
local hardware or plumbing supply store. Coil enough tubing at the
back of the unit to allow movement for cleaning.
P/N 240394901
Page 2
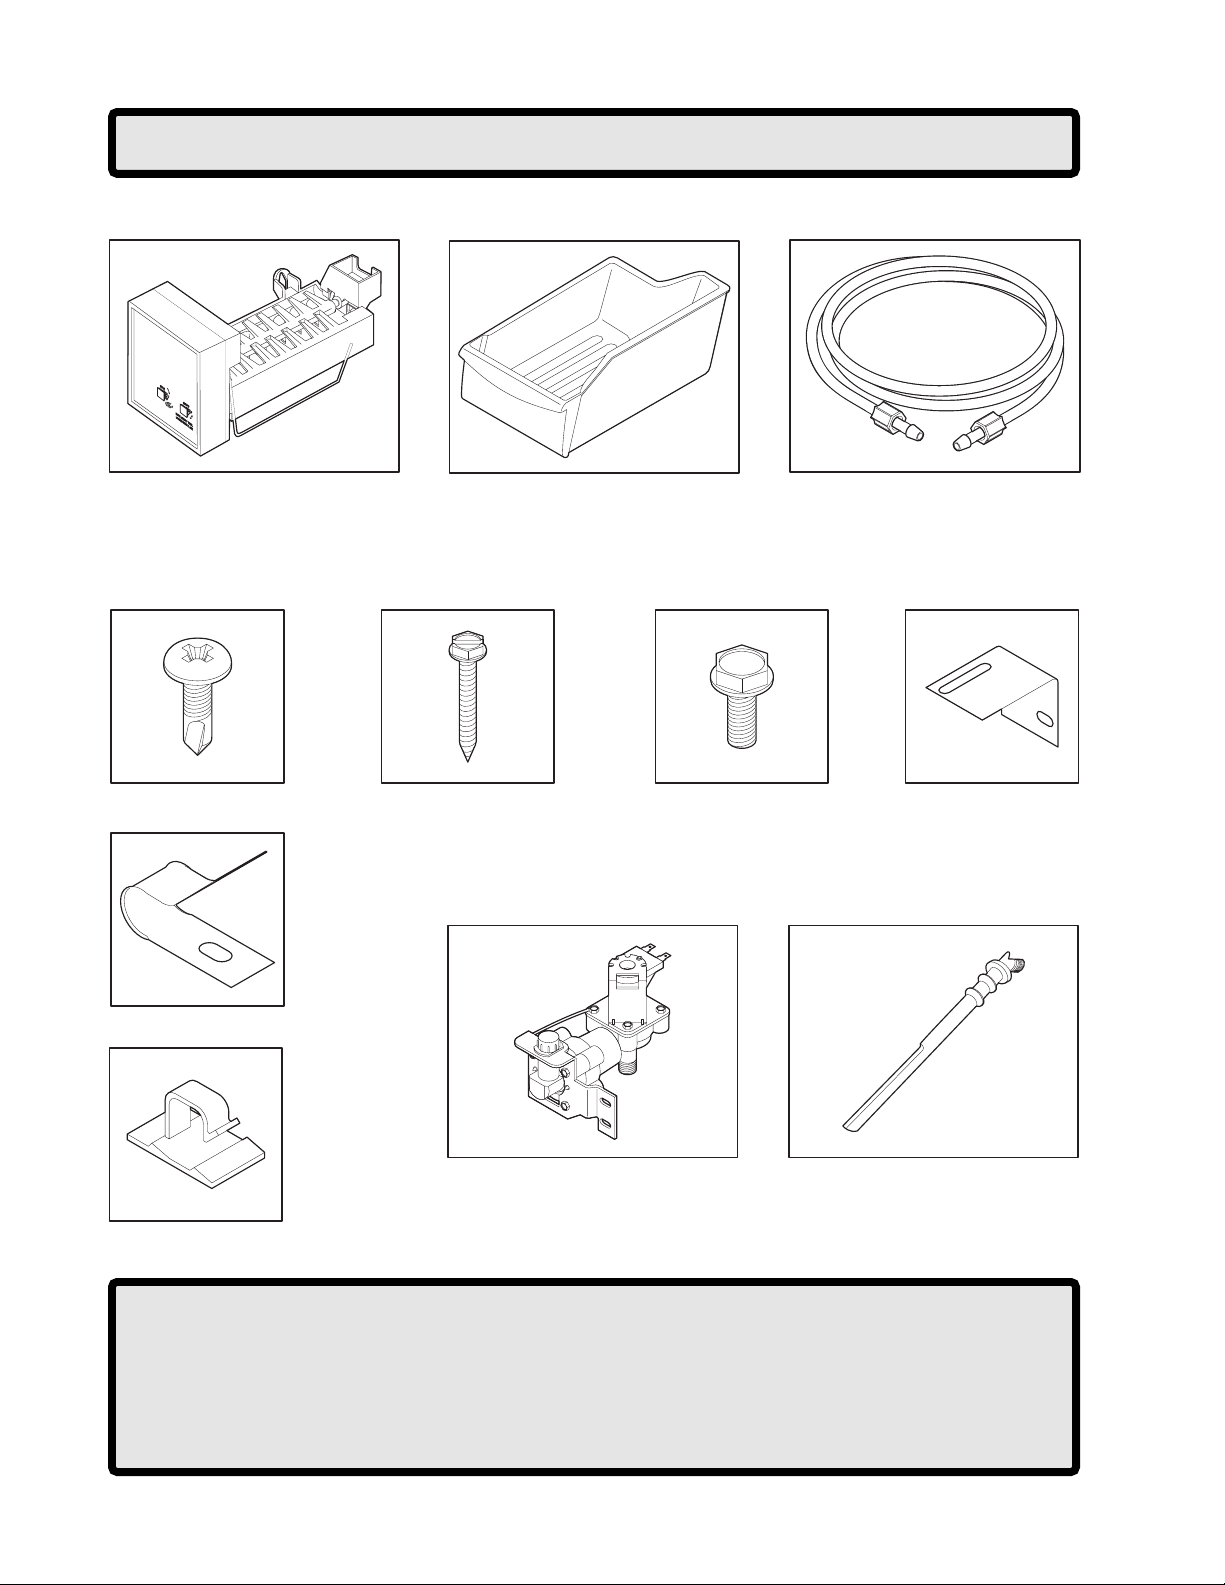
Use This Page to Identify Parts
1. Ice Maker
4. Screws - Qty 2
8. Steel Clamp - Qty 1
2. Ice Container
5. Screws - Qty 2
3. Plastic Water Supply Tubing
6. Leveling Bracket
Screw - Qty 1
7. Leveling Bracket
Qty 1
9. Plastic Clamp - Qty 2
Putty Knife Pliers
¼ inch Socket Wrench Needle Nose Pliers
or Nut Driver Adjustable Wrench
Knife
10. Water Valve - Qty 1
Tools Required:
2
11. Water Inlet Tube - Qty 1
Page 3
1. Unplug refrigerator from wall outlet.
2. Remove ice tray rack from freezer (some models).
3. Remove freezer shelf (some models) by pushing shelf
to left until right side of shelf is out of hole. Slowly lift
up and pull on shelf to remove.
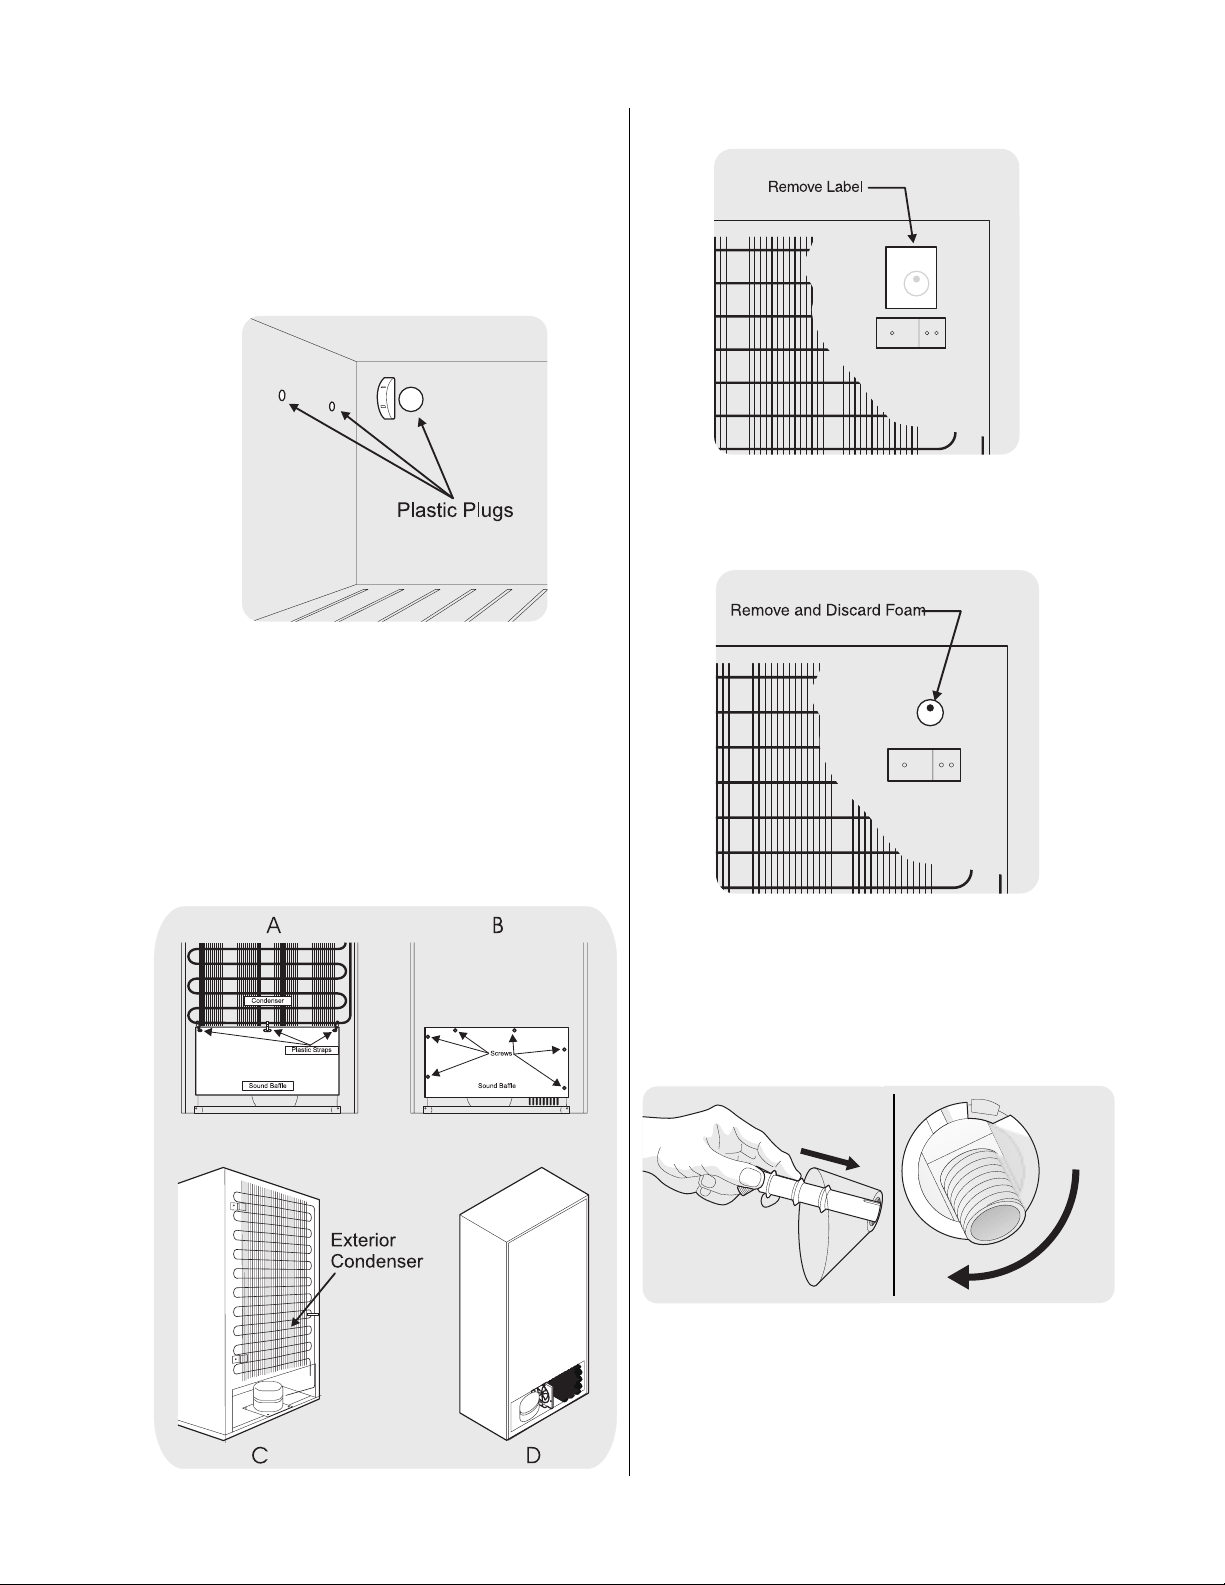
4. Remove plugs from inside freezer compartment
with putty knife.
5. If refrigerator has exterior condenser (C), go to rear of
refrigerator and locate left condenser mounting bracket
screw(s). Remove and save screws. DO NOT remove
compressor sound baffle (A), if installed.Carefully bend
condenser out away from back of refrigerator.
If condenser is mounted inside compressor
compartment (D), remove screws securing
sound baffle to cabinet (B).
6. Peel off label covering ice maker hole.
7. With needle nose pliers, remove foam from hole.
8. Push water inlet tube into small hole on back of
refrigerator. Rotate while inserting tube until flat
surface of inlet tube is tight against back of
refrigerator.
3
Page 4

9. Push plastic water supply tubing (3) into water inlet
tube (11) as far as it will go and finger tighten nylon
compression nut onto threaded end of inlet tube.
Tighten another one half turn with a wrench. DO NOT
over tighten.
12. With ice maker in one hand, plug ice maker
connector into connector mounted on back freezer
panel. Make sure connection is tight.
10. Install adjustable leveling bracket (7) on bottom of
ice maker with screw (6). DO NOT tighten bracket.
(Bracket will be tightened later.)
11. Start two, long, ice maker mounting screws (5) into
freezer wall. Turn each screw five turns clockwise.
13. Mount ice maker onto two screws (5) you installed
in Step 12.Tighten screws. Make sure water inlet
tube (11) is sitting inside fill cup.
14. Adjust leveling bracket (7) to level ice maker (1). Ice
maker is level when gap between freezer wall and
ice maker is same at top and bottom. Tighten screw
(6) when level.
4
Page 5

15. Reinstall freezer shelf in lower position. Set ice
container (2) on shelf.
18. Push plastic water supply tubing into bottom of water
valve as far as it will go. Finger tighten nylon
compression nut onto threaded end of water valve.
Tighten another one half turn with wrench. DO NOT
over ti gh te n.
16. Locate factory punched holes at bottom right corner
of rear panel. Holes are only drilled through cabinet
liner. Align water valve bracket with factory drilled
holes. Use a power drill with a Phillips® head bit to
drive the two self drilling screws (4) through bracket
and into cabinet.
17. Connect wiring harness to water valve. Make sure
connection is tight.
19. Secure plastic water tubing to rear of cabinet with
two plastic clamps (9).
NOTE: Clean back of cabinet with a commercial
household cleaner, ammonia or alcohol before
applying clamps.
20. On models with exterior condenser, reinstall
condenser brackets and tighten down screws.
21. On refrigerators with dynamic condensers, remount
sound baffle, if installed. See step 5.
5
Page 6

Connecting Ice Maker to Water Supply
To avoid electric shock, which can cause death or severe personal injury, disconnect the refrigerator
from electrical power before connecting a water supply line to the refrigerator.
To Avoid Property Damage:
Copper tubing is recommended for the water supply line. Water supply tubing made of
recommended since it greatly increases the potential for water leaks. Manufacturer will not be responsible for any
damage if plastic tubing is used for supply line.
DO NOT install water supply tubing in areas where temperatures fall below freezing.
Connect the ice maker to a potable water source that is not tied into a water softening system. Chemicals from the
softener may damage the ice maker, causing it to malfunction.
IMPORTANT: Ensure that your water supply line connections comply with all local plumbing codes.
Before Installing The Water Supply Line, You Will Need
Basic tools: adjustable wrench, flat blade screwdriver, and PhillipsTM screwdriver.
Access to a household cold water line with water pressure between 20 and 120 psi.
A water supply line made of 1/4 inch (6.4 mm) OD, copper tubing. To determine the length of copper tubing
needed, you will need to measure the distance from the ice maker inlet valve at the back of the refrigerator to your
cold water pipe. Then add approximately 7 feet (2.1 meters), so the refrigerator can be moved out for cleaning.
A shutoff valve to connect the water supply line to your household water system. DO NOT use a self-piercing type
shutoff valve.
1/4 inch plastic is not
A compression nut and ferrule (sleeve) for connecting the water supply line to the ice maker inlet valve.
NOTE: Water line kit number 5303917950, available from your appliance dealer at additional cost, contains 25
feet (7.6 meters) of 1/4 inch OD copper tubing, a saddle type shutoff valve (nonpiercing), (2) 1/4 inch brass
compression nuts, (2) ferrules/sleeves, and instructions for installing a water supply line.
To Connect Water Supply Line To Ice Maker Inlet Valve
1. Disconnect refrigerator from electric power supply.
2. Place end of water supply line into sink or bucket. Turn ON water
supply and flush supply line until water is clear. Turn OFF water
supply at shutoff valve.
3. Unscrew plastic cap from water valve inlet and discard cap.
4. Slide brass compression nut, then ferrule (sleeve), onto water supply
line, as shown.
5. Push water supply line into water valve inlet as far as it will go (1/4
inch). Slide ferrule (sleeve) into valve inlet and finger tighten
compression nut onto valve.Tighten another half turn with a wrench;
DO NOT over tighten.
6. With steel clamp and screw, secure water supply line to rear panel
of refrigerator at location as shown.
7. Coil excess water supply line (about 2-1/2 turns) behind
refrigerator as shown and arrange coils so they do not vibrate or
wear against any other surface.
8. Turn ON water supply at shutoff valve and tighten any
connections that leak.
9. Reconnect refrigerator to electric power supply.
10.To turn ice maker on, lower wire signal arm. (See ice maker front cover for on/off position of arm.)
IMPORTANT: It takes approximately 24 hours for the ice maker to begin producing ice. Air in new plumbing
lines may cause ice maker to cycle two or three times before making a full tray of ice. New plumbing may cause
ice to be discolored or have poor flavor. Discard ice made during the first 24 hours.
6
Page 7

Automatic Ice Maker Tips
Remember that water quality determines your ice quality. Do not connect
the ice maker to water that is softened. Chemicals from a malfunctioning
softener can damage the ice maker.
To stop the ice maker, lift the wire signal arm until it clicks and locks in the
up or OFF position. The ice maker turns off automatically when the ice
container is full. If your model has an adjustable freezer shelf, place the
shelf so the wire signal arm will hit the ice when the ice container is full.
Ice Maker Tips
Ice stored too long may develop an odd flavor. Empty the container and be sure the wire signal arm is in its
down or ON position. The ice maker will then produce more ice.
Occasionally shake the container to keep ice separated.
Keep the wire signal arm in its up or OFF position until the refrigerator is connected to the water supply or
whenever the water supply is turned off.
The following sounds are normal when the ice maker is operating.
Motor running
Ice loosening from tray
Ice dropping into ice container
Running water
Water valve opening or closing
DO NOT place the ice container in your dishwasher.
Wash ice container in warm water with mild detergent. Rinse well and dry.
Stop the ice maker when cleaning the freezer or for short vacations.
If the ice maker will be turned off for a long period of time, turn the water supply valve to the closed position.
7
 Loading...