

Frigidaire Gallery GLHT188WH, Professional PHT189WHSM, GLHT188WHB - 18.3 cu. Ft. Top-Freezer Refrigerator, GLHT188WHB Use And Care Manual

Use & Care Manual
Top Mount
Refrigerator
Welcome 2
Safety Instructions
Installation --
Optional Ice Maker To Water Supply
Do r Removalo
Features at a Glance
Temperature Controls
Looking Inside
Includes Connecting
3
4 - 5
6
7
7 - 8
8 - 10
Español
READ AND SAVE THESE INSTRUCTIONS
19
Water Dispenser
& Ice Service
Food Storage
& Energy Saving Tips
Normal Operating Sounds
Care & Cleaning
Warranty
Before You Call
10 - 12
15 - 16
P/N 241815000 (Jan 2007)
13
14
17
18
WELCOME & CONGRATULATIONS
Congratulations on your purchase of a new refrigerator! We here
at Electrolux Home Products, Inc. are very proud of our product
and we are completely committed to providing you with the best
service possible. Your satisfaction is our #1 priority.
Please read this Use & Care Manual very carefully. It contains
valuable information on how to properly maintain your new
refrigerator.
We know you’ll enjoy your new refrigerator and Thank You for
choosing our product. We hope you consider us for future
purchases.
PLEASE READ AND SAVE THESE INSTRUCTIONS
This Use & Care Manual provides specific operating instructions
for your model. Use your refrigerator only as instructed in this
manual. These instructions are not meant to cover every possible
condition and situation that may occur. Common sense and
caution must be practiced when installing, operating and
maintaining any appliance.
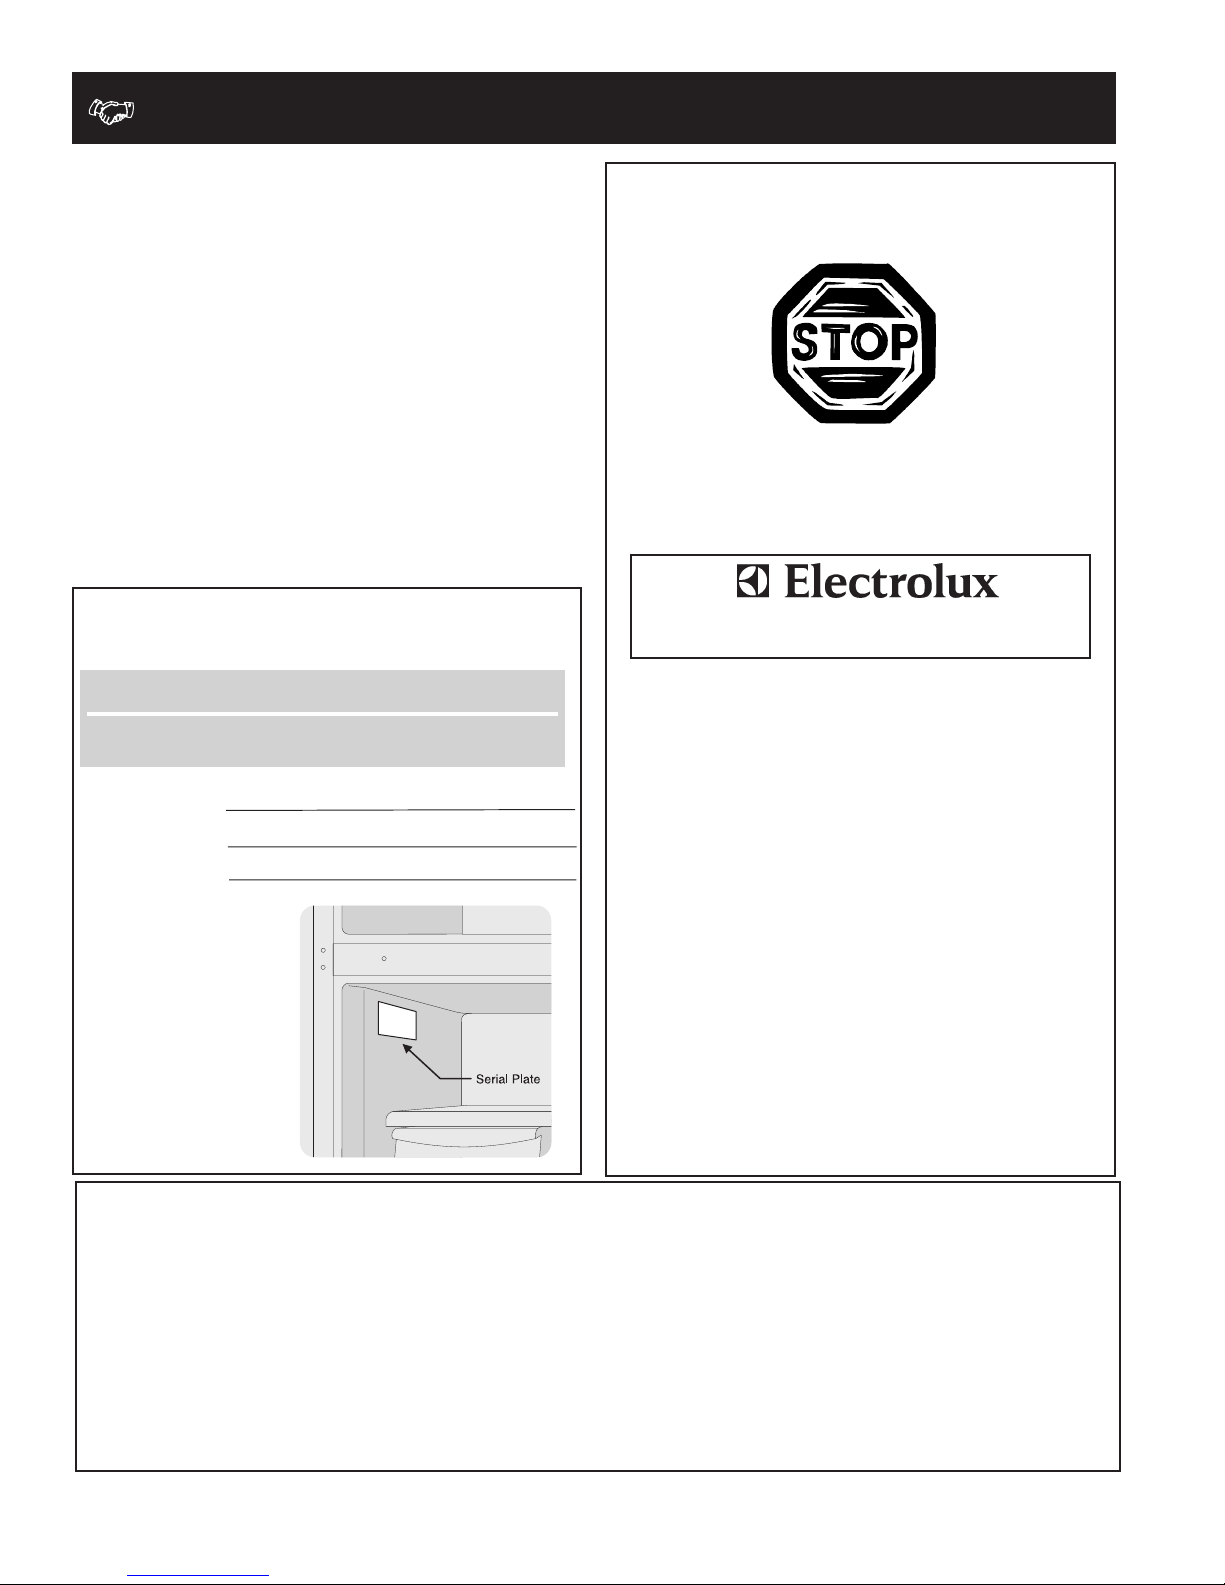
Please record your model and serial numbers below for
future reference. This information is found on the serial
plate located inside the refrigerator compartment.
Got Questions?
Need Parts or Service?
Before Calling Your
Local Repair Service -
CALL:
Solutions Hotline
NOTENOTE
NOTE
NOTENOTE
Use only soap and water to clean serial plate.
Model Number:
Serial Number:
Purchase Date:
Please complete and
mail in the Product
Registration Card
included with your
refrigerator
.
Extend Your Warranty Protection With An
CALL 1-800-944-9044 To Enjoy These Benefits:
(United States)
1-800-944-9044
(Canada)
1-800-668-4606
√√
√ Resolve many service issues over the
√√
phone at your convenience!
√√
√ If we cant resolve your service issue,
√√
we’ll schedule a reputable local
service technician for you!
√√
√ Order Guenine Electrolux Parts &
√√
Accessories
√√
√ Purchase Extended Warranty
√√
Protection
Extended Service Contract
• Total freedom from repair bills so unexpected repairs won’t upset your budget.
• Fast, convenient toll-free service is just a phone call away.
• Top-quality repairs by factory-trained experts.
• Quick access to genuine replacement parts so you can rest assured your refrigerator is
repaired with the proper components.
2
IMPORTANT SAFETY INSTRUCTIONS
WARNING WARNING
WARNING
WARNING WARNING
Please Read All Instructions Before Using This
Refrigerator.
FOR YOUR SAFETY
• Do not store or use gasoline, or other flammable liquids
in the vicinity of this or any other appliance. Read product
labels for warnings regarding flammability and other
hazards.
• Do not operate the refrigerator in the presense of
explosive fumes.
• Avoid contact with any moving parts of automatic ice
maker.
• Remove all staples from the carton. Staples can cause
severe cuts, and also destroy finishes if they come in
contact with other appliances or furniture.
CHILD SAFETY
Destroy or recycle the carton, plastic bags, and any exterior
wrapping material immediately after the refrigerator is
unpacked. Children should NEVER use these items to play.
Cartons covered with rugs, bedspreads, plastic sheets or
stretch wrap may become airtight chambers, and can quickly
cause suffocation.
WARNING WARNING
WARNING
WARNING WARNING
These Guidelines Must Be Followed To Ensure That Safety
Mechanisms In This Refrigerator Will Operate Properly.
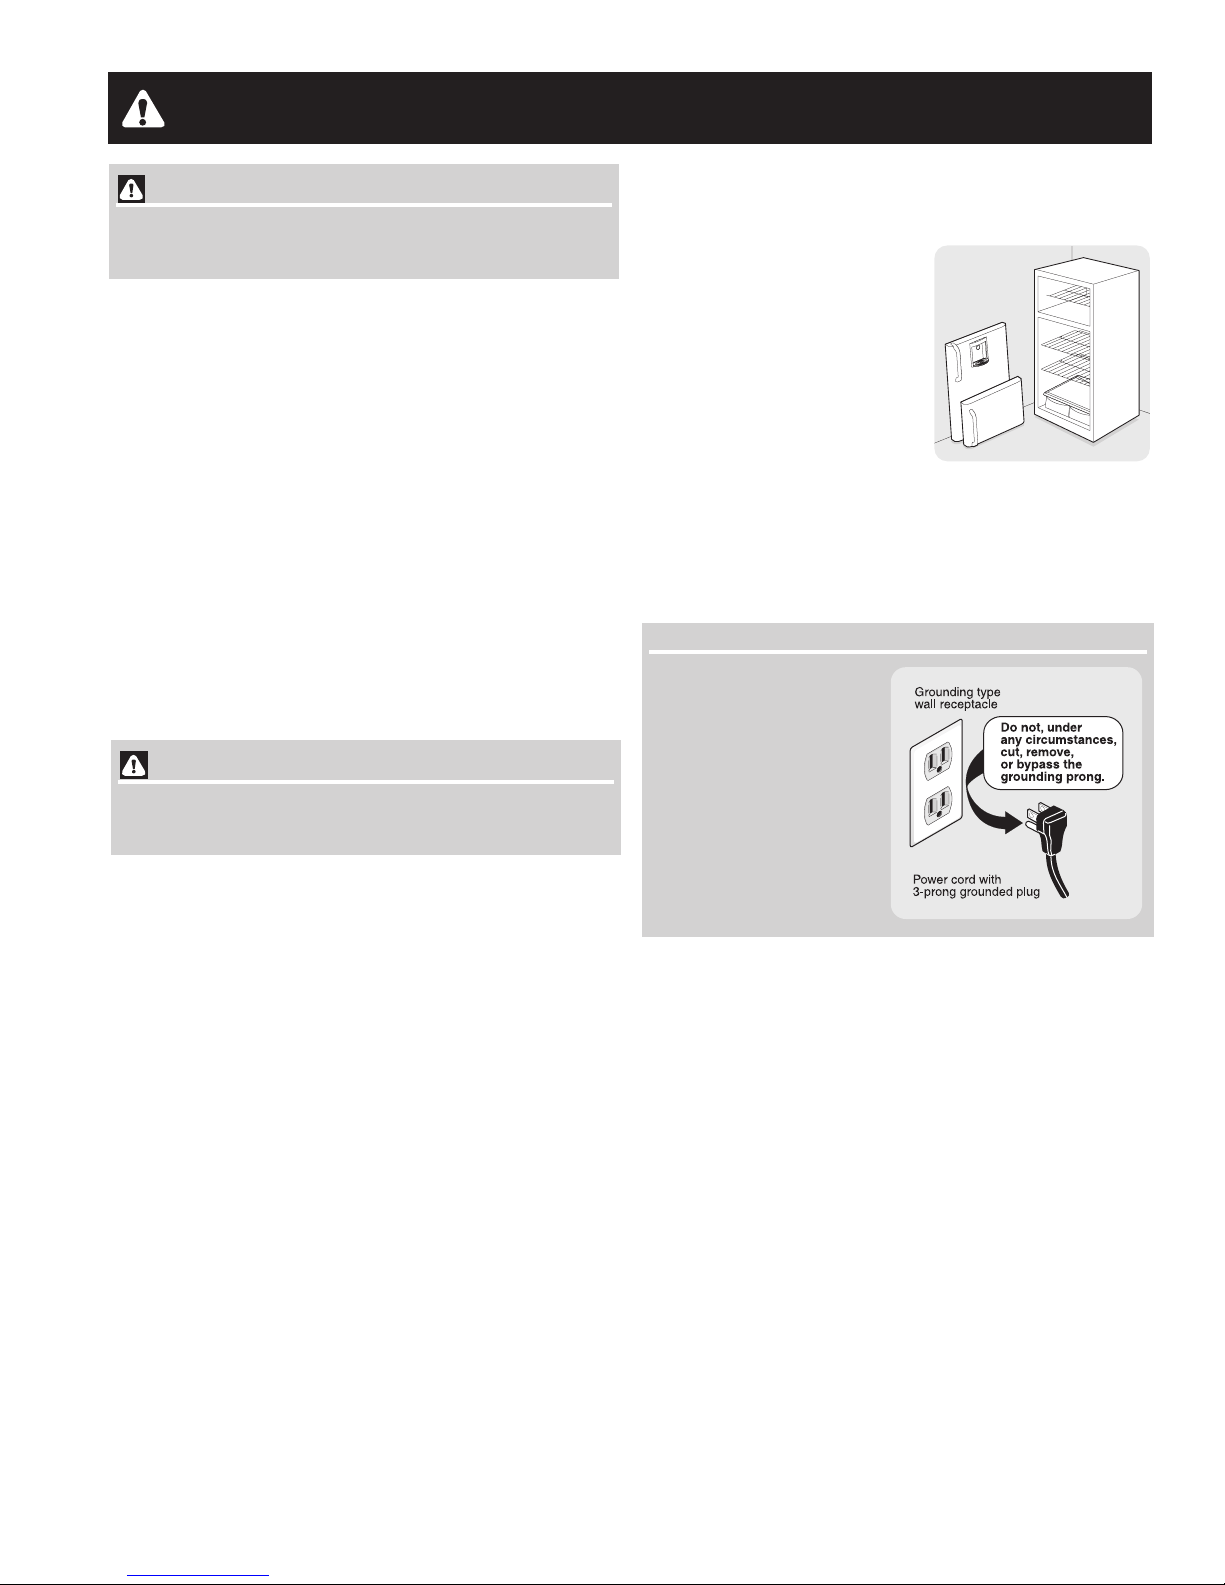
ELECTRICAL INFORMATION
• The refrigerator must be plugged into its own dedicated
115 Volt, 60 Hz., AC only electric outlet. The power cord
of the appliance is equipped with a three-prong grounding
plug for your protection against electrical shock hazards. It
must be plugged directly into a properly grounded threeprong receptacle. The receptacle must be installed in
accordance with local codes and ordinances. Consult a
qualified electrician. Do not use an extension cord or
adapter plug.
• If the power cord is damaged, it should be replaced by the
manufacturer, service technician or a qualified person to
prevent any risk.
• Never unplug the refrigerator by pulling on the power
cord. Always grip the plug firmly, and pull straight out
from the receptacle to prevent damaging the power cord.
• Unplug the refrigerator before cleaning and before
replacing a light bulb to avoid electrical shock.
• Performance may be affected if the voltage varies by 10%
or more. Operating the refrigerator with insufficient power
can damage the compressor. Such damage is not covered
under your warranty.
• Do not plug the unit into an outlet controlled by a wall
switch or pull cord to prevent the refrigerator from being
turned off accidentally.
• Avoid connecting refrigerator to a Ground Fault Interruptor
(GFI) circuit.
PROPER DISPOSAL OF YOUR REFRIGERATOR OR
FREEZER
Risk of child entrapment
Child entrapment and
suffocation are not problems of
the past. Junked or abondoned
refrigerators or freezers are still
dangerous – even if they will sit
for “just a few days.” If you are
getting rid of your old refrigerator
or freezer, please follow the
instructions below to help
prevent accidents.
Before you throw away your old refrigerator/ freezer:
• Remove doors.
• Leave shelves in place so children may not easily climb
inside.
• Have refrigerant removed by a qualified service
technician.
IMPORTANT
Turning the Freezer and
Fresh Food Controls to “0”
turns off the compressor
and prevents your
refrigerator from cooling,
but does not disconnect the
power to the light bulb and
other electrical
components. To turn off
power to your refrigerator
you must unplug the power
cord from the wall outlet.
3

INSTALLATION
This Use & Care Manual provides specific operating
instructions for your model. Use the refrigerator only as
instructed in this Use & Care Manual. Before starting the
refrigerator, follow these important first steps.
LOCATION
• Choose a place that is near a grounded electrical outlet.
Do Not use an extension cord or an adapter plug.
• If possible, place the refrigerator out of direct sunlight
and away from the range, dishwasher or other heat
sources.
• The refrigerator must be installed on a floor that is level
and strong enough to support a fully loaded refrigerator.
• Consider water supply availability for models equipped
with an automatic ice maker.
INSTALLATION
CAUTION CAUTION
CAUTION
CAUTION CAUTION
Do Not install the refrigerator where the temperature will
drop below 55°F (13°C) or rise above 110°F (43°C). The
compressor will not be able to maintain proper
temperatures inside the refrigerator.
Do Not block the toe grille on the lower front of your
refrigerator. Sufficient air circulation is essential for the
proper operation of your refrigerator.
DOOR OPENING
Your refrigerator should be positioned to allow easy access to
a counter when removing food. To make this possible, the
direction in which the doors open can be reversed. See
Removal & Reversal Instructions
NOTENOTE
NOTE
NOTENOTE
If your refrigerator is placed with the door hinge side against
a wall, you may have to allow additional space so the door
can be opened wider.
.
Door
LEVELING
All four corners of your refrigerator must rest firmly on a solid
floor. Your refrigerator is equipped with adjustable front rollers
or front leveling screws to help level your unit.
To Level Your Refrigerator:
1. Remove toe grille.
2. Use flat-blade screwdriver
or 3/8” socket wrench to
adjust front rollers. Use
adjustable wrench to
adjust leveling screws.
NOTENOTE
NOTE
NOTENOTE
IMPORTANT
If you install your refrigerator in a garage or other unheated
area, you may experience freezer temperature problems
during the winter months when temperatures dip below
55° F.
Upgrading your refrigerator with a Garage Kit will lower the
minimum operating temperature of your unit to 34° F. This kit
can be ordered through the
back cover).
Electrolux Solutions Hotline
Installation Clearances
• Allow the following clearances for ease of installation,
proper air circulation, and plumbing and electrical
connections:
Sides & Top 3/8”
Back 1”
NOTENOTE
NOTE
NOTENOTE
If you see black coils/tubing on the back of your refrigerator
(air-cooled condenser) leave 3” clearance at top of
refrigerator.
(see
Raise the front of the refrigerator enough so the doors close
freely when opened halfway. The refrigerator should slope ¼”
to ½” from front to back. Then level the refrigerator from side
to side.
Raise
Adjustable Front Roller
(some models)
Stationary Front Roller
with Leveling Screw
(some models)
WATER DISPENSER DRIP TRAY
The drip tray for your
refrigerator’s water
dispenser comes from the
factory detached. Its
removal also allows easy
cleaning. To install the drip
tray, fit it into the bottom of
the dispenser bay and snap
into place.
4
CONNECTING HOUSEHOLD WATER SUPPLY TO REFRIGERATOR
WARNING WARNING
WARNING
WARNING WARNING
To avoid electric shock, which can cause death or severe
personal injury, disconnect the refrigerator from electrical
power before connecting a water supply line to the
refrigerator.
CAUTION CAUTION
CAUTION
CAUTION CAUTION
To Avoid Property Damage:
• Copper tubing is recommended for the water supply
line. Water supply tubing made of ¼” plastic is not
recommended since it greatly increases the potential
for water leaks. Manufacturer will not be responsible
for any damage if plastic tubing is used for supply
line.
• DO NOT install water supply tubing in areas where
temperatures fall below freezing.
• Chemicals from a malfunctioning softener can
damage the ice maker. If the ice maker is connected
to soft water, ensure that the softener is maintained
and working properly.
IMPORTANT
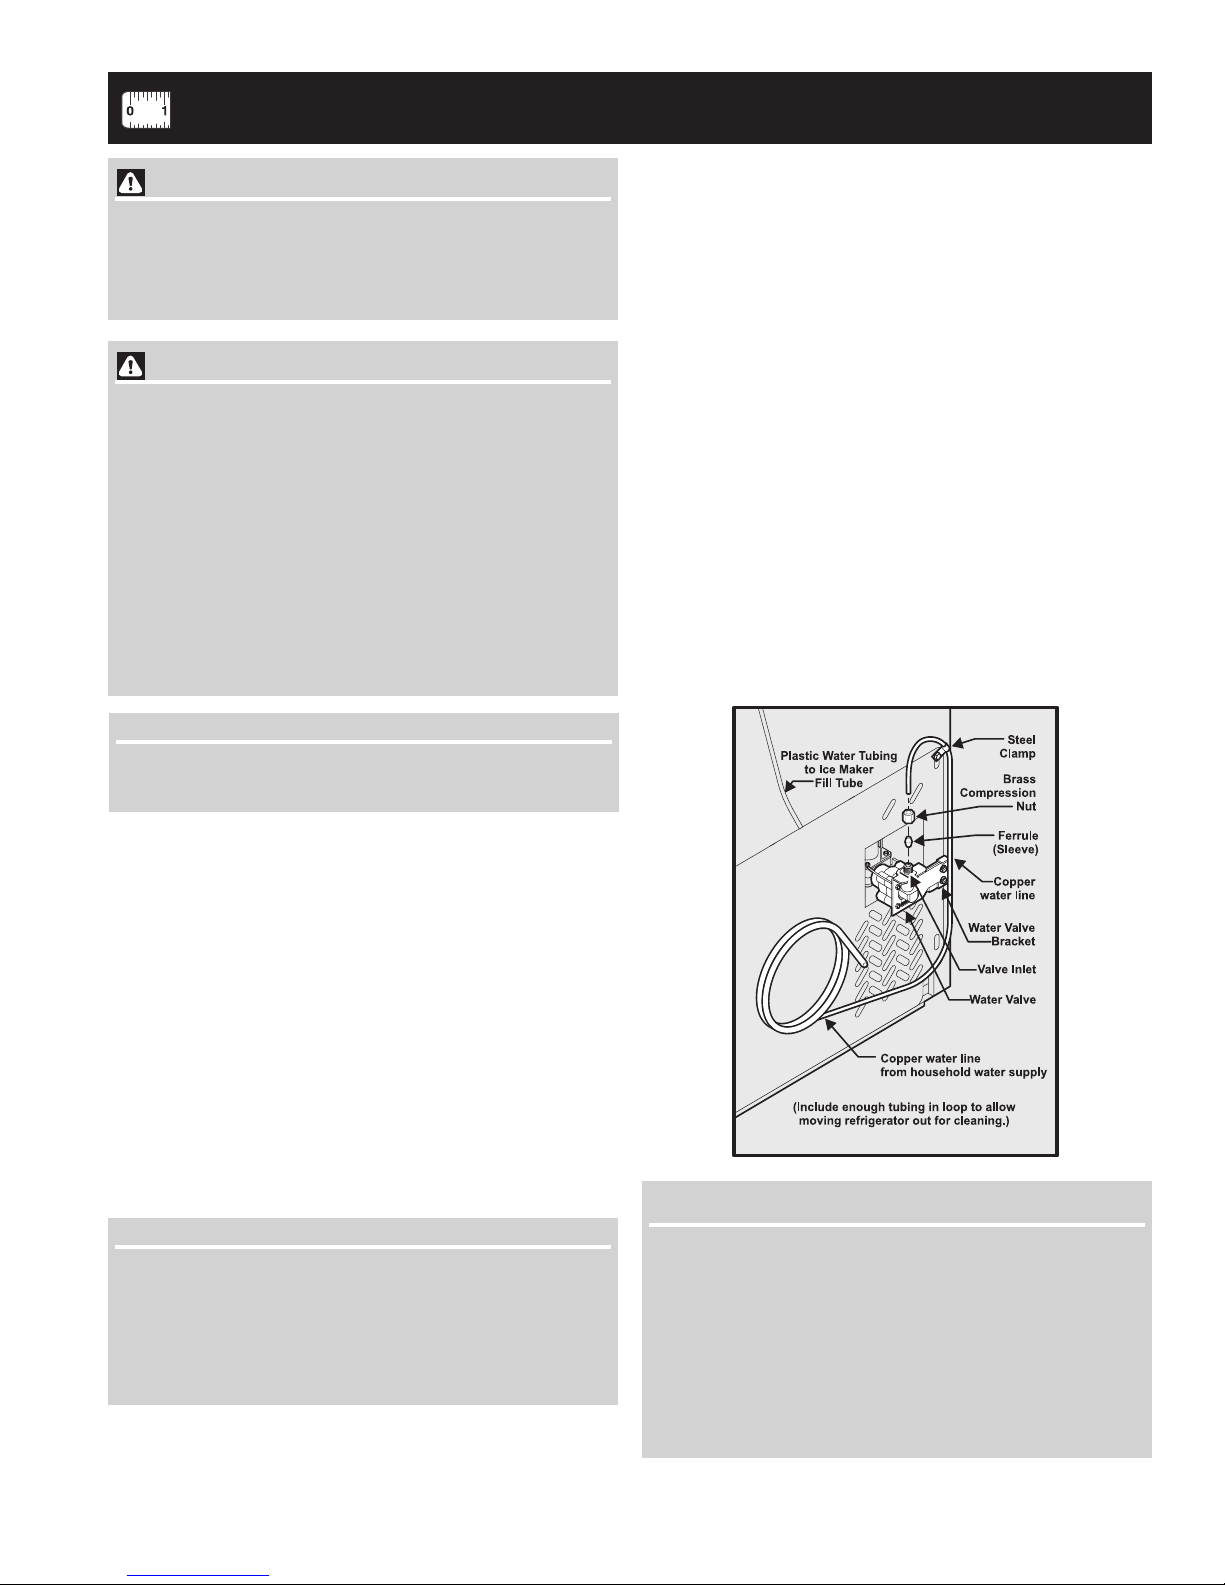
To Connect Water Supply Line To Ice Maker Inlet Valve
1. Disconnect refrigerator from electric power source.
2. Place end of water supply line into sink or bucket. Turn ON
water supply and flush supply line until water is clear. Turn
OFF water supply at shutoff valve.
3. Unscrew plastic cap from water valve inlet and discard
cap.
4. Slide brass compression nut, then ferrule (sleeve) onto
water supply line, as shown.
5. Push water supply line into water valve inlet as far as it
will go (¼ inch). Slide ferrule (sleeve) into valve inlet and
finger tighten compression nut onto valve. Tighten another
half turn with a wrench; DO NOT over tighten.
6. With steel clamp and screw, secure water supply line to
rear panel of refrigerator as shown.
7. Coil excess water supply line (about 2½ turns) behind
refrigerator as shown and arrange coils so they do not
vibrate or wear against any other surface.
8. Turn ON water supply at shutoff valve and tighten any
connections that leak.
9. Reconnect refrigerator to electrical power source.
10. To turn ice maker on, lower wire signal arm (see ice
maker front cover for ON/OFF position of arm).
Ensure that your water supply line connections comply with
all local plumbing codes.
Before Installing The Water Supply Line, You Will Need
• Basic Tools: adjustable wrench, flat-blade screwdriver,
and PhillipsTM screwdriver
• Access to a household cold water line with water pressure
between 30 and 100 psi.
• A water supply line made of ¼ inch (6.4 mm) OD, copper
tubing. To determine the length of copper tubing needed,
you will need to measure the distance from the ice maker
inlet valve at the back of the refrigerator to your cold water
pipe. Then add approximately 7 feet (2.1 meters), so the
refrigerator can be moved out for cleaning (as shown).
• A shutoff valve to connect the water supply line to your
household water system. DO NOT use a self-piercing type
shutoff valve.
• A compression nut and ferrule (sleeve) for connecting the
water supply line to the ice maker inlet valve.
NOTENOTE
NOTE
NOTENOTE
Water line kit number 5303917950, available from your
appliance dealer at additional cost, contains 25 feet (7.6
meters) of ¼ inch OD copper tubing, a saddle type shutoff
valve (nonpiercing), (2) ¼ inch brass compression nuts, (2)
ferrules/sleeves, and instructions for installing a water supply
line.
IMPORIMPOR
IMPOR
IMPORIMPOR
After connecting the water supply, refer to
the Water Supply System”
priming an empty water supply system.
Your refrigerator’s water supply system includes
several tubing lines, a water filter, a water valve and a
water tank. To ensure that your water dispenser works
properly, this system must be completely filled with
water when your refrigerator is first connected to the
household water supply line.
TT
ANTANT
T
ANT
TT
ANTANT
“How to Prime
for important information about
5
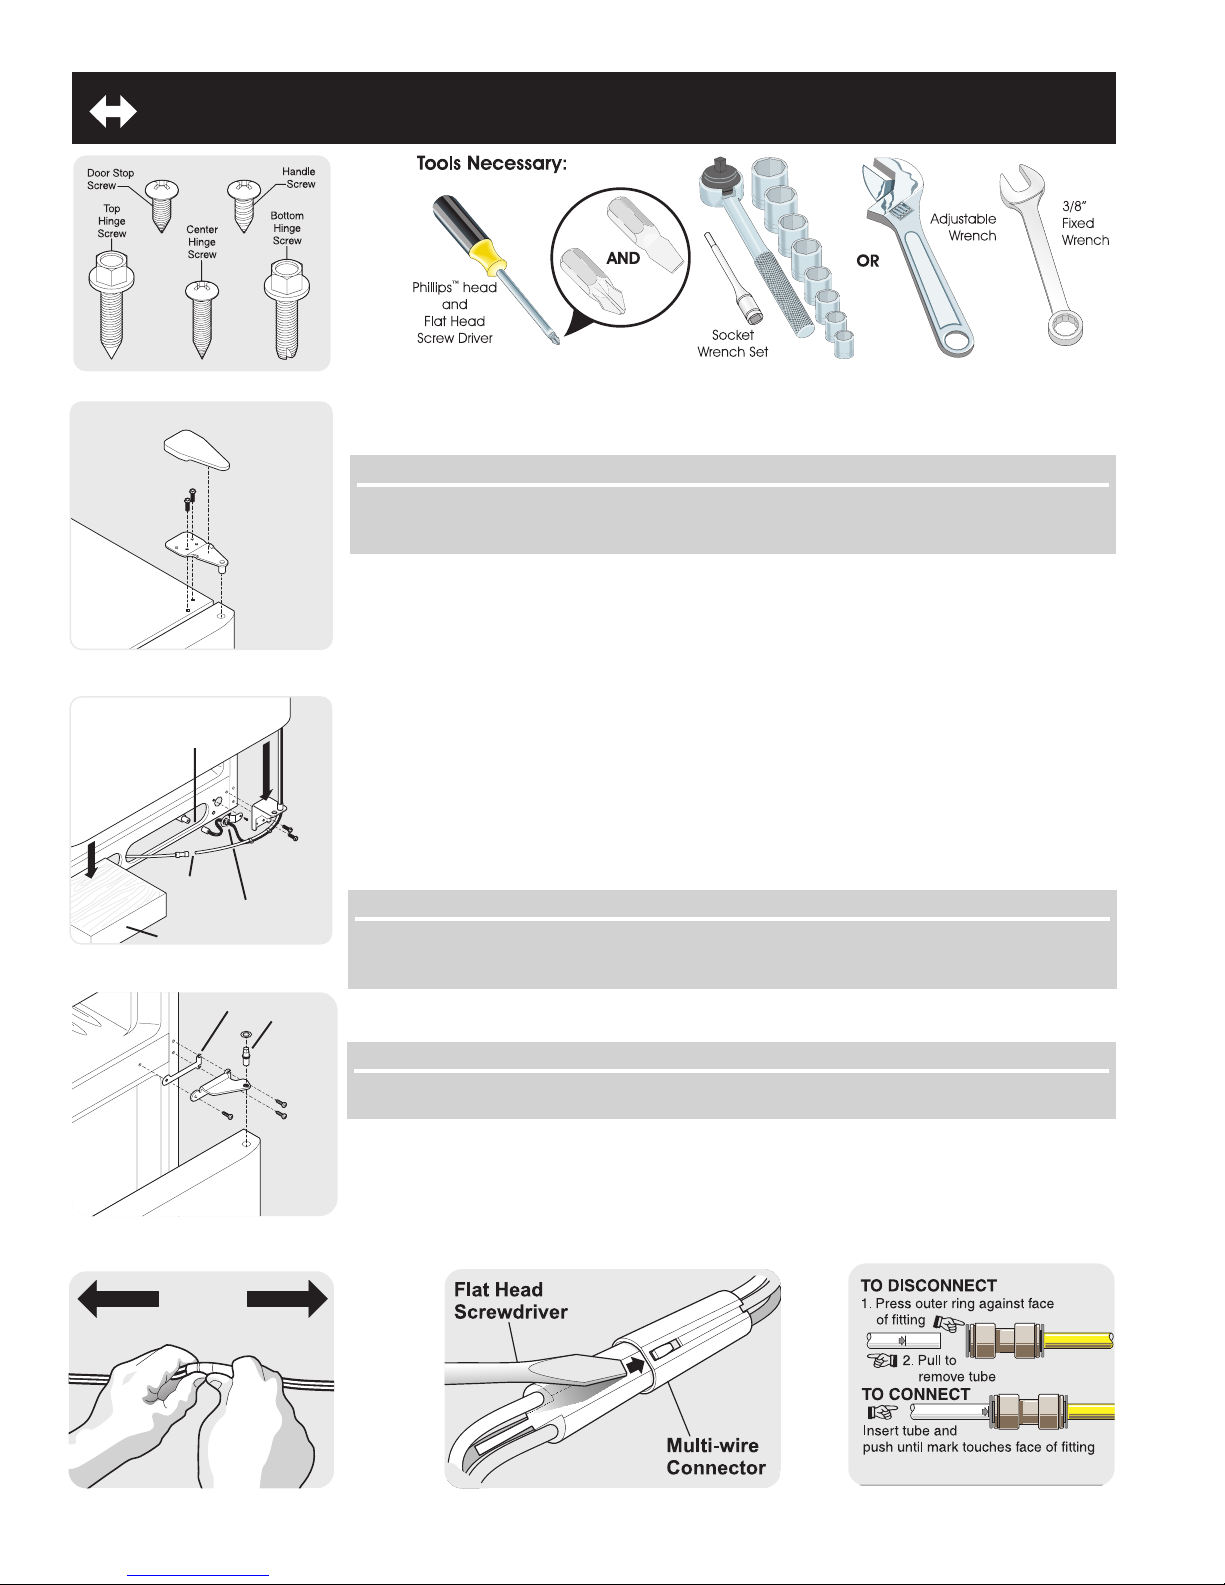
Cable
Water
Tube
Cable Bracket
Wood Block
Top Hinge
Cover
Top Hinge
Bottom
Hinge
DOOR REMOVAL
DOOR REMOVAL INSTRUCTIONS:
If your refrigerator will not fit through an entrance area, you can reduce its size by removing the
doors. Check first by measuring the entrance.
IMPORTANT
Before you begin, turn the refrigerator temperature control to “0” and remove the electrical
power cord from the wall outlet. Remove food from door shelves.
1. Disconnect electrical supply.
2. Remove toe grille (see page 4 to learn how).
To remove freezer door:
1. Remove top hinge cover .
2. Trace around the hinge with a soft lead pencil. This makes reinstallation easier.
3. Remove top hinge and lift door off center hinge pin.
4. Reverse this procedure to reinstall freezer door.
To remove refrigerator door:
1. Place wood block under door to support its weight.
2. Unfasten the multi-wire cable bracket by removing its screw from the cabinet.
3. Detach the multi-wire cable connector located below the door.
Place your thumbs on flat sides of each connector, grasp firmly, and bend both ends back
and forth while pulling apart.
NOTENOTE
NOTE
NOTENOTE
You may need to insert a flat screwdriver between the connector ends to release the
locking tab (see illustration).
Shim
Pin
Center
Hinge
4. Detach the water tube from the connector located below the door. The connector
releases when you press its outer sleeve inward.
NOTENOTE
NOTE
NOTENOTE
If refrigerator has been used, have a container ready to catch excess water from tube.
5. Remove the bottom hinge screws and hinge, holding the door as its weight rests on the
wood block. Lay the door on its side to avoid damage to cable and tube.
6. Remove the center hinge screws and hinge. Ensure plastic washer stays on hinge pin.
7. Reverse this procedure to reinstall refrigerator door. When both doors are reinstalled,
connect water line by inserting tube and pushing until mark touches face of fitting.
Connect cable, replace toe grille, and plug in electrical power cord.
6
 Loading...