

Frigidaire GLET1142CS0, GLET1031CS - 27"" Electric Stack Washer Dryer Combo Owner's Manual
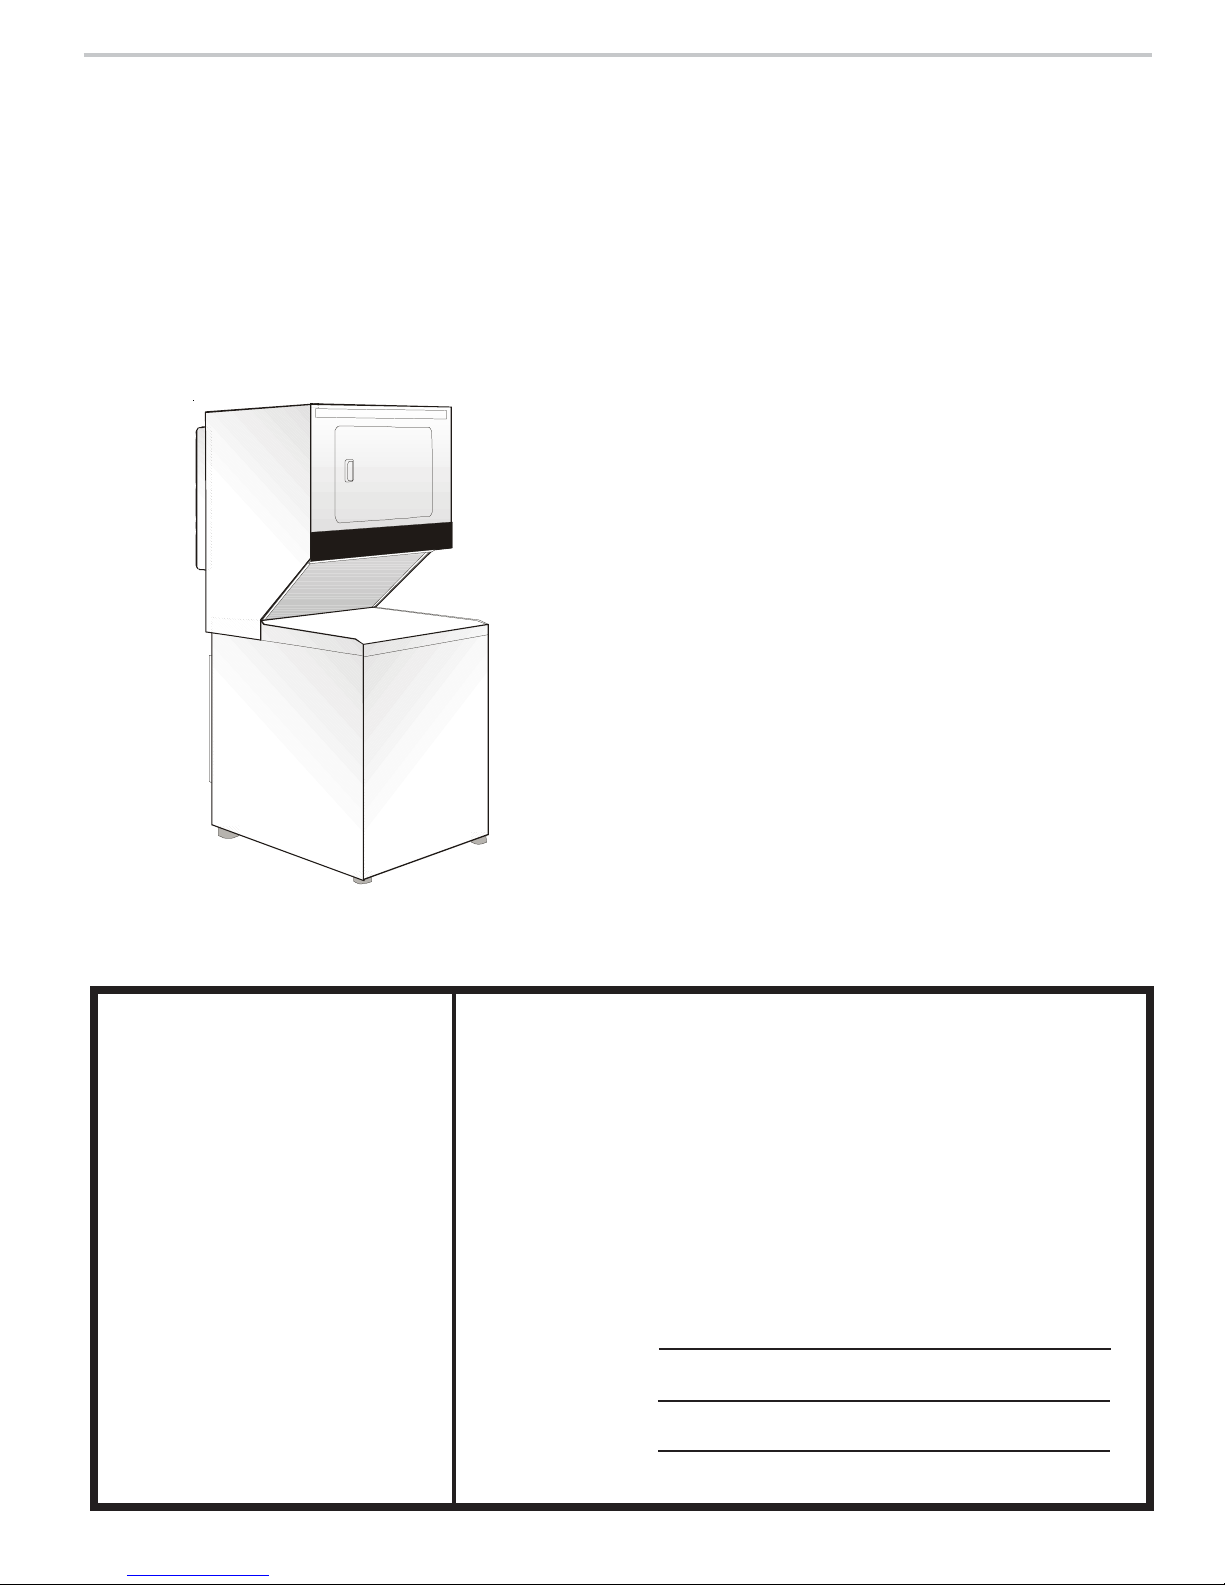
LAUNDRY CENTER
Owner's Guide
LAVADORA Y SECADORA
SUPERPUESTAS
Manual Del Usuario
Important Safety Instructions...........................................2
Washing Procedures.....................................................3-4
Stain Removal..................................................................5
Common Washing Problems..........................................6
Drying Procedures ...........................................................7
Features ............................................................................8
Commom Drying Problems.............................................8
Care and Cleaning.....................................................9-10
Avoid Service Checklist...........................................10-12
Warranty and Service....................................................13
Español.....................................................................14-27
Instrucciones Importantes de Seguridad................14-15
Métodos de Lavado ................................................16-18
Limpieza de Manchas..............................................18-19
Problemas Comunes del Lavado..................................20
Métodos de Secado.......................................................21
Caracteristicas................................................................22
Problemas Comunes de Secado...................................22
Cuidado y Limpieza ................................................23-24
Lista de Control de Averías.....................................24-26
GarantÍa..........................................................................27
Table of Contents
Product Registration
Thank you for choosing this
dryer. This owner's guide will
explain proper operation and care.
Register Your Product
The self-addressed PRODUCT
REGISTRATION CARD should be
filled in completely, signed and
returned.
Registro del Producto
Le agradecemos que haya seleccionado esta secadora. En este manual
del usuario encontrará las intrucciones
apropiadas para su funcionamiento y
cuidado.
Registre su Producto
La TARJETA DE REGISTRO DEL
PRODUCTO ya dirigida debe ser
llenada, firmada y enviada.
www.frigidaire.com
Read and Save These Instructions
Record Your Model and Serial Numbers
Record below the model and serial numbers found on the laundry center serial
plate located on the inside of the dryer door. Keep these numbers for future
reference.
Anote su Número de Modelo y de Serie
Anote a continuación el número de modelo y de serie que se encuentran en
la placa de serie situada en el interior de la puerta de la secadora. Conserve
estos números para referencia futura.
Model Number:
Número de Modelo:
Serial Number:
Número de Serie:
Purchase Date:
Fecha de compra:
1
PN 134669000 (0511)
Grounding type
w
grounding plug
to prevent property damage, personal injury or loss of life.
- Do not store or use gasoline or other flammable vapors and liquids in the vicinity of this or any other appliance.
- WHAT TO DO IF YOU SMELL GAS:
Installation and service must be performed by a qualified installer, service agency or the gas supplier.
with other household chemicals such as toilet cleaners,
rust removers, acid or products containing ammonia.
These mixtures can produce dangerous fumes which
can cause serious injury or death.
For your safety, the information in this manual must be followed to minimize the risk of fire or explosion or
• Do not try to light any appliance.
• Do not touch any electrical switch; do not use any phone in your building.
• Clear the room, building or area of all occupants.
• Immediately call your gas supplier from a neighbor's phone. Follow the gas supplier's instructions.
• If you cannot reach your gas supplier, call the fire department.
Do not use or mix liquid chlorine bleach
Important Safety Instructions
Read all instructions before using this laundry center.
Failure to comply with these warnings could result in serious personal injuries.
Prevent Fire
these items on or near the dryer. These substances give off vapors that could ignite or explode.
to catch fire.
or explode.
If the hot water system has not been used for such a period, before using the washer, turn on all hot water faucets and let the water flow from each for several minutes.
This will release any accumulated hydrogen gas. Hydrogen gas is flammable; do not smoke or use an open flame during this time.
Use Air Fluff (No Heat) only.
18 months by qualified service personnel. An excessive amount of lint build-up in these areas could result in inefficient drying and possible fire. See Care and Cleaning.
drying rack, always replace the lint screen when finished using the drying rack.
Failure to comply with these warnings could result in fire, explosion, serious bodily injury and/or damage to the rubber or plastic parts of the laundry center.
Protect Children
grow, teach them the proper, safe use of all appliances.
rugs, bedspreads or plastic sheets can become airtight chambers.
Failure to comply with these warnings could result in serious personal injuries.
Prevent Injury
in accordance with local codes. Installation instructions are packed in the laundry center for the installer's reference. Refer to INSTALLATION INSTRUCTIONS for detailed
grounding procedures. If the laundry center is moved to a new location, have it checked and reinstalled by a qualified service person.
Never ground the laundry center to a gas pipe. Do not use an extension cord or an adaptor plug.
• Do not combine laundry products for use in 1 load unless specified on the label.
• Do not mix chlorine bleach with ammonia or acids such as vinegar.
• All repairs and servicing must be performed by an authorized servicer unless specifically recommended in this Owner's Guide. Use only authorized factory parts.
• Do not tamper with controls.
• Do not install or store the laundry center where it will be exposed to the weather.
or injury.
allow the tub to coast to a complete stop before reaching inside.
A thermal limiter switch automatically turns off the dryer motor in the unlikely event of an overheated situation (electric dryers only). A service technician must replace the
thermal limiter switch after correcting the fault.
The washer is equipped with an electrical overload protector. The motor will stop if it becomes overheated. The washer will automatically restart after a cool down
period of up to 30 minutes, if the washer has not been manually turned off during this time.
Failure to comply with these warnings could result in serious personal injuries.
To reduce the risk of fire, electrical shock, or injury to persons when using this laundry center, comply with the basic warnings listed below.
Do not wash or dry items that have been previously cleaned in, soaked in, or spotted with gasoline, cleaning solvents, kerosene, waxes, etc. Do not store
Do not place items exposed to cooking oils in your dryer. Items contaminated with cooking oils may contribute to a chemical reaction that could cause a load
Do not put oily or greasy rags or clothing on top of the laundry center. These substances give off vapors that could ignite the materials.
Do not add gasoline, cleaning solvents, or other flammable or explosive substances to the wash water. These substances give off vapors that could ignite
Under certain conditions, hydrogen gas may be produced in a hot water system that has not been used for 2 weeks or more. HYDROGEN GAS IS EXPLOSIVE.
To prevent fire, do not use heat to dry items containing plastic, foam rubber or similarly textured rubber-like materials, or items containing feathers or down.
Clean the dryer lint screen before or after each load. The interior of the dryer, lint screen housing and exhaust duct should be cleaned approximately every
Do not operate the dryer if the lint screen is blocked, damaged or missing. Fire hazard, overheating and damage to fabrics can occur. If your dryer has a
Keep area around the exhaust opening and surrounding areas free from the accumulation of lint, dust and dirt.
Do not obstruct the flow of ventilating air. Do not stack or place laundry or throw rugs against the front or back of the laundry center.
Do not spray any type of aerosol into, on or near laundry center at any time.
Do not use fabric softeners or products to eliminate static unless recommended by the manufacturer of the fabric softener or product.
Do not allow children to play on or in the laundry center. Close supervision of children is necessary when the laundry center is used near children. As children
Destroy the carton, plastic bag and other packing materials after the laundry center is unpacked. Children might use them for play. Cartons covered with
Keep laundry products out of children's reach. To prevent personal injury, observe all warnings on product labels.
Before the laundry center is removed from service or discarded, remove the washer lid and dryer door to prevent accidental entrapment.
To prevent shock hazard and assure stability during operation, the laundry center must be installed and electrically grounded by a qualified service person
To prevent personal injury or damage to the laundry center, the electrical power cord of a gas laundry center must be plugged into a properly grounded system.
Follow package directions when using laundry products. Incorrect usage can produce poisonous gas--resulting in serious injury or death.
To prevent serious personal injury and damage to the laundry center:
ALWAYS disconnect the laundry center from the electrical supply before attempting any service or cleaning. Failure to do so can result in electrical shock
Do not use any type spray cleanser when cleaning dryer interior. Hazardous fumes or electrical shock could occur.
To prevent injury, do not reach into the washer while parts are moving. Before loading, unloading or adding items, push in the cycle selector knob and
To prevent injury, do not reach into the dryer if the drum is moving. Wait until the dryer has stopped completely before reaching into the drum.
all receptacle
Grounding type
wall receptacle
Use this way ONLYUse this way ONLY
Use this way ONLY
Use this way ONLYUse this way ONLY
GASGAS
LAUNDRY CENTERS: LAUNDRY CENTERS:
GAS
LAUNDRY CENTERS:
GASGAS
LAUNDRY CENTERS: LAUNDRY CENTERS:
Do not under
Do not under
any circumstances
any circumstances
cut, remove,
cut, remove,
or bypass
or bypass
the grounding prong
the grounding prong
from this plug
from this plug.
CORRECTCORRECT
CORRECT
CORRECTCORRECT
Power supply
cord with 3-prong
2
Power supply
cord with 3-prong
grounding plug
This Owner's Guide provides
general operating instructions
for your laundry center. It also
contains information about
features for several other
models. Your laundry center may
not have every feature included.
Use the laundry center only as
instructed in this Owner's Guide.
Avoid fire hazard or
electrical shock. Do not use an adaptor
plug or extension cord or remove
grounding prong from electrical
power cord. Failure to follow this
warning can cause serious injury, fire
or death.
Note: The instructions appearing
in this Owner's Guide are not meant
to cover every possible condition
and situation that may occur.
Common sense and caution must
be practiced when installing,
operating and maintaining any
appliance.
SAVE THESE INSTRUCTIONS
Printed in U.S.A.
WW
ashing Prashing Pr
W
ashing Pr
WW
ashing Prashing Pr
Sort laundry into loads that can be
washed together.
ocedurocedur
ocedur
ocedurocedur
Empty pockets.
eses
es
eses
• Follow the guidelines below for preparing the wash load.
• Read the Washer Operating Instructions for operating your specific model.
• Always read and follow fabric care and laundry product labels.
To reduce the risk of fire, electrical shock, or injury to persons, read
Important Safety Instructions, page
2, before operating this washer.
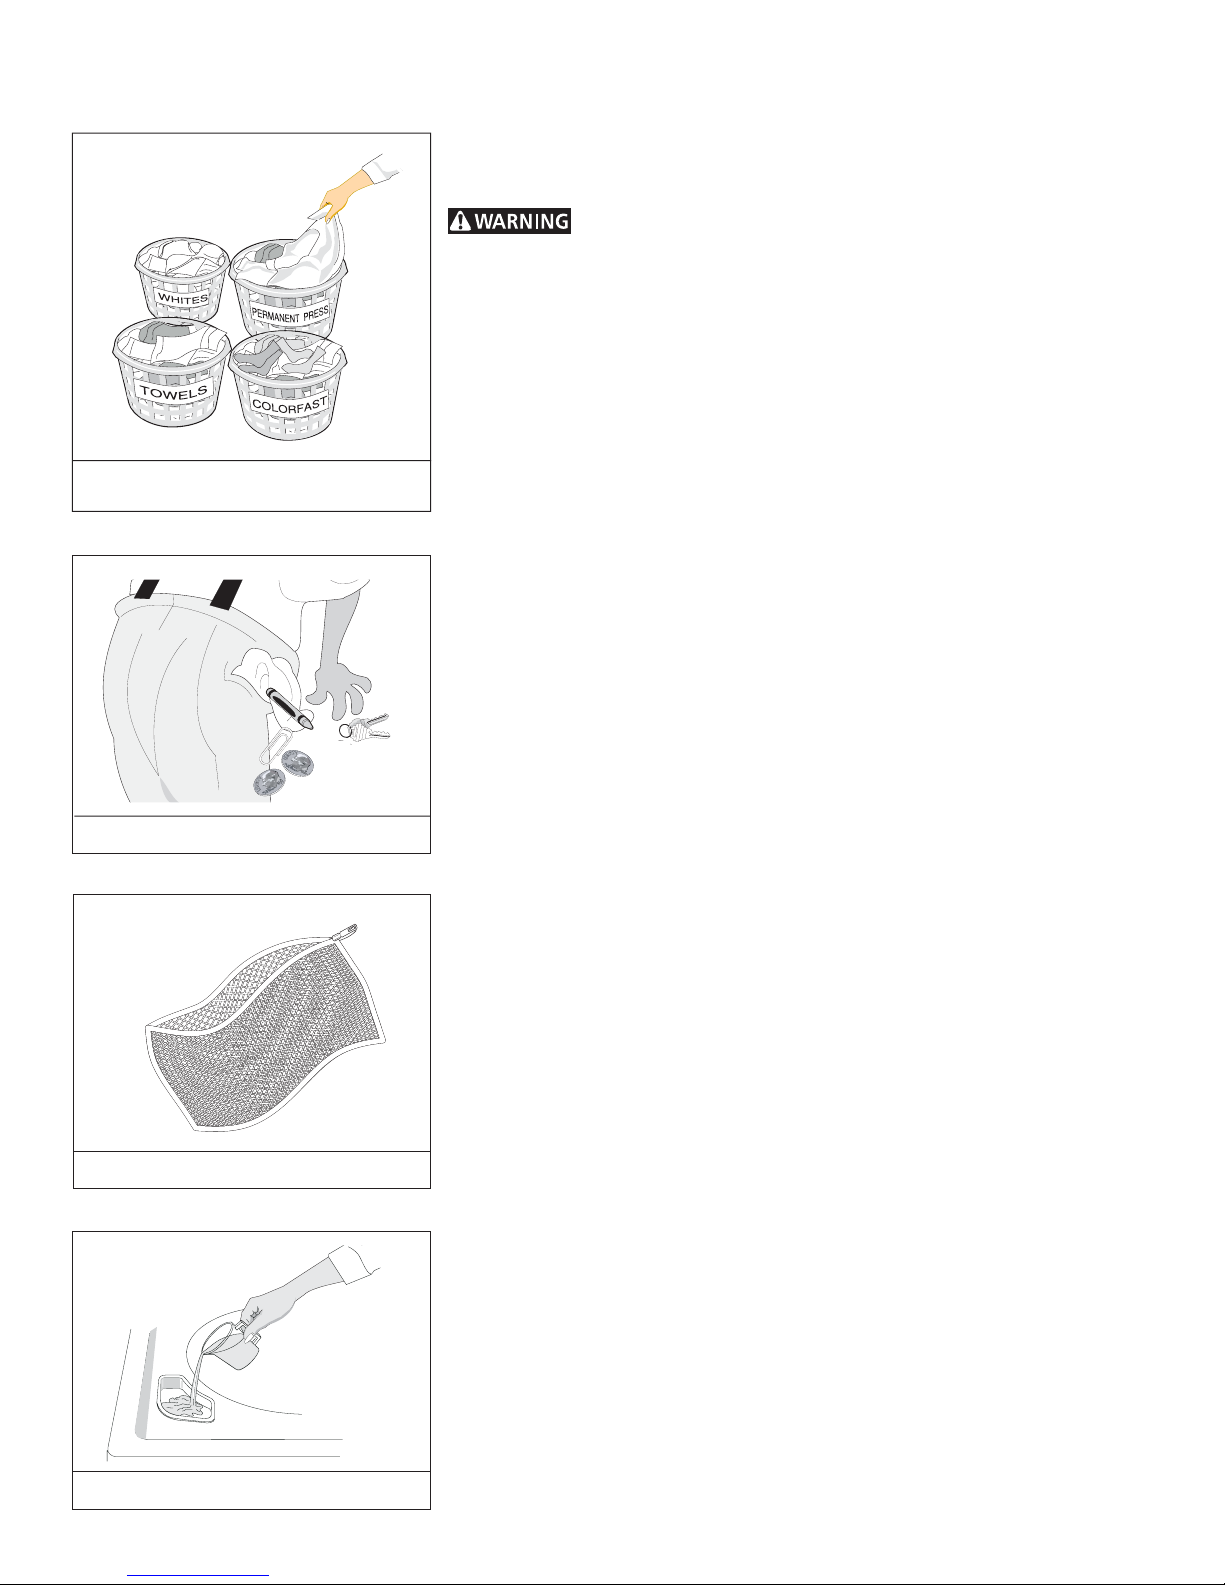
1. Sort laundry into loads that can be washed together.
Sort items by recommended water temperatures, wash time, and agitate/spin
speeds.
• Separate white, light, and colorfast items from dark and noncolorfast items.
• Separate items which shed lint from items which attract lint. Permanent
press, synthetic, knit and corduroy items will pick up lint from towels, rugs
and chenille bedspreads.
• Separate heavily soiled items from lightly soiled items.
• Separate lacy, sheer and loosely knit items from sturdy items.
2. Prepare items for washing.
• Empty pockets.
• Brush off lint and dirt. Shake out rugs and beach towels.
• Close zippers, fasten hooks, tie strings and sashes, and remove nonwashable
trims and ornaments.
• Remove pins, decorative buttons, belt buckles, and other objects which
could be damaged. This also helps protect other items in the wash load.
• Mend rips and tears to prevent further damage during washing.
• Place delicate items such as bras, shoulder pads, hosiery, and belts in a mesh
bag to prevent tangling during the wash cycle.
• Turn knit items inside out to prevent pilling.
Place delicate items in a mesh bag.
3. Pretreat stains and heavy soil.
See Stain Removal, page 5, for details.
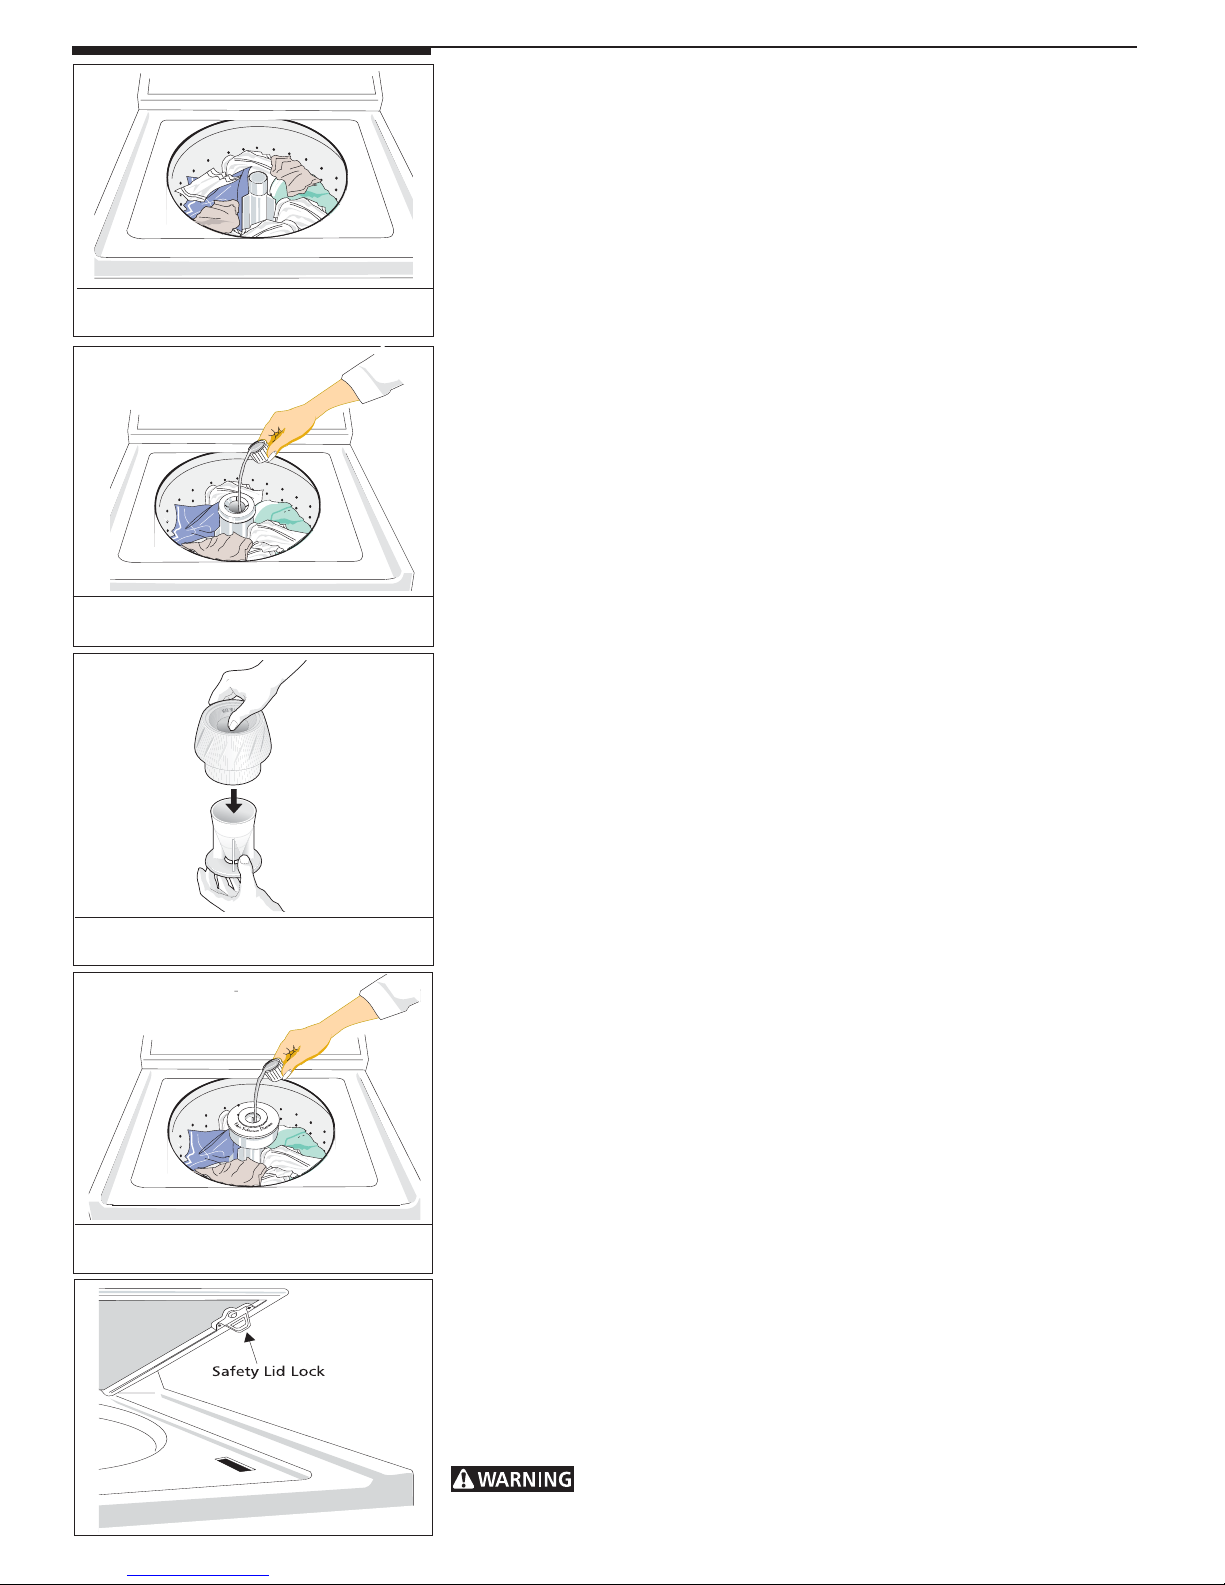
4. Add a measured amount of detergent to the wash tub
before adding the laundry load.
Follow detergent manufacturer's directions. The amount required depends on
type of detergent, load size and soil level, and water hardness.
5. If desired, add liquid bleach to Bleach Dispenser (some models).
• Before adding the wash load, add liquid bleach to bleach dispenser located
in left front corner under the lid:
• 3/4 cup (180 ml) for small loads
• 1 cup (240 ml) for large loads
• 1-1/4 cups (300 ml) for extra-large loads.
• Then add 1 cup (240 ml) water to flush the dispenser.
• Do not use powdered bleach in the bleach dispenser.
For models without a bleach dispenser, dilute the recommended amount of
liquid chlorine bleach in 1 quart (.95 L) water. Add it to wash water after
a few minutes of agitation. Do not pour bleach directly on wash load.
Bleach Dispenser (some models)
3
Do not load items above
top row of holes in wash tub.
Built-In Fabric Softener Dispenser
(some models)
Washing Procedures
(continued)
6. Add laundry load to washer.
• Dry load level should not be higher than top row of holes in wash tub.
Do not overload washer.
• Do not put items on top of agitator or wrap them around it. Load items evenly.
• Combine large and small items in a load. Load large items first. Large items
should not be more than half the total wash load.
• When washing a single heavy item, add 1 or 2 towels to balance the load.
7. If desired, add liquid fabric softener to Fabric Softener
Dispenser
For models with a built-in dispenser (see picture to the left):
1. Add liquid softener to the dispenser, following fabric softener label directions.
2. Add water to bring liquid level to fill line on dispenser cap.
3. Remove the dispenser from the agitator after each use. Rinse both cap and cup
with warm water. Replace dispenser in the agitator.
NOTE: To separate cap from cup, put thumb into dispenser and push against side
of cup (see picture to the left). After cleaning, push cap and cup firmly together.
Replace dispenser by lining up the ribs and grooves and snapping it into position.
Fabric softener will be flushed from area under the built-in fabric softener dispenser
when Large Load Water Level is selected. If a build-up of fabric softener occurs,
clean with hot water. DO NOT REMOVE SERVICE CAP.
(some models).
Built-In Fabric Softener Dispenser
(some models)
Removable Fabric Softener Dispenser
(some models)
For models with a removable dispenser (see picture below to the left):
1. Attach fabric softener dispenser to top of agitator by pressing down gently.
2. Add softener to the dispenser, following fabric softener label directions.
3. Add water to bring liquid level to top of the peg in the center of the cup.
4. Remove the dispenser from the agitator after each use. Rinse both lid and bowl
thoroughly with warm water. Reassemble and place dispenser on agitator or
store it nearby.
For models without a fabric softener dispenser, follow fabric softener label
directions. Add diluted fabric softener to the final rinse. Do not pour fabric
softener directly on the wash load.
8. Set cycle selector knob and washer controls according to type,
size, and soil level of each load, and detergent used.
See Operating Instructions for your specific model controls.
9. Start the washer.
Close the washer lid and pull out the cycle selector knob. The washer will not
agitate or spin with the lid open.
• To stop the washer, push in the cycle selector knob.
• To change a cycle, push in the cycle selector knob. Turn it clockwise to the
desired setting. Pull out the knob to restart the washer.
10.Remove items when the cycle is completed.
For your safety, the lid locks when the tub is spinning. It will remain locked for about
1 minute after the tub stops spinning.
• To open the lid during a spin, push in the cycle selector knob and wait about
1 minute for the lid lock to release. Do not force open the locked lid.
Place washed items in automatic dryer, line dry, or dry flat as directed by fabric
care label. Excess wrinkling, color transfer or odors may develop in items left in the
washer after the cycle has ended.
To avoid serious personal injury, do not operate washer if safety lid lock
is missing or damaged.
4
 Loading...